- Title: Warstride Challenges
- Release Date:
- Developer:
- Publisher:
Information about Warstride Challenges is still incomplete. Please help us fill the details of the game using this contact form.
In every regular level of the campaign, there’s a secret yellow skull hidden. You can find a total of 180 of these skulls. To count as collected, you need to not only grab the skull but also finish the level within a certain time limit. It’s usually not too hard because the skulls are usually close to your path. However, Forge-29 Hardcore is an exception. It has a big detour, making it challenging. You’ll need to consistently earn the best medal before trying to get it. I asked for more time on this level to make it easier.
Once you collect a skull, it turns green for all future plays. These same skulls are also in the BFL levels, and they’ll still be yellow there, even if you got them in the regular version of the map. You don’t have to collect them in BFL levels, and the game doesn’t track them in the menus.
Crypt-1
Crypt-1 Normal: Can’t be missed, it’s close to the exit.
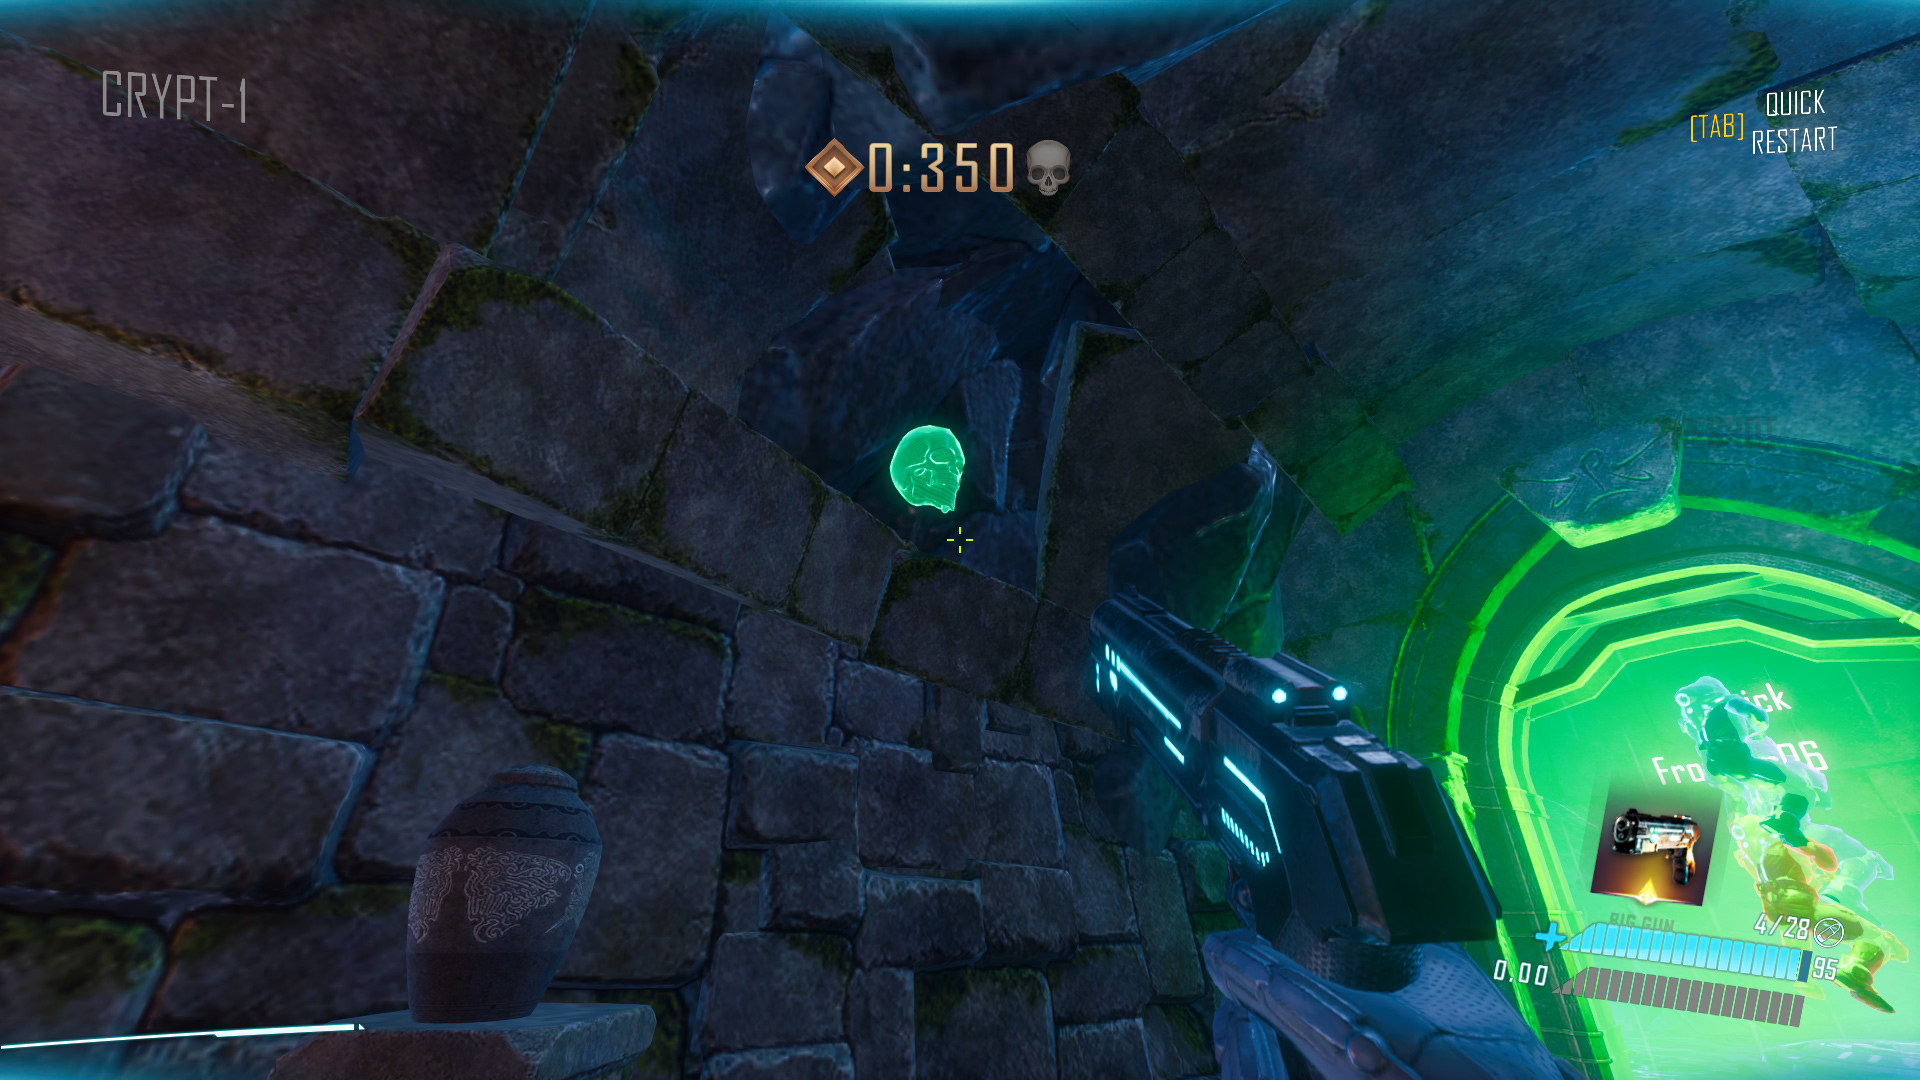
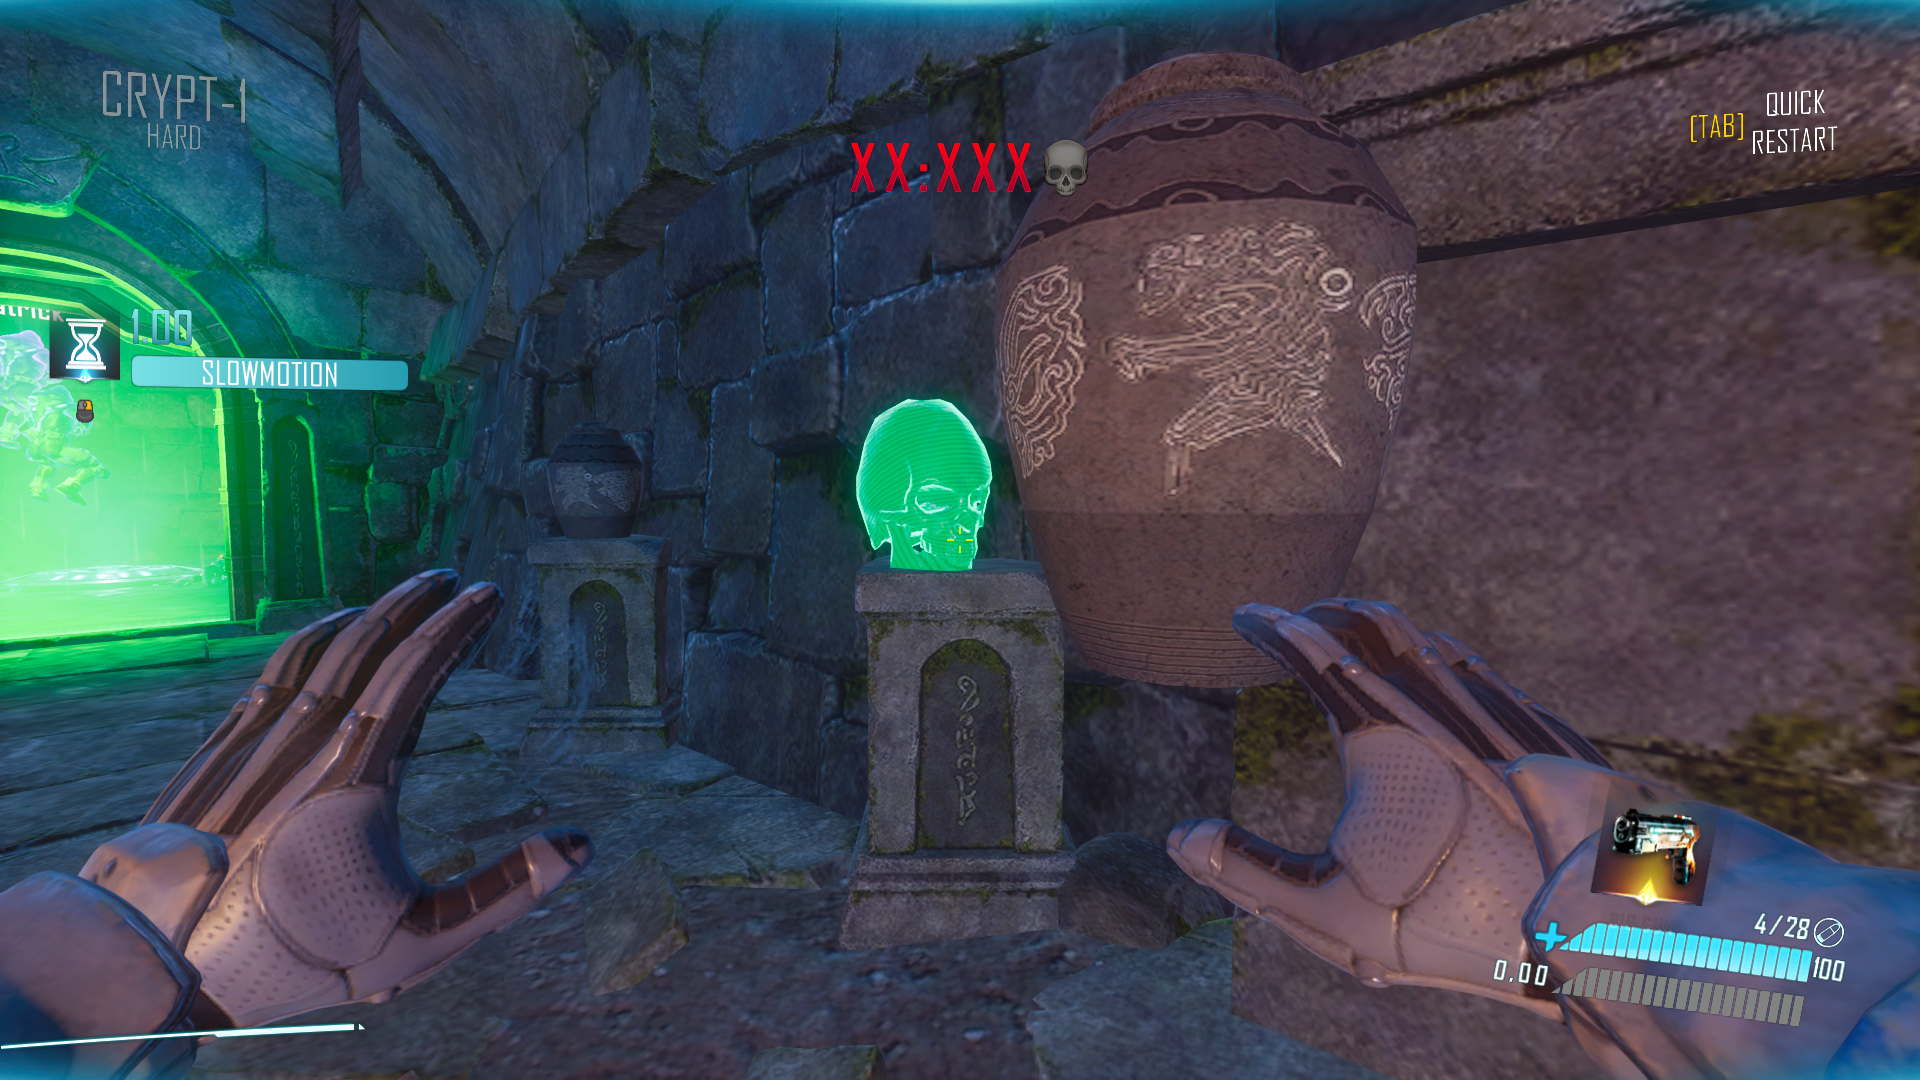
Crypt-1 Hard: Concealed within the second-to-last vase on the right.
Crypt-1 Very Hard: Positioned above the starting point, behind you.

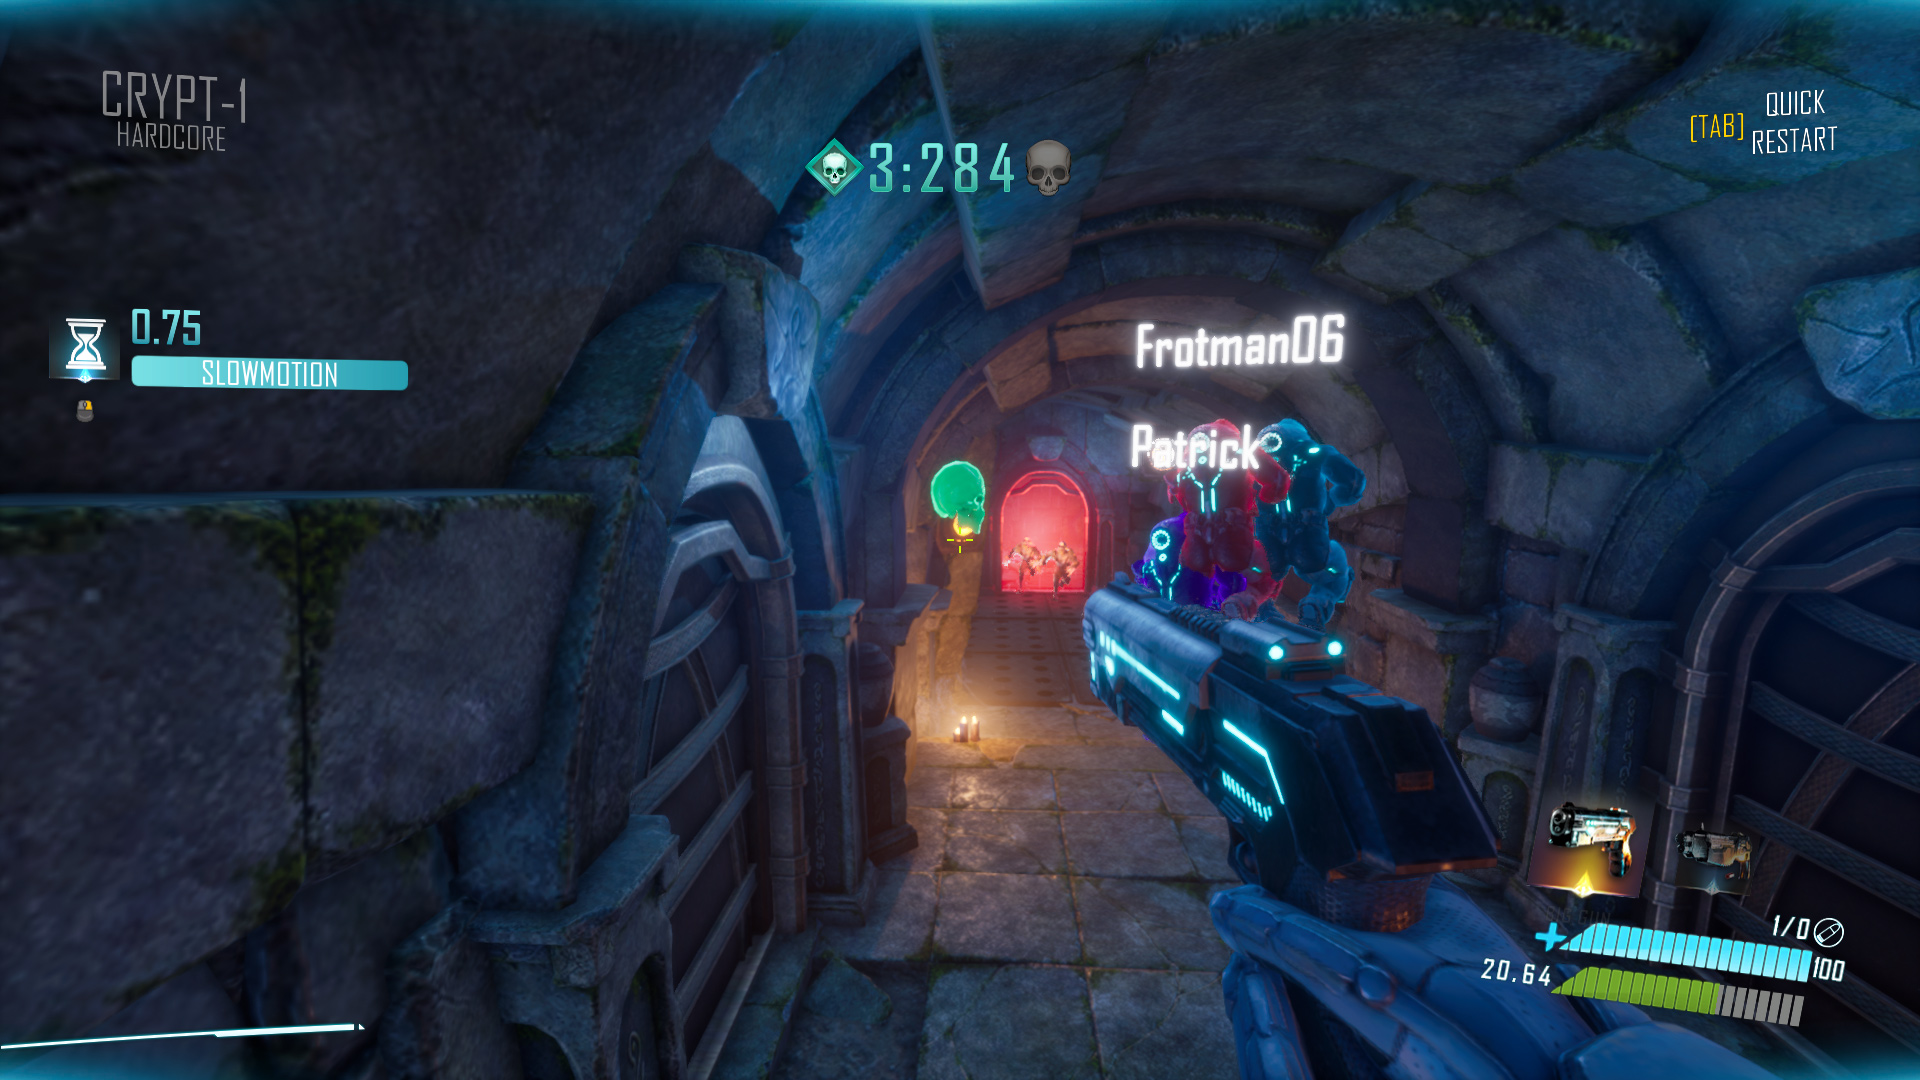
Crypt-1 Hardcore: You can align your shot to hit both the skull and the button with a pistol bullet. Alternatively, you can grab the skull by holding the slide before starting with a jump for a boost.
Crypt-1 Nightmare: Located in the ceiling at the center of the room.

Crypt-2
Crypt-2 Normal: Unavoidable, situated on the left near the exit.

Crypt-2 Hard: Found in the spawn room, right behind and above you.
Crypt-2 Very Hard: Hidden above the door opposite the exit.

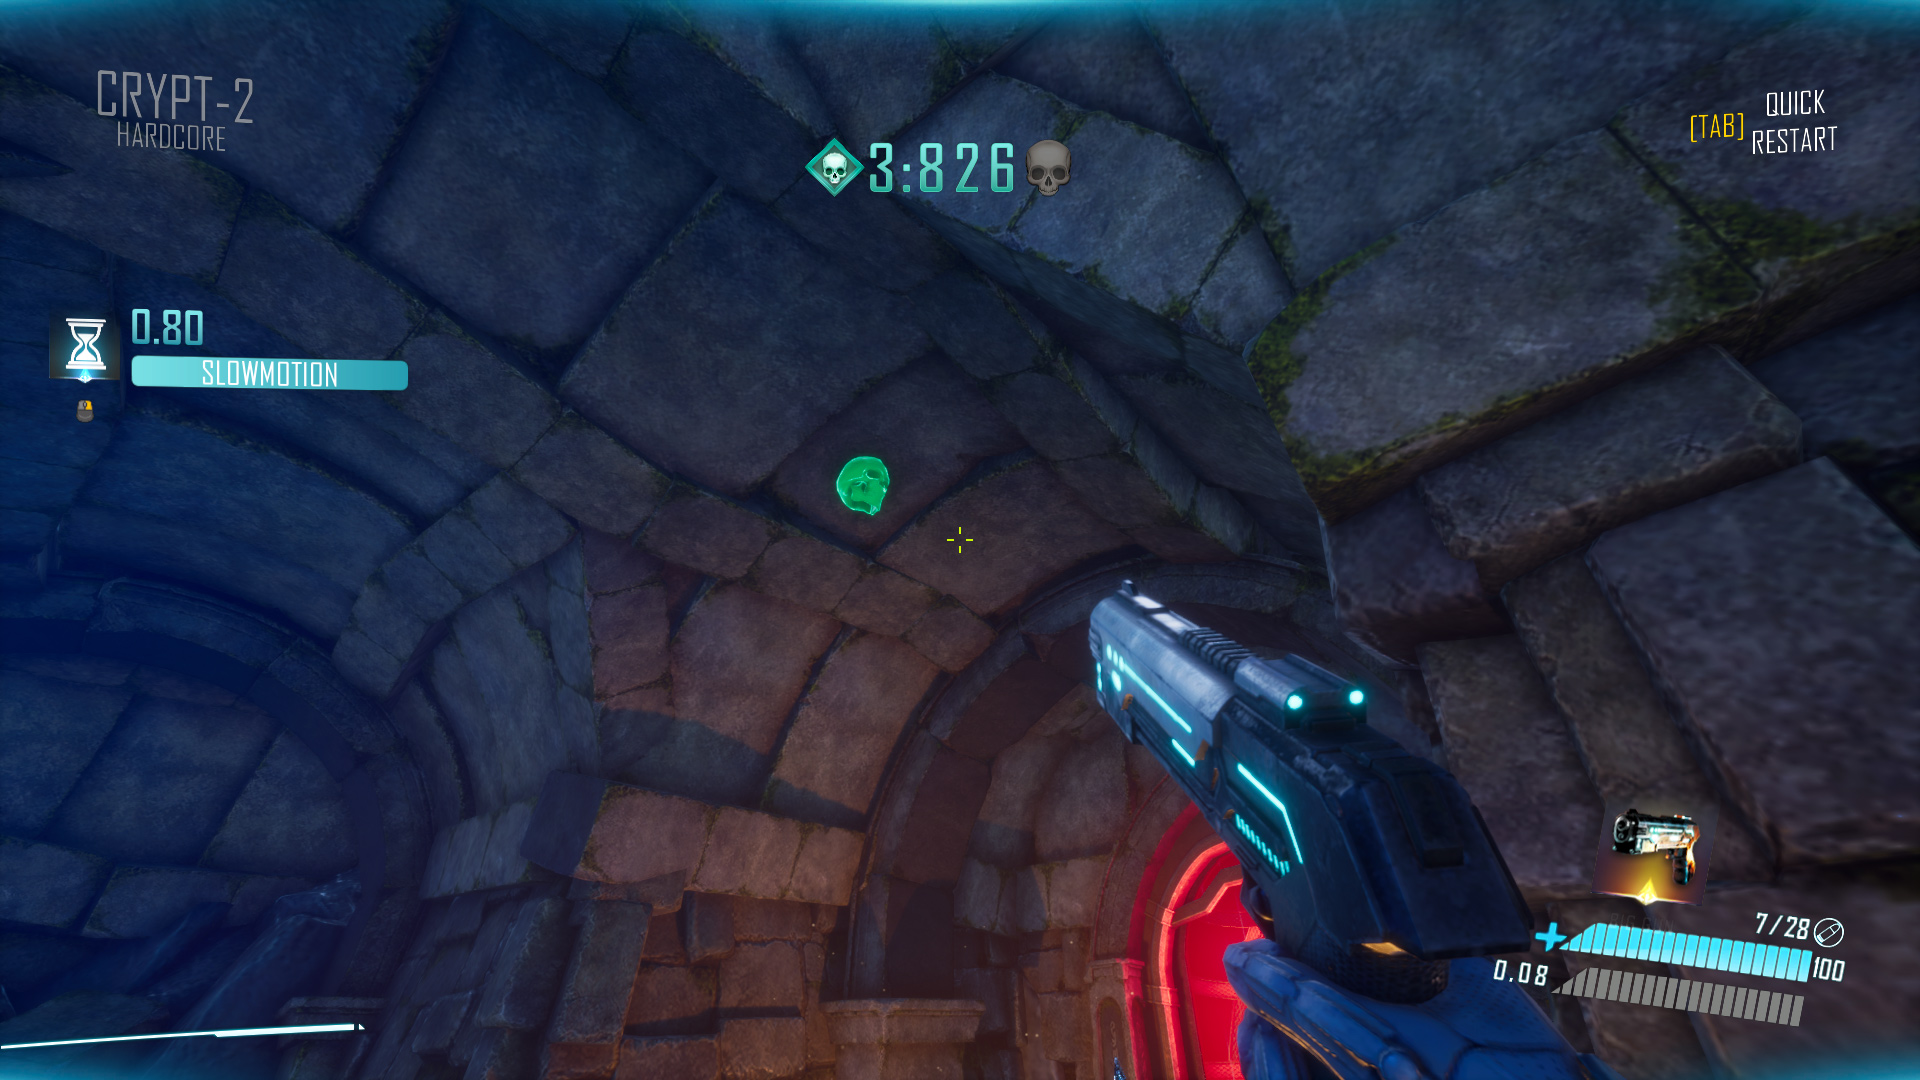
Crypt-2 Hardcore: Near the exit on the ceiling.
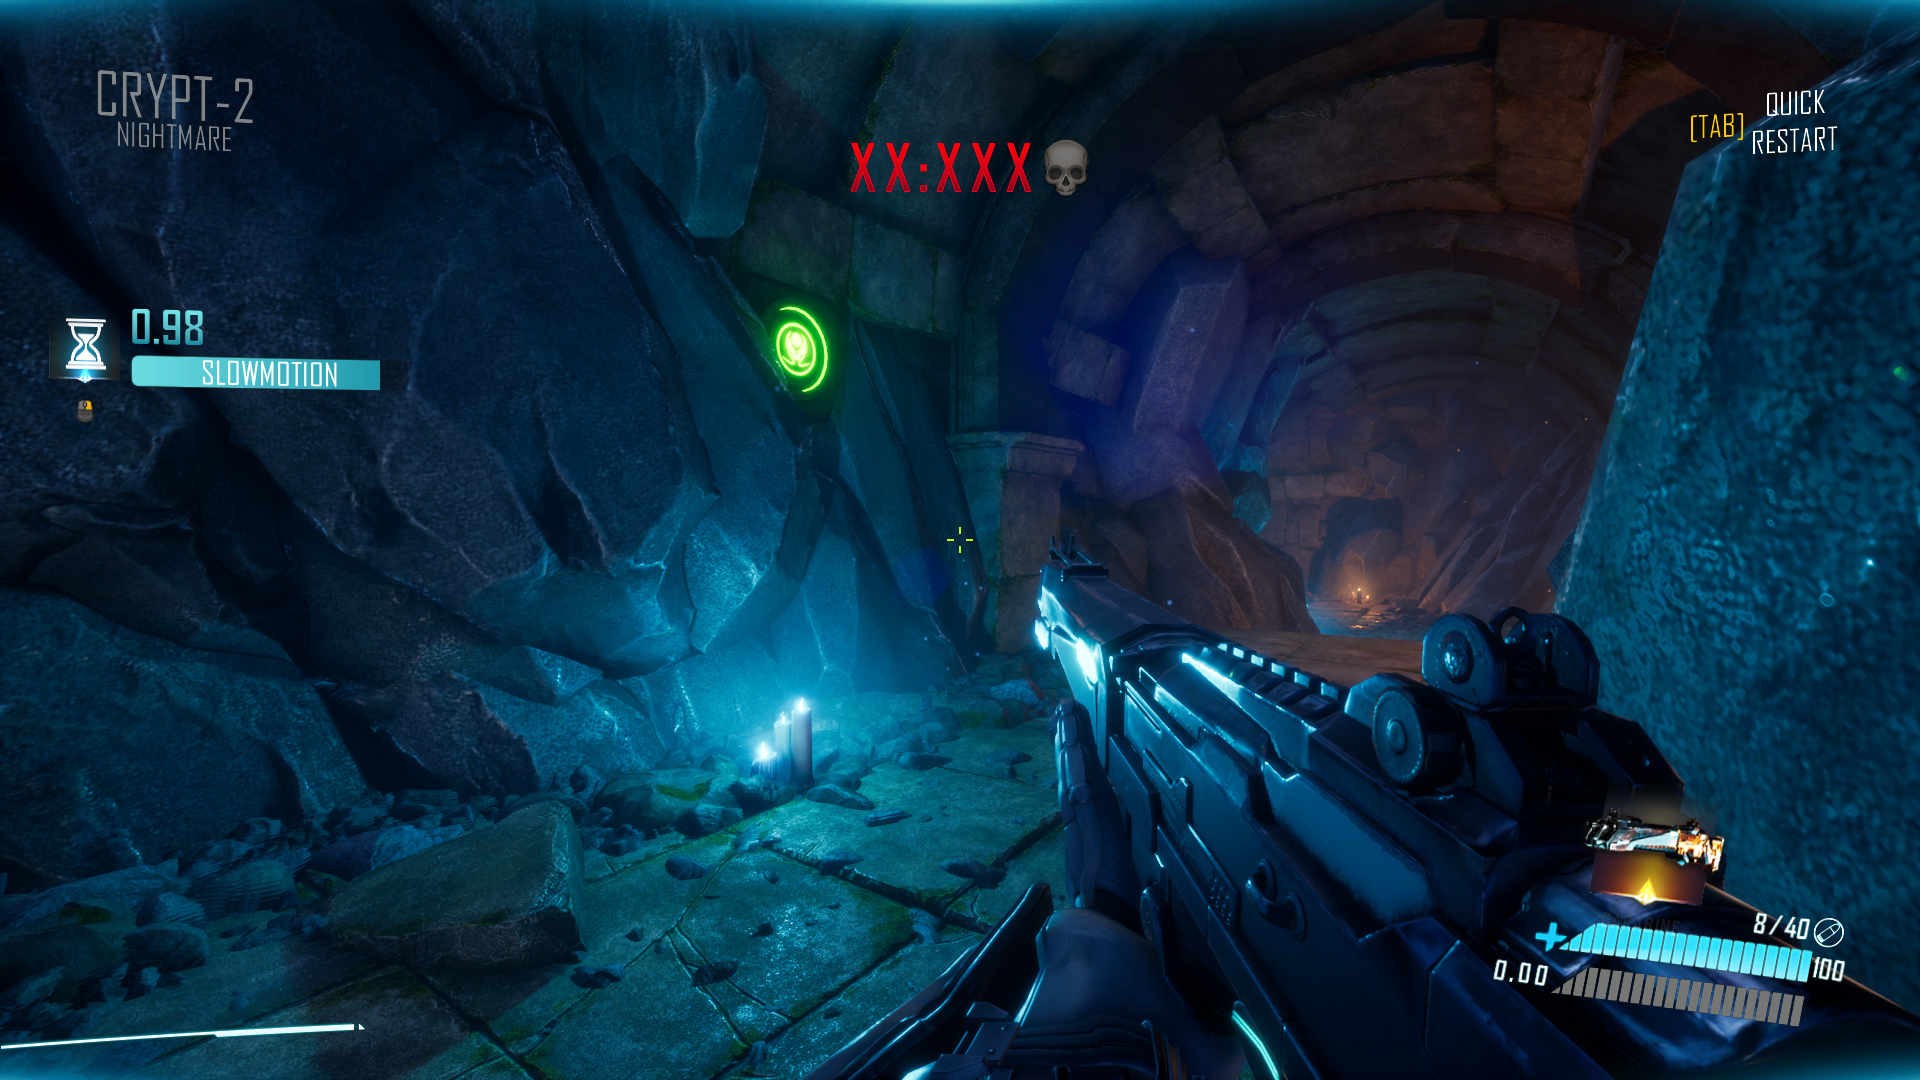
Crypt-2 Nightmare: Shortly after the start, a yellow button on the left unlocks a crevice on the right ahead.
Crypt-3
Crypt-3 Normal: Upon entering the final large room, check behind you.
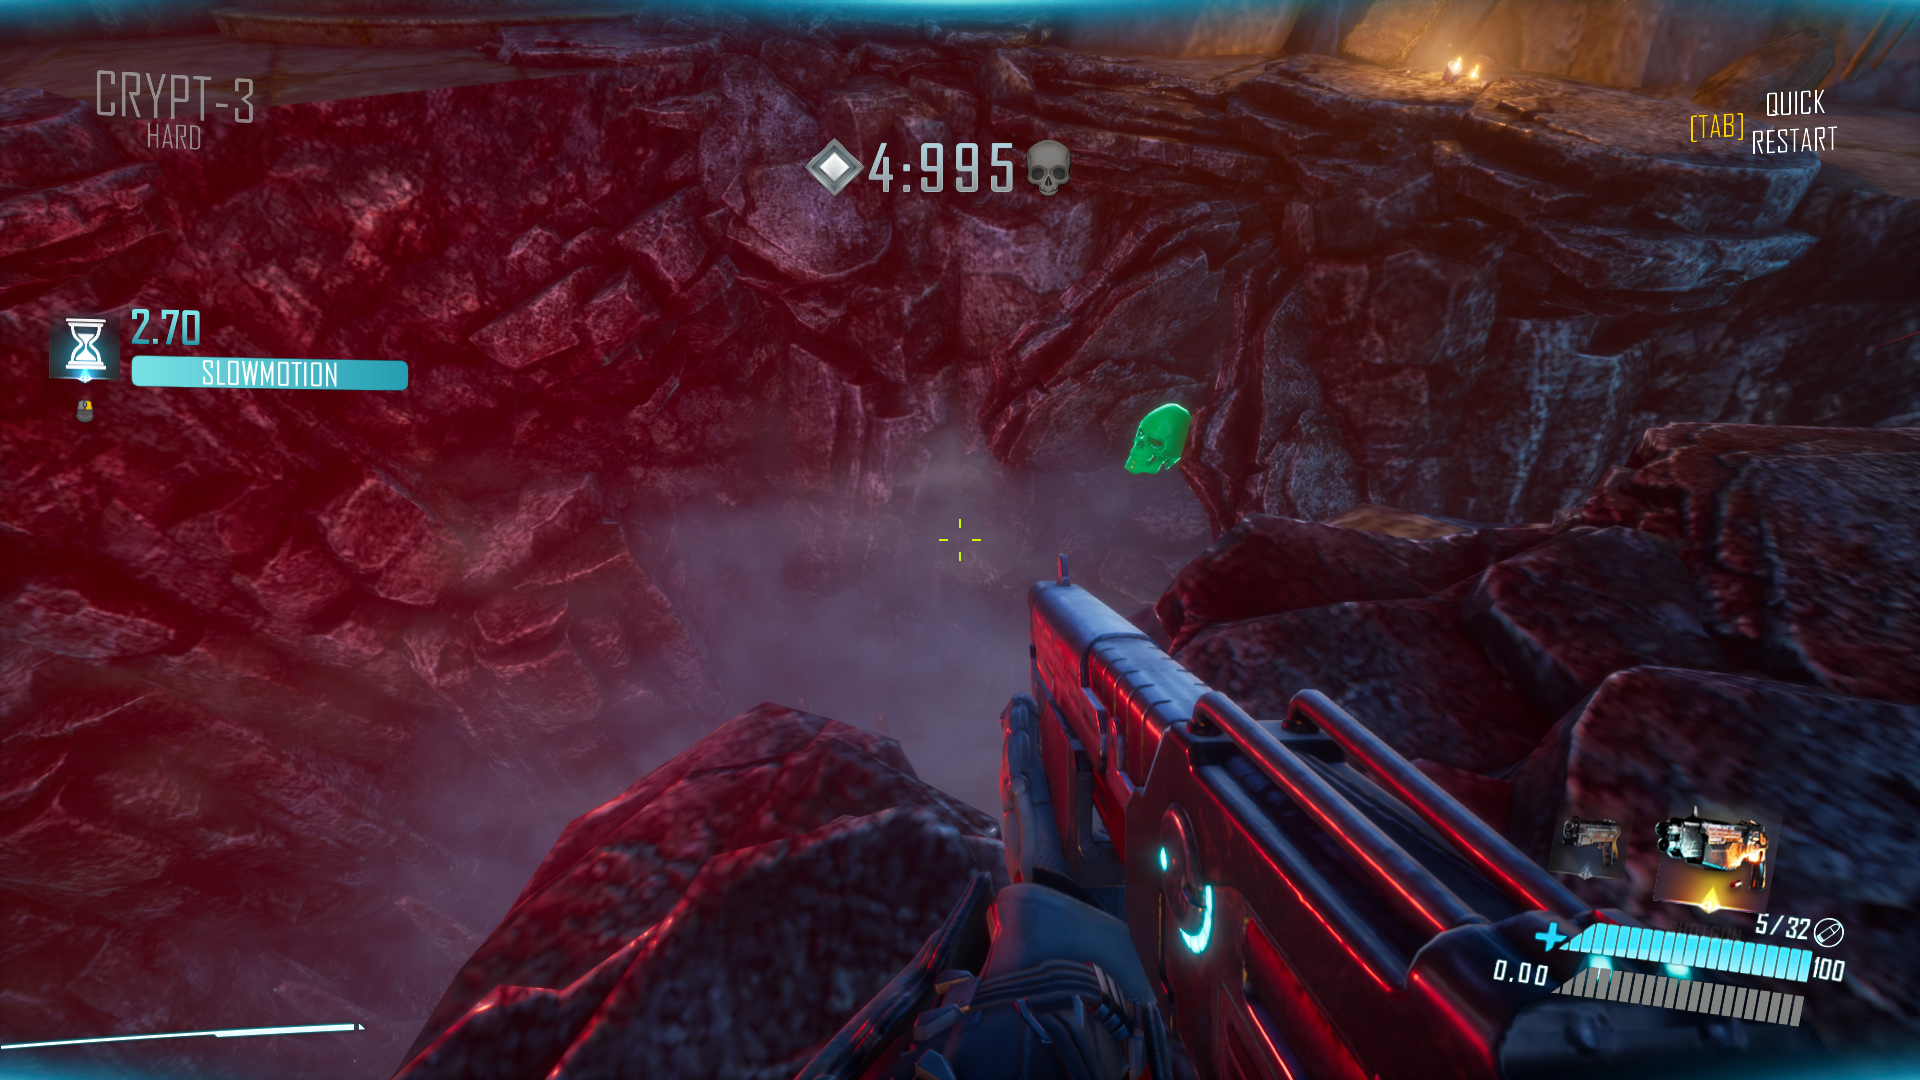
Crypt-3 Hard: Inside the final room with cracked ground, look down and to the right.
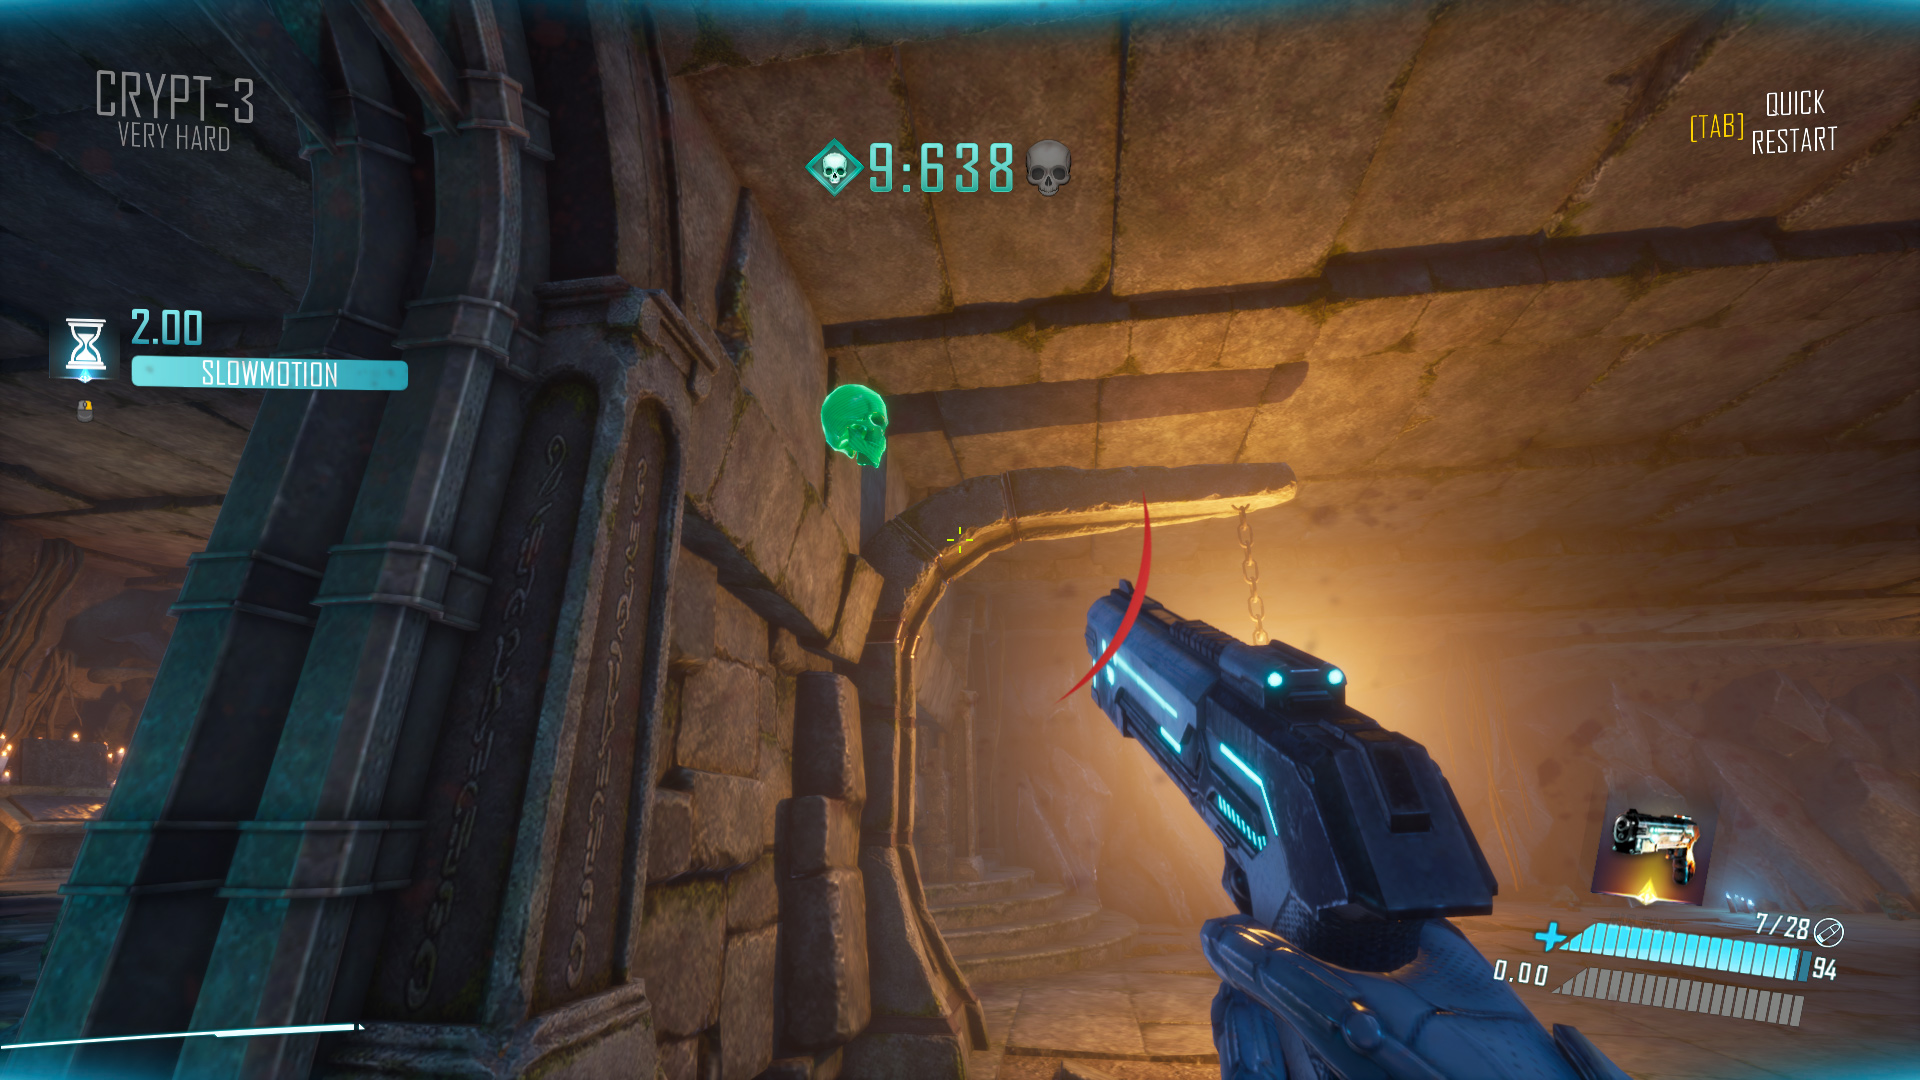
Crypt-3 Very Hard: Right after leaving the starting room, look immediately to your left.
Crypt-3 Hardcore: Behind the altar in the extra room on your left from the spawn. Use the yellow button for a different exit.

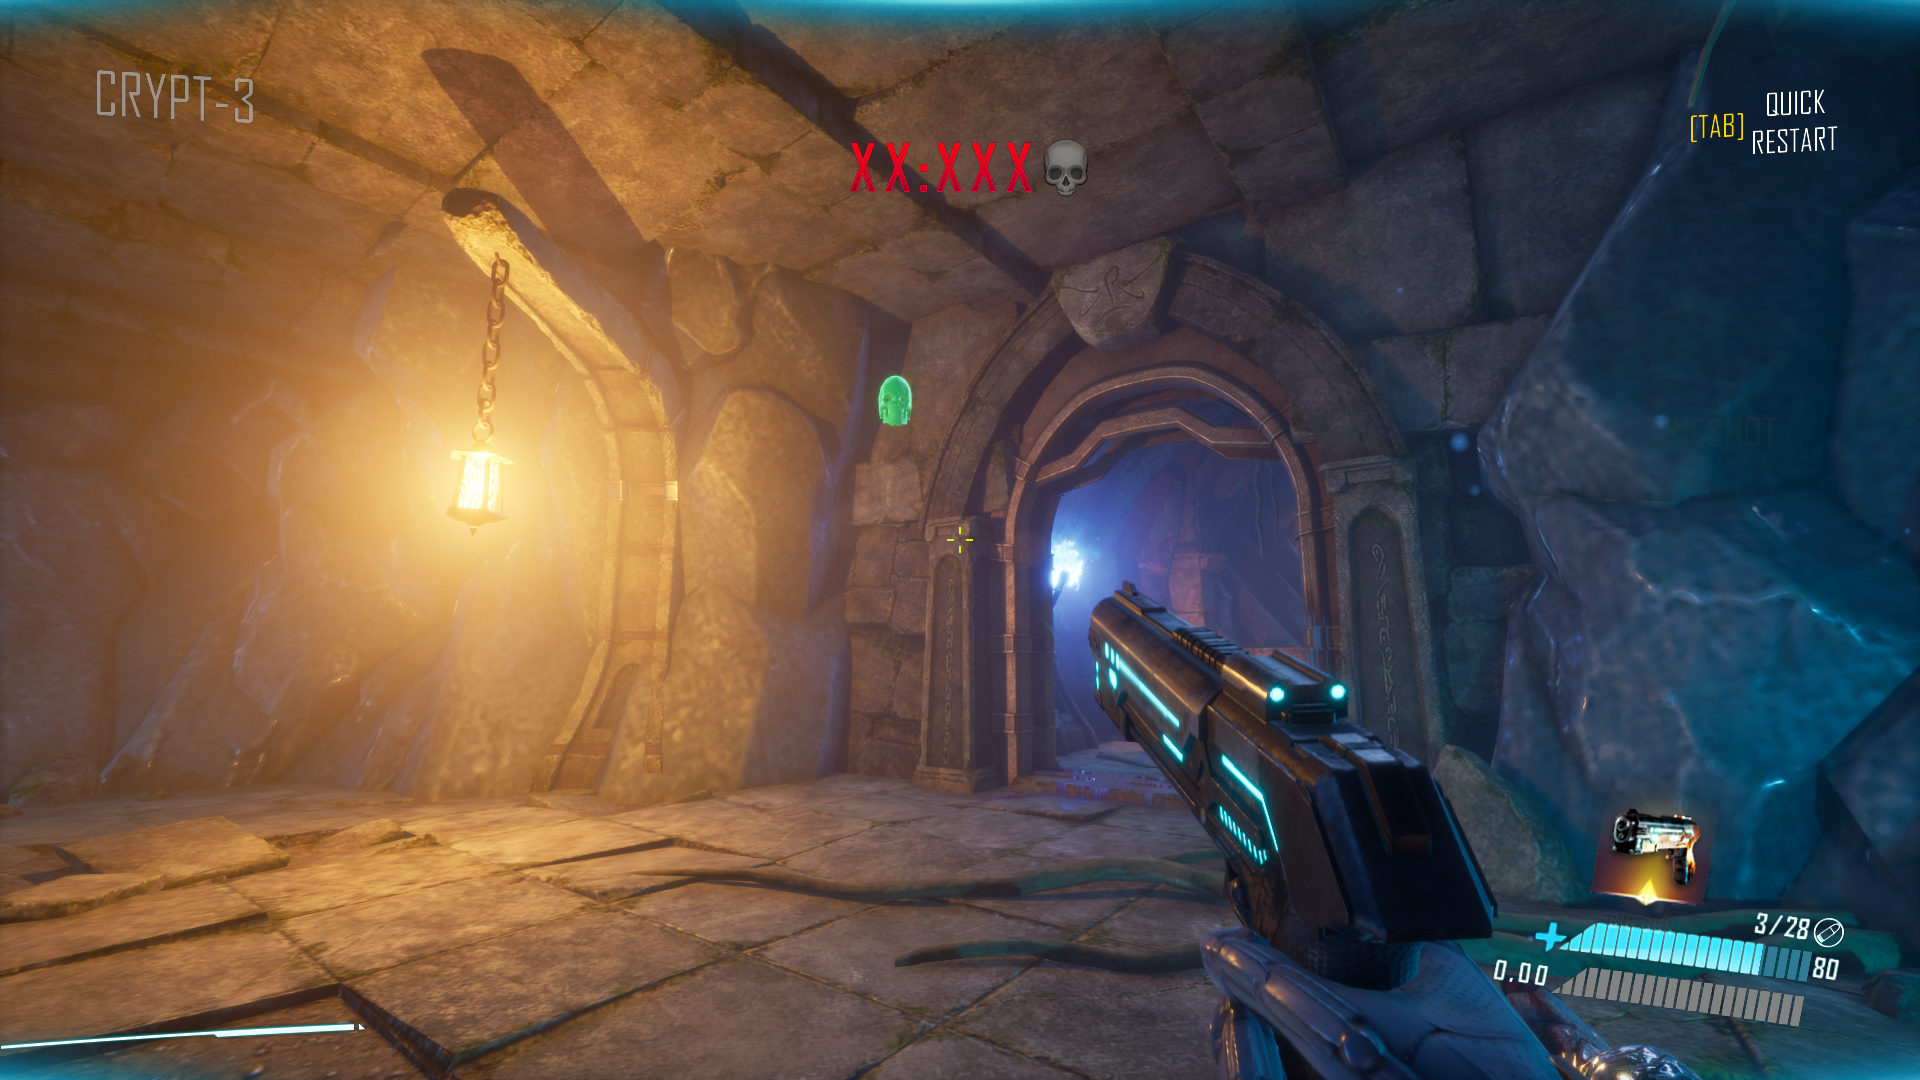
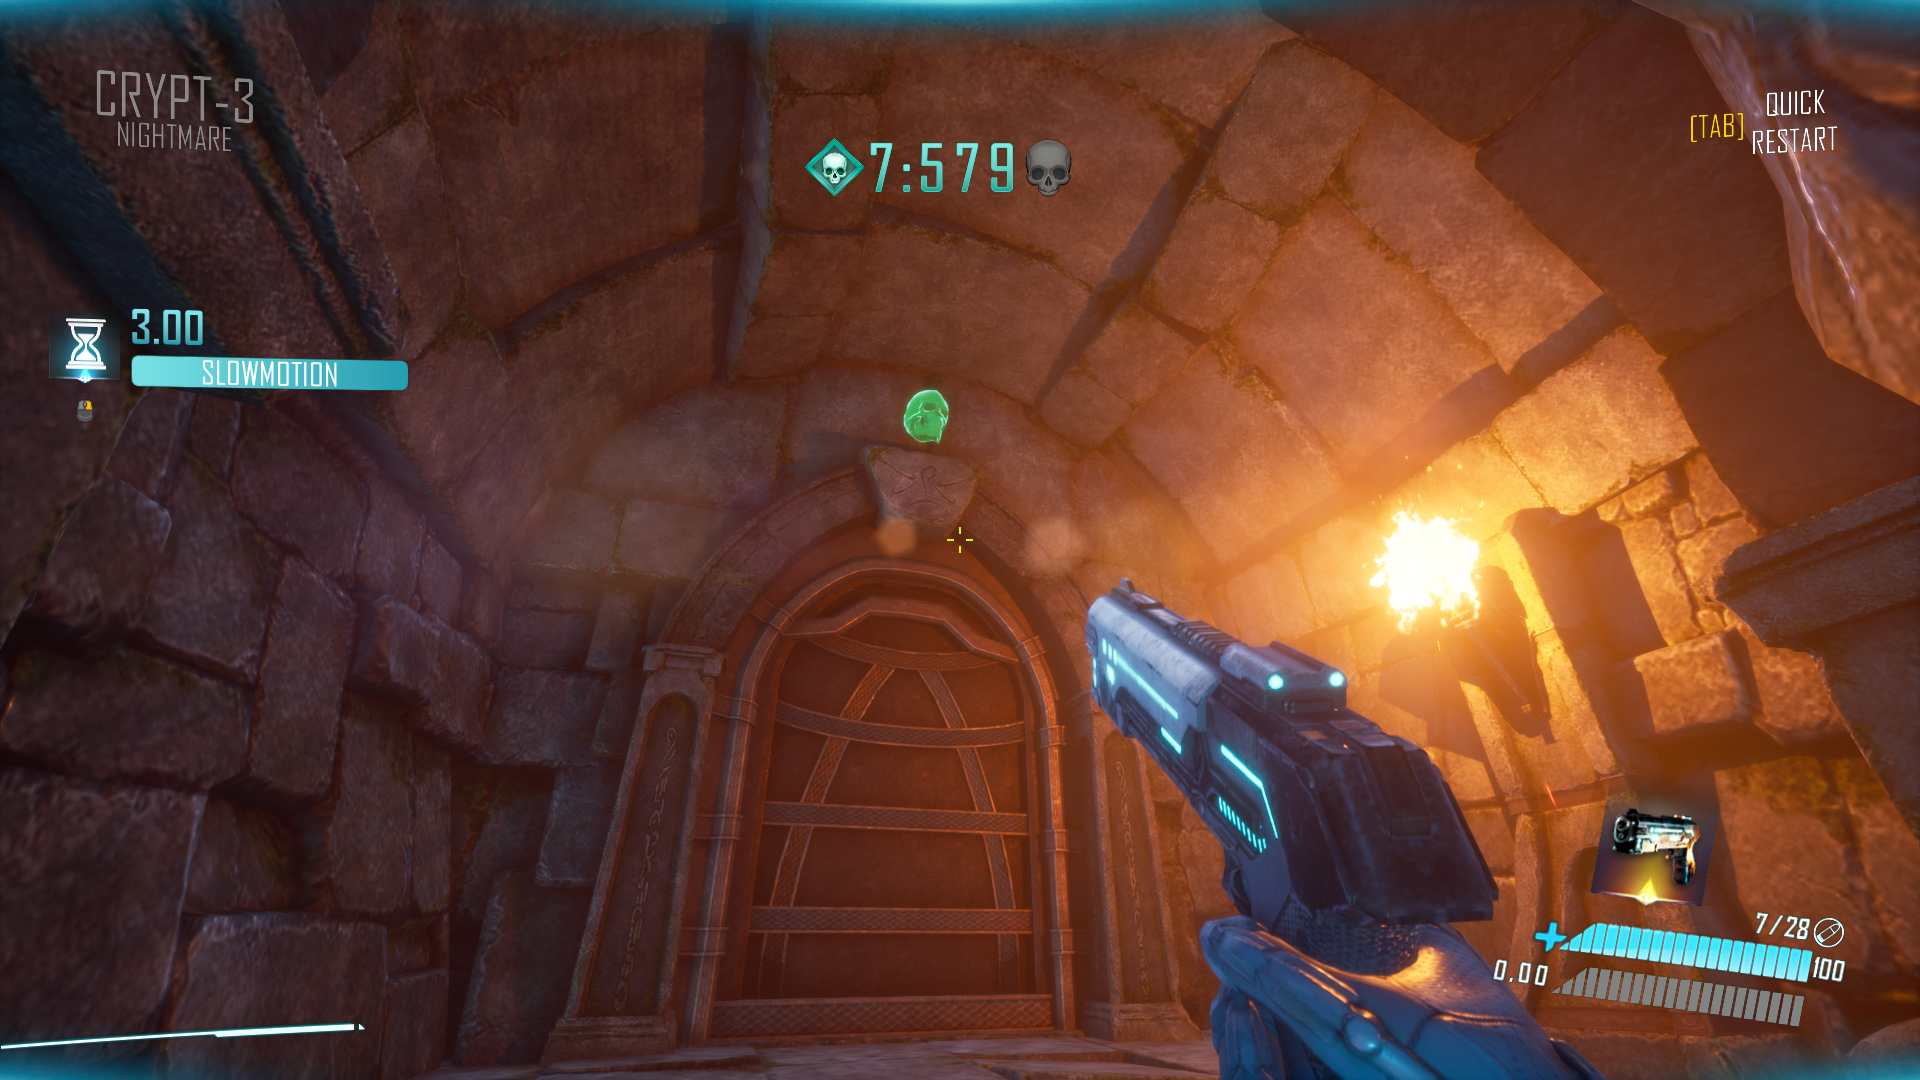
Crypt-3 Nightmare: Directly above the spawn, upward glance.
Crypt-4
Crypt-4 Normal: Above the door just past the spawn room.

Crypt-4 Hard: Suspended above the door opposite the exit.

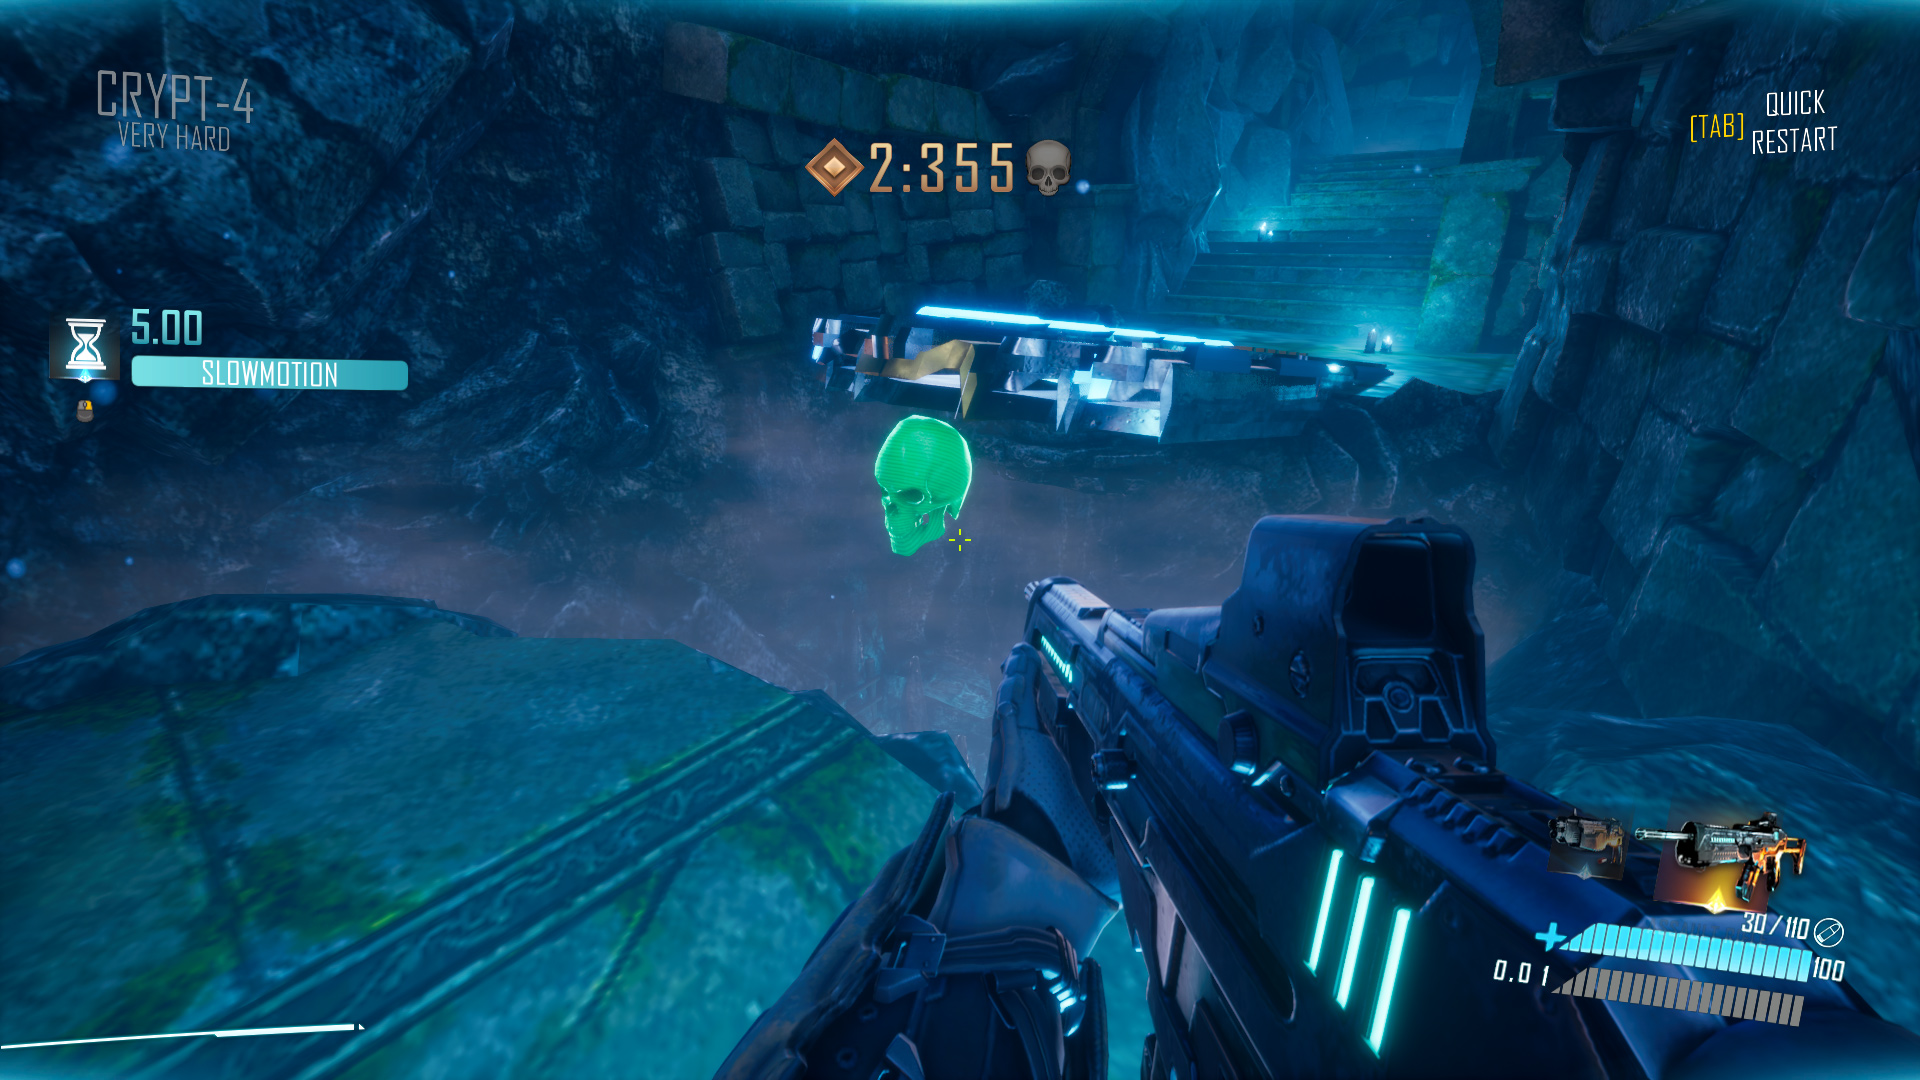
Crypt-4 Very Hard: Just beneath the slidepad in the final room.
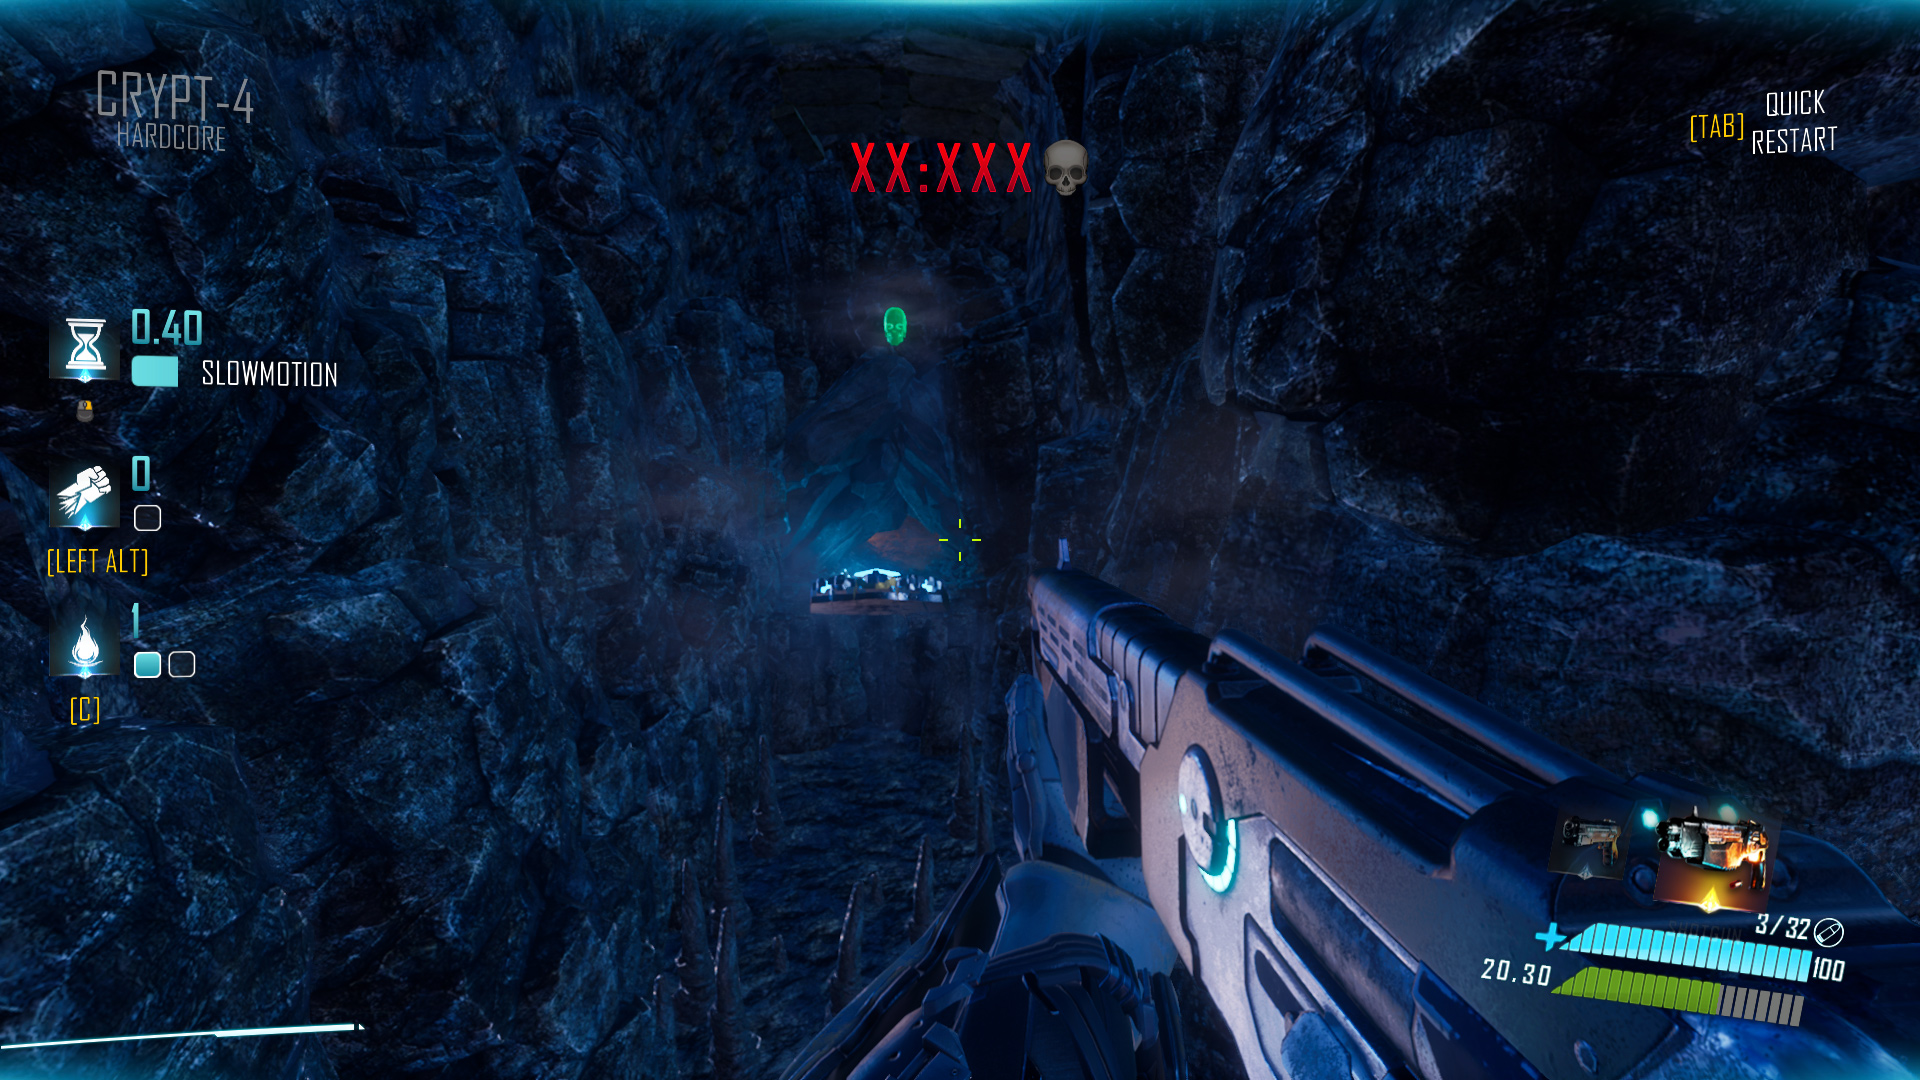
Crypt-4 Hardcore: Positioned just above the slidepad in the last room.
Crypt-4 Nightmare: In the last room, to the right by the entrance.

Crypt-5
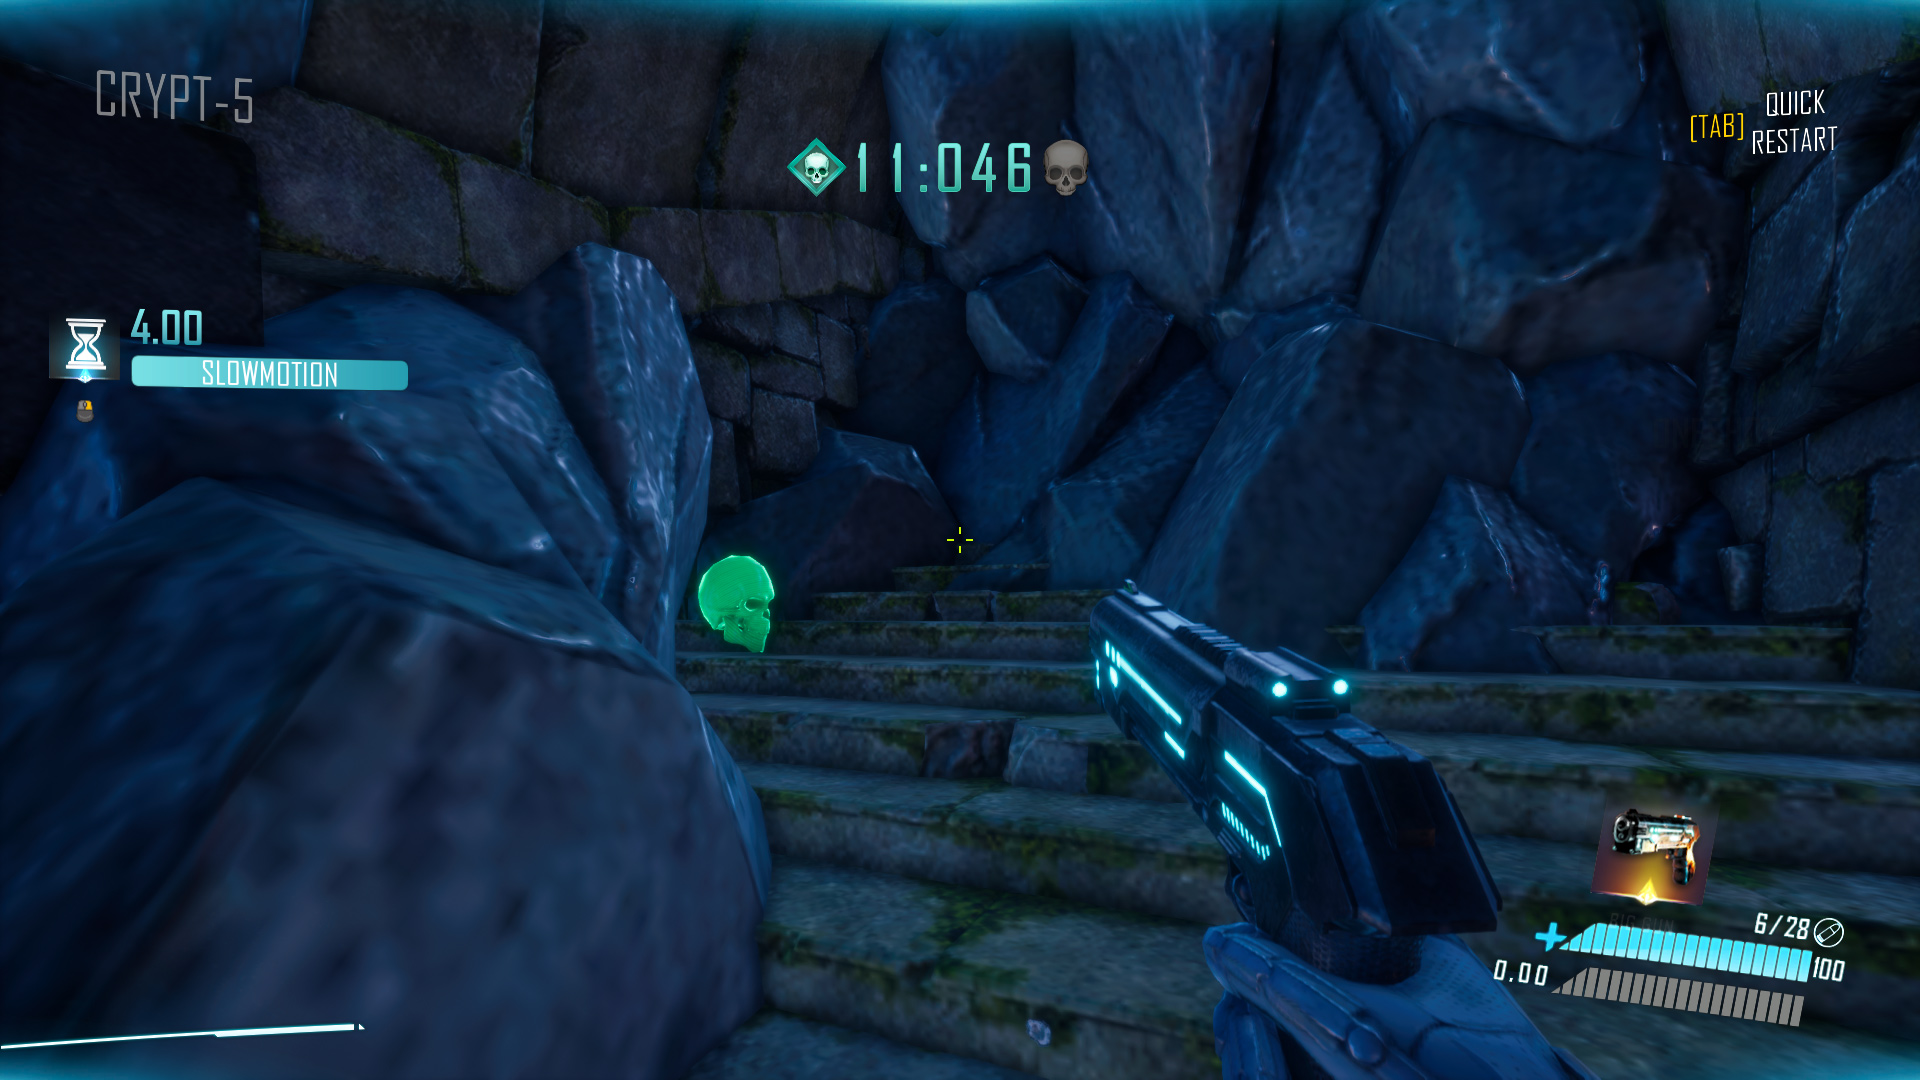
Crypt-5 Normal: Proceed forward from the spawn.
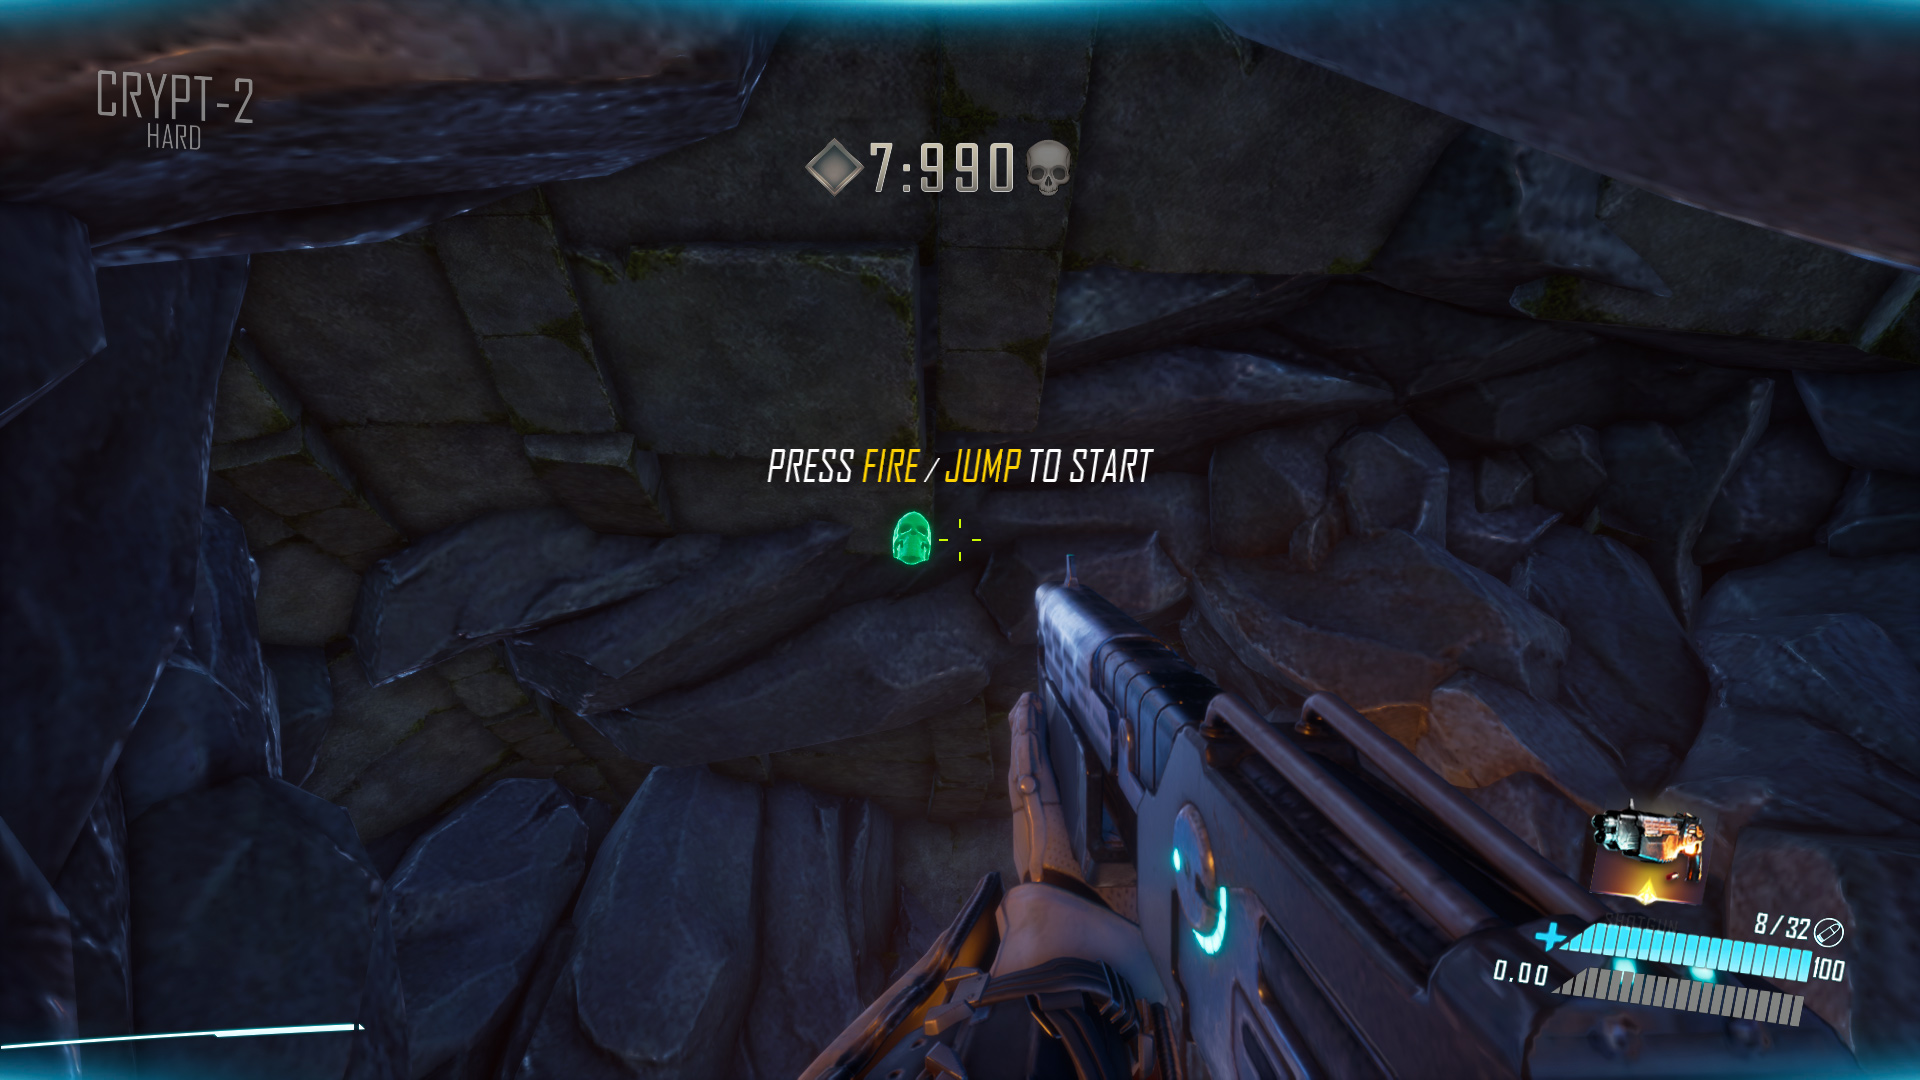
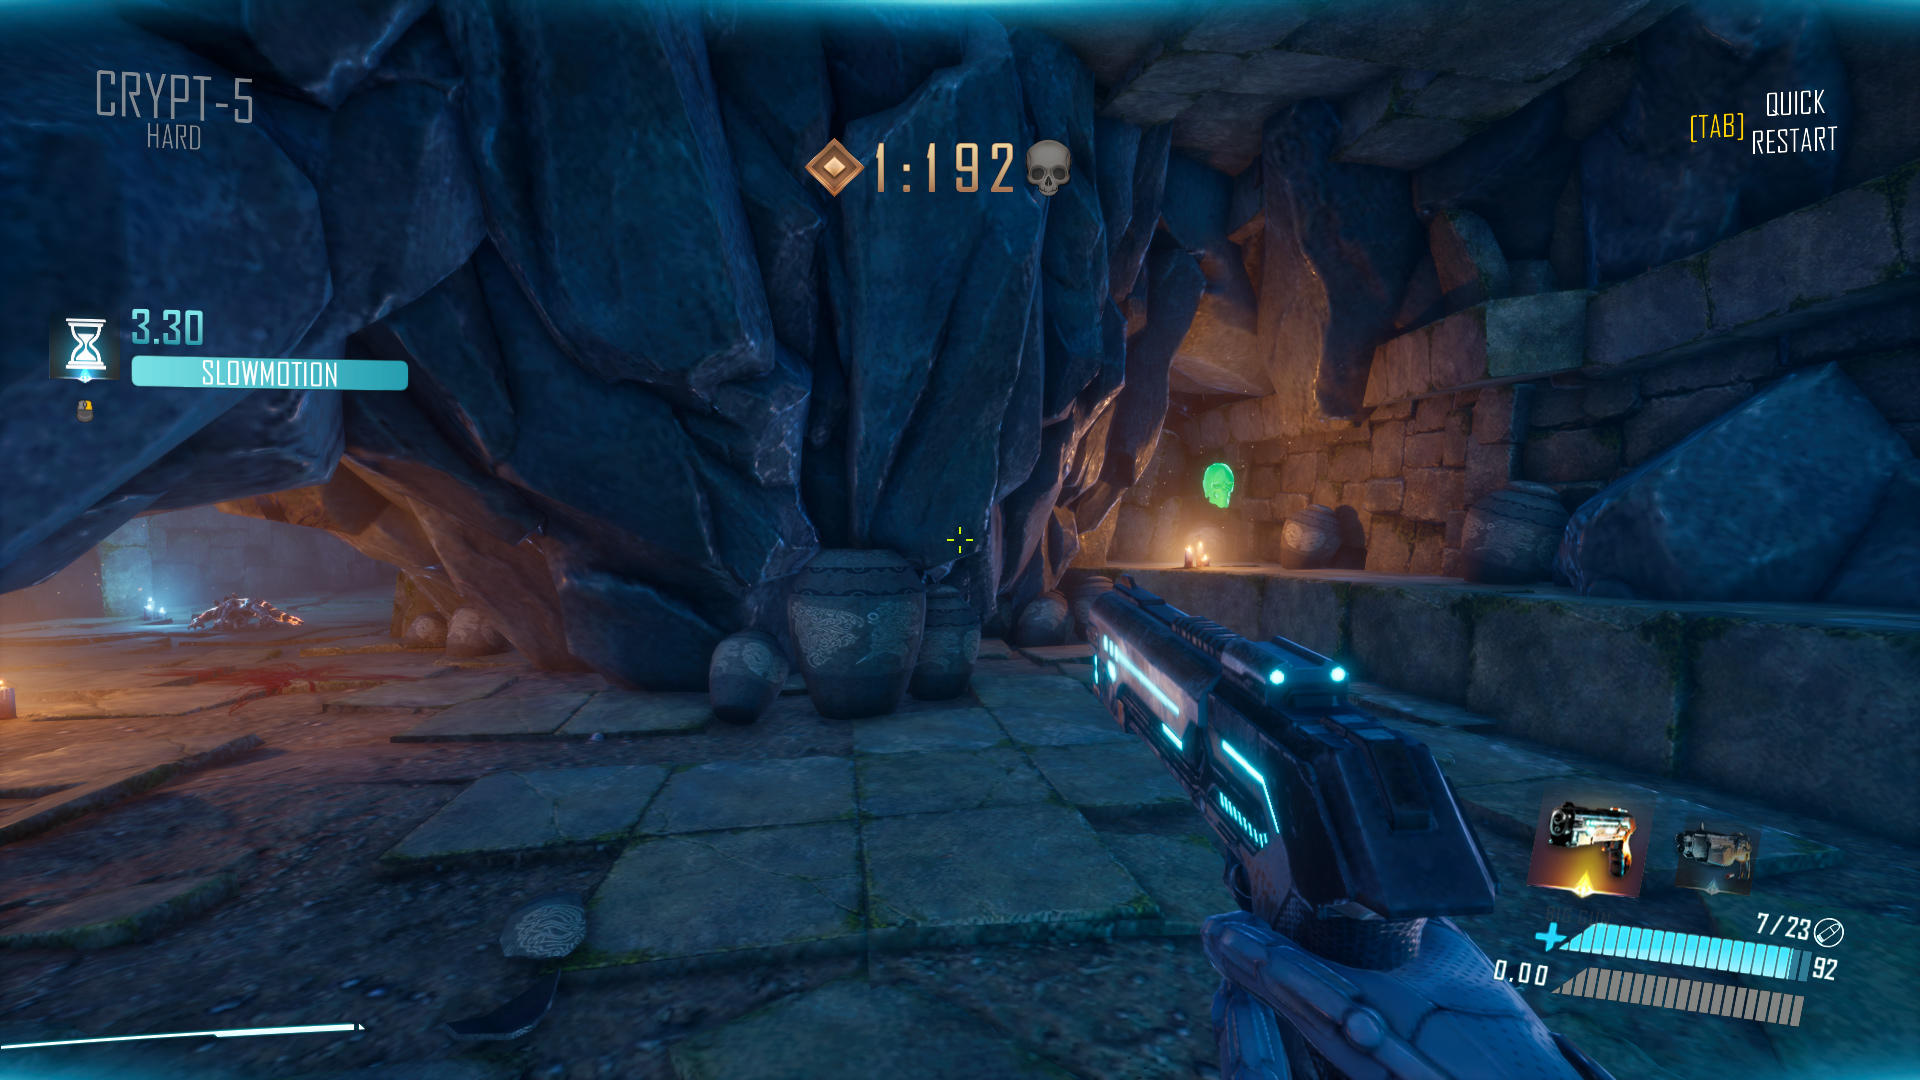
Crypt-5 Hard: After sliding through a tunnel at the beginning, look to your left.
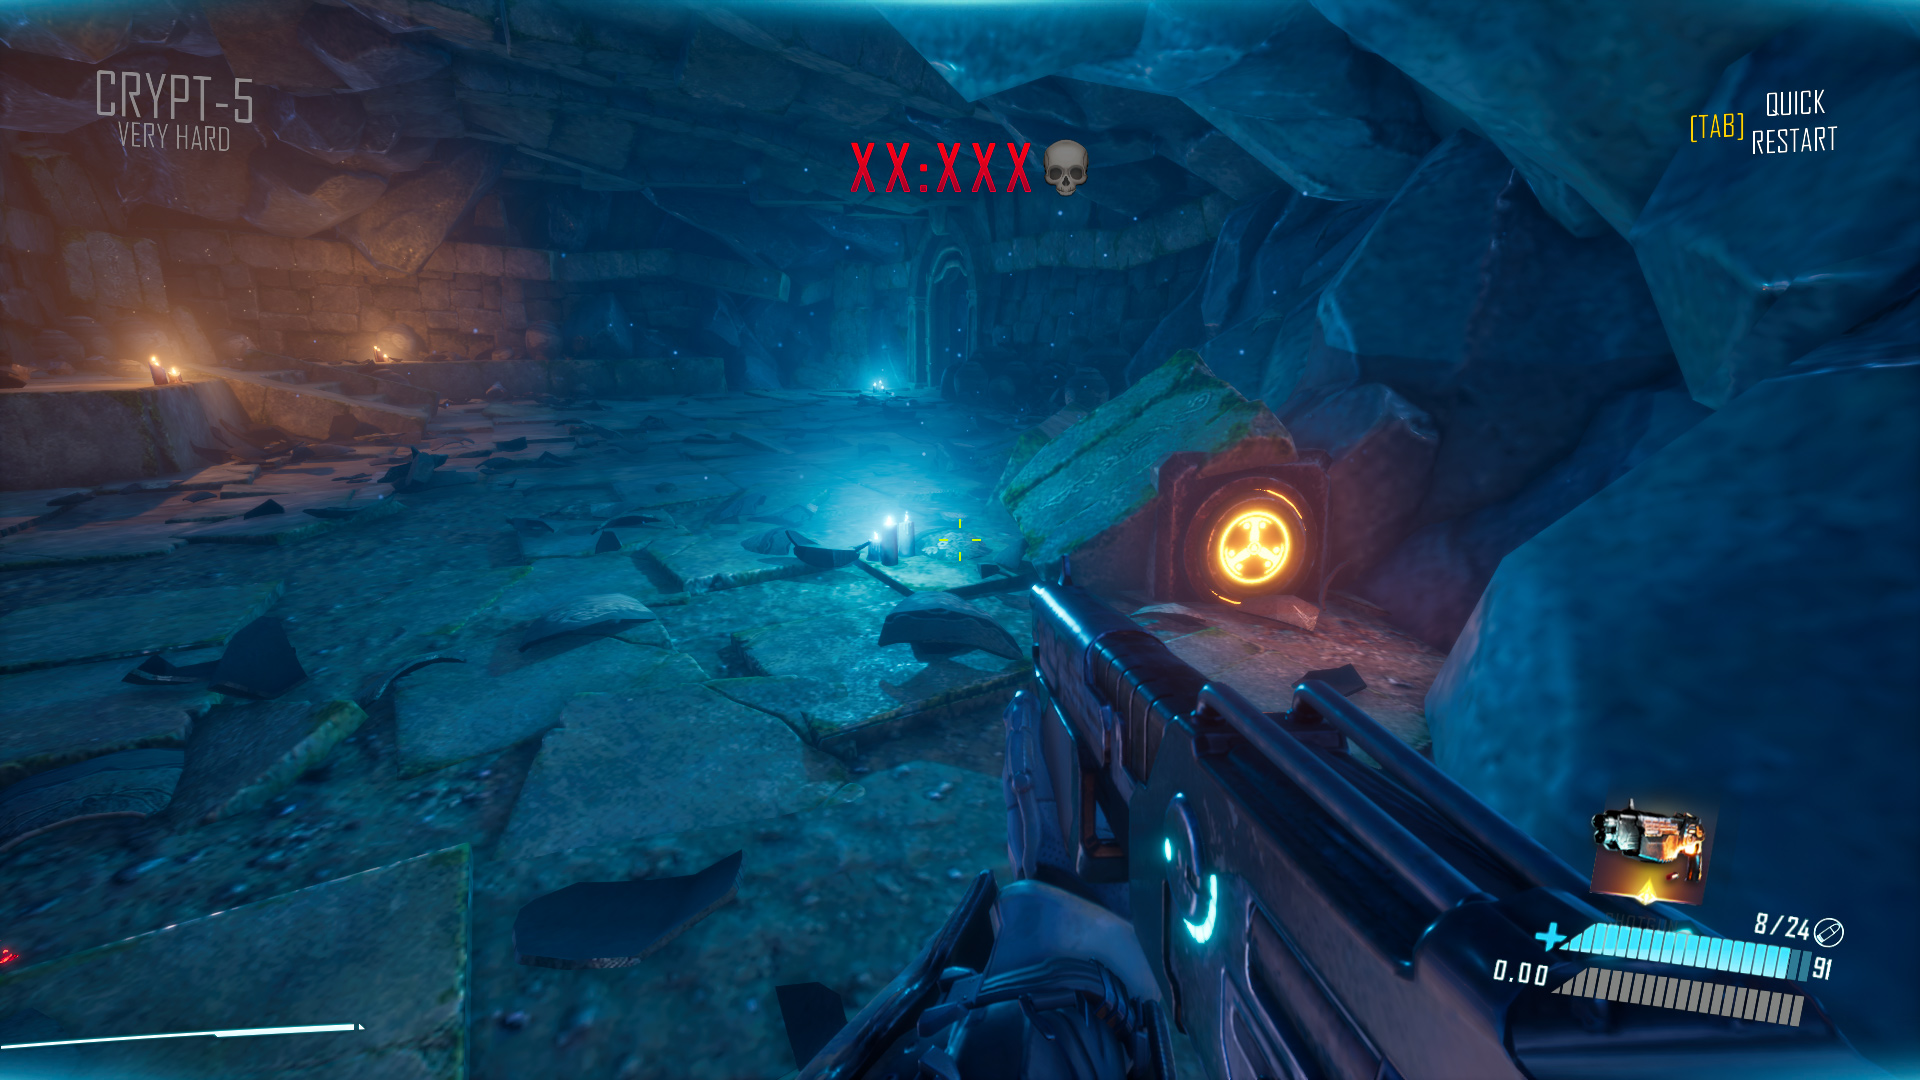
Crypt-5 Very Hard: Activate a hidden button to unlock a nearby crevice on the left side of the exit, where the skull is hidden.
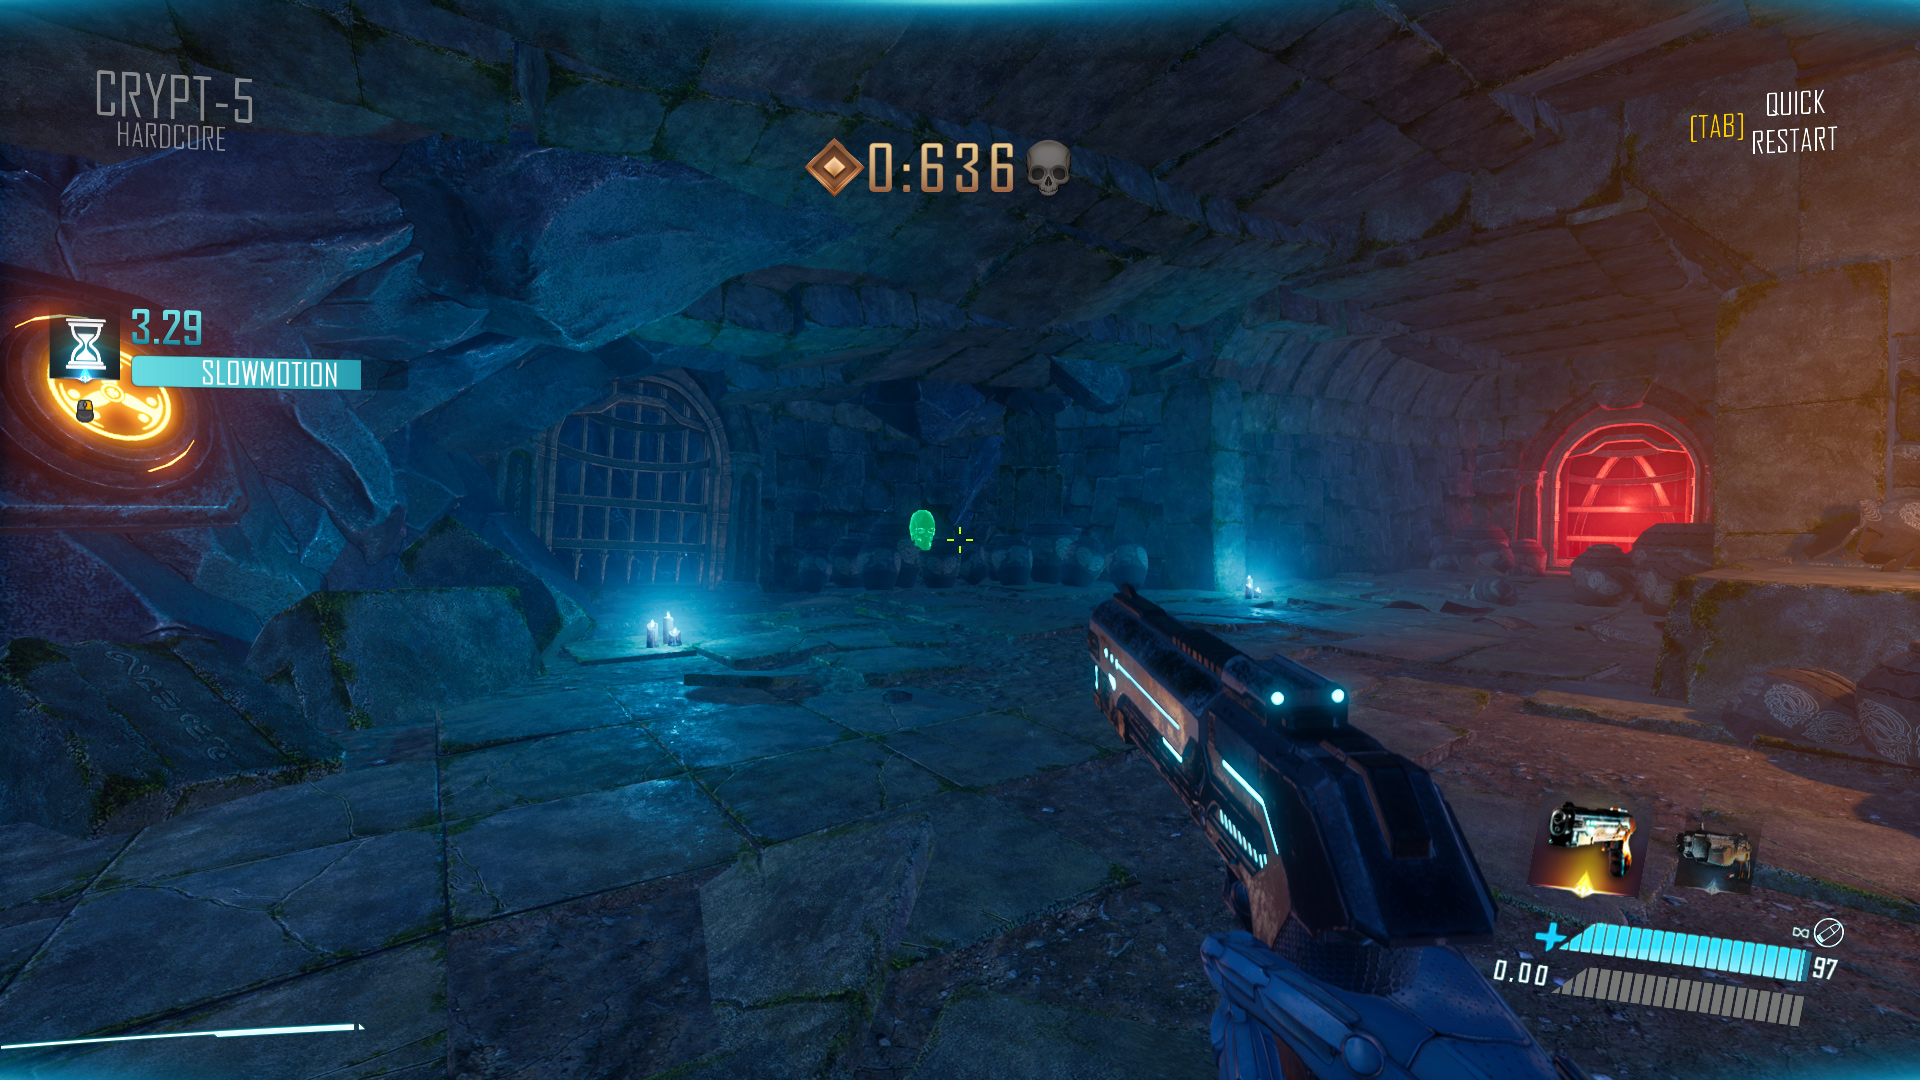
Crypt-5 Hardcore: Openly visible near the exit.
Crypt-5 Nightmare: In the ceiling of the first room, above the small stairs.

Crypt-6
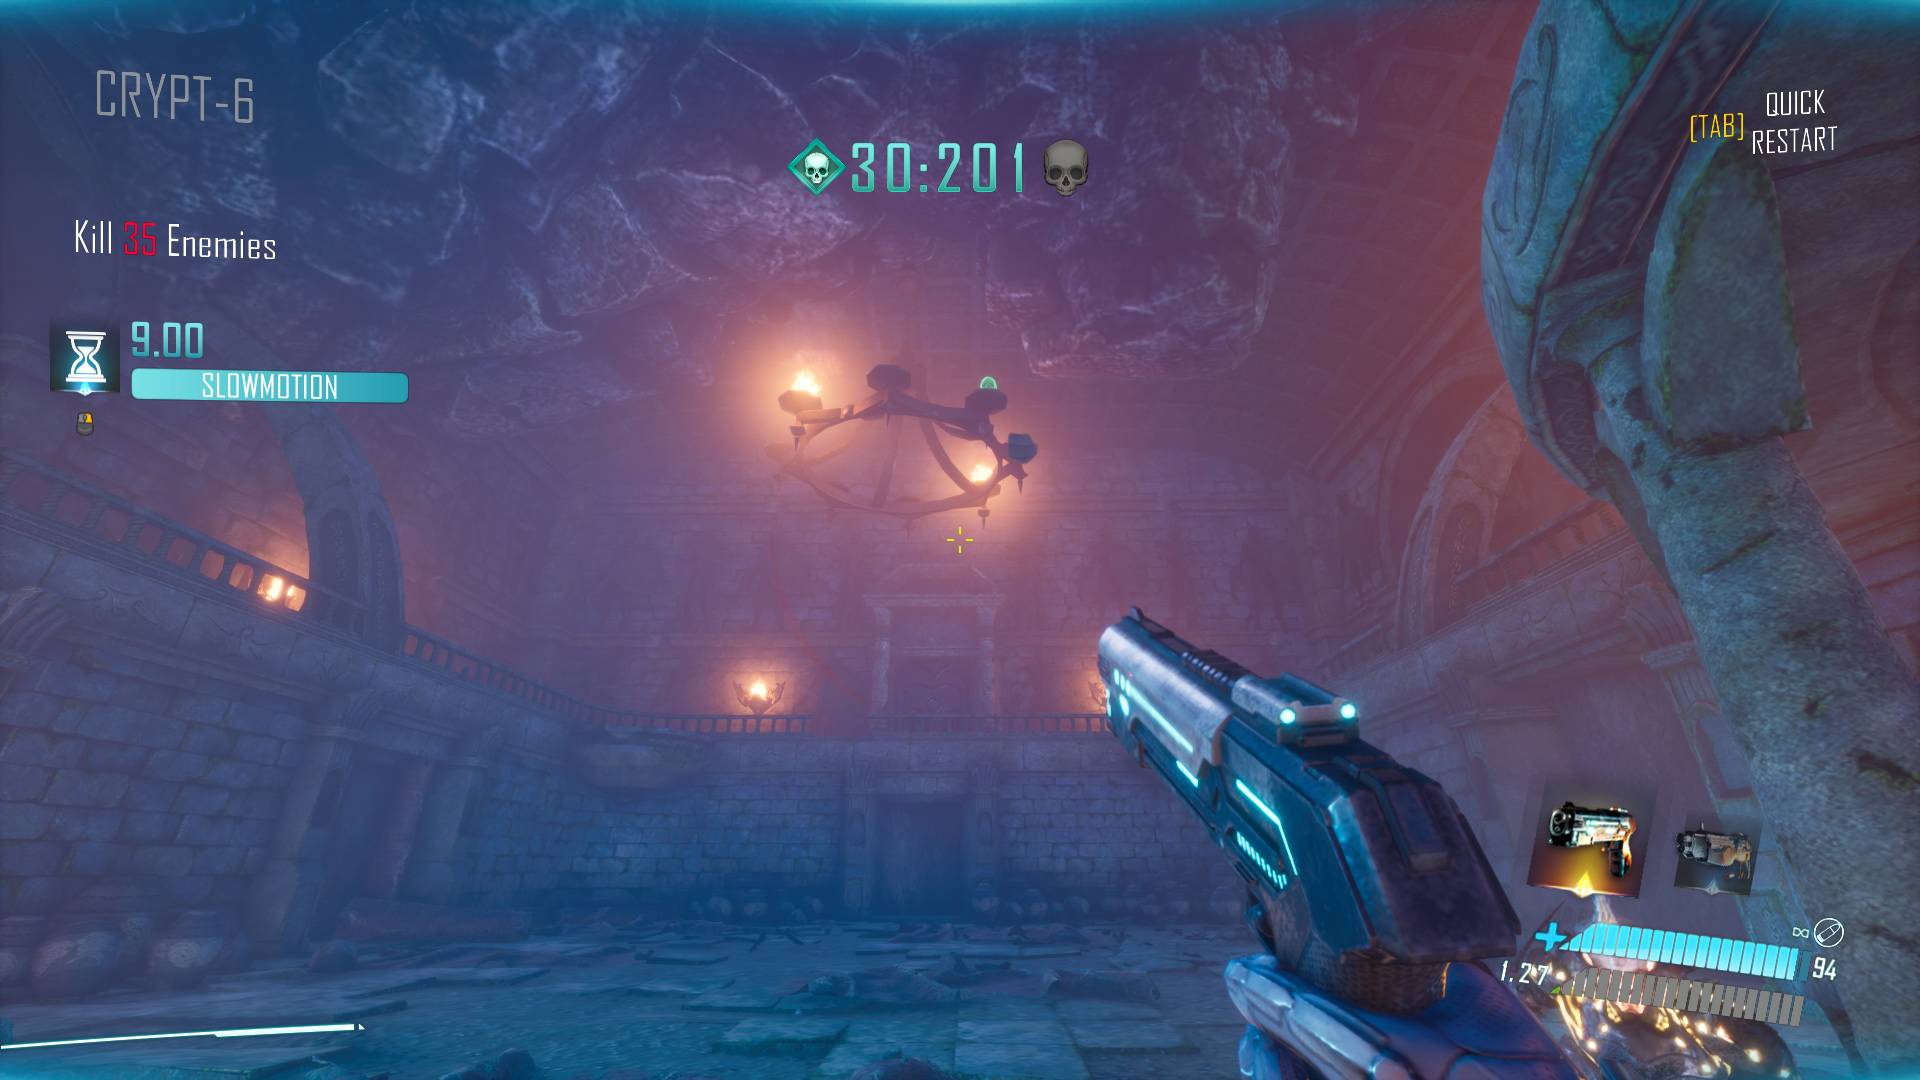
Crypt-6 Normal: Found on a candelabra in the largest room. You can spot it from the spawn or shoot it at the end from the upper floor.
Crypt-6 Hard: Take a right from the spawn, then another right into a small room. The skull is deeply hidden in the ceiling.
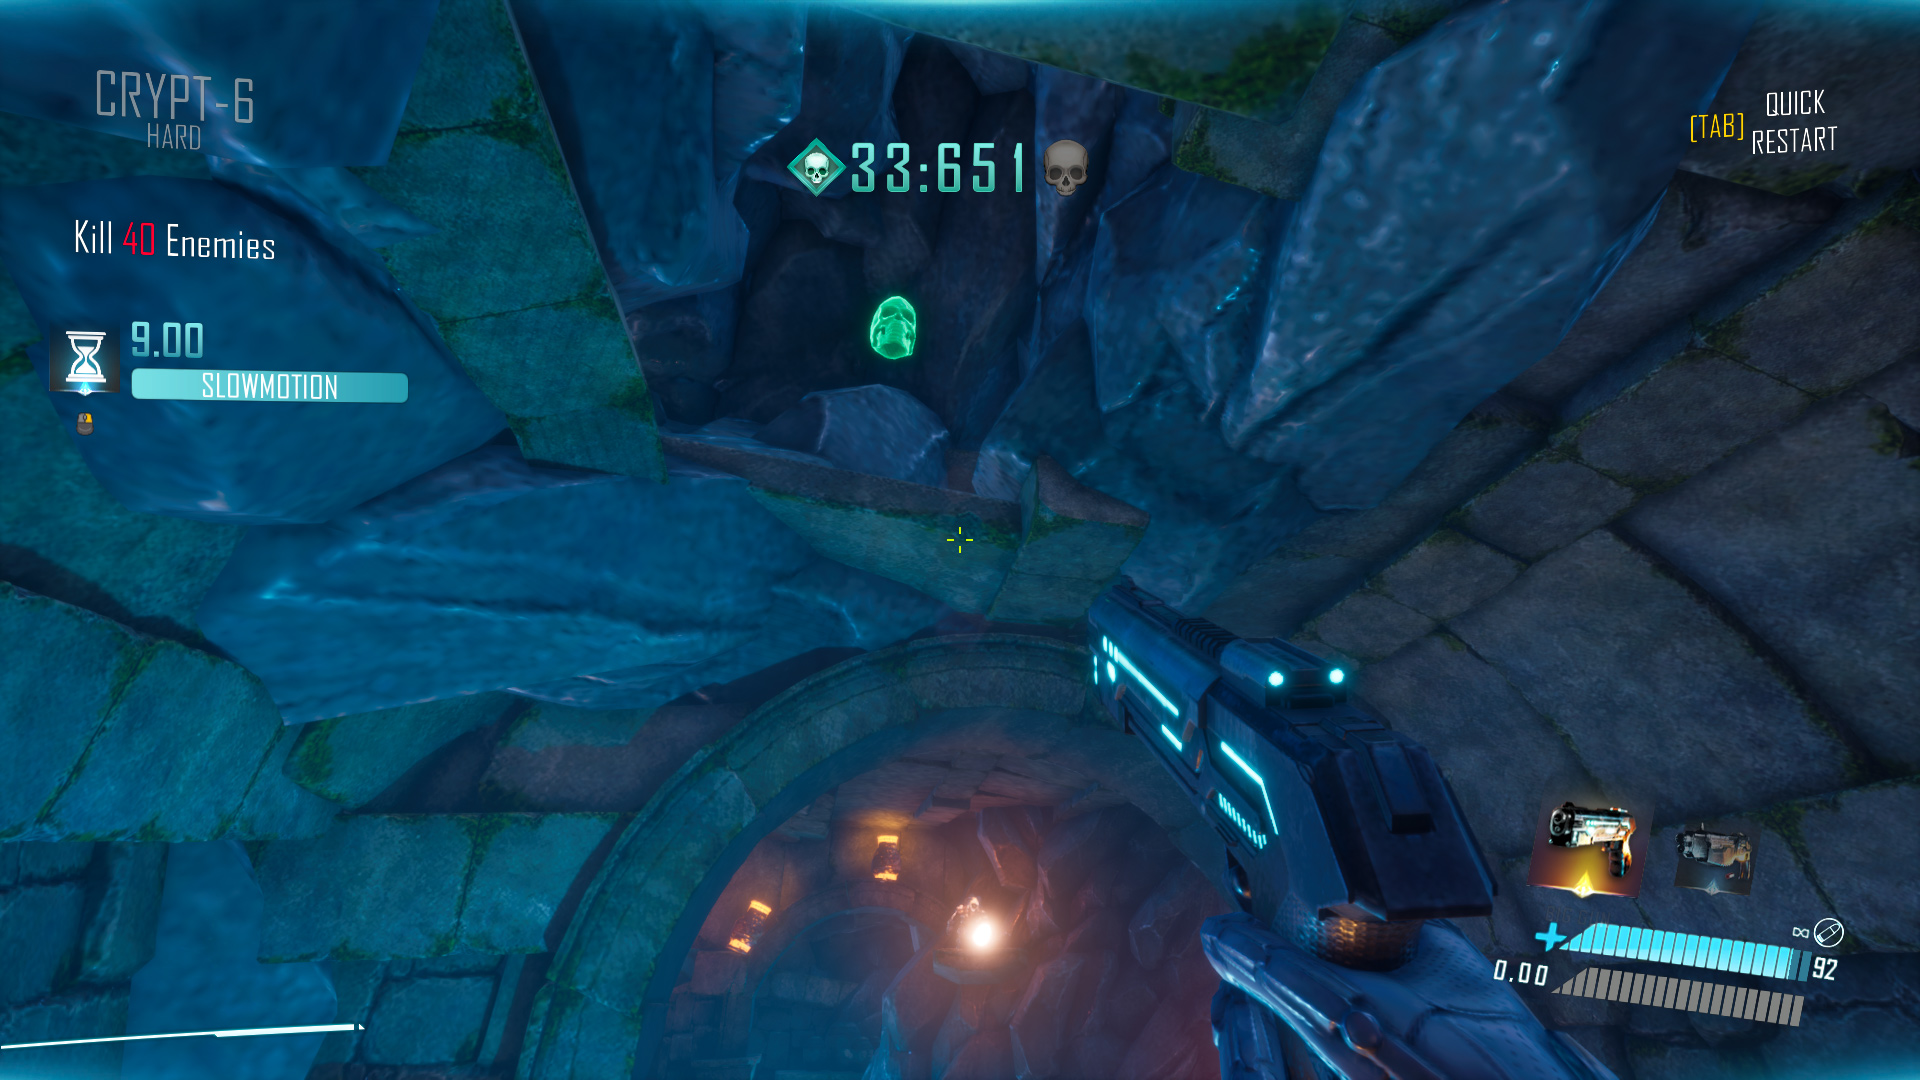
Crypt-6 Very Hard: Look on the left side of the long connecting tunnel to the upper floor of the main large room.

Crypt-6 Hardcore: Concealed within a torch on the upper floor of the largest room, somewhat above the lever that enables the slidepads.

Crypt-6 Nightmare: To the left (upper floor) from the spawn area, behind the statue’s head.

Crypt-7
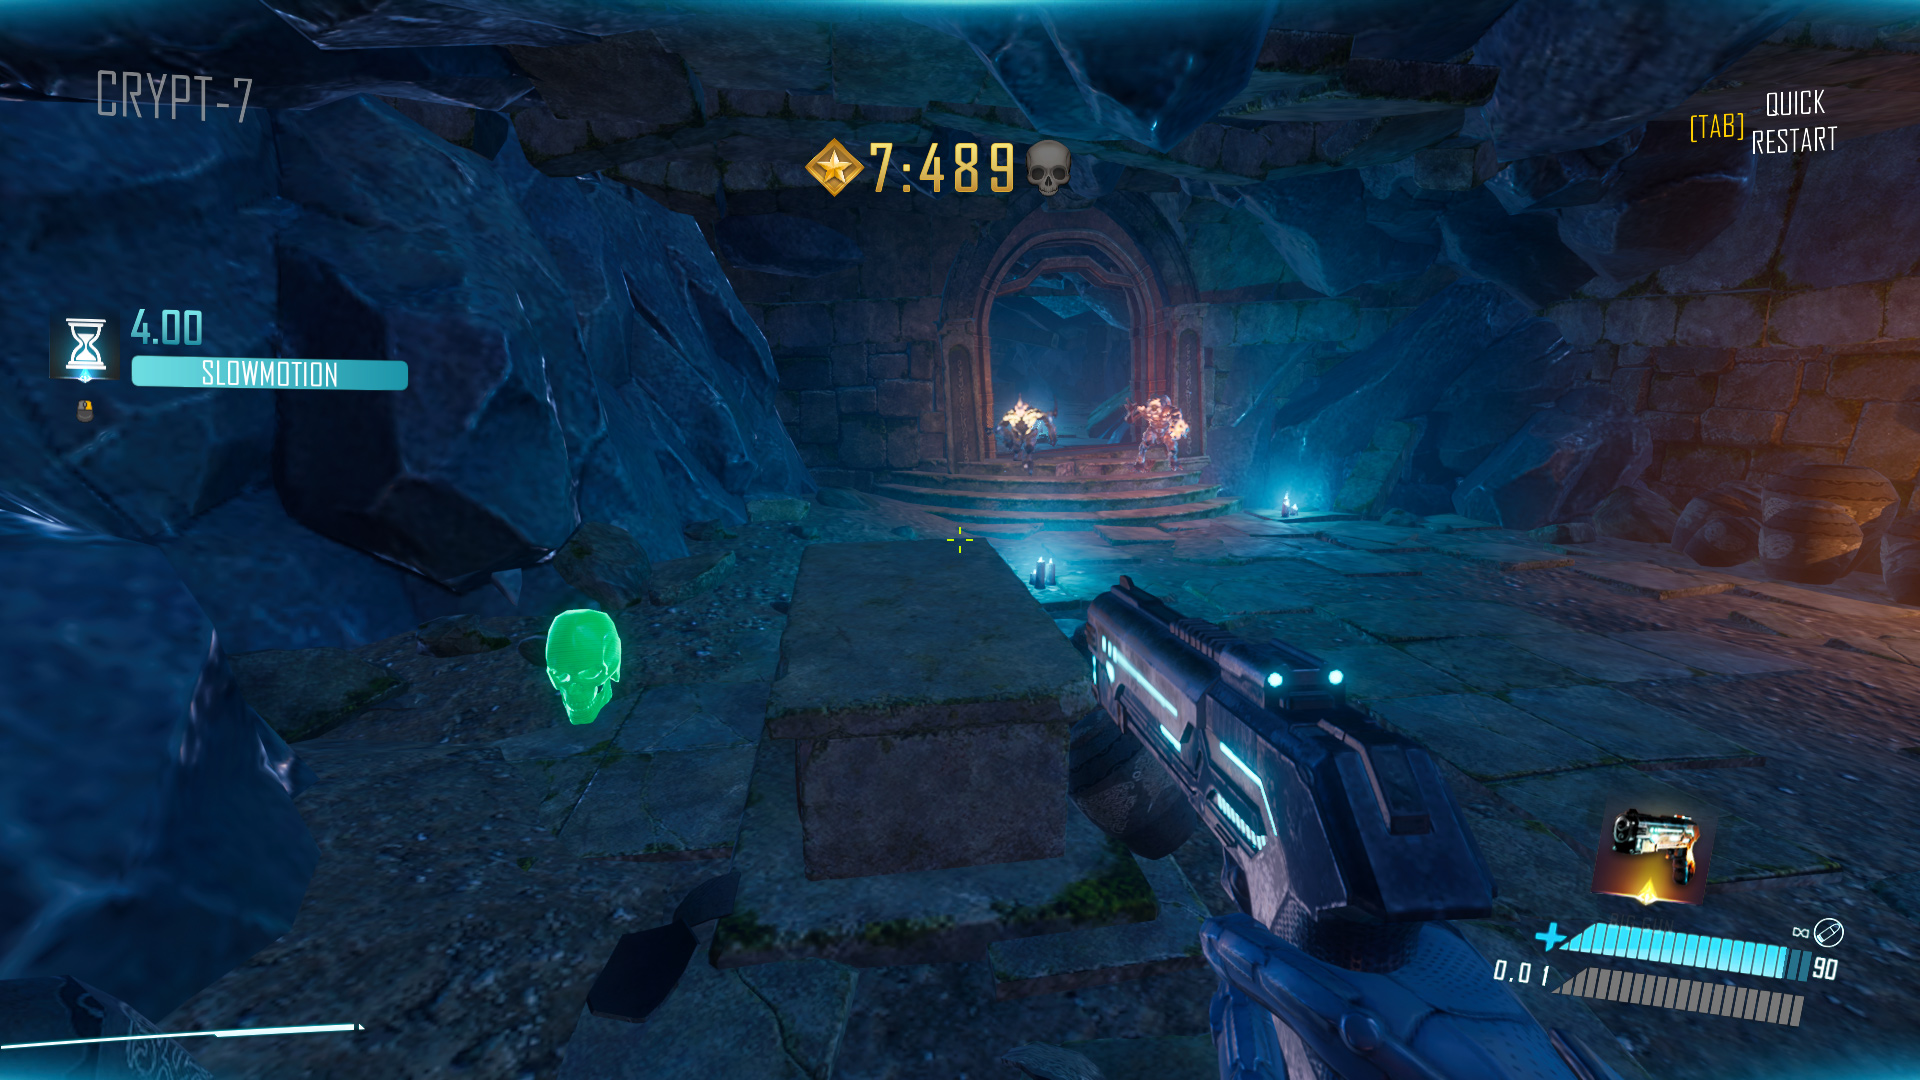
Crypt-7 Normal: After encountering three “crabs,” it’s in the following room.
Crypt-7 Hard: Inside one of the urns on the left side near the exit.

Crypt-7 Very Hard: Positioned near two enemies by a barrel towards the level’s end.

Crypt-7 Hardcore: Directly above you in the next room after sliding through a small tunnel following the lever pull and door passage.

Crypt-7 Nightmare: In the ceiling in front of the starting gate.

Crypt-8
Crypt-8 Normal: Concealed in a large urn in the second-to-last room before the U-turn towards the exit.

Crypt-8 Hard: Inside a grave niche mid-level (in the room preceding the stairs).

Crypt-8 Very Hard: Among several explosive barrels on the right side of the exit door, accessible by blowing up all the barrels.

Crypt-8 Hardcore: A button hidden on the side of the pedestal with the first lever reveals the nearby skull.

Crypt-8 Nightmare: A lever hidden above the room where the second enemy is killed. Use the platform on the left or a crouch-jump from the coffins on the right to access it.

Crypt-9
Crypt-9 Normal: Check the optional room on the right after descending two flights of stairs, before sliding into the small tunnel.

Crypt-9 Hard: After sliding through the tunnel, visit the optional room on your left to find the slightly better-hidden skull.

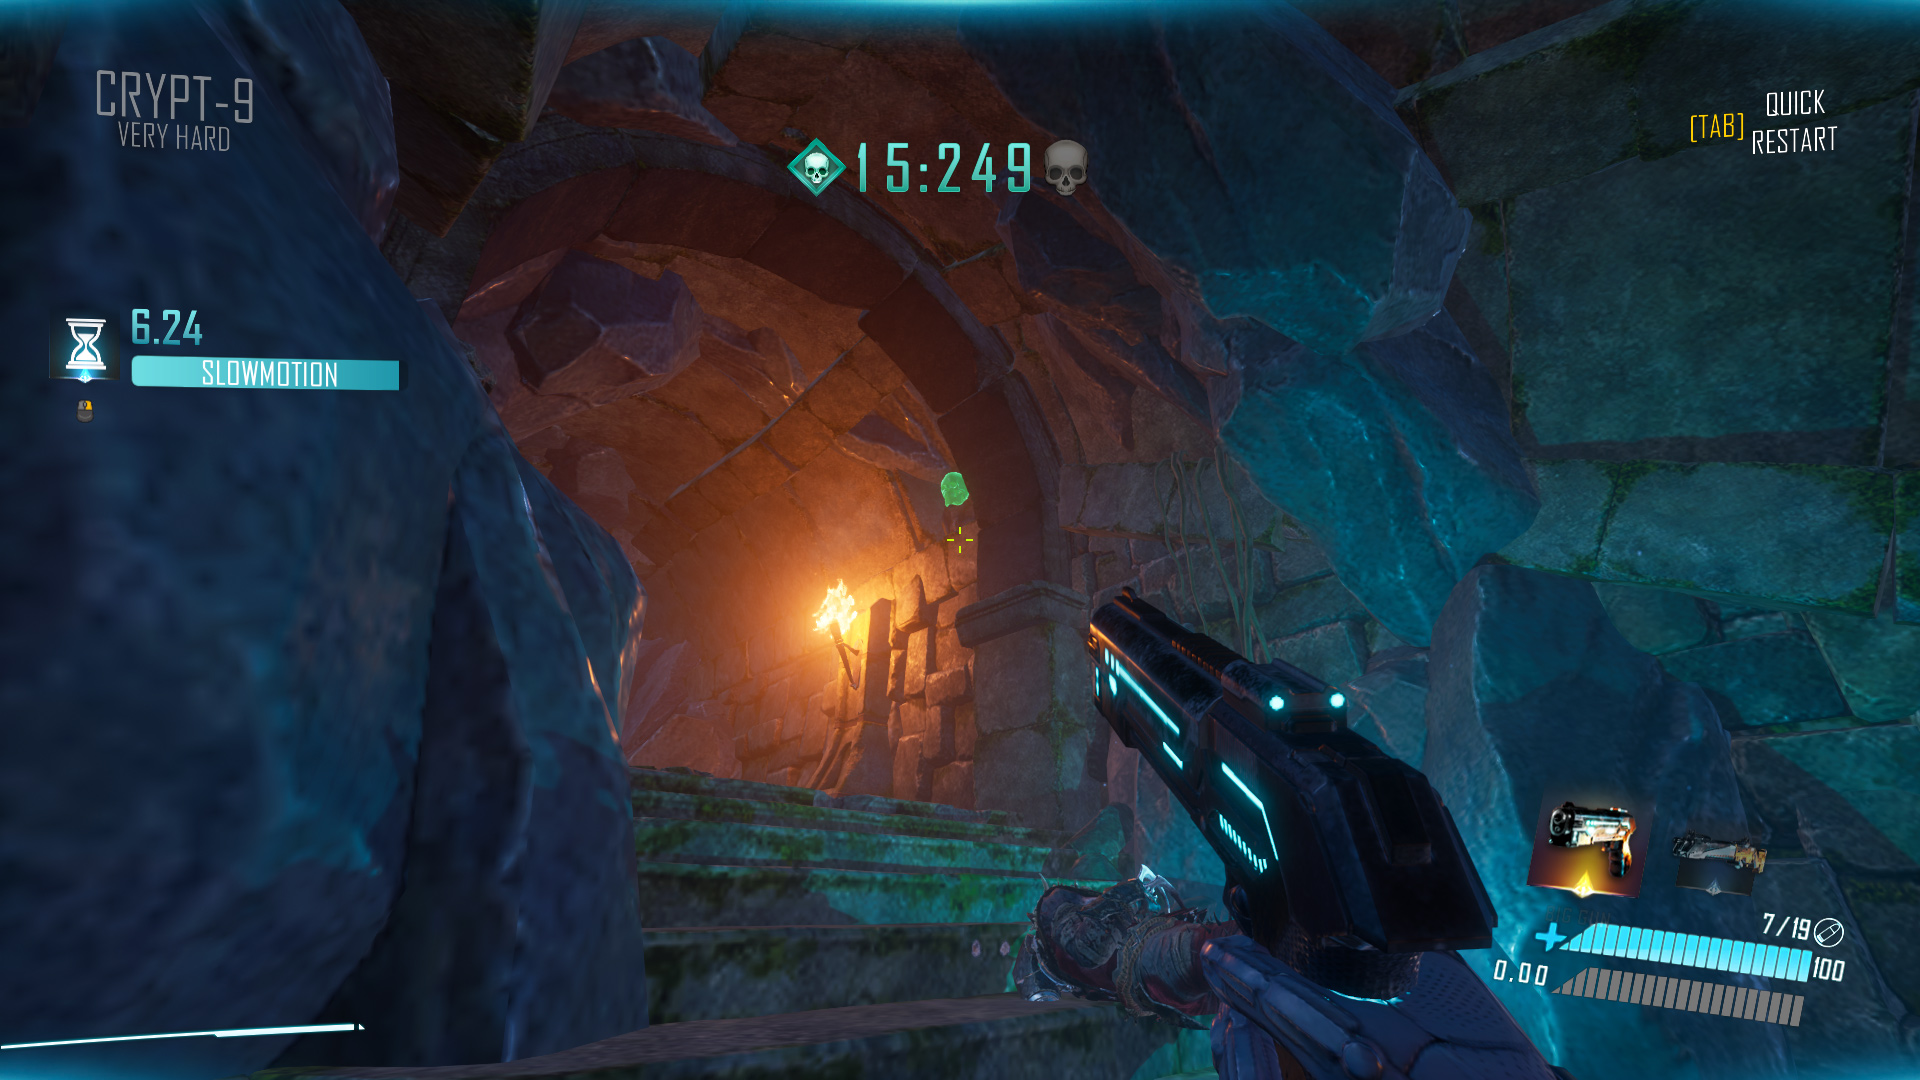
Crypt-9 Very Hard: Shoot four buttons to escape the starting room, then spot the skull above and to the right after reaching a set of stairs.
Crypt-9 Hardcore: A button, immediately after the first flight of stairs from the start, reveals a skull.

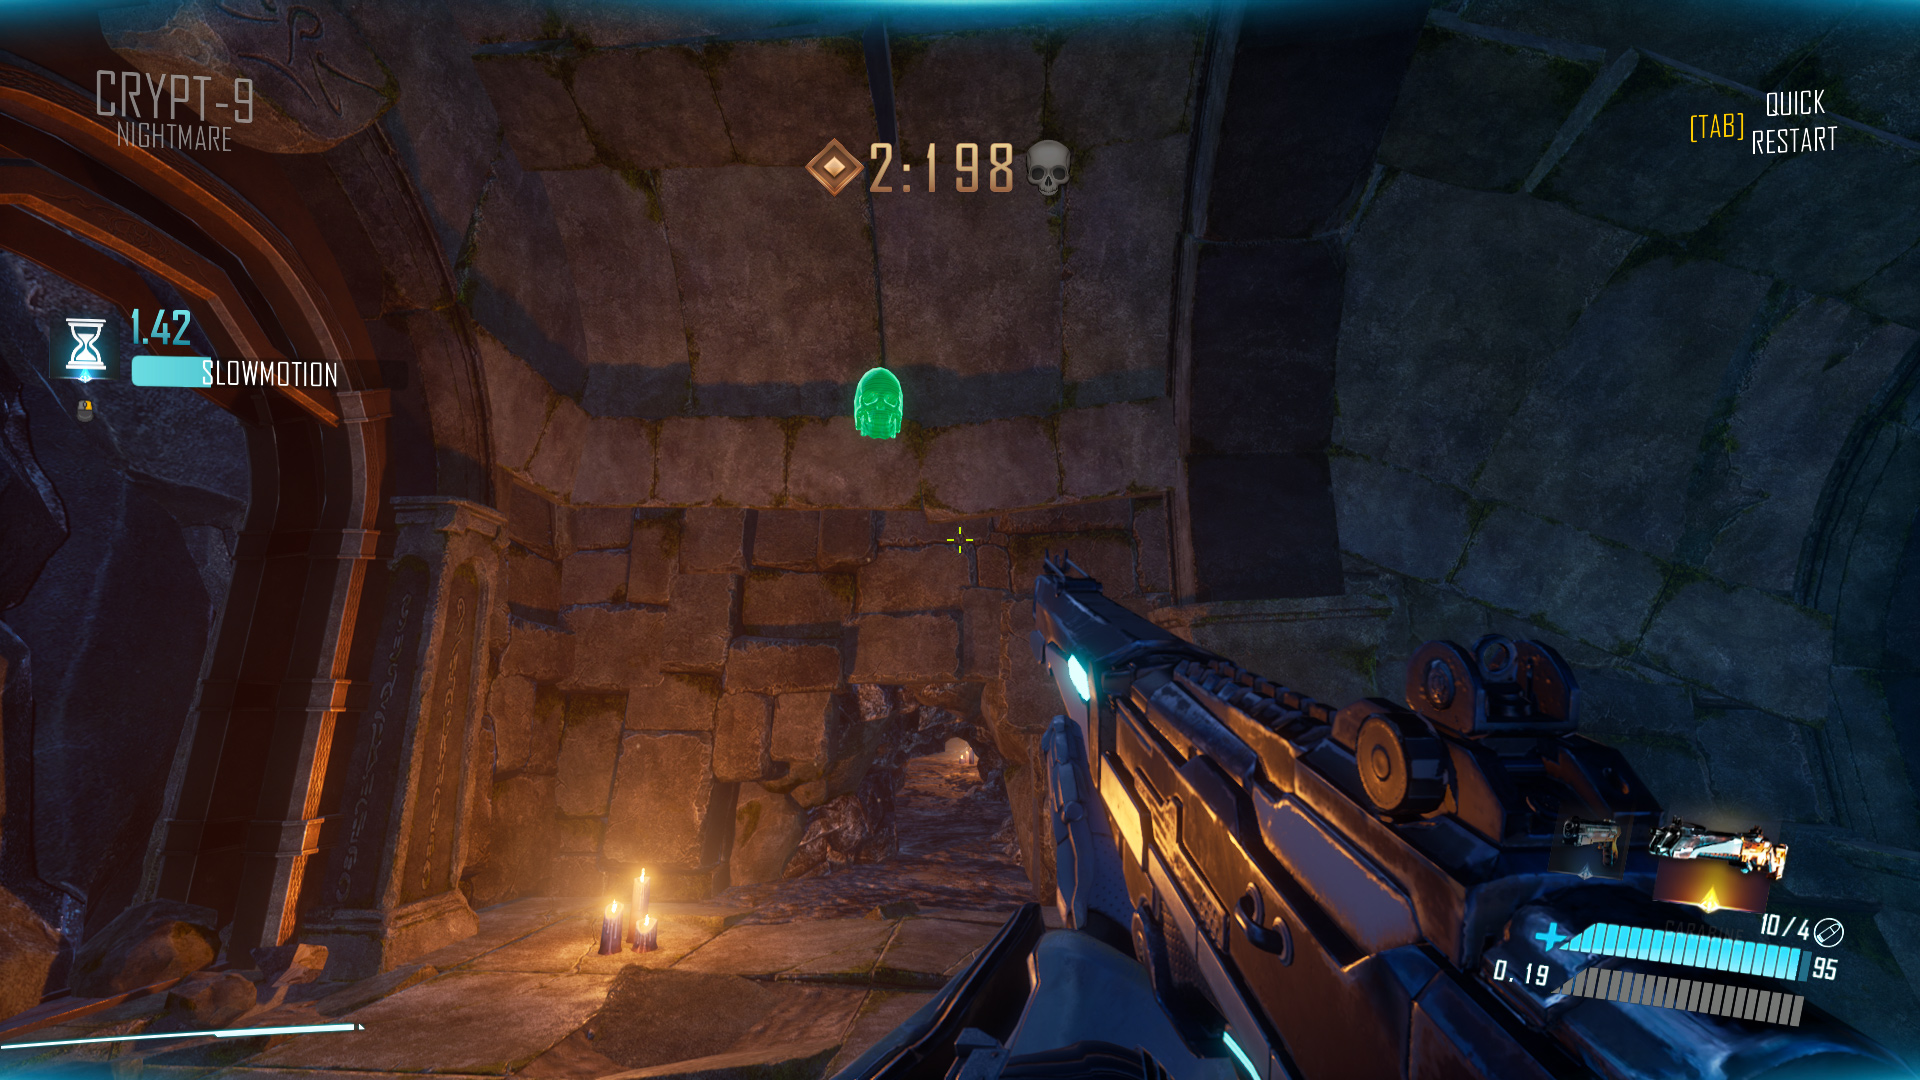
Crypt-9 Nightmare: Look up directly after the long sliding section.
Crypt-10
Crypt-10 Normal: Before picking up the carabine, check the extra room on your right.
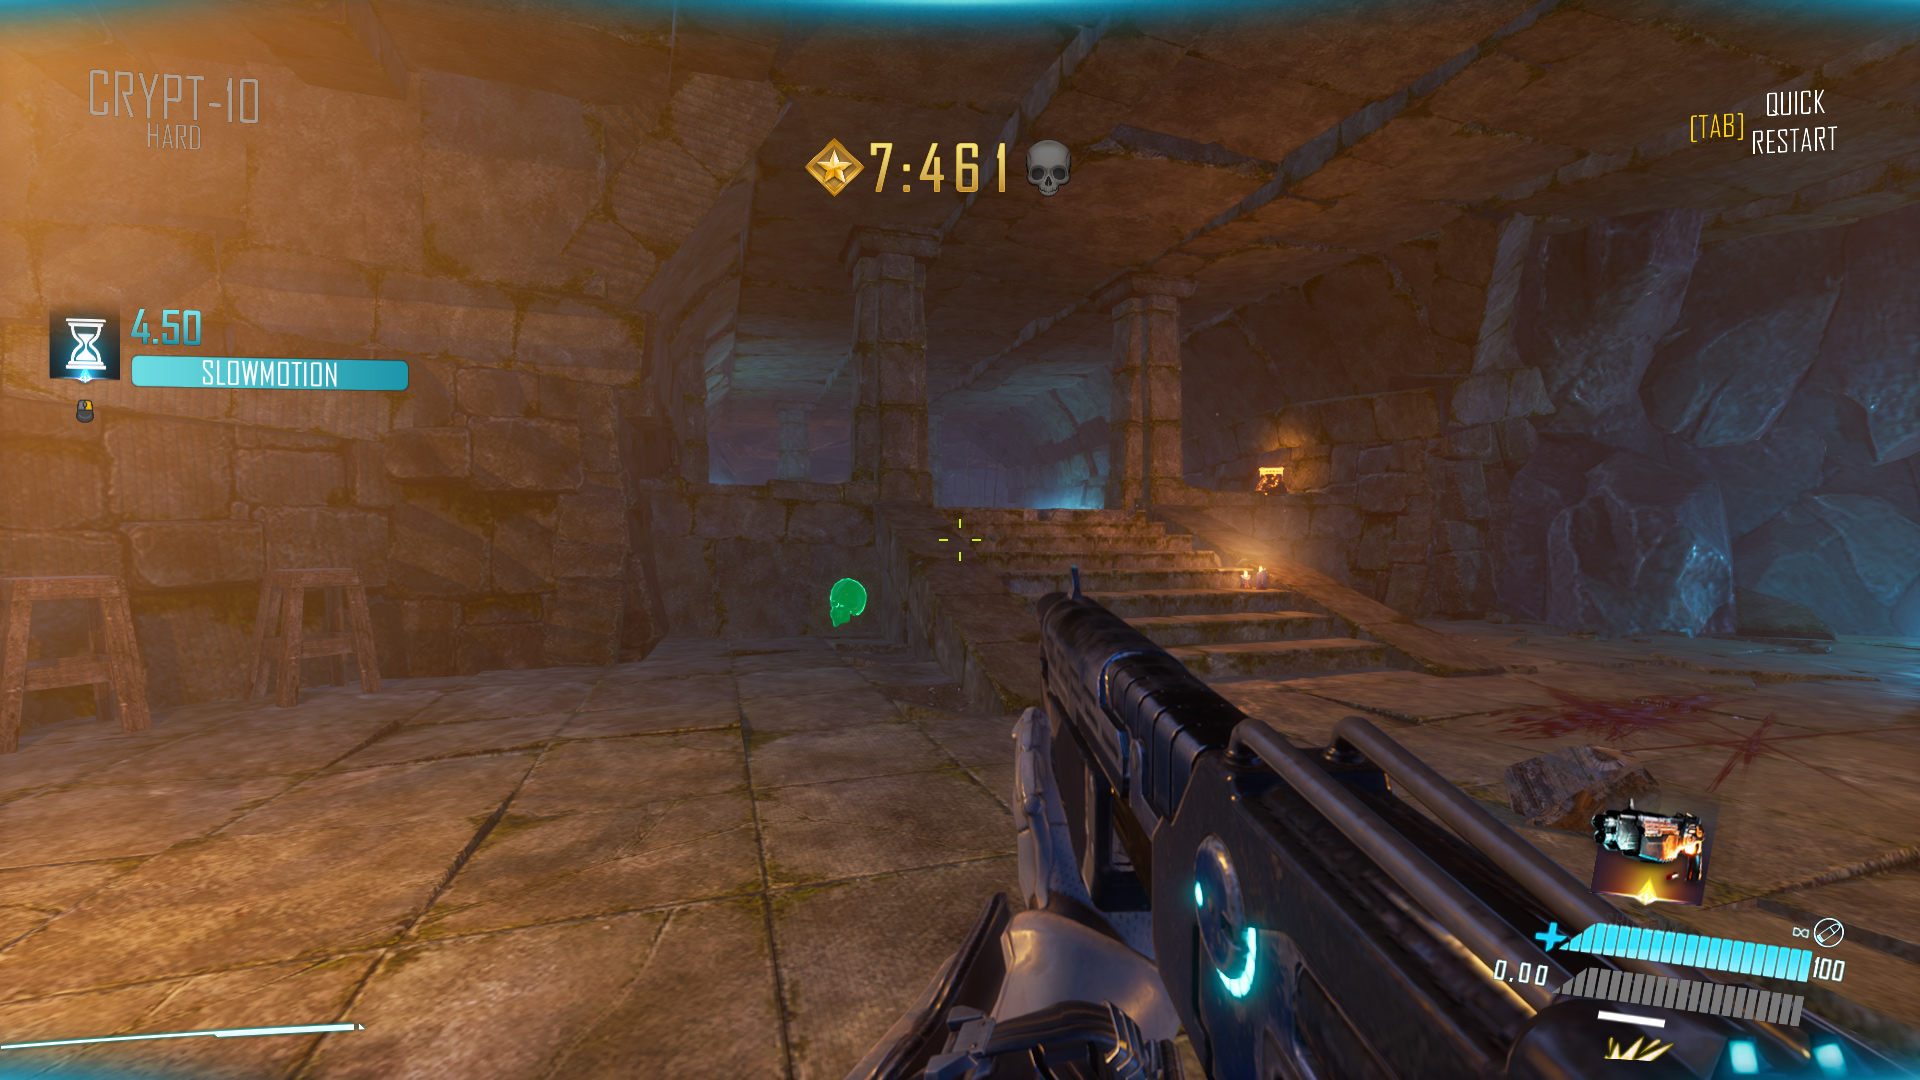
Crypt-10 Hard: Beneath the stairs in the large room.
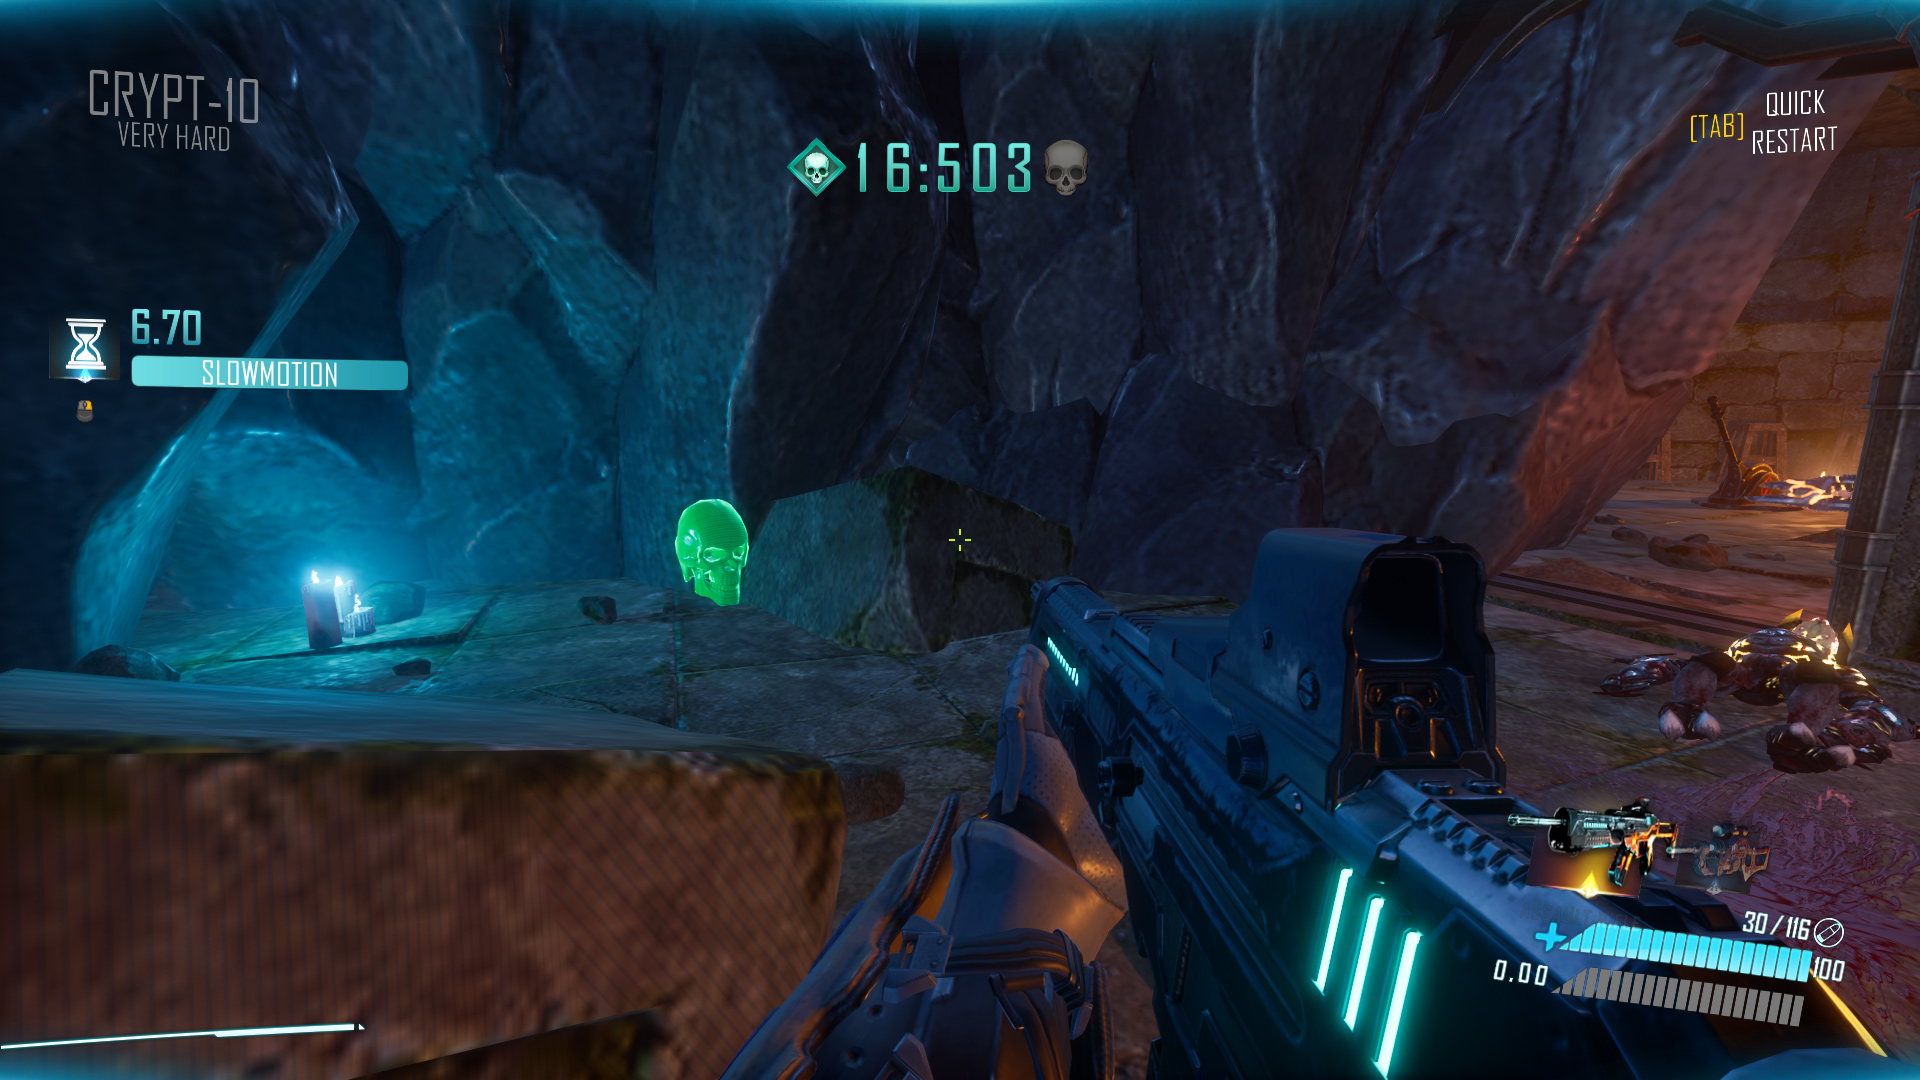
Crypt-10 Very Hard: Directly behind the spawn there’s a tiny room with the skull inside.
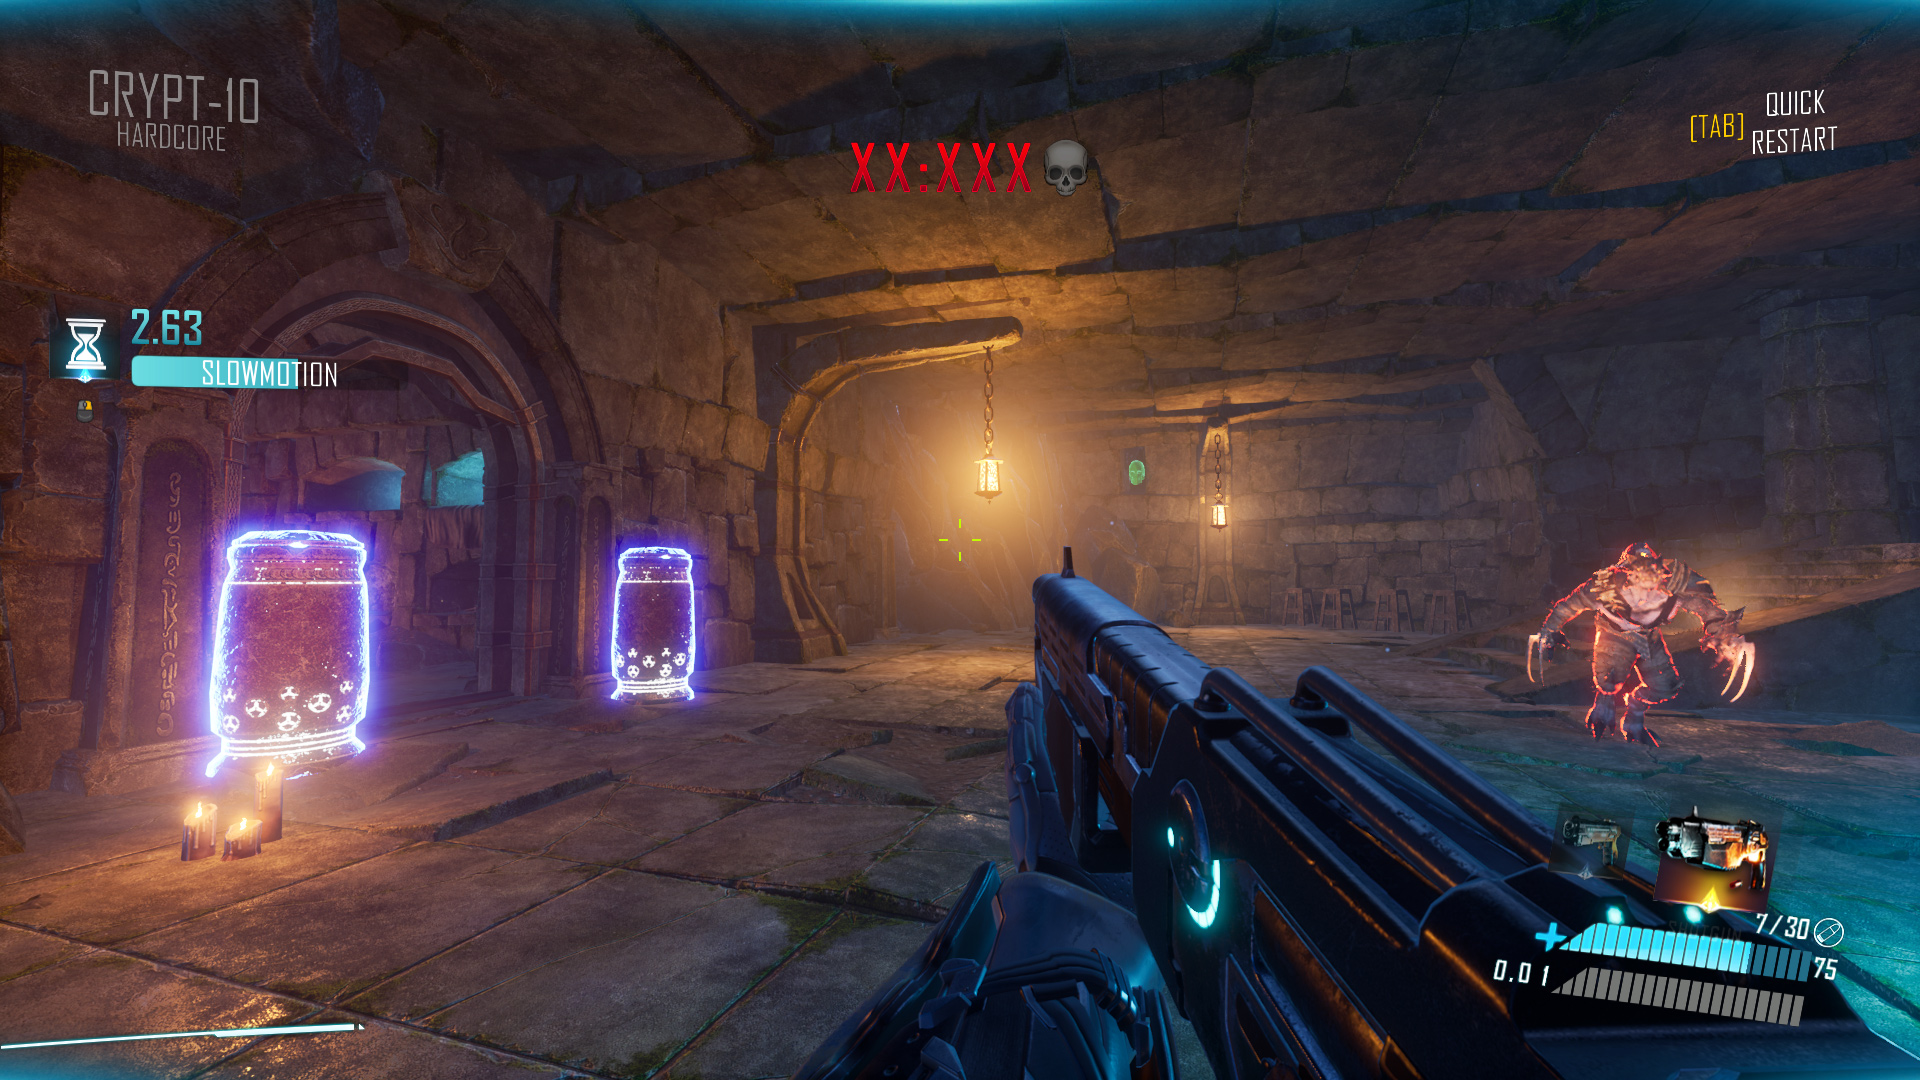
Crypt-10 Hardcore: Concealed in the wall to the right of the two blue barrels.
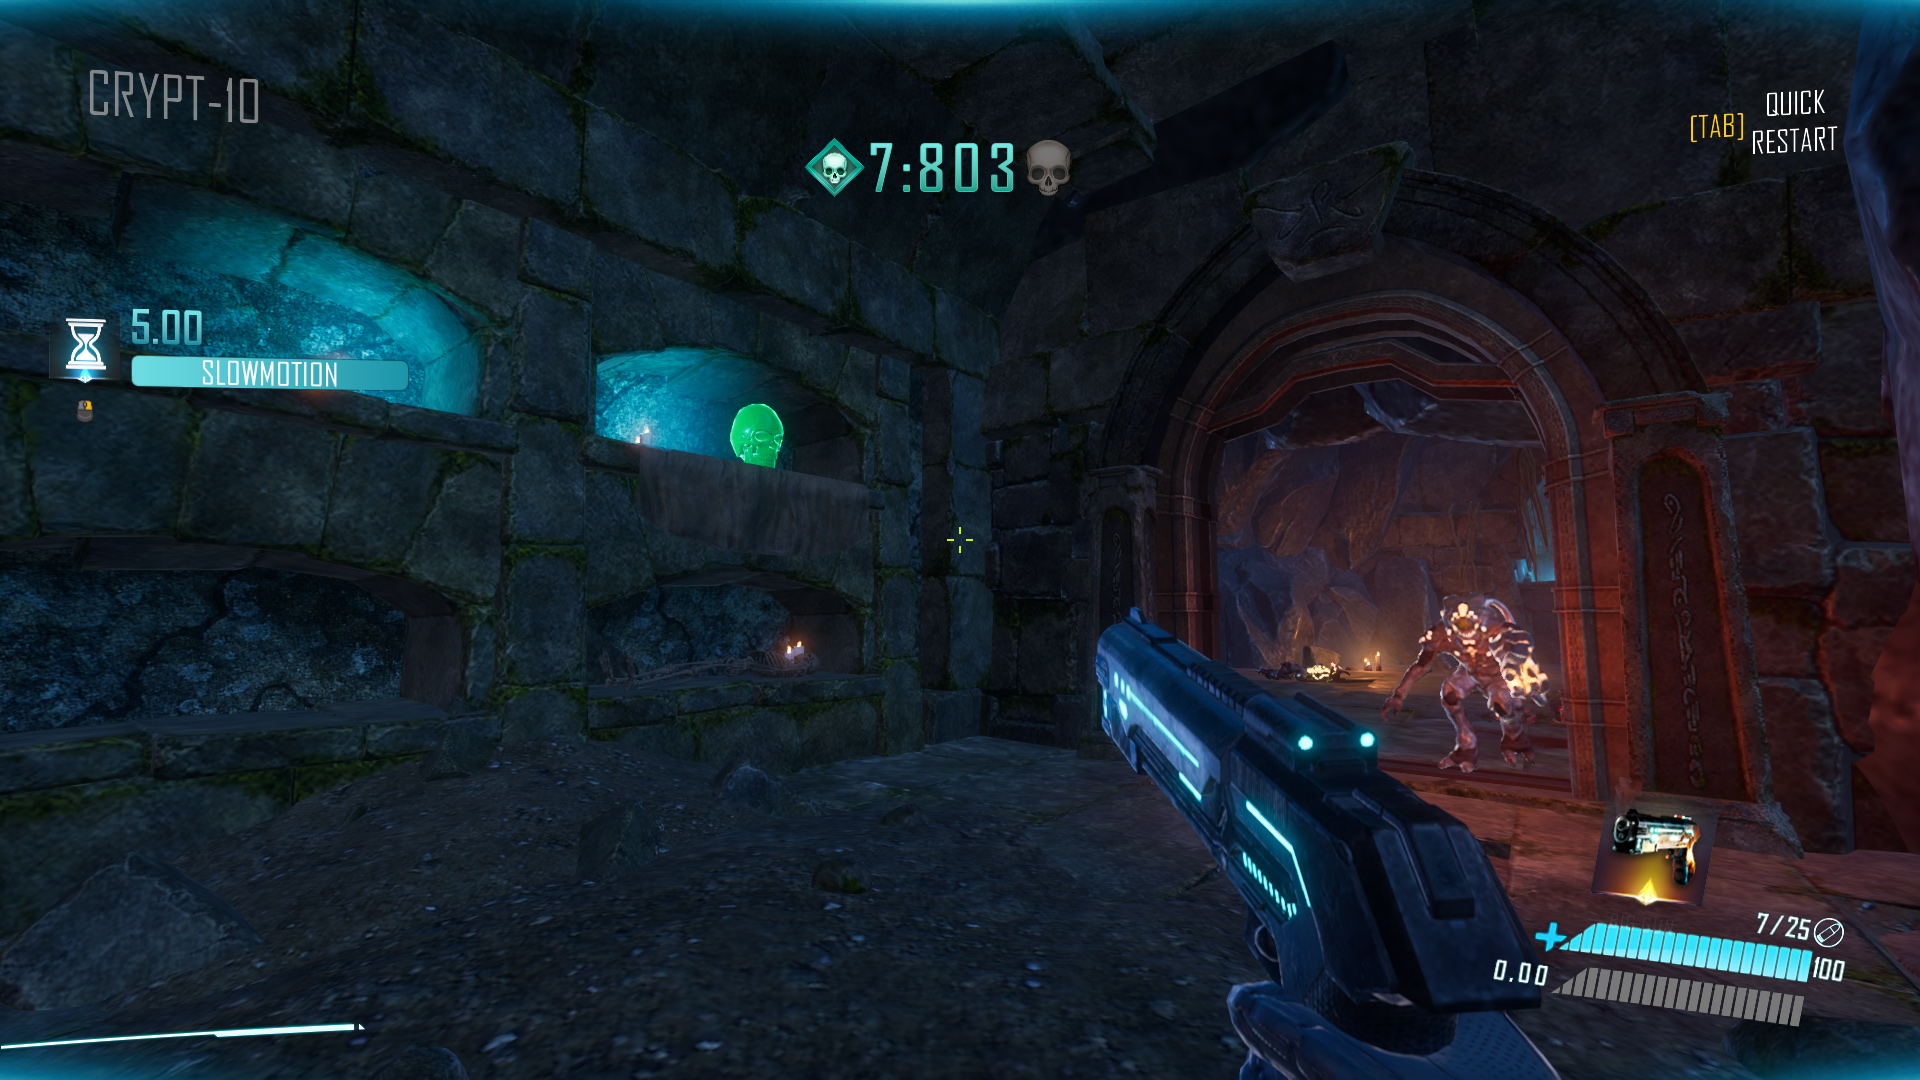
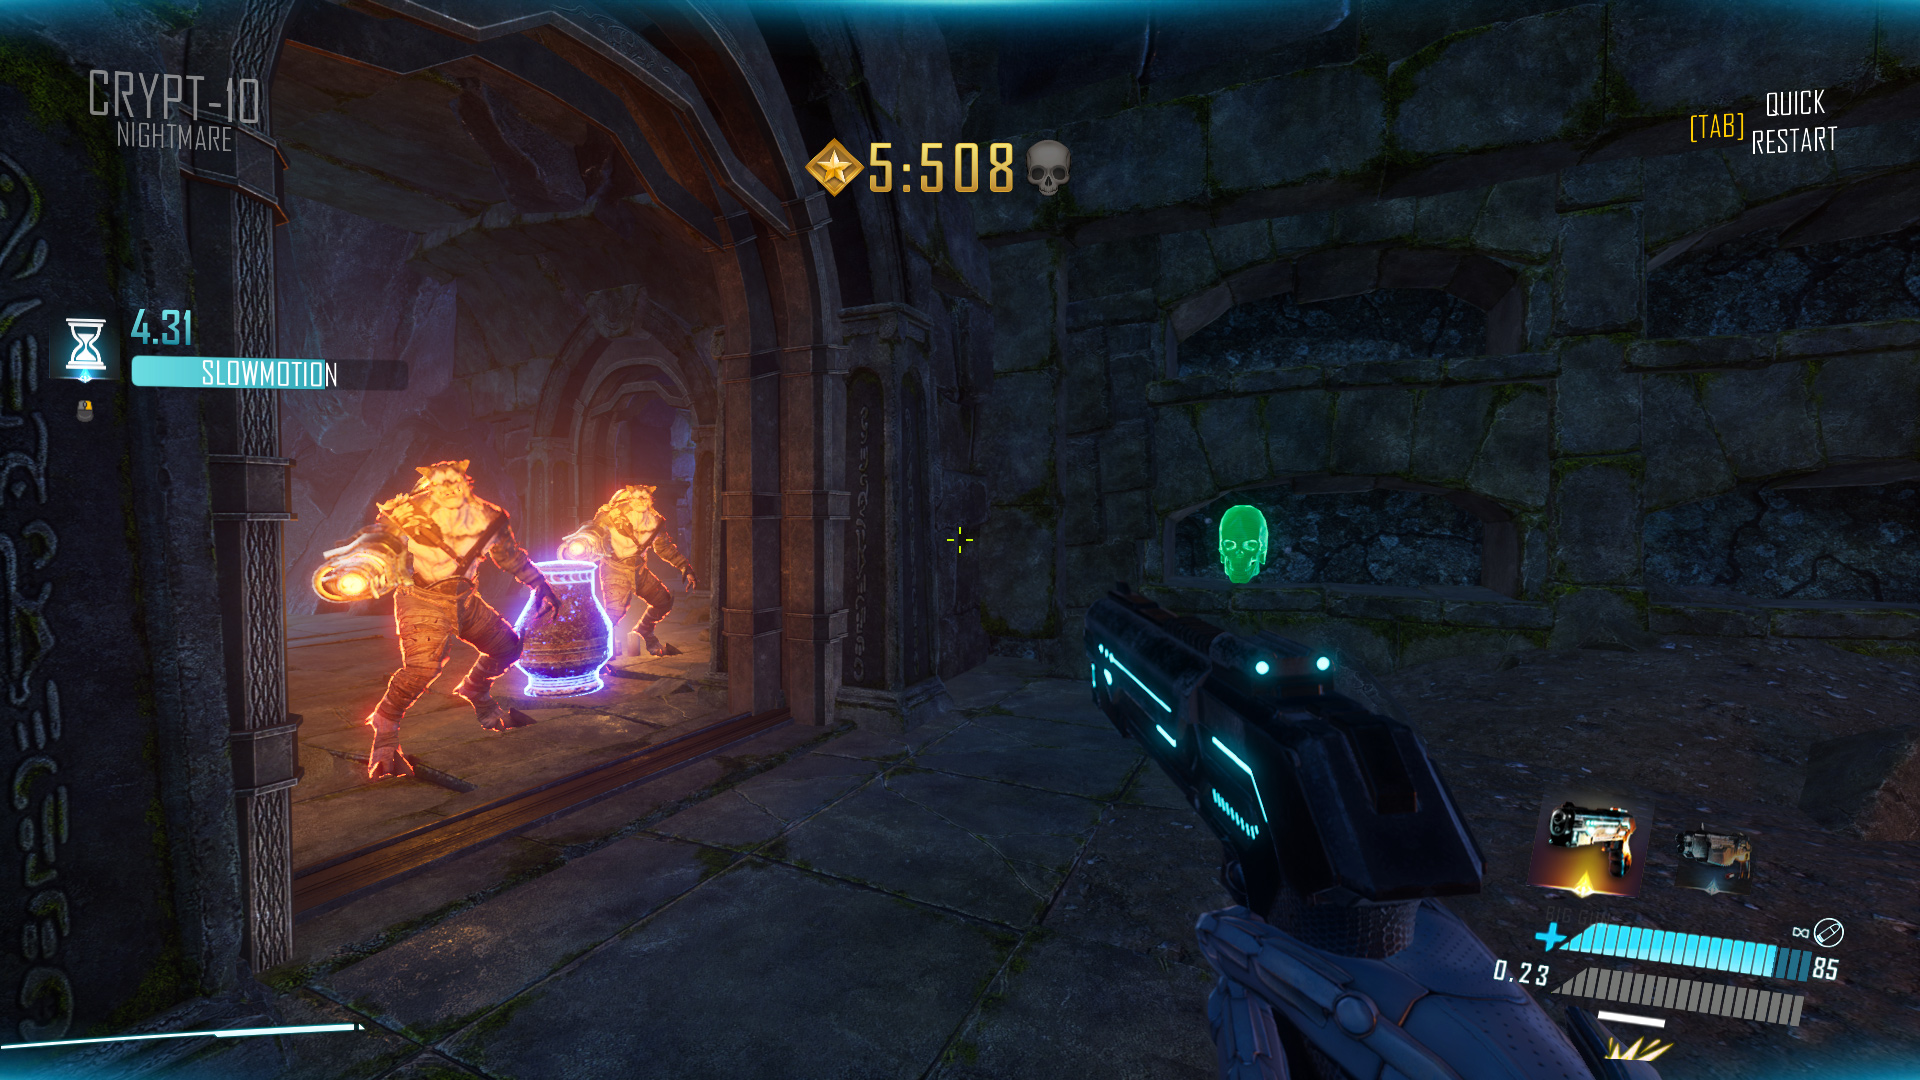
Crypt-10 Nightmare: In the room directly behind the two blue barrels.
Crypt-11
Crypt-11 Normal: Directly below the exit door.

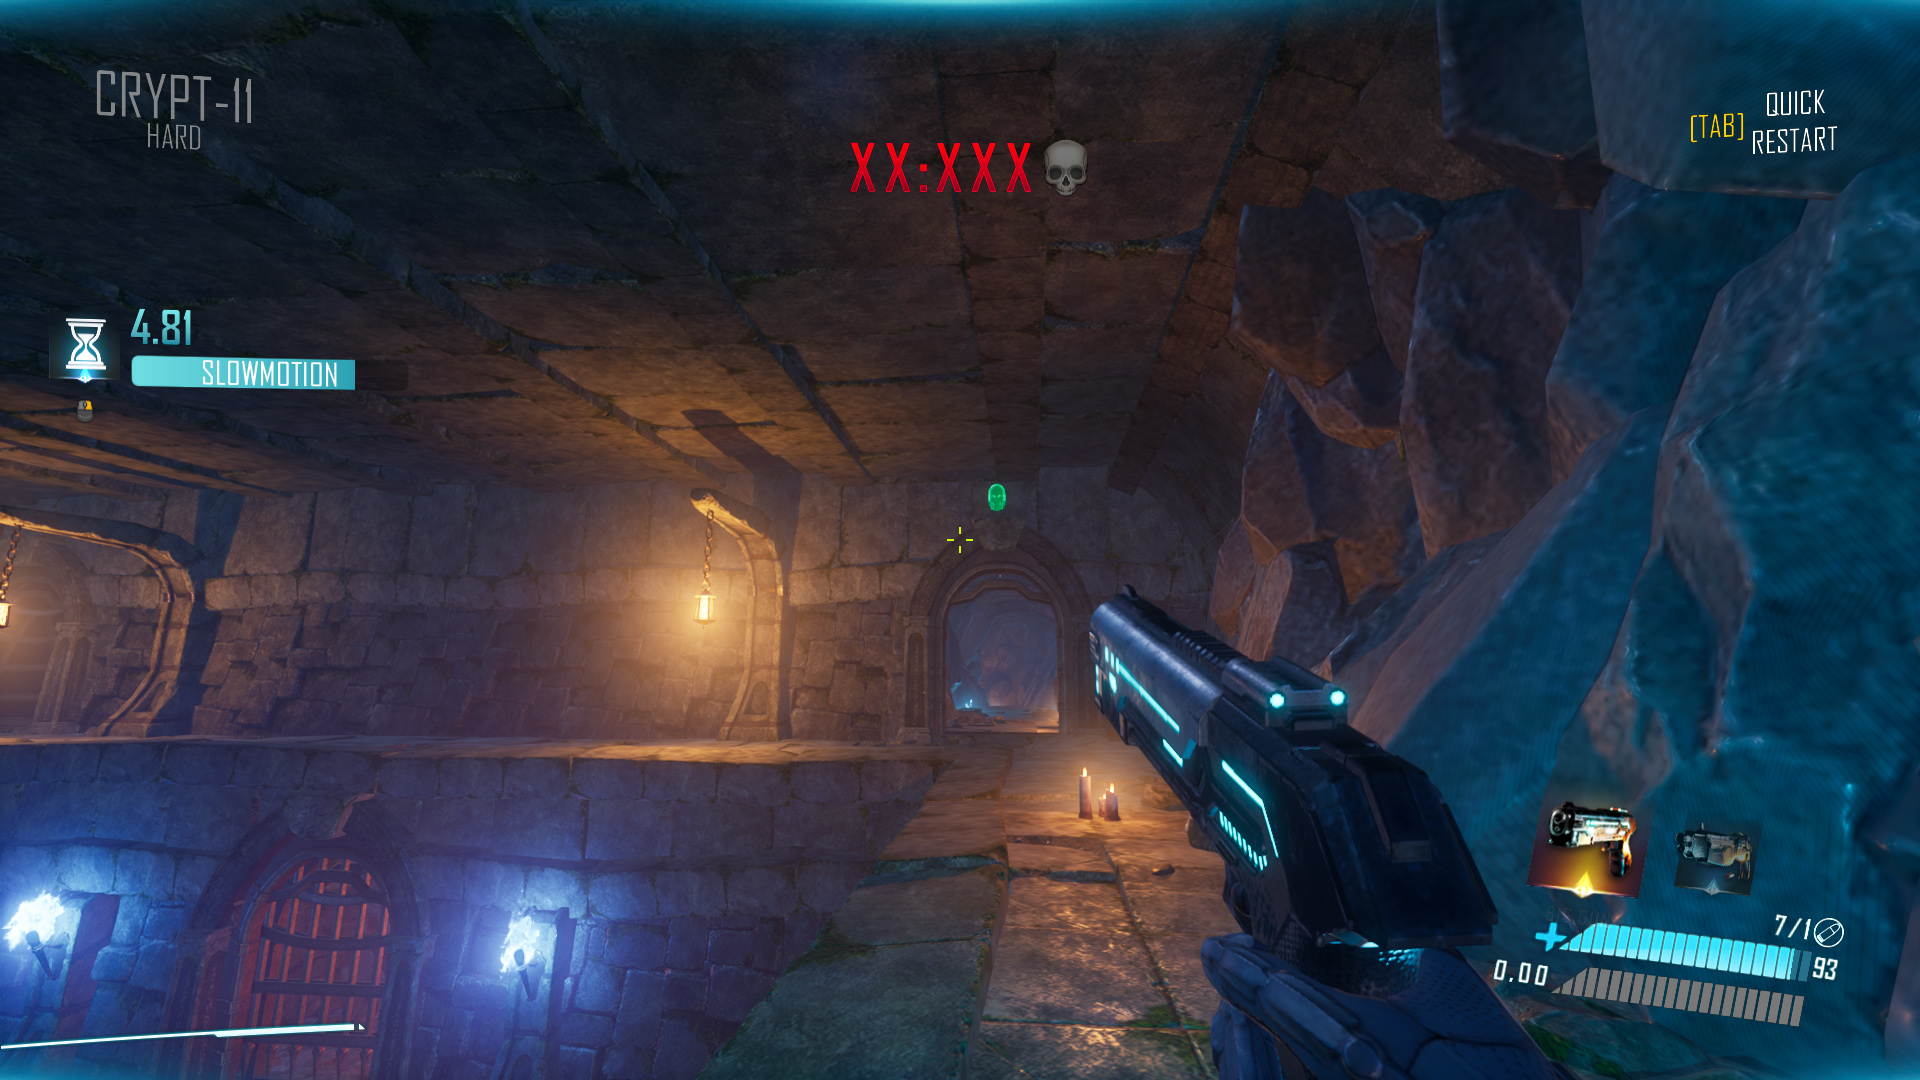
Crypt-11 Hard: After shooting the first button and entering the “hub” room, look back and up.
Crypt-11 Very Hard: Found in the room with the first button, next to the carabine.

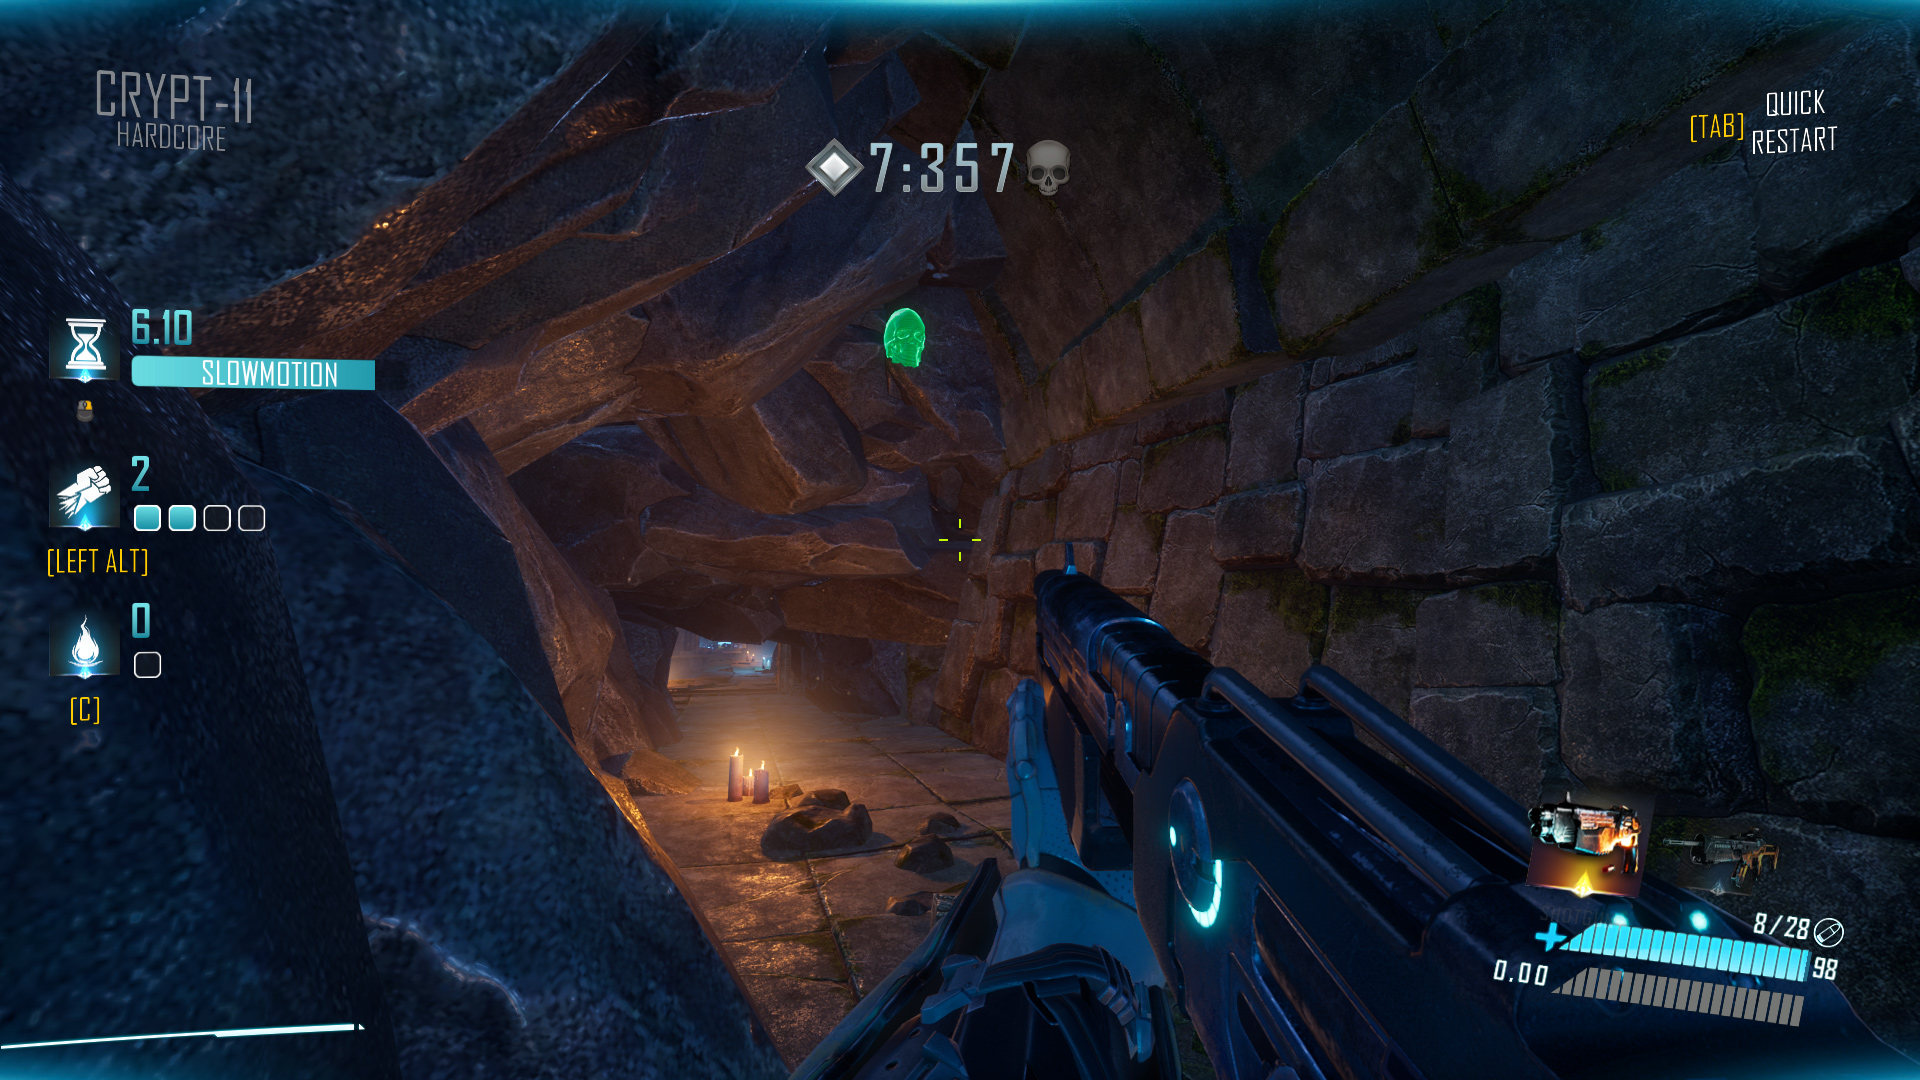
Crypt-11 Hardcore: After taking the second slidepad, defeating three enemies, and sliding through a tunnel, look up for the skull.
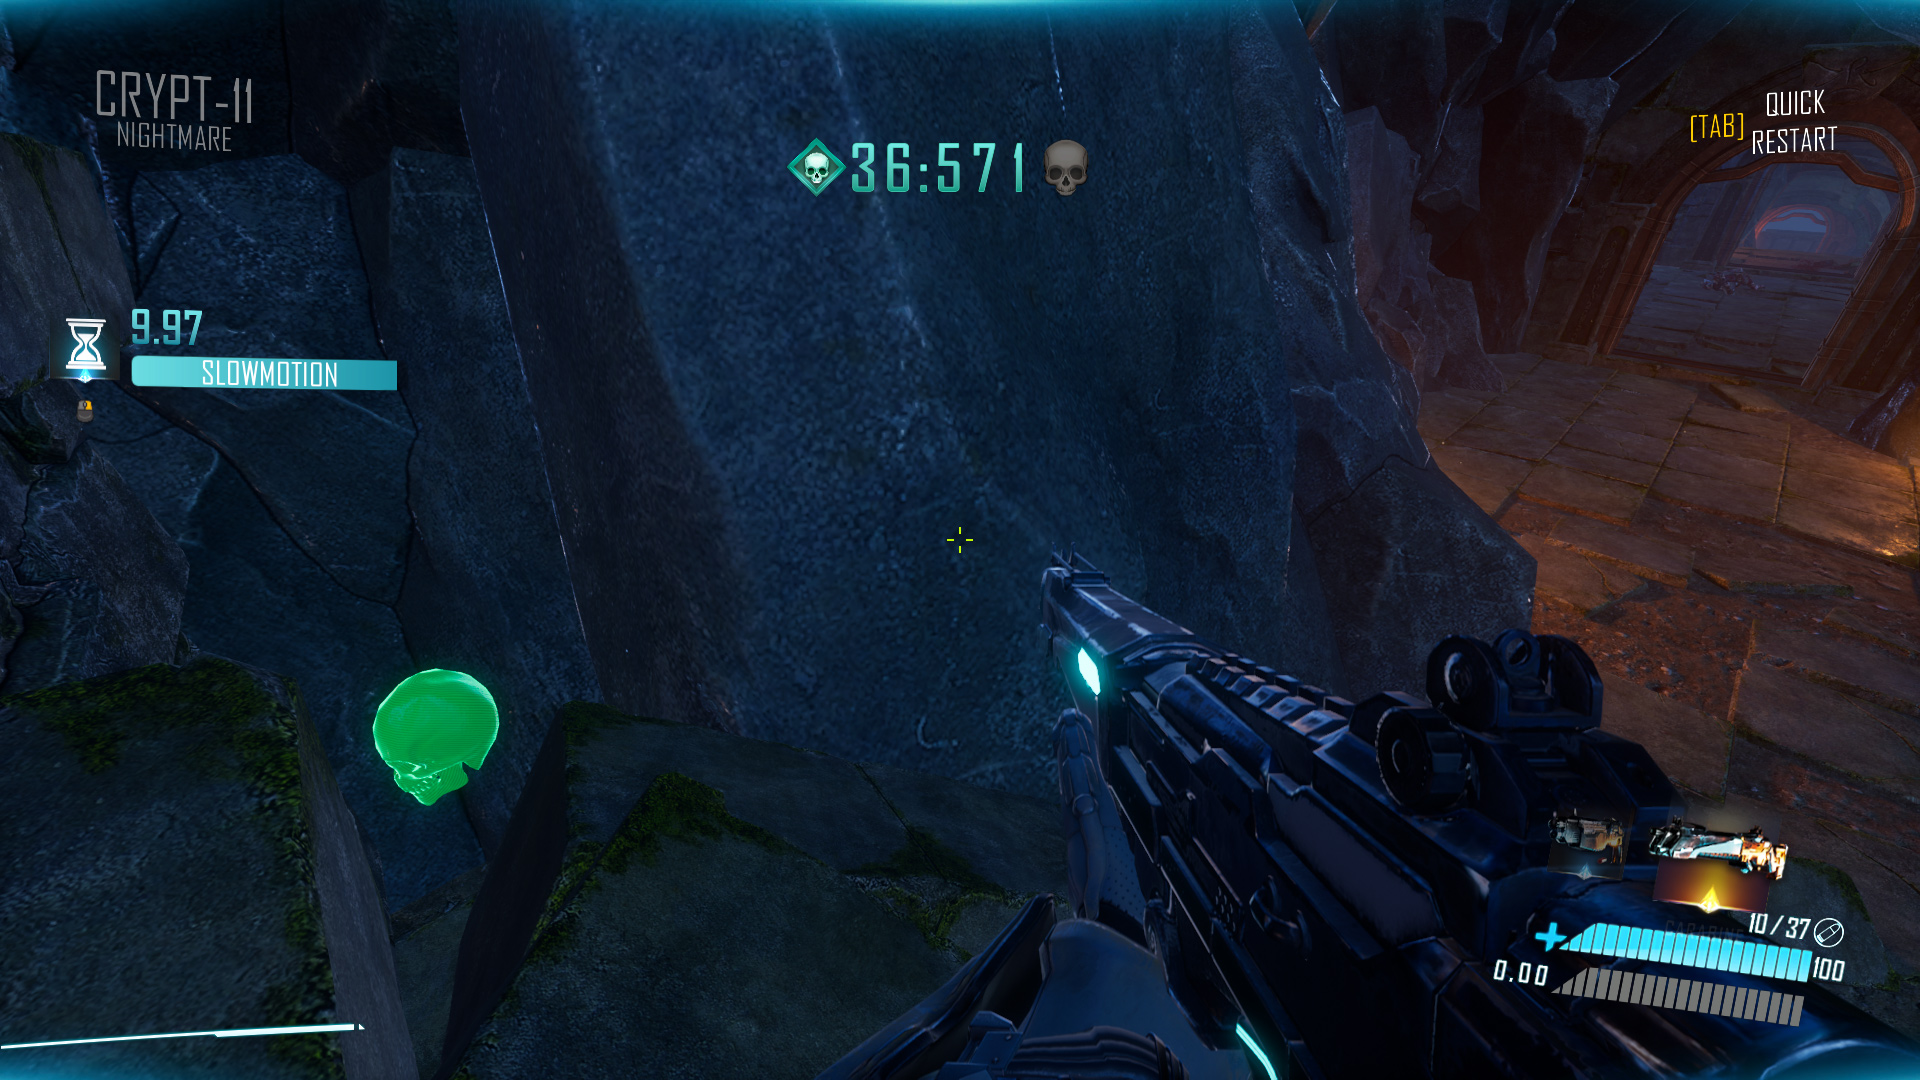
Crypt-11 Nightmare: Near the first button further down the room, but be careful not to jump down as you might get stuck.
Crypt-12
Crypt-12 Normal: Behind the altar in front of you.
Crypt-12 Hard: Located in the ceiling, so remember to look up.

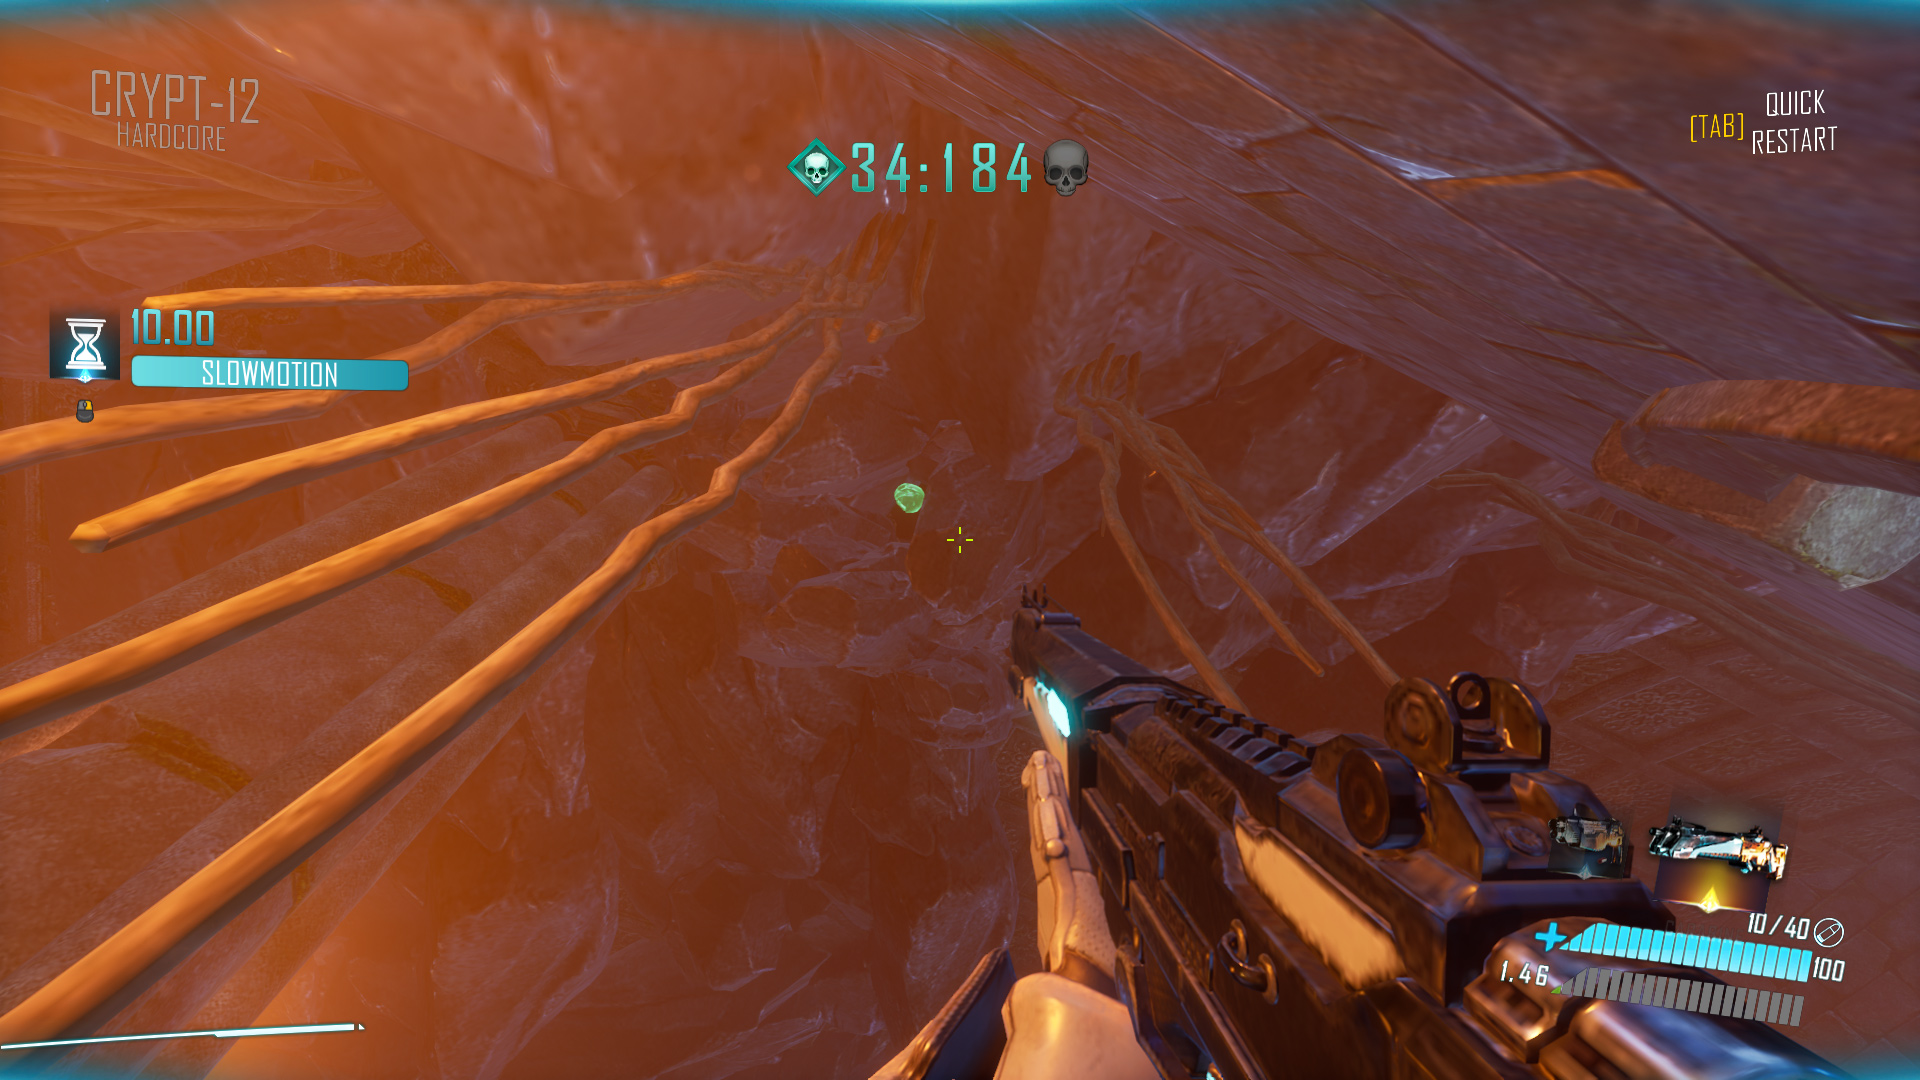
Crypt-12 Very Hard: Hidden in a torch on the right side of the permanently locked door.

Crypt-12 Hardcore: From the spawn (assuming you’re facing the altar) go to the blue gate on your left and look for the skull in the ceiling.
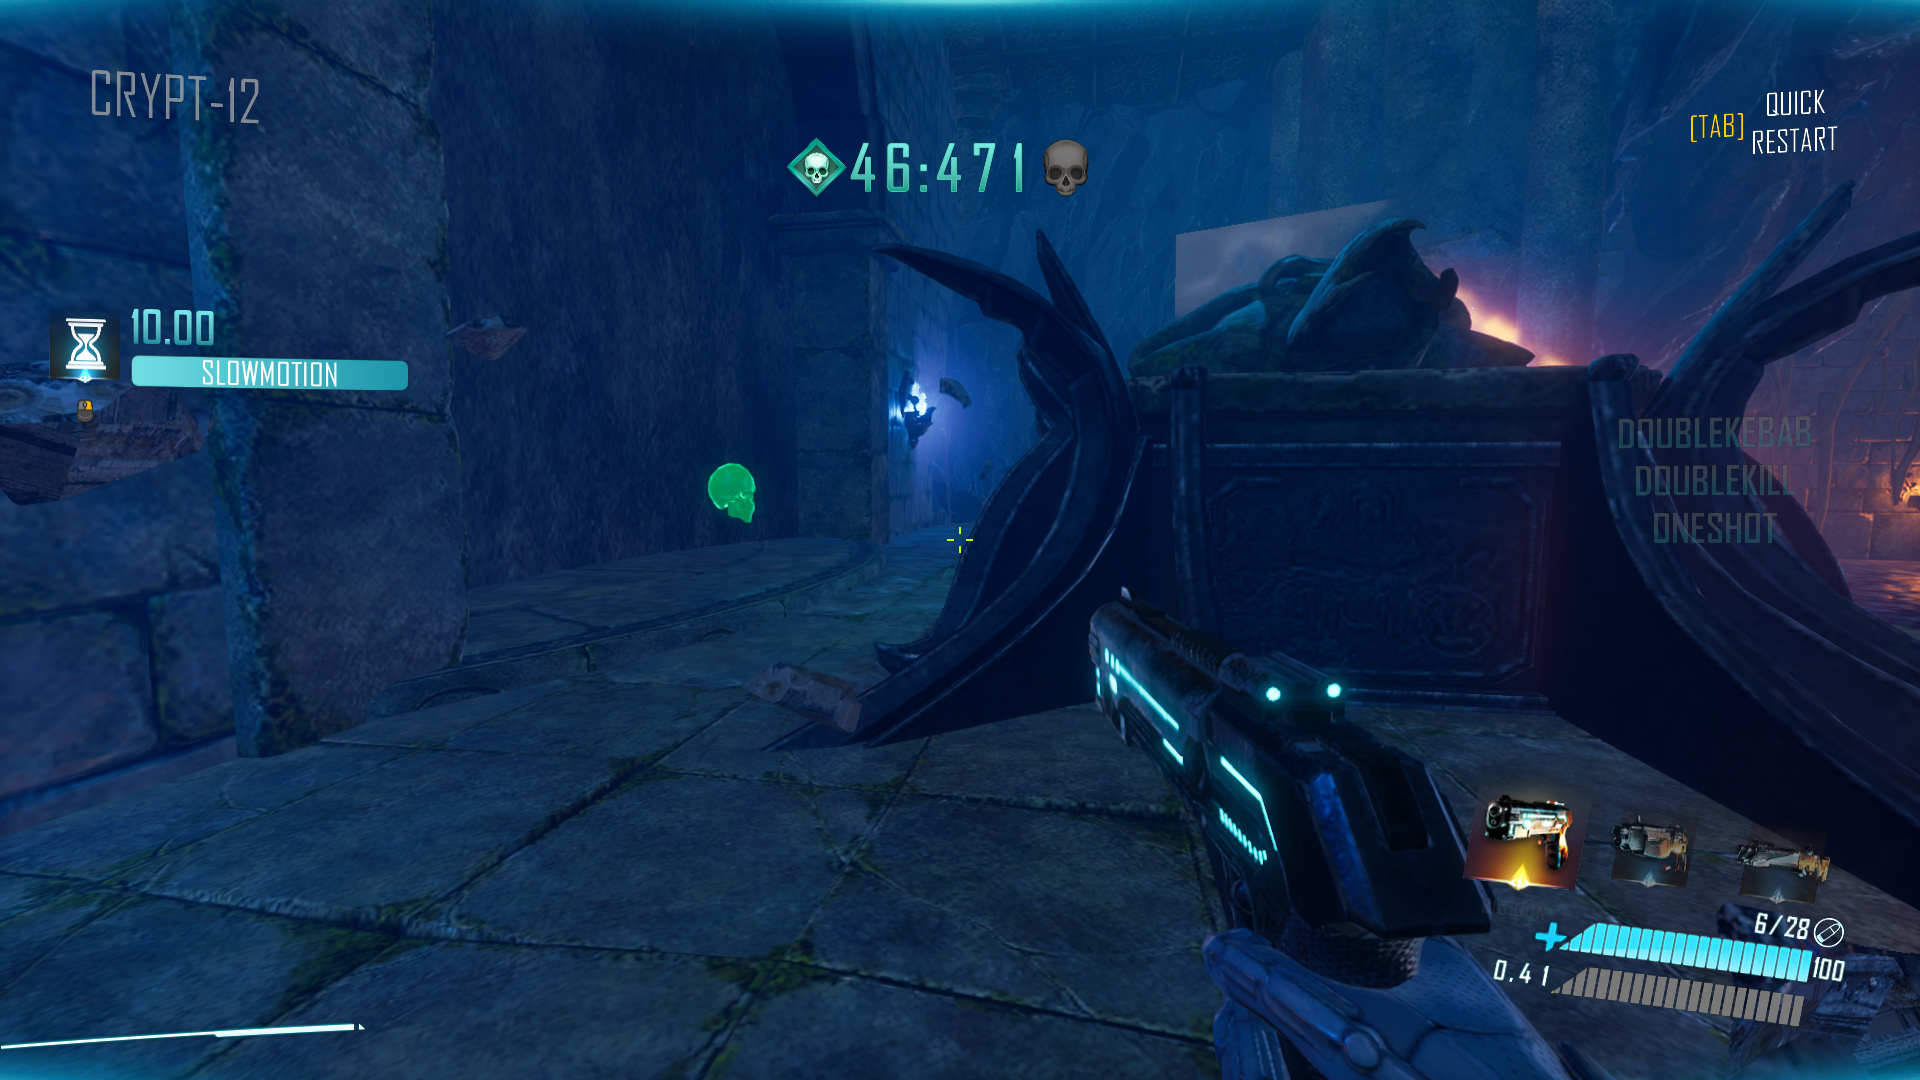
Crypt-12 Nightmare: On the right side of the altar, there’s a yellow button on the wall. Shoot it to reveal the skull on the other side, across the altar.

Ruins-13
Ruins-13 Normal: In the room with the button, above the entrance.
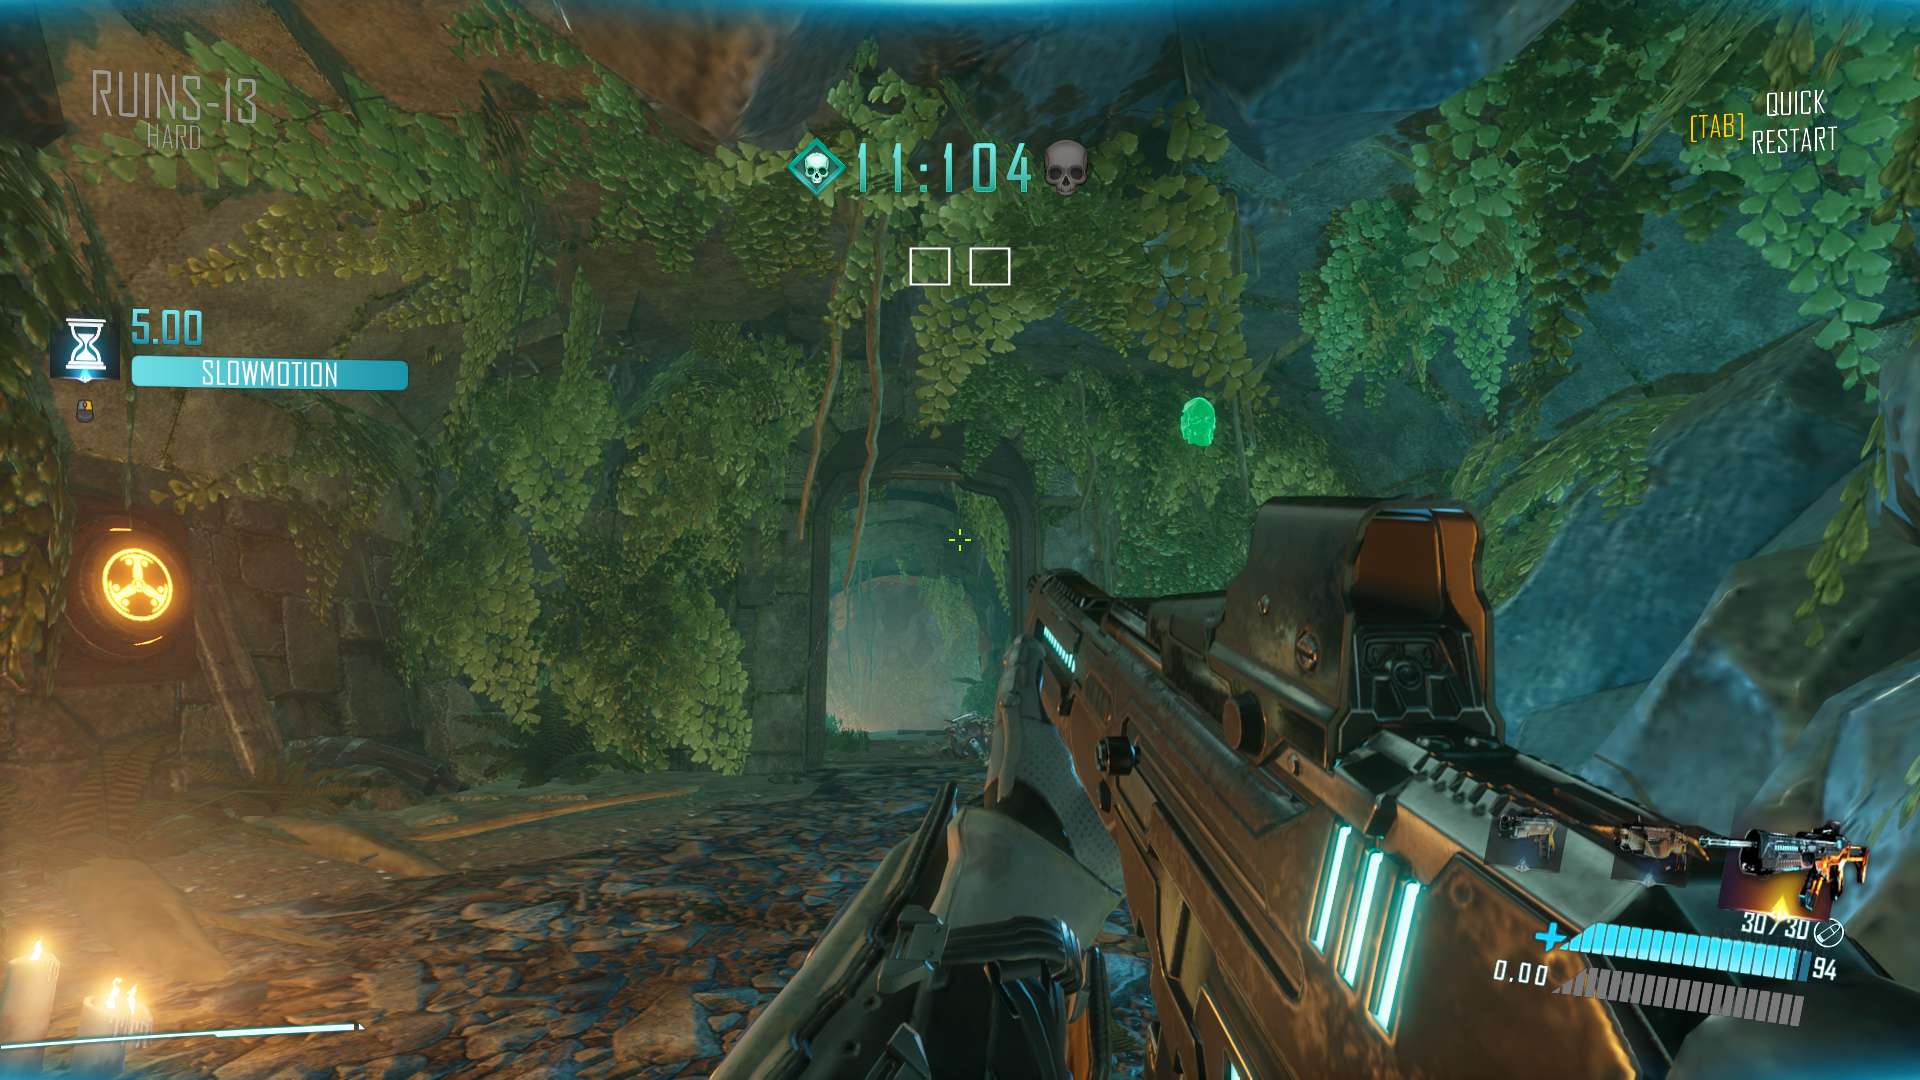
Ruins-13 Hard: In the room with two buttons and the assault rifle, above the entrance.
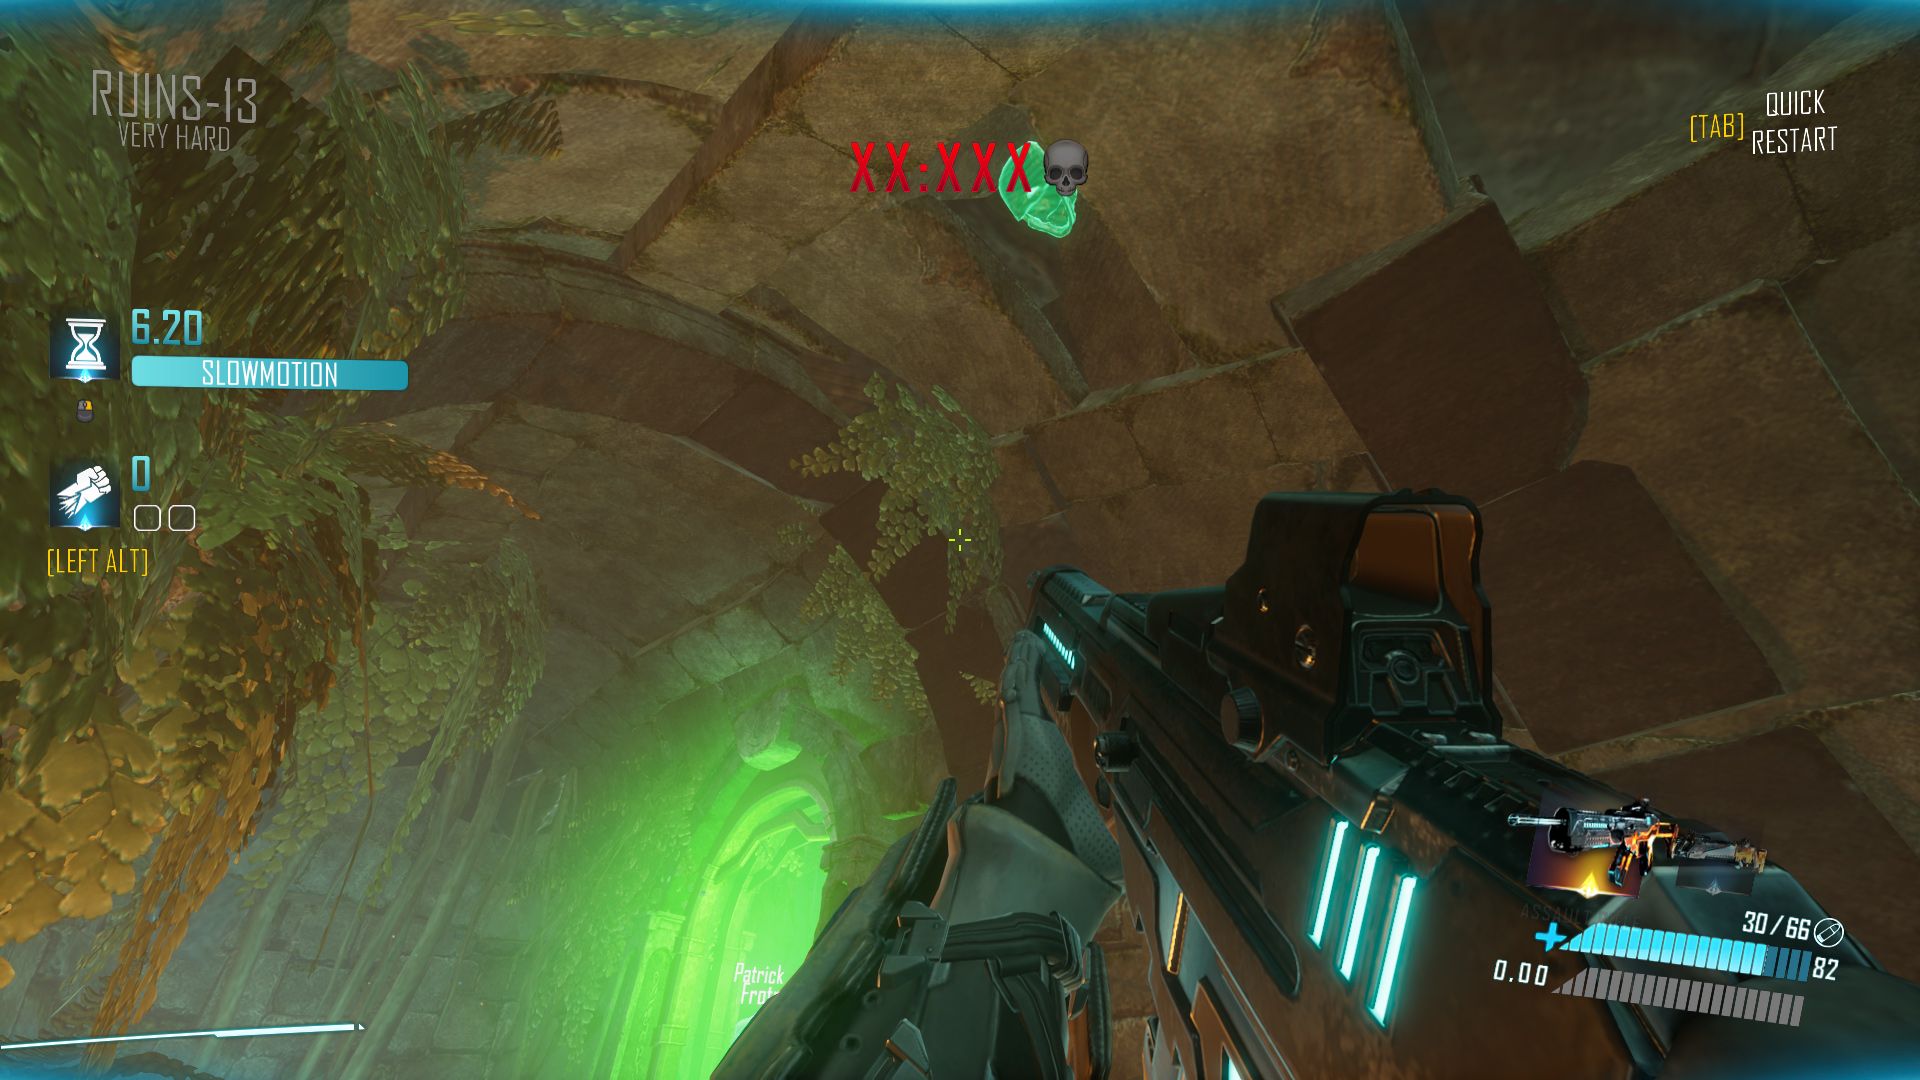
Ruins-13 Very Hard: It’s in the ceiling just before the exit.
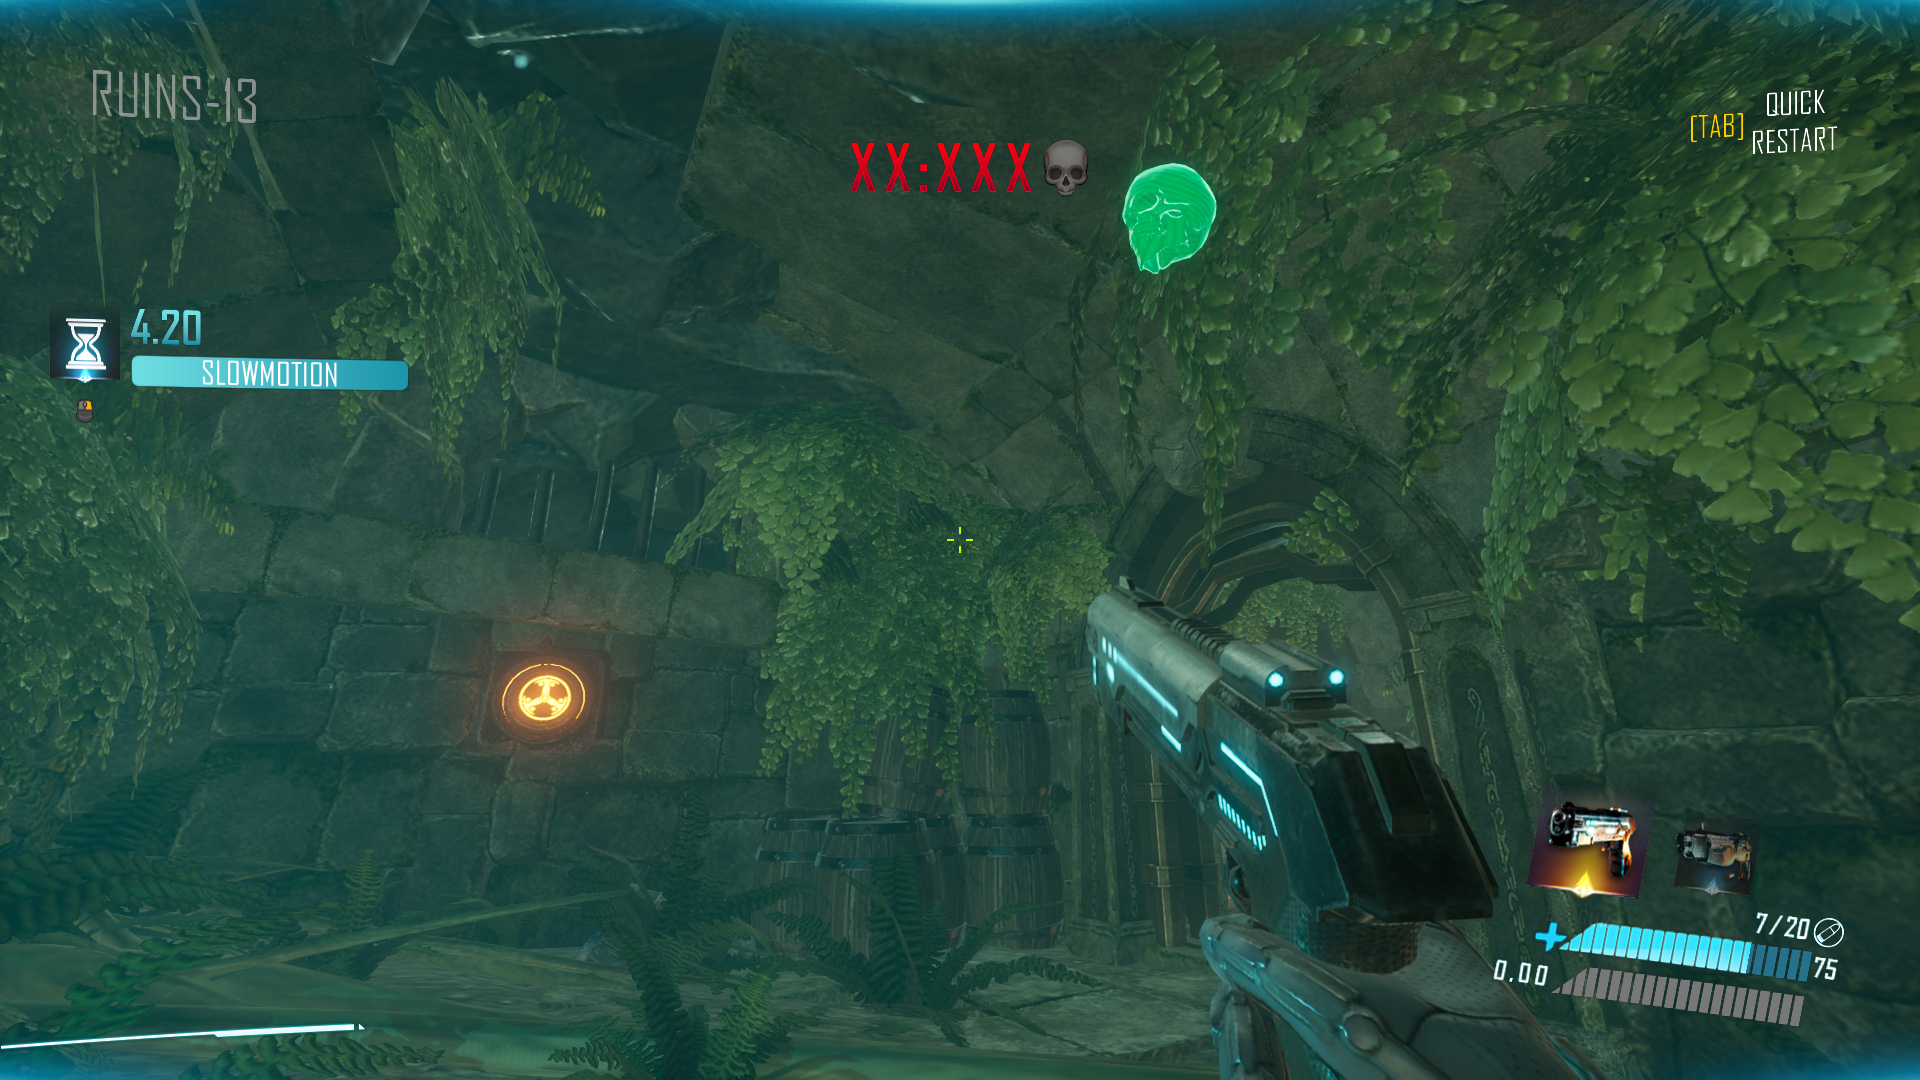
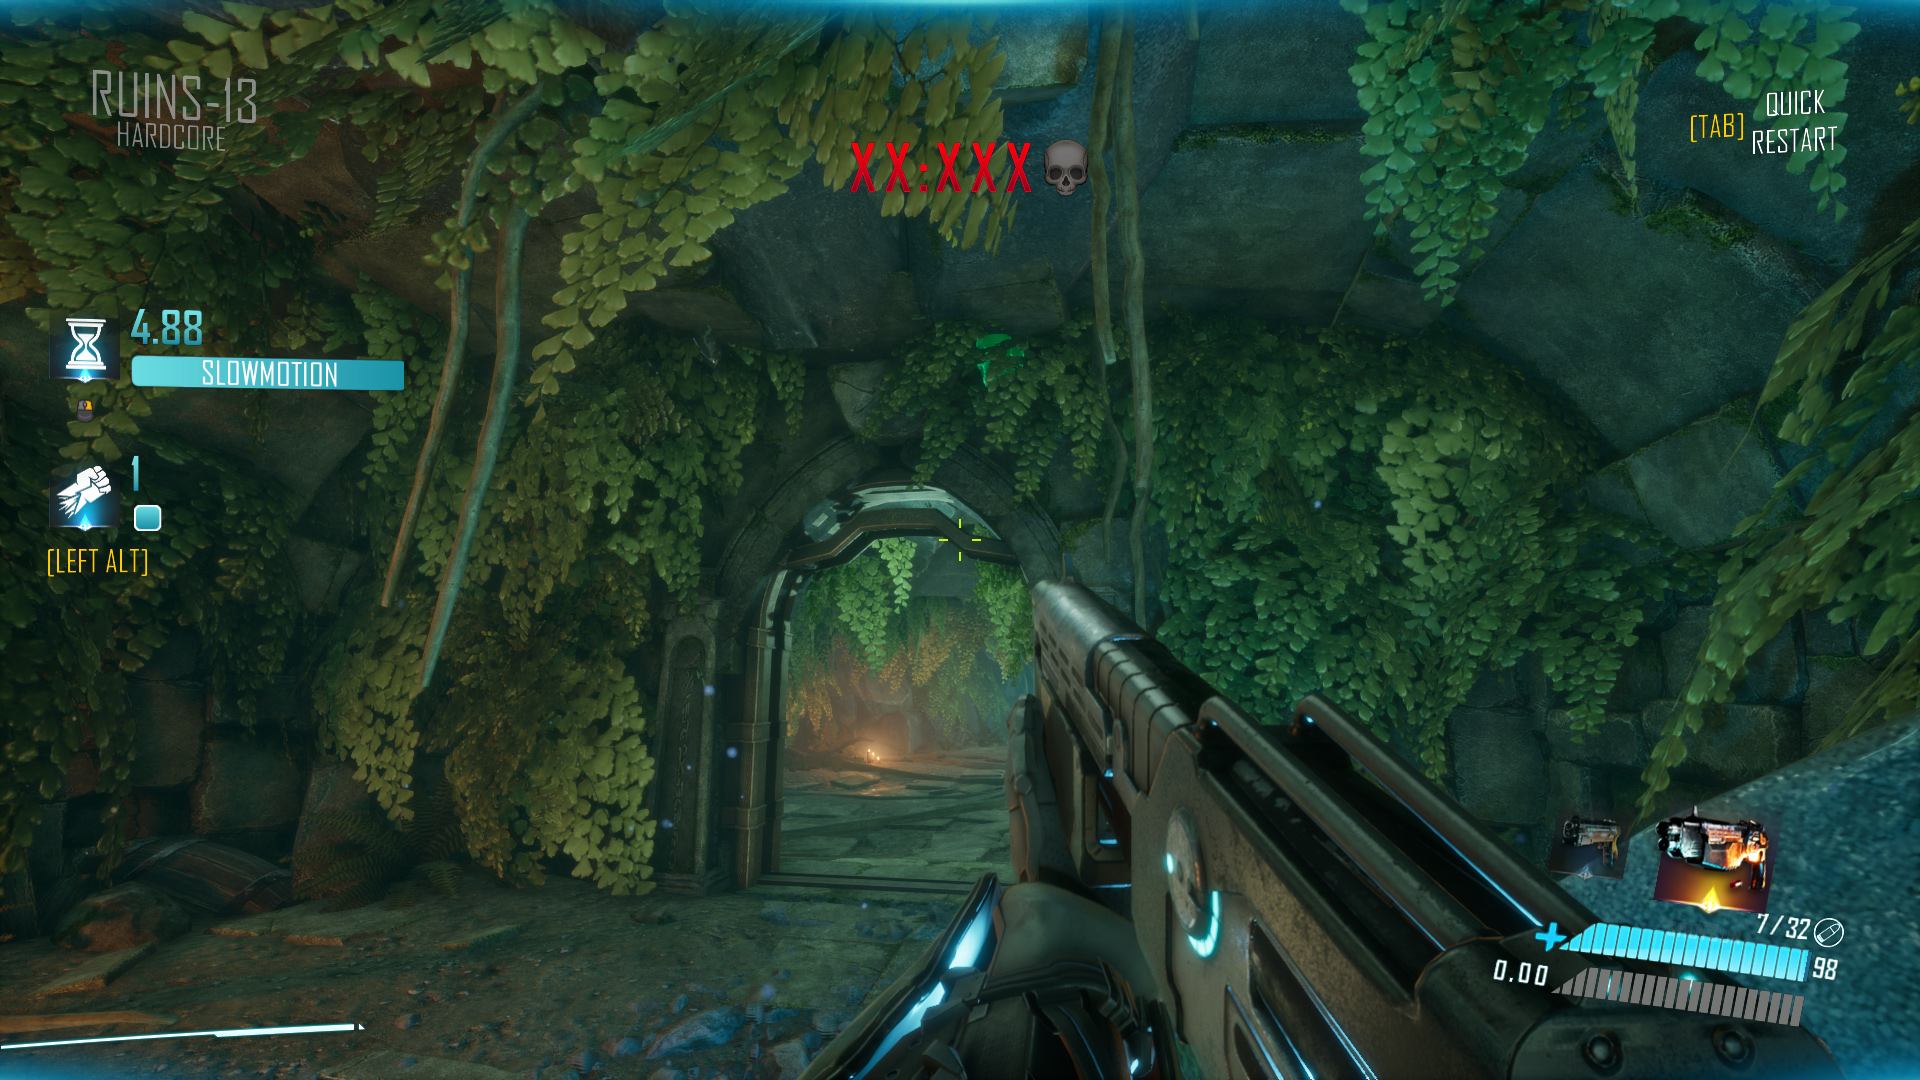
Ruins-13 Hardcore: In the room with the second lever. Hidden above the entrance.
Ruins-13 Nightmare: It’s right in the explosive barrel, you’ll likely get it without knowing. The trick is probably to make you search the level for the skull that you already have on you.

Ruins-14
Ruins-14 Normal: On the left of the exit, under some wooden planks.

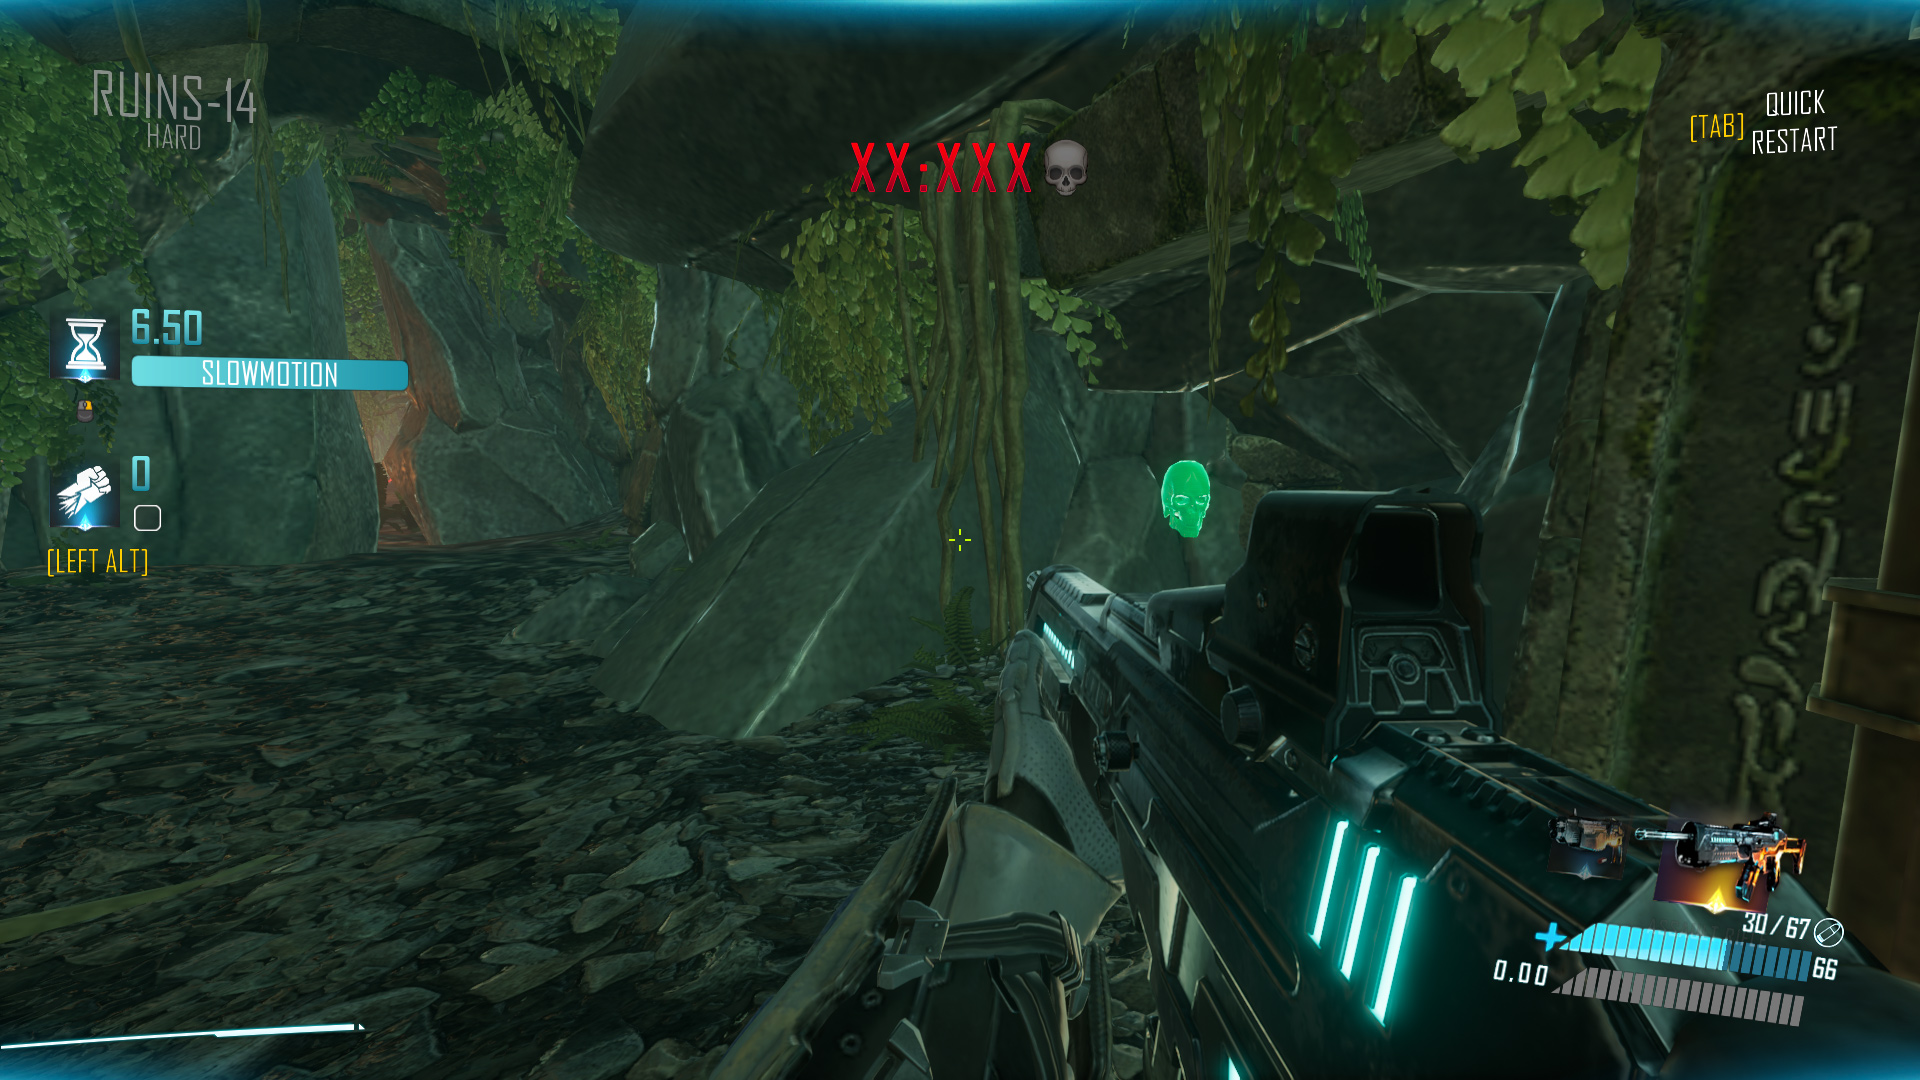
Ruins-14 Hard: Shortly before the exit, there’s an extra area somewhat hidden between the rocks. Deeper into this area, you’ll find the skull.
Ruins-14 Very Hard: Activate the lever and jump down a flight of stairs. Then immediately after you slide through a small rocky tunnel, you’ll find the skull hanging above and behind you.

Ruins-14 Hardcore: Upon entering the final large room, instead of going left, go right to find the skull behind the table.

Ruins-14 Nightmare: Look behind you just before exiting the level. A bit to the right.

Ruins-15
Ruins-15 Normal: Look back just before exiting the level.

Ruins-15 Hard: Similarly, look back where you came from just before exiting.
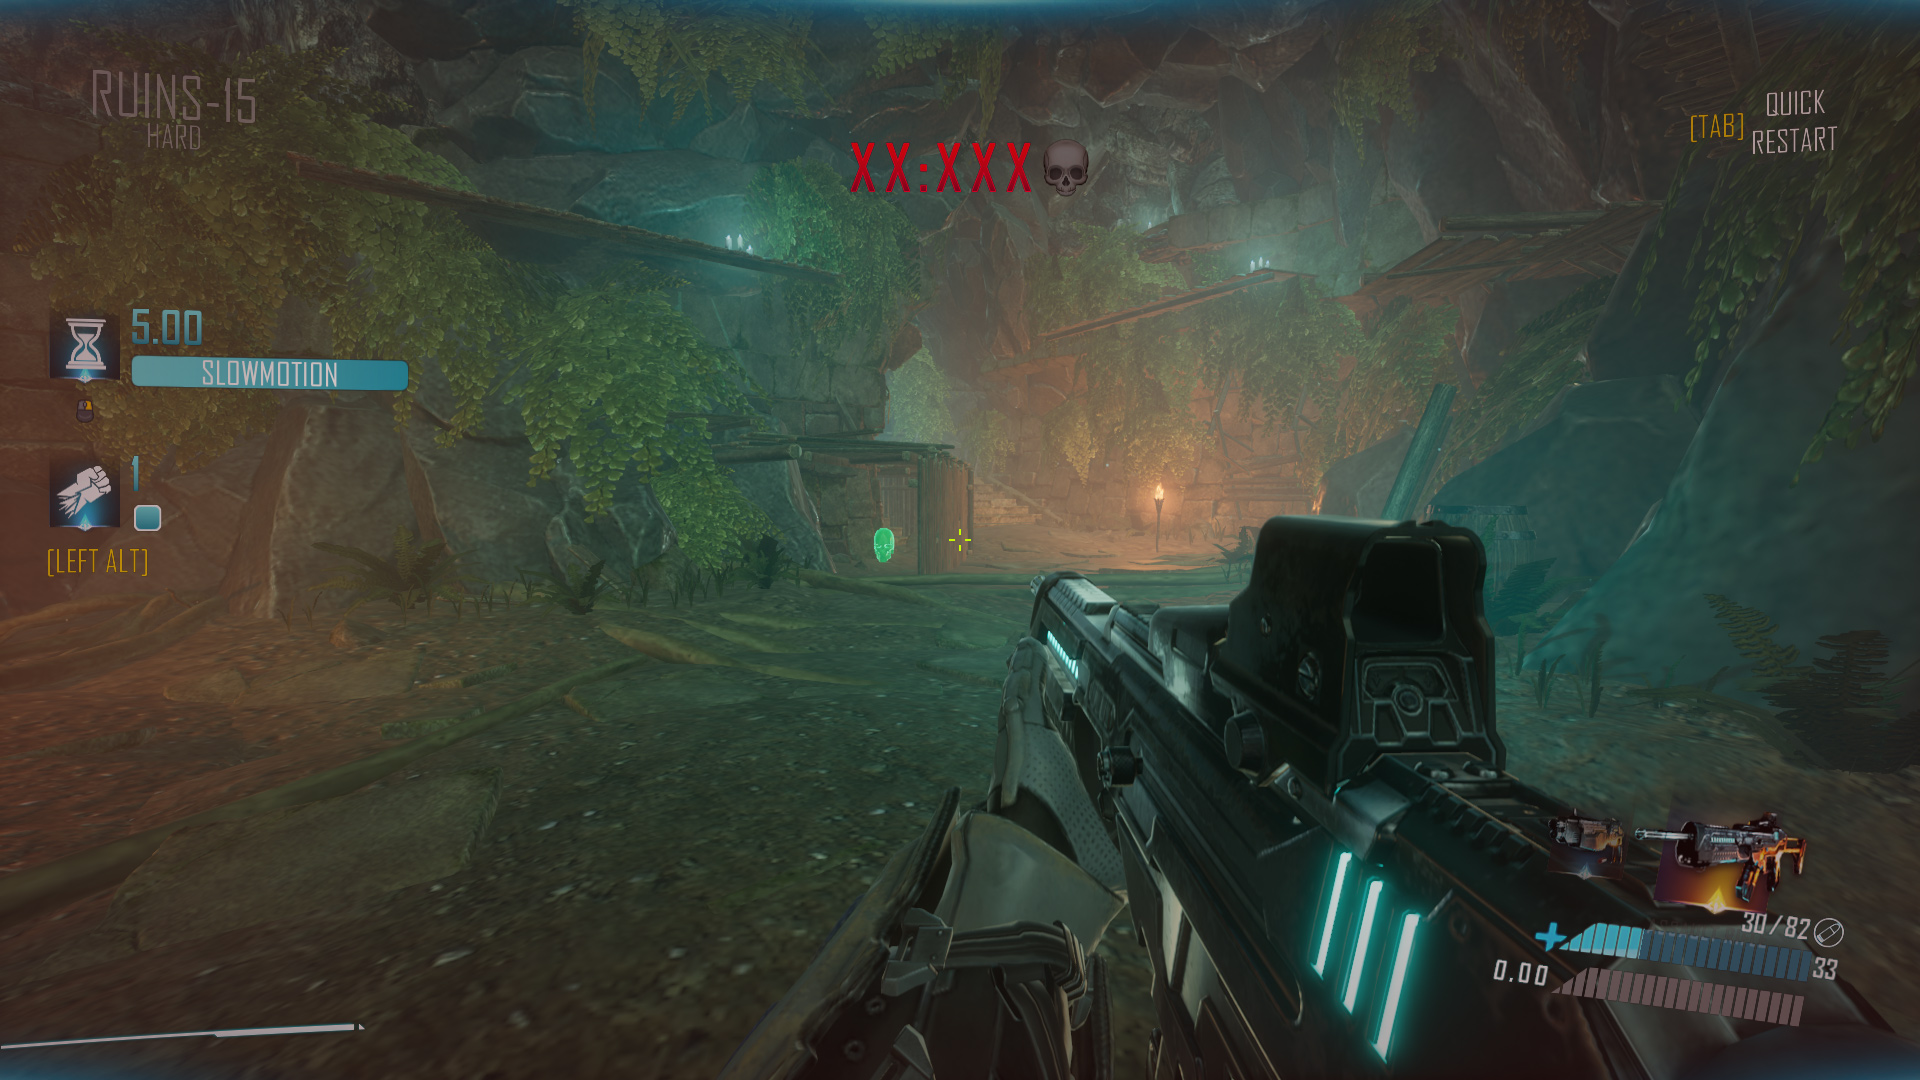
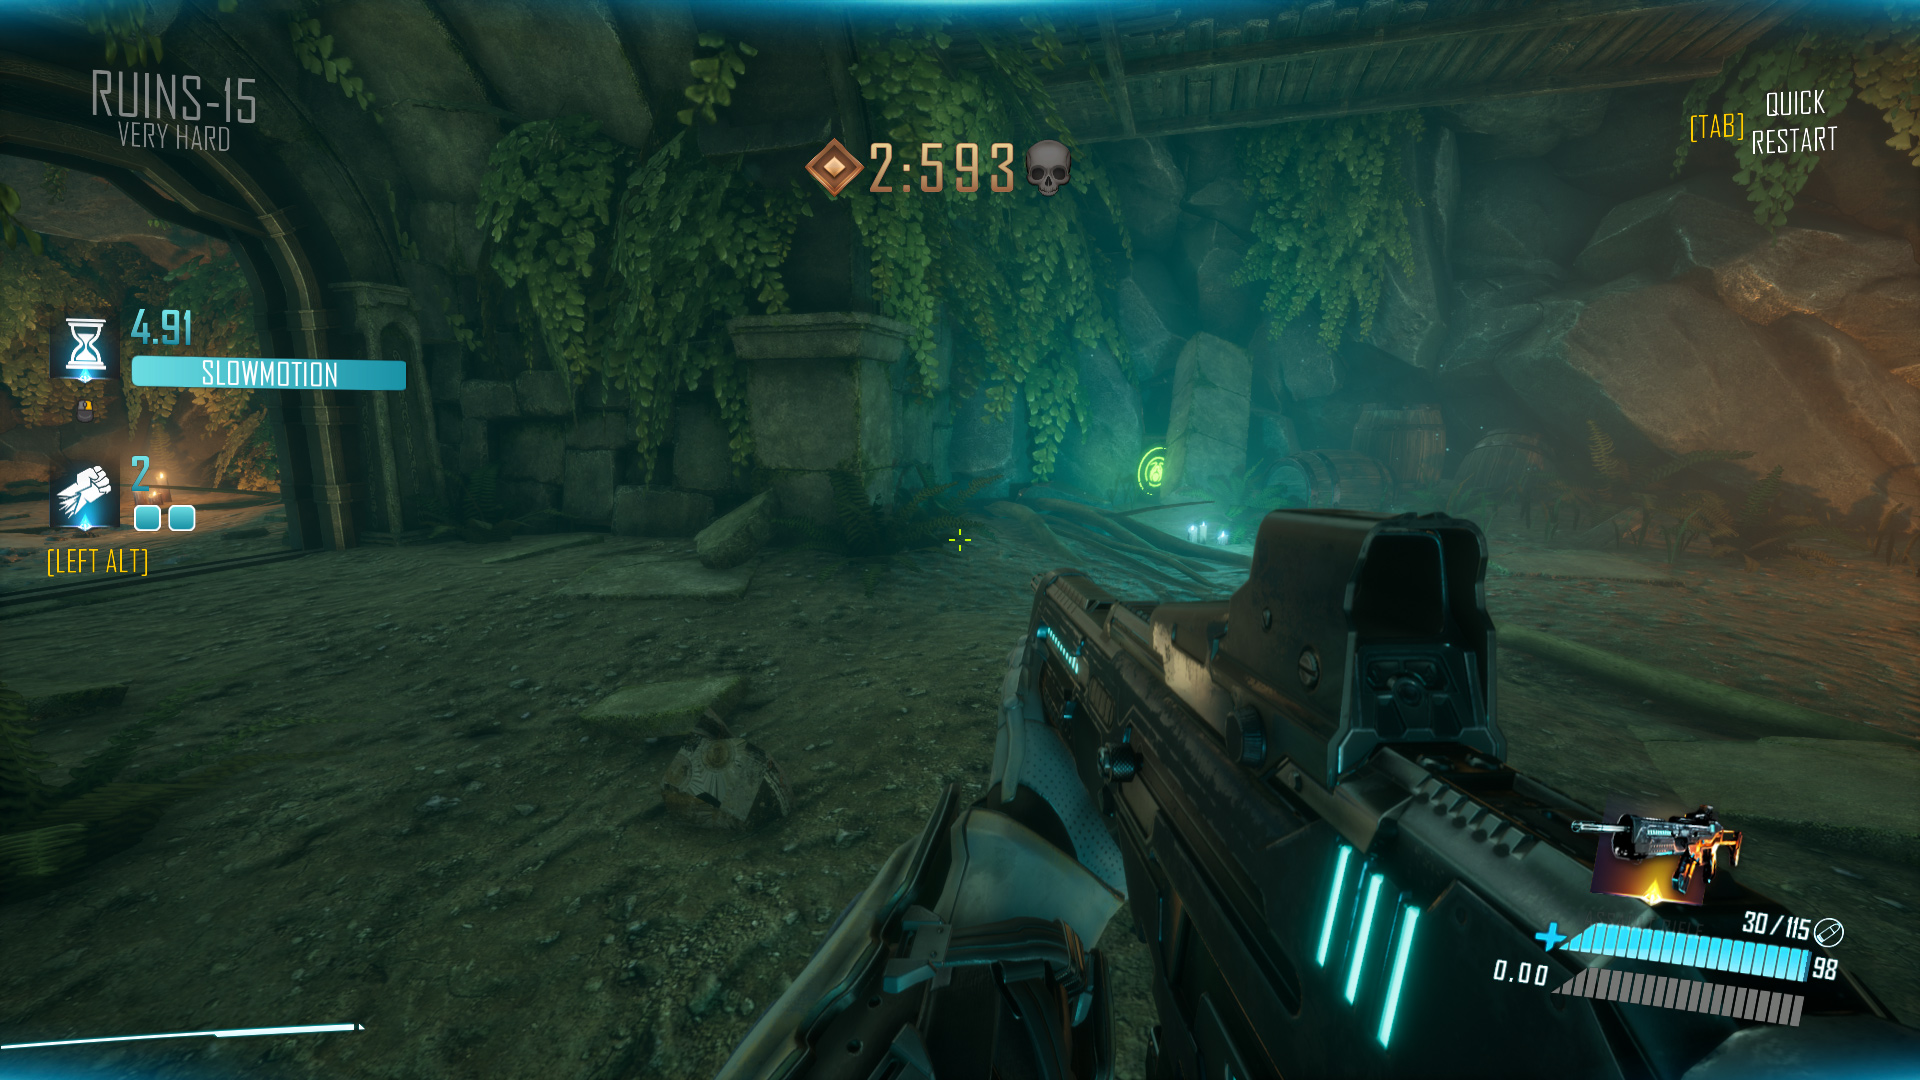
Ruins-15 Very Hard: Drop to the right from spawn and find a hidden button unlocking the door with the skull.
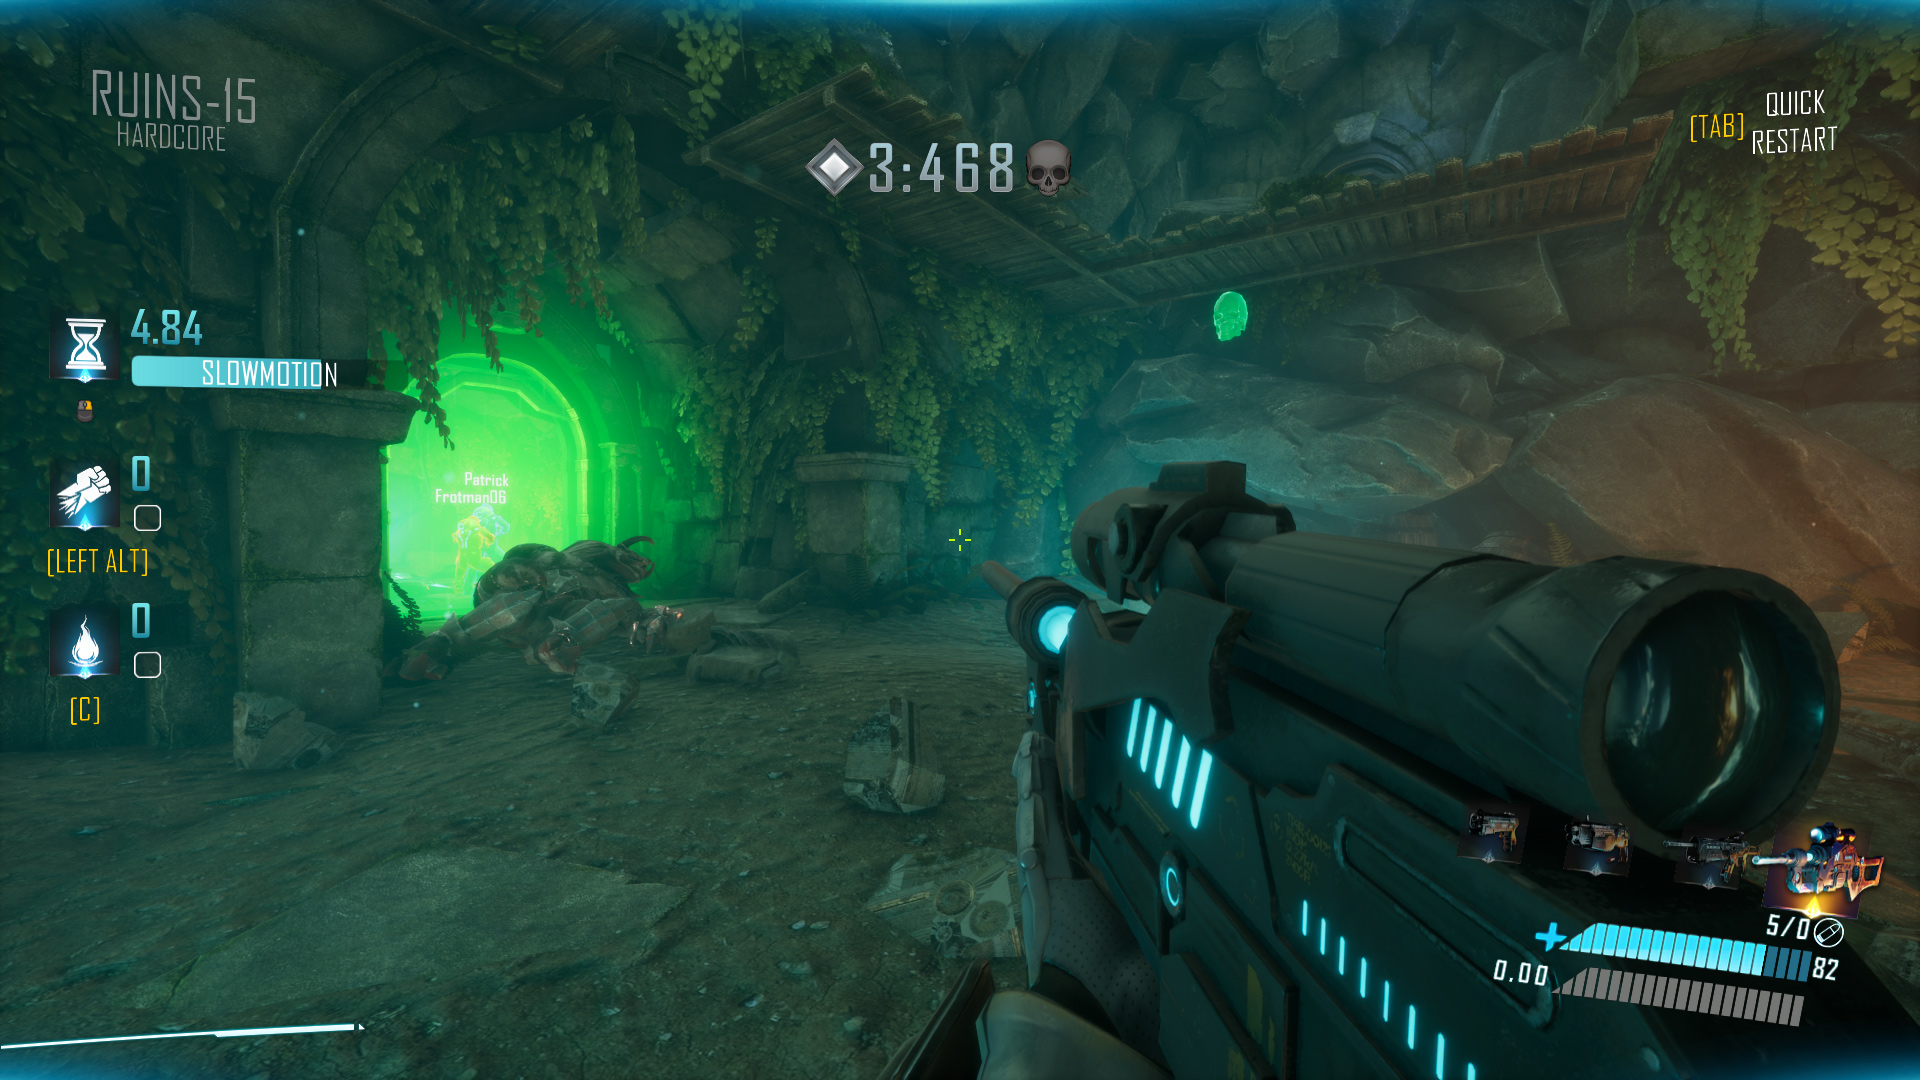
Ruins-15 Hardcore: Unmissable, it’s on the right of the exit.
Ruins-15 Nightmare: As you use the bouncepad to reach the poison-enabling lever, you’ll see a cave on your right with the skull inside. You can grab it after using the lever, but flying straight to it from the bouncepad is easier.

Ruins-16
Ruins-16 Normal: After breaking the door and sliding through a small tunnel behind it, look to your right.
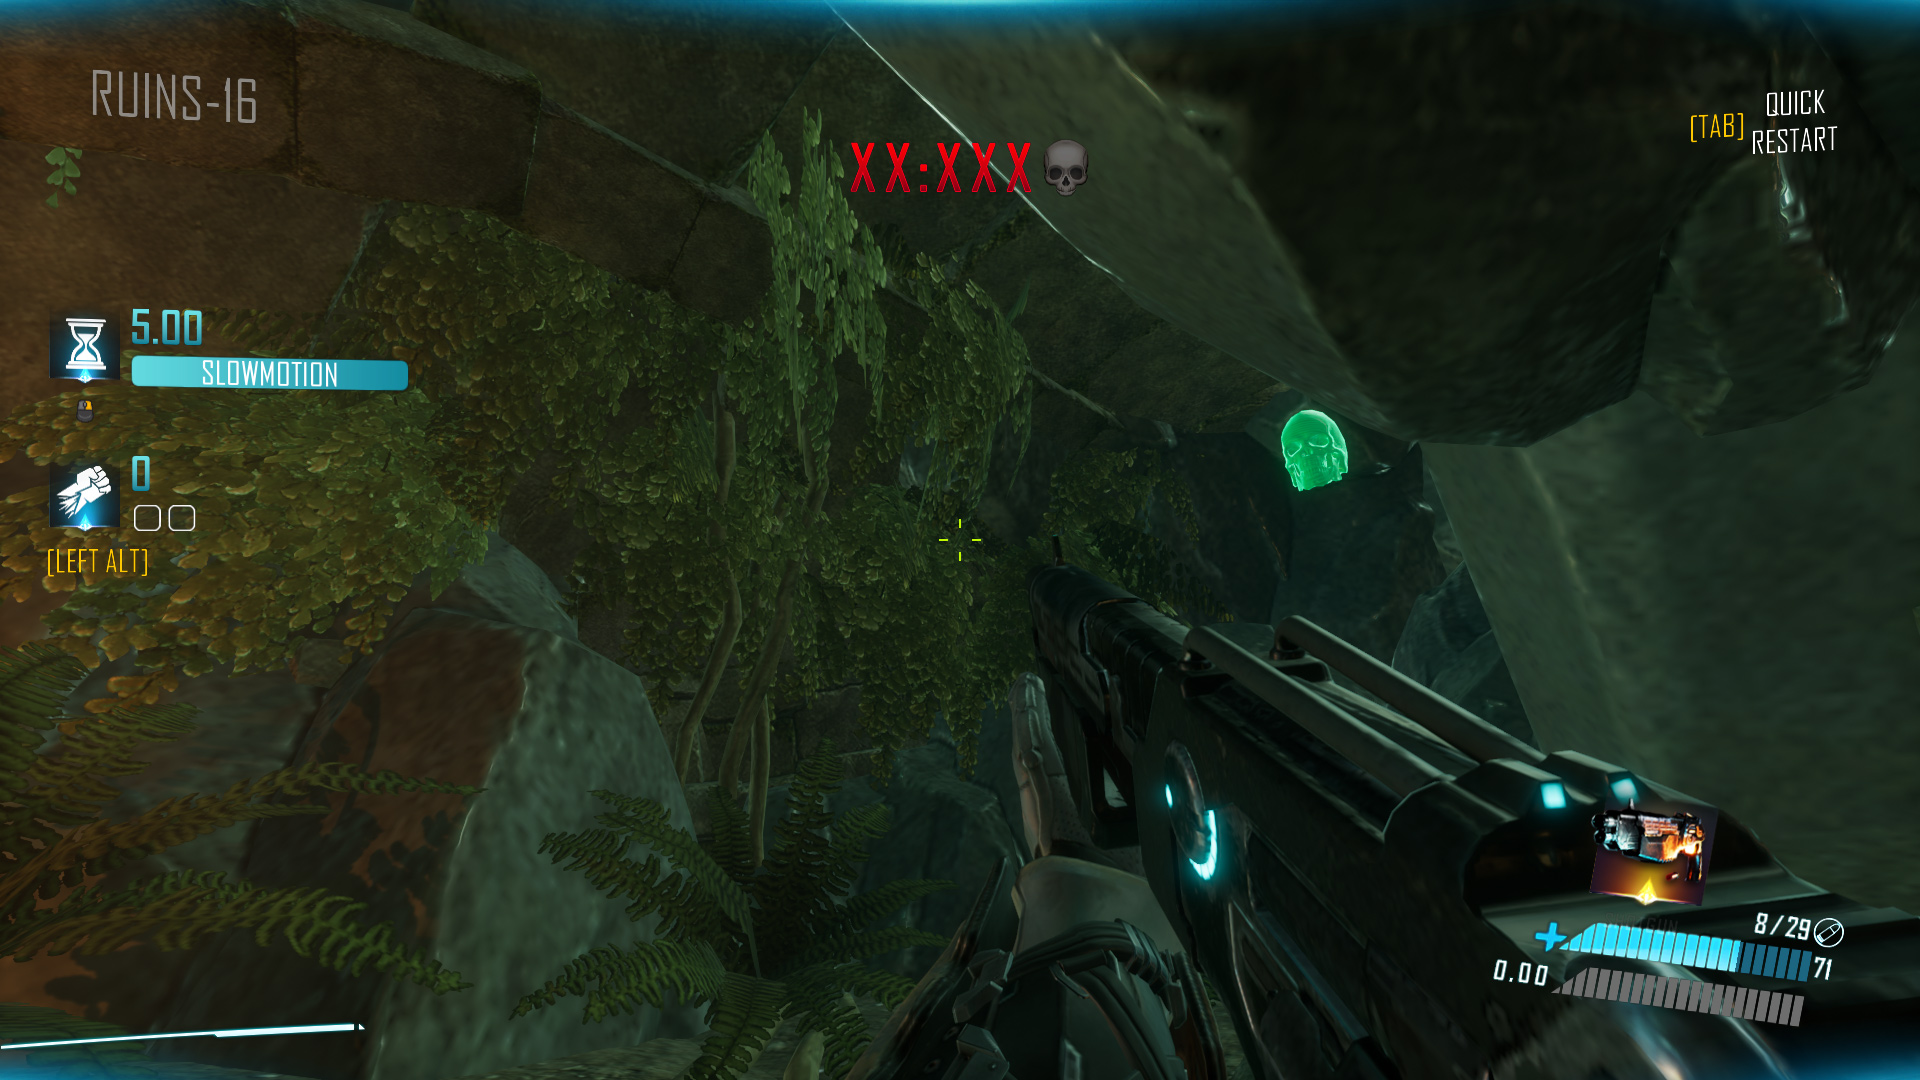
Ruins-16 Hard: In the last room, opposite to the exit.
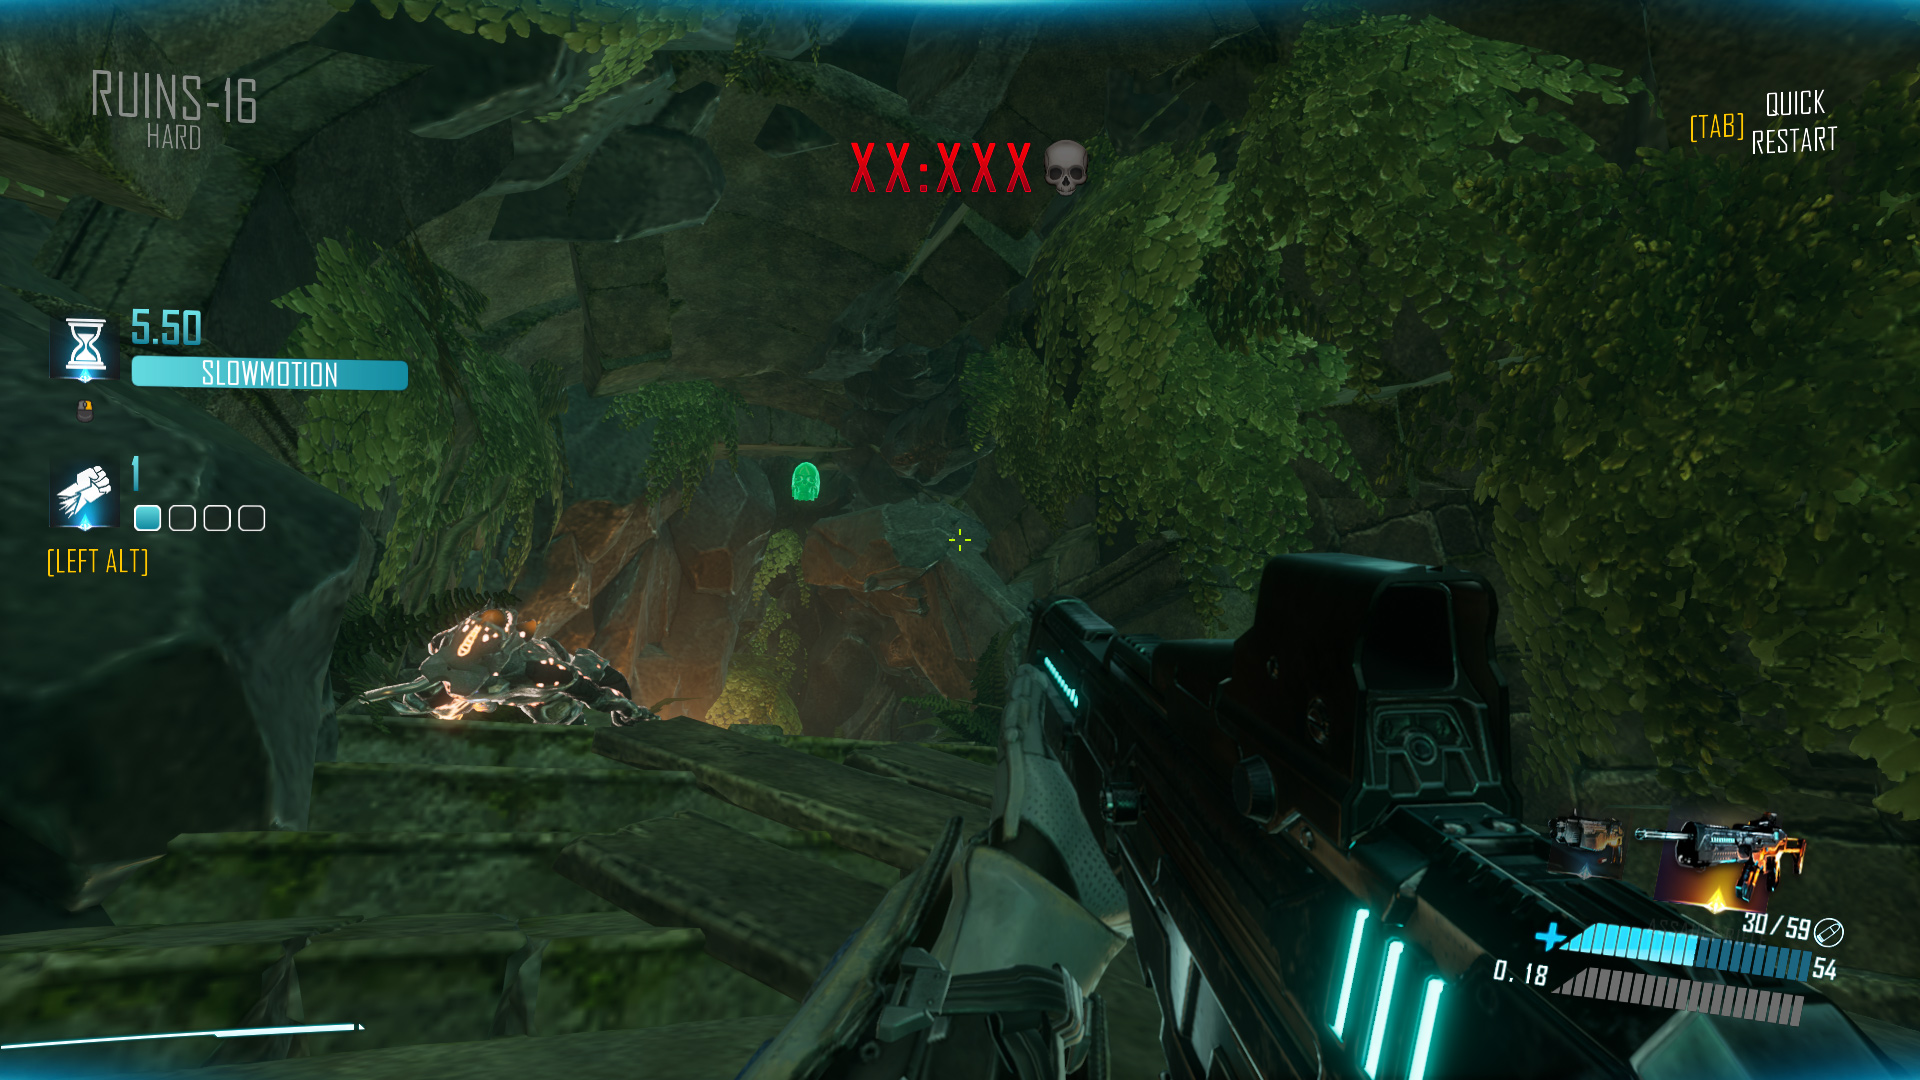
Ruins-16 Very Hard: Towards the end, after you stomp a trio of enemies, there’s a button that activates the final slidepad. The skull is located deeper into that same room, just past the button.
Ruins-16 Hardcore: Pull the lever and take the bouncepad to land on the bridge. But instead of going left, go right and walk into the room. You’ll find a wooden barrel in the corner with the skull inside.

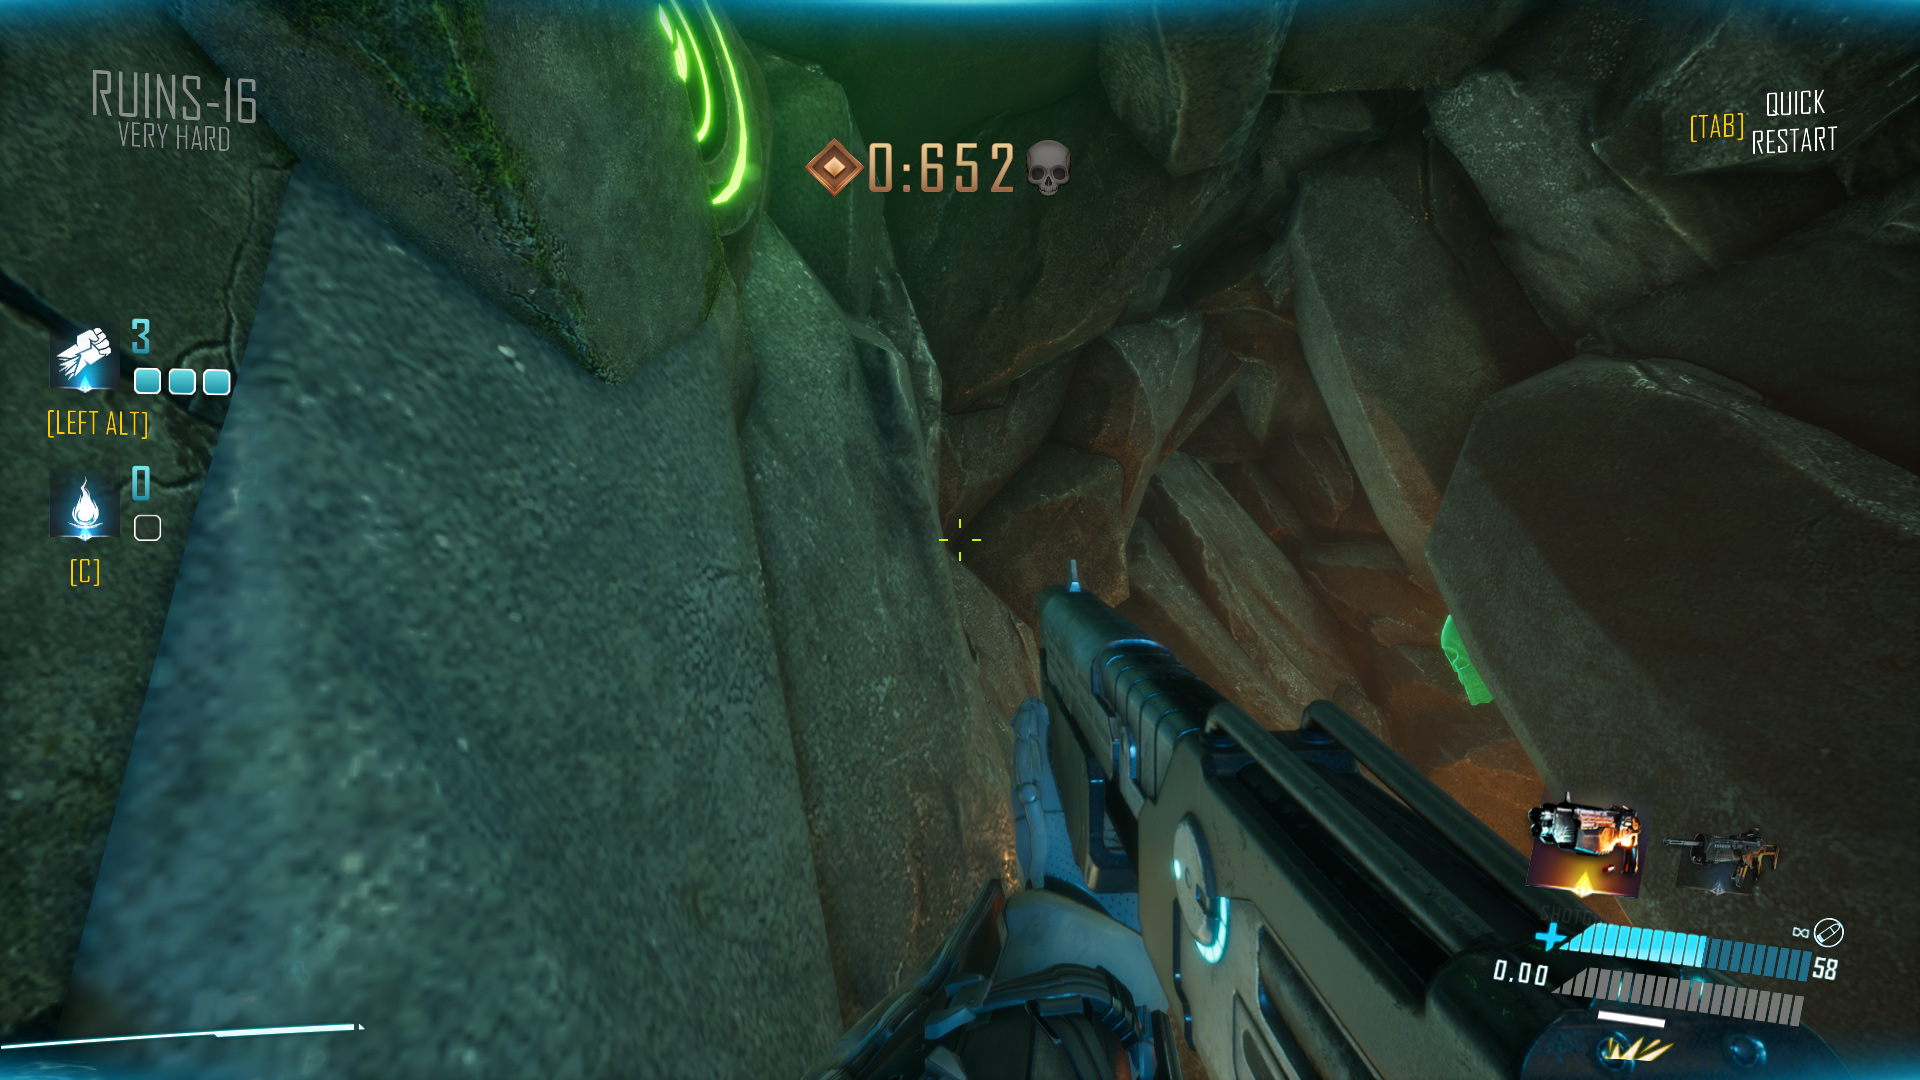
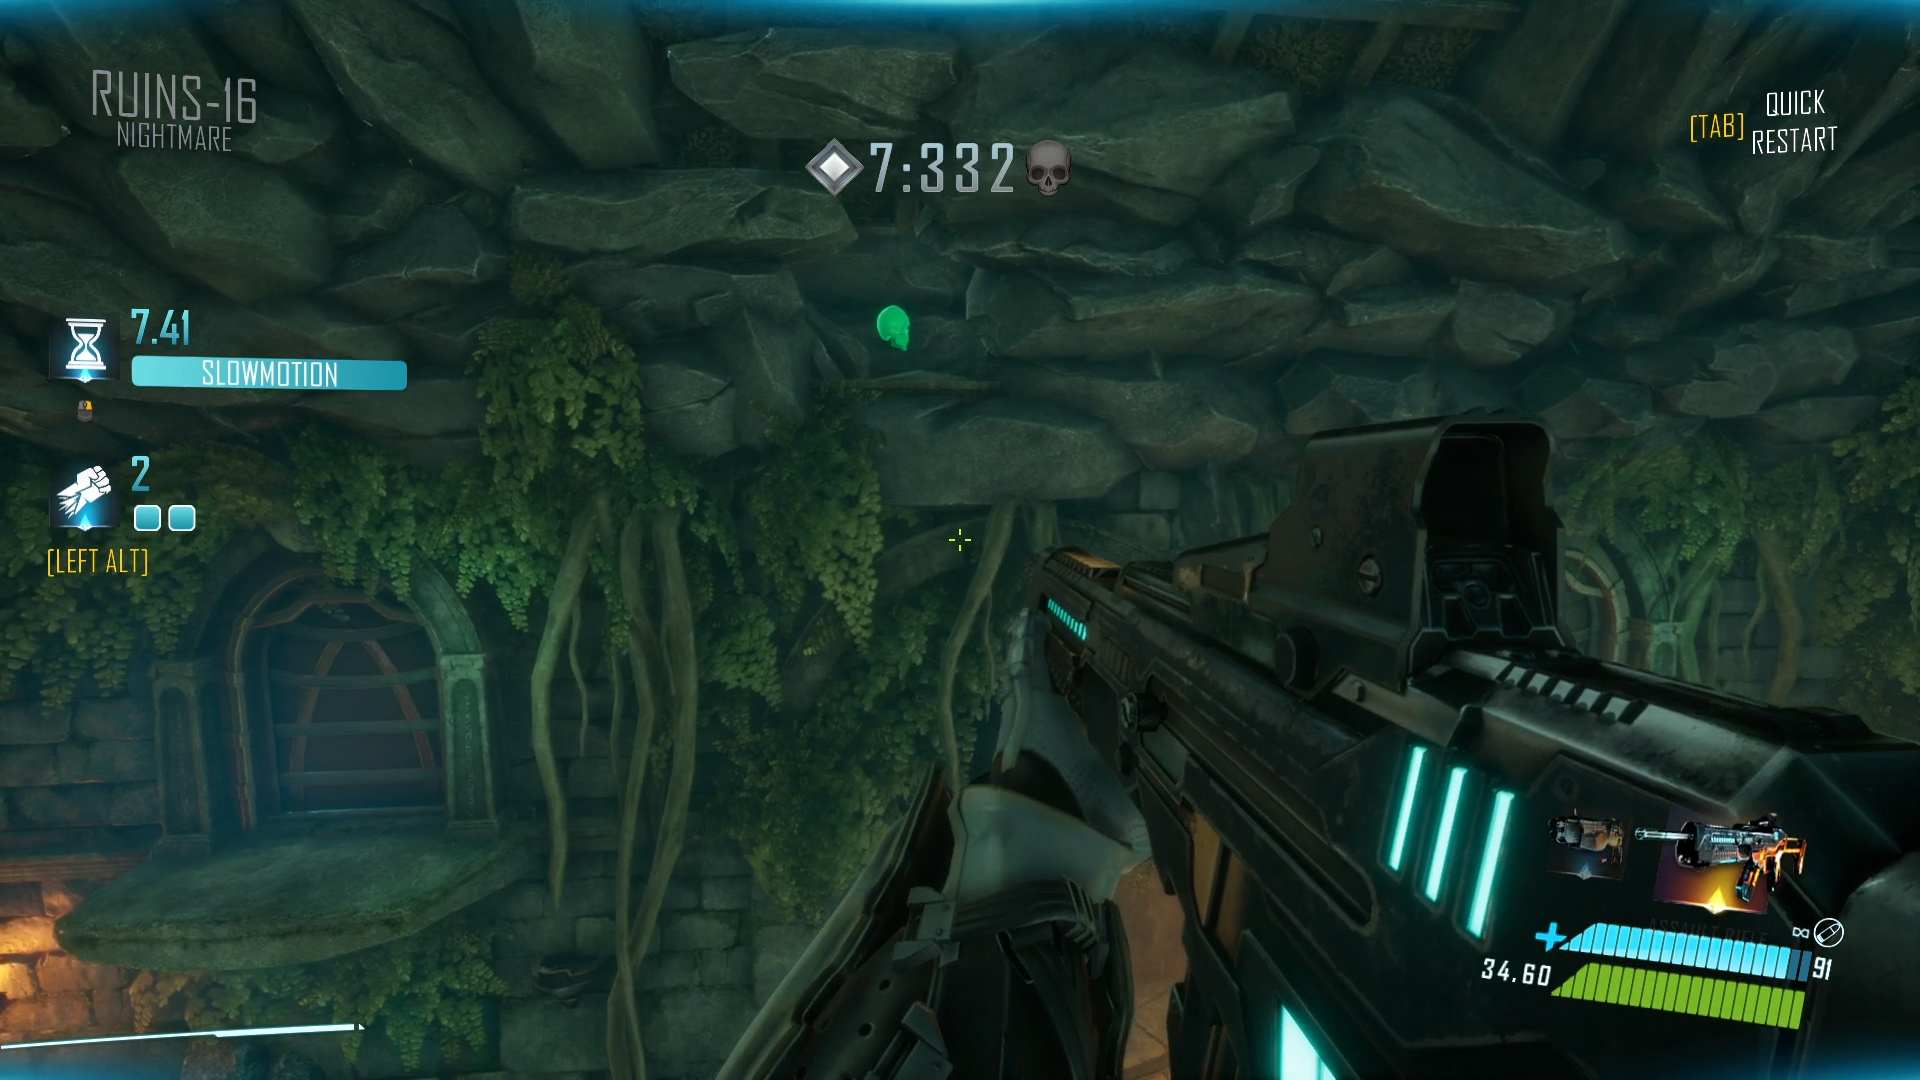
Ruins-16 Nightmare: After activating the bounce pad that sends you flying across the room, carefully spot the skull hidden on the left side in a crevice. Try to grab it while mid-air.
Ruins-17
Ruins-17 Normal: It’s hidden in a wooden barrel. Before entering the lever room, look towards a corner to your right.

Ruins-17 Hard: Once you pick up the sniper rifle, immediately look up to find the skull.

Ruins-17 Very Hard: You’ll find it on the ground near the altar. Take a step to the left from the spawn and look down.

Ruins-17 Hardcore: Look to your left immediately at the spawn to spot a wooden barrel by the gate. The skull is concealed inside.

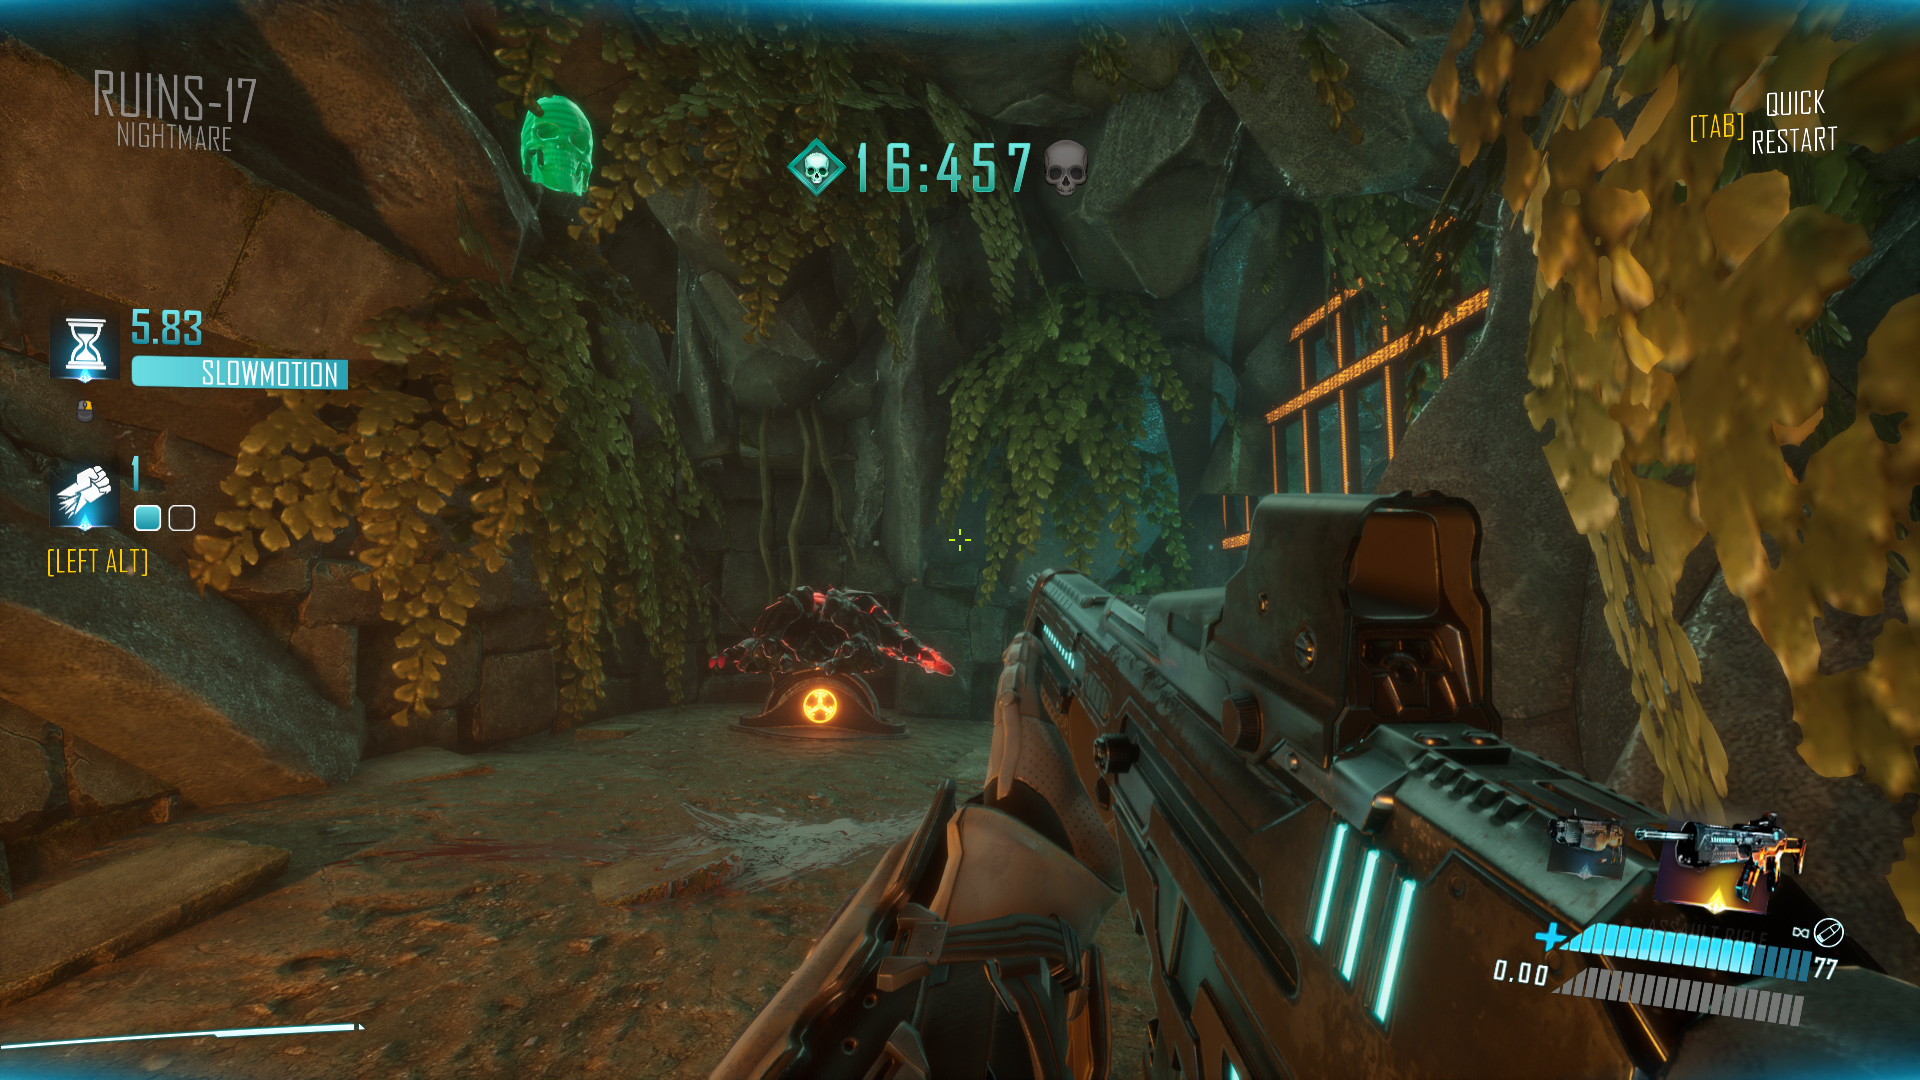
Ruins-17 Nightmare: You can’t miss this one. It’s plainly visible just above the first lever you pull.
Ruins-18
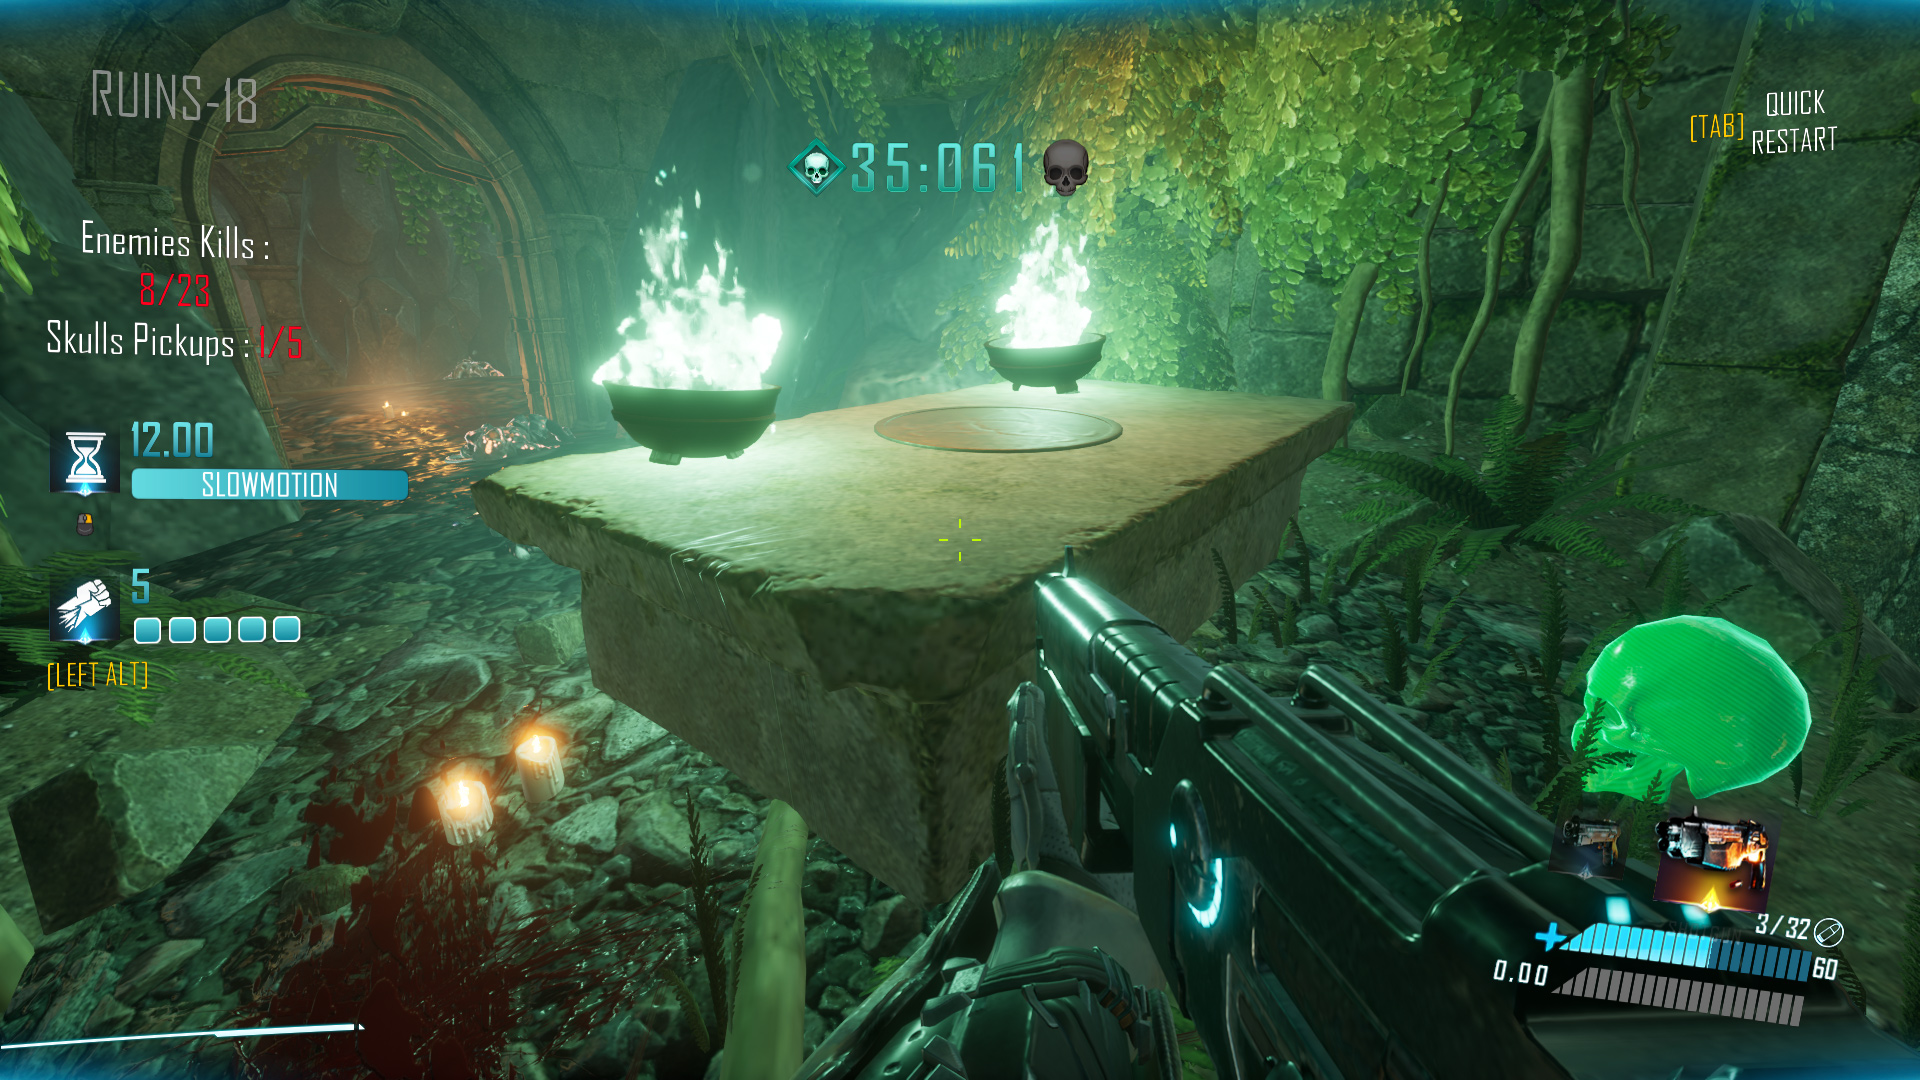
Ruins-18 Normal: Look for it in a small room on the upper floor, behind two distinct, bright green fires on a table.
Ruins-18 Hard: It’s hidden on the chandelier in the main room.

Ruins-18 Very Hard: Head forward from the spawn, then turn left to face a group of enemies. Look for a button next to them that opens a nearby door, leading to the skull.

Ruins-18 Hardcore: Proceed forward from the spawn and find a hidden button behind a tomb in the wall. Press it to reveal the skull in the nearby corridor.

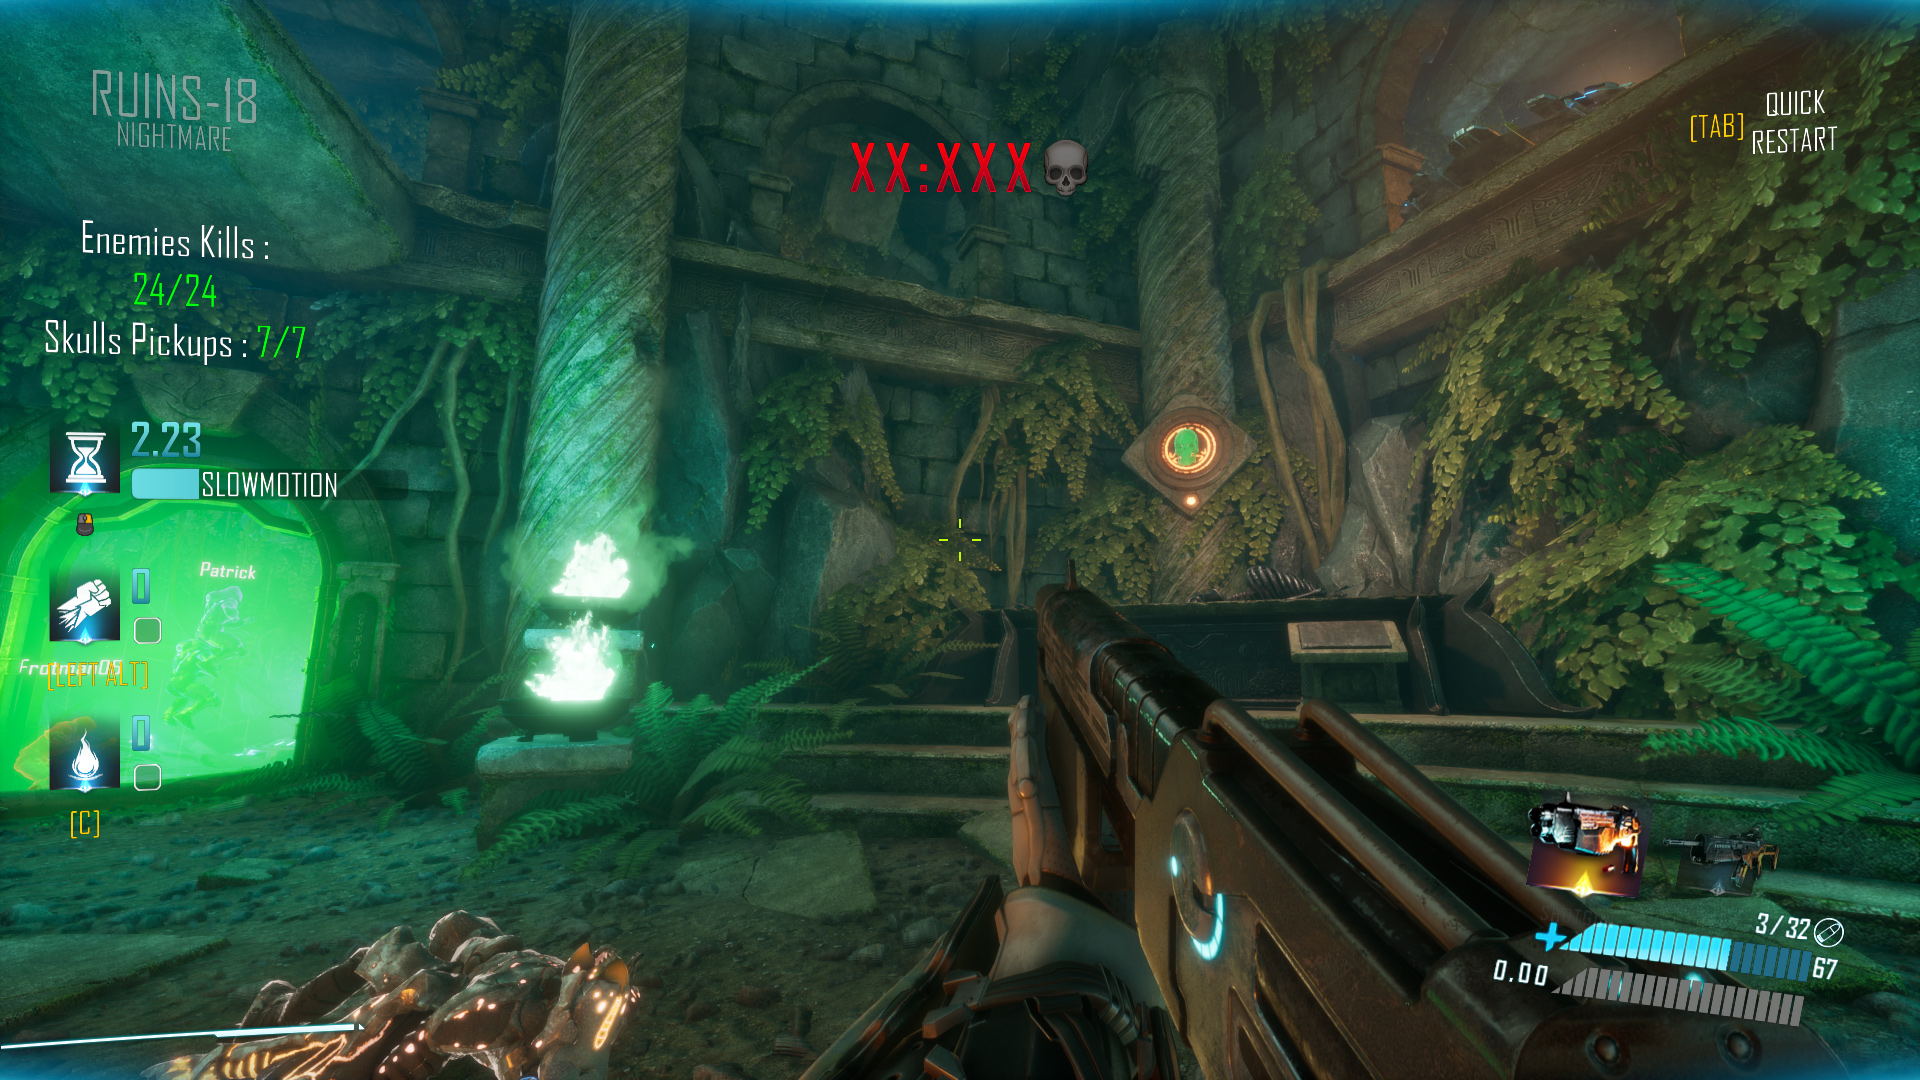
Ruins-18 Nightmare: It’s tucked away on the right of the exit, concealed by a yellow symbol in the corner.
Ruins-19
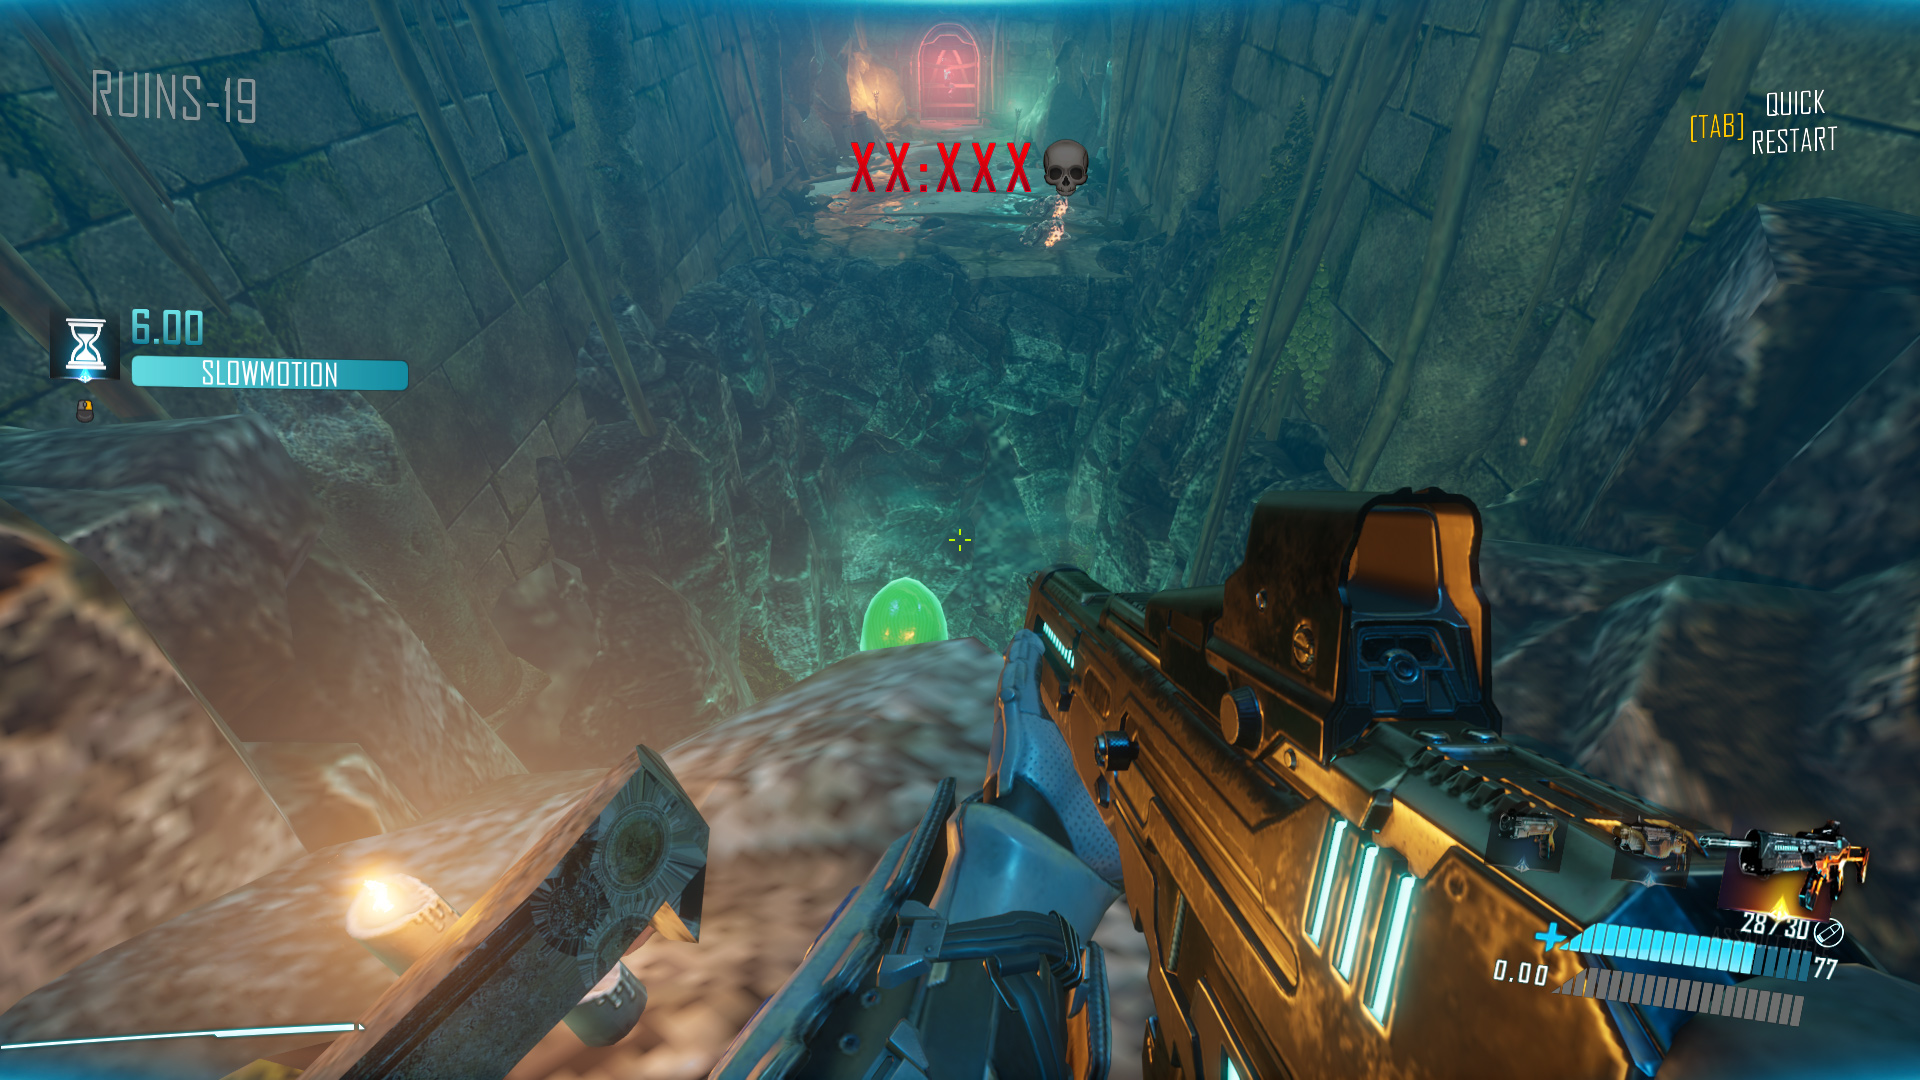
Ruins-19 Normal: As you pick up the assault rifle, glance down before jumping towards the exit.
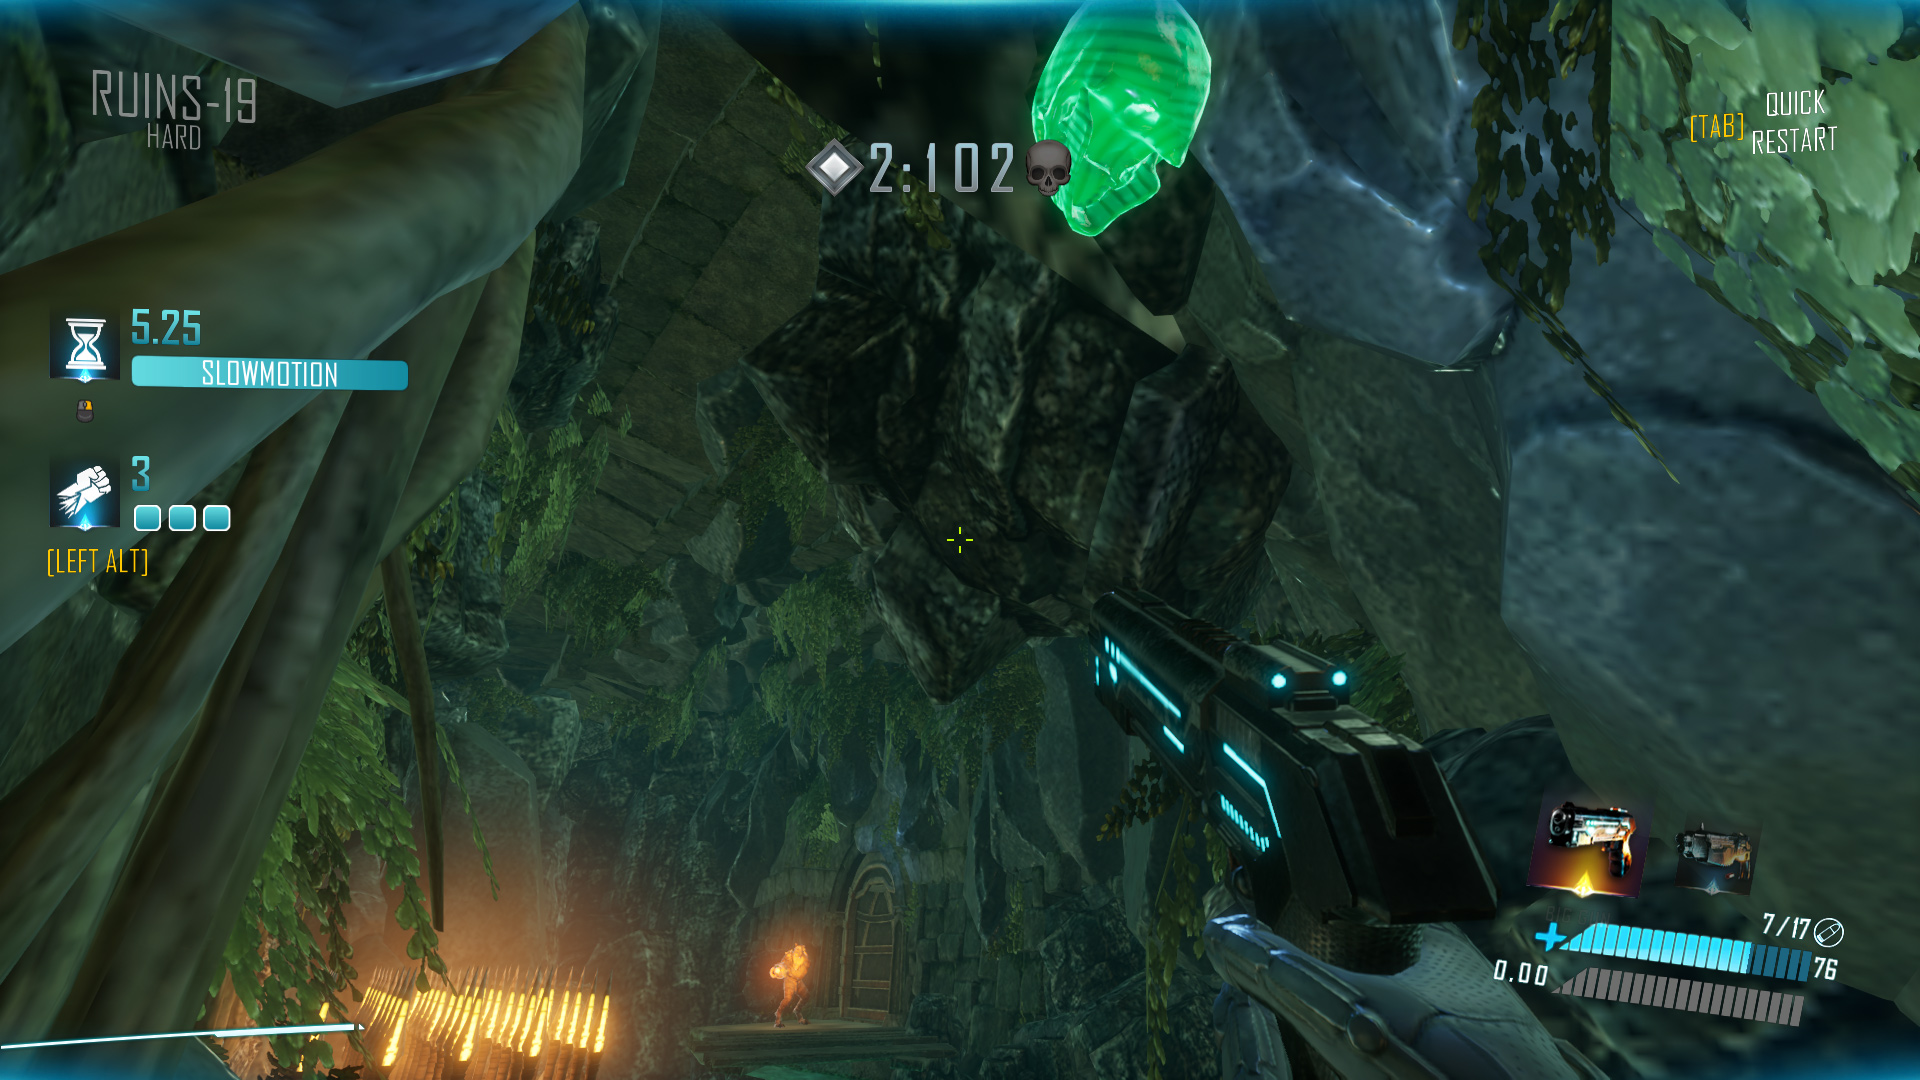
Ruins-19 Hard: After taking two slide pads and going through a small tunnel, look up to find the skull near a spike trap.
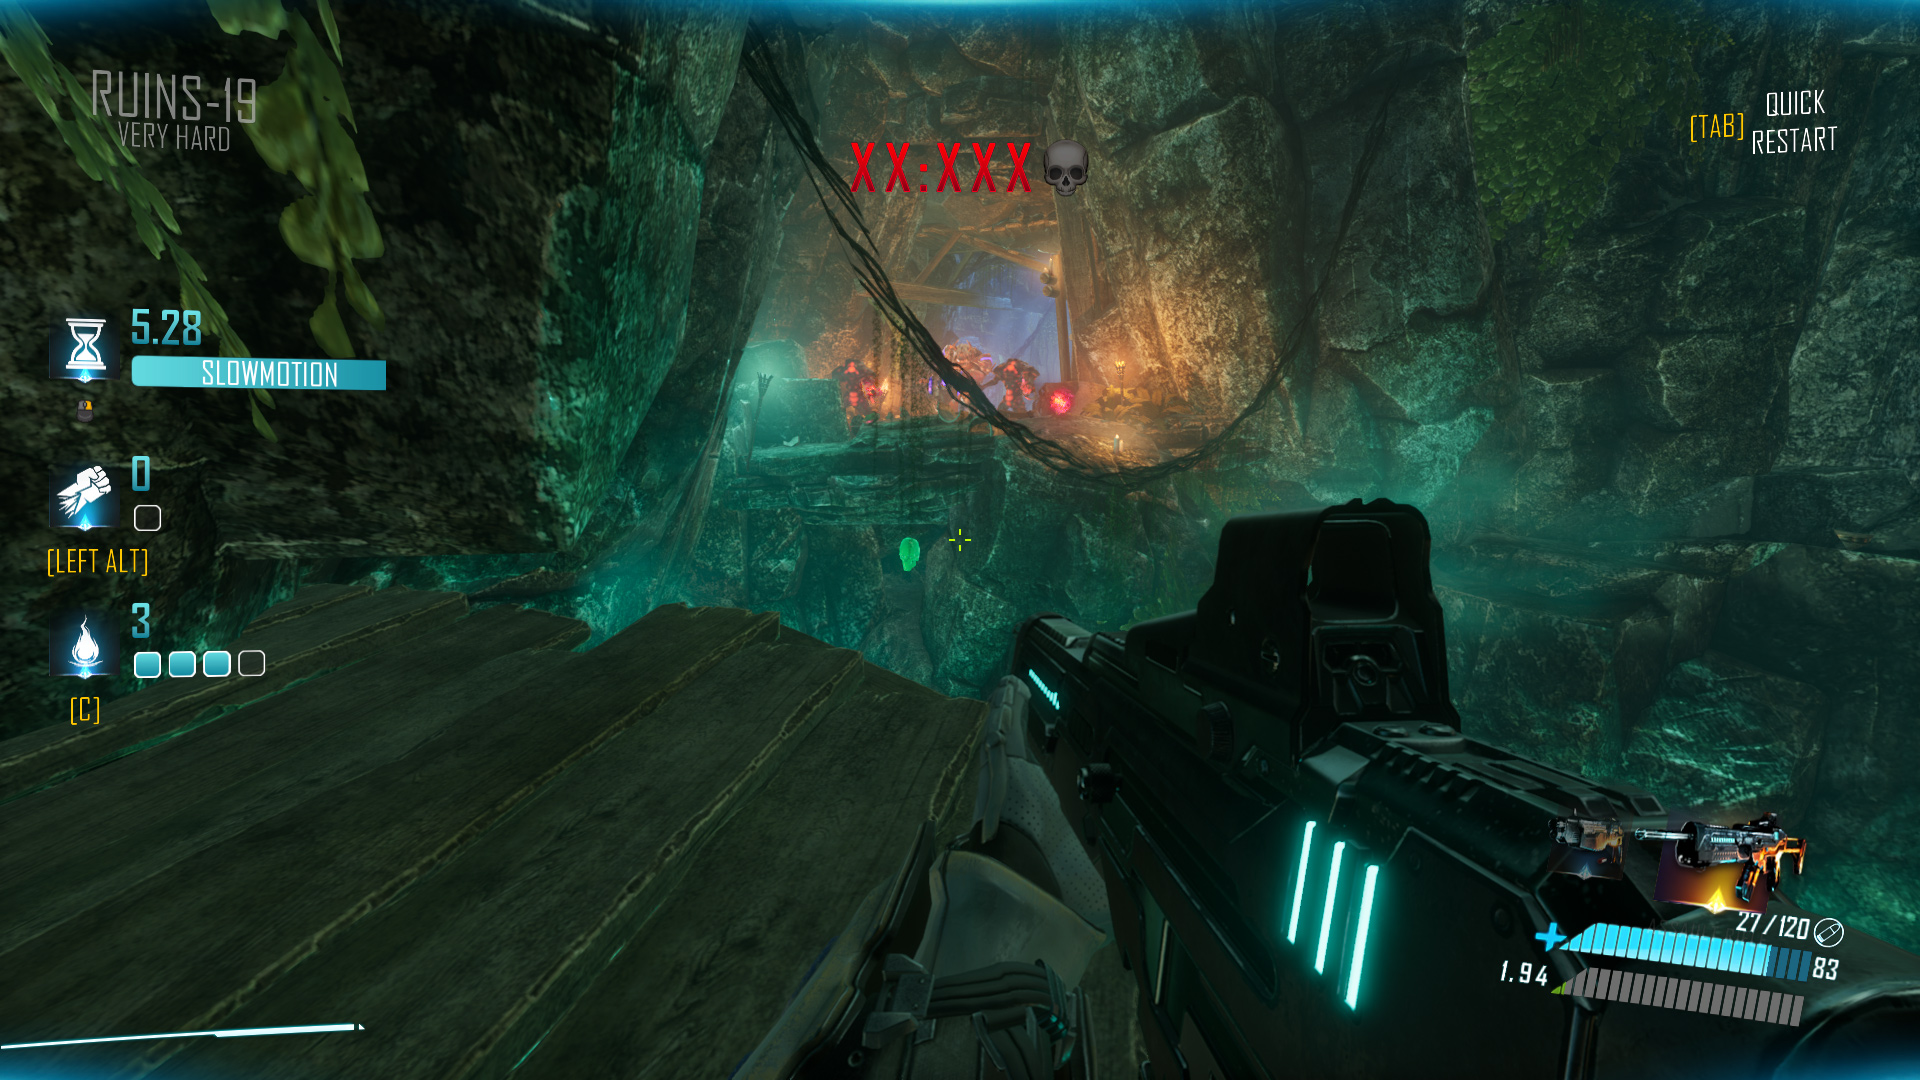
Ruins-19 Very Hard: Instead of jumping down to the next enemies, jump to a wooden platform on the left. You’ll see the skull from there.
Ruins-19 Hardcore: After shooting the three buttons and jumping onto the next platform, look behind you to spot another button that opens the room with the skull inside.

Ruins-19 Nightmare: Spot the skull as you reach the first green grappling hook block, looking up and to the right.

Ruins-20
Ruins-20 Normal: It’s located behind the second lever that opens the exit door.
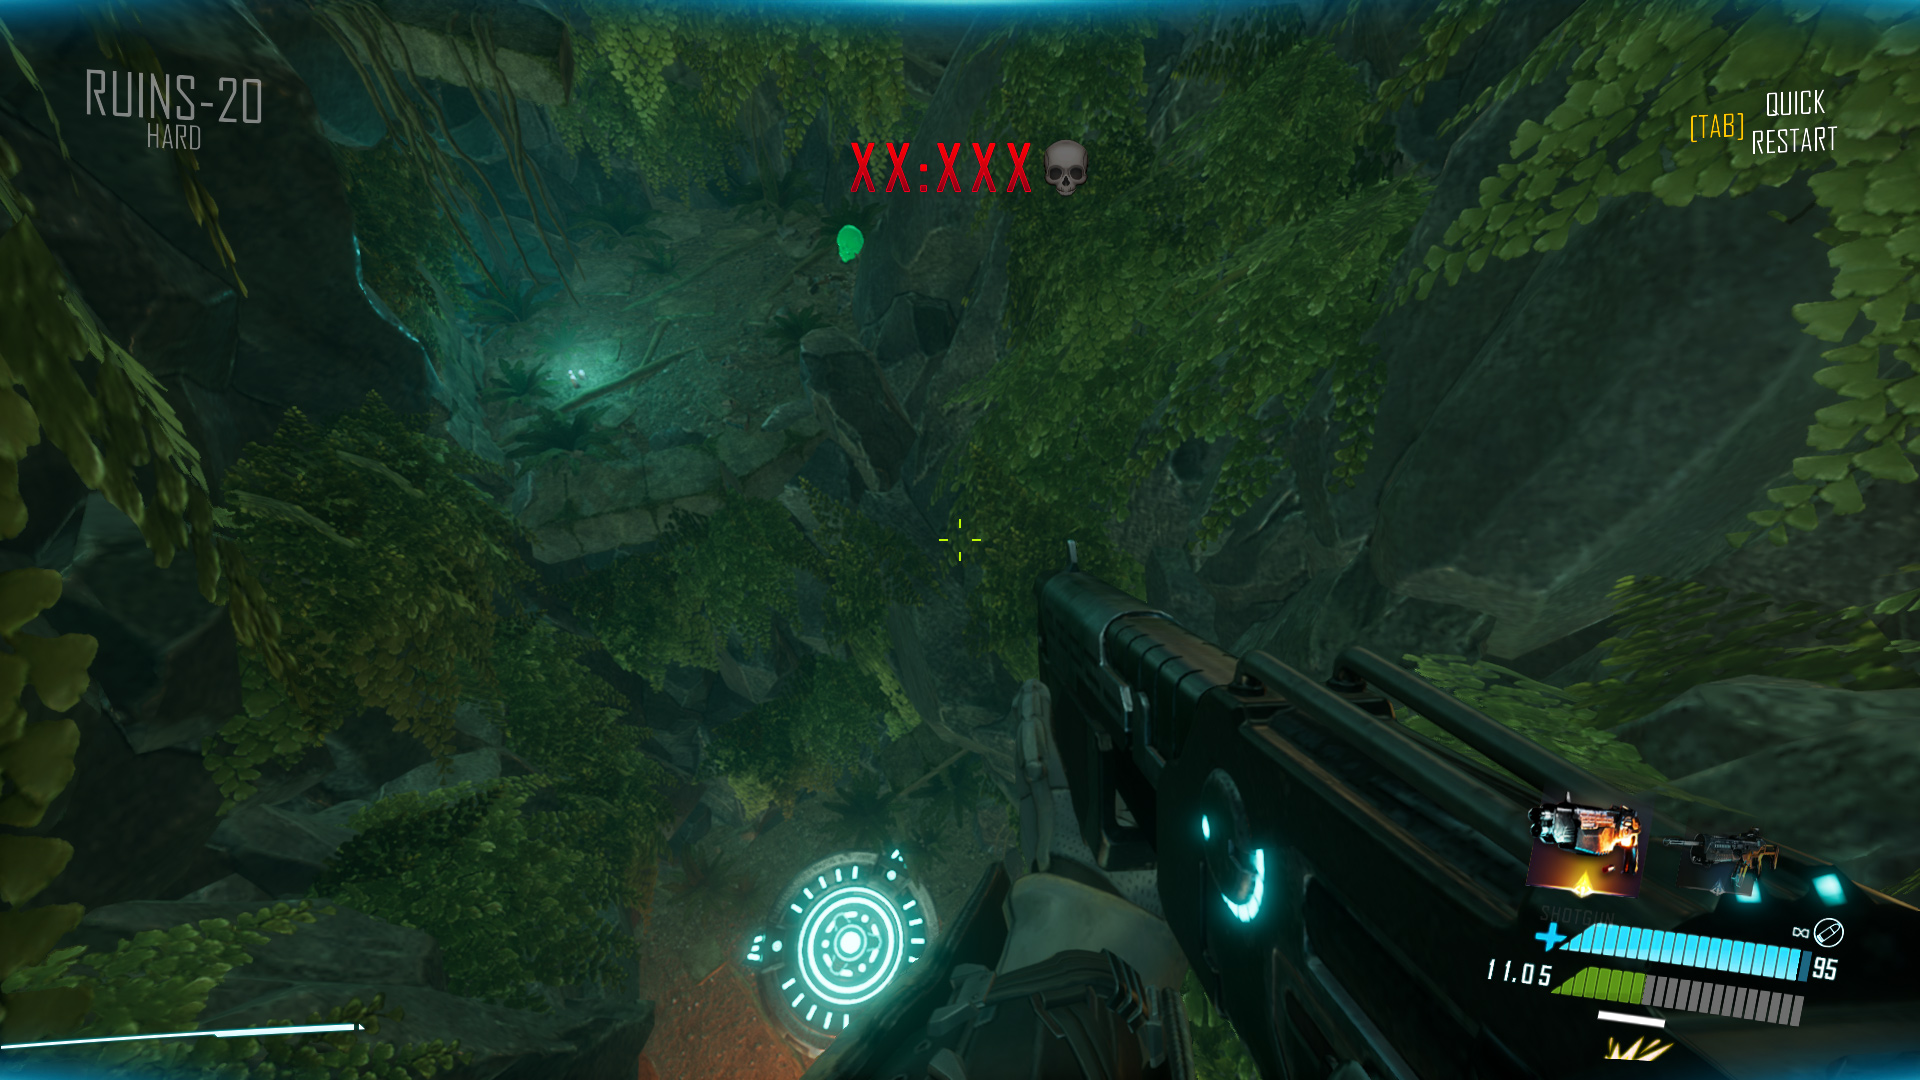
Ruins-20 Hard: Look for it hidden behind some vases on a “middle floor” between the bounce pad and the exit platform.
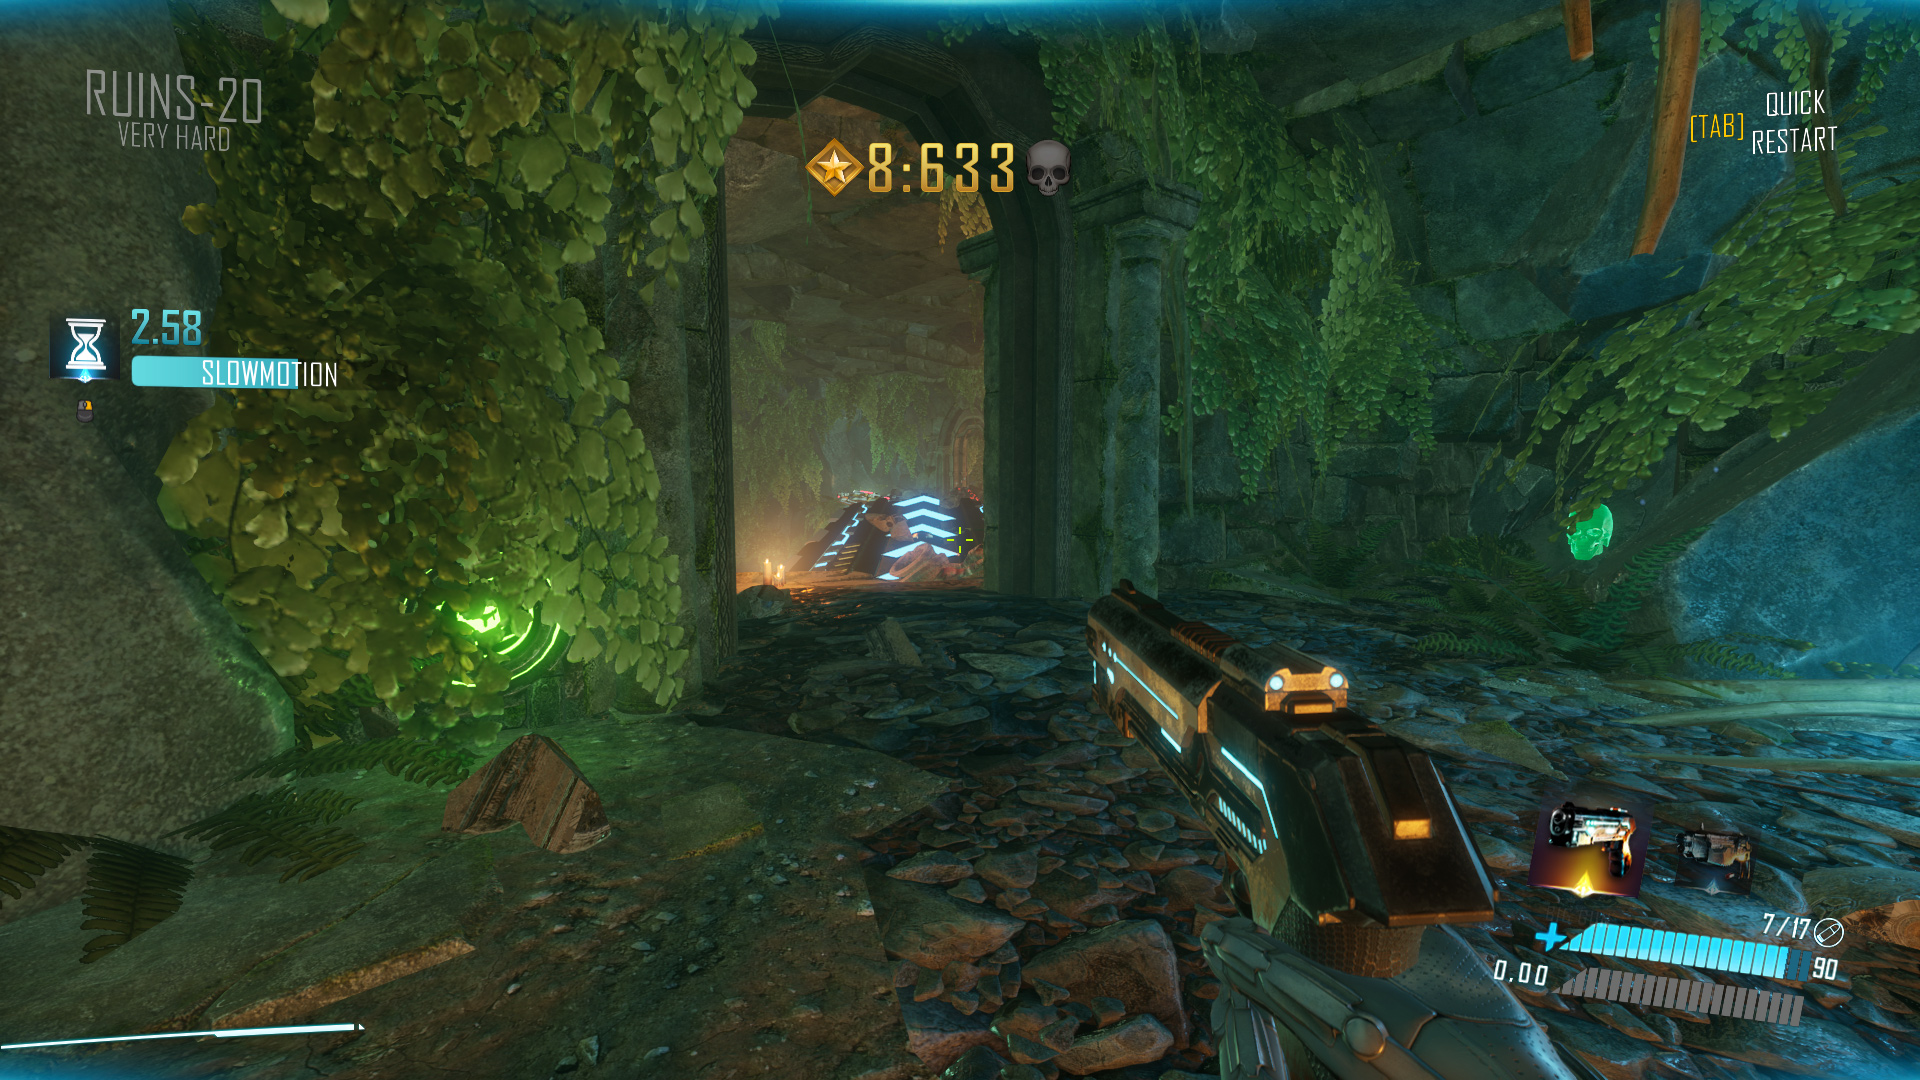
Ruins-20 Very Hard: Find a hidden button in the room with the second lever that opens a nearby door, revealing the skull.
Ruins-20 Hardcore: After obtaining the sniper rifle, head up the flight of stairs just before it. The skull is hidden at the top.

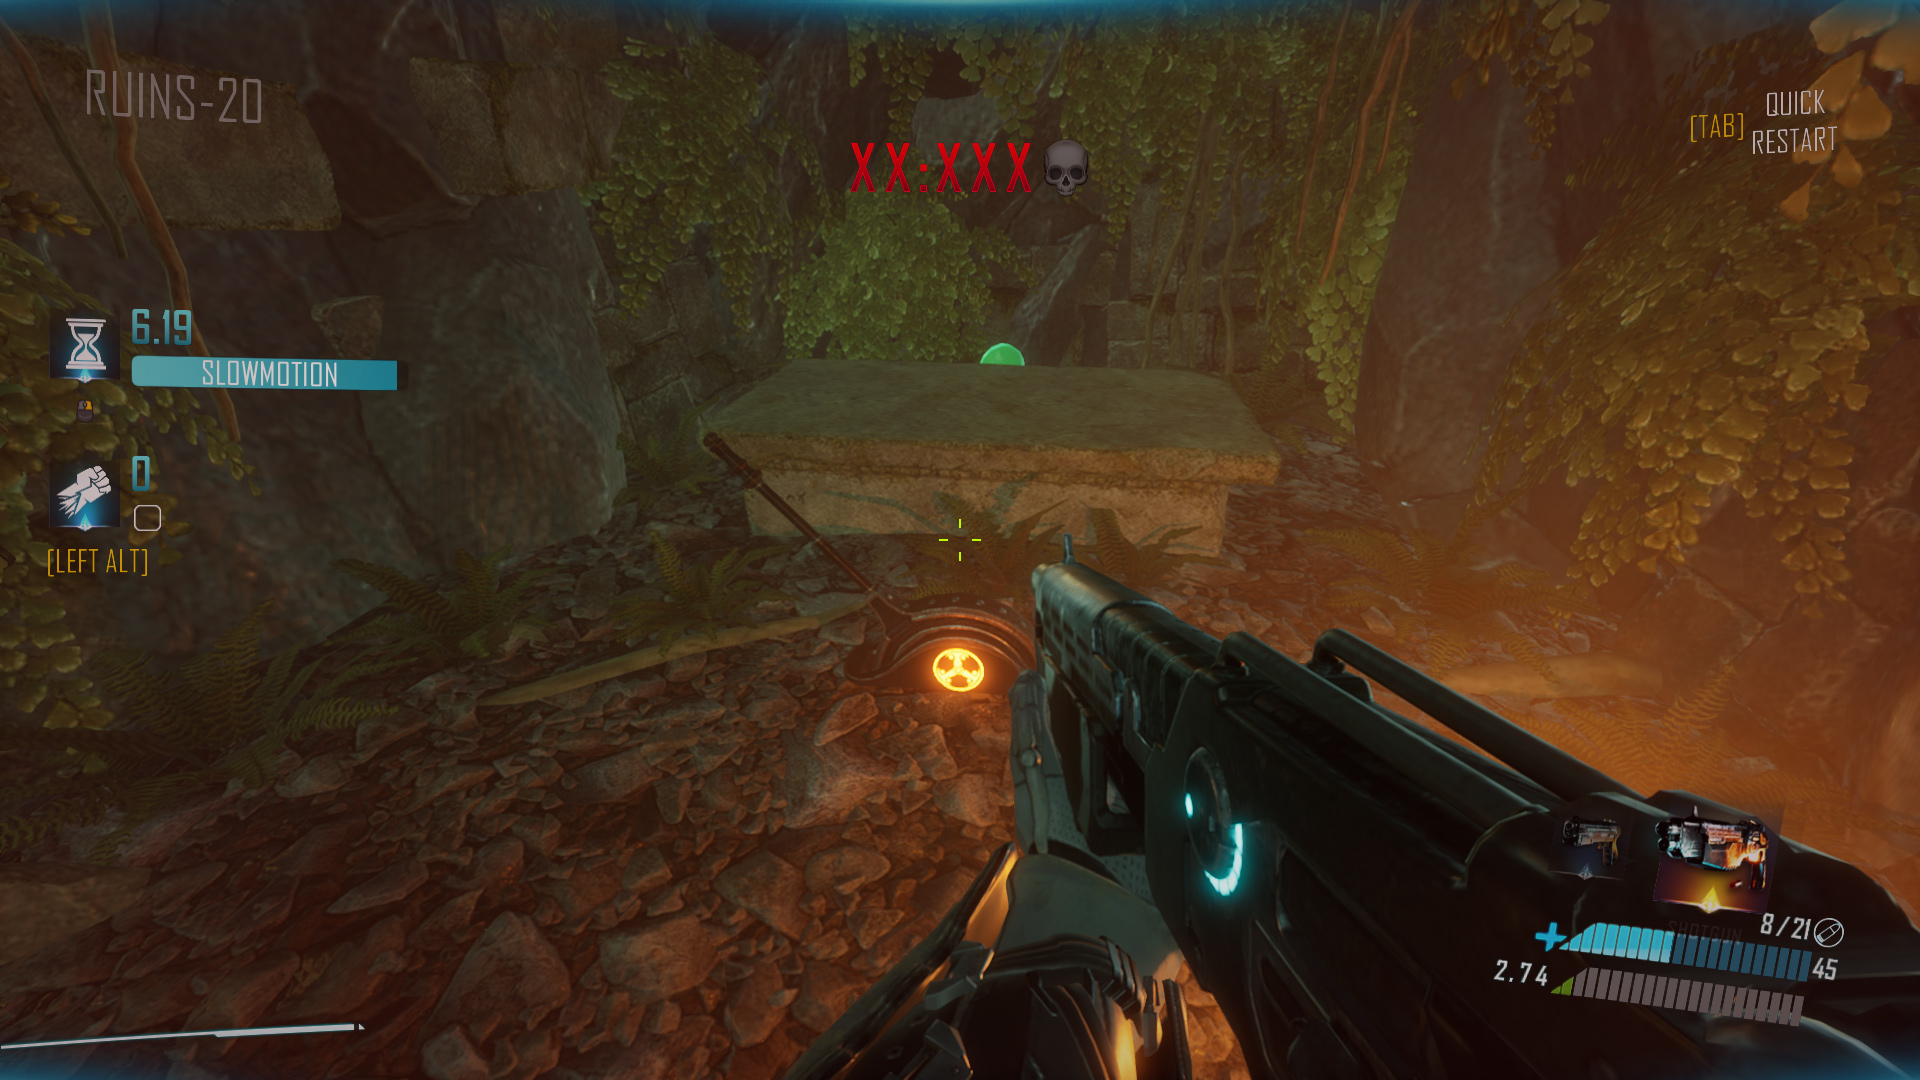
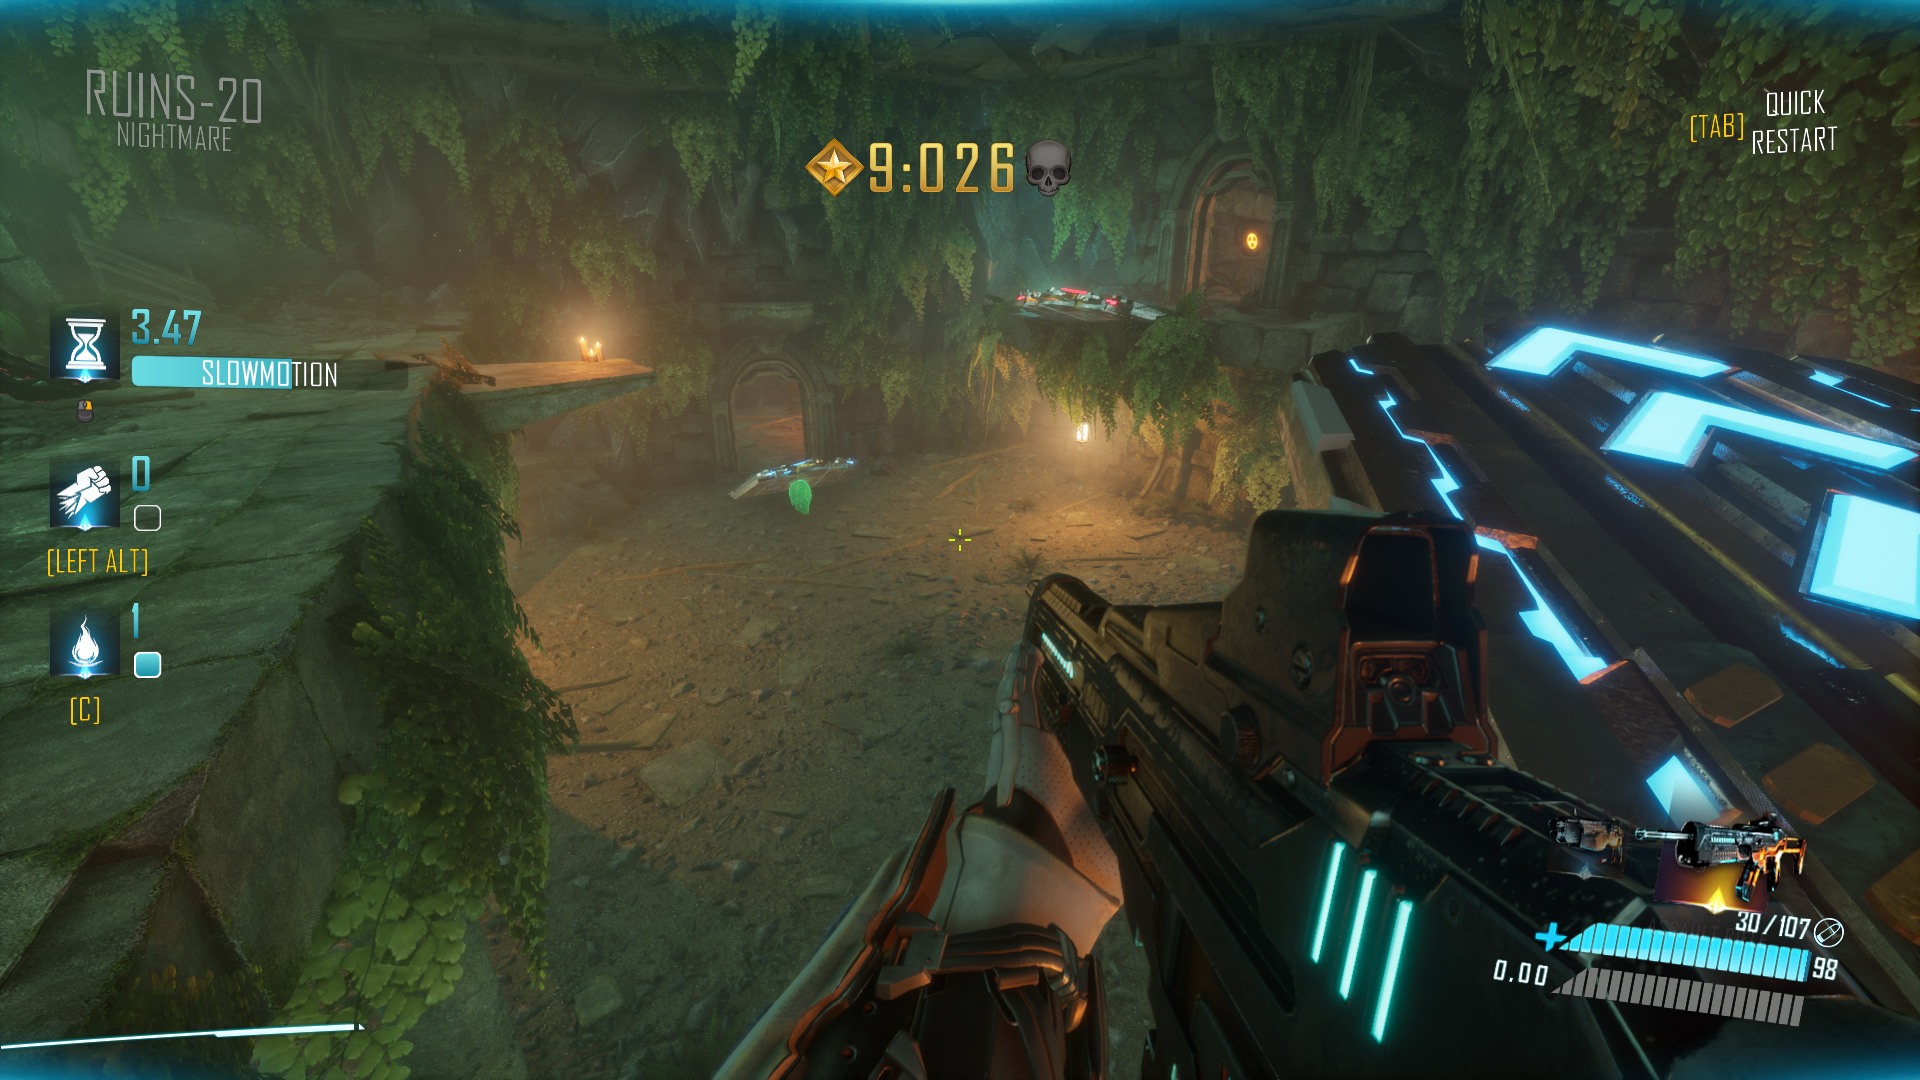
Ruins-20 Nightmare: It’s just beneath the first slide pad.
Ruins-21
Ruins-21 Normal: Spot the skull in the room with a green acid pool below, behind two explosive spiders on a platform to the right.

Ruins-21 Hard: The skull is at the beginning of the level. Look around the small ramp that leads to the lever.

Ruins-21 Very Hard: Take the slide pad and pull the lever, then head into the room behind the spawning reddish-pink fireball enemy to find the skull hidden in wooden barrels.
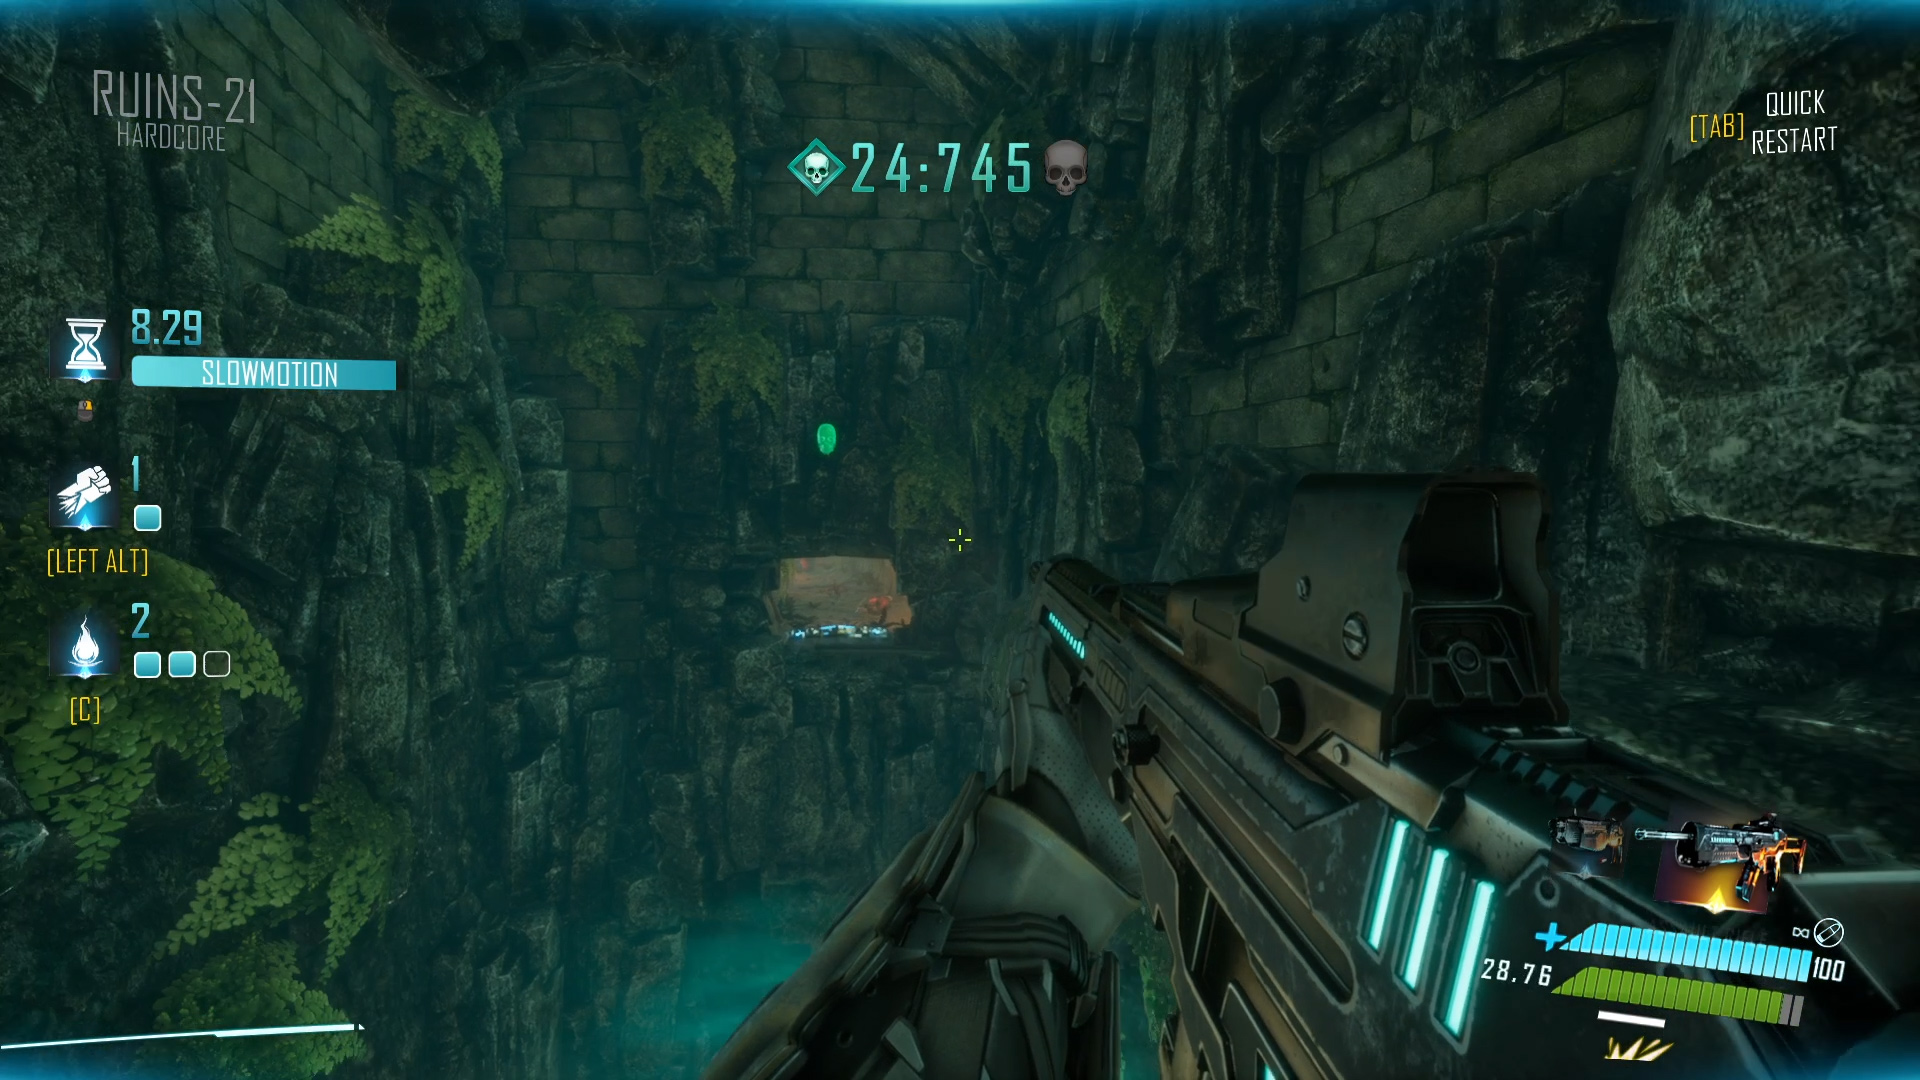
Ruins-21 Hardcore: After the first stomp and slide pad, look behind you to find the skull above.
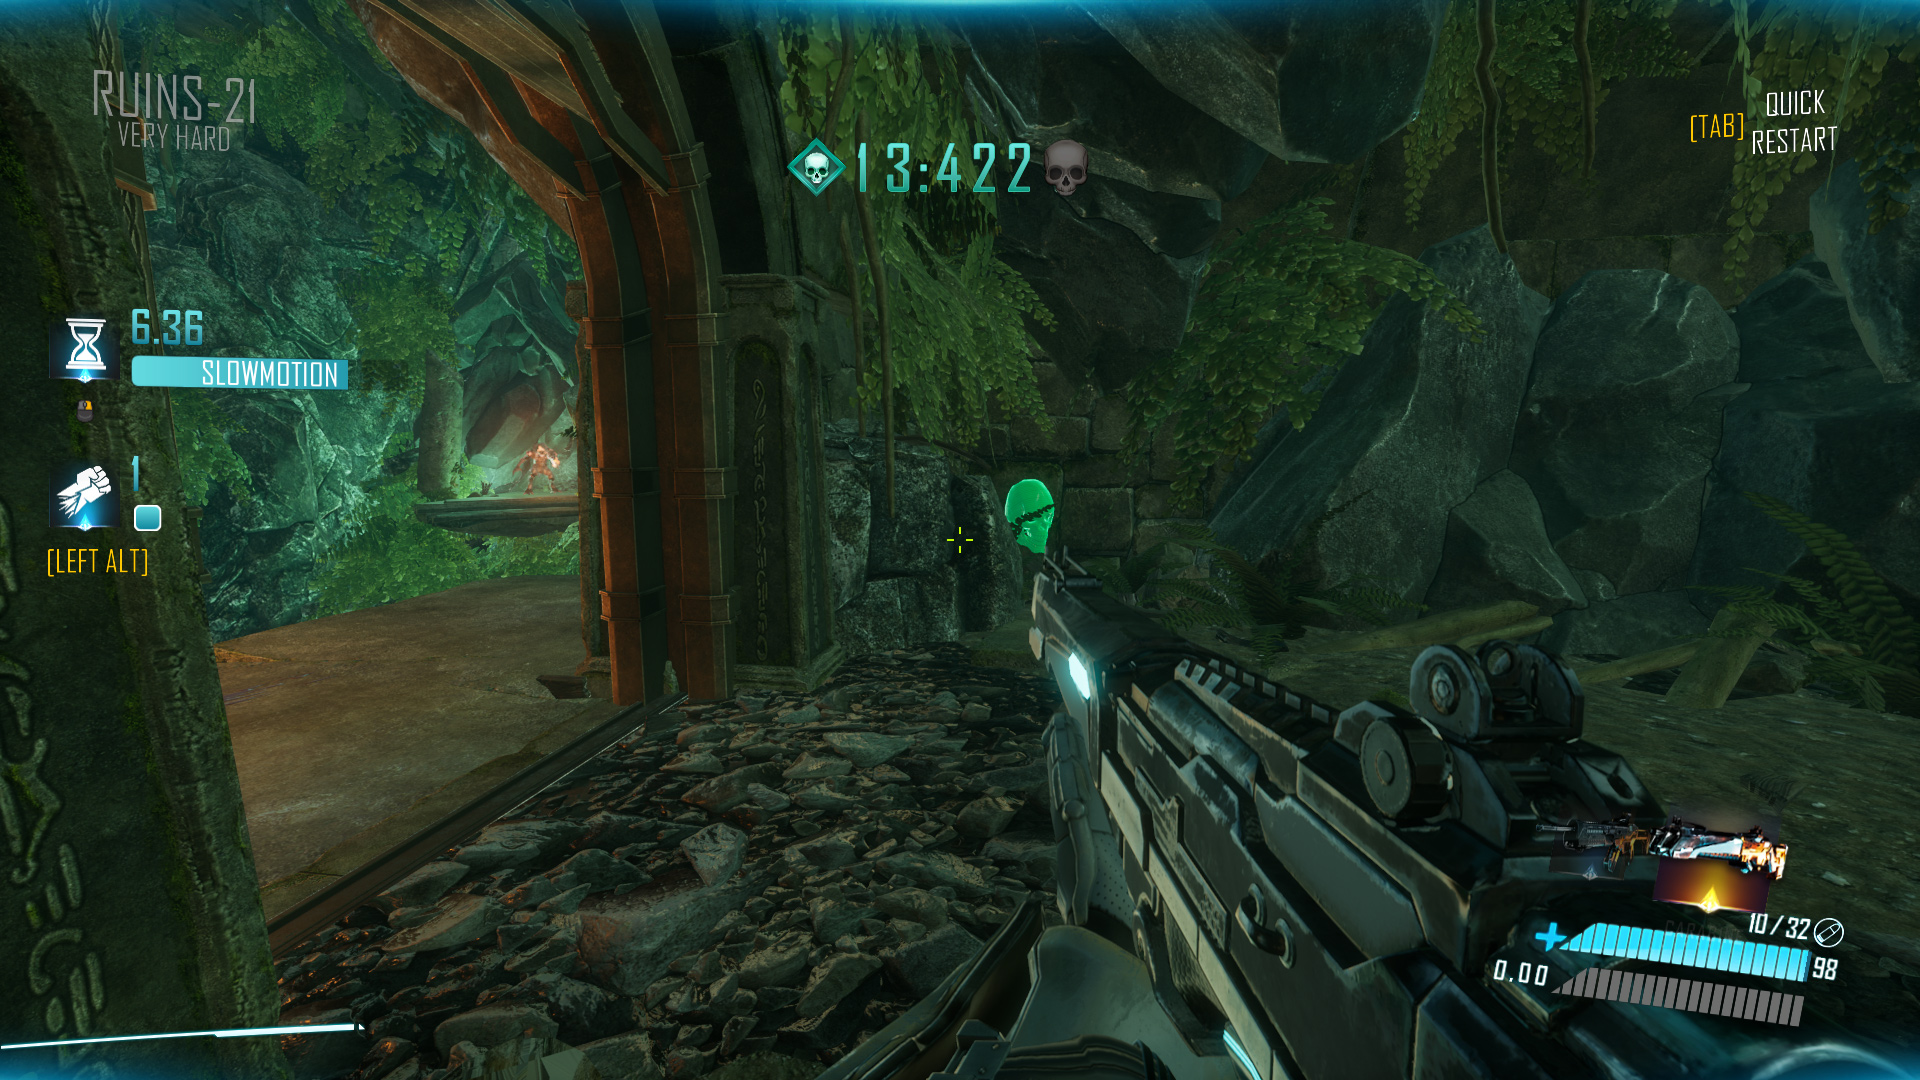
Ruins-21 Nightmare: After stomping a trio of enemies and going through a short tunnel, look to your left.

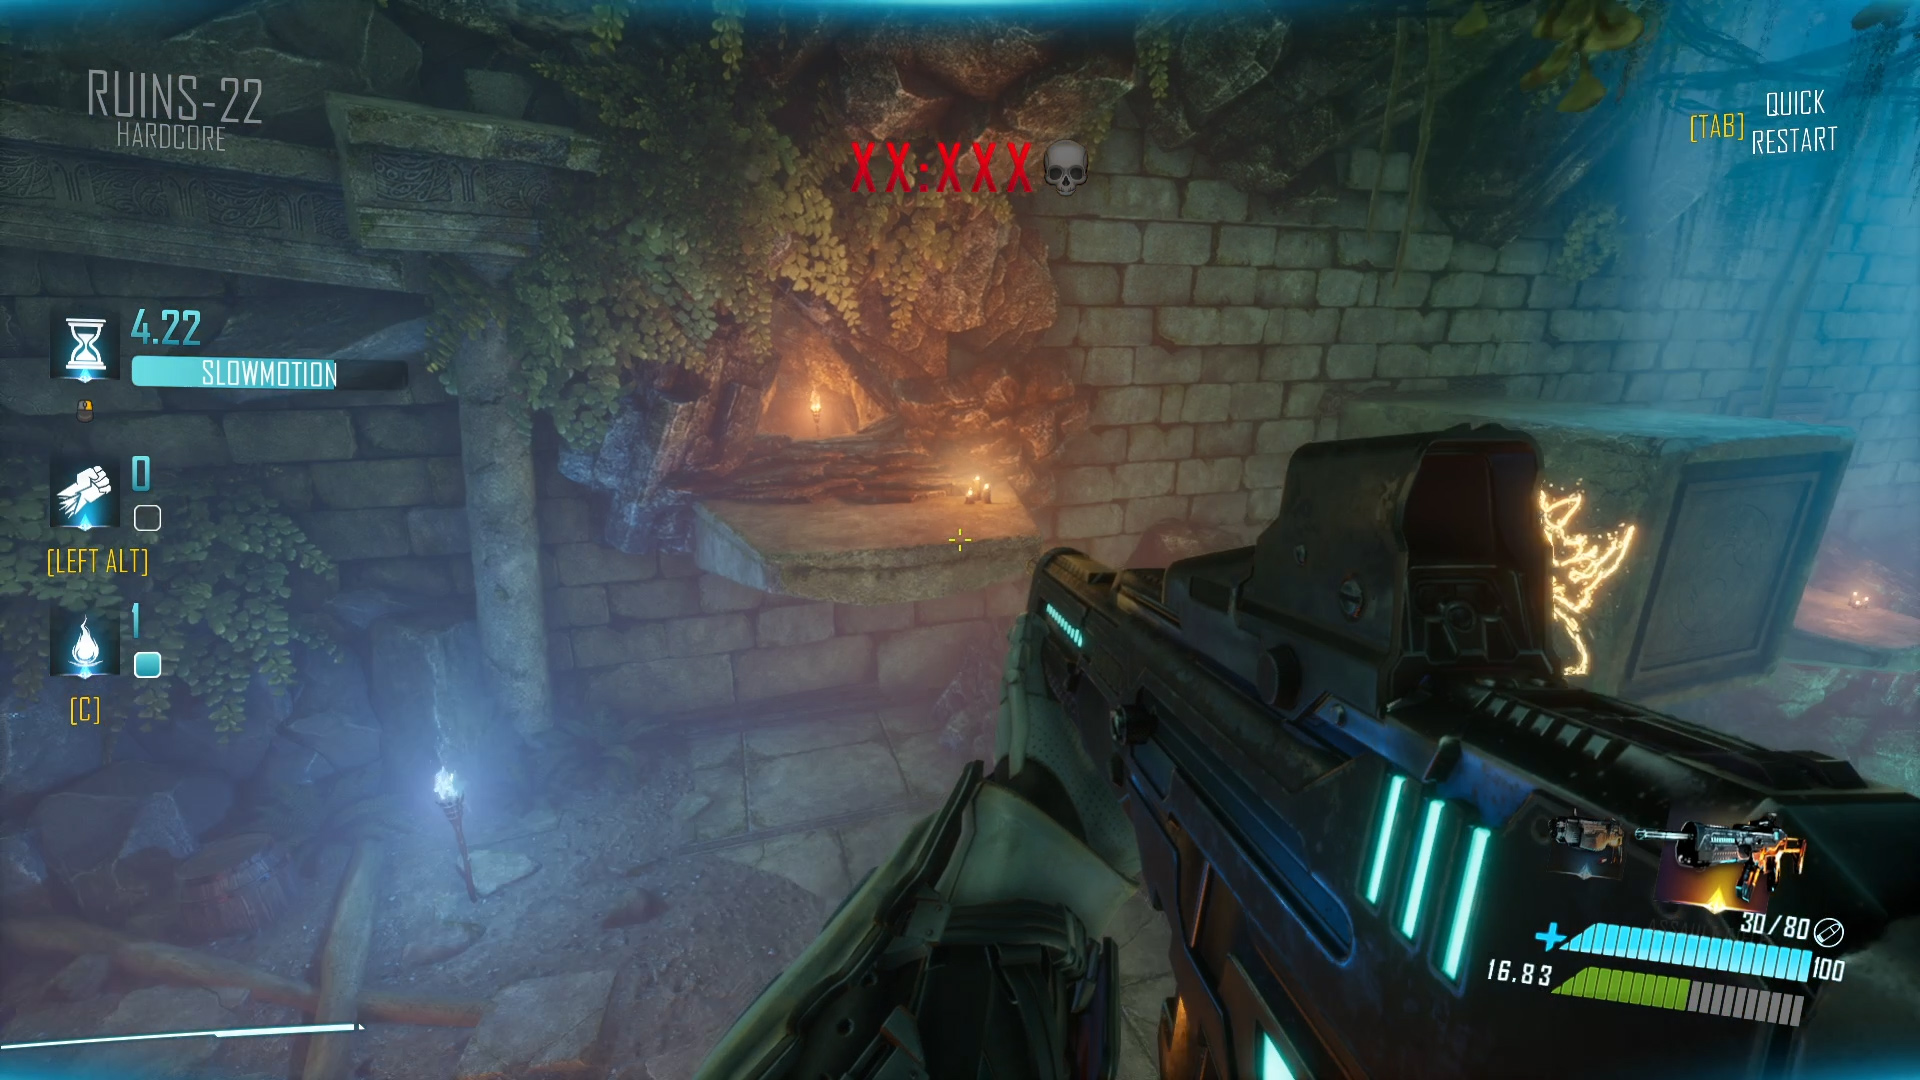
Ruins-22
Ruins-22 Normal: It’s located inside the room in the middle of the way back, towards the end of the level.

Ruins-22 Hard: Early in the level, jump onto the wooden platform with the first enemy and check below.
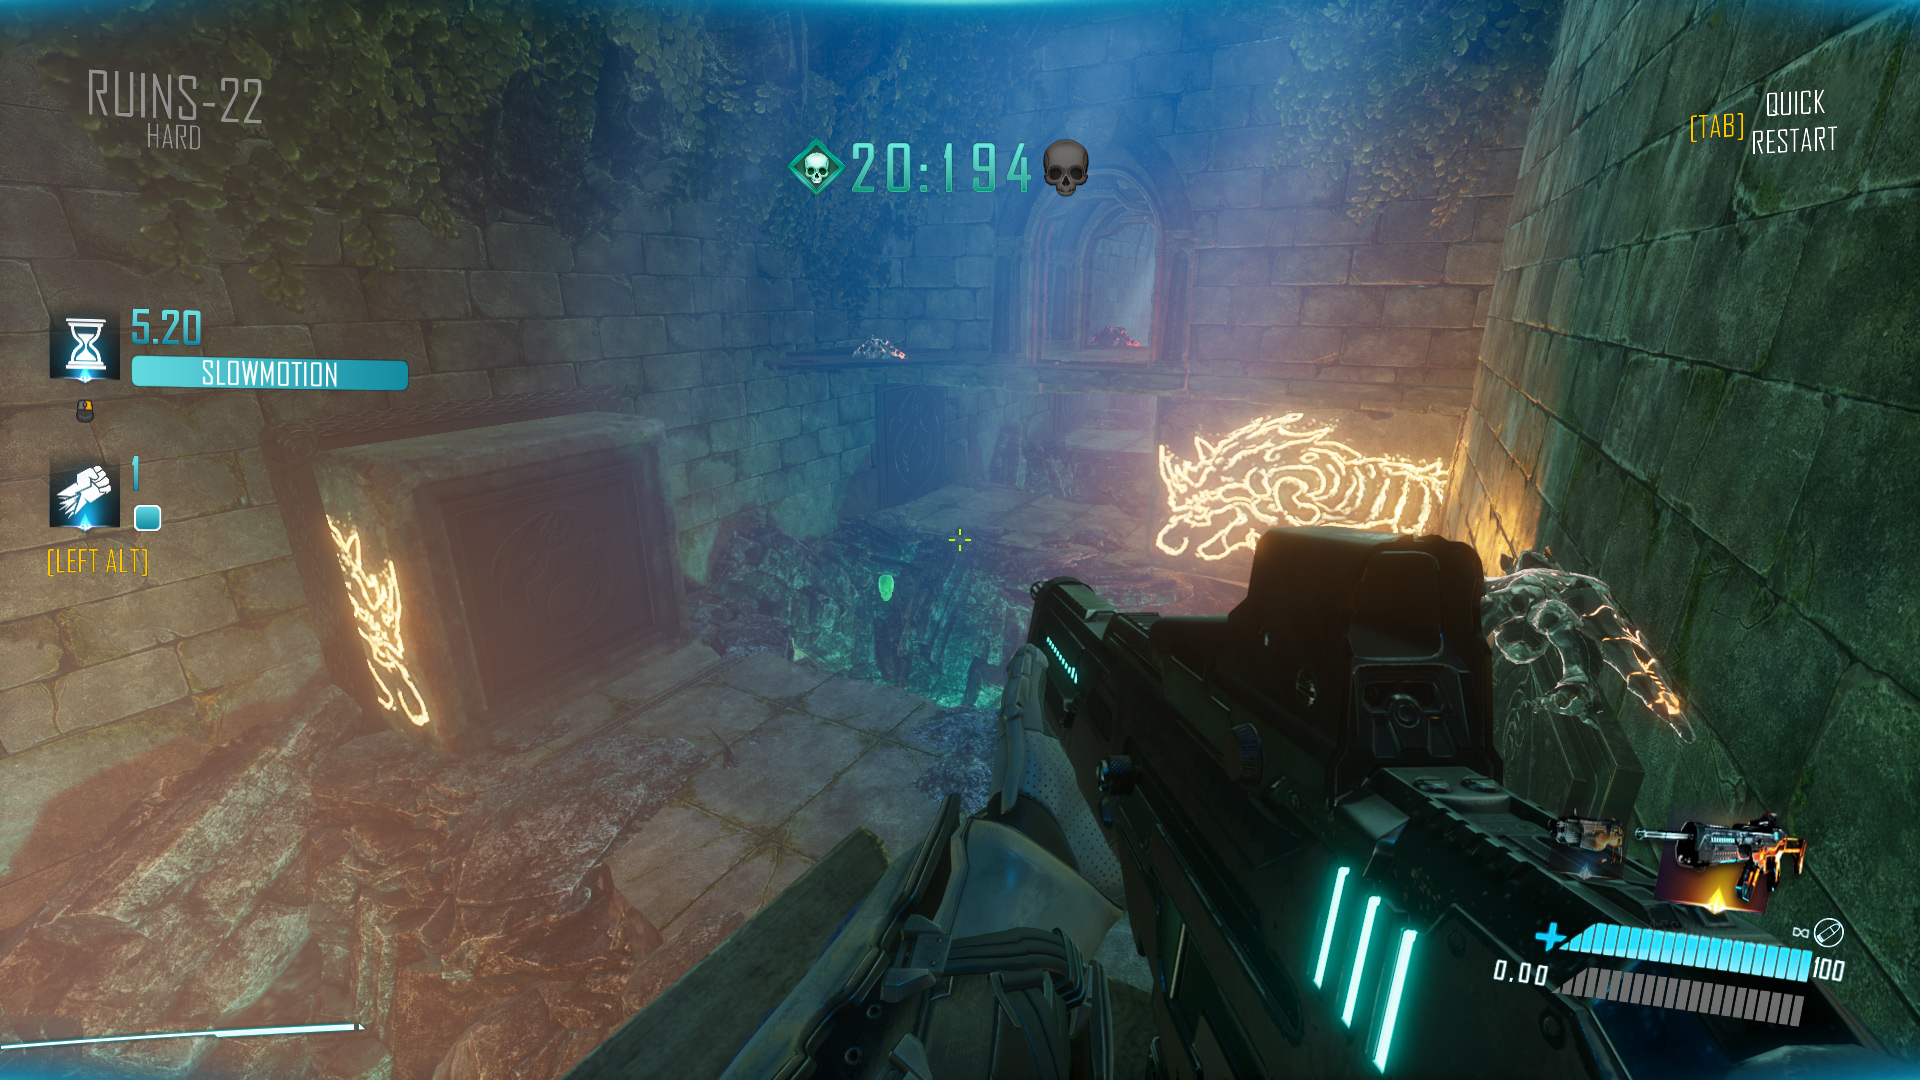
Ruins-22 Very Hard: After shooting the first button and entering the doorway, look to your left for the skull.

Ruins-22 Hardcore: Discover a well-lit tunnel after the second slide pad. It’s a dead end with a skull in it.
Ruins-22 Nightmare: In the very last room, instead of going left, turn right and upward to find the skull.

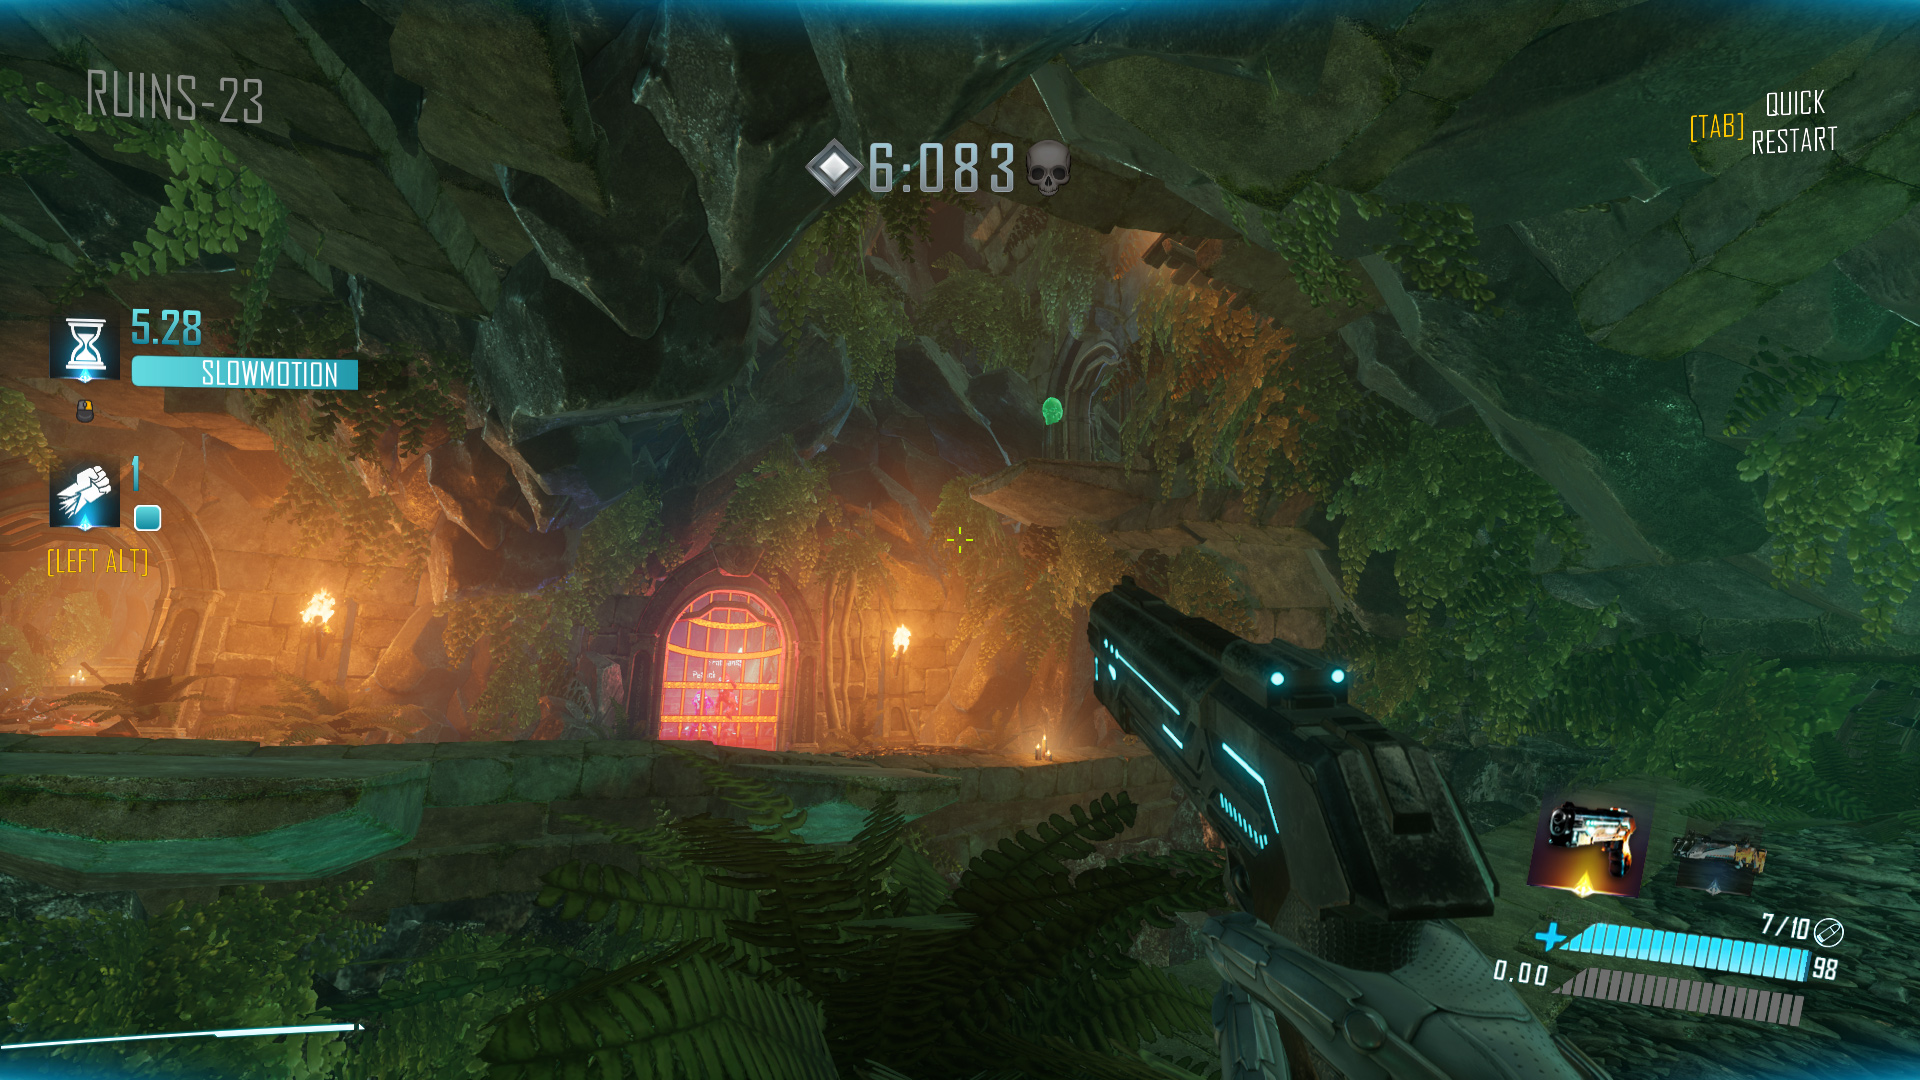
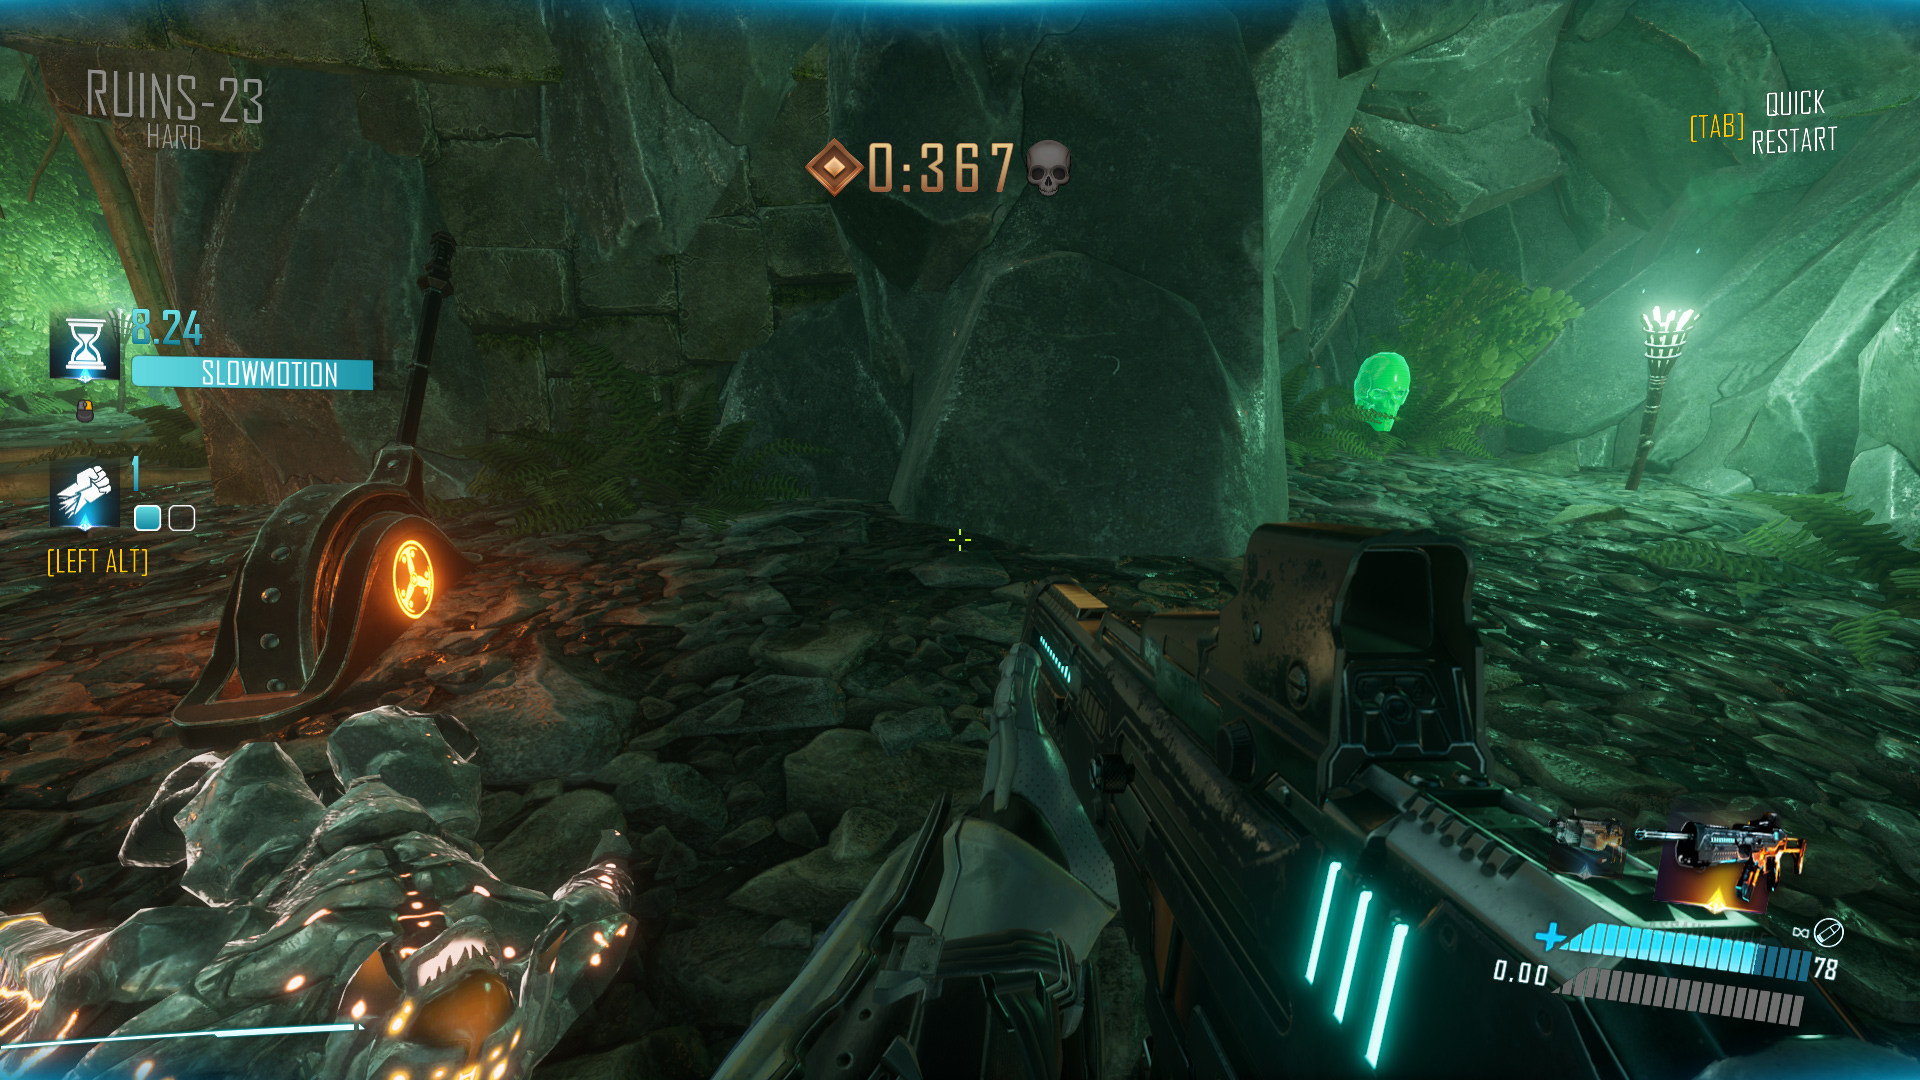
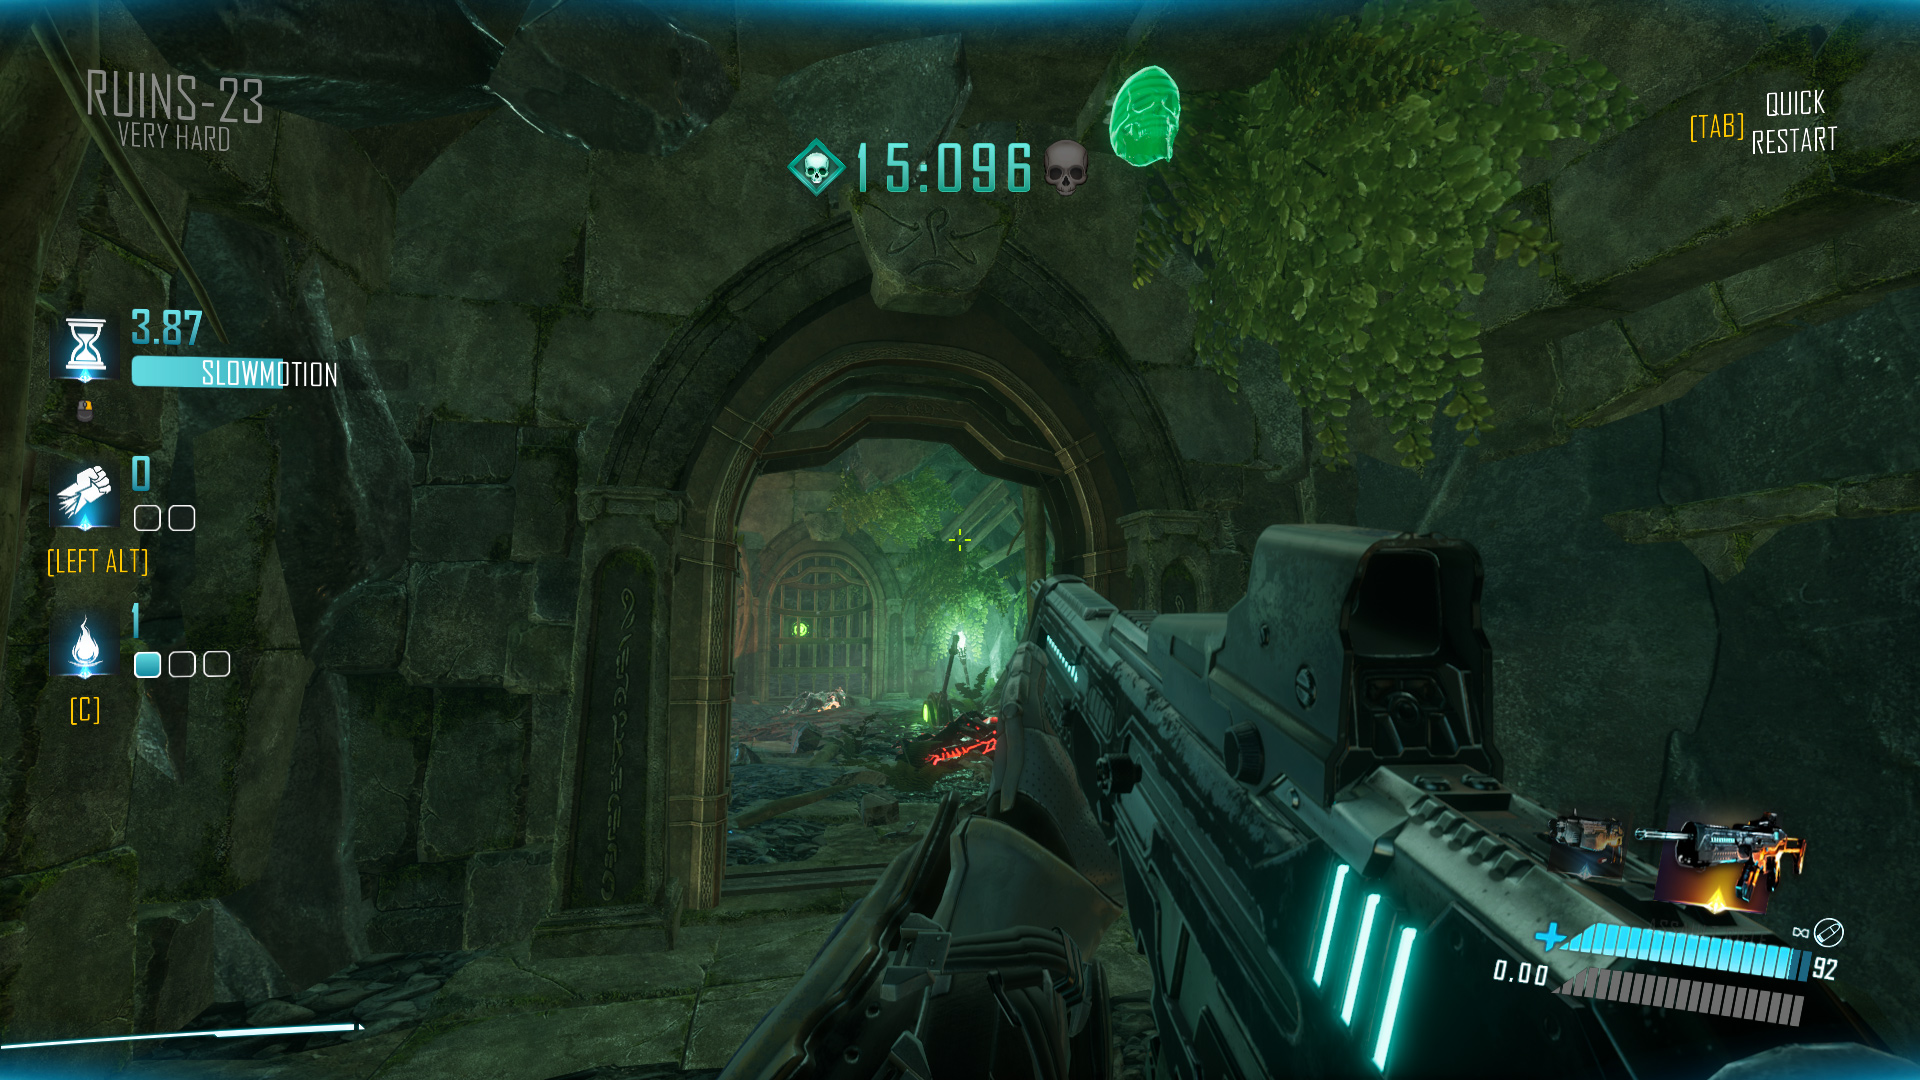
Ruins-23
Ruins-23 Normal: The skull is hanging just above the exit; you can’t miss it.
Ruins-23 Hard: Look behind the lever to find the skull concealed by a barrel.
Ruins-23 Very Hard: Activate a button through the left gate to open the right gate and reveal the skull in the room behind it.
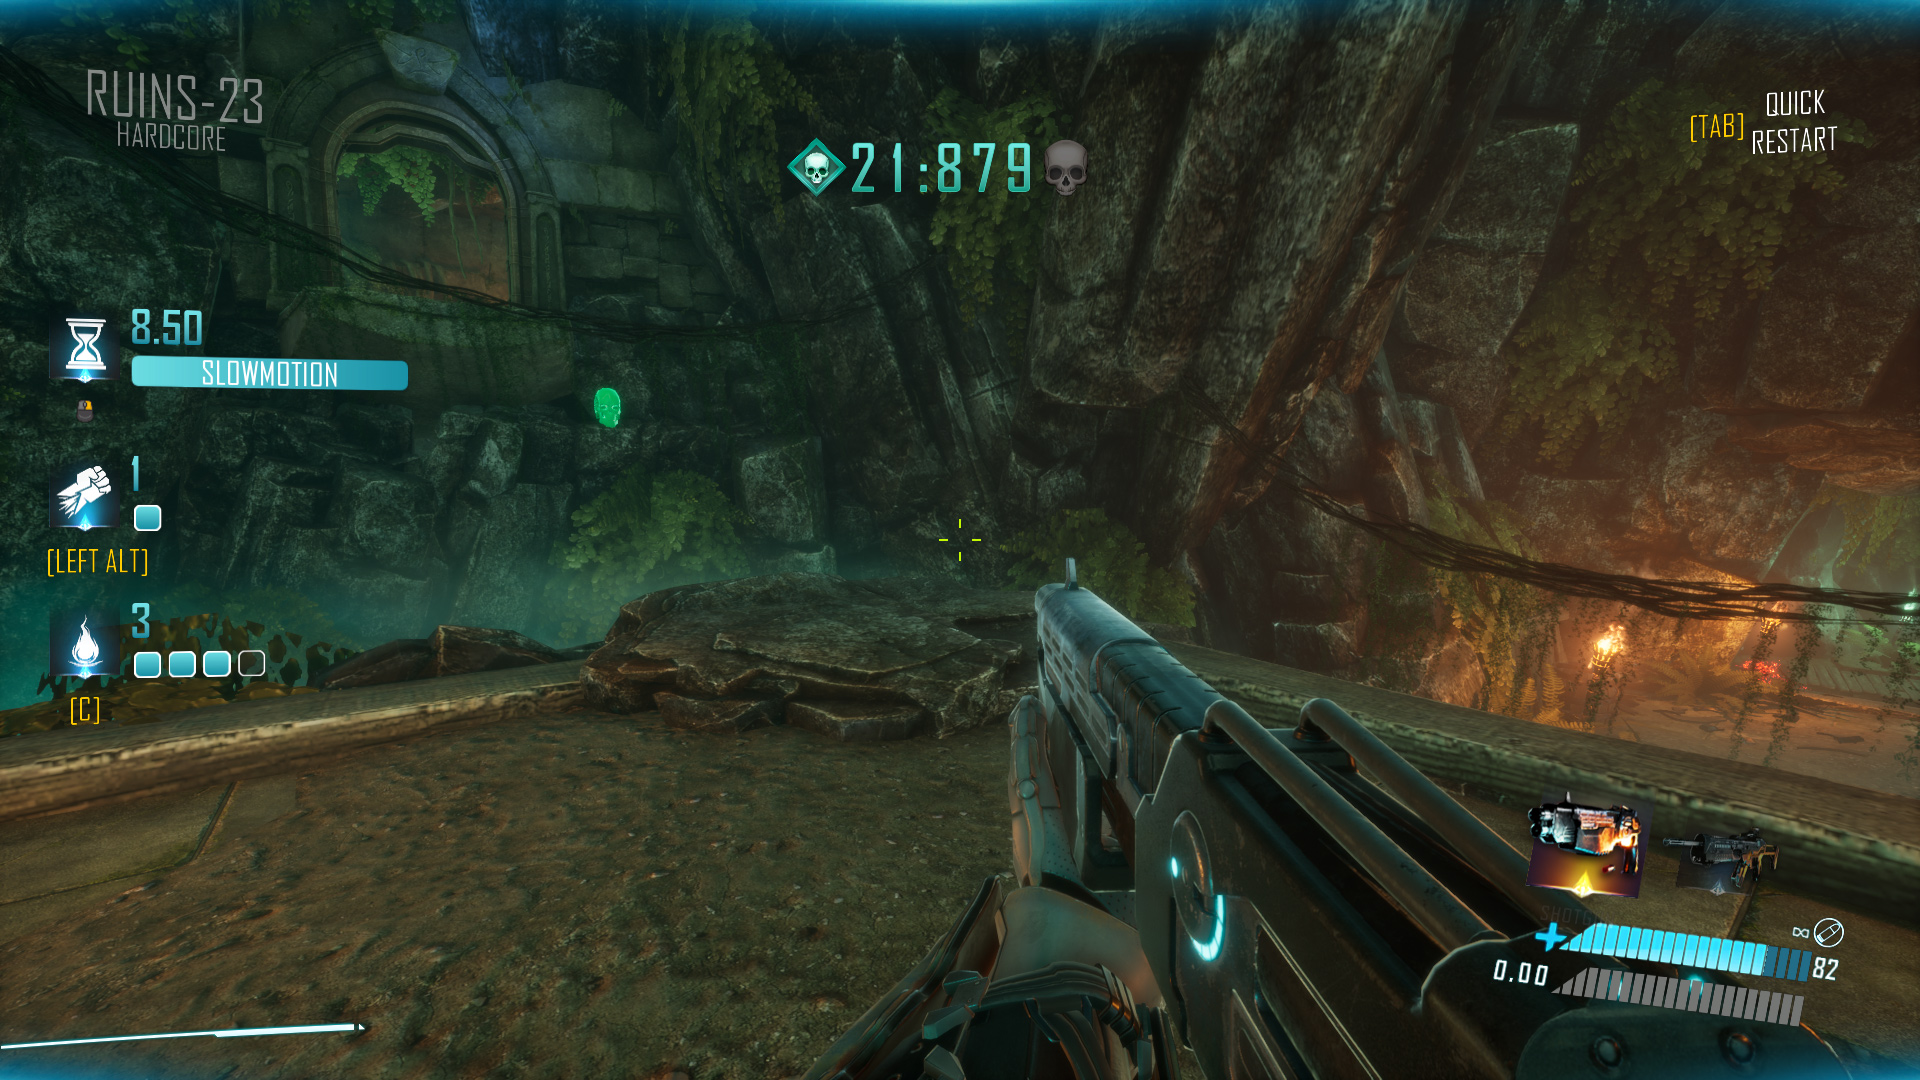
Ruins-23 Hardcore: It’s just under the starting platform; look behind after the first stomp.
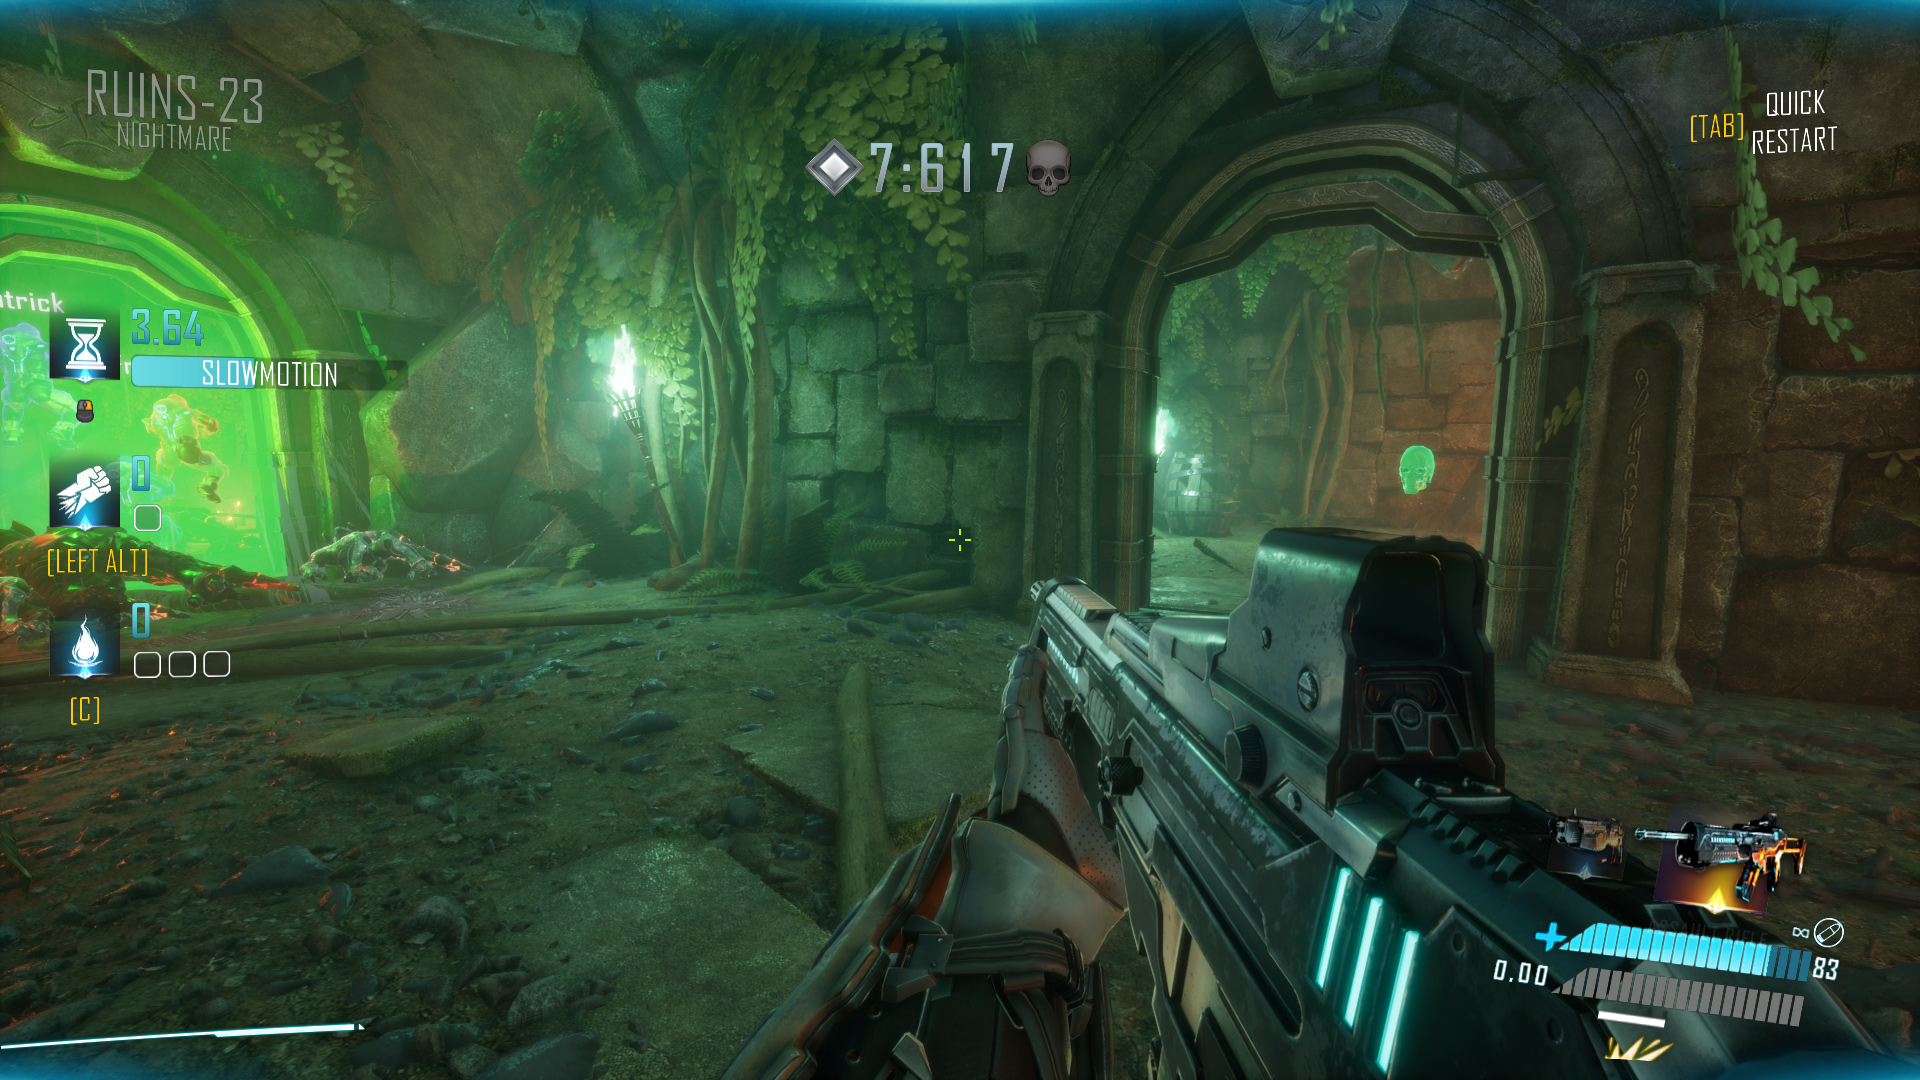
Ruins-23 Nightmare: In a small room on the right, just near the exit.
Ruins-24
Ruins-24 Normal: It’s inside an urn in front of the statues with yellow swords, on the left side when facing the statues.
Ruins-24 Hard: Check behind the shield of one of the green statues.

Ruins-24 Very Hard: Find a hidden lever behind some barrels on the left of the statue with a green shield. Activate it to uncover the nearby skull.

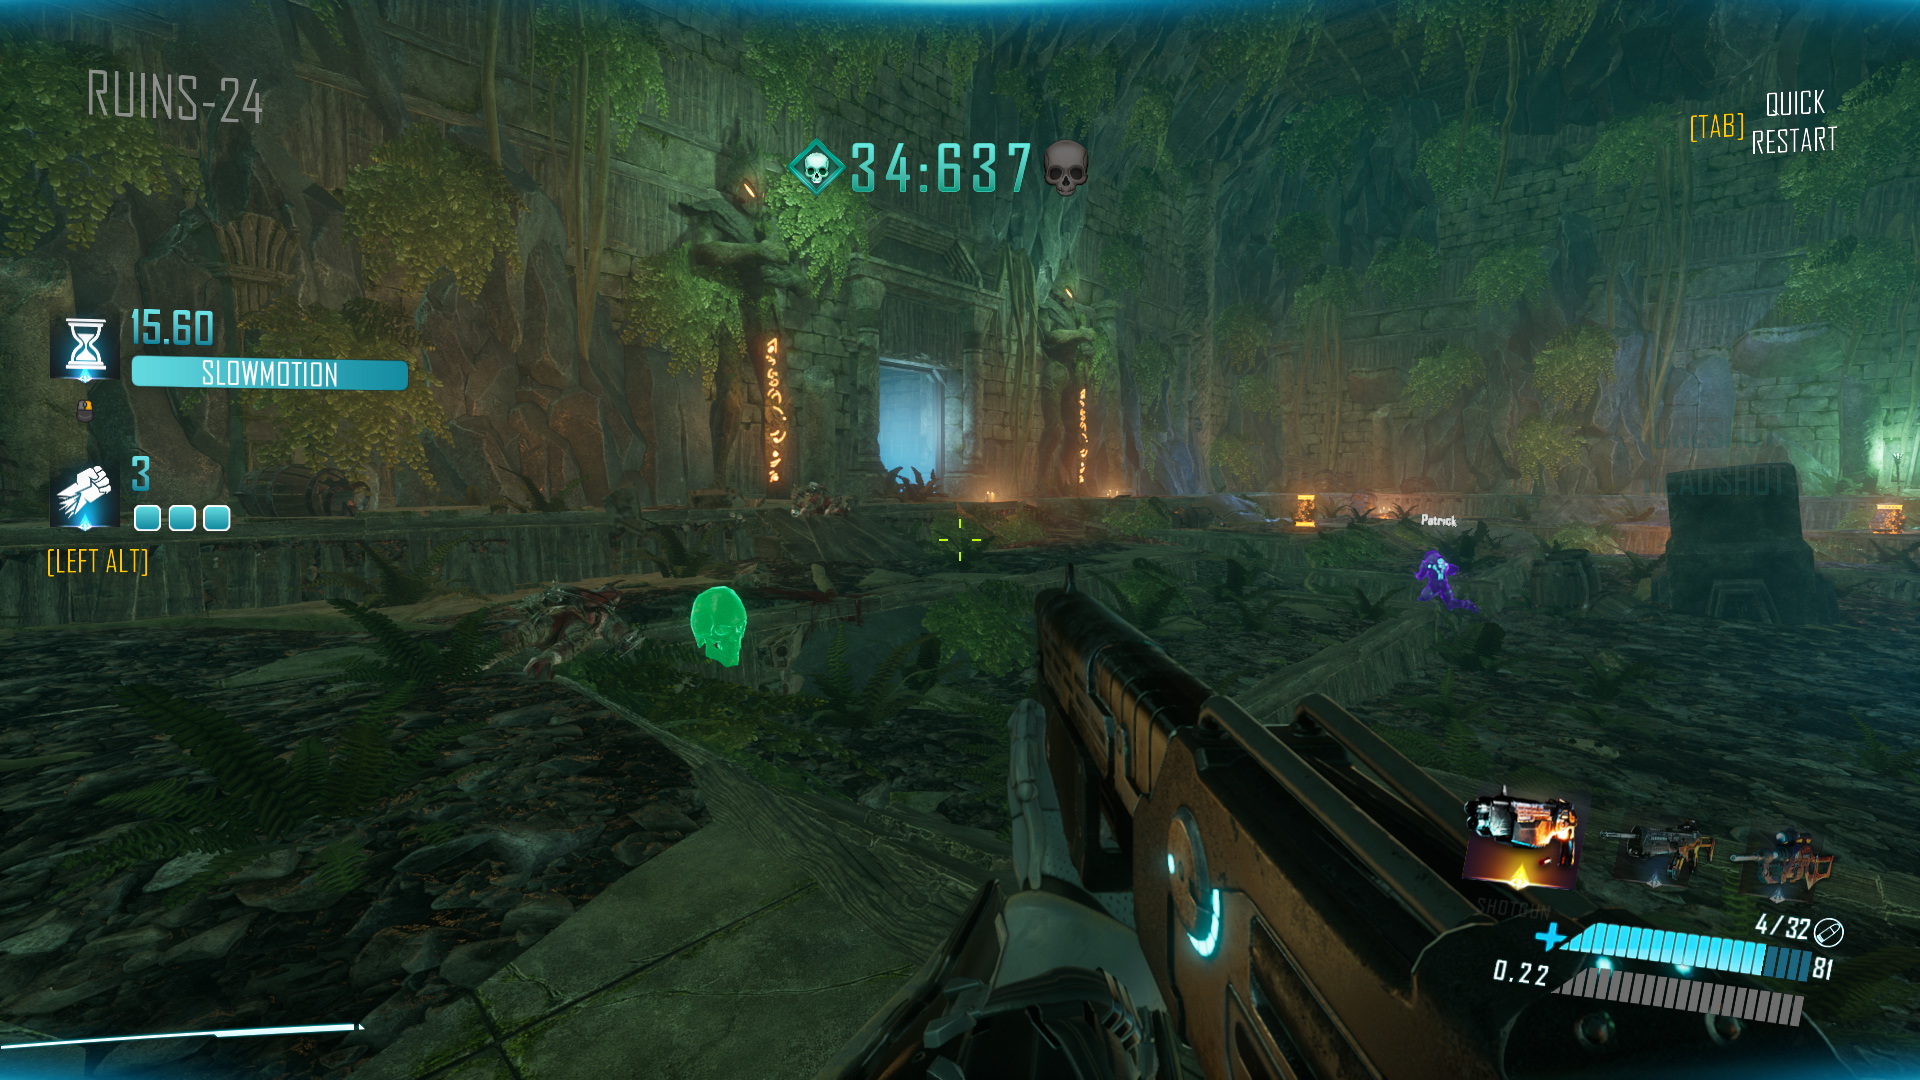
Ruins-24 Hardcore: Shoot a button at the top of the only surviving column to reveal the skull behind it.

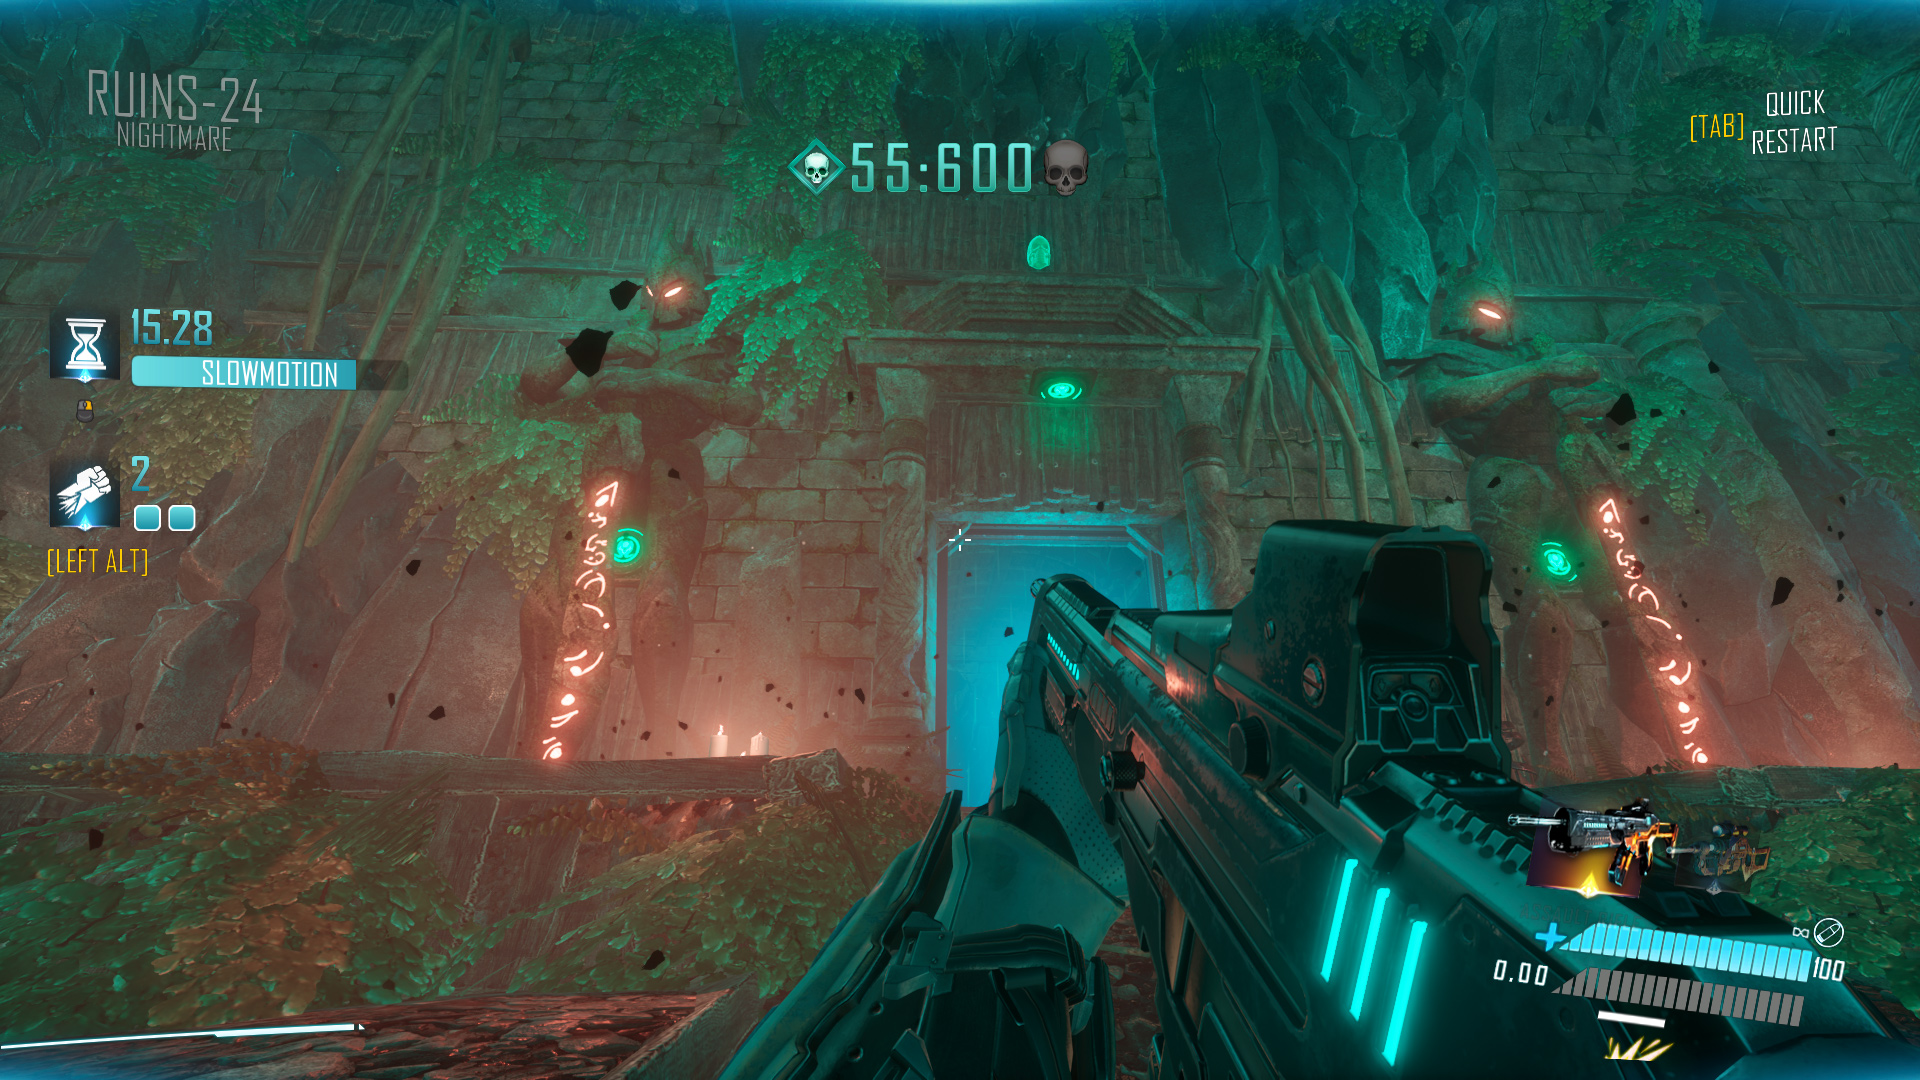
Ruins-24 Nightmare: Shoot the three buttons around the gate guarded by the yellow statues to reveal the skull above.
Forge-25
Forge-25 Normal: In a tunnel on your left, just after all the flame traps but before you drop down.

Forge-25 Hard: Under the first slidepad.
Forge-25 Very Hard: Near the end of the level, in the lava pit room. Look behind where you came from to see the skull hanging above.

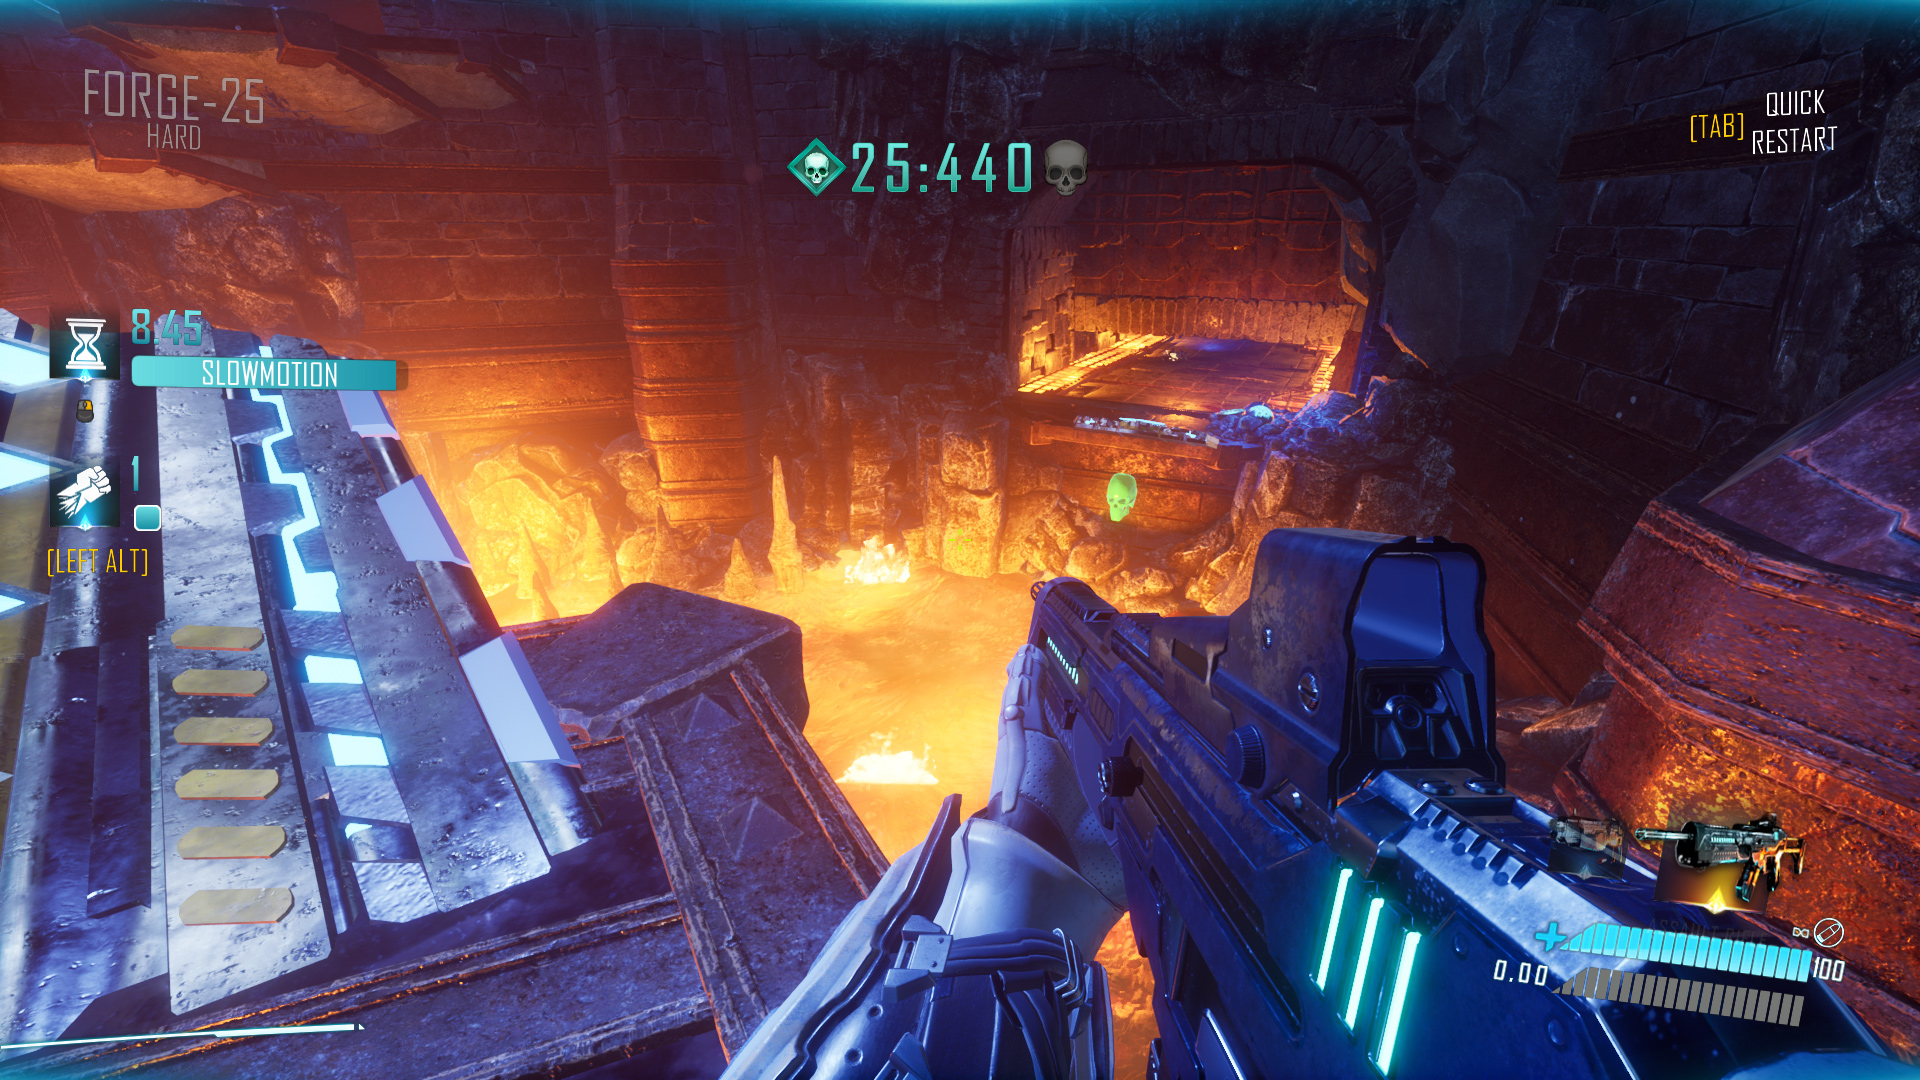
Forge-25 Hardcore: As you reach the third lever, look for a lava pool with a short pillar behind it. The skull is hidden behind that pillar in the lava.

Forge-25 Nightmare: First, activate a lever, then two buttons. After doing that, as you turn back, the skull is visible on the right side of the cave.

Forge-26
Forge-26 Normal: Right at the start of the level, after defeating one enemy, the skull can be found at the lava, somewhat behind the second enemy.

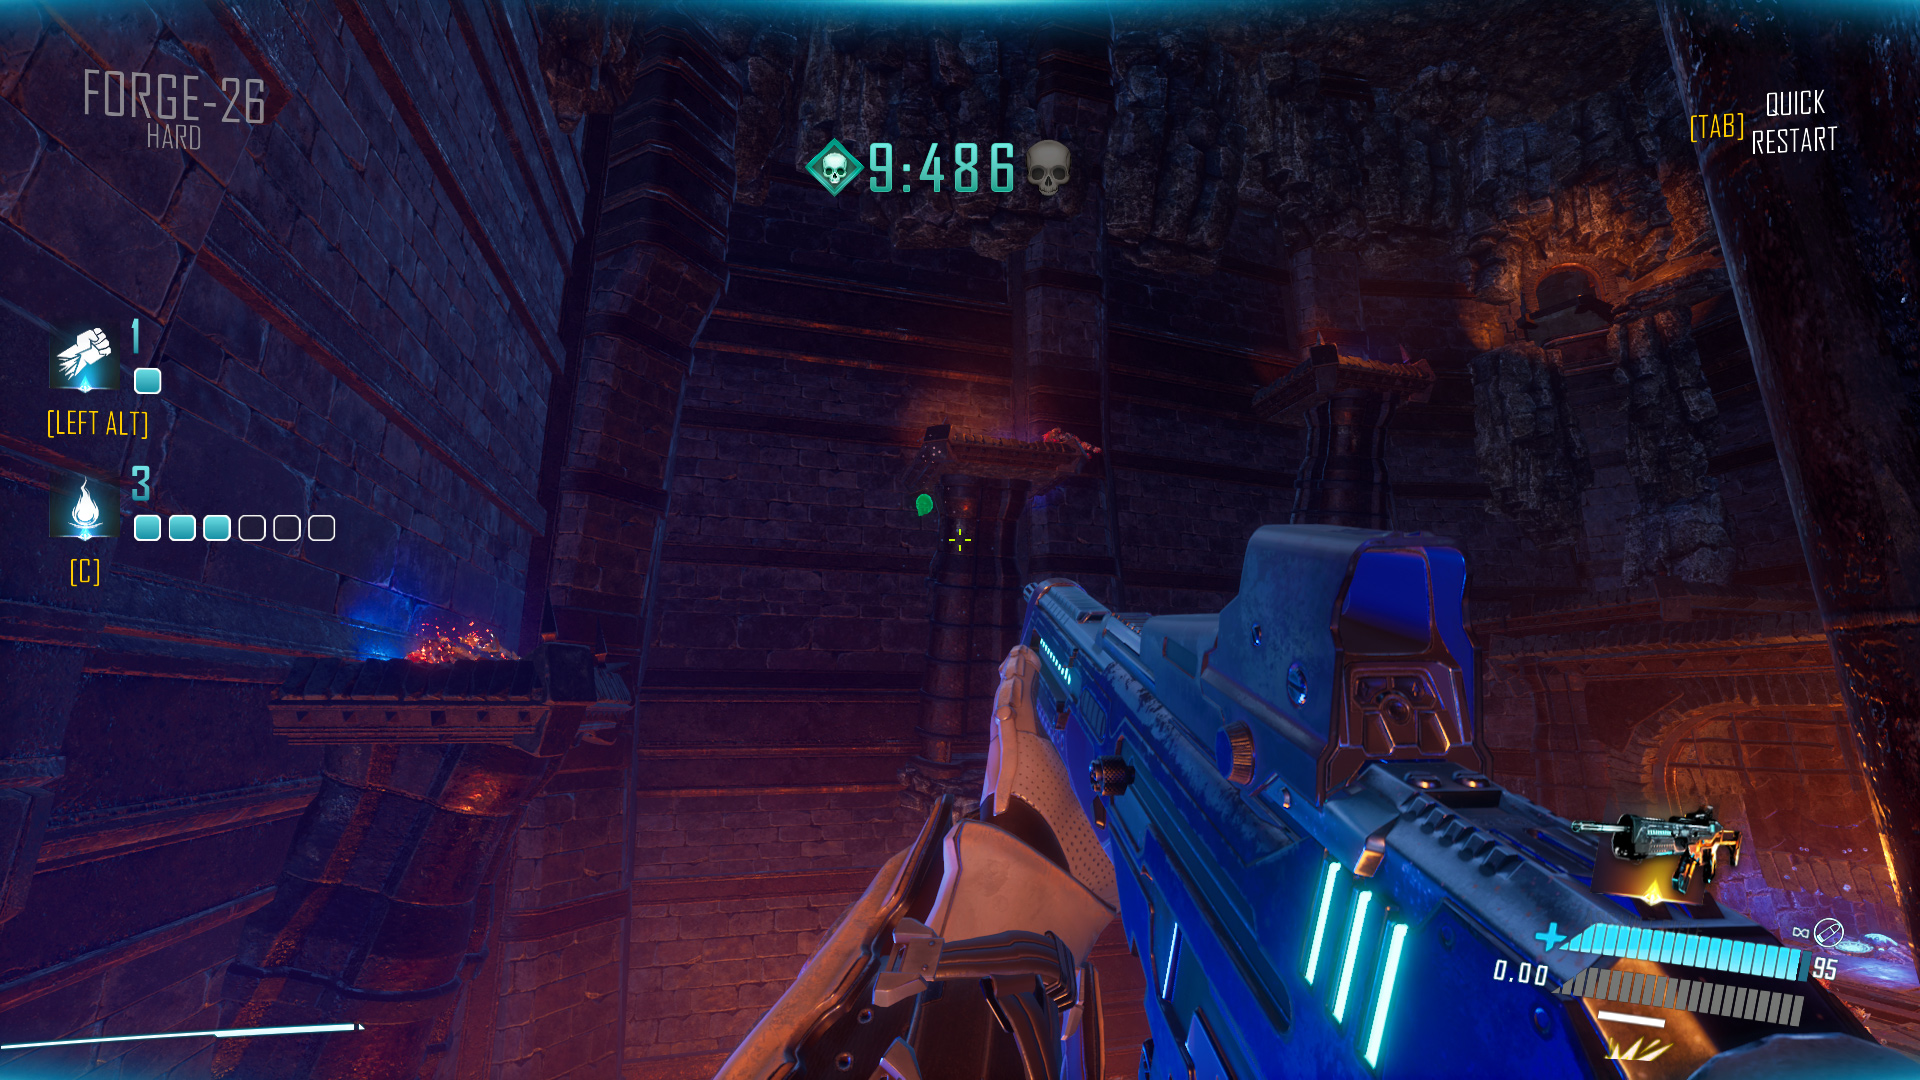
Forge-26 Hard: Under the second platform you jump down to. You’ll see it above after pulling the lever and turning back.
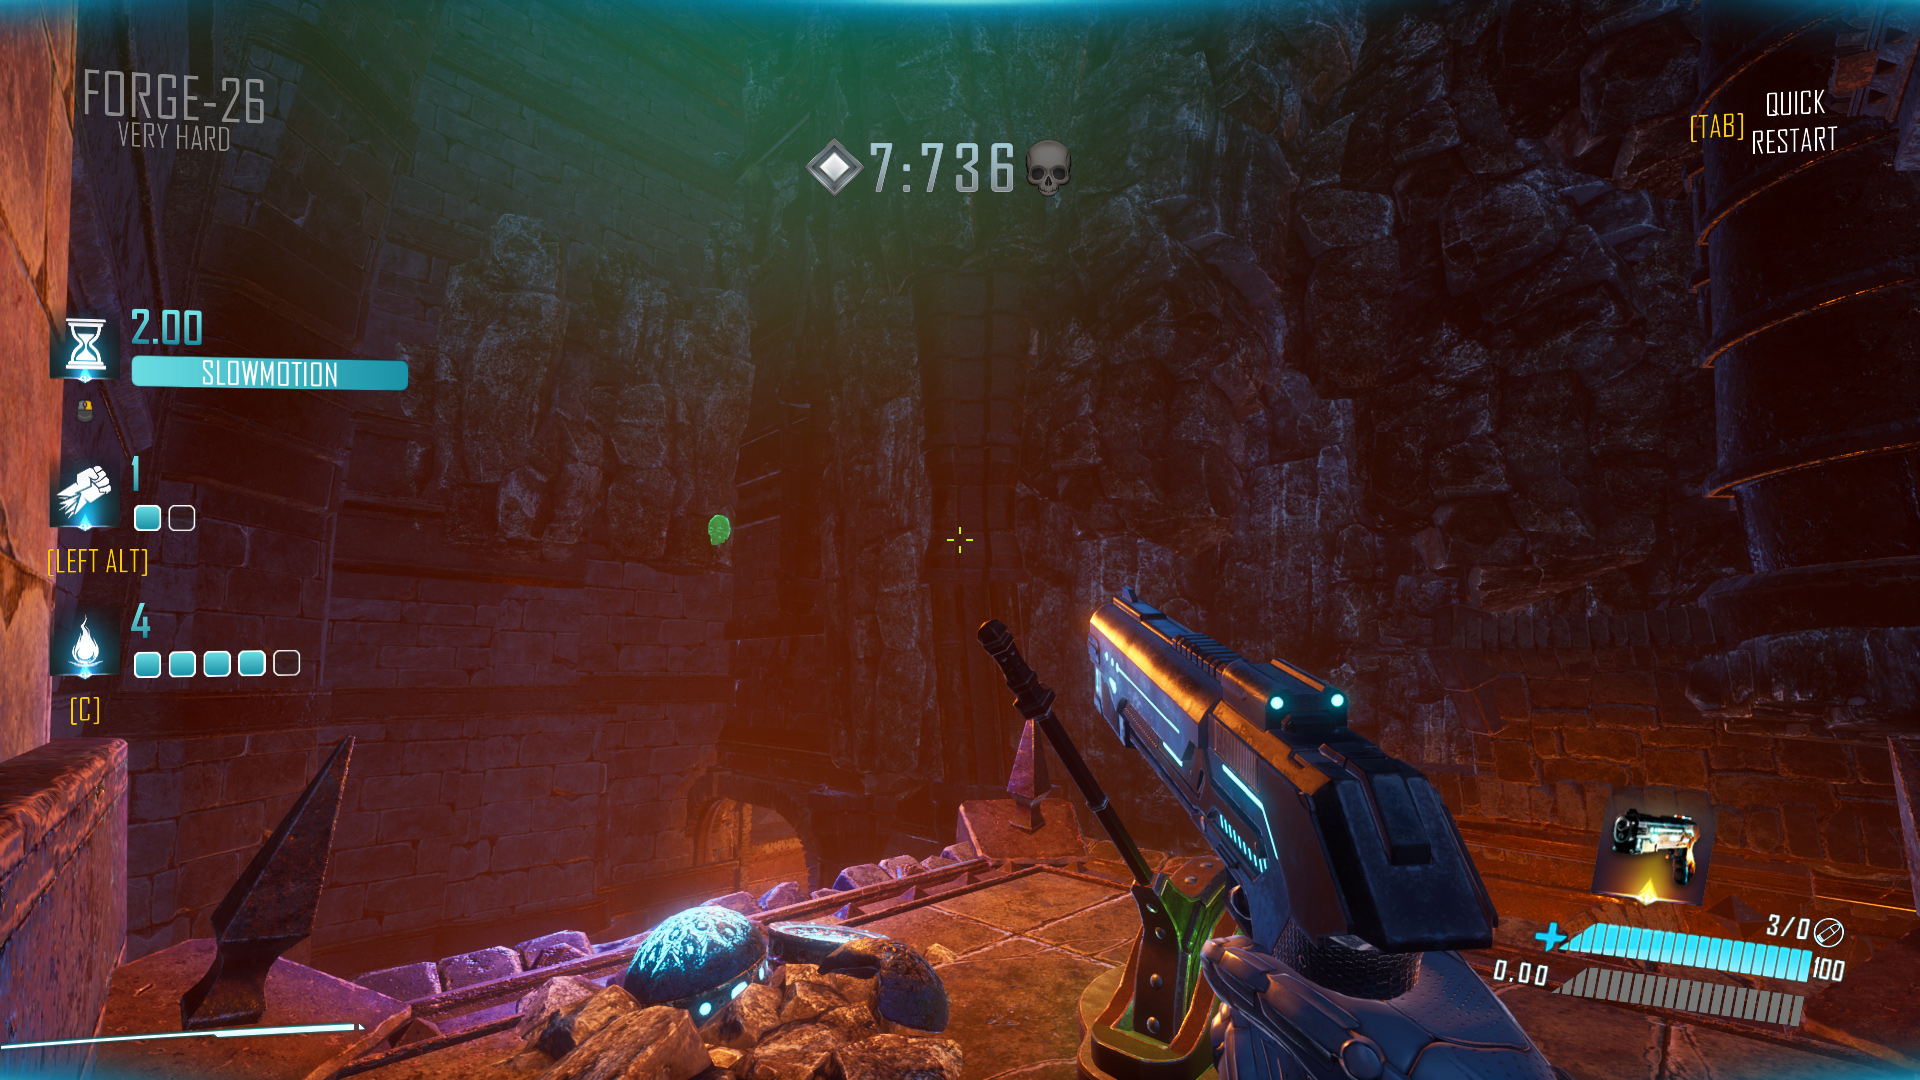
Forge-26 Very Hard: In the room with the second lever, check back where you came from after pulling it.
Forge-26 Hardcore: After reaching the second lever, activate it, and then look to your right as you use the grappling hook to reach the exit door. The skull can be spotted there.

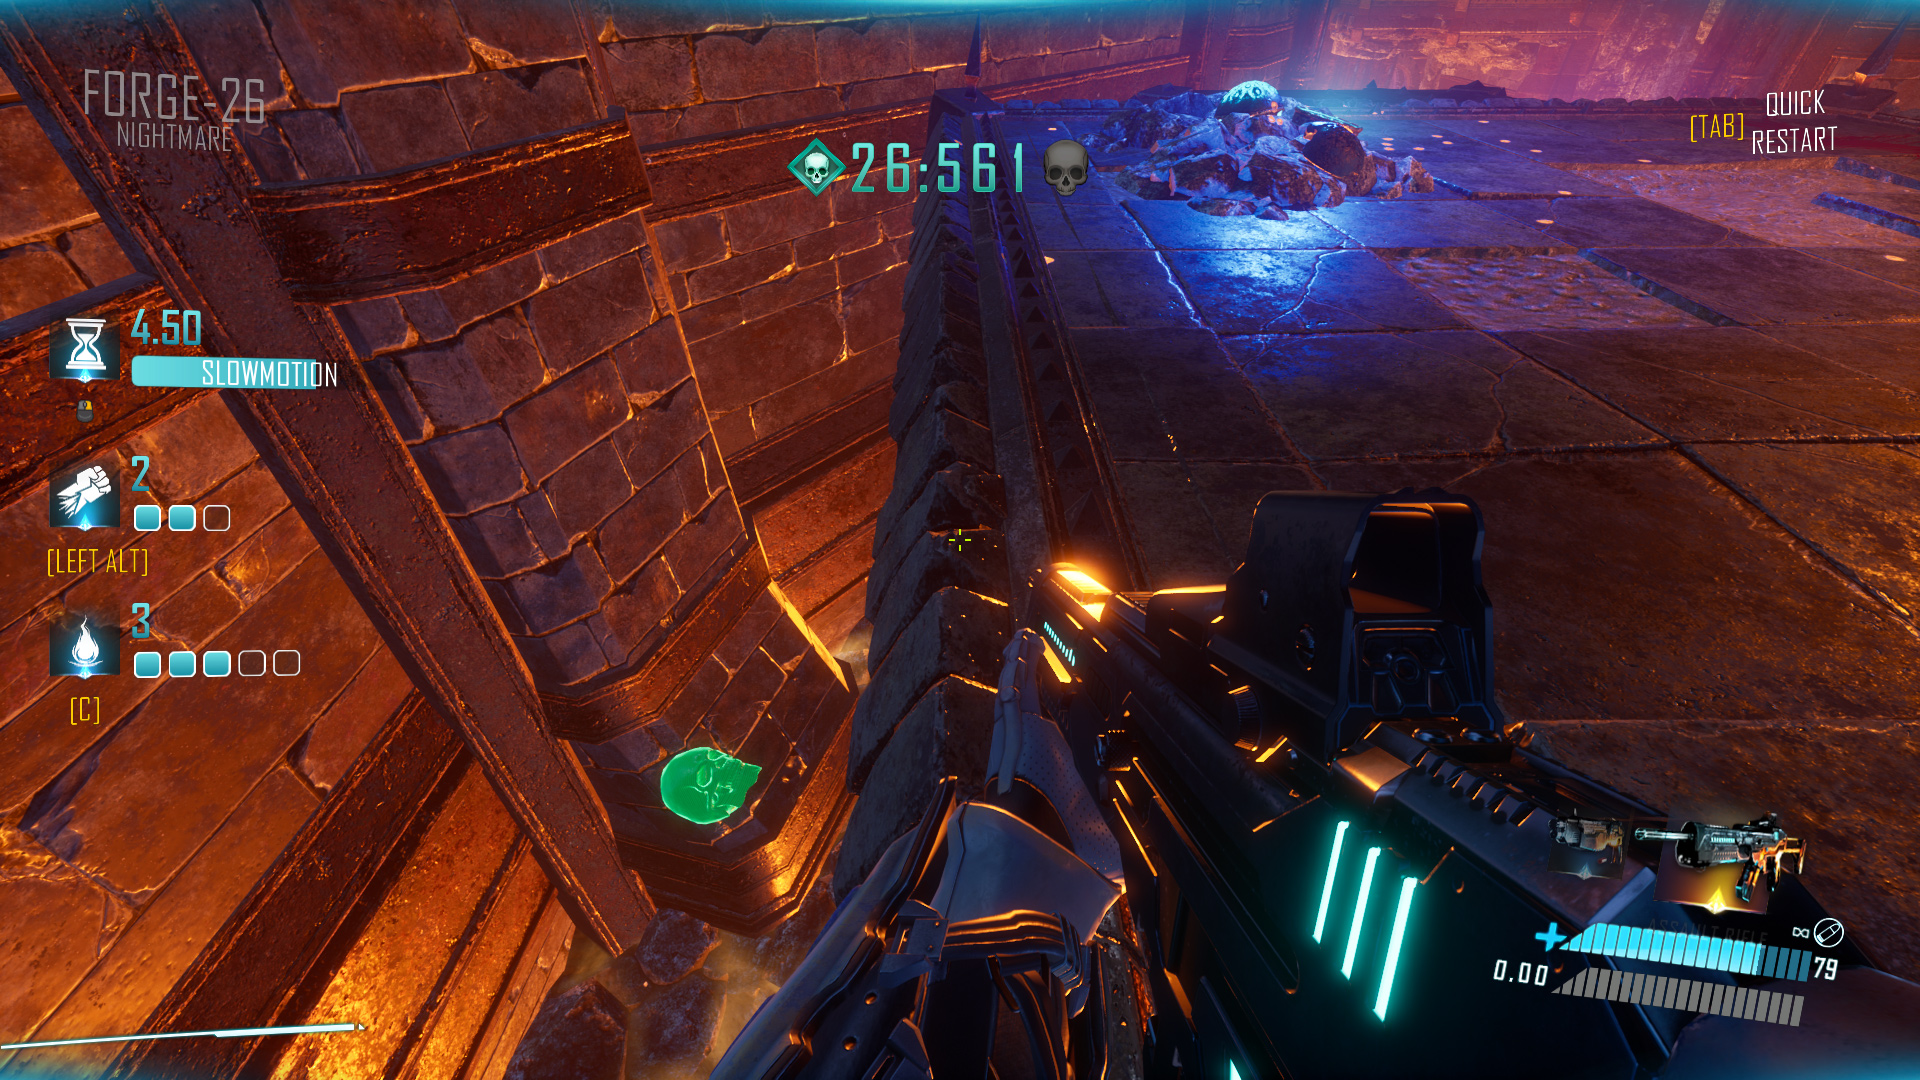
Forge-26 Nightmare: Activate the first lever and turn around. A lone enemy spawns on the intermediary platform on your left. Jump onto it and look down its edge on the left side to find the skull.
Forge-27
Forge-27 Normal: It’s just above and behind the second lever that you pull.
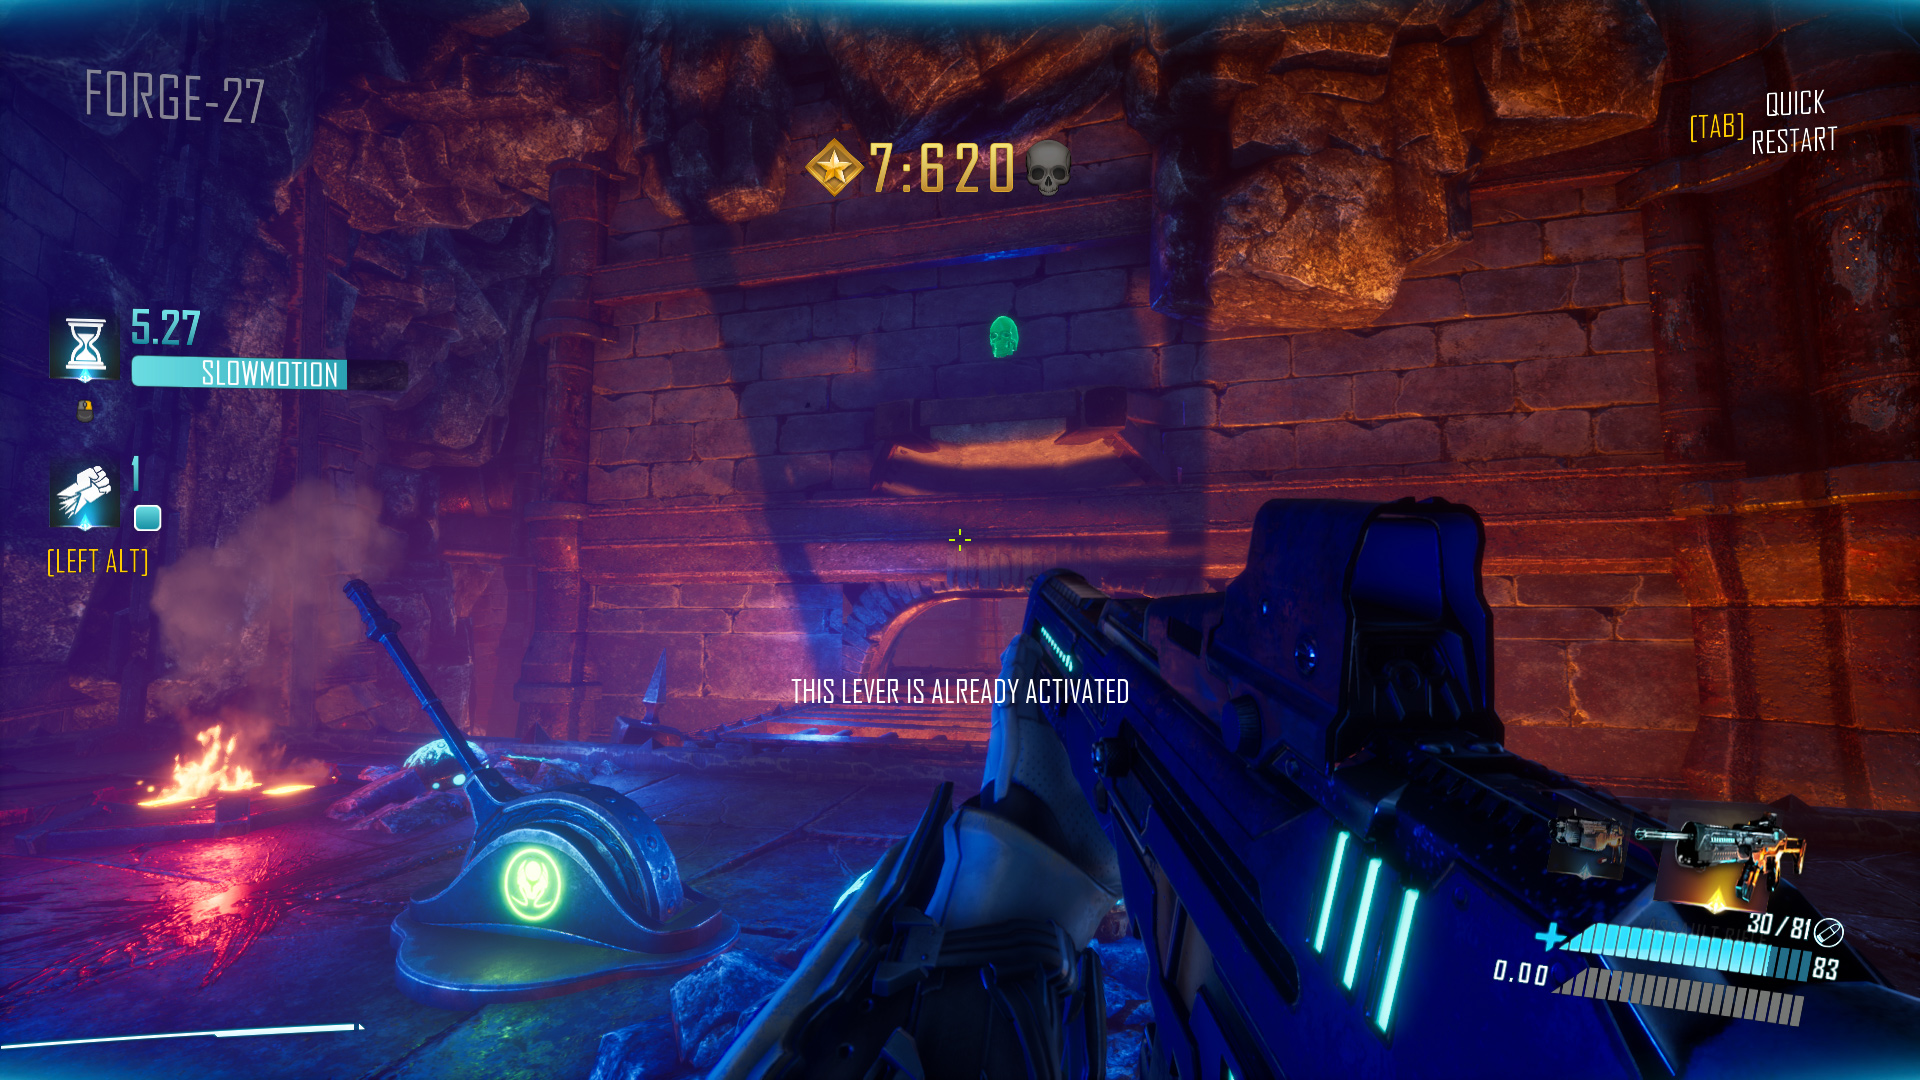
Forge-27 Hard: It’s located just to the right of the sniper rifle, tough to miss. You can shoot it from the previous platform before taking the slidepad to avoid switching weapons.
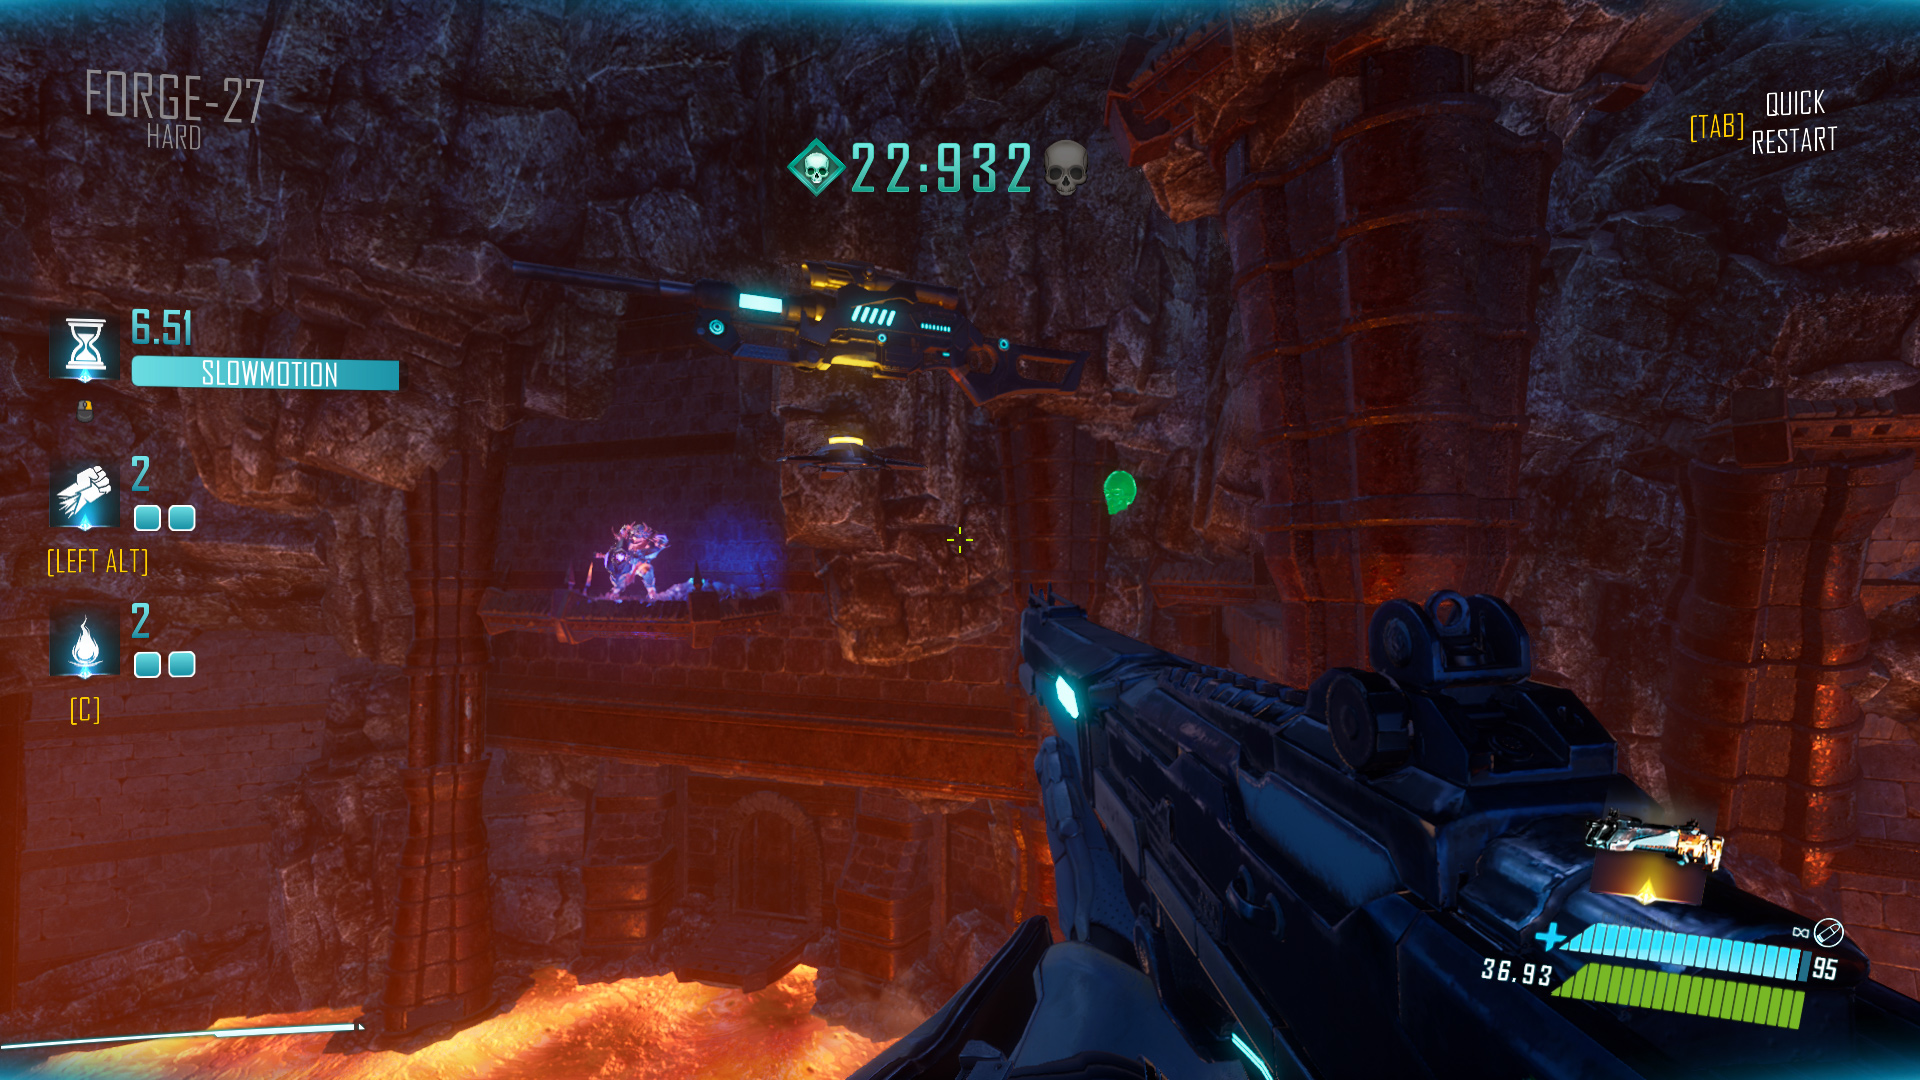
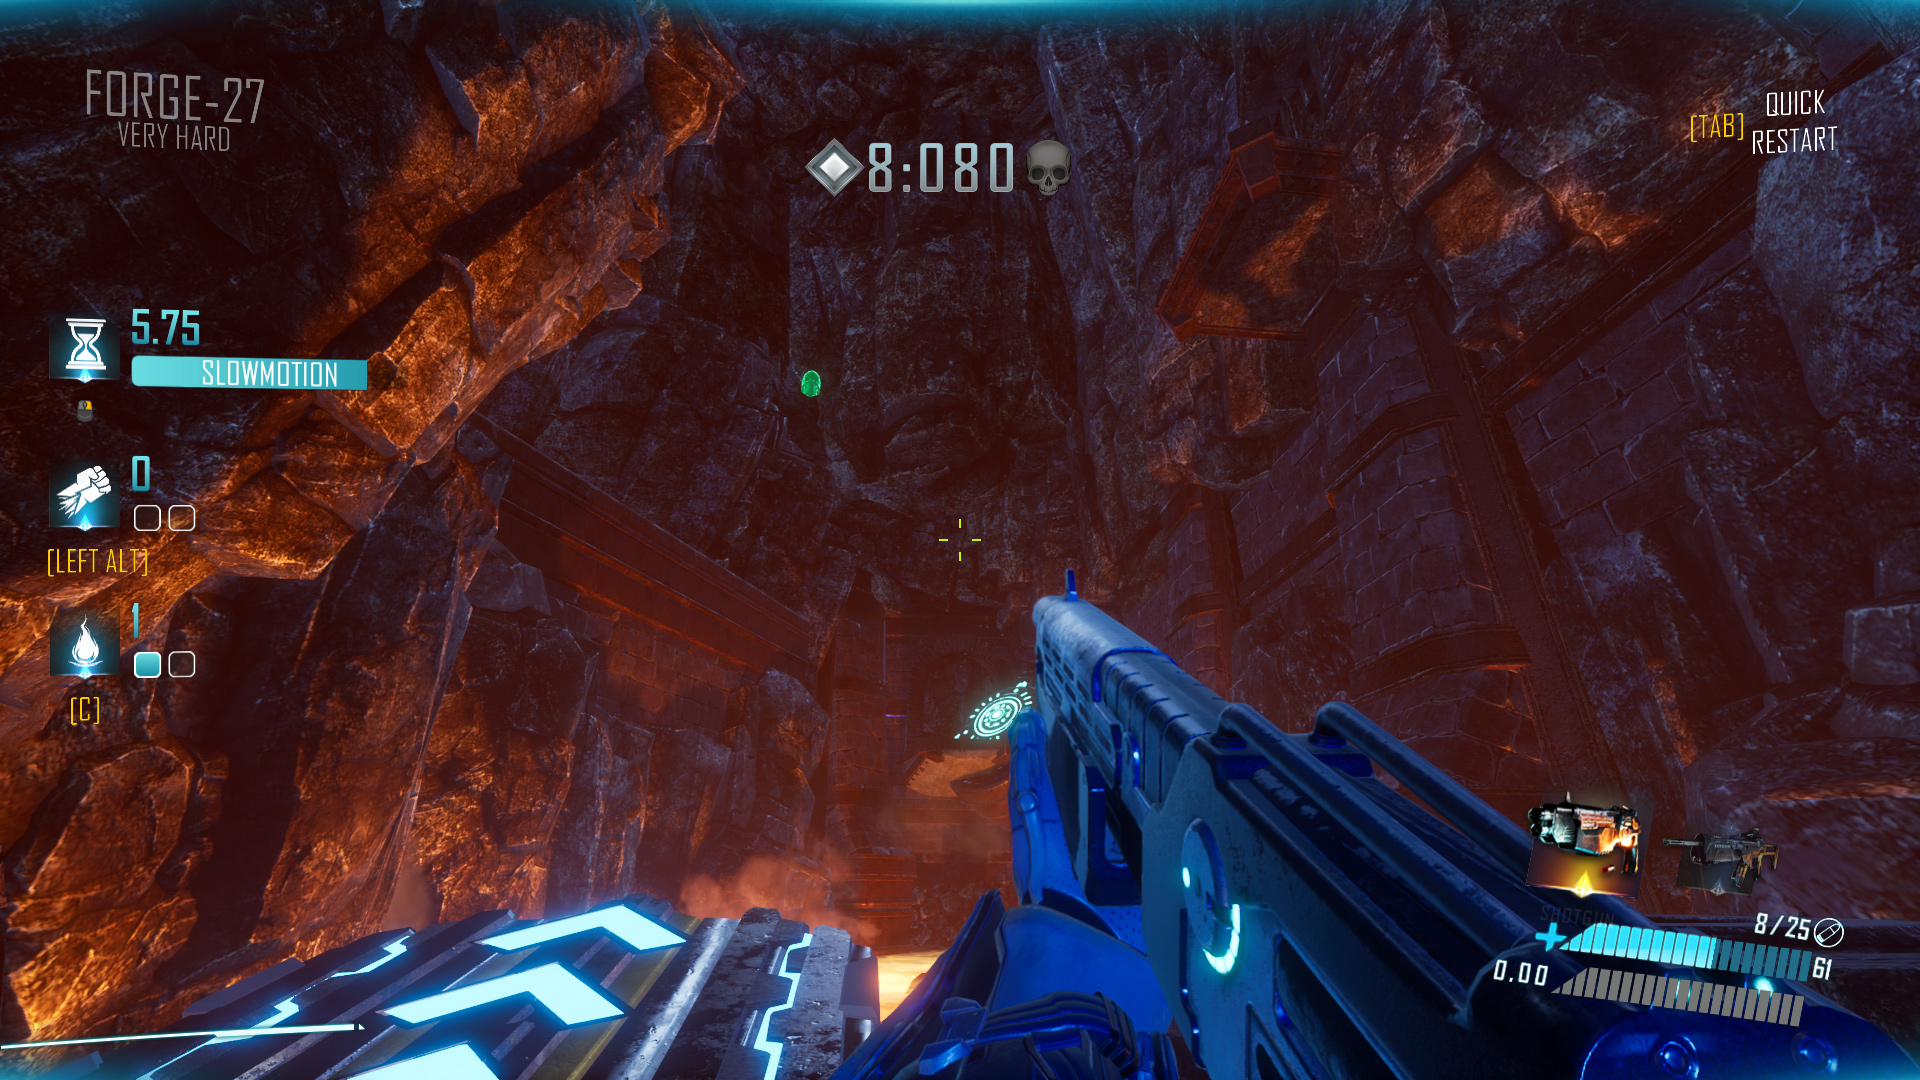
Forge-27 Very Hard: You can’t miss this one; it’s directly on your path, near the flying enemy that you fly into.
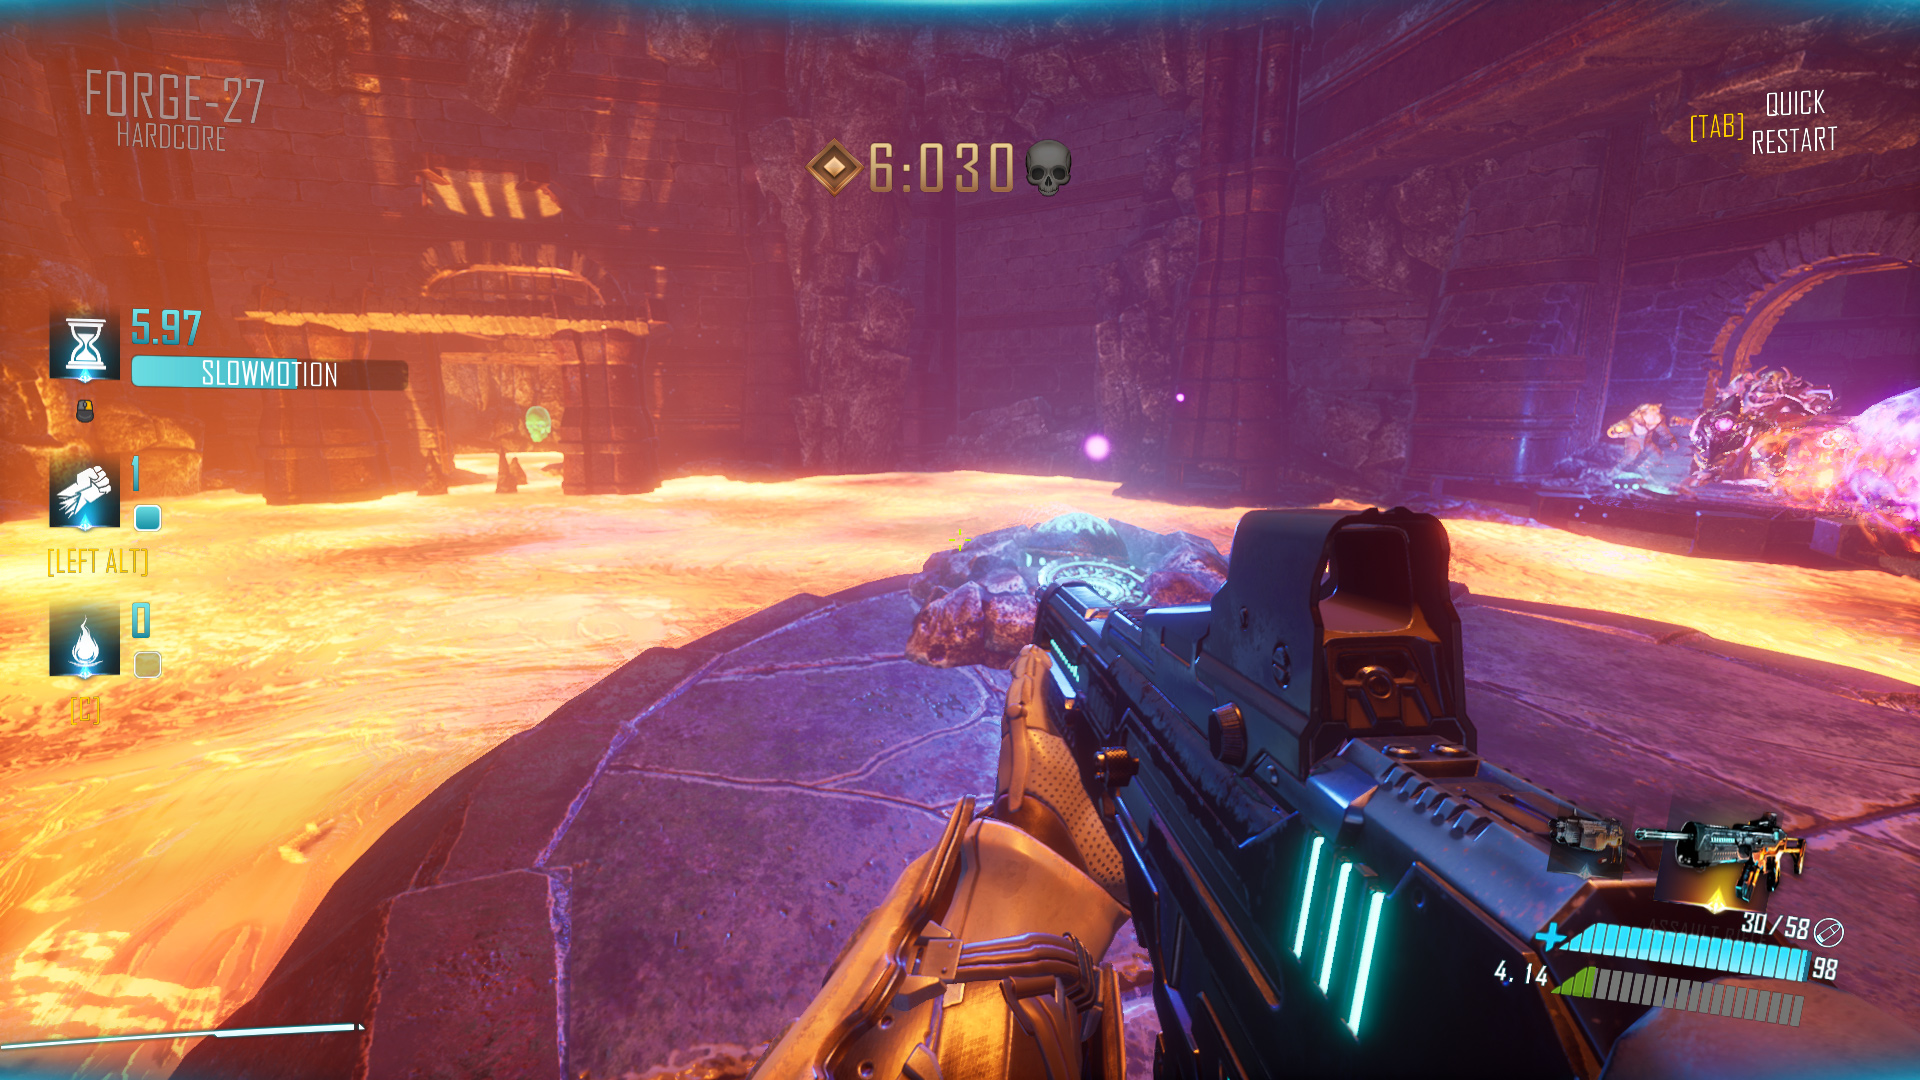
Forge-27 Hardcore: As you hop through lava towards the final third lever, the skull can be seen up ahead, close to the lava.
Forge-27 Nightmare: Almost at the very end of the level, as you take a slidepad that sends you into a bouncepad (past a flying enemy), head right to notice a rocky ledge with a distinct blue light in it. The skull is inside the cavern there.

Forge-28
Forge-28 Normal: Look up after using the grappling hook two times.

Forge-28 Hard: The skull is in a small crevice on the left of the second grappling hook block. Look behind you as you descend into the final long room.
Forge-28 Very Hard: Close to the exit, there is a hidden crevice on the right side, down at the lava. You can stand on the edges below without taking damage.

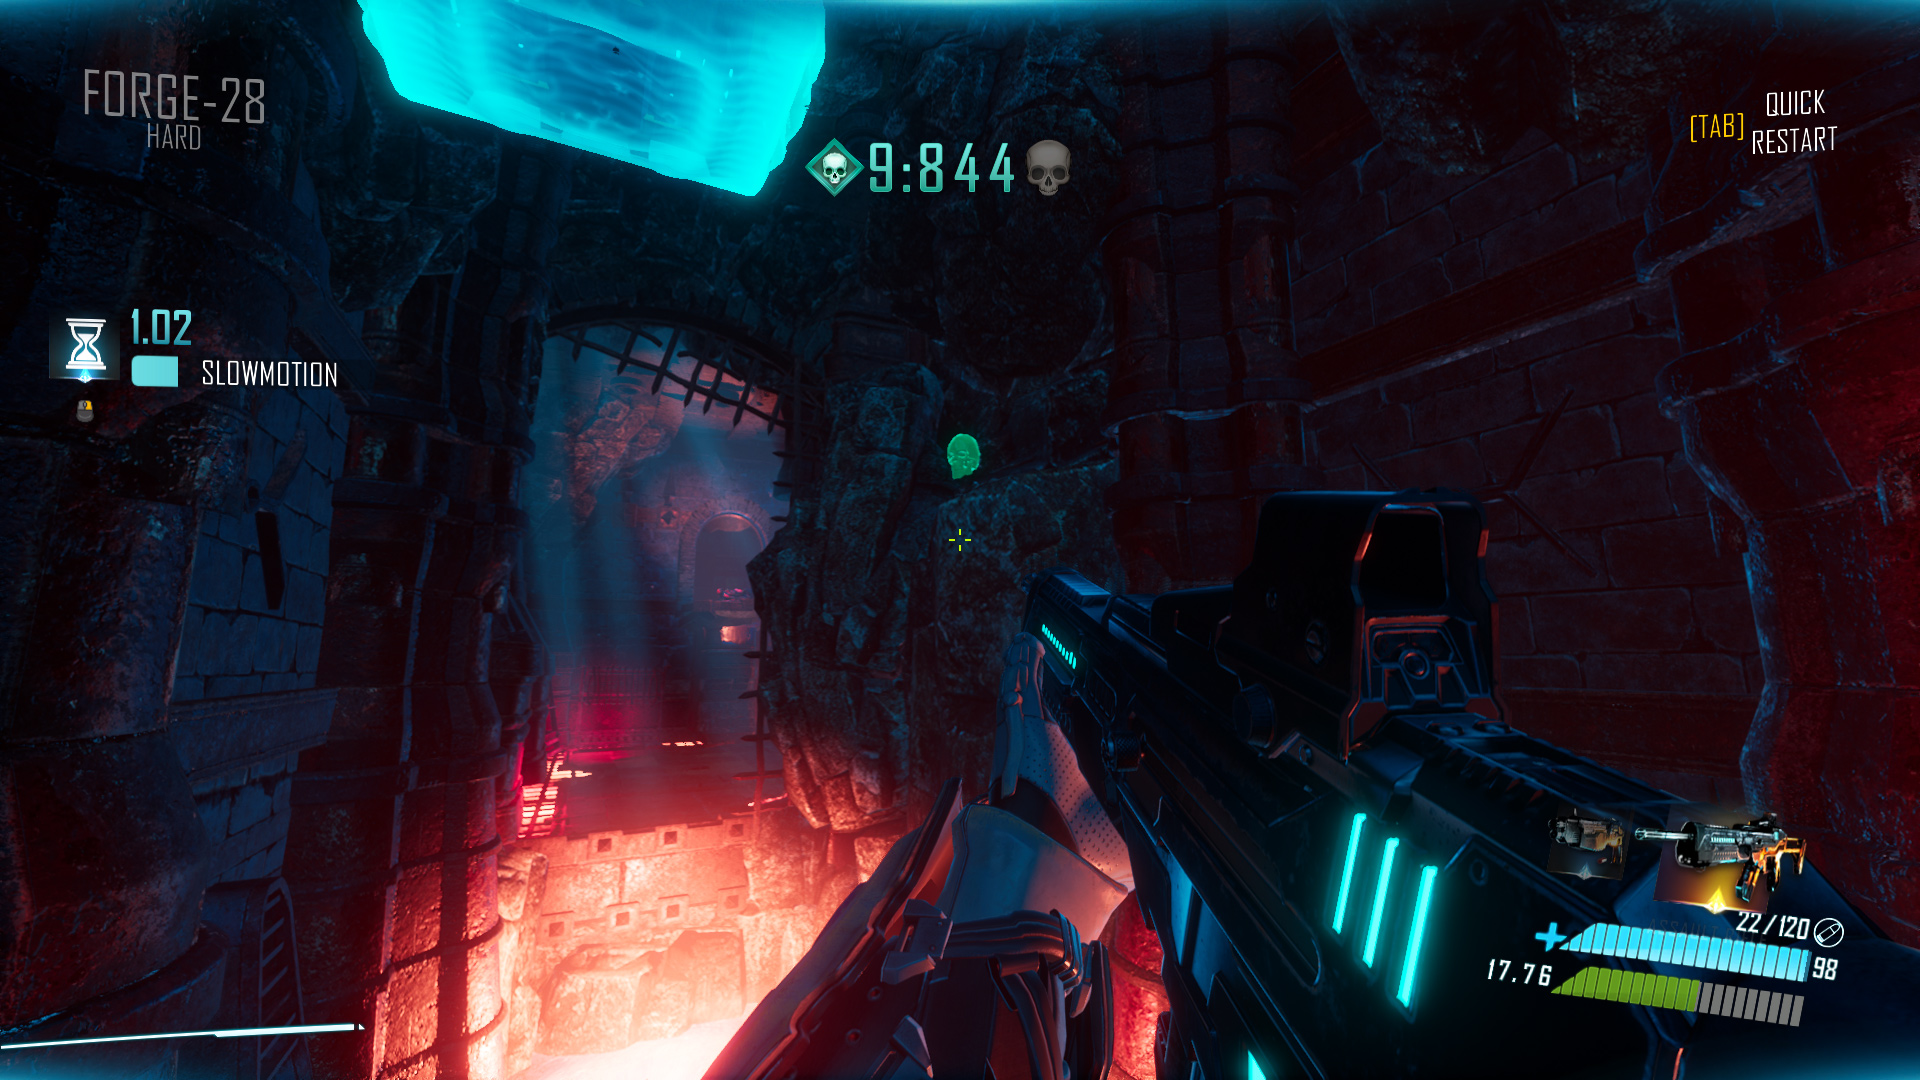
Forge-28 Hardcore: Just near the exit, there’s a small extra room on the left side with the skull at its entrance.

Forge-28 Nightmare: The two very first grappling hook blocks are located one above another. Hook up to the top and look left. There’s a small extra room with the skull inside it.

Forge-29
Forge-29 Normal: Can’t miss it; after taking the first bouncepad, look up and left for the skull above.
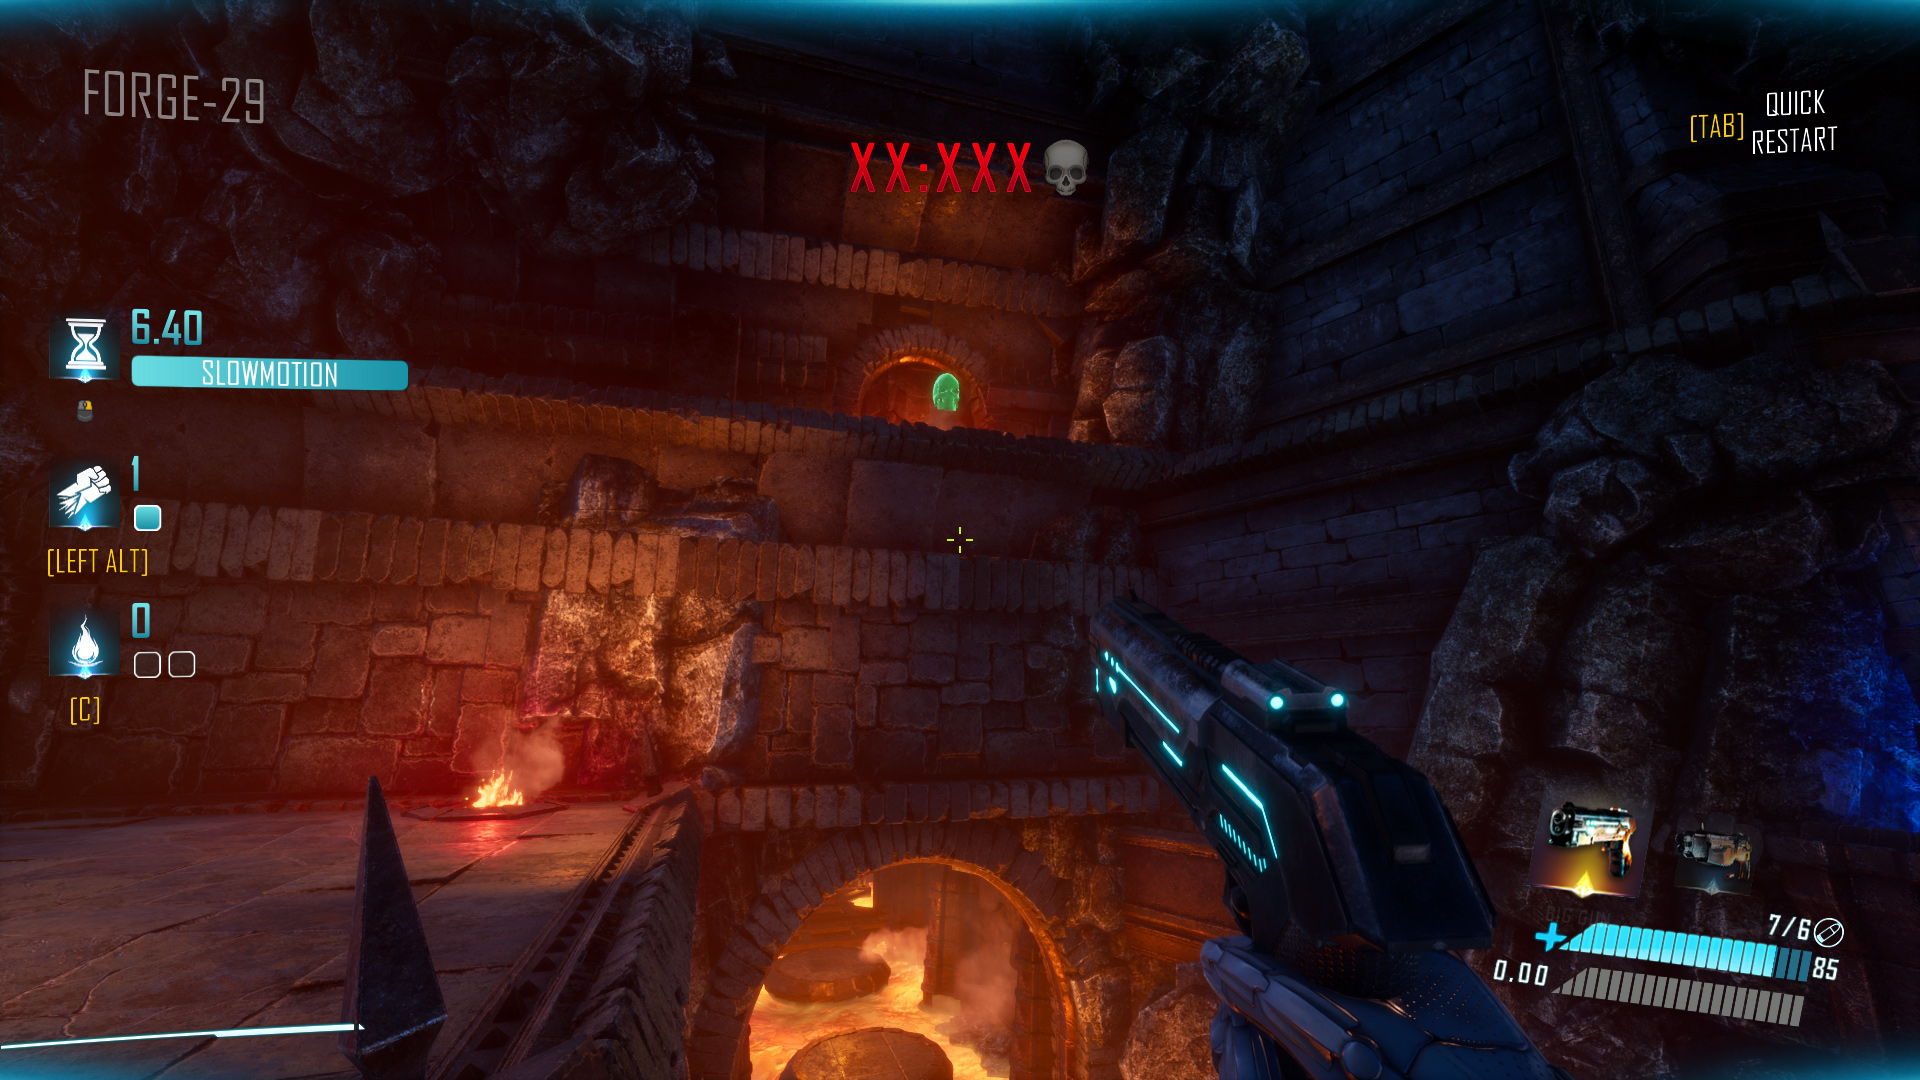
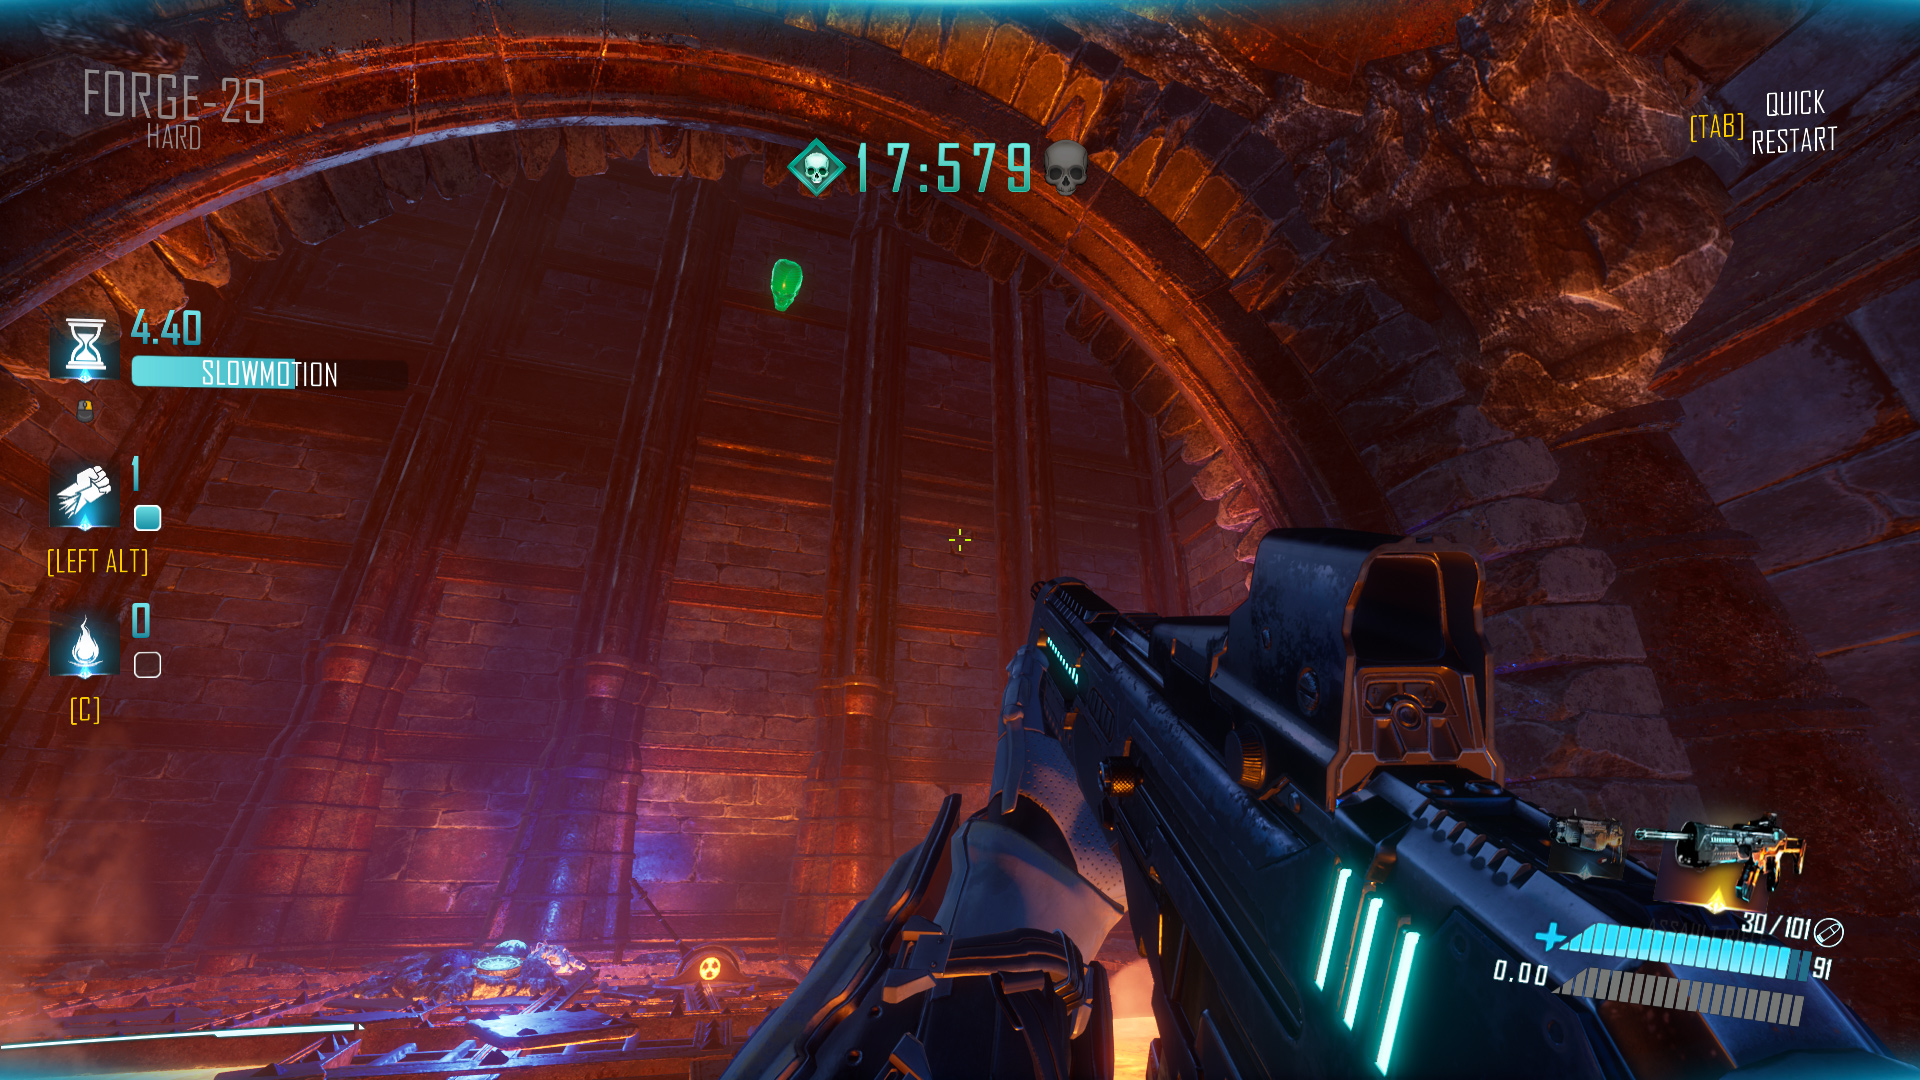
Forge-29 Hard: Mid-level, you shoot two buttons, then drop all the way down to pull a lever. The skull is hanging directly above that lever.
Forge-29 Very Hard: In the same room where you pull the first lever, there is a small pipe sticking out of a wall. The skull is hidden inside.

Forge-29 Hardcore: Towards the end of the level, you encounter a trio of backflip enemies. Deal with them and jump down to find a button under a ledge. It opens the door just above the button. Use the nearby bouncepad to get into that room and go all the way in to find the skull. This is a long detour, so the time limit can be challenging here.

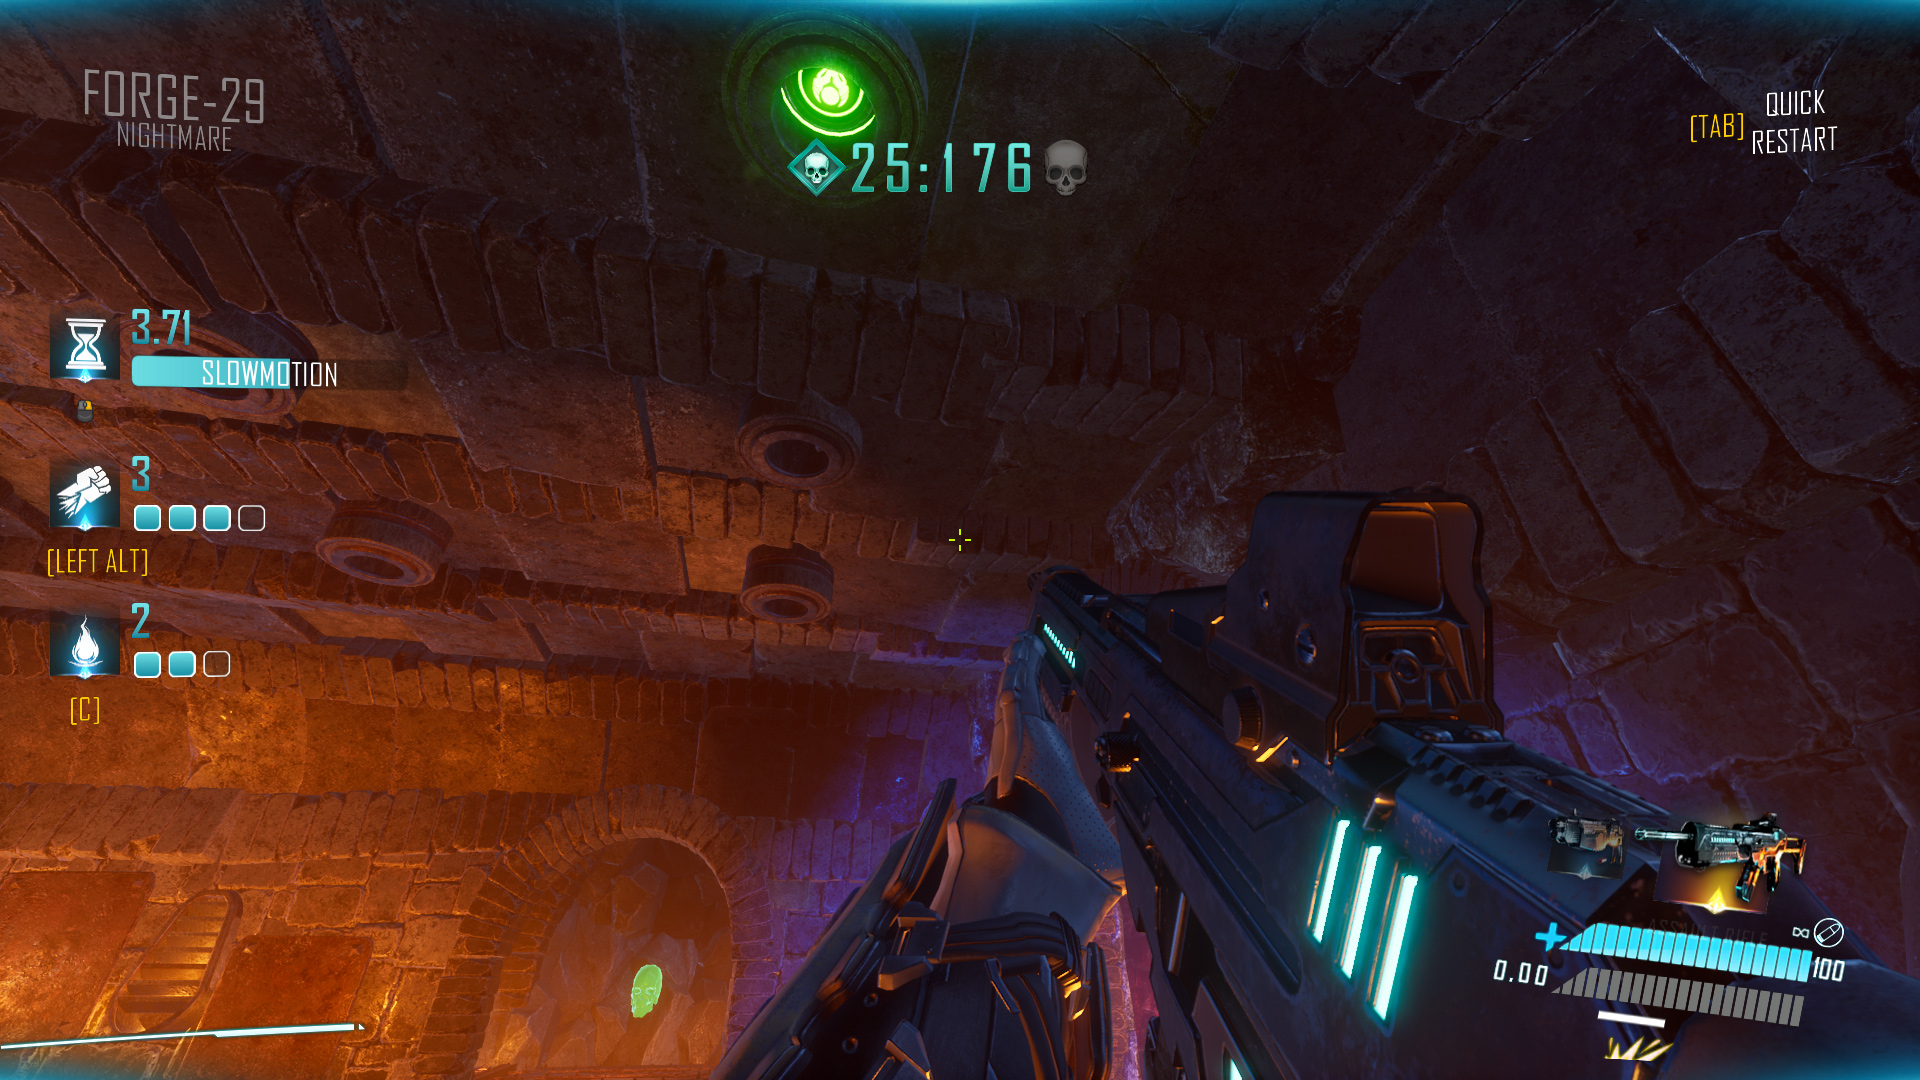
Forge-29 Nightmare: Upon picking up the rocket launcher and blasting away the two groups of enemies in the room, look for a hidden button in the ceiling of the same room. It reveals the skull nearby.
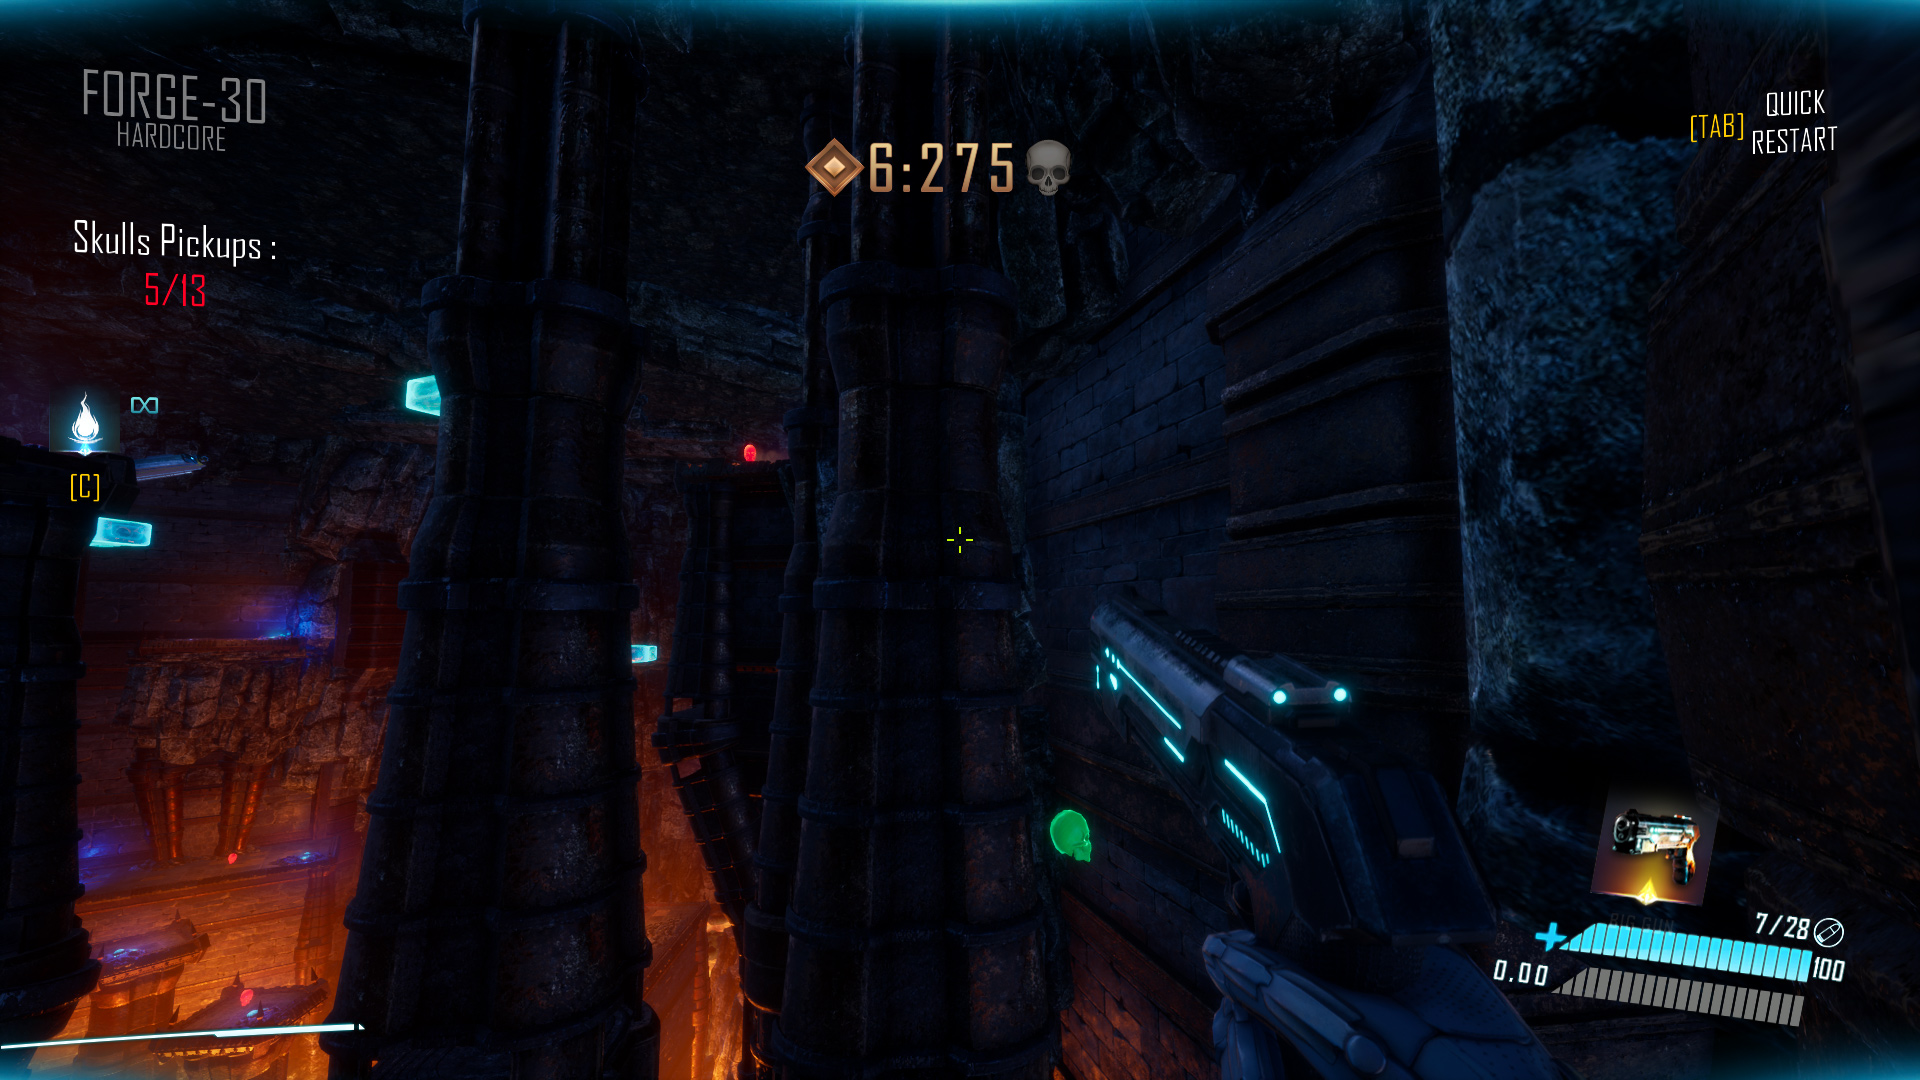
Forge-30
Forge-30 Normal: From the spawn, turn around and go back. See the platform below with a slidepad on it? You need to get to another small platform closest to that one. The skull pickup is hidden in a crevice in the wall there.

Forge-30 Hard: In the largest room, on one of the highest platforms, there is a large pink-fireball hulk guarding a platform with lots of skulls alone. The skull pickup is in a crevice behind him.

Forge-30 Very Hard: Follow Patrick’s route – right slidepad at the start, then right again. Eventually, you’ll reach a dark area with bouncepads that bump you back and forth very fast. The skull pickup is on the next platform, at the next bouncepad. It’s easy to spot. You have no bullets, but you can use the stomp ability to forcibly stop at this platform.

Forge-30 Hardcore: Let’s follow Patrick here. He collects 5 skulls first, then grapples upwards to collect the 6th on a tall pillar above. That’s where we have to go. From that skull, carefully jump onto the adjacent metal tube and walk around it towards the dark corner of the map. You’ll see the collectible soon enough, just below. You can also just dash into the dark corner, but getting out might be tricky.
Forge-30 Nightmare: Count with me! Upon getting to the 14th grappling hook block, jump down below it and turn around. You’ll see an obvious yellow button located on one of the pillars. Shoot it and proceed through the level; you’ll see the collectible dead ahead of you. Friendly reminder that you can shoot that skull, unlike all the others, to avoid wasting time trying to pick it up.

Forge-31
Forge-31 Normal: Near the start, look on your sharp left immediately after taking the slidepad.

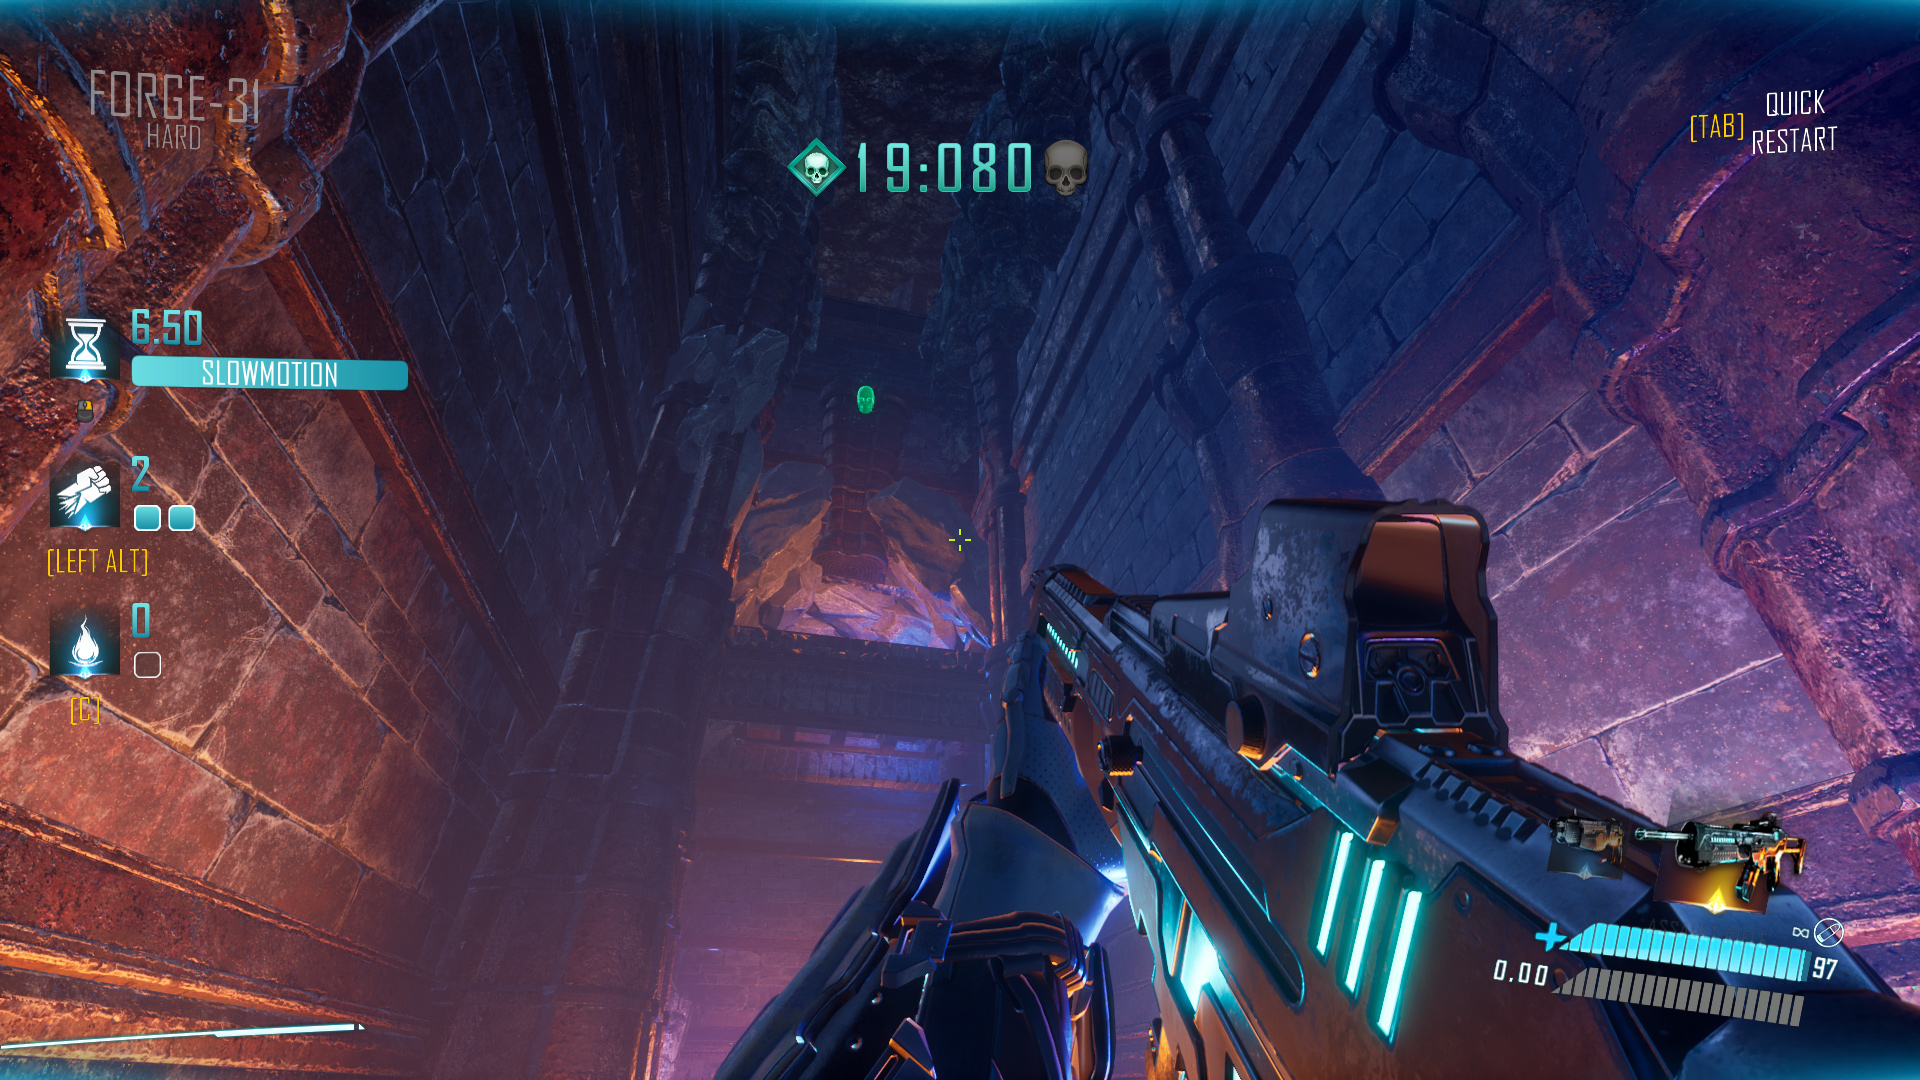
Forge-31 Hard: Mid-level, you jump down to stomp the enemies, then turn around 180 to slide into the next area. Look up after stomping to find the skull above you.
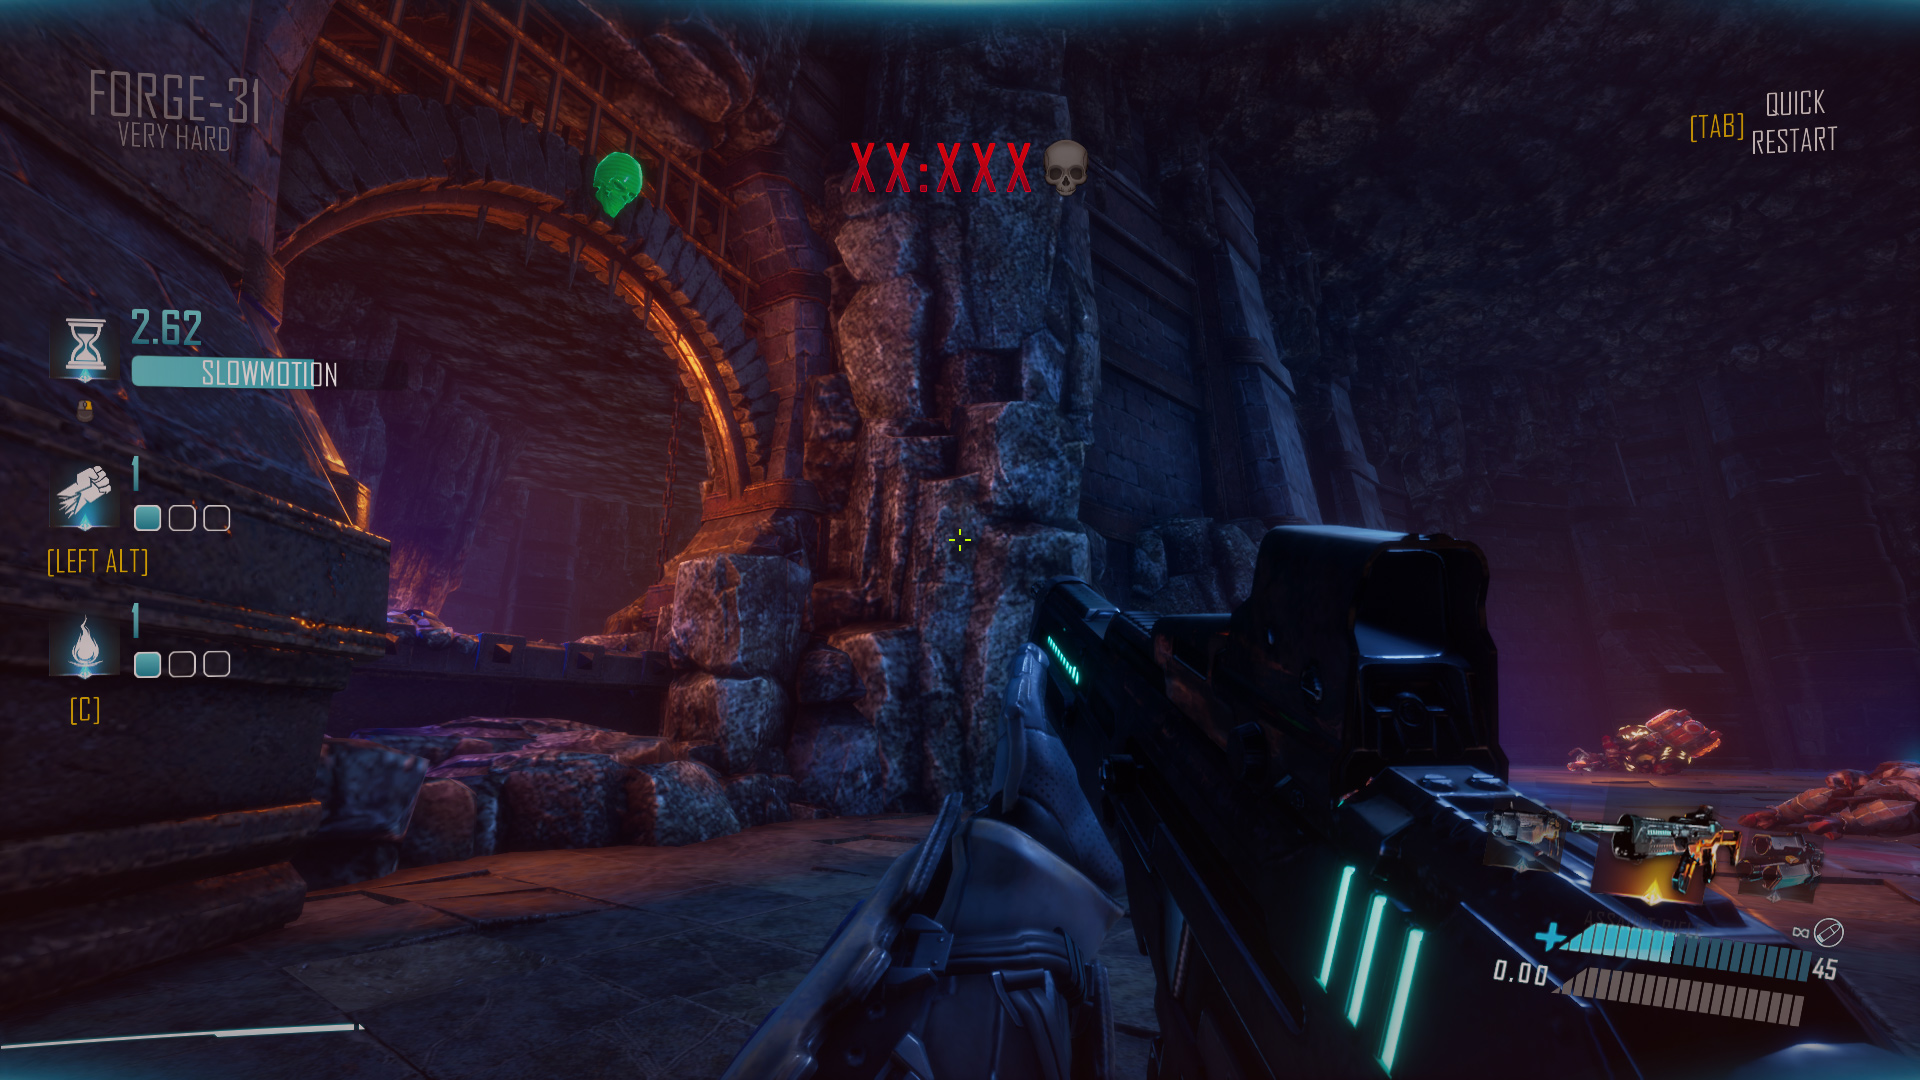
Forge-31 Very Hard: After you get a rocket launcher and unlock large circular gates, the skull can be seen directly above, past the aforementioned gates.
Forge-31 Hardcore: Navigate the level until you reach the part where you do a U-turn into a lava river that you hover across using two grappling hook blocks. Before hooking up to the first block, look all the way up to find the skull hanging near the ceiling.

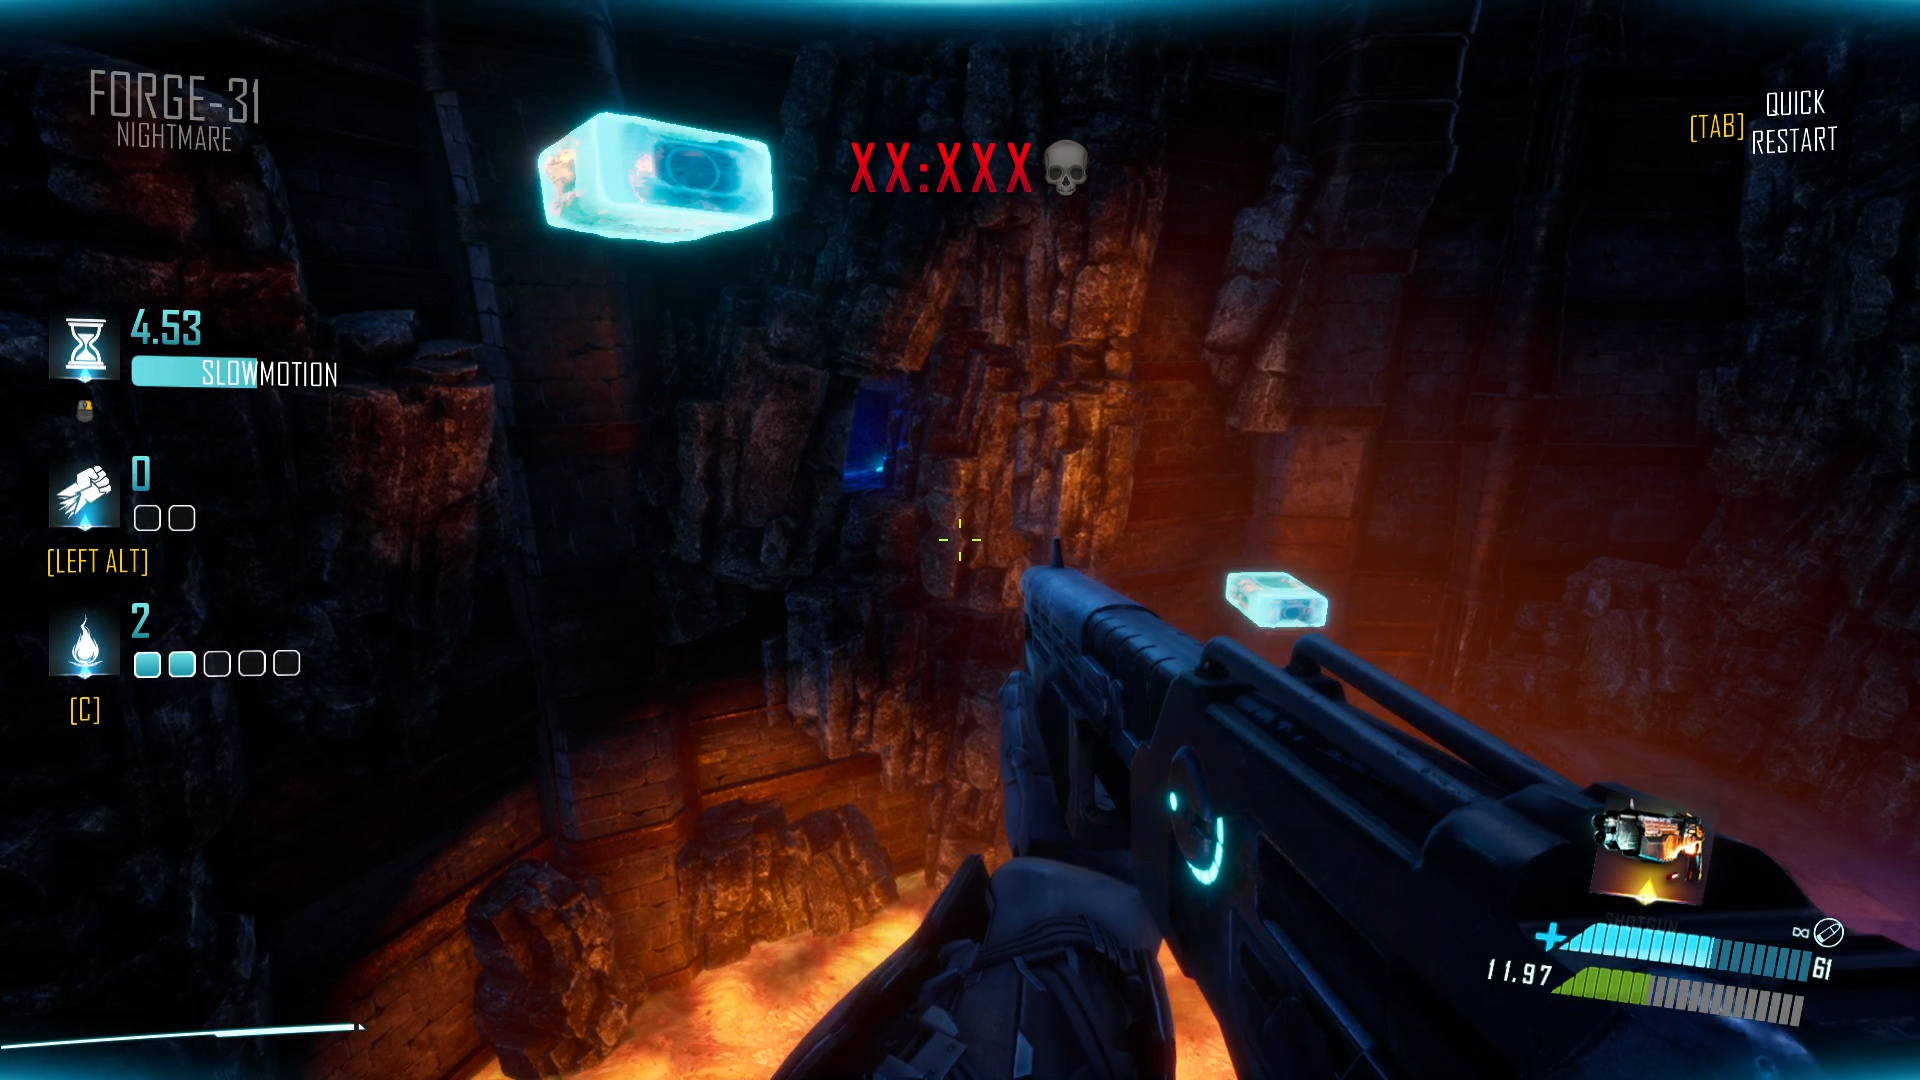
Forge-31 Nightmare: Mid-level, you pull the lever and soon after that, you proceed to climb up using the grappling hook blocks, following an upwards spiral of sorts. In this area, just after the first blue block, check the walls on the right to notice a small cave with a blue light in it. The skull is inside.
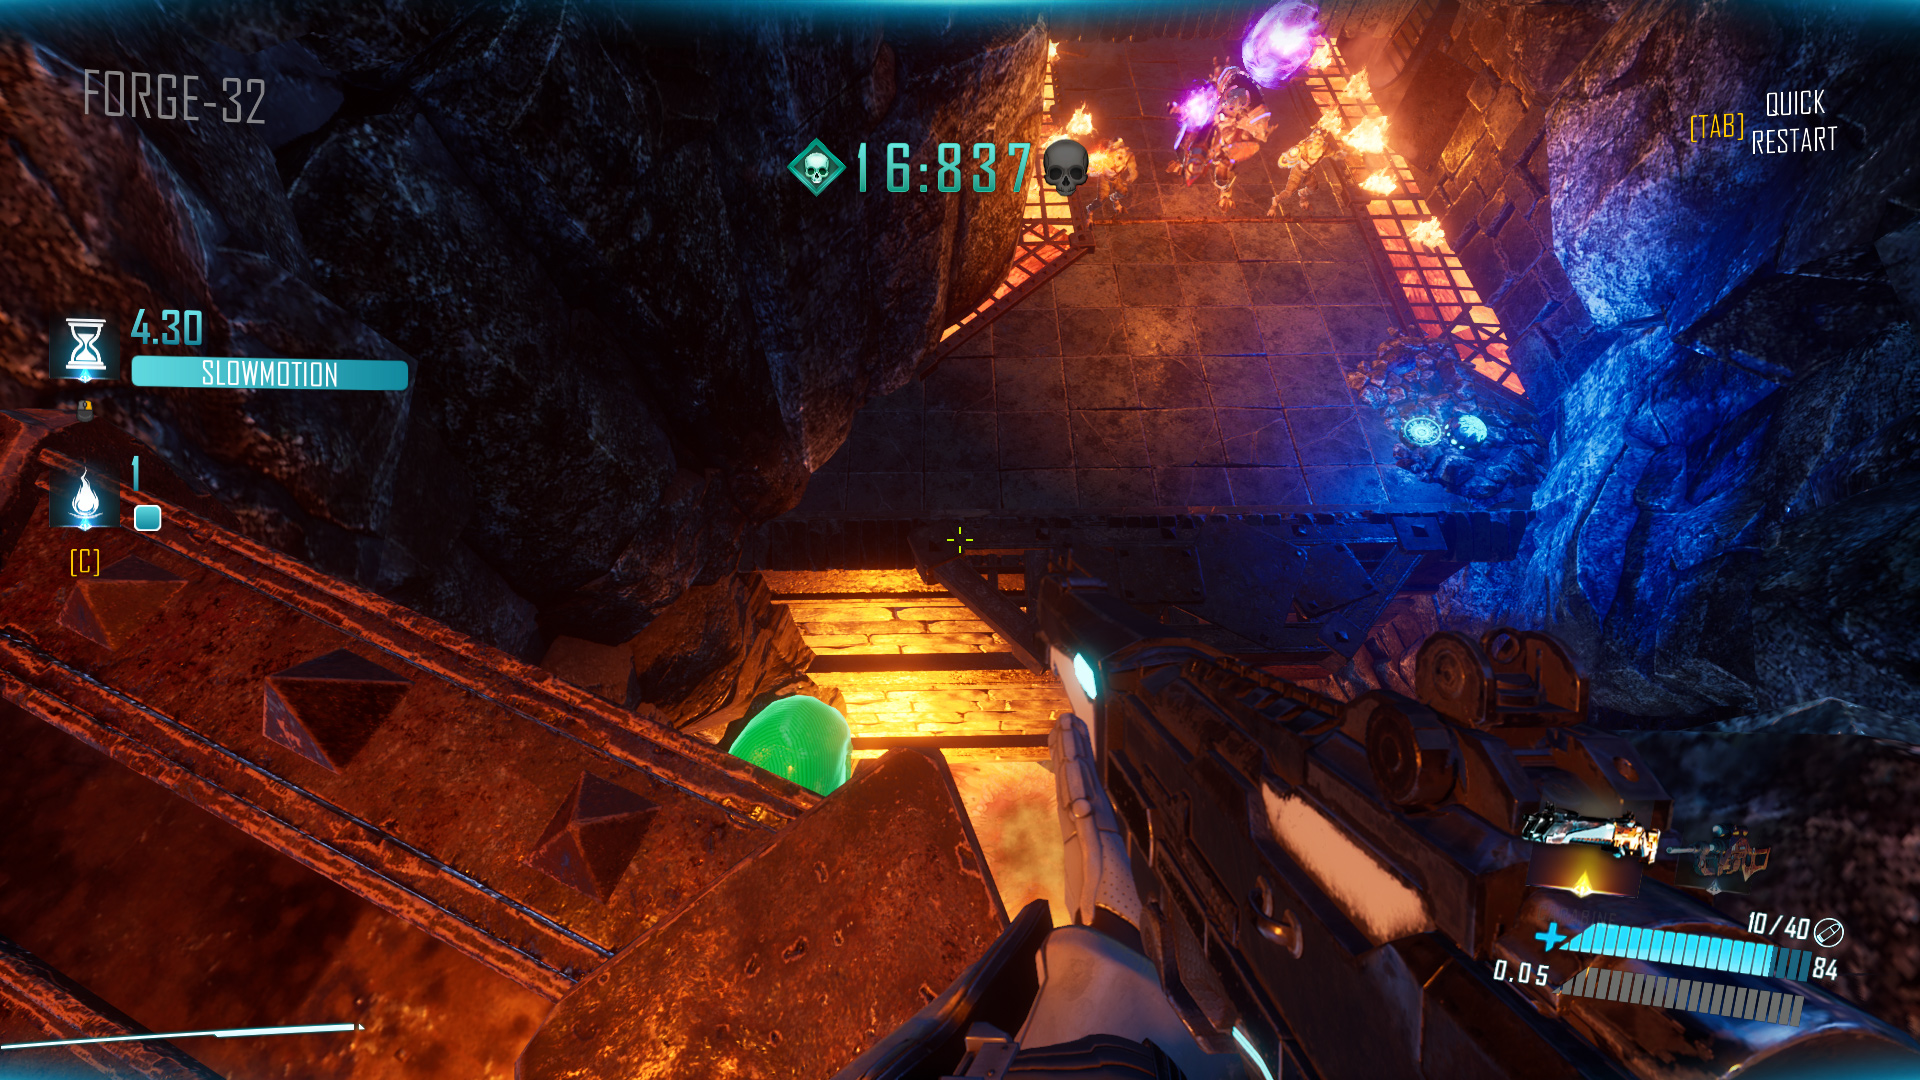
Forge-32
Forge-32 Normal: It’s directly under the starting platform.
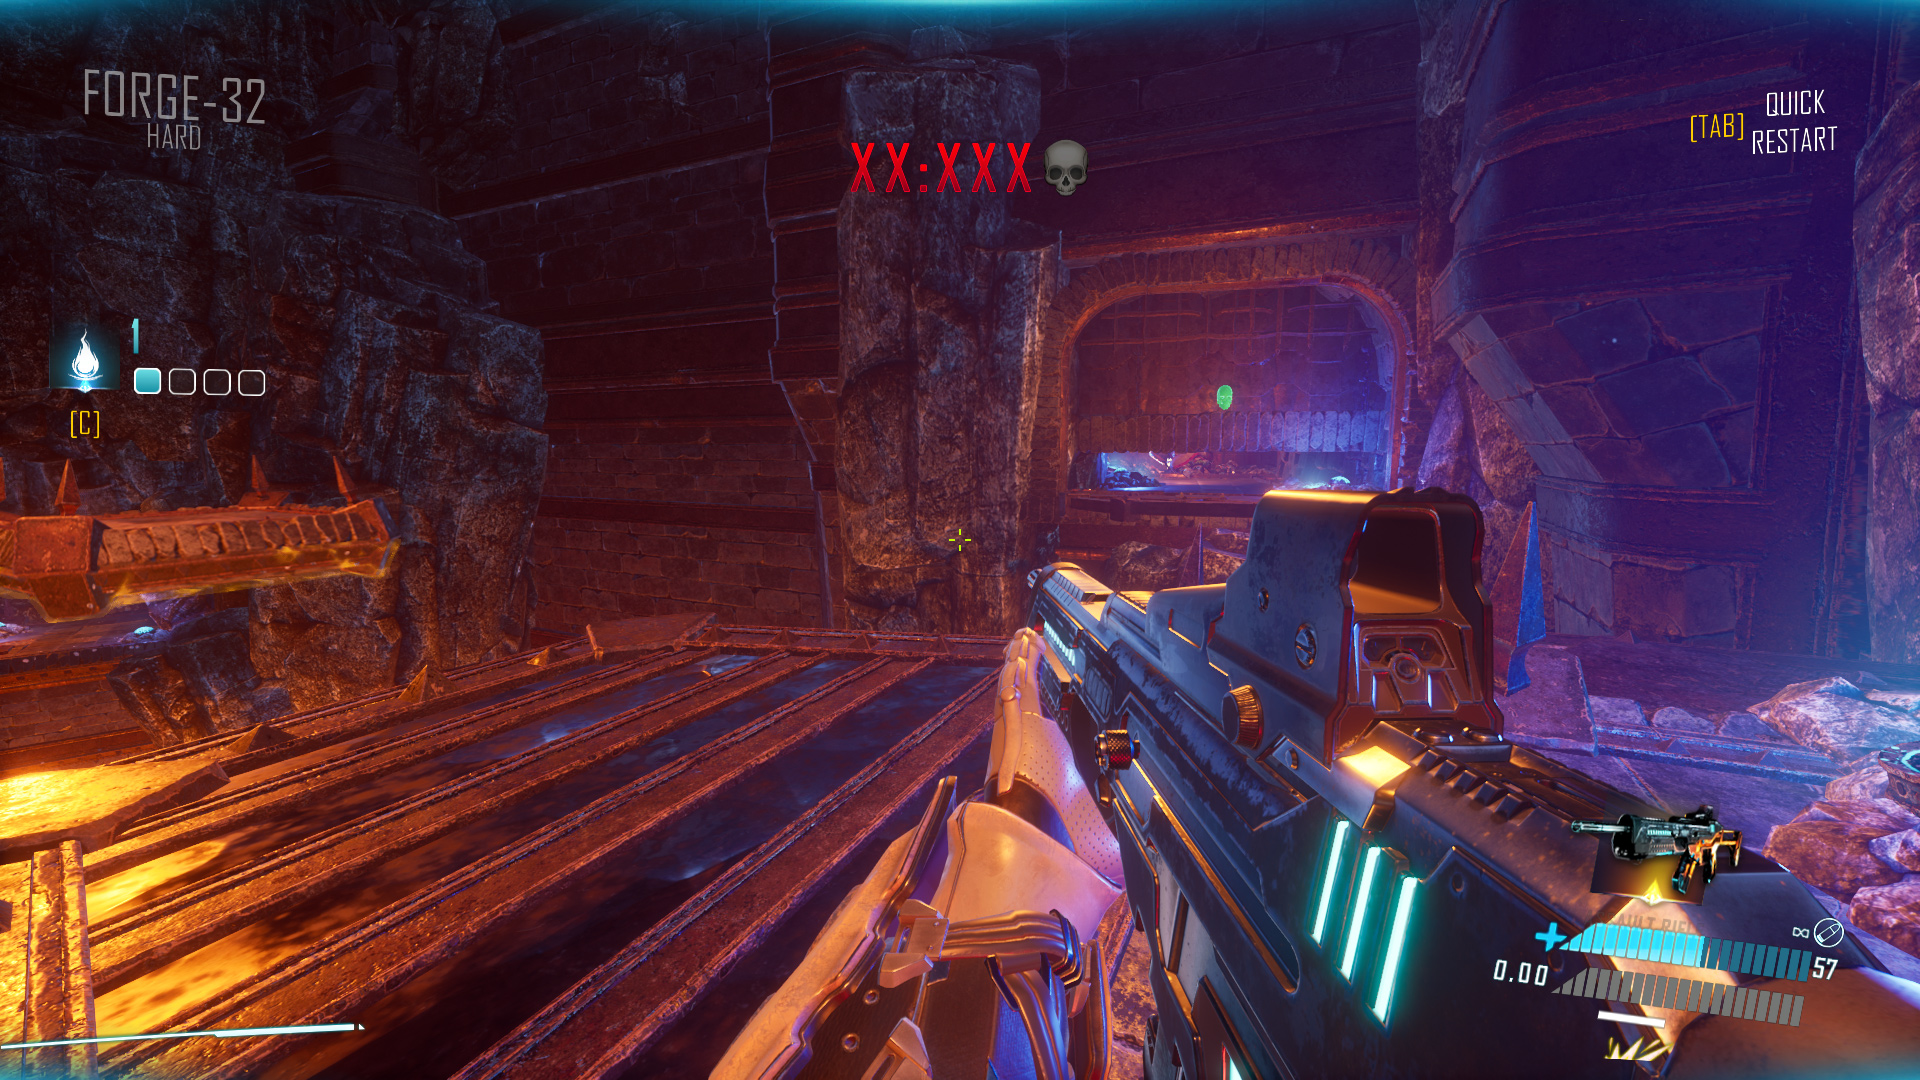
Forge-32 Hard: As you enter the last room and approach the horizontally moving platform look back where you came from to spot the skull.
Forge-32 Very Hard: After using the first grappling hook block, instead of proceeding to the left, check the right side first. The skull is there. Rockets won’t collide with it though, so switch to the pistol.
Forge-32 Hardcore: Turn around 180 degrees and grapple your way onto the platform. Take the slidepad to your right. The lonely barrel on this platform conceals the skull underneath.

Forge-32 Nightmare: Just after picking up the second rocket launcher, don’t proceed forward just yet. Instead explore the blue platforms on the left of where you need to go. You’ll find the skull hidden there.

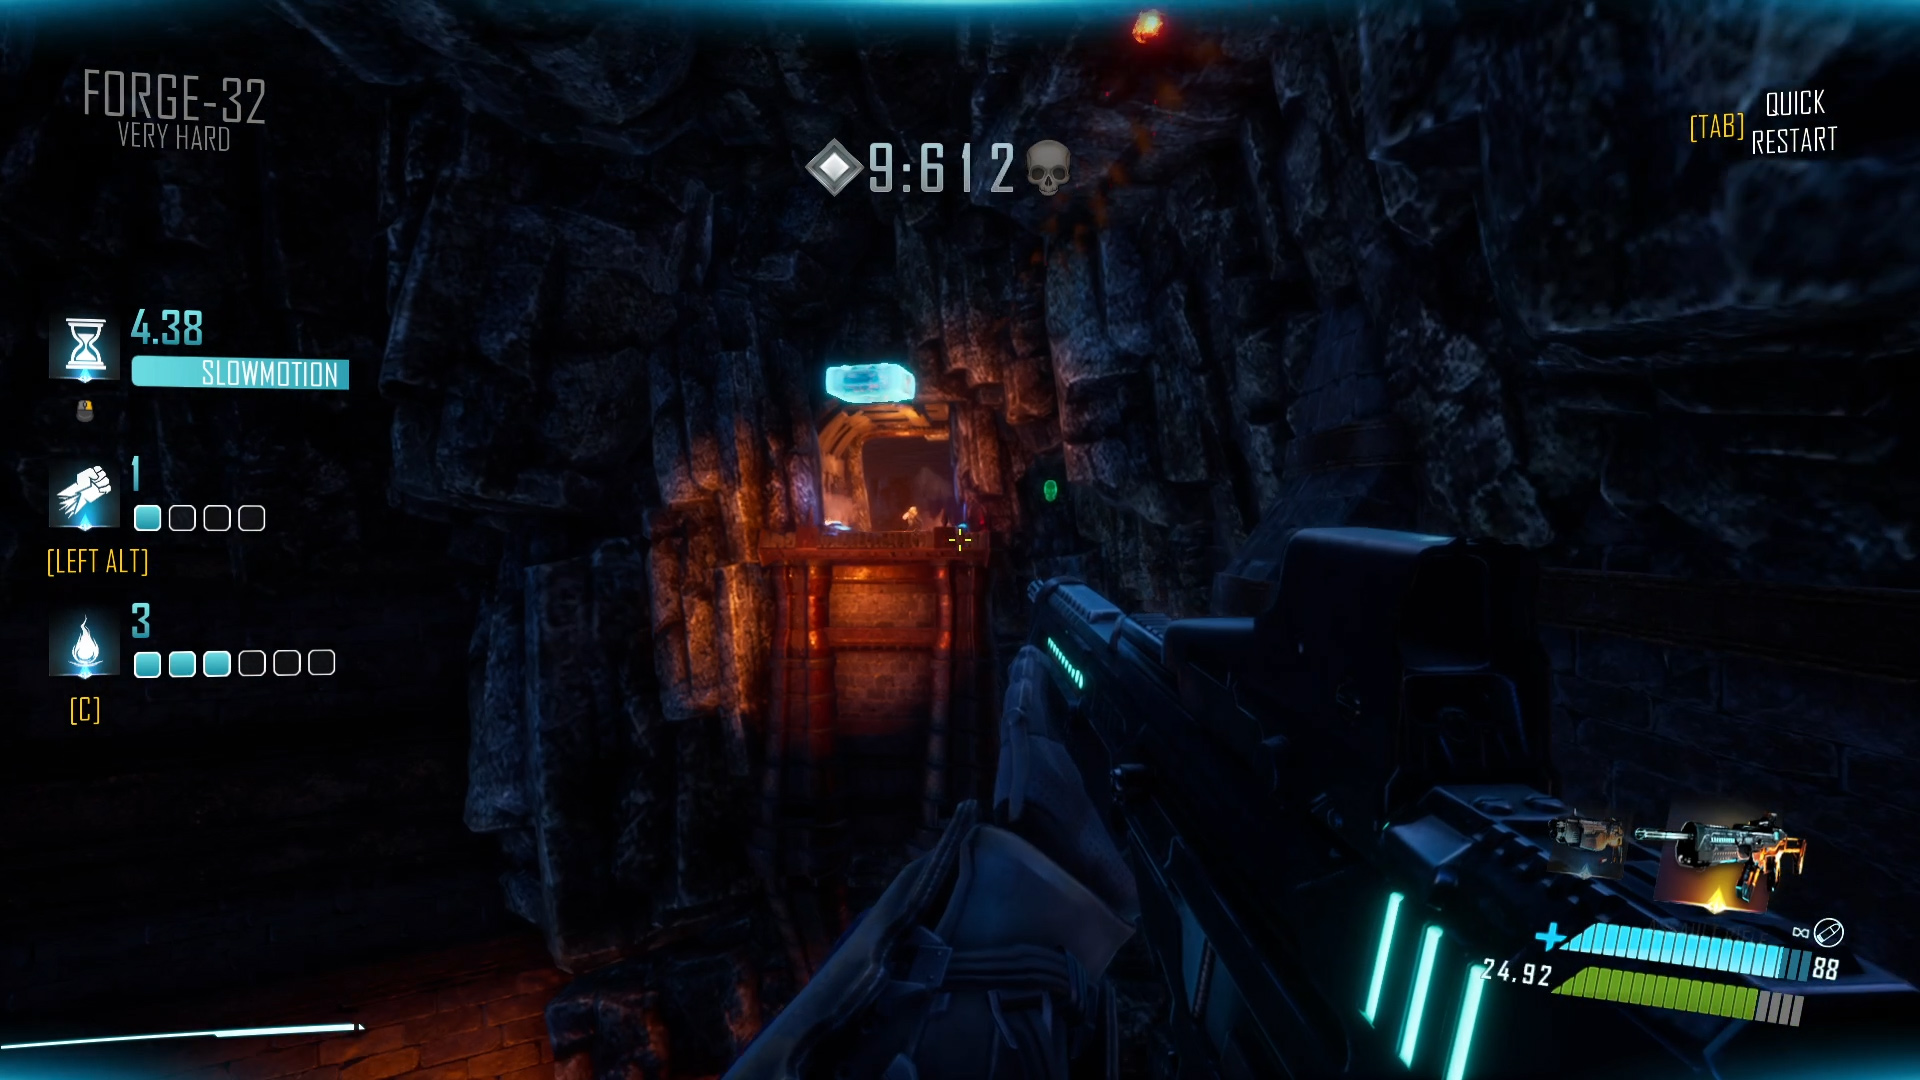
Forge-33
Forge-33 Normal: The skull is in the air directly on your path, but you need to grab it because rockets won’t collide with skulls.

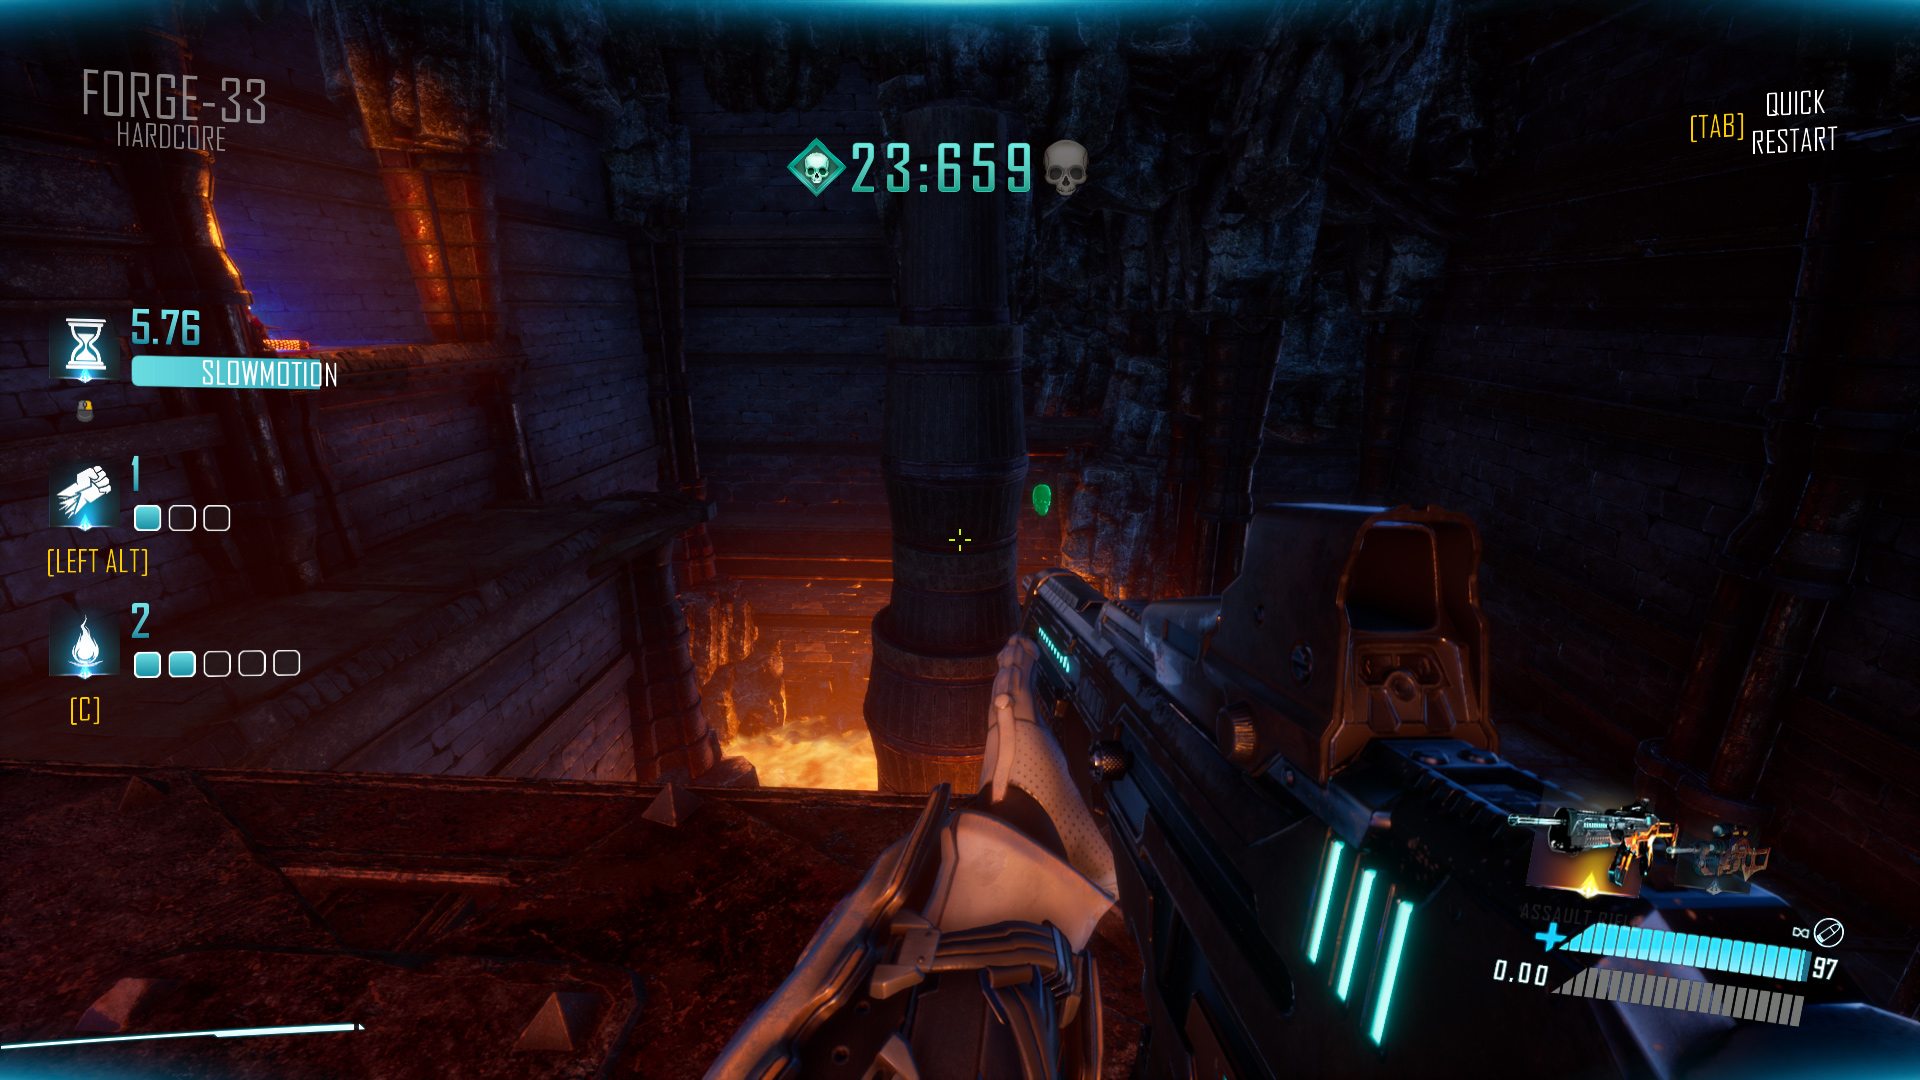
Forge-33 Hard: In the room where you spiral down counterclockwise, the skull is at the column in the middle of that room.

Forge-33 Very Hard: In the last area when you jump onto the curved metal/rock structures, look behind you for the skull.

Forge-33 Hardcore: Mid-level you take out a flying enemy, dive all the way down, and then use a slidepad. This next room has the skull behind a pillar. It’s just before the next part where you stomp from one platform to another.
Forge-33 Nightmare:The skull is hidden at the massive circular bell-like structure. You use grappling hook blocks to fly past it and climb onto an edge above. Look behind you once you make it to the top.

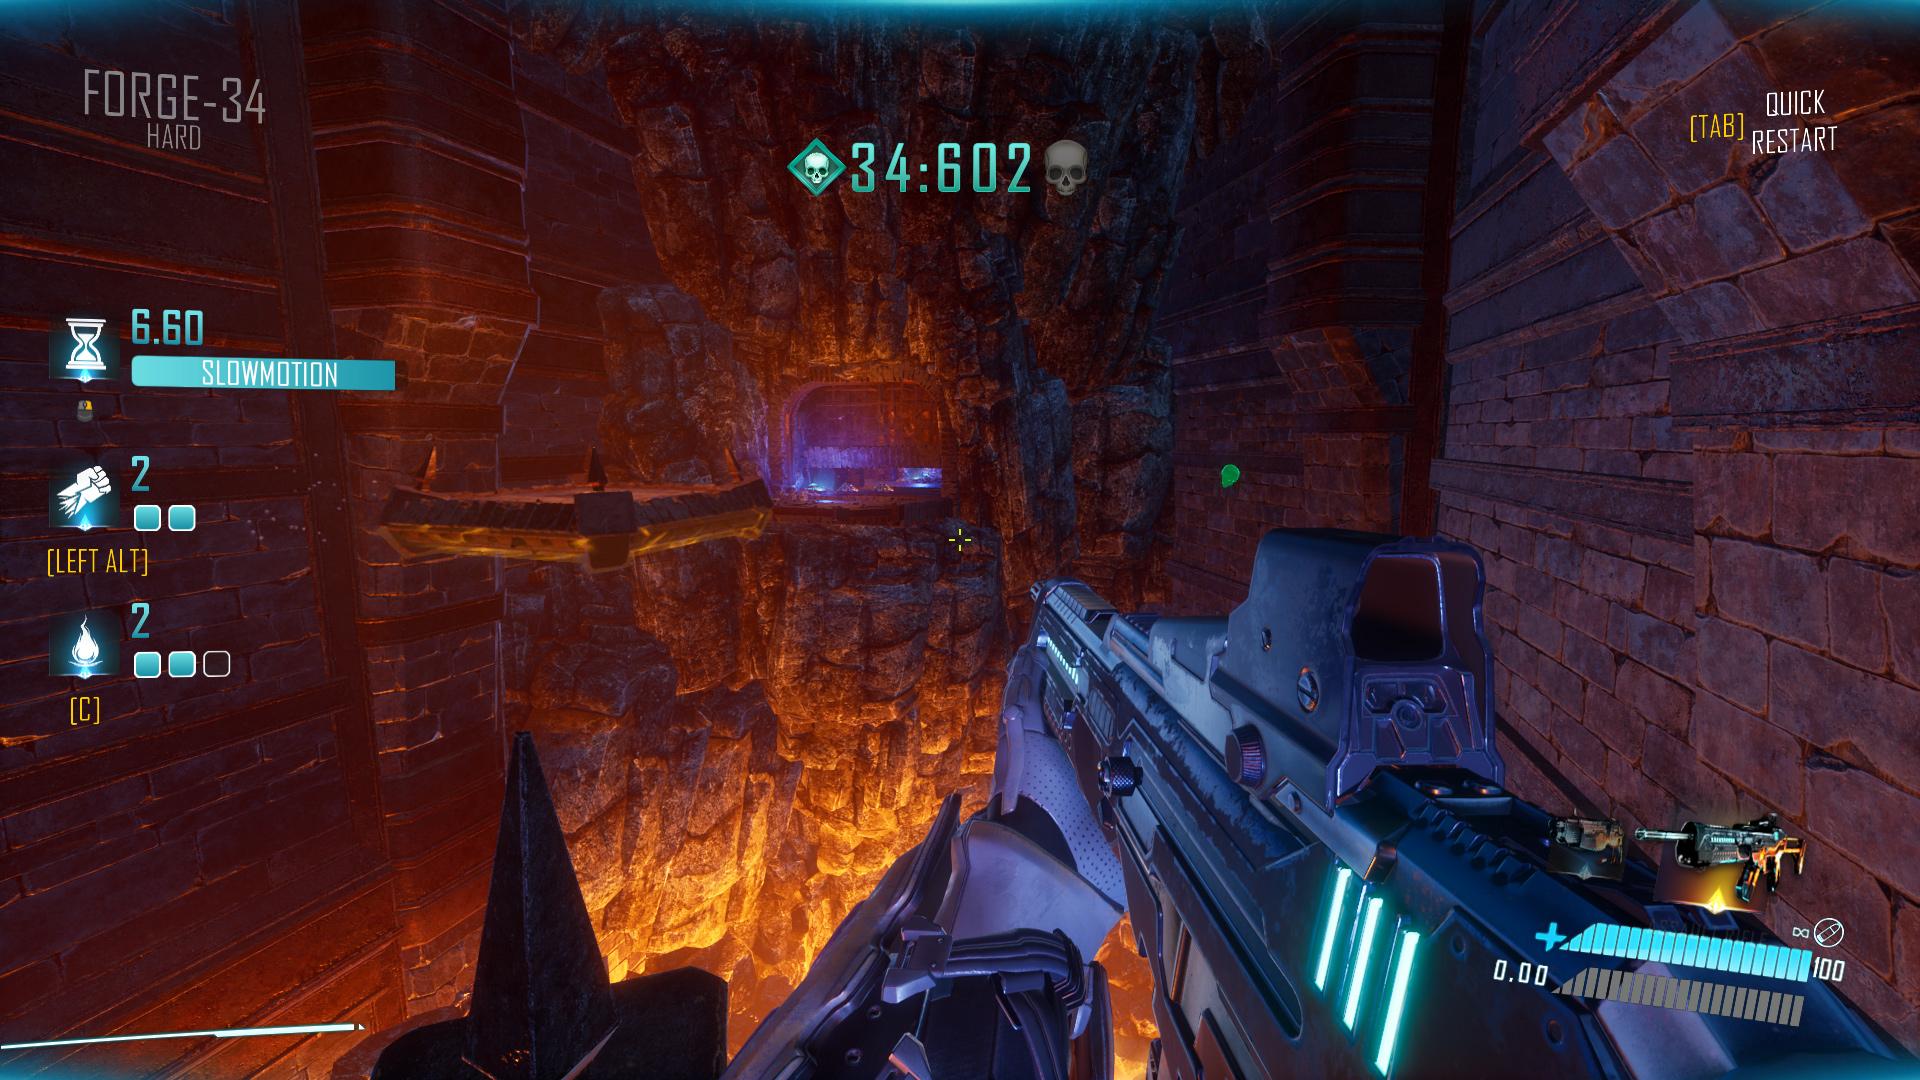
Forge-34
Forge-34 Normal: It’s hanging above, visible immediately after performing two rocket jumps. You’ll need to grab it because rockets won’t collide with skulls.

Forge-34 Hard: Unmissable. It’s right out in the open in the first room, on the right.
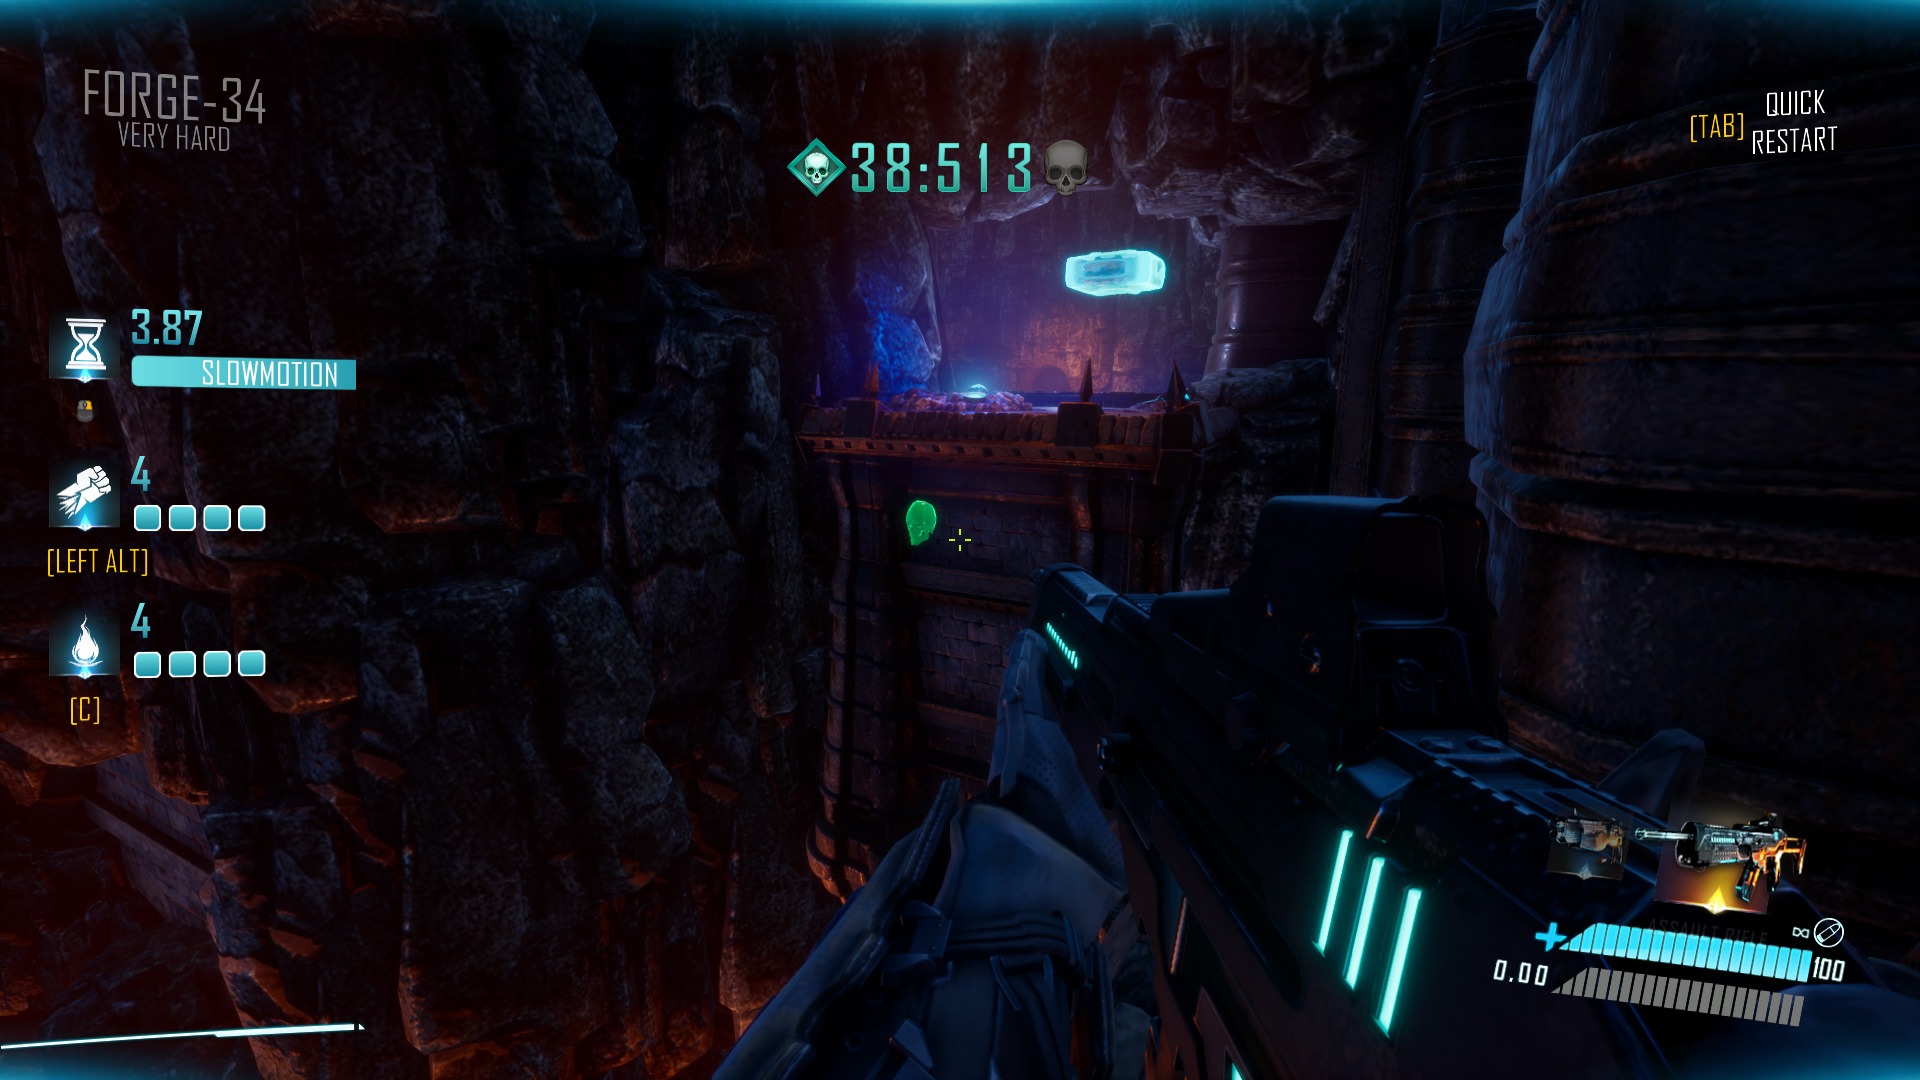
Forge-34 Very Hard: At the beginning, you shoot two buttons to open the gate and fly into it with the grappling hook. Look behind you once you go past the now-unlocked gate.
Forge-34 Hardcore: Near the end of the level, there’s a room with two buttons that you need to shoot. When exiting that room, check your immediate left for the skull.

Forge-34 Nightmare: After pulling the second lever, don’t proceed forward just yet. Instead, explore the blue platforms on the left of where you need to go. You’ll find the skull hidden there.

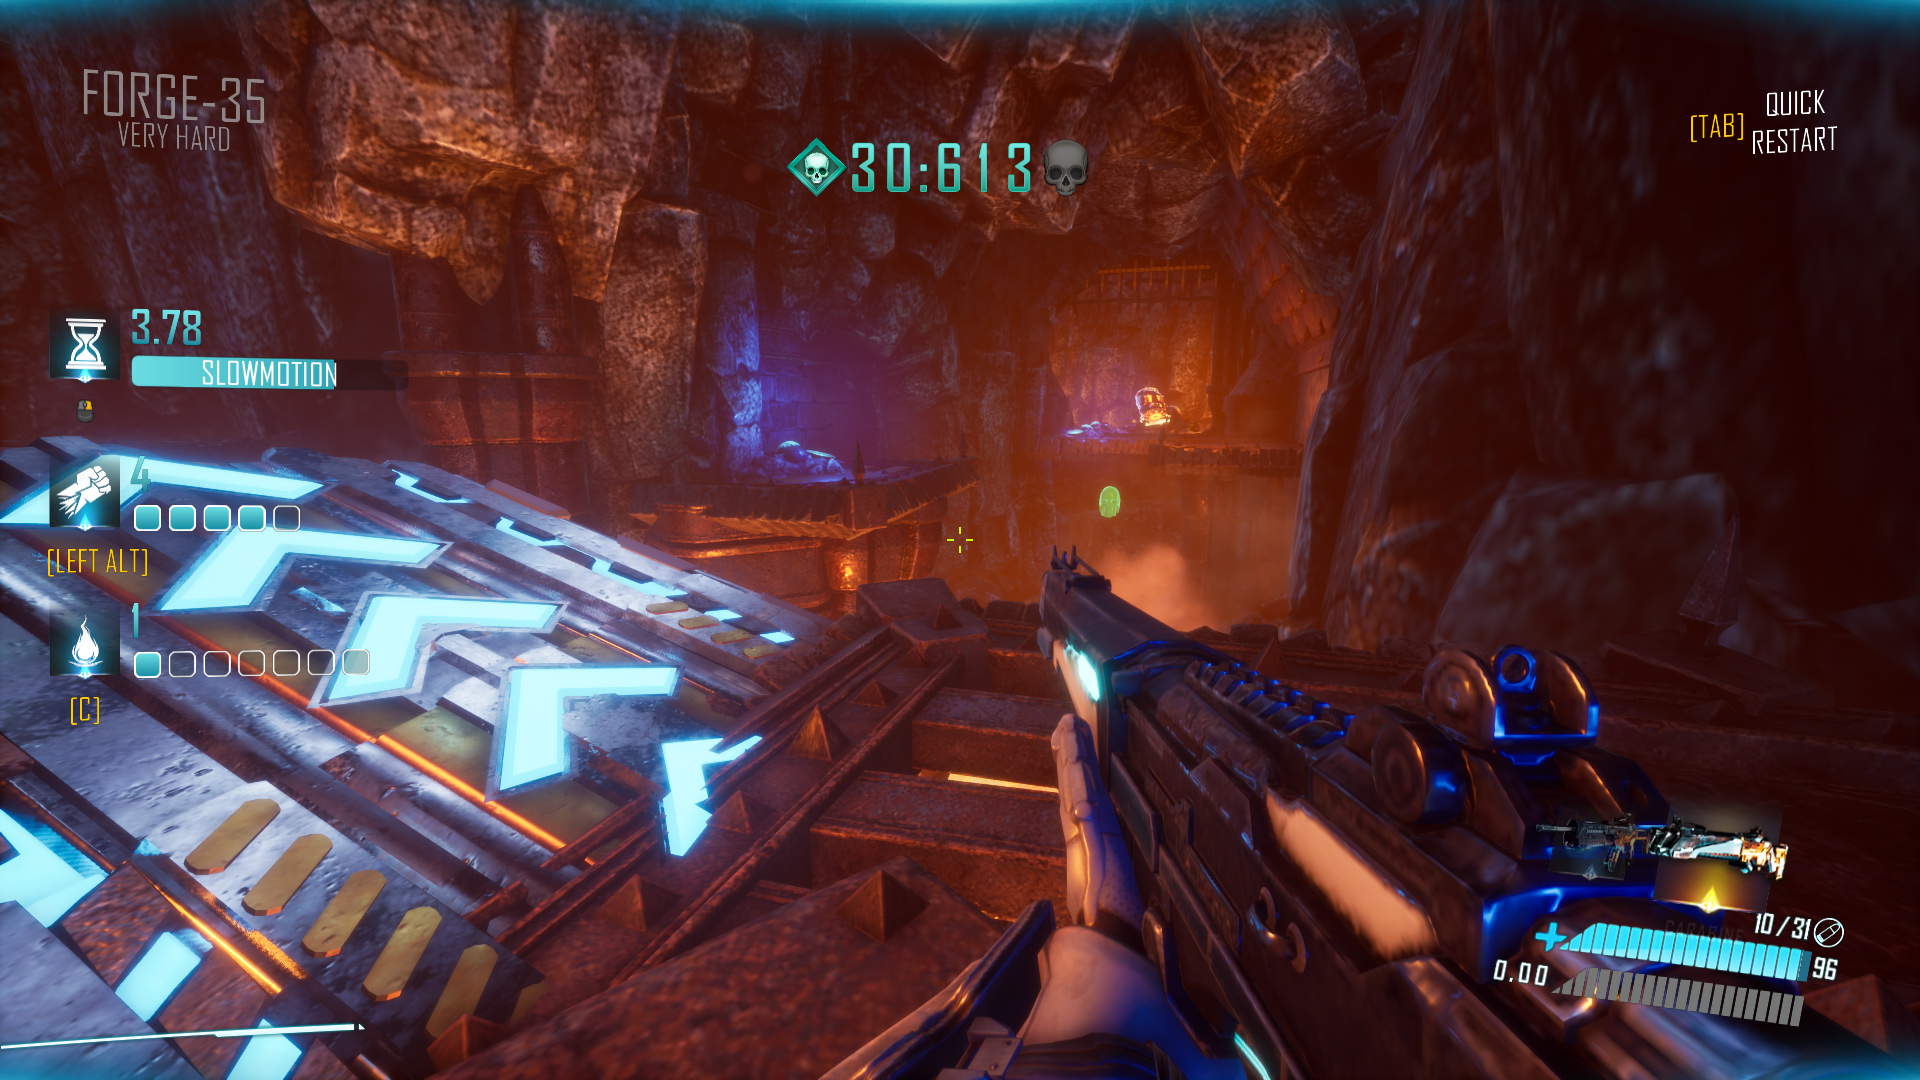
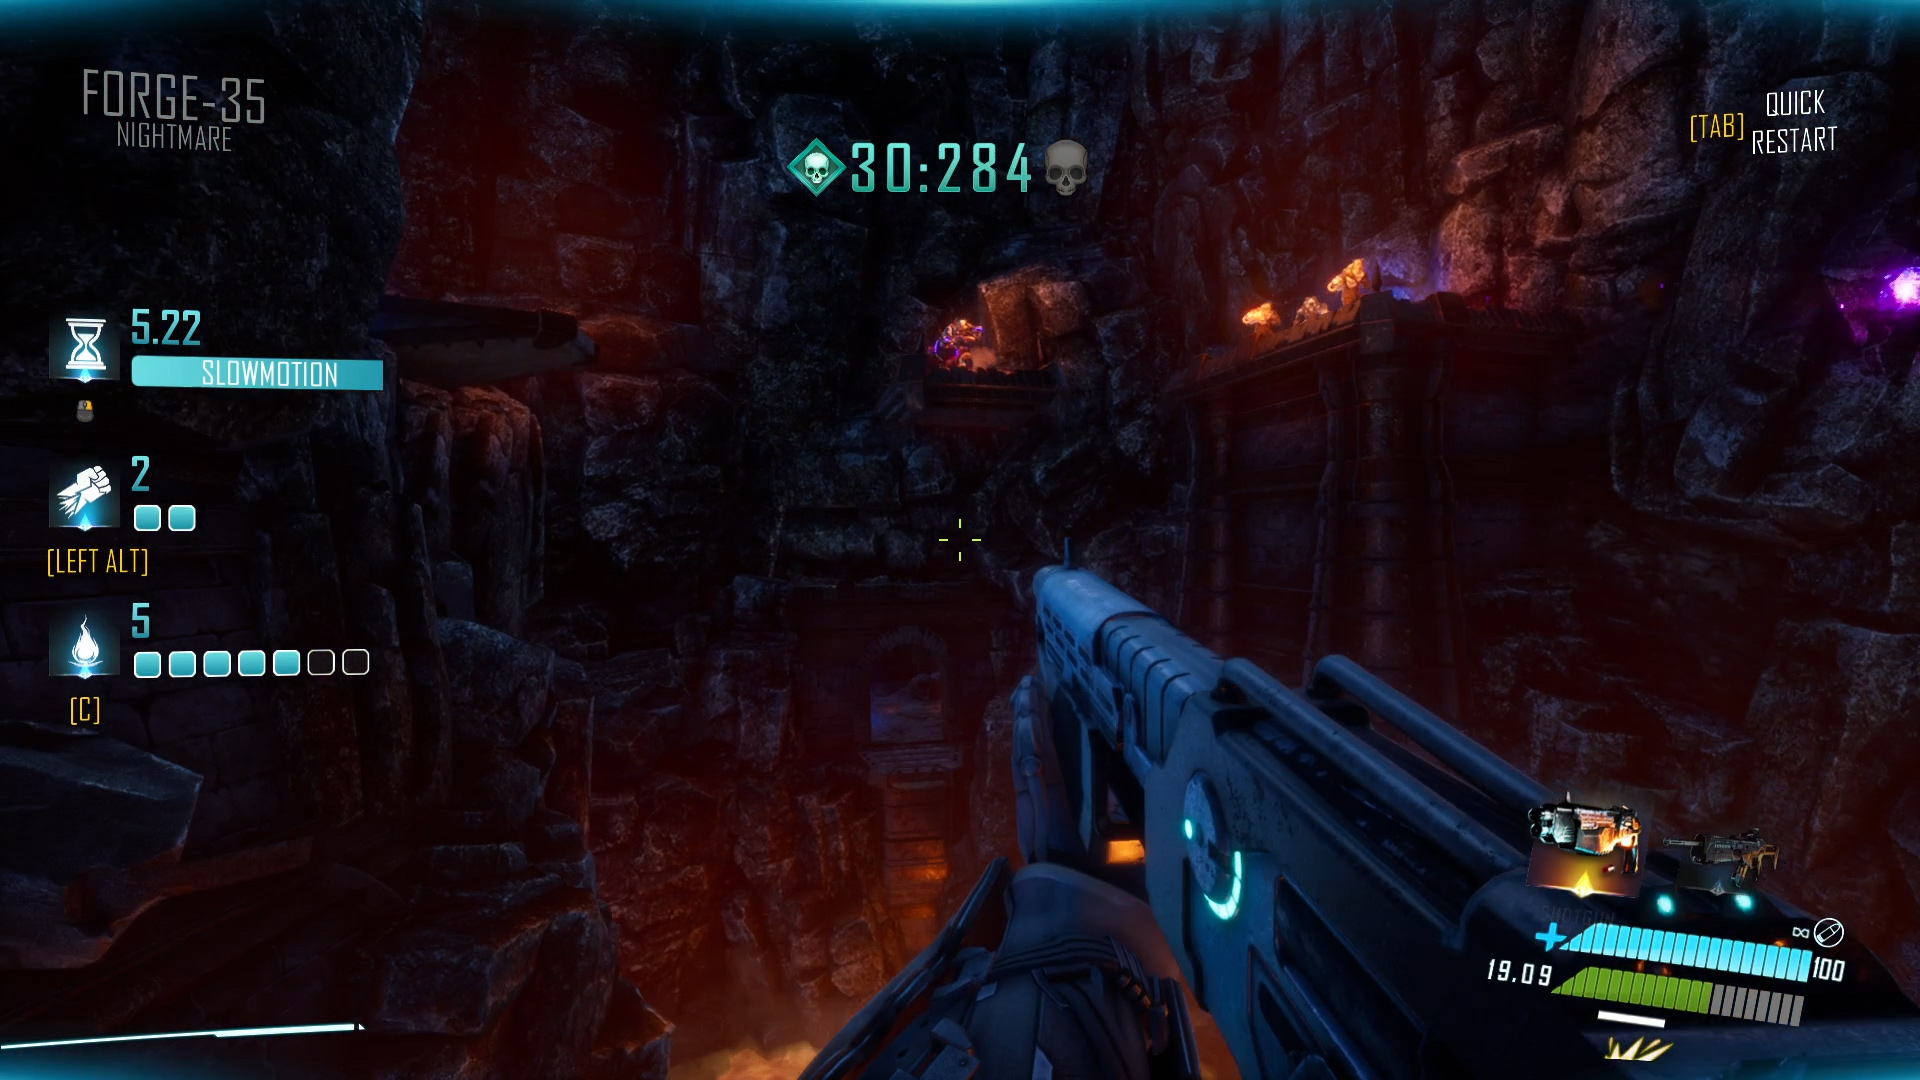
Forge-35
Forge-35 Normal: Towards the end of the level, near the lava. You can just see it if you exit the room with two buttons and walk as close to the edge (forward and to the right) as possible.
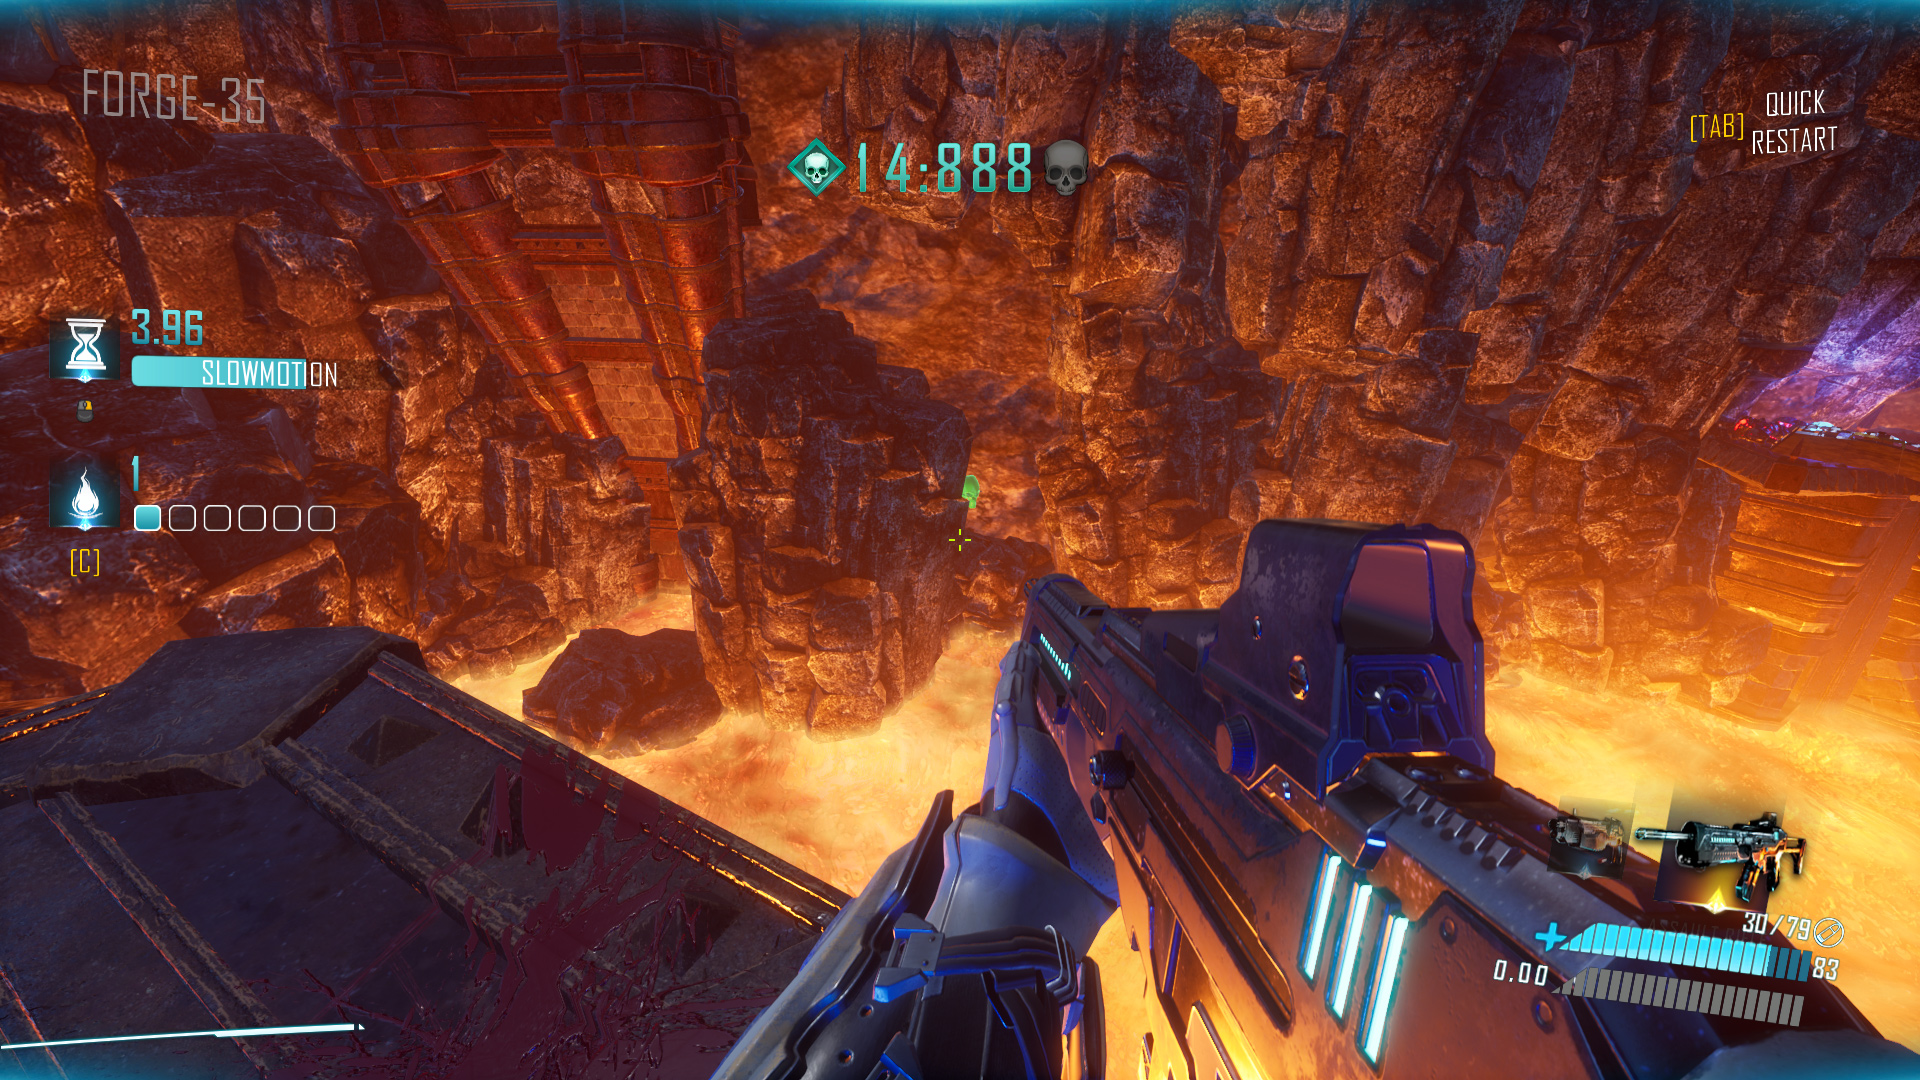
Forge-35 Hard: Right from the start, walk forward to the edge and look down to spot the skull. You can choose to shoot it later when you return to the bottom floor of this area later in the level.

Forge-35 Very Hard: After climbing to the top and pressing three buttons, then stomping your way down, before taking the slidepad in the next area, look behind you to find the skull.
Forge-35 Hardcore: It’s hidden in the area where you repeatedly hook upwards in a spiral around a tall platform. If you go all the way to the top, pull the lever, and walk back to the edge, you’ll find the skull in the far-right corner.

Forge-35 Nightmare: Right after picking up the second rocket launcher, drop down into the lava and look to your left. There’s a small secret room with a lever inside that reveals the skull. Remember, you still need to complete the level, so consider shooting the elevated enemies with rockets before dropping down.
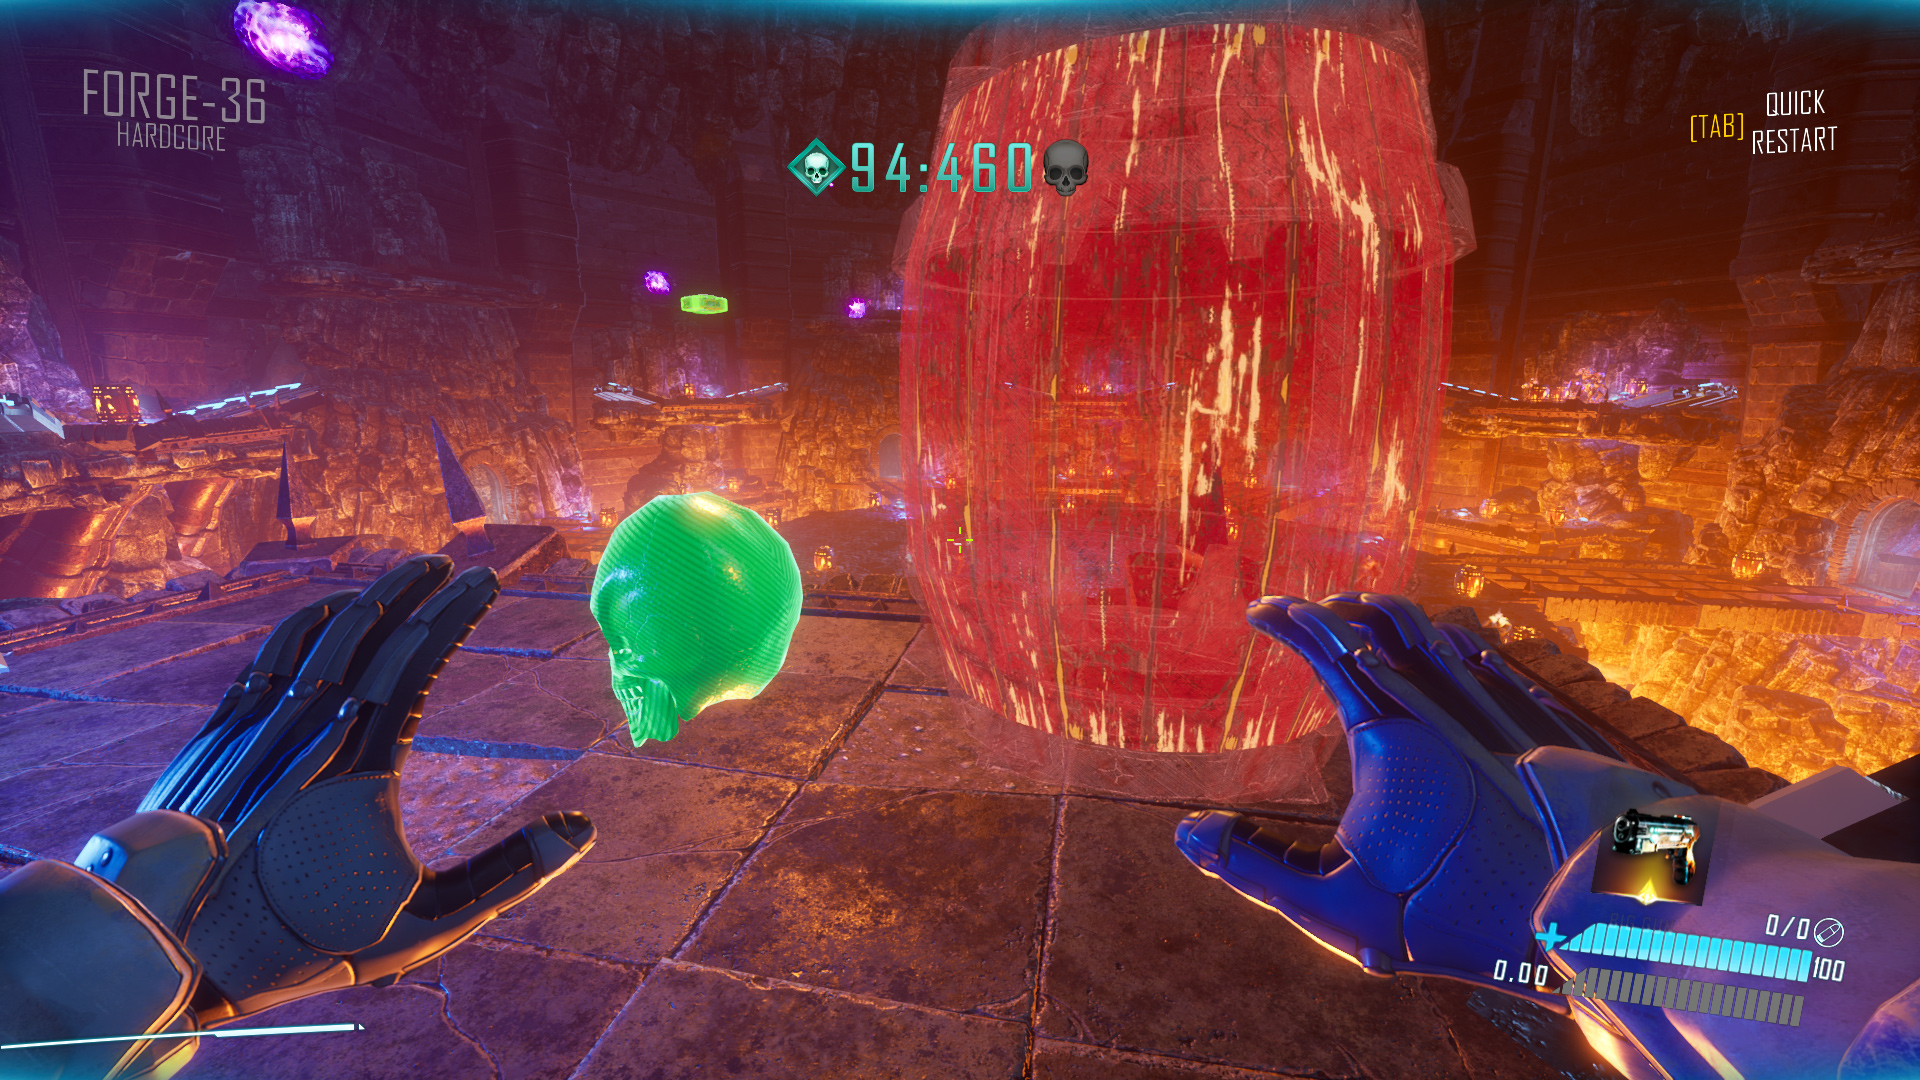
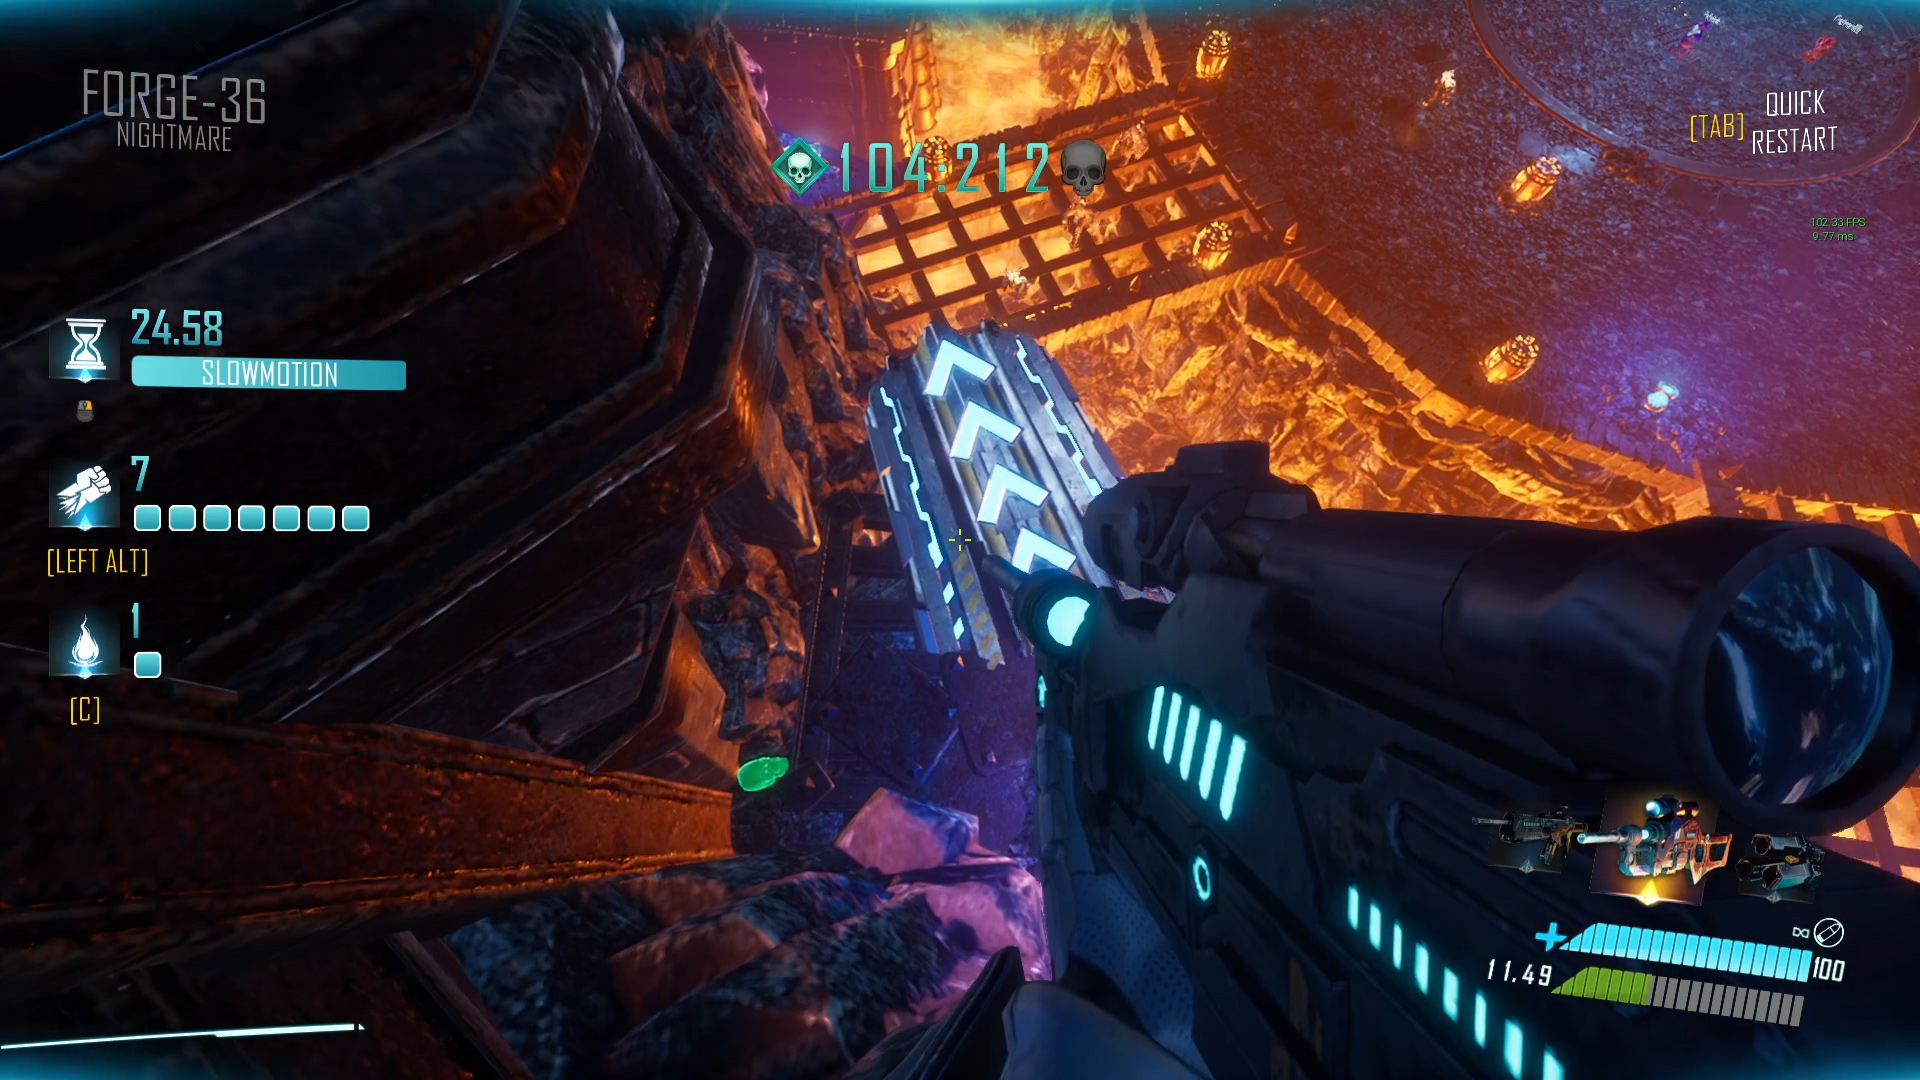
Forge-36
Forge-36 Normal: Start your run and slowly turn right until you see pink fireballs coming at you. Beneath the meathulk that fires them, there’s a barely visible wooden barrel on the lower platform to the right. The skull is inside it.
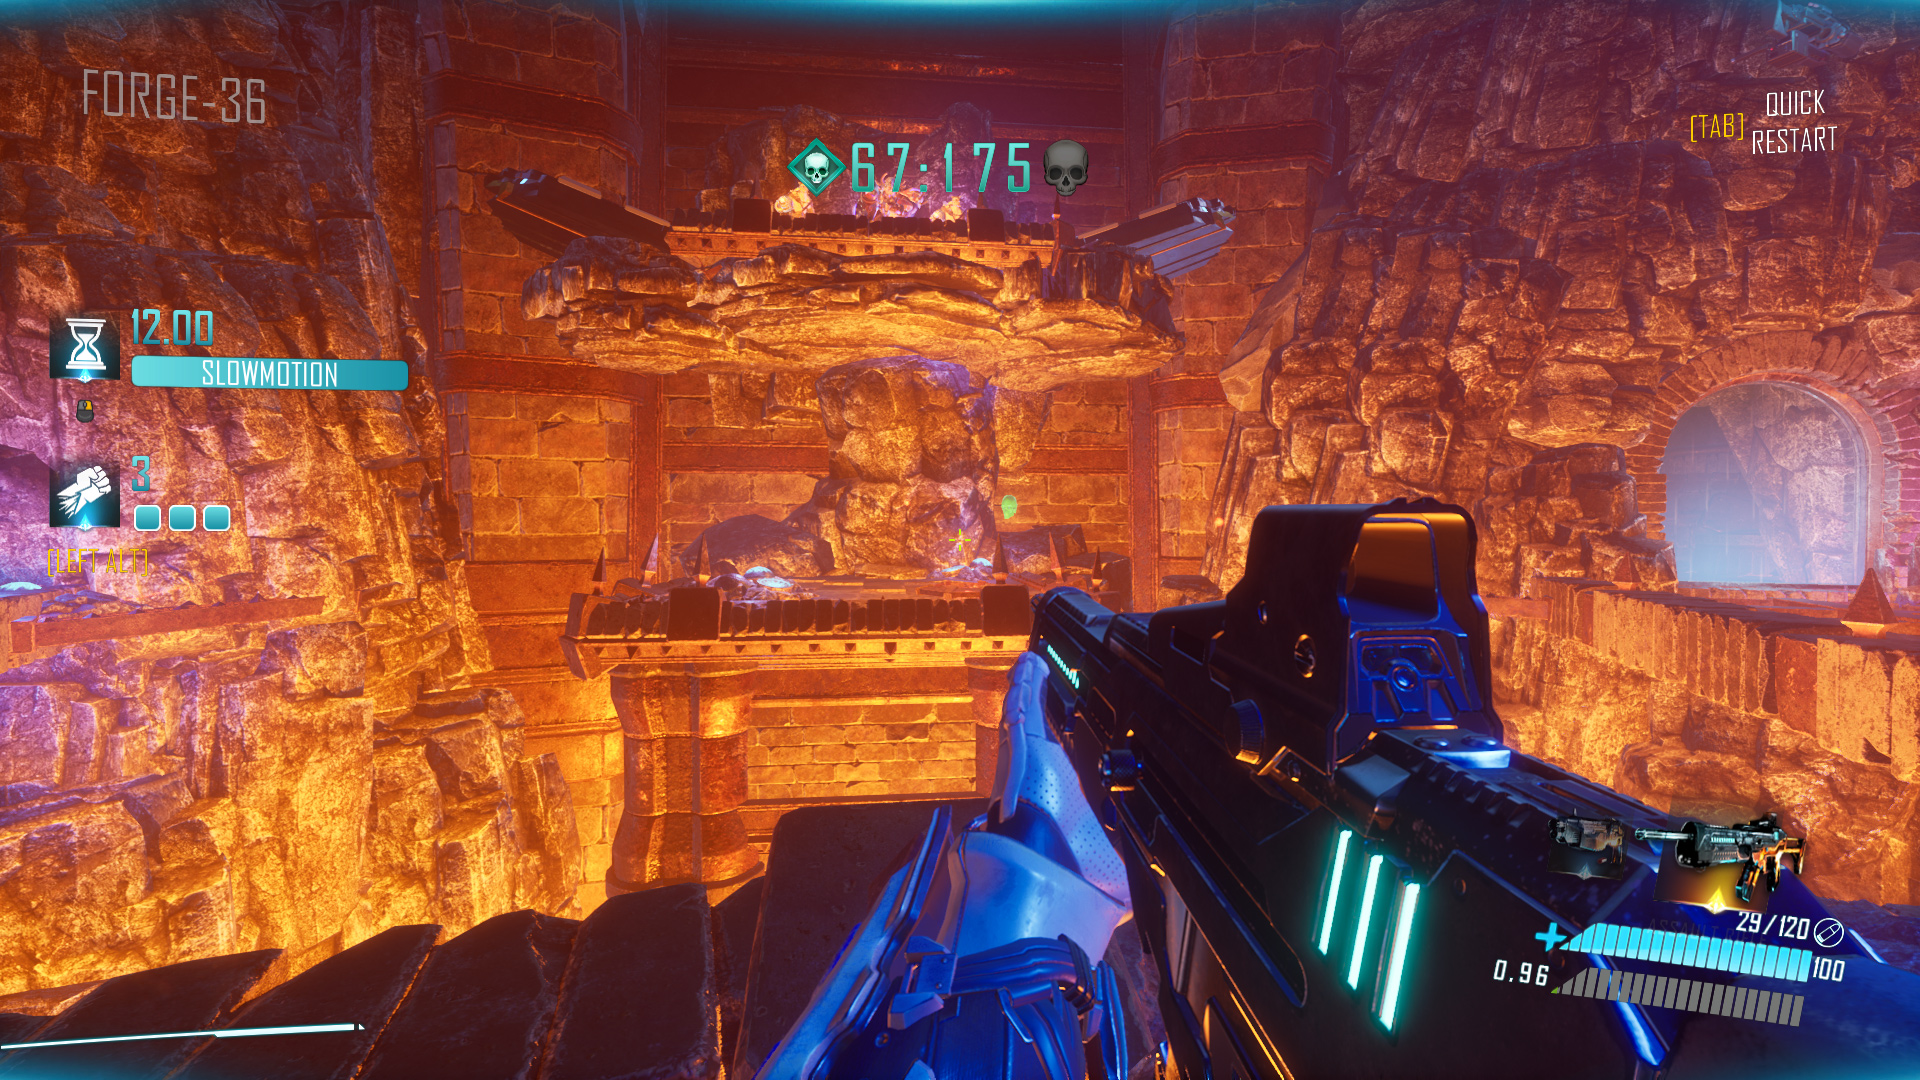
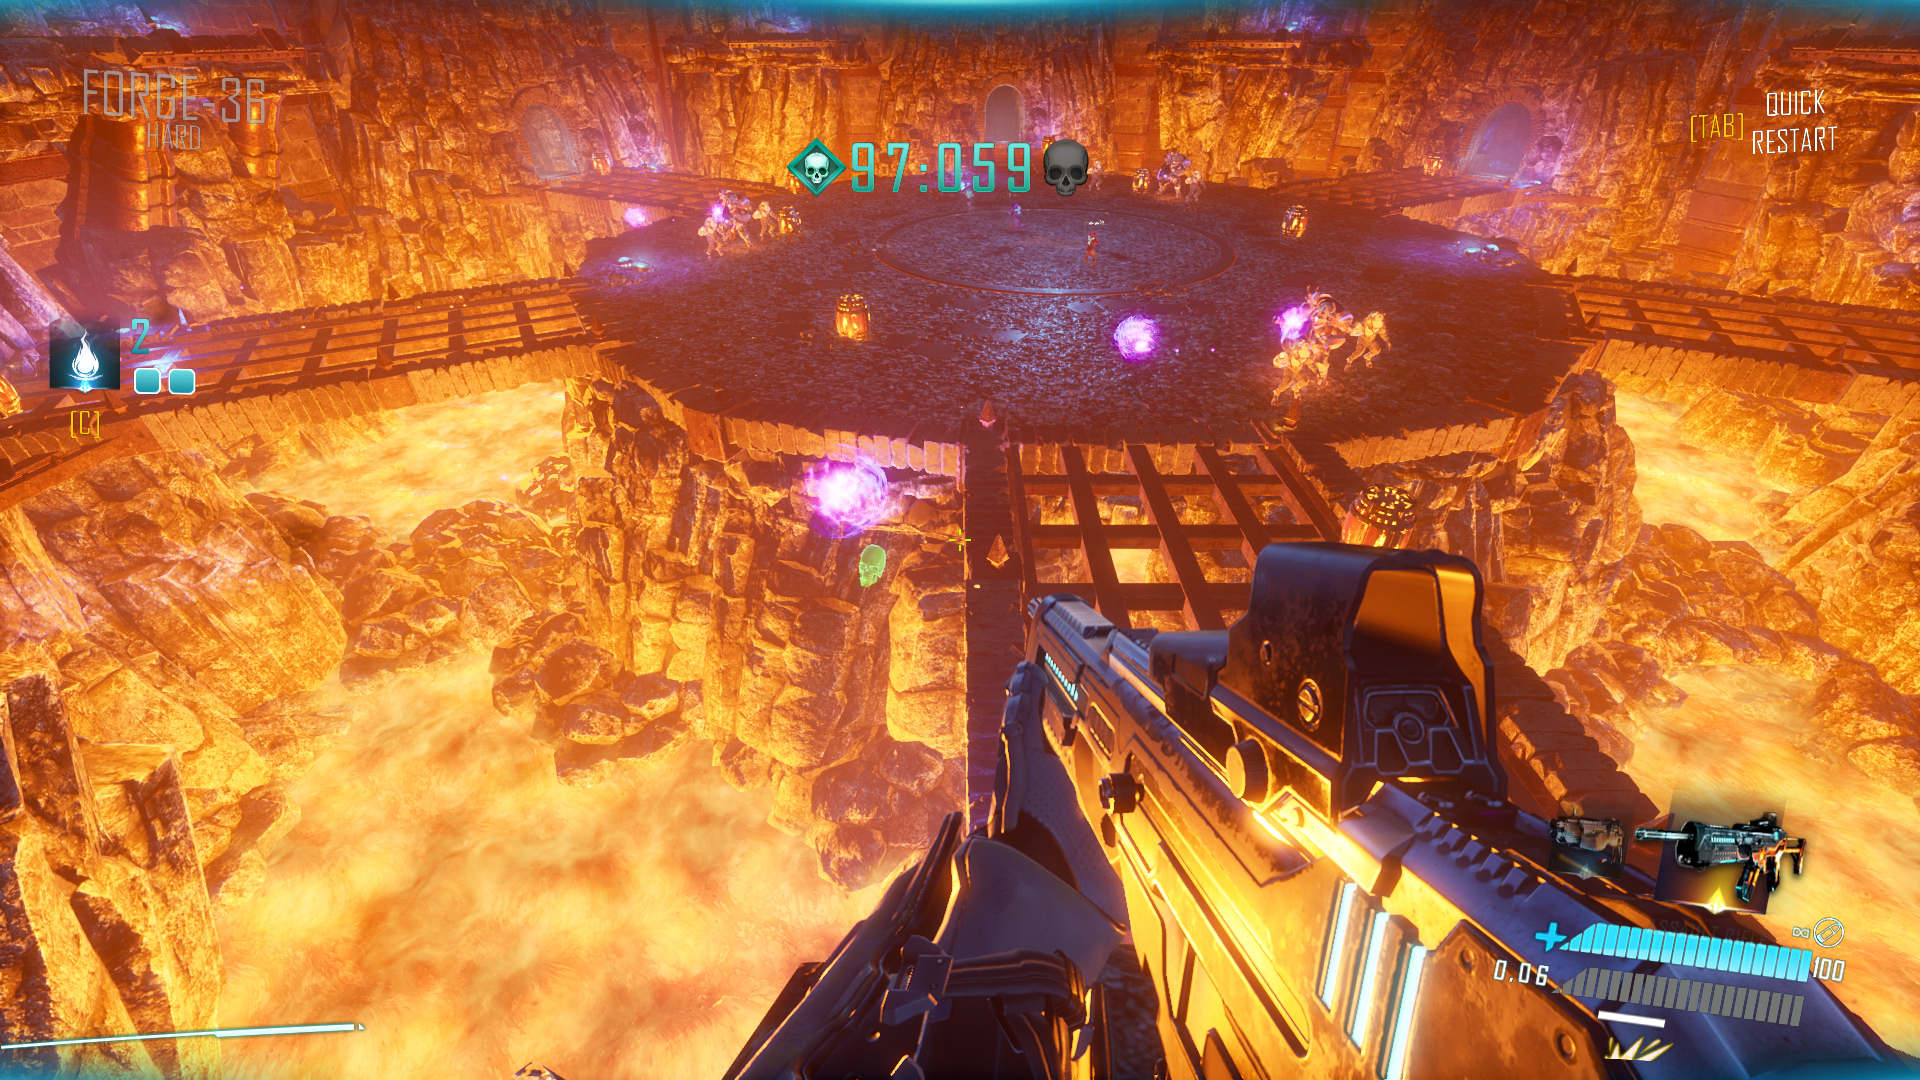
Forge-36 Hard: It’s just under the central circular area. Jump to the left from the spawn to spot it.
Forge-36 Very Hard: The skull is visible from the start, near the ceiling on the right. However, shots go straight through it, so you have to grab it. Reach one of the higher platforms (the dark ones) underneath it and then wallclimb with the rocket launcher. Alternatively, use either of the grappling hook blocks to activate another one hidden high in the ceiling in the middle – this is likely the intended way. Wall climbing might be easier.

Forge-36 Hardcore: Turn around 180 degrees and grapple your way onto the platform. Take the slidepad to your right. The lonely barrel on this platform hides the skull underneath.
Forge-36 Nightmare: From the spawn, jump to the left onto the platform below you. Move forward to take the slidepad (i.e., go clockwise). You will arrive at another such platform with a lone barrel on it. The skull is hidden on this platform by the wall, behind some rubble.
That's everything we are sharing today for this Warstride Challenges guide. This guide was originally created and written by Rushin'. In case we fail to update this guide, you can find the latest update by following this link.