
This guide serves as a valuable resource for newcomers to this exciting Early Access game, and it’s created with the intention of sharing the awesomeness of this game with a wider audience. Encouraging more people to play and enjoy it is a commendable goal, and this guide is a simple way to contribute to that cause. The guide will continue to evolve as the author gains more experience in the game, and readers are invited to provide comments and suggestions to enhance its completeness.
Getting Started
In this new Early Access Game, let’s dive right in and explore what it has to offer. The tutorial is where you begin, but for the purposes of this guide, we’ll skip it and start here.
- Find Companions: This game is not designed for solo play. While it’s technically possible, it can be a challenging and sanity-draining experience. It’s highly recommended to gather some friends to join you in your adventures. If that’s not an option, there are usually public lobbies available. Ensure your microphone is working correctly by checking the settings.
- Embrace the Power of Levels: In this game, levels are your lifeline. During your first playthrough, you won’t have access to many building options beyond the basics. However, don’t fret, as you’ll level up quite quickly, unlocking more capabilities as you progress.
- Enjoy the Journey: Above all, remember to have fun and enjoy the experience. Embrace the challenges and adventures that await, and carry on with a positive spirit. This game is meant to be an enjoyable and immersive experience.
As this guide is a work in progress, keep an eye out for updates and feel free to provide feedback and suggestions for improvement. Happy gaming!
Your First Adventure
Before embarking on your first spacefaring adventure, let’s go over the essential steps to ensure a smooth journey.
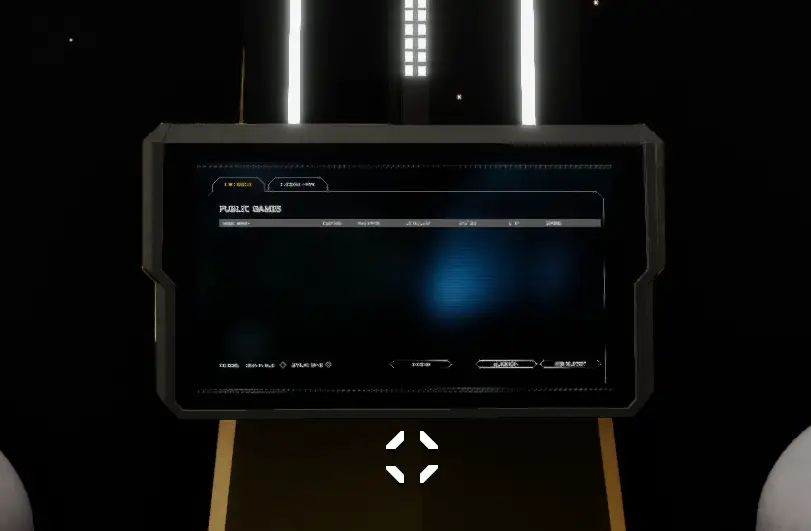
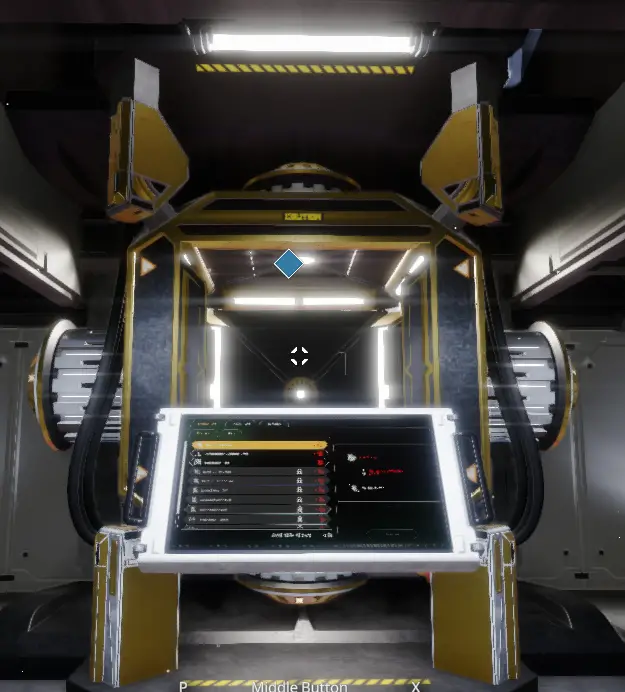
Join a Crew: As previously emphasized, playing this game solo is a Herculean task. Therefore, your initial priority is to find a group of fellow spacefarers to accompany you. Remember, in dire situations, it’s perfectly acceptable to place the blame on your teammates, as we must heed the instructions of our celestial overlords. To get started, head to the server manager immediately after departing from your pod. You can find it to the left or right, as shown in the image below.
 ⠀
⠀
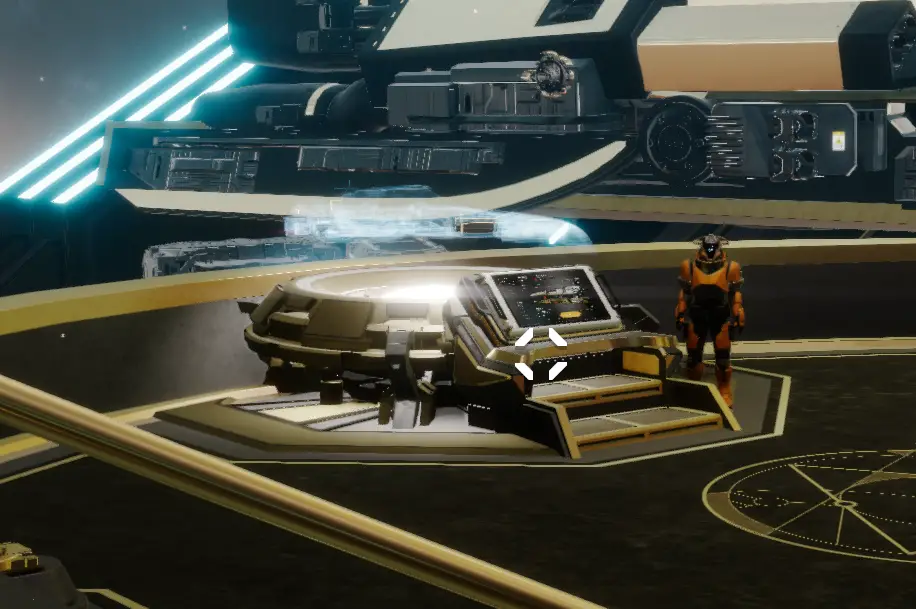
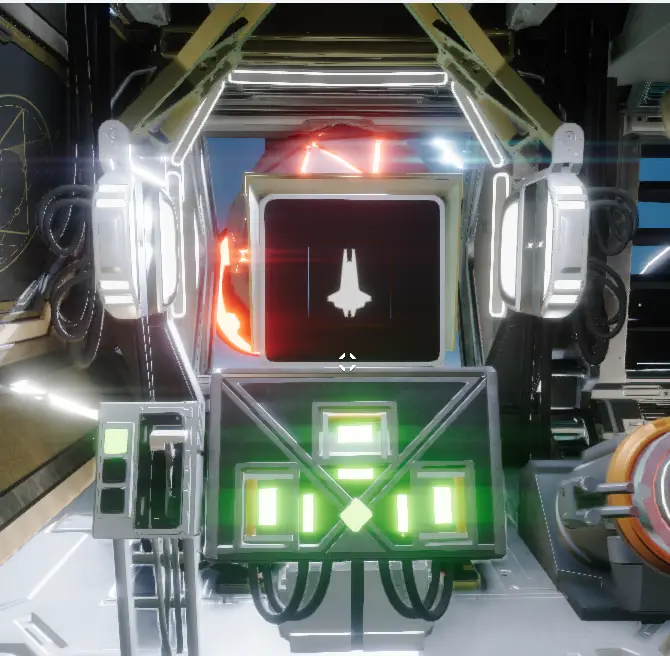
Select the Right Ship: If you’re the host, it’s your responsibility to choose an appropriate ship for your team’s size. You’ll need to decide between a 2-3 person ship or a 3-4 person ship. After exiting your pod and entering the spacious room with the map, look to your left. The top set of ships houses the 3-4 person ships, while the bottom set contains the 2-3 person ones. Your choice here significantly impacts gameplay, so select the one that best suits your team’s composition.
 ⠀
⠀
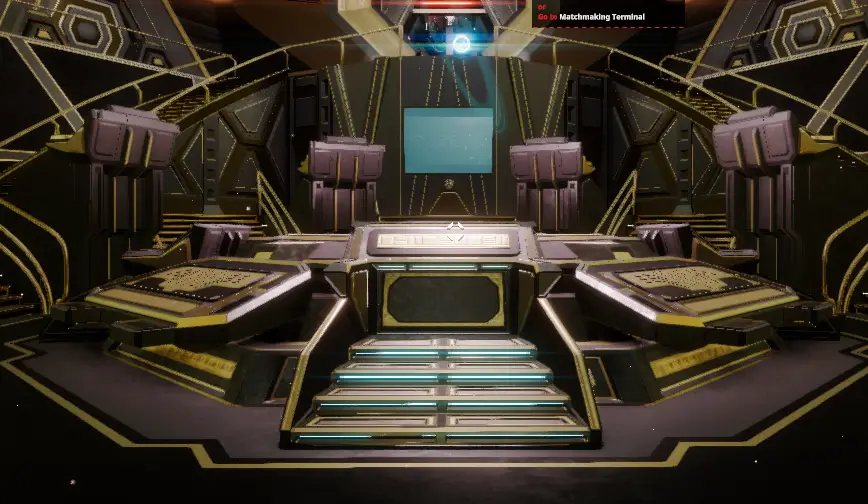
Mission Assignment: The next step is to pick a mission. If you’re the host, this duty falls on your shoulders. Head to the central terminal in the room to make your selection. In the next chapter, we’ll delve into the specifics of the different mission types.
 ⠀
⠀
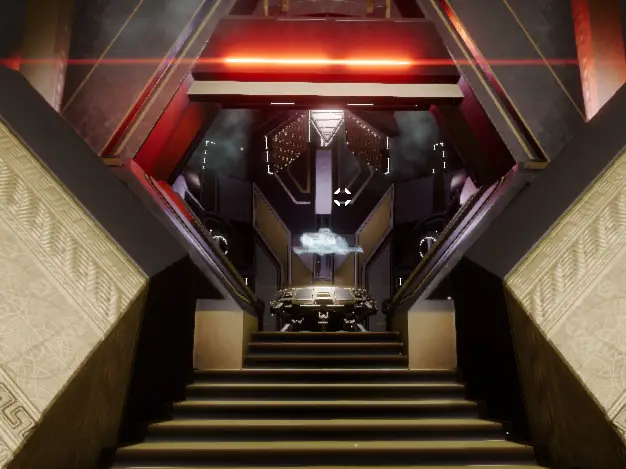
Seat Up and Lift Off: After you’ve chosen your mission, you and your crew of intrepid spacemen will proceed to the doors located at the rear of the room and take your seats, ready for an adventure in the style of GTFO or DRG.
These steps lay the foundation for your spacefaring endeavors, so be sure to follow them diligently for a successful and enjoyable experience. May the stars be in your favor!
Mission Types
Now, let’s delve into the diverse mission types you can encounter during your pilgrimages across Helios. While we may not be treasure hunters, our missions are equally significant.
Zone Overview:
- Temperance – Starting Level 0
- Vigilance – Starting Level 8
- Bravery – Starting Level 19
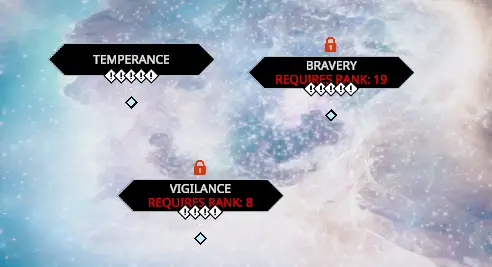
Helios is divided into these three main zones, each with its own starting level. Note that I can’t provide information about Vigilance and Bravery at the moment, but I’ll update you once I have more insights.
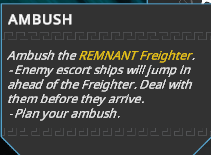
Ambush – Marked by a Skull
As the name suggests, an Ambush mission involves luring an enemy ship during your mission and subsequently destroying it. This action yields loot for your ship, which converts into XP at the mission’s conclusion. However, this loot does not carry over.
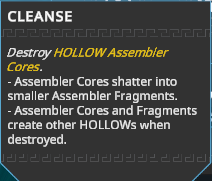
Cleanse – Depicted by a Geometric Globe
Cleanse missions are intriguing. Your objective is to destroy fragments floating in space. But don’t expect a peaceful journey, as you’ll face attacks during this task.
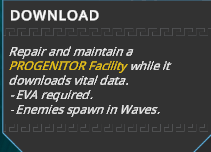
Download – Illustrated with a Satellite Dish Broadcasting
Download missions are engaging. One team member must venture out to repair a large satellite spire while the rest of the crew defends it. These missions involve various puzzles and repairs, all within a limited time frame, so quick thinking is essential.
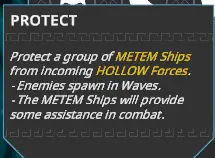
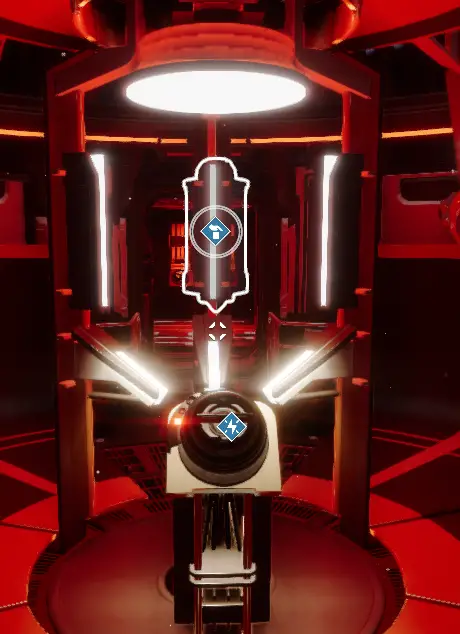
Protect – Represented by a Shield
Protection missions require you to safeguard allied ships. Think of them as escort missions, but without the frustratingly slow pace. These missions are wave-based defense scenarios.
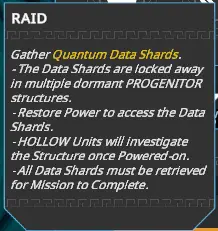
Raid – Indicated by a set of Hands Stealing a Box
Raid missions involve gathering resources from derelict structures and repairing them to gain access. Similar to download missions, these tasks feature numerous puzzles and repairs that need to be solved for successful completion.
Completing missions not only progresses your character but also rewards you with XP and cosmetic loot boxes. The absence of a pay-to-win element is commendable, and we hope it remains that way in the future.
Zone Modifiers
Let’s explore the intriguing world of zone modifiers, which add an extra layer of complexity to your Helios pilgrimages. While I can’t confirm whether these modifiers change or remain constant at the time of writing, I encourage you to leave a comment if you observe any alterations.
You’ll find these modifiers listed at the bottom of the zone pages, and I’ve included a screenshot example from my adventures in Temperance for reference.

Current Modifiers
Ice Shard Storms:

- Beware of these little terrors; they can wreak havoc when you’re outside the ship or damage various parts of the vessel. Ice Shard Storms strike at random intervals and are far from enjoyable to deal with.

Limited Visibility:

- Limited Visibility tampers with your system sensors, reducing your field of view. While it can add an element of suspense, particularly when dealing with enemy ships, it might not be a major source of concern.

Systems Malfunction Surge:

- Brace yourself for this one. Systems Malfunction Surge creates a static-like fuzz on your screen, making it challenging to see and use various systems. Moreover, it can trigger malfunctions in your ship’s systems, such as power failures. I’ve experienced a situation where our power went out and overloaded due to this modifier, and it was certainly not a pleasant experience.

These modifiers inject unpredictability and challenge into your missions, so be prepared to adapt and overcome the obstacles they present.
Ship Mechanics (Startup)
Within the vast and intricate realm of ship mechanics in the game, it’s imperative to acquaint yourself with the specific features of each ship before embarking on your adventure. To assist you in your journey, make sure to press the TAB key to reveal waypoint markers.
Medical Pod
Your journey commences within the Medical Pod. This pod serves as a sanctuary for healing and, intriguingly, the reconstruction of your body in the event of catastrophic disintegration. Take note of the Biomass Storage indicator, which displays the amount of matter you possess for respawning and healing purposes. As you venture forth, you’ll come across more of this vital resource.
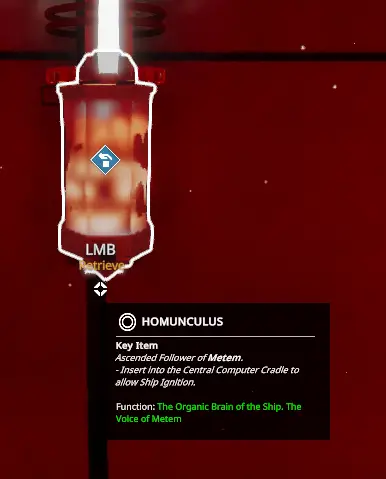
Voice of Metem/Homonculus
Don’t forget to acquire the Homonculus. It’s a crucial part of your ship’s functionality.
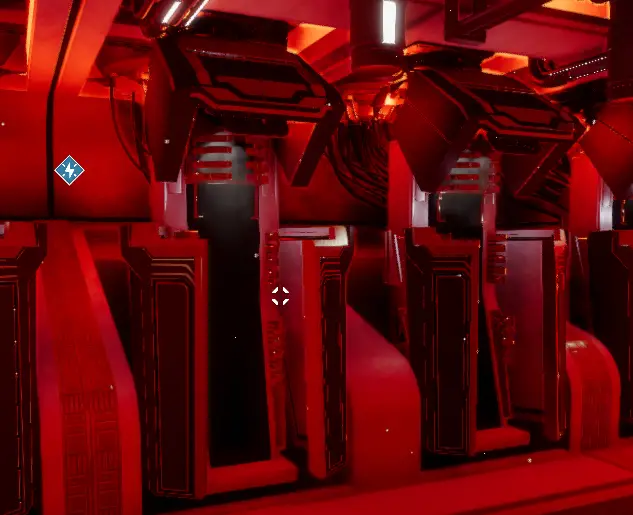
Computer Terminal
Locate the ship’s computer station and insert the Homonculus into the designated slot. After successfully inserting the Homonculus, initiate the ship’s startup process by using the switch located below the terminal.
Ship Mechanics (Defenses)
Now, let’s delve into the intricacies of ship defenses, including shields and point defenses, to ensure your safety during your spacefaring adventures.
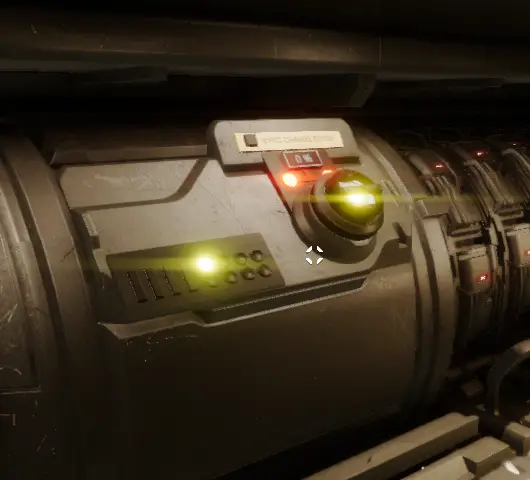
Shields:
- Shields serve as your protective barrier. In most cases, you should be just fine unless someone decides to unleash a bass cannon. The shield generator is relatively straightforward compared to other ship systems.
Power Up:
- Begin by flipping the switch on the left.
- Activate all switches on the inside panel. To do this, hold down the activate button until the levers click into place.
Keep in mind that the basic tier shield doesn’t cover its rear side. The three sides it protects depend on its placement. For example, if it’s positioned on the left side of the ship, it covers the Rear, Left, and Front sides.
More Boost:
- You can enhance the shield generator’s performance by inserting energy cells into the right slot. This significantly increases the recharge rate. However, you’ll need to have energy cells unlocked by leveling up and charge them inside the energy room. (Refer to Power Mechanics for details)
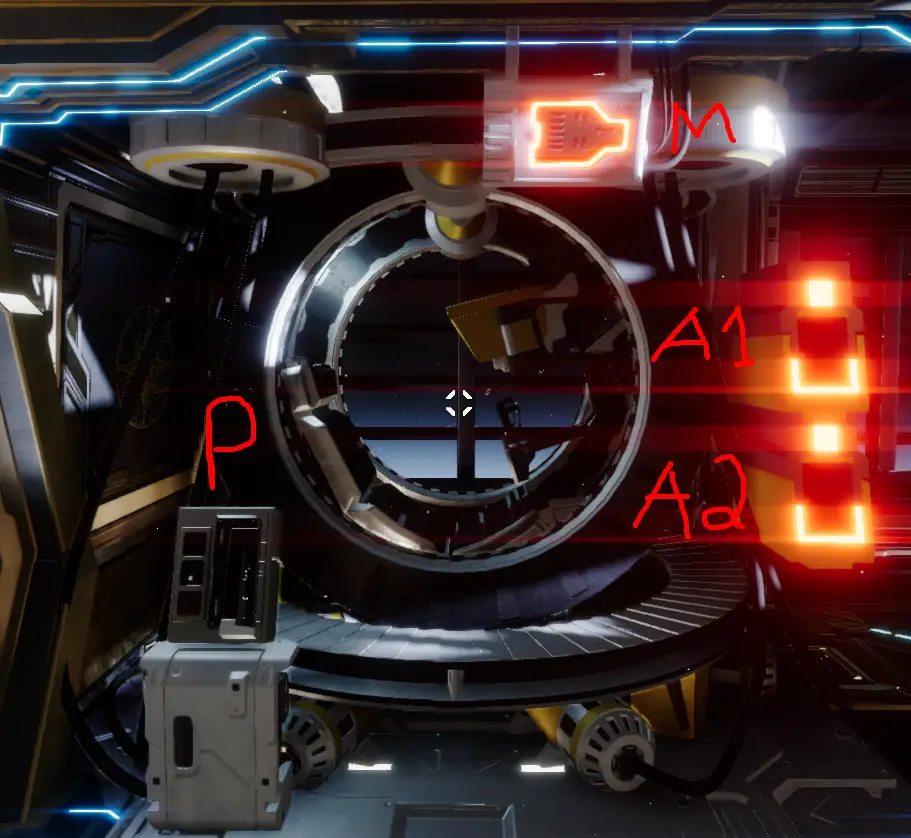
Point Defenses:
- Point defenses are your rapid-fire guardians. Each ammo box provides them with 1000 rounds, making them formidable against missiles and projectiles. They unleash a barrage of firepower to protect your ship.
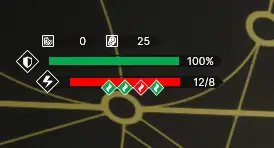
Point Defense Slots:
- These slots display the current ammo in the module (CA), power status (P), and the ammo slot (A) for adding ammunition.
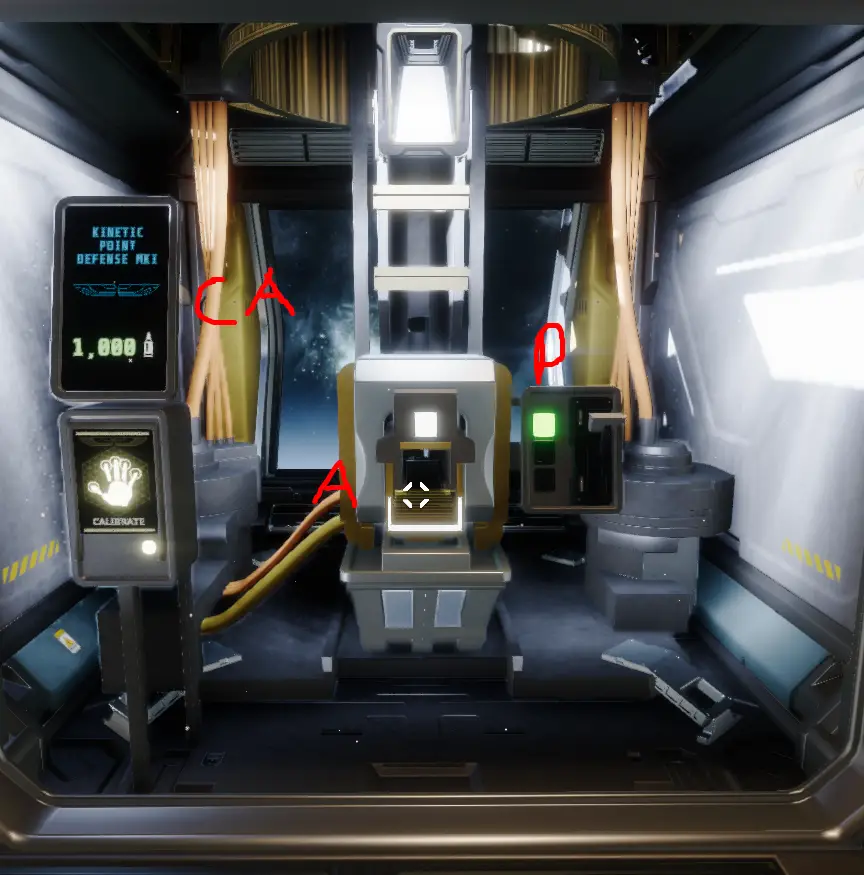
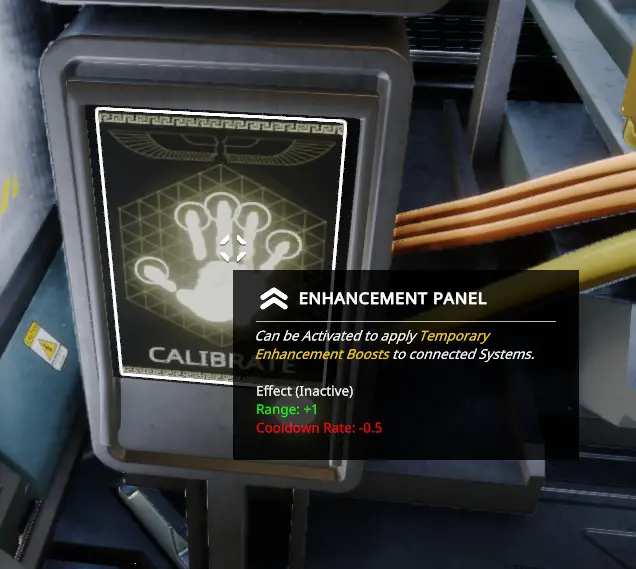
Point Defense Enhancement:
- Activating the enhancement adds some extra range to the interception capabilities of your point defenses.
Ship Mechanics (Engines)
Ship engines are the lifeblood of your vessel, and understanding how to operate and maintain them is crucial to your survival in the vast expanse of space. Let’s delve into the specifics of warp drives, thrust boosters, and the trim mini-game to ensure your ship’s engines run smoothly.
Void Drives (Warp Drives):
- The Warp Drive, also known as the Void Drive, enables you to traverse vast distances between star systems in mere seconds. However, it’s imperative that you are inside the ship and seated during warp travel. Failure to do so can result in significant damage or even death, leading to the loss of valuable Organic Matter.
Void Drive Charging:
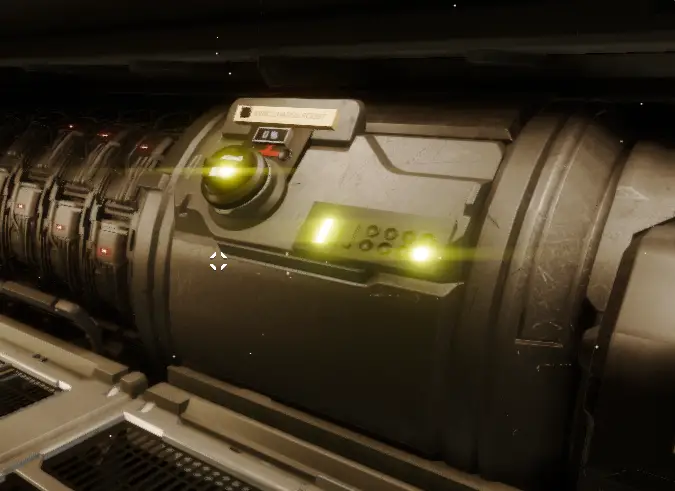
- To initiate the charging process, activate both charging switches as pictured above.
- It’s recommended to have two players in the rear of the ship simultaneously activate both switches for a quicker charge. However, in certain situations, you can manage it alone by activating both switches.
- Once fully charged, the pilot can activate the drive (see Pilot Seat Section) after someone selects the destination on the world map (see World Map Section).
Thrust Booster:
- Near the engines, you’ll find a set of engine boosters. These provide an additional thrust boost but have a limited duration. They can be recharged an infinite number of times after usage, enhancing your ship’s maneuverability.

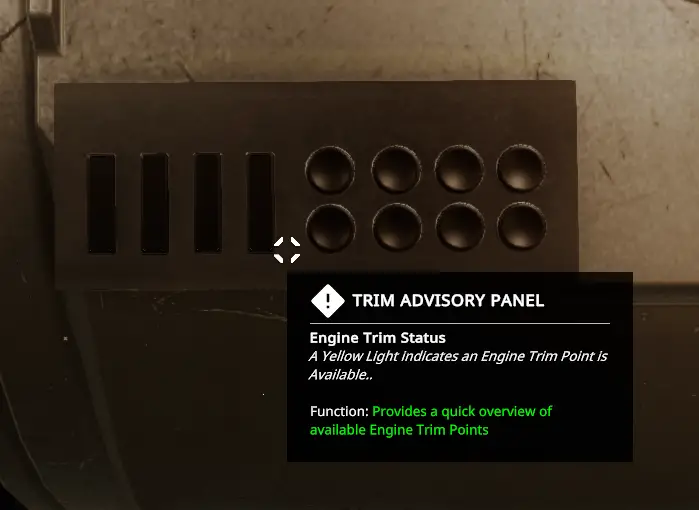
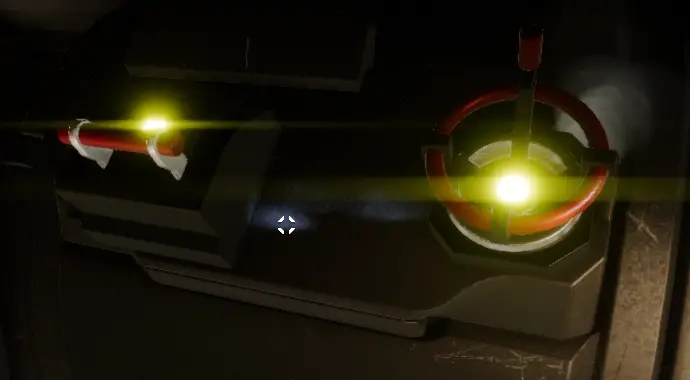
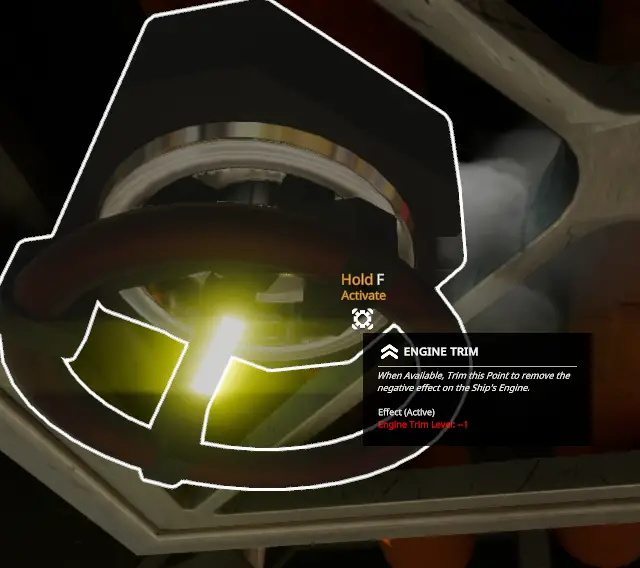
Trim Mini-Game:
- The Trim Mini-Game is a challenging task that requires your attention and skill. You’ll encounter Valves, Switches, and Levers throughout the ship, all of which control Engine Trim. This trim affects your ship’s speed and its ability to decelerate effectively. If one of these components activates, you’ll hear an audible hissing noise and notice a flashing yellow light. To rectify this, approach the affected item and repair it. The pilot will be alerted when Engine Trim has a negative impact and can inform you of the number of items that need repair. To locate the trim items or determine which side requires attention, refer to the trim panel, usually located near the engines. Levers and switches are represented as lines, while valves are depicted as circles.
Needs Repair
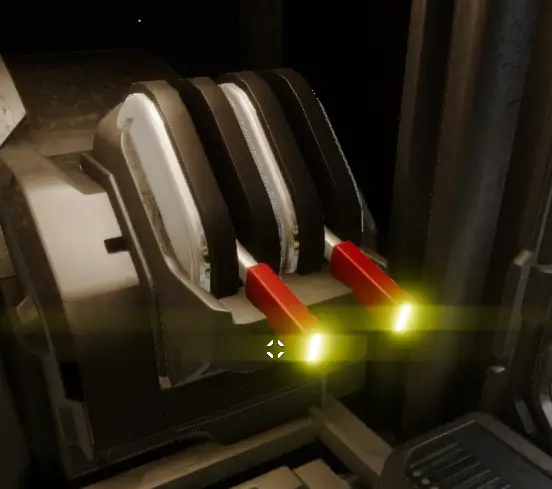
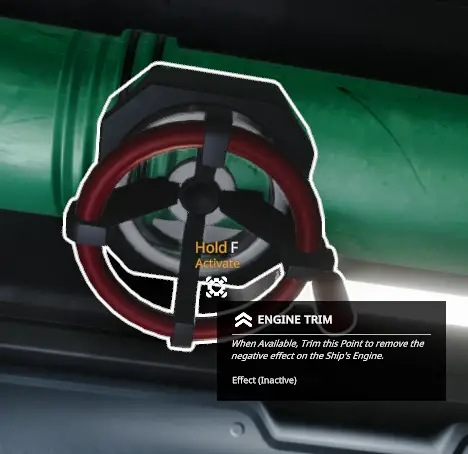
Repaired
Ship Mechanics (Fabricator)
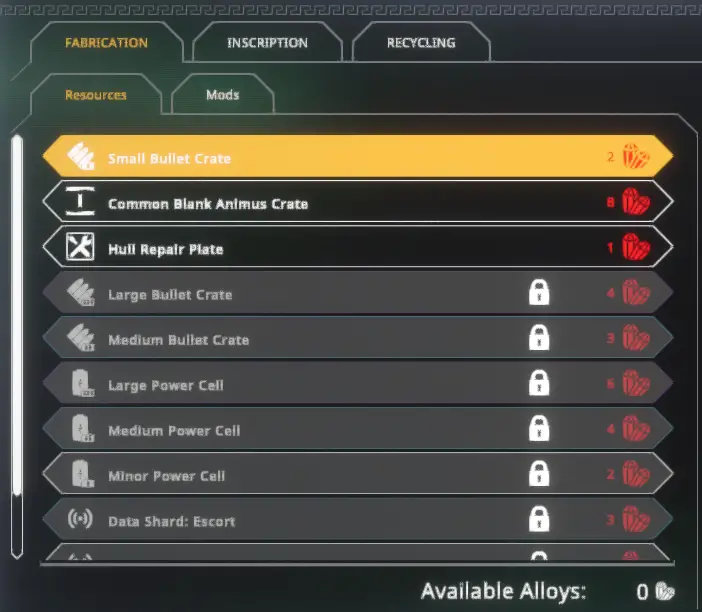
The Fabricator, a celestial crafting table, is where you wield the power to create wonders from nano alloys, the building blocks of the universe itself. These alloys are the foundation for crafting every item in the game, making the Fabricator a pivotal part of your journey.
Fabrication Resources:
- Resources encompass a wide range of items, including ammunition crates (for higher-tier weapons), Animus crates (essential for modules like power cells, hull repair modules, and Data Shards for calling in support ships).
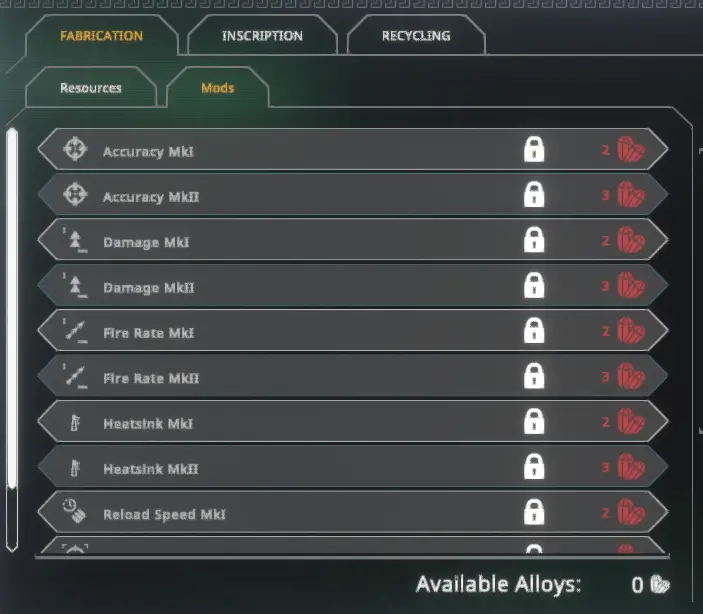
Fabrication Mods:
- Mods are exclusively used for upgrading your weapons. To understand how to install mods and the effects of each mod, refer to the Ship Mechanics Weapons section.
Inscription
The Inscription category can be further divided into three sections: Offense, Defense, and Utility. These modules provide your ship with new capabilities, allowing you to adapt to various challenges in space.
Inscription Offense:
- These modules consist of various weapons that can be installed on your ship, enhancing its offensive capabilities.

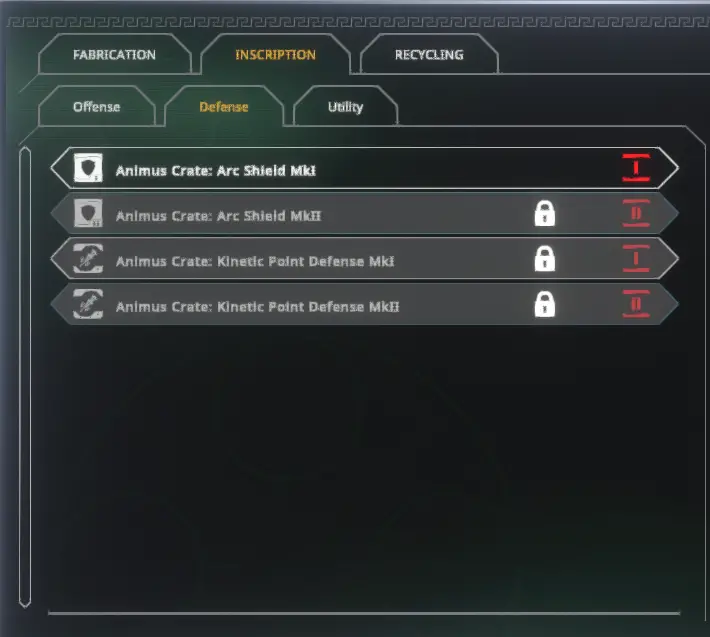
Inscription Defense:
- Shields and antimissile modules fall under this category, bolstering your ship’s defense against incoming threats.
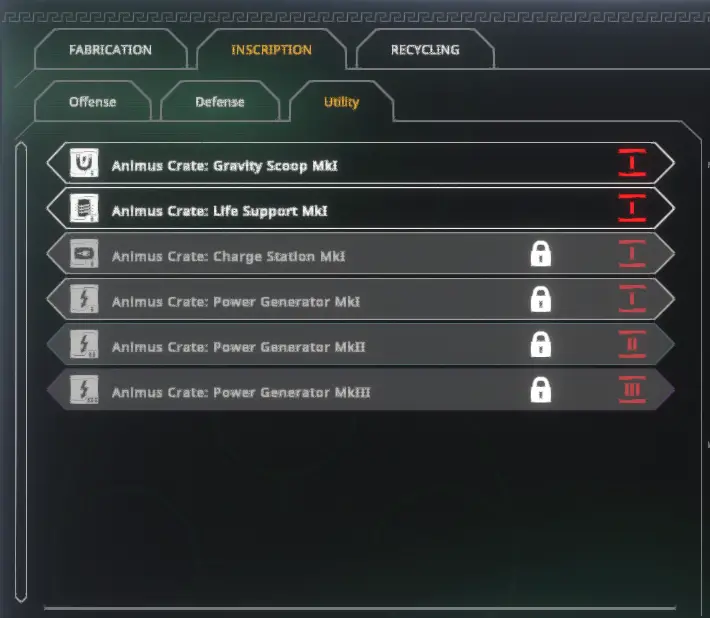
Inscription Utility:
- Utility modules include generators, life support systems, and gravity scoop modules, which serve various utility functions on your ship.
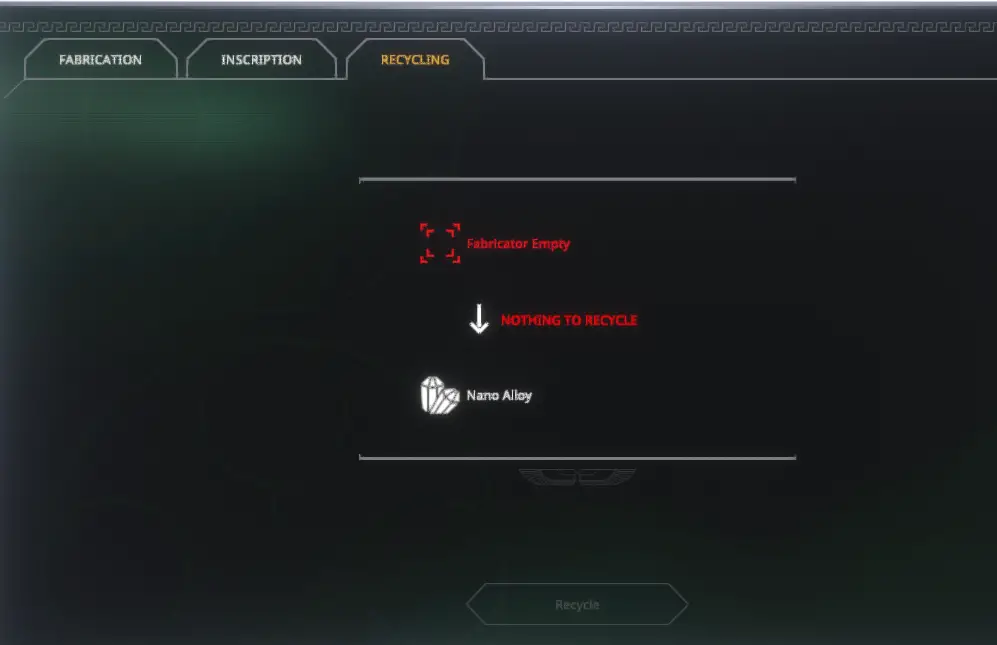
Recycling:
- Embrace the mantra of “reduce, reuse, recycle, and let it grow.” The recycling menu allows you to convert scraps discovered during your travels into valuable alloys. This eco-friendly practice not only conserves resources but also contributes to the growth of your cosmic adventure.
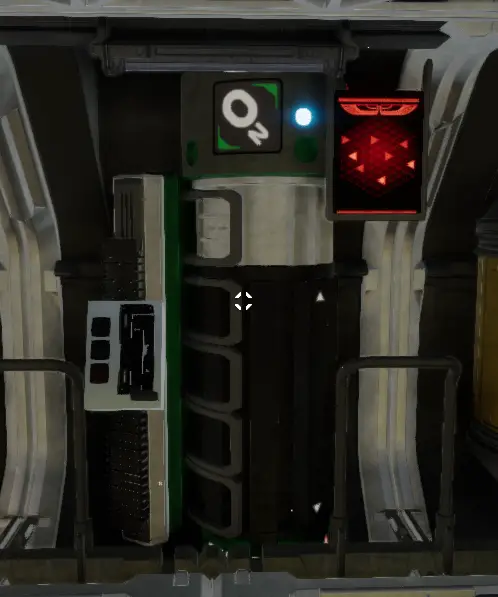
Ship Mechanics (Life Support)
Life support is the heart of your ship, responsible for producing the life-sustaining breathable juice you need for survival in the cold expanse of space. In simple terms, just turn it on, and you’re good to go.
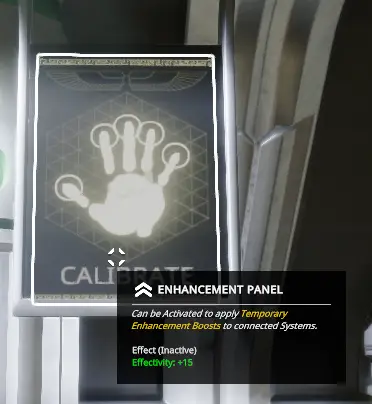
For those curious about a little extra boost, there’s an option to increase the O2 generation by 15% for 5 seconds through a small puzzle. However, it’s worth noting that this feature is seldom necessary.
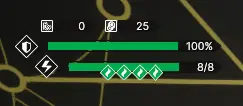
The status bar displays both temperature and O2 levels. Keep an eye on it, though it can sometimes bug out and fail to update. Stay vigilant, and may your life support systems always keep the breathable juice flowing smoothly!

Ship Mechanics (Power and Auxillary Terminal)
Power management can be a fascinating endeavor, but it becomes rather simple when you have enough players on board. With the right team, you can produce a whopping 1.21 Gigawatts with ease and never run out of power. Just remember to keep resetting those breakers, as you can monitor their statuses on the energy bar.
Here’s a breakdown of power management:
Power Consumption:
- Power is plentiful, and there’s no need to fear breaker overload.
- If one breaker pops due to excessive power draw, it’s not a major concern.
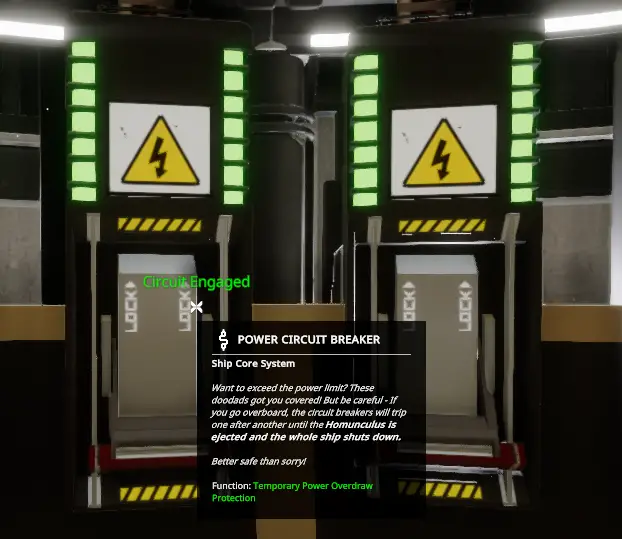
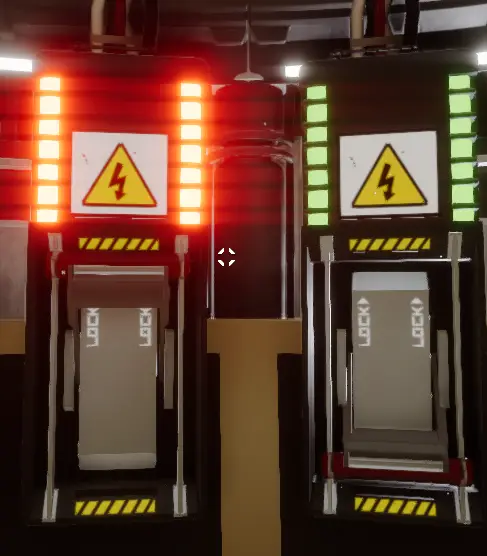
Main Breakers:
- The main breakers reside inside the power room, allowing you to overload your power supply for nearly an infinite duration, as long as someone keeps resetting them. Each breaker will pop after being overloaded for a certain amount of time.
- If all breakers pop and energy consumption continues, the Homonculus will emerge, signaling the need to restart the ship. However, as long as someone keeps resetting the breakers, you can enjoy an almost unlimited power supply.
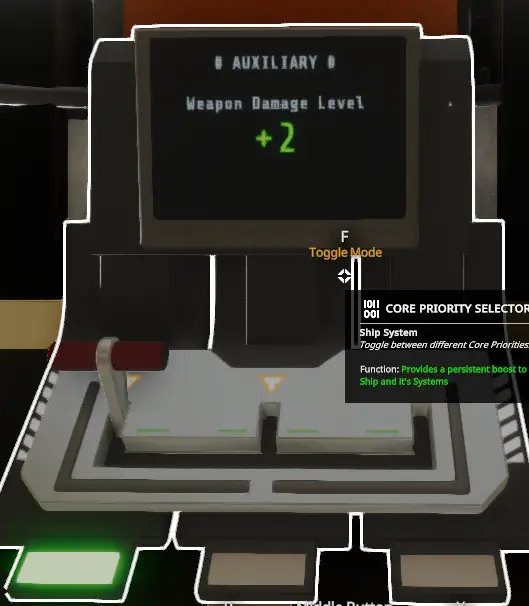
Aux Terminal:
- Some ships come equipped with an Aux Terminal, while others do not. This small terminal in the power room offers three specific buffs to the ship that do not expire:
Aux Shields: Increases the charge rate and hitpoints of your shields by 50%.
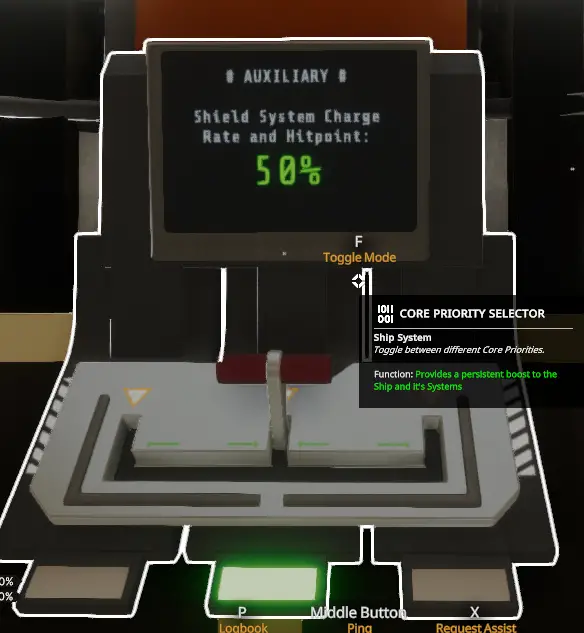
Aux Thrusters: Extends the duration of Thruster Boosters (refer to the Engines Guide) by 50%.
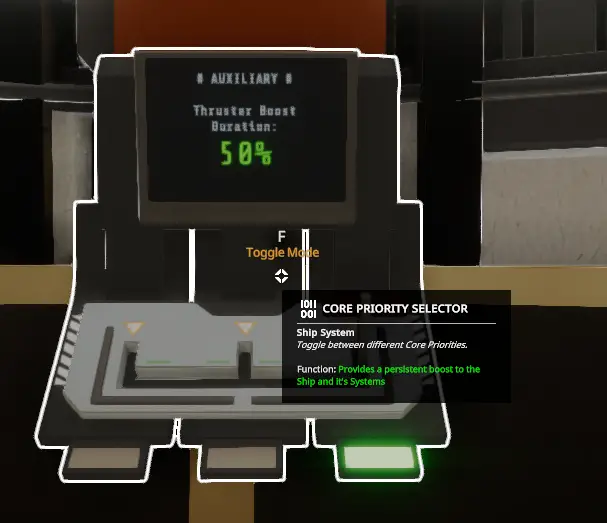
Aux Weapons: Boosts weapon damage level by 2 points.
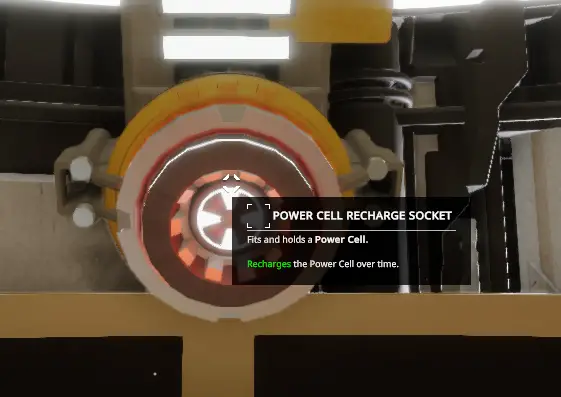
Power Cell Charging:
- Once you unlock power cell crafting, you can charge these cells inside the power room, enhancing your ship’s capabilities.
Ship Mechanics (Weapons)
Prepare to explore the diverse array of weaponry at your disposal, each with its unique characteristics and abilities. While detailed stats are a work in progress, here’s an overview of the five primary weapon types in the game:
Beamcaster:
- Picture a colossal laser beam. The Beamcaster excels at long-range combat, offering precision and effectiveness. It’s particularly adept at breaking through shields.
- Versions: Only one version available.
Cannon:
- A classic pirate’s cannon designed for medium to long-range engagements.
- Versions: Comes in three variations: Single, Dual, and Quad Barrels.
Minigun:
- The Minigun unleashes a rapid barrage of firepower, making it highly effective against enemy fighters. It shines in medium-range combat.
- Versions: Available in two versions: Single and Dual Barrels.
Carronade:
- The Carronade, while not yet unlocked, offers medium-range capabilities. It comes in three versions: Single, Dual, and Quad Barrels.
Energy-Gatling:
- Similar to the Carronade, the Energy-Gatling remains locked for now. It operates effectively at medium range and offers a single version.
Each weapon type brings its strengths and playstyle, allowing you to tailor your ship’s loadout to your preferred combat style. Whether you prefer precision with the Beamcaster or the rapid fire of the Minigun, choose your arsenal wisely, and may your shots always find their mark!
That's everything we are sharing today for this Void Crew guide. This guide was originally created and written by Tylerun. In case we fail to update this guide, you can find the latest update by following this link.