- Title: Samorost 3
- Release Date:
- Developer:
- Publisher:
Information about Samorost 3 is still incomplete. Please help us fill the details of the game using this contact form.
This comprehensive guide aims to assist you in successfully finishing the game, providing a full walkthrough of Samorost 3.
Introduction
Immerse yourself in an enchanting point-and-click adventure game set in a captivating and mysterious new realm. Every scene in this game is meticulously crafted, resulting in a visually stunning experience that will leave you in awe. Unlike traditional games, the Samorost series relies on visual storytelling, where you assume the role of a space-traveling gnome embarking on thrilling journeys across various worlds and moons. It’s hard to resist the allure of this game and not feel an overwhelming sense of joy.
Walkthrough Part I
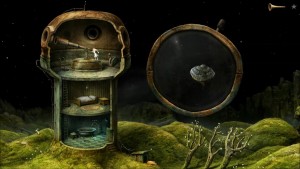
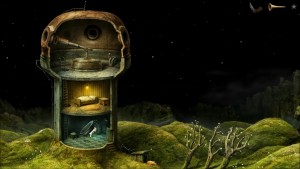
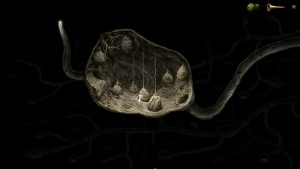
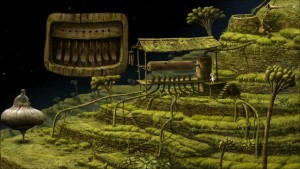
To commence your journey, you assume the role of a gnome inside an observatory situated on a vibrant, tree-like planet. Unexpectedly, a trumpet descends from the sky and lands on the grassy area in front of the observatory. Curiously, you pick up the trumpet and give it a playful toot. Interestingly, the trumpet also serves as a listening device. A brief tutorial guides you on navigating the game’s world. You can zoom in and out using the scroll wheel and click and drag the screen with the left mouse button.
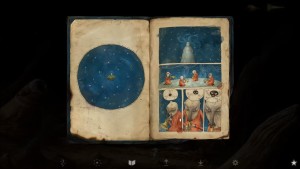
Utilize the trumpet on the tree with a hole to listen to the sounds made by a woodpecker. Proceed into the observatory and climb up the ladder to reach your bedroom. Rest in the bed and experience a dream involving flying in a UFO. On the bedside table, there’s a book containing a captivating story for you to read. Climb back up the ladder to the observatory and peer through the telescope, adjusting the view until you spot another planet.
Activate the lever and observe through the adjacent window. Once again, explore the view until you come across a peculiar planet. Repeat this process for the third window, revealing yet another planet. Descend the ladder, exit the observatory, and head west. Use the trumpet to listen to the unique mushroom-like plant, witnessing an image of it transforming into a UFO. Now, run down the mountain to encounter a man engaged in soldering. Use the trumpet on the water bottle, and the gnome will have the idea to cut it and utilize it for the UFO. Engage in a conversation with the inventor, who will provide you with a picture of the necessary parts to construct the flying ship.
Return to the observatory and head east. Take a look at the levers next to the wooden pole. The left lever moves the log horizontally, while the right lever adjusts its vertical position. Adjust the right lever to the fourth setting, which is the second from the bottom, aligning it with the base of the right wooden pole. Refer to the accompanying image for clarification.
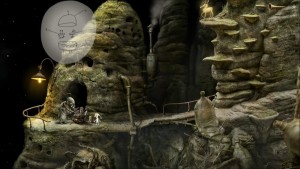
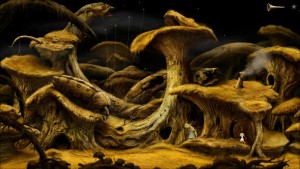
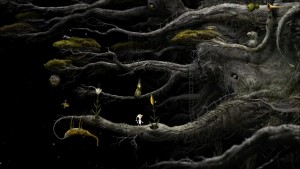
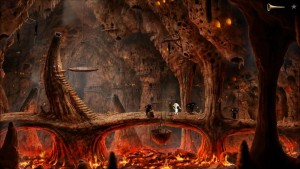
Once the height is correctly set, swing the log from left to right using the left lever. When you hit the base of the right pole twice, it will collapse, creating a bridge between two rocks. Cross the bridge to the east, leading you to a greener area where you’ll encounter a peculiar man perched on a tree. He will vanish and reappear in different locations. Use the trumpet on the central tree, triggering a strange scene involving worm-like creatures and the sudden appearance of mushrooms. The man will start picking the mushrooms.
Walkthrough Part II
Move toward the small stump on the right side of the screen. After a brief period, the man will join you and suggest playing cards together.
A box with four slots and several cards below will appear. You can pick up a card and place it in one of the slots. Arrange the two people in a tent in the fourth slot. They need to gather four pieces of food to solve the puzzle. Here is the solution:
- The Pig: Place the man with a bow in the first slot, the pig in the second slot, and the campfire in the third slot. Once the pig is cooked, remove the campfire and place the cooked pig in the third slot. The two individuals under the tent will eagerly devour it.
- The Mammoth: Position the two men with spears in the first slot, the pond in the third slot, and the mammoth in the second slot. The two men will chase the mammoth into the pond and slay it. Replace the pond with the fire and replace the mammoth with the cooked one. Put the cooked mammoth in the third slot to satiate the two men under the tent.
- The Moose: Follow the same steps as with the pig, but before that, feed the moose with the mushroom. Offer the mushroom to the moose, making it ill. Then, place the man with the bow in the first slot, the moose in the second slot, and the fire in the third slot to kill the moose. Once the moose is cooked, move it to the third slot so that the two individuals in the tent can consume it.
- The Fish: Put the man with the fishing rod in the first slot and the mushroom in the second slot. The man will hook the mushroom. Place a fire in the second slot, and the man will cook the mushroom. A worm will emerge, and he will use it as bait. Replace the fire with the pond, and the man will start fishing, eventually catching a fish. Reintroduce the fire in the second slot to cook the fish. Place the cooked fish in the third slot to provide the final piece of food to the two individuals.
Having successfully solved the puzzle, the man will reward you with his knife. Return to the west and descend the mountain to find the inventor. Use the knife on the bottle and bring the top piece to the inventor. In response, he will present you with a picture of the flying machine’s components.
Walkthrough Part III
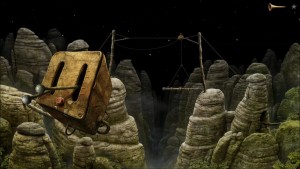
Return to the observatory and collect the bathtub. The gnome will take it back to the inventor as part of the flying machine. However, you still need the seat and lever mechanism.
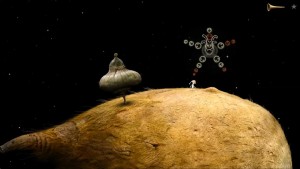
Rush back to the east where you constructed the bridge and obtain the lever mechanism. Bring it back to the inventor. Now, you need a seat, but what can you use? Return to the observatory and retrieve the small stool that was next to the bathtub. Take it to the inventor. He will complete the construction of the cockpit section of the UFO. Together, you will lower it onto the large mushroom plant, and the flying journey will begin. Before venturing to a new planet, you must return the knife to the mushroom collector. You will automatically fly near him, so simply select the knife and give it back to him. Now it’s time to soar towards a new planet!
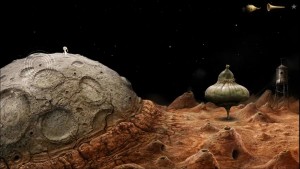
You won’t be able to directly reach the second planet. Instead, hop onto the asteroid when it comes within range.
Asteroid and Second Planet
The Asteroid:
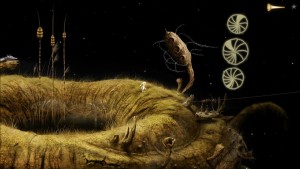
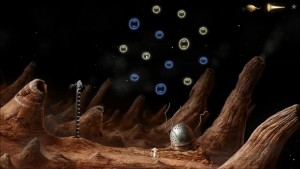
Use the trumpet on the small knob located at the top of the asteroid. This action triggers a new puzzle. Fortunately, this one is relatively easy. Grab and rotate the wheel to consume all of the red circles. In some cases, you may need to move the white circles to different lines by eating them and spitting them out elsewhere to access the red circles.
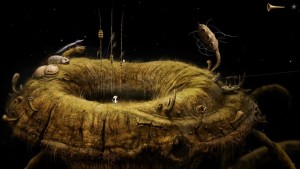
Once all the circles turn white, arrange them in lines of three. This will solve the puzzle and open a hole at the top of the asteroid. Jump down into it. Inside, you’ll find a bug clinging to the cave roof with two antennae. Pluck both antennae to produce a sound. Pluck them repeatedly until the bug wakes up and releases an ice cloud. Click on the feature on the left side of the cave, which will open up and reveal a keyhole. Click on the keyhole and discover that a key is needed to unlock it.
For now, you have done all you can in this area. Return to the surface and hop into your flying machine. Click out into space to take off. When the asteroid approaches the second planet, click on it to make your way there.
Walkthrough Part IV
The Second Planet:
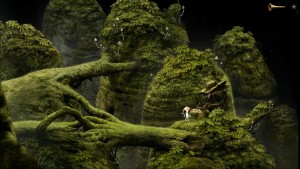
Exit your ship and move one screen to the west. Enter the hole at the base of the first tree, and you will emerge from a tree log just above. The tree to the left is emitting a sound, so use your trumpet to interact with it. You’ll see a depiction of a tree and how you can climb into one hole and emerge from another.
To your right, there’s a small chimney with a mushroom cap. Click on the mushroom to hold the chimney closed. Smoke will start to billow out of the treehouse, and a lady will rush out. Enter the hole on the far right of the screen to appear at the bottom behind the creature. Proceed into the treehouse.
You will come out at the top right, above the giant bug. Pull on the rope hanging from the branch, causing the tree on the left to emit smoke. Crawl back into the hole and re-enter the hole at the base of the large tree. This time, you will emerge from the top of the tree, allowing you to pluck the antennae. Pluck all the antennae, and the bug will awaken, releasing a peculiar gas that turns day into night.

Now that the bug is awake, use the trumpet on it. The bug will show you an image of two bugs together. Listen to the sound they make with their antennae and observe which antennae are moving. You need to pluck the same ones in the same pattern. Here’s the pattern from left to right: 3 -> 4 -> 1 -> 2 -> 3 -> 3 -> 1 -> 1 -> 4 -> 4 -> 4 -> 2 -> 2 -> 2.
Once you have the pattern correct, little gnomes will appear from the tree, and a purple-blue circle will appear next to you. Grab the small purple-blue circle and place it in the middle of the bug’s pattern.
Walkthrough Part V
The bugs will provide an extension to the pattern for you to follow. The initial part remains the same, but more is added to the end. Grab the circle and place it in your inventory, then follow the pattern: 3 -> 4 -> 1 -> 2 -> 3 -> 3 -> 1 -> 1 -> 4 -> 4 -> 4 -> 2-2 -> 2-2 -> 2-2.
Once again, the little gnomes will start flying around the tree. Climb back into the hole to emerge at the base of the tree. Walk all the way to the west and jump on the zip-line to the other side. On the other side of the hole, you’ll find lizard-like creatures and a strange branch with three circles in it. Click on the branch to examine it closely. Use your trumpet on the branch, and it will reveal a circle pattern.
Click on each of the three lizards to wake them up. When they are awake, they will start singing, and the tune will depend on the position of the pod on the reeds. The reeds in the center have a small pod that can be moved up and down. Adjust the reeds as follows to trigger a reaction: position them in the following way: one of the lizards will sing loudly, and the top of the branch will shoot off.
Now, go to the branch and pull it down so that a seed falls out. A new plant will sprout up. Move the new plant closer, and a sticky substance will come out. Stand directly underneath the sticky substance to grab it. Return to the other side of the zip line. You’ll need to use the lever to move left and right to make your way back up.
Go back to the east where your ship landed. Click on the dangling mushroom to ensure that it is off the faucet. This is a giant tap, and below it, there is what appears to be broken pottery. Use the sticky substance on all the broken pieces to hold them in place. Start putting the pieces back together until the pottery is complete.
Press the small circles on the turtle’s shell to push them all in. Use the trumpet to communicate with the turtle again. The turtle will show you an image of a pattern.

Walkthrough Part VI
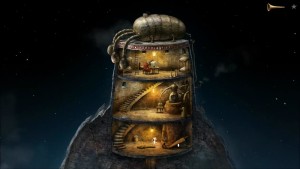
Disconnect the pipe located just above and to the left of the right monkey. This will cut off his heat supply.
Move the pipe at the top left to connect with the pipe at the very top. Wait for a few seconds, and this will bring water down to the bottom bathtub.

Grab the pipe from the left and connect it to the pipes to the left of the right monkey.
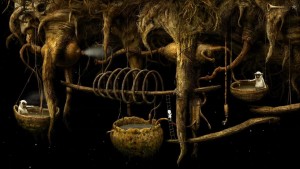
Take a look through the telescope hanging on a rope and move the lever up and down until the cup is full and lowers down.

Before you leave, reconnect the pipes to their original positions; otherwise, the monkey will catch you when you try to leave and put you back. Return to the area where your ship landed and the pottery that you fixed. The cup should now be filled with water. Climb into the hole at the bottom of the faucet. You will descend into a round cave with two black bugs with antennae. Numbering the antennae from left to right as 1 to 4, pluck them in the following order to wake up the bugs: 1 -> 3 -> 3 -> 2 -> 4 -> 1.
You will receive the purple/blue circle in your inventory. Use it on one of the bugs. This will create two bugs that produce a tune. You need to copy this tune, as before. The pattern is: 3 -> 4 -> 1 -> 2 -> 3 -> 3 -> 1 -> 1 -> 4 -> 4 -> 4 -> 2 -> 2 -> 2.
Once you replicate the tune, a hole will open up below, and the key will appear. Pick up the key and climb back up the rope. Return to your spaceship and take off. Land on the asteroid when it comes near, and go back down the small hole at the top. Use the key on the keyhole, and the course of the asteroid will change. Hop back into your spaceship and take off. Wait until you are near the world that looks like a flying grey tree stump, and fly towards it.
Push the circles down in the same pattern as shown. The turtle will slide backward, revealing a hole underneath. Walk into the hole. You will arrive at a small island with ropes and creatures dangling from two of them. You can pick up the creatures and move them to a different rope. Some parts of the ropes have spikes on them. The solution is to pull the ropes down so that you can jump to a part of the rope without any spikes.
Walkthrough Part VII
Grey Tree Moon
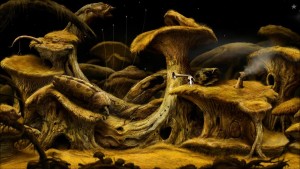
Land on the planet and exit your spaceship. As you land, a vine will grab your ship, and you won’t be able to pull it off. Walk to the west and sit on one of the cushions in front of the man in the tent. He will show you the image of a creature and pour you a cup of tea. Stand up and zoom out until you can see all of the trees. Look for a small green plant with a bulb growing on one of the trees. Pull the green bulb up until the parrots get interested. They will slowly hop towards it and begin fighting over it.

The parrots will break off the bulb, and it will drop to the ground. Pick it up. Walk to the east twice and use the trumpet on the hole in the tree branch that is sticking up. You will see an image depicting a fight between a tree and a space creature. Continue walking to the east until you reach the end of this tree planet. Termites will be walking out of their holes and returning. Click on the termites until they start to sing. When a number of them sing in unison, a large termite will appear.

This marks the beginning of another puzzle. Click on the symbol that appears in the sky after the termite flies away. Pull down the jaw of the branch at the top and climb down it like a ladder. Enter the large hole to the left of the screen, and you will reappear one screen to the west. Walk out of the hole and then along the log to the east. Continue walking east and then turn back to enter the large hole slightly below the path you were walking. This will take you into the termite’s nest.

In the central chamber, you will see four lights dangling down. From left to right, if you pull the fourth light, the termite will lay an egg that you can pick up. There are three tunnels where you can place the egg. Pulling the other three lights will change the path that the egg will follow. You want to drop an egg into all three baby termite rooms at the bottom. Pull the third light and then drop an egg into the third hole. This will drop an egg next to the first termite, near the pile of eggs. The termite will eat it and send a signal up to the strange white plant in the top left, which will create a symbol. Click on it to continue.
Pull the first light and the third light until the switch underneath stands straight up. Pull the fourth light for an egg, and then drop it into the first hole. This will feed the second termite. The termite will eat it and send a signal to a termite on a wheel, who will lift up the white cotton underneath him. You can now walk to the right and go down the tunnel, which will take you west. Keep walking to the west until you enter a cave with rocks. A fly is trapped inside here. Keep pulling the rocks until the path to the west is clear and the fly escapes.
Walkthrough Part VIII
Go back to the central chamber and pull the fourth light for another egg. Pull the second light, and then drop the egg into the second hole. This will feed the third baby termite. You will be sucked into a white container. Click on the container to be spat out and continue your journey downwards. There are many little creatures here that you can click on to hear funny noises. Walk to the left, and you will see two plants growing out of the branch, with a little long-nosed creature hanging upside down on the branch.
Pull up the suction cup at the end of the branch and let it go so it flings back and gets stuck on the little creature. Click on the beehive, and a bee will come out to pollinate the flowers. Click on one flower and then the other. The bee will follow the pollen, and some kind of yellow fruit will appear. Be aware that the bird may eat the fruit the first time you do it. You’ll need to pollinate the flower that is furthest from the bird and quickly grab the fruit before the bird eats it.
Climb up the two ladders to the top. Follow the path behind the tree and continue along the highest branch at the back to the left. You will come across another ladder. Climb up it to return to the man sitting under the tent. Head back to your ship to the east. You will also notice two flowers here. Click on the beehive, and then click on the first flower and then the other. The bee will follow the pollen and cross-pollinate the flowers, producing a fruit similar to an apple. Pick it up. By now, you should have three fruits.
Place the yellow banana-like fruit in the hole just above and to the left of the first red flower. Place the green fruit in the hole just below and to the left of the yellow fruit. Place the red fruit to the right of the red flower. This will produce a fruit that is a mix between the two plants. Grab it and plant it again. Keep repeating this process until the plants produce what looks like a little mandrake root creature. Pick it up.
Return to the man under the tent and give him the mandrake root creature. He will put it in his tea. Use the trumpet on the tea kettle. You will see a little image showing how to make a bomb. The man will pour you some tea and show you how to get rid of the vine that is trapping your spaceship. Take the cup of tea. Click on the green parrot above the tent until it poops on the tent. When the man stands up to clean it off, quickly jump to the right and smoke the pipe. Click on the symbol that appears and walk back to your spaceship. Use the tea on the vine. Now you can hop back into your ship and take off.
Click on the orange planet to fly towards it…
Walkthrough Part IX
Third Planet
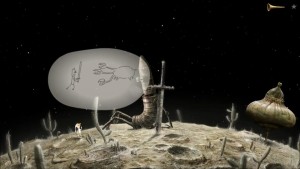
Exit your spaceship and use the trumpet on the pinnacle of the gray meteor. An image will appear, depicting another encounter with the peculiar creature and how the meteor crashed onto the planet.
Descend from the meteor and proceed eastwards to the cluster of three totem poles. Use the trumpet at the base of each pole, causing them to display a distinct symbol. Continue eastward and employ your trumpet on the metallic object, triggering what I refer to as the Bubble Puzzle.
To solve this puzzle, merge the blue bubbles together. Combine two of them, then another two. Merge these two larger bubbles to form a four-sized bubble. Eliminate the white bubbles by merging them into the larger blue bubbles. Once all the white bubbles are cleared, merge the remaining blue bubbles in pairs and then in fours. This will result in four-sized bubbles. Combine the fours to create two eight-sized bubbles. Finally, merge these two donut-shaped bubbles to complete the puzzle.
The metallic object will unlock, allowing you to acquire the second book. Click on the book icon at the top of the screen to read its contents.
The book narrates the tale of a monk who turned malevolent and created a dragon-like creature after being expelled and banished. The monk attacked his fellow brethren and seized their trumpets. Presumably, one of the trumpets was dropped, which is how the little gnome discovered it.
The totem pole with a ladder on its side can be swung from left to right. Click and drag it towards the hole on the left, where it will become wedged, forming steps for you to enter.
Inside the cave, you will find the underside of the totem poles. You can raise and lower them like a code, aligning them with the three symbols you encountered while conversing with the upper poles. The correct positioning of the totem poles inside the earth is shown in the image below.
The circular board will rotate, and a caterpillar will emerge. Click on the caterpillar until it reveals a symbol, then click on that symbol. Exit the cave and head westward. A platform now covers the hole. Step onto it to be lowered into another cave.
Walkthrough Part X
In this area, you will encounter peculiar small black creatures. Click on them to make them sing. Click on all four of them at the right moment to synchronize their singing in harmony. You will know you’ve succeeded when the gnome starts dancing.
The creatures will lift the basket and roll out a brown ball. Guide the ball towards the west and into a pool of lava. This cave is situated beneath the crashed meteor. Return to the four black creatures and place the mandrake root creature inside the basket. Once again, prompt all the creatures to sing together. After they finish singing, they will lift the basket and roll out the brown ball once more. Click on the ball to roll it towards the lava pool.
This time, the ball will explode, causing the meteor to take off. Climb back onto the platform and return to your spaceship. Enter the spaceship and take off. The meteor will transport you to a new system consisting of a planet and two moons.
Fourth Planet
Blue Moon:
Click on the blue moon to land on it. There, you will encounter one of the benevolent monks. He will share his experience of being attacked by the dragon, which consumed all the small creatures and stole something from the moon. Return to your spaceship and fly off to the crescent moon.
Crescent Moon:
Atop the crescent moon, you will find a colossal sleeping robot and a massive sword. Currently, there is nothing to be done here except for observation. Return to your ship and depart.
Fourth Planet:
The fourth planet is a vibrant world covered in lush forests and mountains. There are pipes here that resemble an organ. Before playing the pipes, pull the lever next to the well to bring water into the pipe organ.
Walkthrough Part XI
To give the plants an ample water supply, play the pipes in a specific order. The pipe that leads down to the plants should be played last. It is the fourth pipe from the left. Play all the other notes first and save this one for last.
A pumpkin-like vegetable will appear. Leave it where it is for now and head eastward. There, you will find three monks. Speak with each of them individually to gather clues on what to do next.

Navigate through the forest and ascend the mountain to reach the observatory. The mechanical dragon is located there, but you won’t be able to enter. Descend back to the monks and click on the small rowboat. The monk will ferry you across the lake.
Proceed towards the cave and use the trumpet on its entrance. A large anteater will emerge and show you a picture of the pumpkin. Return to the rowboat and cross the lake again. Retrieve the pumpkin from where you left it. Carry it across to the anteater, who will allow you to climb onto its nose and transport you to a higher rock ledge. Use your trumpet on the rock door located just to the left.
A fish puzzle will appear. Rotate one of the fish to face the opposite direction and then rotate all four fish until they change color. Repeat this process for all four fish. The rock door will open, revealing a secret entrance into the observatory.
Utilize the bellows, causing the malevolent monk to become agitated and run around. Pick up the small basket of coal and place it in the fire. Use the bellows once more until the contraption above starts whistling and drips liquid into a glass jar. The bad monk will descend and drink the liquid, resulting in throat discomfort that renders him unable to use his trumpets. Descend the ladder with the basket and blow your trumpet at the anteater, who will lower you down. Click on the pile of coal/dung to refill the basket and hop on the anteater’s nose.
Return to the observatory and replenish the fire with coal from the basket. Use the bellows again until the machine whistles. The bad monk will drink the liquid once more and attempt to use his trumpets. You will need to repeat this process for a third time. Retrieve coal/dung to refill the basket, replenish the fire, and use the bellows. Despite previous experiences, the monk fails to learn, and the liquid impairs his abilities again. This time, he boards the mechanical dragon and flies away.
Walkthrough Part XII ( Final part )
Ascend the stairs to the top level and take the round sphere from the table. Return to your spaceship and take off.
Head back to the Crescent Moon.
Crescent Moon:
Exit your spaceship and use the black sphere on the dormant robot. It will awaken. Click on the robot to converse with it and inform it about the dragon.
The robot will engage in a battle with the malevolent monk riding the dragon, ultimately defeating the dragon.
That's everything we are sharing today for this Samorost 3 guide. This guide was originally created and written by W̷.̷A̷.̷R̷_̷a̷n̷g̷e̷l. In case we fail to update this guide, you can find the latest update by following this link.