- Заголовок: Project Malice
- Дата выпуска:
- Разработчик:
- Издатель:
Information about Project Malice is still incomplete. Пожалуйста, помогите нам заполнить детали игры, используя это контактная форма.
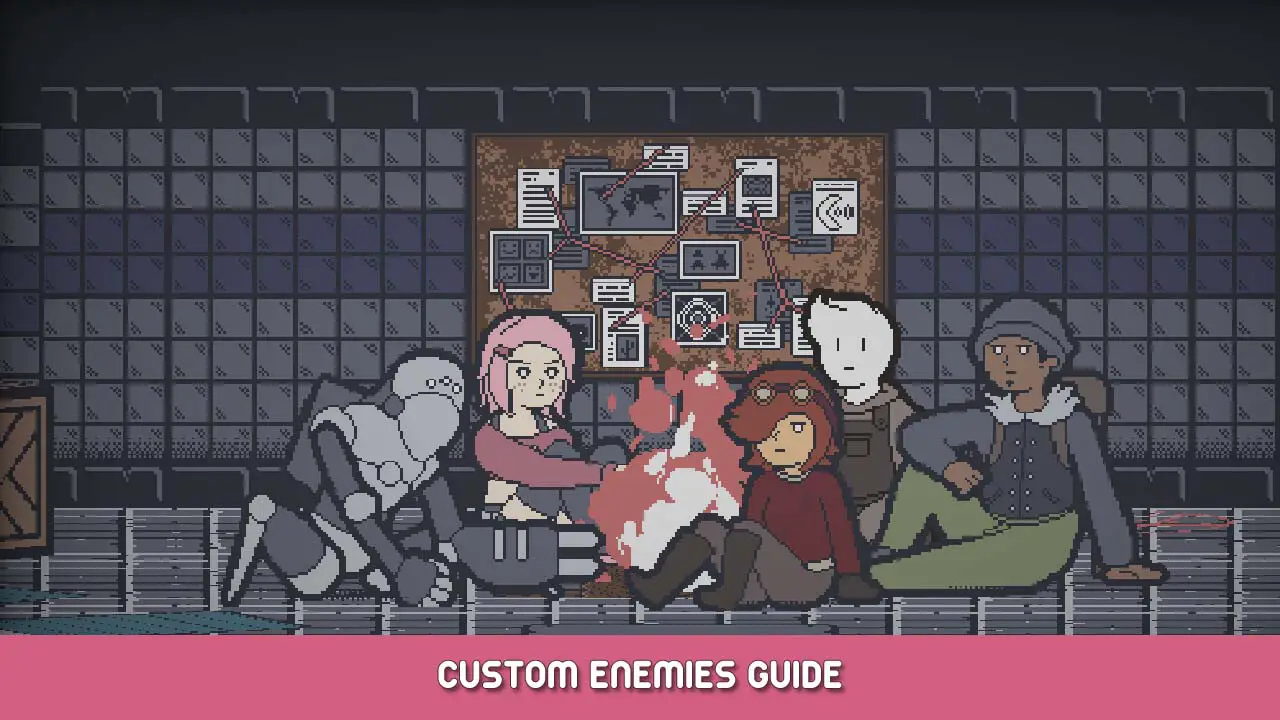
A guide on how to create, upload, and download custom enemies for Project Malice using the Steam Workshop.
Обзор
Привет! I am Aplove, the creator of Project Malice. Так, you want to add in custom enemies to the game, хм? The ones I added in not doing it for you anymore? Это нормально, Я полностью понимаю.
В этом руководстве, I am going to walk you through how to create, редактировать, управлять, upload, and download custom enemies for the game.
Просто внимание, this will require digging through some of your computer’s files, so if you don’t know where your Appdata folder is then I would advise that you hand your computer over to someone who’s probably under the age of 25 and let them take over for you. Также, this tutorial is for Windows only, so if you’re playing this on any other OS you’re on your own.
In Project Malice, after you have died 10 раз, a banner at the top of the screen will tell you that visitors from realms beyond and invaded. После того, как это произойдет, in the Refuge you will notice that a pentagram with a book has appeared. This is where you can view and manage your custom enemies.
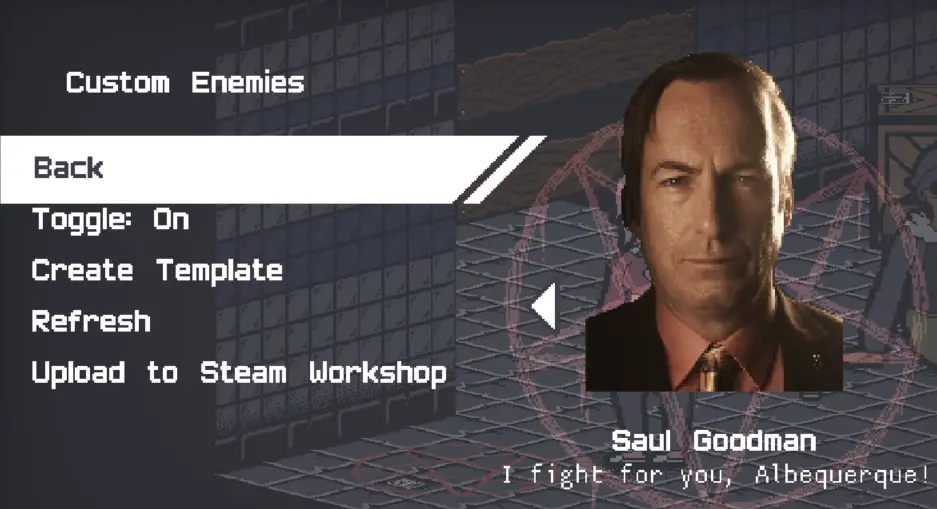
Отсюда, ты можешь:
- Enable/Disable enemies from spawning
- Create a template
- Refresh the enemy list
- Upload to Steam workshop
If the only enemy that you see is a greyish figure, then that probably means you don’t have any custom enemies. Let’s fix that, А не ___ ли нам?
Creating an enemy
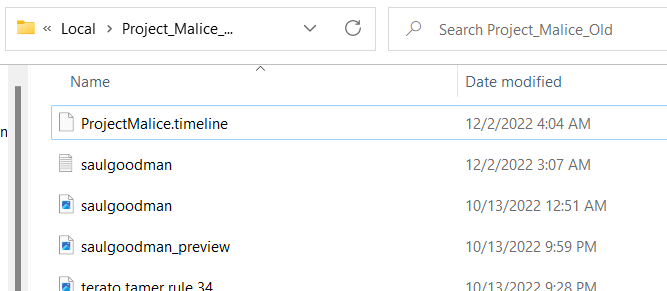
To get started with creating a custom enemy, you’re going to need a template. Pressing the Create Template button will create a new file in the game’s save data location, which should be located in
С:\Пользователи[ты]\AppData\Local\Project_Malice_Old. Here you’ll find your template file, signified by the .CUSTOM suffix. You’ll also find your timeline files, don’t touch those. Open up your template with notepad to edit it.
Here you’ll find all sorts of values that will be read when the game creates your custom enemy. It’s seperated into different sections, which I will go over one by one:
[ИМЯ] This is the name, описание, and author name of the enemy. This will show up when displayed in he custom enemy menu, and when you upload it to the Steam workshop. Try to keep the description fairly brief.
[СТАТИСТИКА] This is your enemy’s general stats. Здоровье, повреждать, скорость перемещения, и т. д.. Range is measured relative to the size of the sprites, so if a range value is set to 160 it will be approximately one Shambler away.
Detect range is how close to the enemy you need to be for it to see you, attack for how close to attack you, and alert is how close for them to back away from you.
Attack Prepare is how long it takes for the attack to wind up, and attack cooldown is how long before the enemy can attack again. This is measured in increments of 60 кадров в секунду, так 90 будет 1.5 секунды.
Attack type is how the attack is telegraphed:
0 – Arrow on the ground (по умолчанию)
1 – Crosshair on the ground with line of sight (great for long range)
2 – Dotted circle on the ground
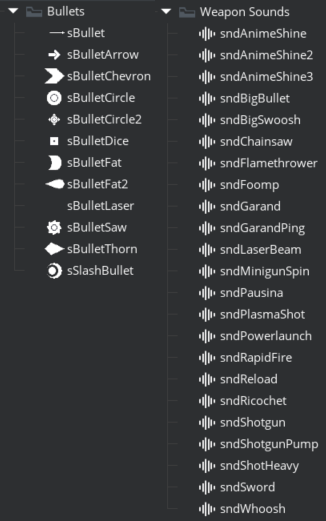
[BULLET] These are the properties the projectile your enemy fires will have, such as damage, скорость, отбрасывание, количество, и т. д.. Bullet Fan signifies if the bullets will be fired in a fan-like pattern instead of the spread being randomized, like a shotgun. Bullet Billboard determines if the bullet will be facing towards the camera instead of being drawn perpendicular to the floor. Bullet Size determines the size of the shot.
Bullet Sprite and Bullet Sound are basically what you think they are, but because it’s not really possible to have custom projectiles or custom sounds, you’ll have to pick from a list that’s already in the game. Here’s a list of bullets and sounds from the game’s files:
[ЭФФЕКТЫ] This determines if you want your enemy to have a status effect inflicted through the bullet fired or passively if the player gets close enough to the enemy. Set the effect values to -1 if you don’t want any. В противном случае, here is a list of status effects:
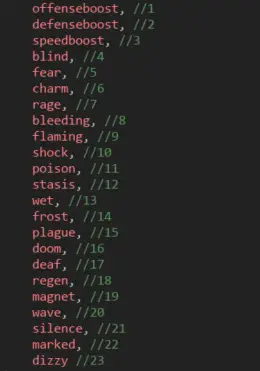
Set the value to the comme- *ehem* sorry, зеленый number next to the effect you want to inflict. Some statuses have strength values, то есть. flames and poison will deal X amount of damage every few seconds, and offense/defense boost will boost off/def by X*100% (which you can set to negative to decrease.)
[РАЗНОЕ]This section has some extra values, such as if the enemy can fly over pits or if you want them to bleed when getting hit. Despawn determines if the enemy despawns if you get far enough away, это правда (1) по умолчанию. Corpse Gib determines if the enemy explodes into a bunch of pieces when they die, or if they just fall to the ground. Ammo determines how many times the enemy attacks while attacking, so if you want them to attack 3 раз подряд, установите его на 3.
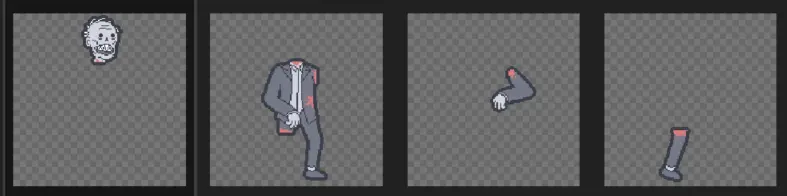
[VISUALS]This is where the fun part is. This is where you set all of the sprites you want associated with the enemy, and how many frames each of the images have, the origins of the sprite, и т. д..
Есть 4 sprites you can set: Праздный, Ходить, Атака, and Corpse. If you don’t have sprites for your enemy yet, then open up your favorite image editing software and get to work! Keep in mind that when making your enemy, the standard enemy size is 160×160. If you make an enemy that’s 32×32, it’s going to appear very small. When you have the sprites, add them as seperate files into the same folder and the .CUSTOM file, and then type in the file names into the respective fields. The frames is basically how many frames are in the sprite, so if you have a 6 frame walk cycle, помещать 6.
For the corpse sprite, it will function differently if you have the enemy gib or not. If they gib, then when the enemy dies, it will create “насмешки” using the frames of this sprite. If it doesn’t the enemy’s corpse will display as the first frame while they are in the air, and the second when they hit the ground.
The x and y origins are basically where the image is going to be drawn from, which is usually at their feet. You can measure this by starting at the top left have corner of the image and seeing how many pixels horizontally/vertically it is to that spot.
The image preview only really matters when uploading to the Steam workshop, so unless you want to make something fancy, then leave it blank.
И это все! You have a brand-spankin’-new enemy! Look at you, nice work! Сейчас, let’s boot up the game and see them in action!
Your enemy in action!
Now that you’ve got your custom enemy done, boot up the game and head over to the custom enemies menu. If the game is already running, you can refresh and it might show up. If the enemy doesn’t show up, make sure that it’s in the same file and that is has the .CUSTOM file ending.
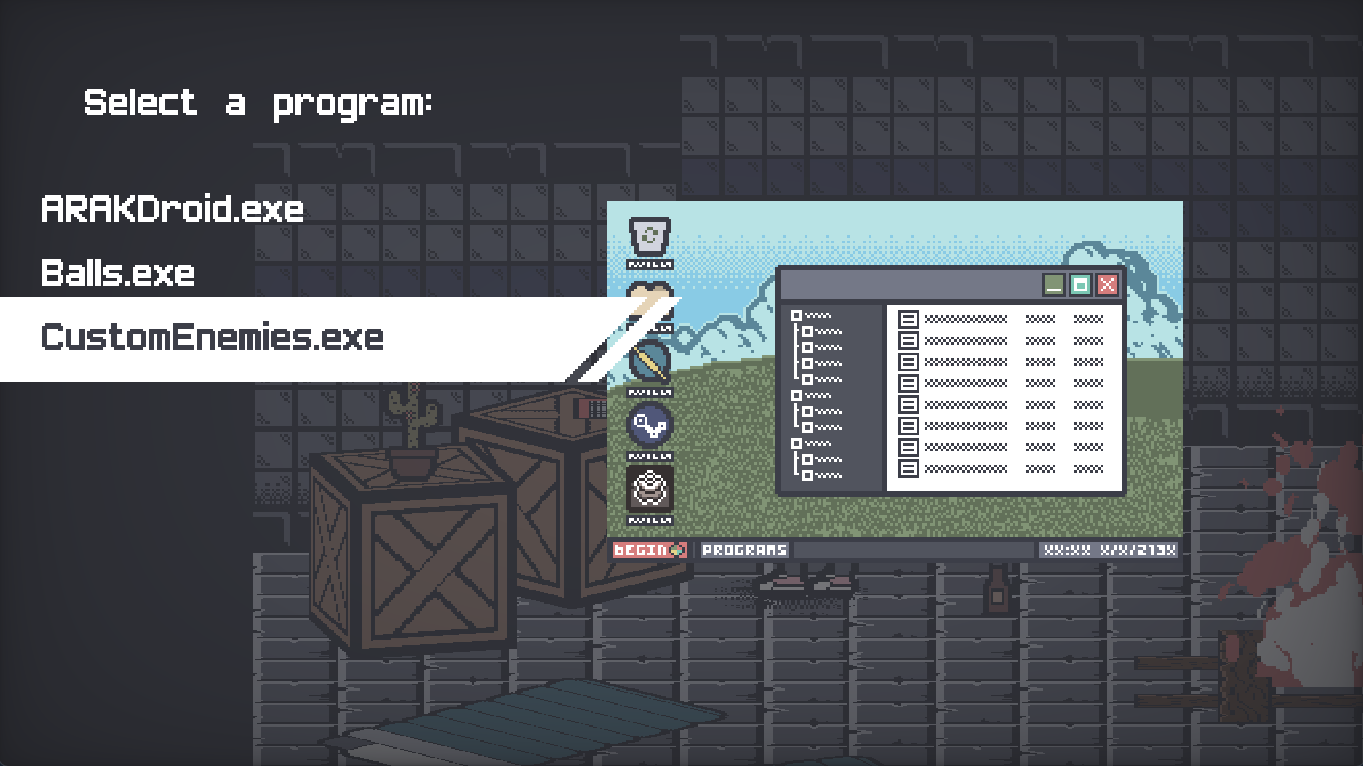
If the enemy appears, тогда поздравляю! Yipee! The enemy will appear at random in your runs. All custom enemies are classified as Mythical, so they won’t appear too often. If you’d like to test out your enemy, you can head over to the Laptop and scroll down to the CustomEnemies.exe program. This will take you to a simulation where you can spawn in and test your enemies.
If the enemy only appears as a Shambler with a green jacket, then there’s a good chance that something went wrong with loading the sprites. Make sure that the sprites associated are in the same folder as the .CUSTOM file, and that they are pngs.
Uploading & Downloading from Steam Workshop
Now that your beautiful creation is done, it’s fine to share it with the world! (если ты хочешь)
To upload an enemy to the Steam workshop, head over to the Custom Enemies menu and select Upload to Steam Workshop. A banner at the top will let you know if it is successfully uploaded. Если так, then you can head to the Workshop and find your creation! Легко! Keep in mind that uploaded enemies are hidden by default, so you will have to manually set it to publicly visible if you want others to see it.
To download an enemy, simply find an enemy in the workshop and subscribe to it. If the enemy doesn’t appear in the Custom Enemies menu, then Steam might still be trying to download the enemy. To remove the enemy, simply unsubscribe the enemy from the Workshop.
Please keep in mind that I am not going to be moderating Workshop submissions, so try to keep submissions civil. Do not upload anything that could get you banned liked uploading porn or something. If you have an enemy that has massive badonkers or is missing their arms that’s okay, but keep in mind that the Workshop is not marked as adults only. Также, please don’t submit anything that would make others uncomfortable. If you make an enemy that’s literally just pictures of your ex or a political figure, that’s a big no no. Только… don’t be weird, хорошо? If you see anyone else engaging in activites like this, just report/block them.
Enjoy your creations!
И это все! Have fun creating!
If you encounter any issues with custom enemies, feel free to post in the community discussions and if I see it, I’ll see what I can do to resolve the issue.
Thank you for playing Project Malice!
Это все, чем мы делимся сегодня для этого. Project Malice гид. Это руководство было первоначально создано и написано Aplove. На случай, если нам не удастся обновить это руководство, вы можете найти последнее обновление, следуя этому связь.