- Заголовок: Hunternet Starfighter
- Дата выпуска:
- Разработчик:
- Издатель:
Information about Hunternet Starfighter is still incomplete. Пожалуйста, помогите нам заполнить детали игры, используя это контактная форма.
This guide will show you all the basic things that you should know in Hunternet Starfighter.
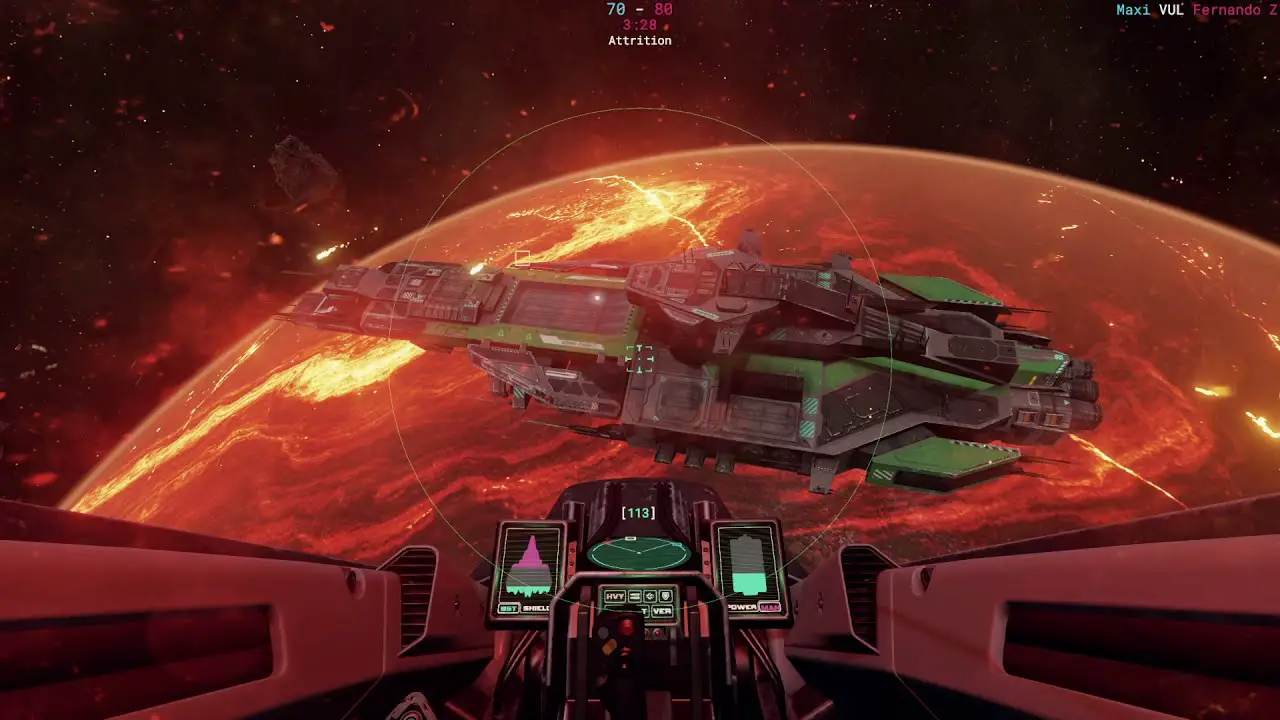
The Cockpit

The cockpit is your most important piece of information. There are three panels and a radar. It is important to know how to properly read the information they display.
This is the left panel, it displays information about your shields and hull.
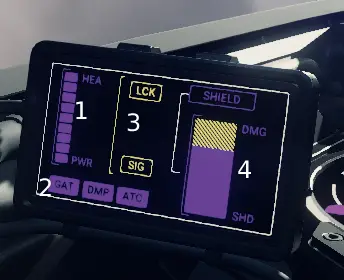
- This is your power bar. it displays how much power you are generating. Different actions, such as moving around and boosting, reduce the amount of power you are generating. Any leftover power is automatically put into your shield regeneration. Суммируя, moving around, firing weapons*, повышение, и т. д.. reduce how much shield you generate.
- This is your current equipment. It shows what you currently have equipped in your three hardpoints. If you are using a kinetic weapon. The filled color will slowly deplete as you consume more ammo.
- This is your signature bar and lock indicator. The signature bar isn’t too important and can be ignored for the most part. The lock, which is the little “LCK” символ, displays if someone has a target lock on you. If it is blinking slow, у вас есть 1-2 locks on yourself. If it blinks fast, у вас есть 3+ locks on yourself.
- This is your shield and hull bar, one of your most important pieces of information. The solid color is your shields. All actions drain your shields*, but the power bar indicates how fast you are regenerating your shield. Most of the time you will have a net positive charge, aside from when you are doing a combination of actions that consume more shield than you can generate.
The color with lines through it is your hull, или более конкретно, твой hull damage. Taking damage reduces your shields and damages your hull. Whenever you take damage, your max shield capacity goes down depending on how much damage you took. This accumulates until you are destroyed. If you have zero shield energy and get hit by a projectile, you will take significantly more damage. The only ways to repair your hull is by landing on an allied deck (discussed in the maps section) or by getting hit by the repair gun (discussed in the weapons section).
*In a recent update, this function was significantly changed. Kinetic weapons no longer draw energy. Вместо, they have limited ammo, and generate heat upon firing. Heat decreases how much max power you can generate, but automatically dissipates. Energy weapons still draw energy from your reserves. (I’ll rewrite this once I figure out how to make it sound right.)
This is the right panel. This displays information about nearby fighters and your current target.

- This is the contacts section. It shows both ally and enemy. If their name is flashing, this means they have low shields. You will also notice some * next to the enemy names. If they have two, they are within 4km of you. If they only have one, they are over 4km away from you. Если * next to the name is blinking, they have a low hull.
- This is information related to your target. We have already gone over many of the elements of this, they are just re-purposed. You can see their shield and hull bar, their signature bar, and their current equipment. Some of the new elements are their name, what kind of fighter they are flying (discussed in the ships section), and their distance away from you in meters.
This is the top display. It shows information about your speed and movement, as well as the current flight assist mode (discussed in the movement section).

The long bar is your current speed shown in meters per second. There are also three indicators, and they light up depending if they are active or not. The left one shows if you are повышение, the middle one shows if you are power burning, and the right one shows whether flight assist is on or off. If it is off, it will display the off mode it is currently set to.
This is the radar and is very important for situational awareness.

The radar displays nearby ships within a 1.5km range and is relative to you. The front of the radar is forward, the rear is backward, and left and right is your left and right. Ships that are above you have an upwards-facing triangle, while ships that are below you have a downwards-facing triangle. You might notice that some of the triangles are shaped weirdly. If they are an ally, the triangle will be bent inwards on the sides. Enemies are traditional triangles. Your current target will have their triangle turn white, and will have blinking brackets.
Также, the closest enemy that is too far to show up on the radar normally will appear on the edge of the radar. The same applies to allies. Your respawn point is also indicated by a box with a pointy spot.
Когда сомневаешься, you can refer to this quick reference card. It is slightly outdated though.

Движение
Moving around the battlefield is something you will be doing very often, so it’s important to know how movement works as well as understanding G-forces and how to counteract them.
The default movement controls are as follow:
- WASD for forwards, назад, левый, and right directional movement
- Space for up
- Control for down
- Shift for Boost
- F for Power Burn
- T for Flight Assist
- Q и E для рулона
Basic movement is very simple; push the button corresponding to the direction you want to move. Having flight assist enabled makes this even easier, as it will auto-correct your thrusters to only move in the direction you want to go.
Оборудование – Оружие
Есть 15 pieces of equipment for you to choose from, but you only have three hard points. This section will go over each piece of equipment’s strengths and weaknesses so you can get an understanding of which ones might be the best for you.
FLK – Flak Cannon
This weapon can be best compared to a shotgun. It fires two projectiles that split into smaller ones that have a decent spread. Each projectile does a small amount of damage, but if all of them hit, it still doesn’t do that much damage. Однако, if your target has no shields, flak cannon will absolutely tear through them, dealing an insane amount of damage.
Плюсы:
- Very fast projectile speed
- Large spread
- Does insane damage per shot to targets with no shields
Минусы:
- Very low damage per shot against targets with shields
- Low ROF compared to other weapons
- Large spread
Заключение: The Flak Cannon does chip damage to most targets. You will strike hard when they are weak, but a skilled player will know this and counter accordingly. The other options are better and more consistent, but this isn’t a terrible choice.
ГАТ – Gatling Gun
This weapon is, как следует из названия, a minigun. It has a very low ROF at first, but if you hold down the trigger, it will spin up faster and faster you are spraying and praying all over the place. It doesn’t take much energy per shot, but once fully spun up, you will be consuming a very large amount of energy.
Плюсы:
- Highest ROF in the game once fully spun up
- Fast projectile speed
- Doesn’t generate much heat per shot
Минусы:
- Low damage per shot
- Very high heat generation when fully spun up.
- Firing other weapons will interrupt the weapon and reset it’s ROF
Заключение: The Gatling Gun is a very good weapon, but you have to be careful not to overexert yourself, as that could lead to very dangerous situations. Общий, it is a very reliable weapon.
VUL – Вулканская пушка
This weapon is the jack-of-all-trades, master of none. Даже тогда, it is a very good choice. There isn’t inherently anything wrong with this weapon, but it doesn’t have anything special about it either.
Плюсы:
- Doesn’t generate much heat per shot
- Good damage per shot
- Good ROF
- Good projectile speed
Минусы:
- Общий
Заключение: The Vulcan Cannon is very basic. That isn’t bad however, this weapon is a great choice. Very reliable in all situations and is consistent in performance.
HVC – Heavy Cannon
This weapon is a slow firing, hard hitting beast. It is also a plasma weapon, which means it has a small AOE effect in case you didn’t hit your target directly.
Плюсы:
- Высокий урон за выстрел
- Has a small AOE due to plasma characteristics
- Приличная скорость снаряда
Минусы:
- Low ROF
- Slower than average projectile speed
Заключение: The Heavy Cannon is a good choice if you like to keep your distance from your opponent, and it works great as a secondary weapon if you choose to use multiple weapons.
PLC – Плазменная пушка
This weapon is the odd one out. It does amazing hull damage per shot, but has awful projectile speed, making it hard to hit with. It does have a good ROF however.
Плюсы:
- High hull damage per shot
- Has a small AOE due to plasma characteristics
- Good ROF
Минусы:
- Low shield damage per shot
- Very slow projectile speed
Заключение: The Plasma Cannon is a weird weapon. It’s very strong if you can land your shots. The small AOE somewhat remedies this, but it takes some skill, and perhaps some luck, to effectively use this weapon.
REP – Инструмент для ремонта
While this is a projectile, it isn’t a weapon. You shoot it at an ally (or an enemy if you’re into that) and it heals their hull. The more hull damage they have, the less it repairs. It has a very slow ROF, unless you use it while piloting a bomber, where it has a very high ROF.
ROC – Unguided High-Explosive Rockets
This weapon is the only rocket in the game. It’s slow firing, high damage rocket. They come with a proximity fuze, you miss, they will explode if they are in proximity. These can be shot down, but that’s hard to do without a plasma weapon. If you are piloting the bomber, the rockets get a significant rate of fire increase.
Плюсы:
- Very high damage on direct hit
- Large AOE
- Fast ROF when using rockets in the bomber
Минусы:
- Very slow projectile speed
- Can be shot down
- Very slow ROF
Заключение: The High-Explosive Rockets are very fun to use, but you might find it hard to find a practical scenario for them. They work wonders against capital ship turrets though, as they can take out turrets in a single blow if the rocket lands straight on them.
SRS – Short Range Swarm Missiles x2
These are homing missiles of the short range variety, which means they only work within radar range (1.5км). When you fire these missiles, a target painter is displayed on your HUD.
While you do not have to keep the target inside the target painter for the missiles to track properly, they gain increased turn speed. If you are flying the bomber, you get increased ROF with the missiles, as well as a larger target painter
Плюсы:
- They look cool
- They work very well against bots
Минусы:
- They are slow
- They have a slow turn speed
- They are very easy to outrun
Заключение: The Swarm Missiles are fun to use and are a spectacle to watch, but are not practical weapons for most situations. You should never use these as a primary weapon and probably shouldn’t use them as a secondary if you are serious.
ЛРМ – Long Range Homing Missile
These are the antithesis of the Swarm Missiles. They have a maximum range of 6KM, and are best used for sniping unaware or distracted targets. They don’t have a great turn speed, and only make one pass on a target, so don’t try using them too close to a target.
When launched, they start off pretty slow. The longer they travel, the faster they become.
Just like the SRS, these missiles also have a target painter. Однако, unlike the SRS, you must keep your target inside the target painter. Если вы этого не сделаете, the missile won’t properly track it’s target. The target painter will spin depending on how much the missile needs to correct itself in order to hit the target. If you are flying a bomber, the target painter is larger, and you have a much faster reload speed.
Плюсы:
- Can catch someone unaware
- Travel pretty fast once they gain speed
- Good for taking out enemy turrets without entering their firing range
- Relatively high damage per shot.
Минусы:
- Long reload time without bomber
- They appear on the targets radar
- Warning alarm when an LRM is launched
Заключение: The Long Range Homing Missiles are very hit or miss, figuratively and literally. They are very situational, so figure out if you want to use them or not before heading into battle. В противном случае, you might be in for a world of hurt.
Оборудование – Баффы
HSK – Радиатор
This is a passive buff you can slot into a hardpoint. При наличии, it reduces your Boost energy cost and your Power Burn energy cost.
BST – Boost Augment
This is a passive buff you can slot into a hardpoint. При наличии, it increased your acceleration in all directions.
HUL – Усиленный корпус
This is a passive buff you can slot into a hardpoint. При наличии, it decreases the amount of Hull damage you take per shot.
SLR – Silent Running
This is an active buff you can slot into a hardpoint. При активации, you become invisible on all Radars, Scanners, and HUDs as long as you are not targeted by them. It also limits the effectiveness of enemy SRS, ЛРМ, and ATC. Enemy target alarms are not sounded if you target them outside of 4KM and have Silent Running active.
While Silent Running is active, you passively build up the heat (показано ниже), which reduces how much energy you generate. Как только вы достигнете 75% нагревать, all Silent Running effects are deactivated. Shooting your weapons is the only way to dispel heat while Silent Running is active.
DMP – Inertial Dampener
This is a passive buff you can slot into a hardpoint. При наличии, it decreases the amount of G-forces you experience.
УВД – Advanced Targeting Computer
This is a passive buff you can slot into a hardpoint. При наличии, it enabled PIPs (Predicted Impact Points). PIPs tell you where to shoot in order to hit an enemy. These are arguably your most important piece of equipment, and you should have these equipped no matter what.
Alarms
Sometimes you might hear beeping sounds and other various noises. These are alarms. Each alarm has a specific sound, and they also show up on your front display.
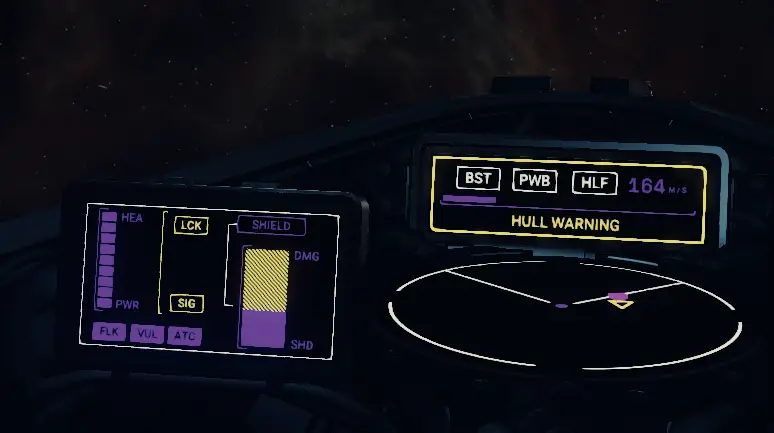
На картинке выше, you can see I have a warning for my hull status. While reading the warning is nice, sometimes you won’t be able to look at it, so it’s important to know what each alarm sound means.
Если вы хотите, you can use the SCS menu to access the Flight Manual and move to the Alarm and Alerts section. Оттуда, you can test and hear the different alarm sounds, and change the volume of them if you wish.
Корабли
Minor disclaimer: Each fighter type is due for a graphical overhaul, I will update this section when that happens.
As of writing this, there are three different types of starfighters, all of which fall under the UCS banner. Прямо сейчас, the only way to tell the difference between them is their color and the target information display. None of the fighters are objectively better than each other, it just comes down to personal preference.
SF-11 Tiger Shark – LGT – Light Fighter: The light fighter is the fastest and most nimble fighter, but has the weakest hull. They are colored синий.
SF-13 Legendary Fox – HVY – Тяжелый истребитель: The heavy fighter is a mix between the light fighter and the bomber. It is well-rounded in speed, маневренность, and hull strength. They are colored красный.
TB-17 Super Snapper – BMR – Бомбардировщик: The bomber is the slowest fighter out of the three but has the highest hull strength. Кроме того, they get improved capabilities with rocket and missile weaponry. They are colored зеленый.
Режимы игры
There are multiple game modes for Hunternet, each with its specific rules and scoring systems. Understanding how each one works is key to winning your matches.
Потертость
This is the most basic mode. A player kill is worth 10 очки, and bot/turret kills are worth 1 точка. The team with the most points win.
Capital Ship Assault
This mode is to strip the enemy battleship(с) of all of their turrets (eventually it will be to destroy the battleship, but that isn’t in the game yet). The score indicator shows how many turrets each team has. Once a team’s score reaches zero, они проигрывают. Player and bot kills do not affect the score.
Выживание
This is the same as attrition, but each player only has one life. Once a team has run out of alive players, they loose.
Охота за головами
This is an FFA mode with no teams. At the start of the match, every player is worth has $1 and is worth +1 за убийство. Каждый $5 someone has, they gain an additional +1 за убийство. So if someone has $10, they are worth +2 за убийство, $15 является +3, и т. д.. Чтобы выиграть, you must get over $50. In the extended mode, you must get over $100.
Some players also use this game mode as a makeshift dueling mode. When they do this, they will fire a shot in your direction. If you accept the duel, you shoot back in their direction. You move forward and pass each other and the duel begins.
Squad Wars
No one plays this mode.
Карты
Есть 5 maps to choose from. Let’s go over each one
Уведомление: Some of the skyboxes for each map have changed, but the location of objects has not.
Old Blue

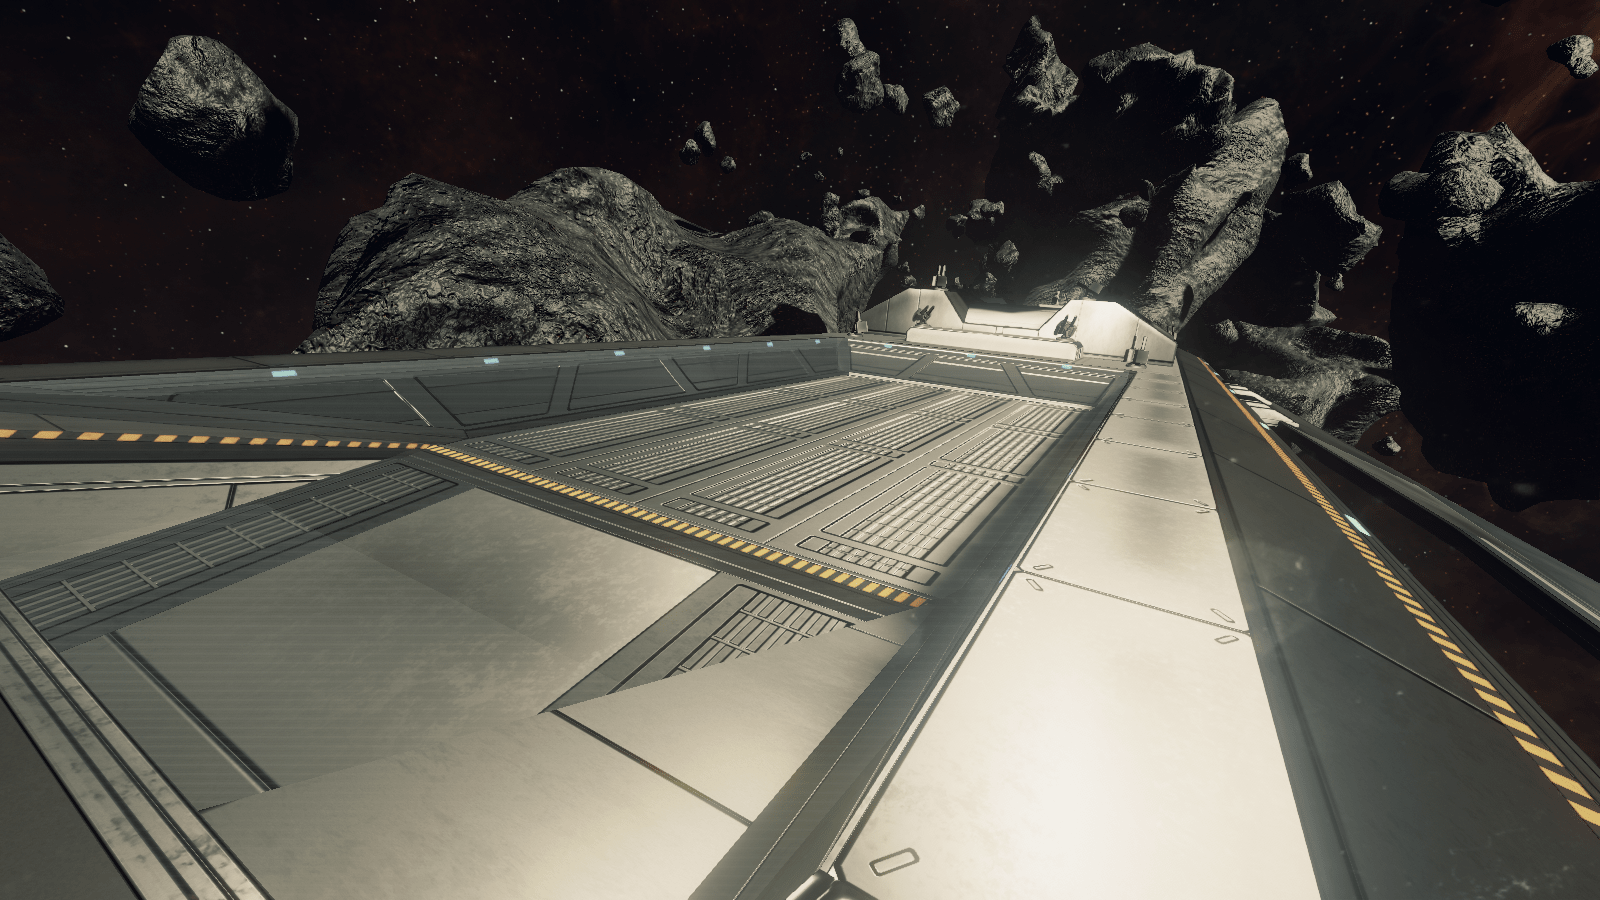
This is the oldest (играбельный) карта. It has two capital ships per side, and each capital ship has 83 башенки на этом. It also has a light asteroid field which can be used for cover and ambushes. To repair mid-match, you must land (to land, enter the highlighted area and come to a complete stop) on a capital ship’s deck (показано ниже). Make sure it’s one of your teams ships first.

This map supports the following game modes: Squad Wars, Потертость, Capital Ship Assault, Выживание, Охота за головами.
PRIMORDIUM
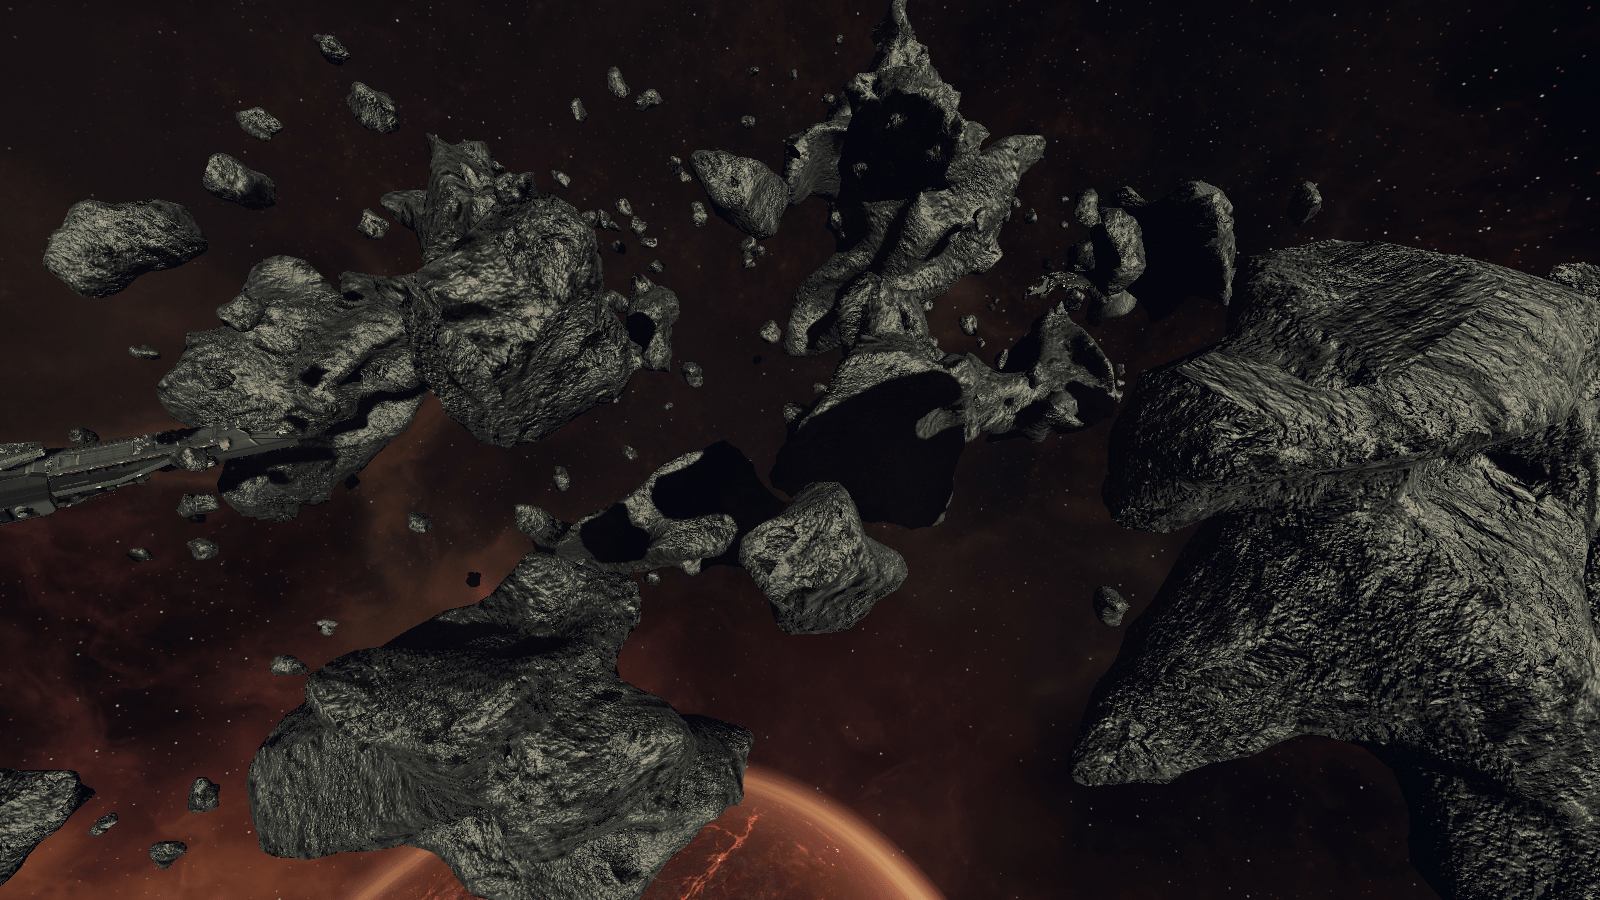
This map has one capital ship per side, and each capital ship has 83 башенки. It also has a dense asteroid field that can be used for cover and ambushes. To repair mid-match, you must land on a capital ship’s deck (показано ниже). Make sure it’s one of your teams’ ships first.
This map supports the following game modes: Squad Wars, Потертость, Capital Ship Assault, Выживание, Охота за головами.
Deep Space

Ан пустой map in deep space. There is nothing here to find.
This map supports the following game modes: Squad Wars, Потертость, Выживание, Охота за головами.
КОМБАЙН
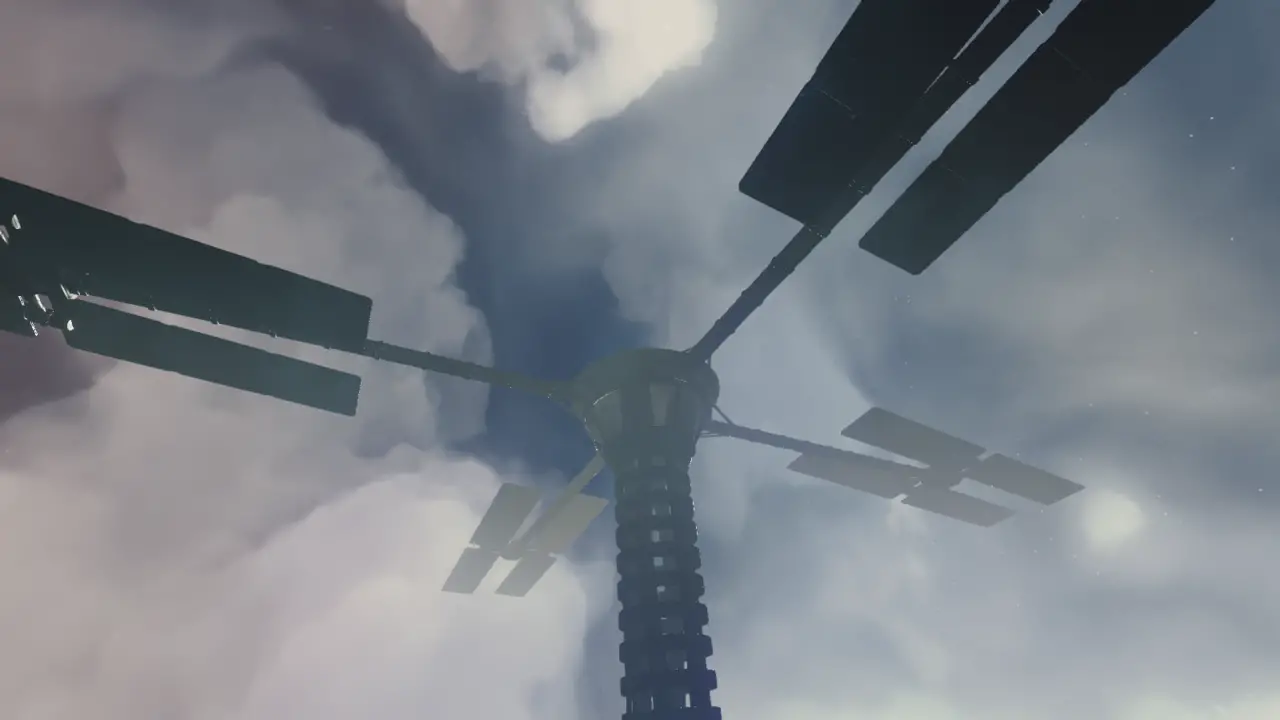
A gas mining station on Jupiter, this map has spots for closed-in and tunnel fights а также открытые площадки. You can use the station to cut off your opponents.

Each tunnel has an entrance and exit at the end of the station as well as the inside. To repair mid-match, you must come to a stop at the end of the А (красный) tunnel or the Б (синий) туннель. Make sure you come to the correct one for your team.

This map supports the following game modes: Squad Wars, Потертость, Выживание, Охота за головами.
BLACK CORRIDOR

This map is a racing track with 38 different checkpoints. Your goal is to get the best time.
Это все, чем мы делимся сегодня для этого. Hunternet Starfighter гид. Это руководство было первоначально создано и написано Zopto. На случай, если нам не удастся обновить это руководство, вы можете найти последнее обновление, следуя этому связь.