

- Заголовок: Эмпирион - Галактическое выживание
- Дата выпуска:
- Разработчик:
- Издатель:
Информация об Эмпирионе - Galactic Survival все еще не завершена. Пожалуйста, помогите нам заполнить детали игры, используя это контактная форма.
This is a Common Guides for “Myna2 type M L12 (СВ)” и “Myna2 type H L12 (СВ)”.
Он был создан как руководство, потому что я не смог выложить его в мастерскую из-за переполнения страницы..
Maintenance Tips
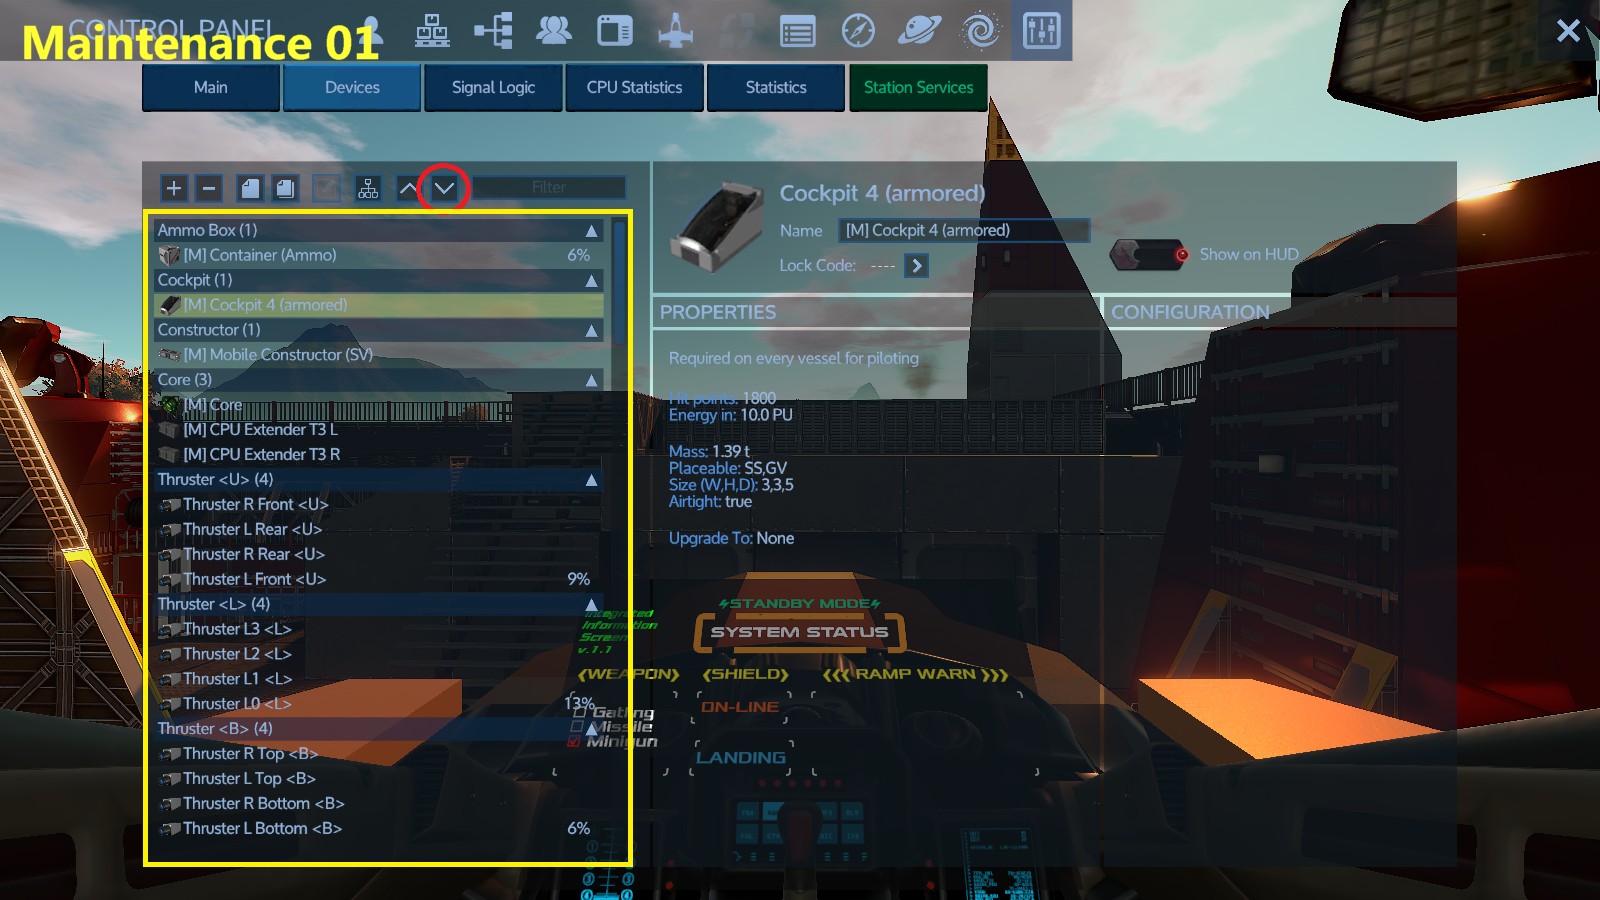
- When an vessel is damaged by combat, the type and approximate location of the damaged device can be determined by clicking the down arrow button in the Devices tab of the control panel to expand the device list. Devices that can be repaired in the maintenance room are prefixed with [М]. (ScreenShot:Обслуживание 01)
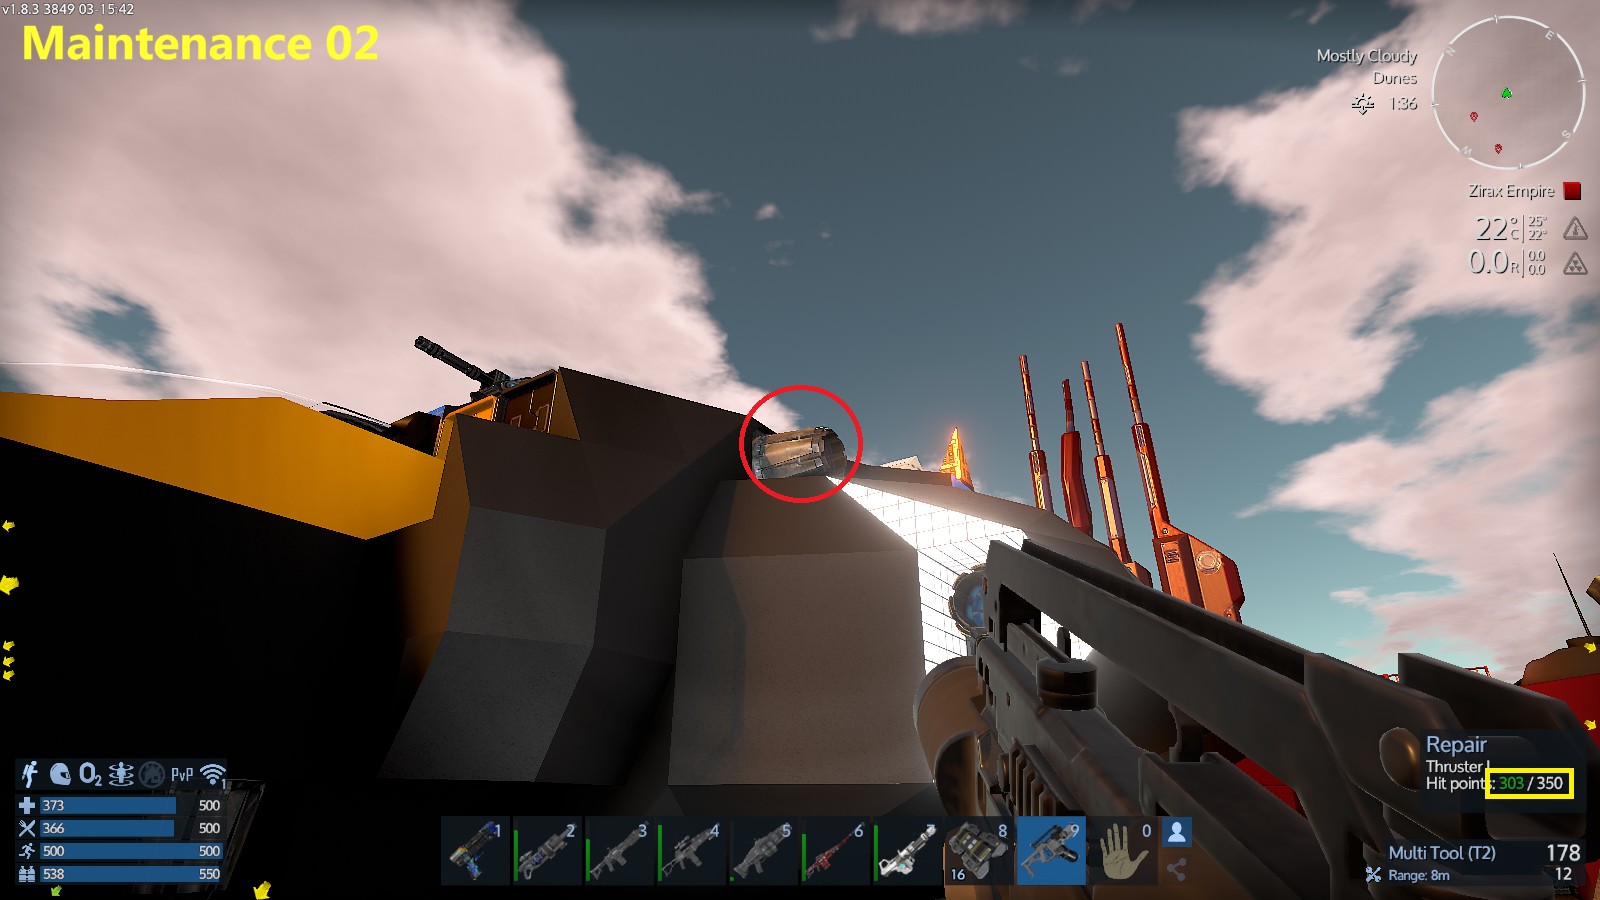
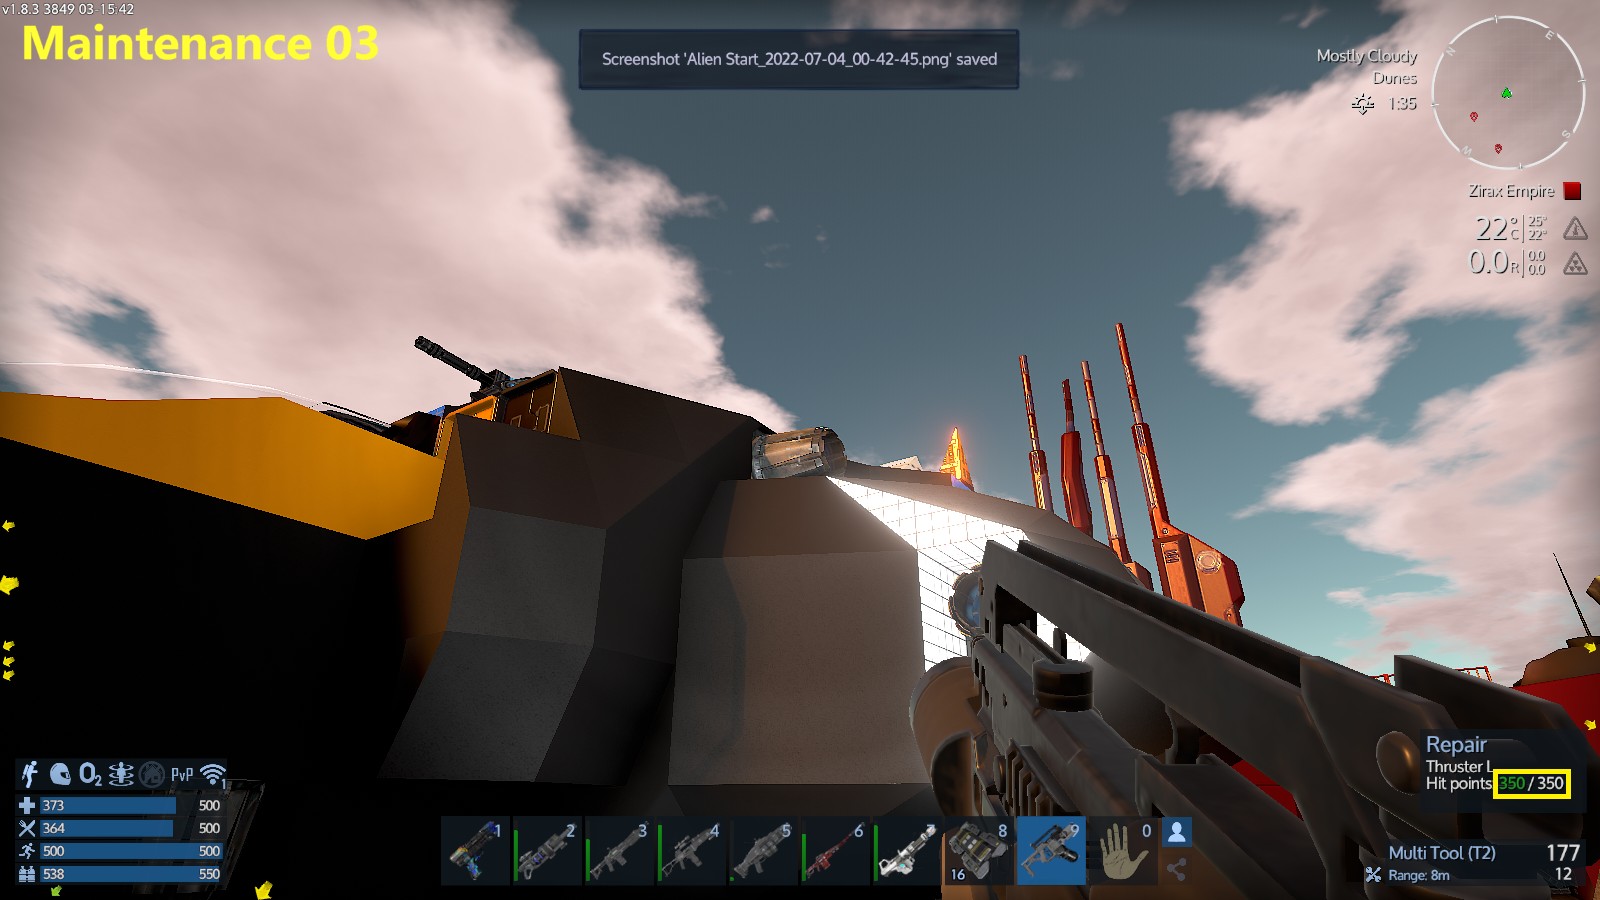
Since the damage to the hull cannot be determined here, set the multi-tool to repair mode and focus on the area around the damaged device. - Подруливающие устройства, landing gear, оружие, and spotlights can all be repaired directly with the multitool from outside the vehicle. (ScreenShot:Обслуживание 02-03)
Other devices are embedded inside the vessel and normally cannot be repaired directly, but in Myna2 most devices can be repaired in the maintenance room.
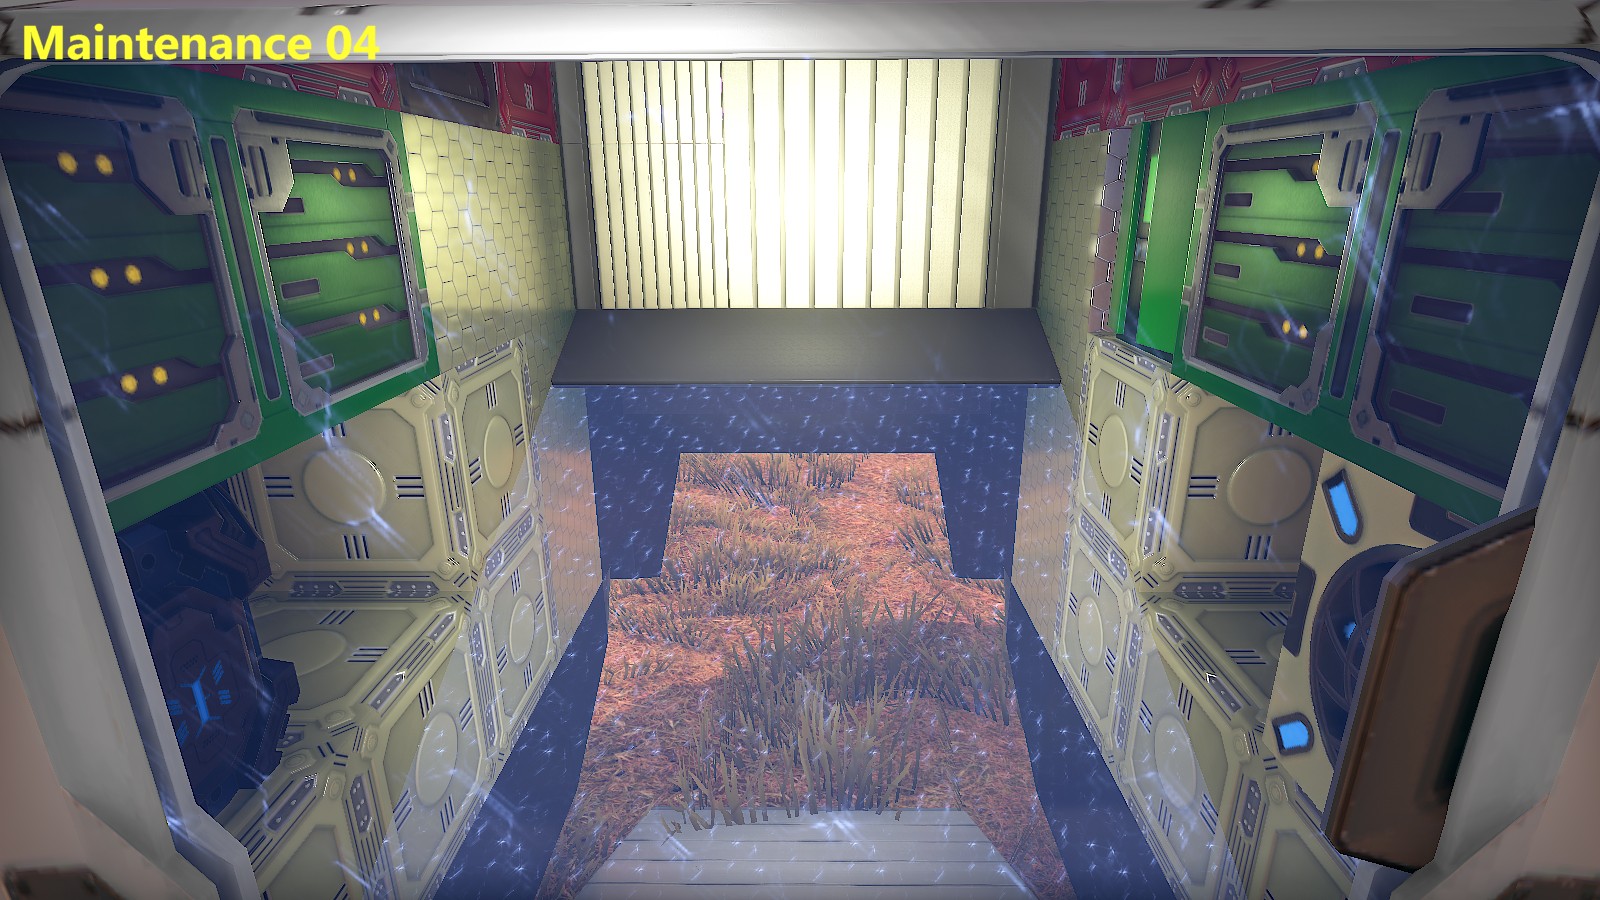
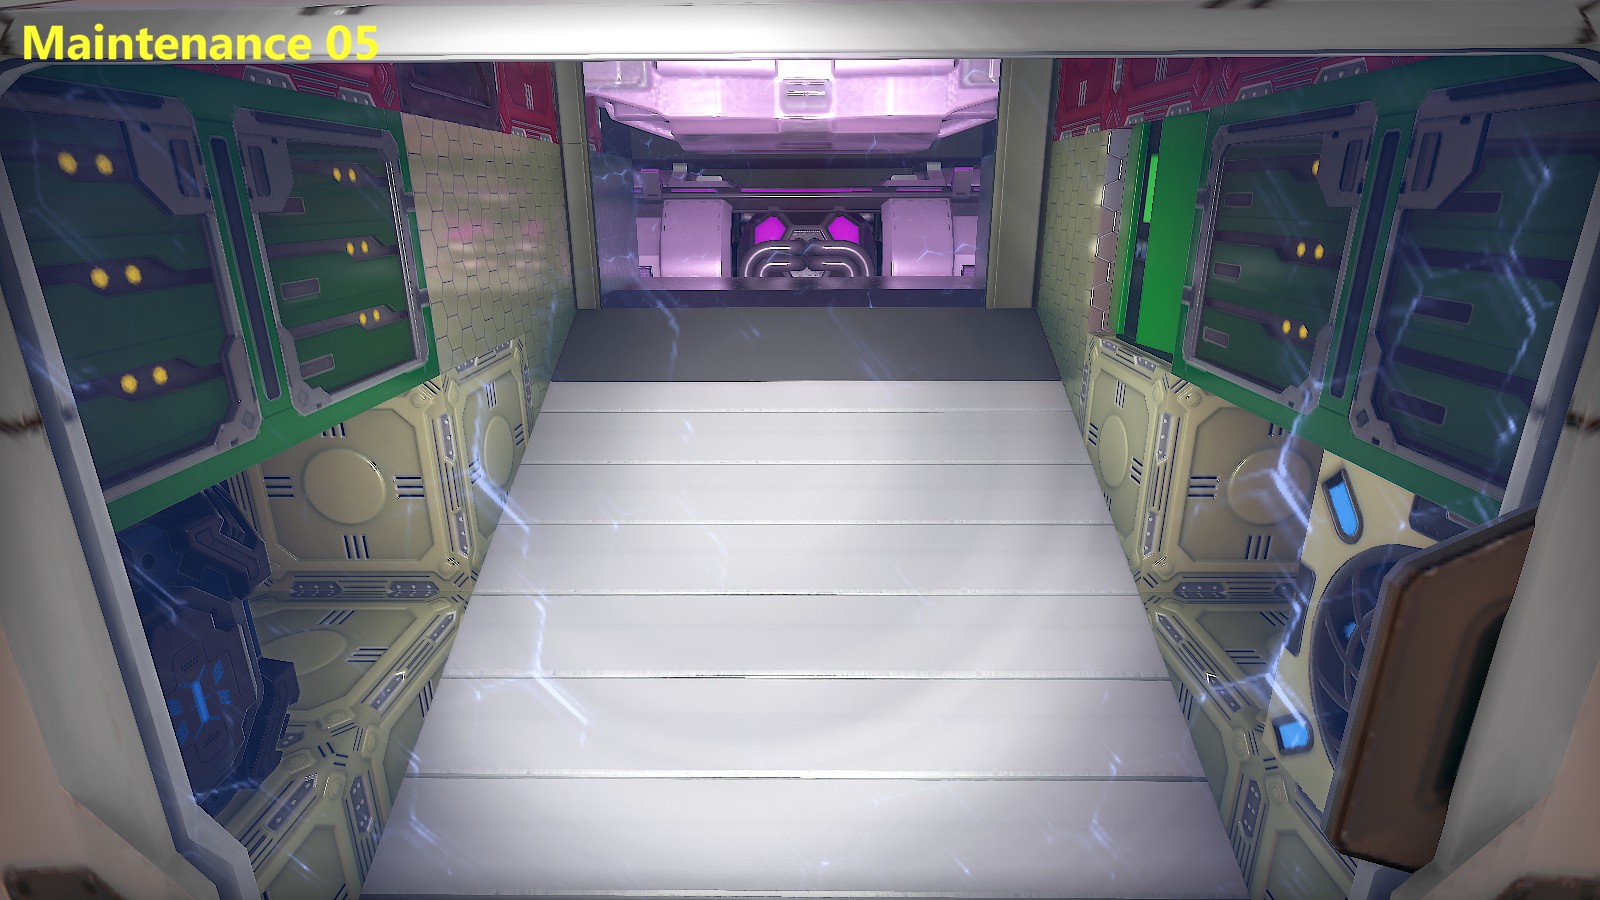
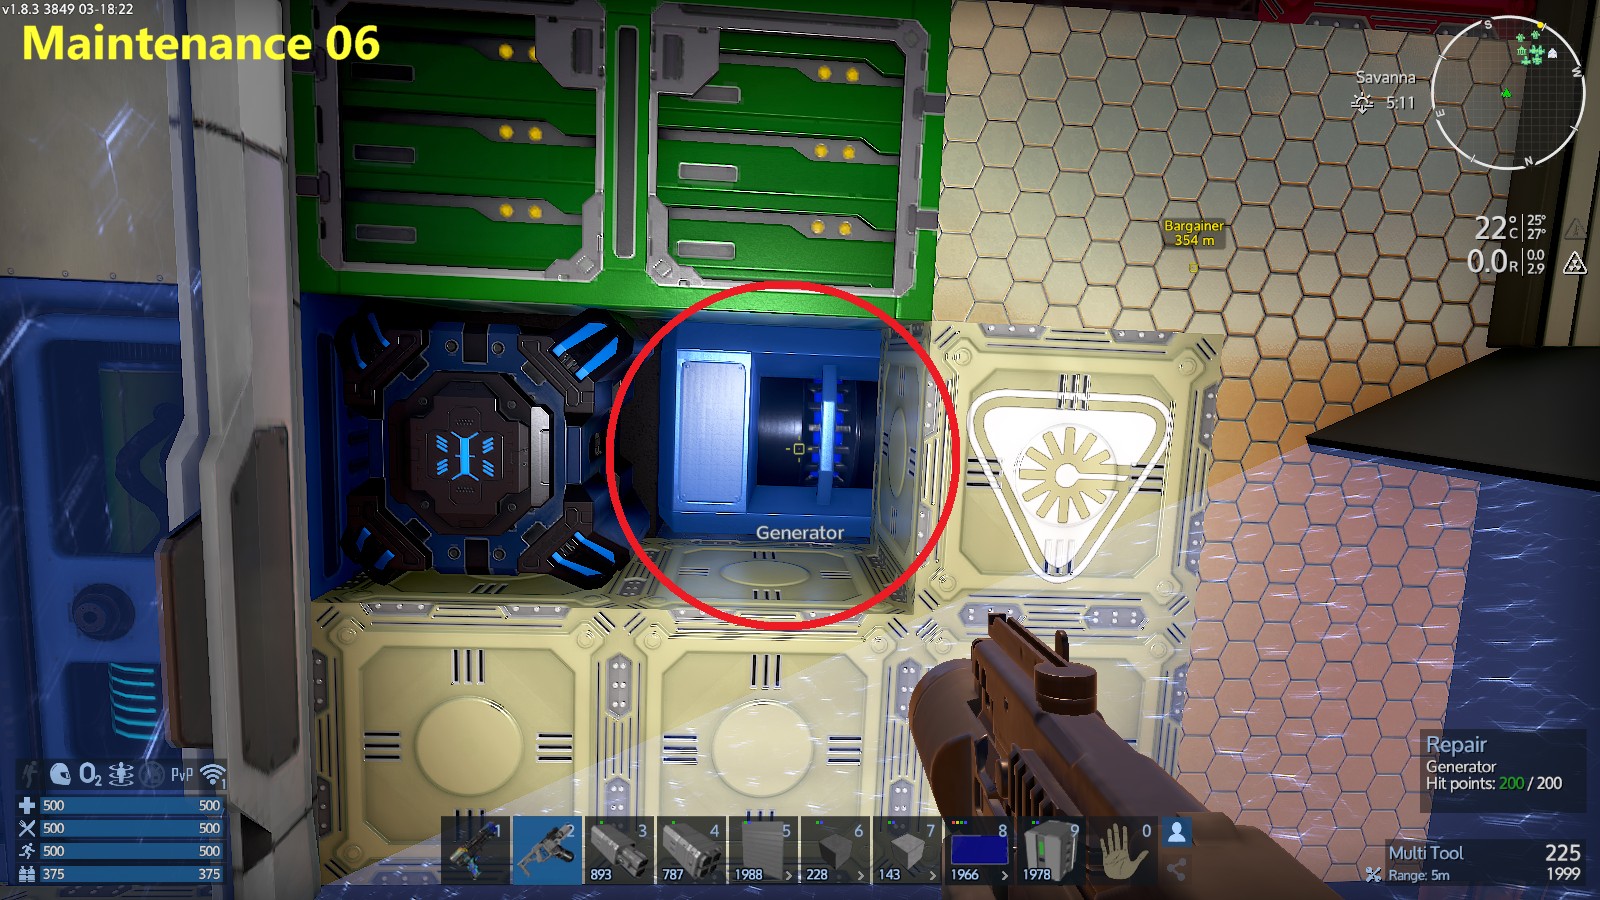
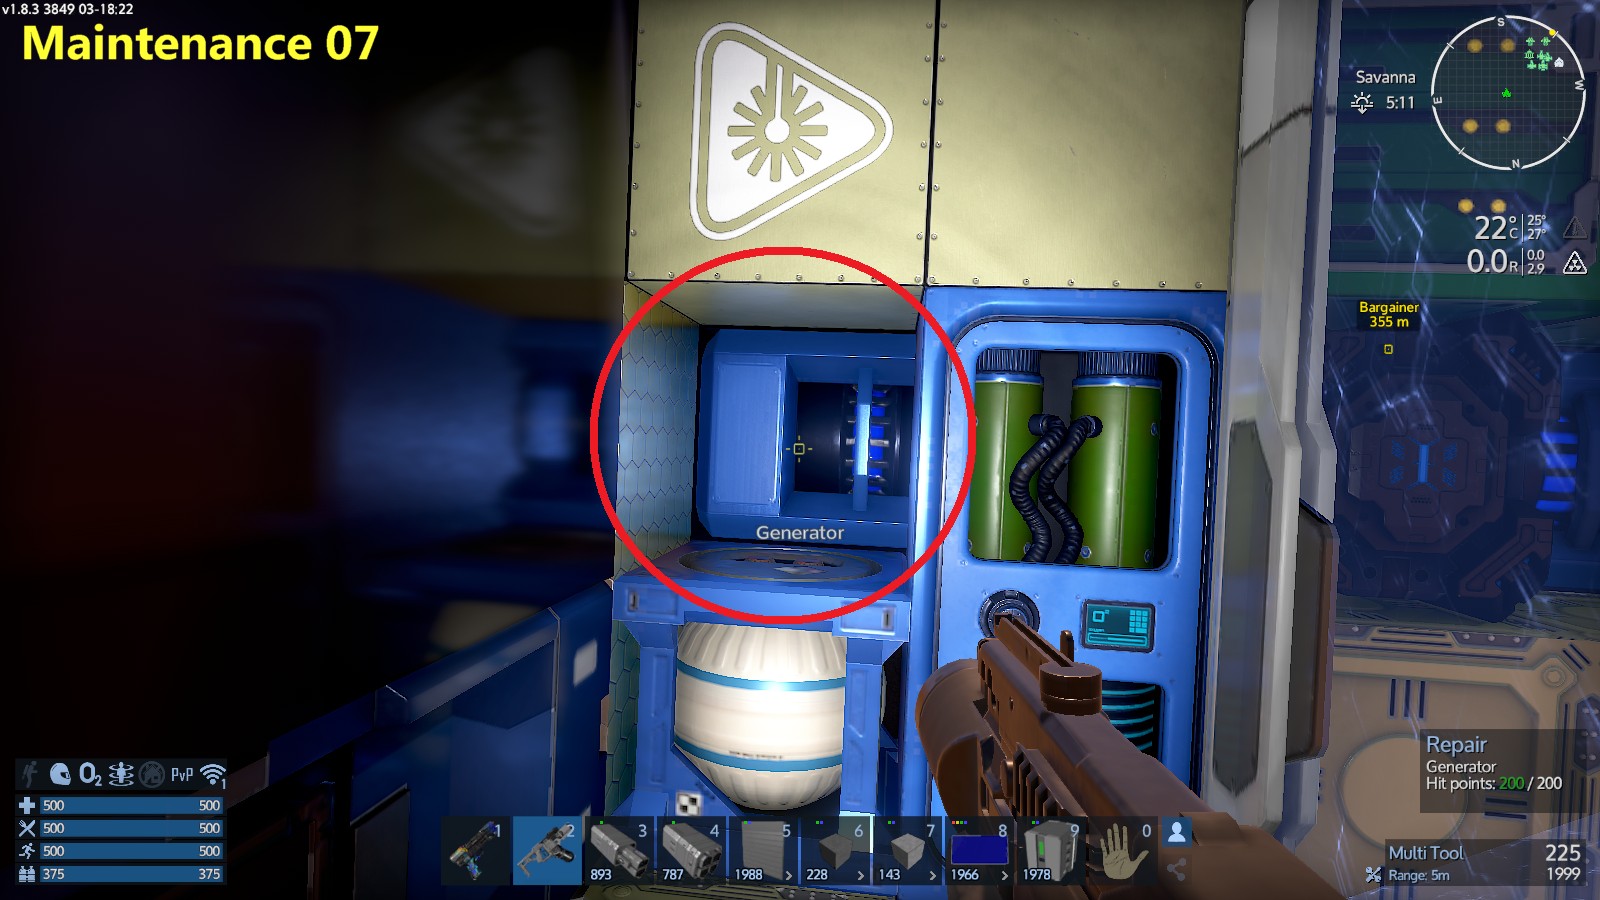
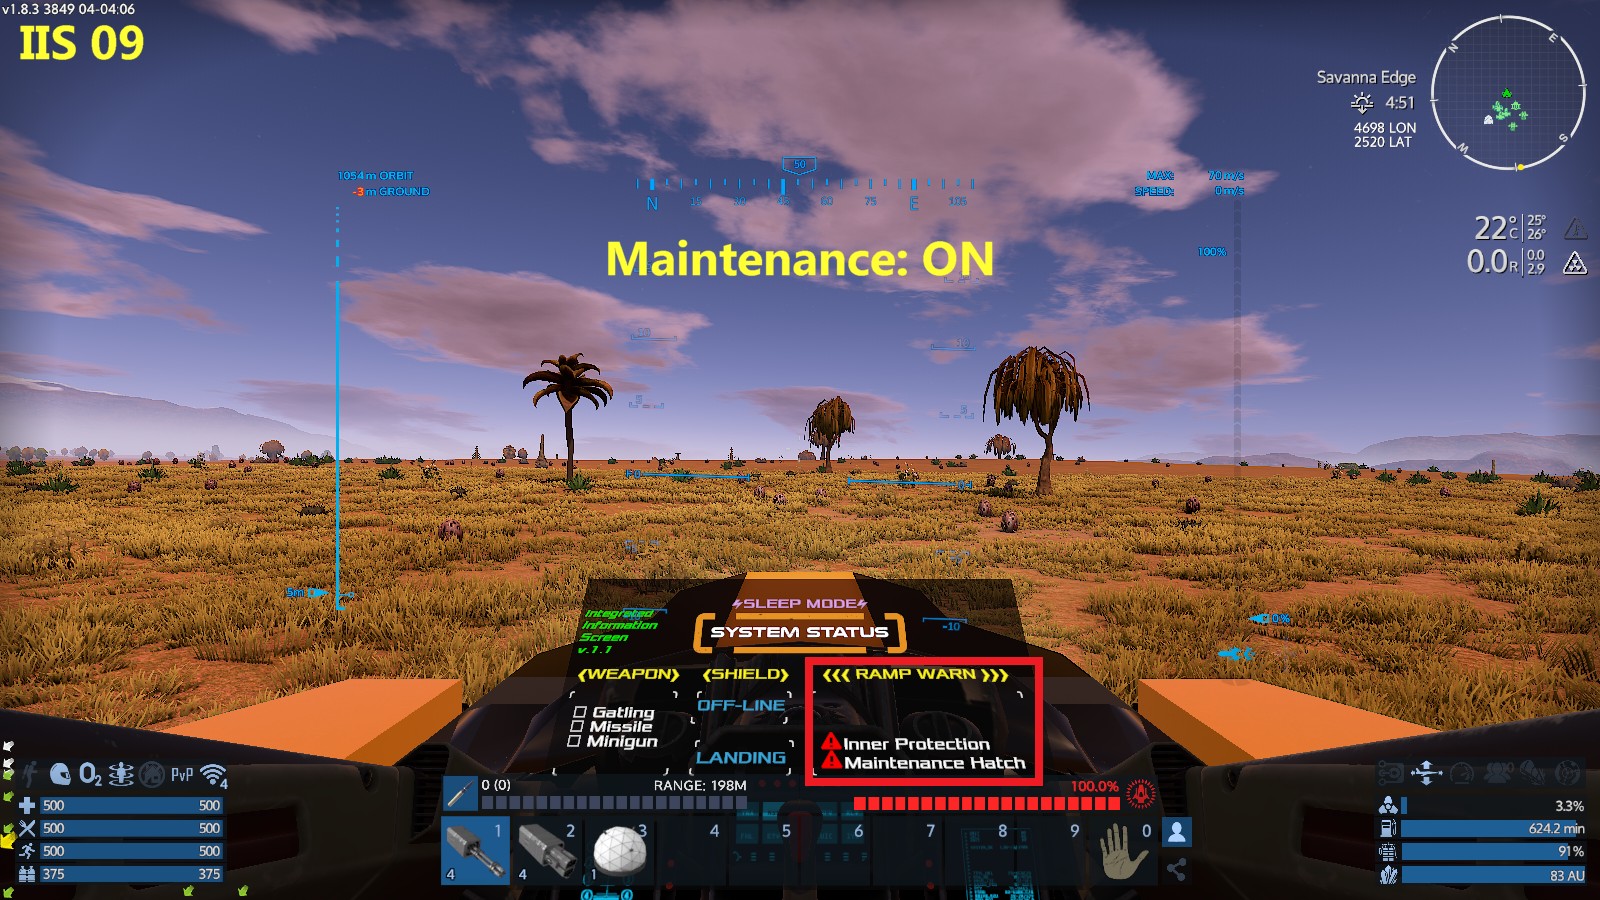
When the signal “Обслуживание” is turned ON, the Protection Ramp closes and the rear maintenance hatch opens to allow access to the warp drive and shield generator. Turn ON only when you are in the maintenance room.(ScreenShot:Обслуживание 04-07)
If you forget to turn the “Обслуживание” signal back OFF, the boarding ramp on the bottom of the vessel will not open the next time you attempt to board. - Many of the pentoxide tanks, топливные баки, and oxygen tanks are embedded for safety reasons and cannot be accessed from the maintenance room. If the device is damaged while the armor is still in place, it should be repaired after removing the armor or in the repair bay.
- The cockpit can be accessed from the forefront of the maintenance room.
- The top of the Protection Door (manual door) is still open and not airtight, but there is a Protection Ramp step on the floor, so if the ceiling is attached, you will have to crouch down to get aft. This is a hassle, so the ceiling was not added in favor of practicality. Only the protection ramp at the bottom of the vessel is airtight.
Сигнал
Sleep and Standby do not control lights, холодильник, O2Ventilator, or shield. Turn on/off manually.
- Combat Mode
Even in Sleep mode, you can take off in Combat Mode just by turning on this one signal.
It will force all weapons and shield active, ignoring all other settings.
When Combat Mode is turned off, it will operate according to the original signal settings. (Note that the shield will be forced off if it is not set to on in the signal.) - Sleep Mode
Использовать “Sleep Mode” only in areas where your surroundings are secured.
In addition to Standby Mode, constructor, wireless and Minigun Turret are also turned off.
If you wish to use the constructor or wireless during Sleep, turn them on manually from the CUSTOM menu.
Please do not forget disable the Sleep Mode before you drive the vessel. - Standby Mode
Использовать “Standby Mode” when temporarily leaving the ship while you are working.
All Thruster, Gatling and Rocket Launcher are switched OFF.
Please do not forget disable the Standby Mode before you drive the vessel. - Щит
Turn the shield ON. (Please use this signal to turn ON/OFF shield so that it will not be turned OFF when Combat mode is deactivated.) - Обслуживание
Protection Ramp closes to allow access to the rear maintenance hatch.
Aft Maintenance Shutters open to allow repair of warp drive and shield generator.
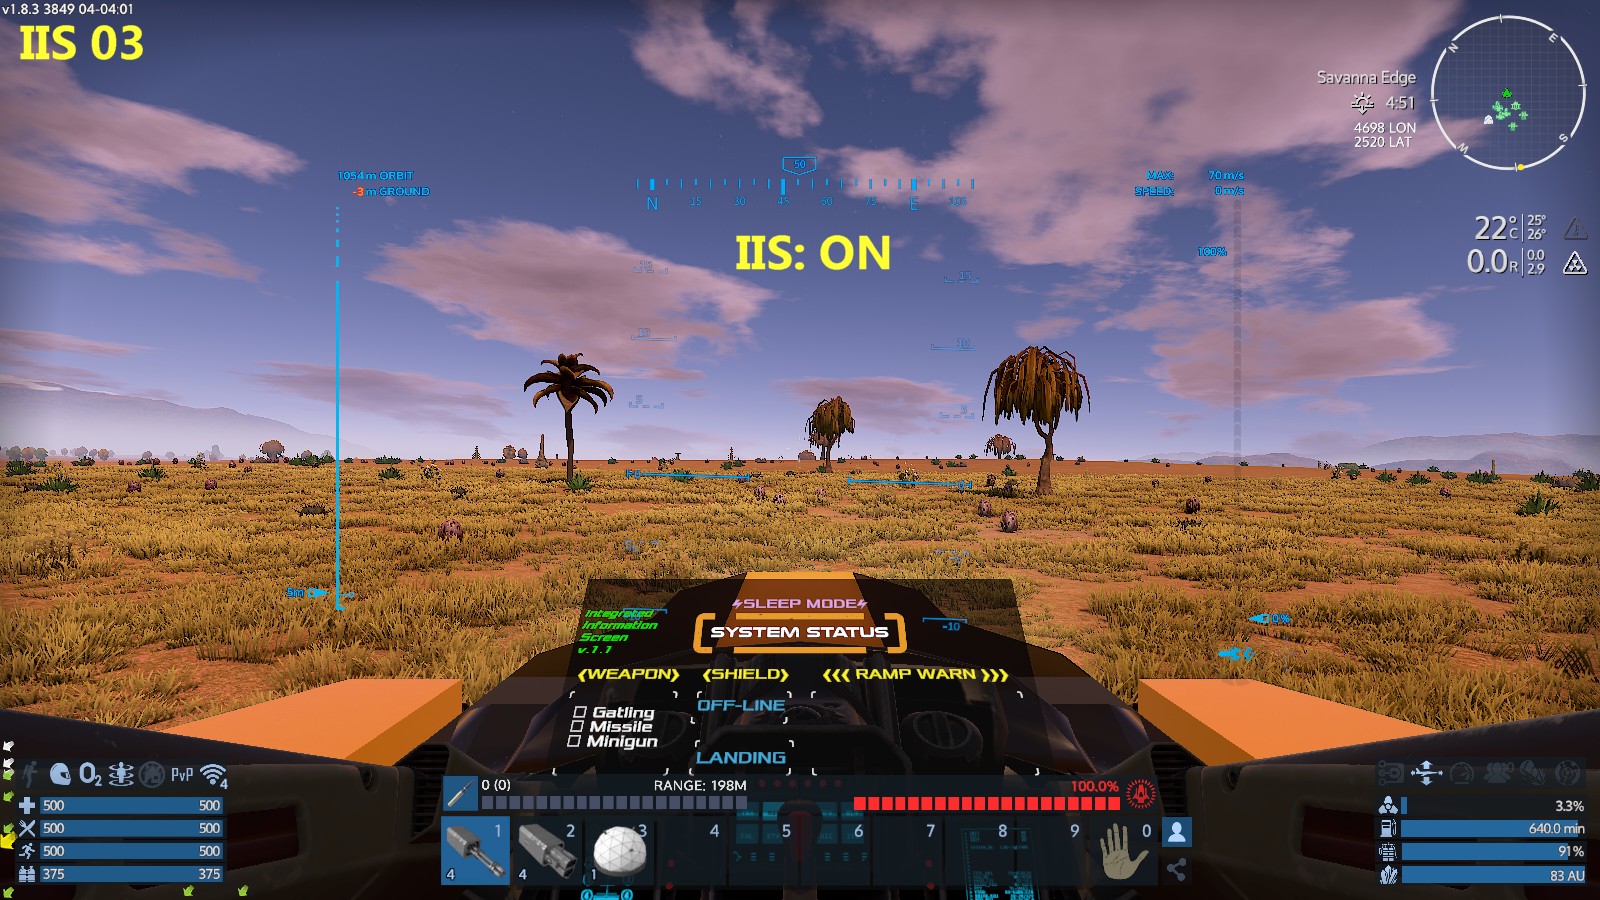
With Signal Combat ON, the aft maintenance shutters are forced closed for safety. - IIS
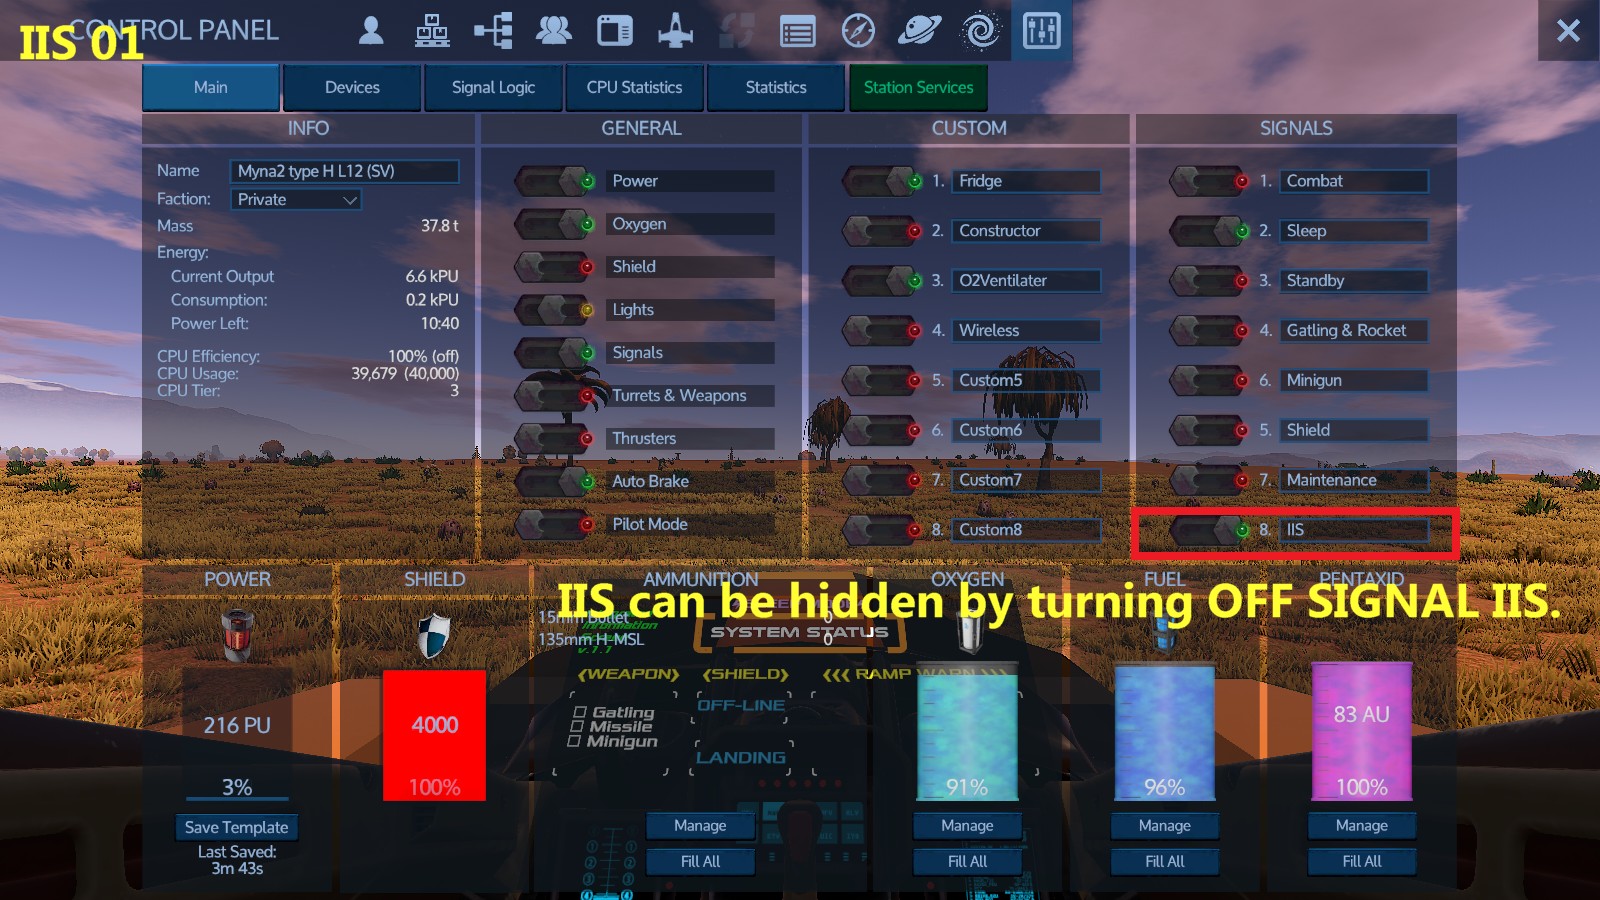
Turns the IIS (Integrated Information Screen) on and off. Default is ON, but turn it OFF if it interferes with maneuvering.(ScreenShot:IIS 01-03)

Customization Tips
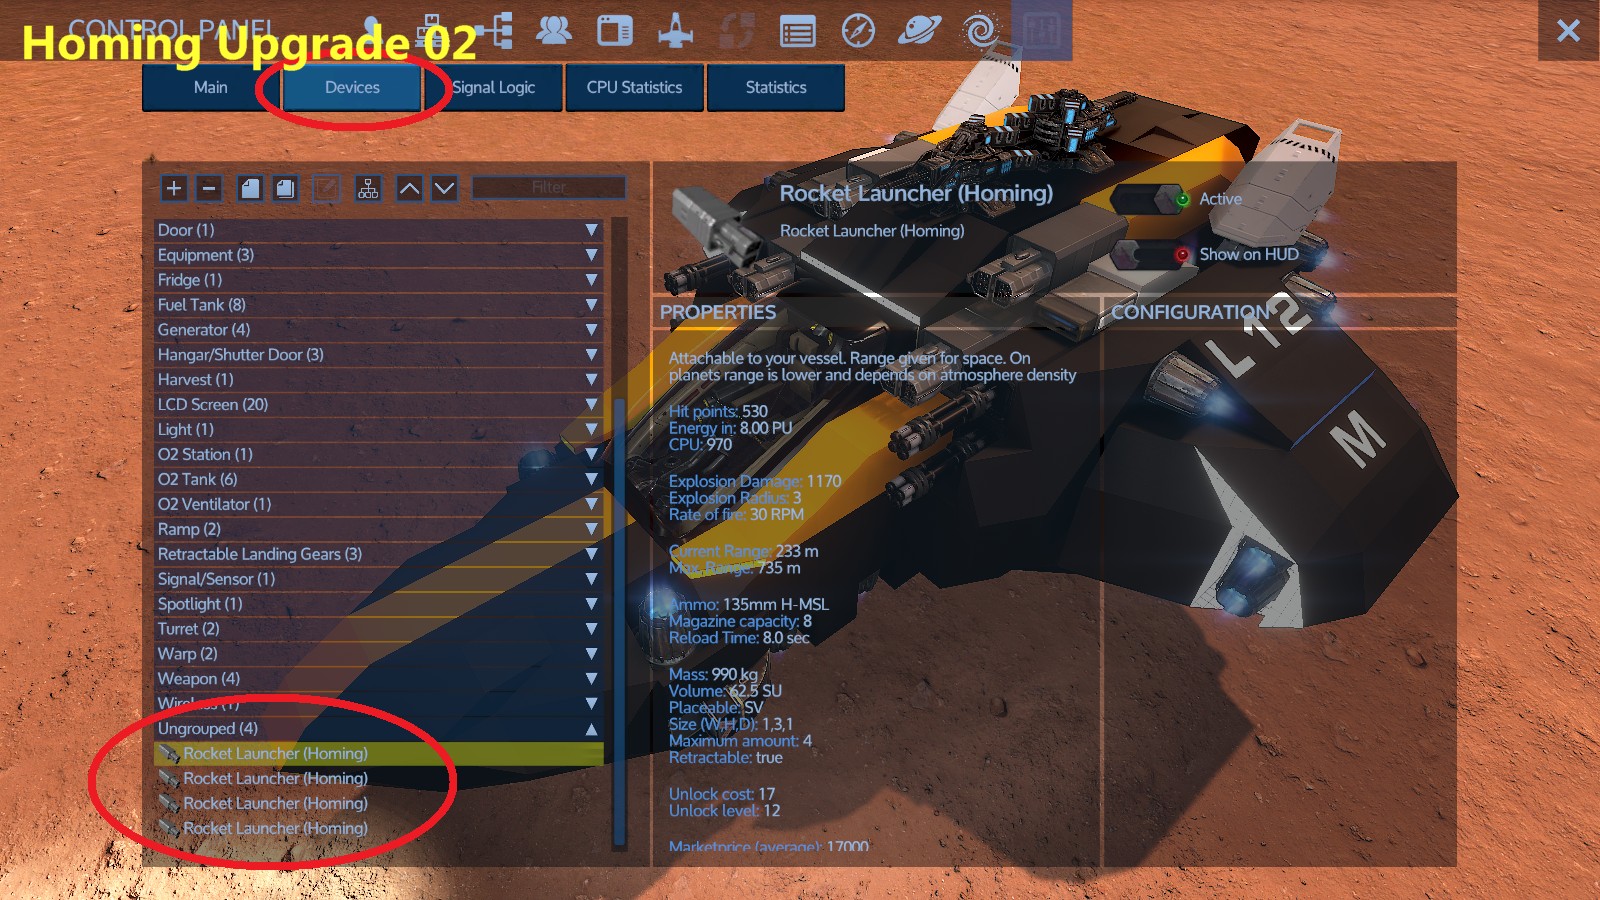
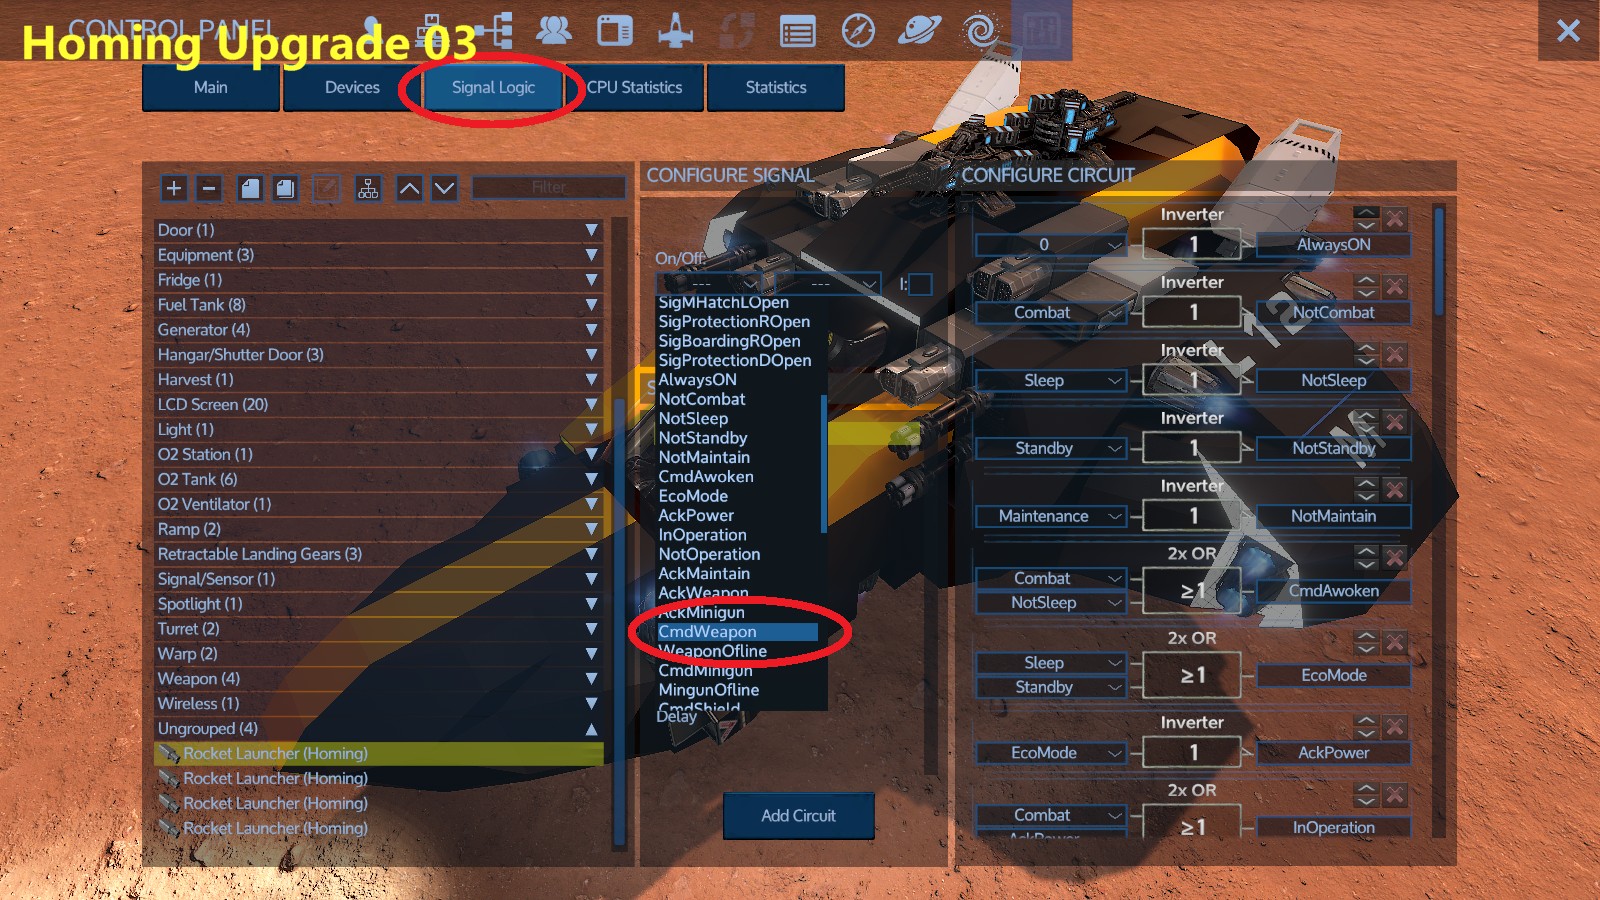
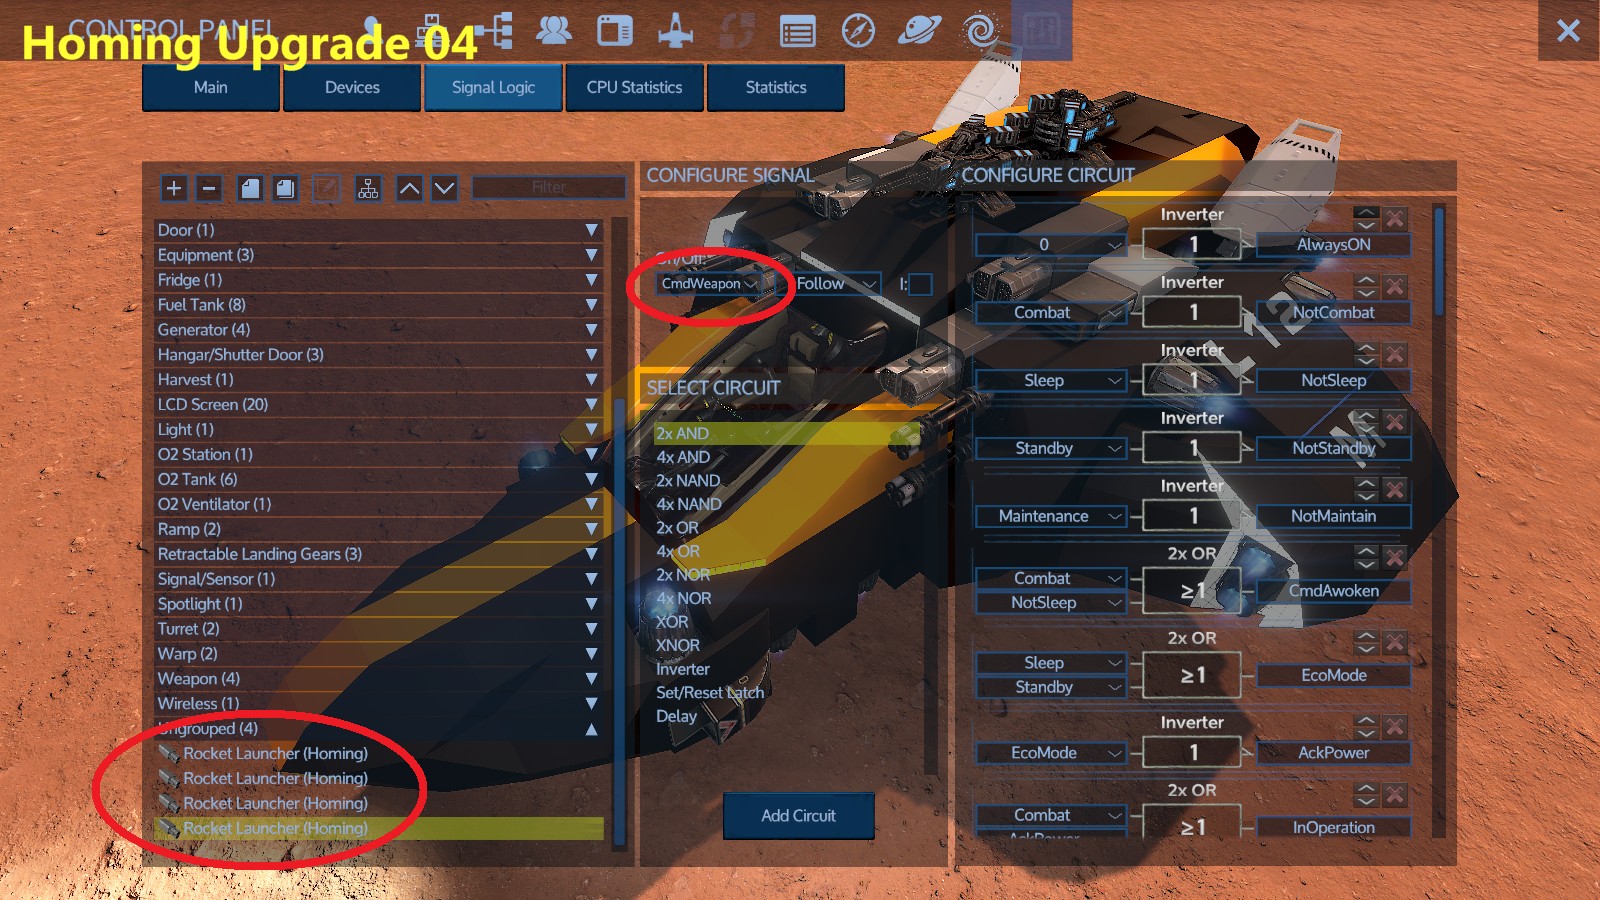
- Rocket Launcher Replacement (type M)
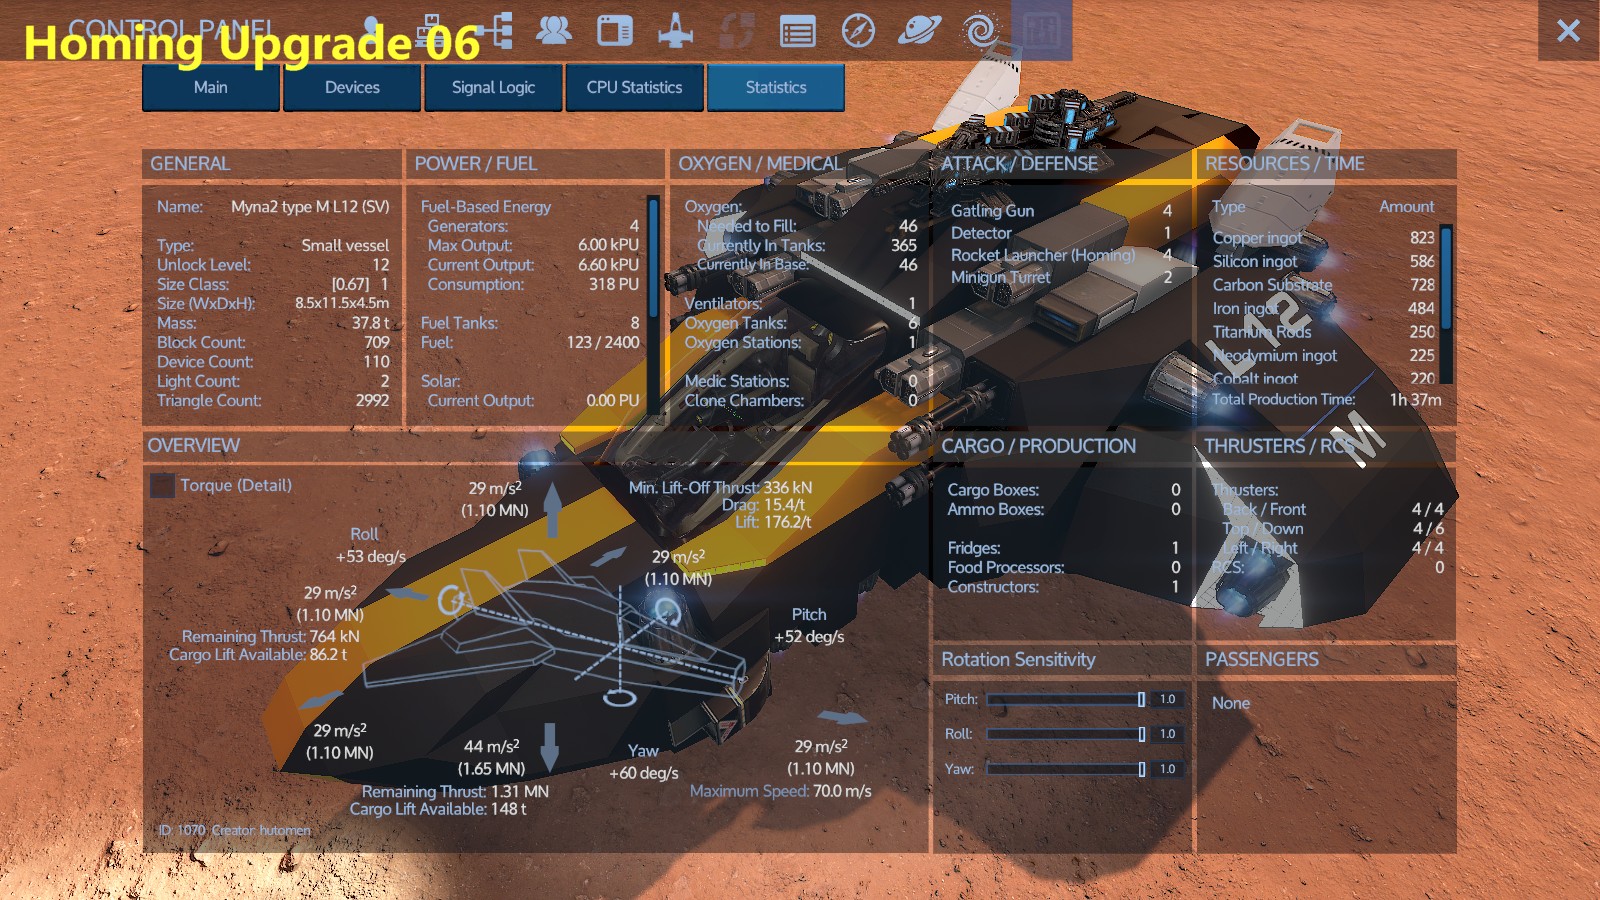
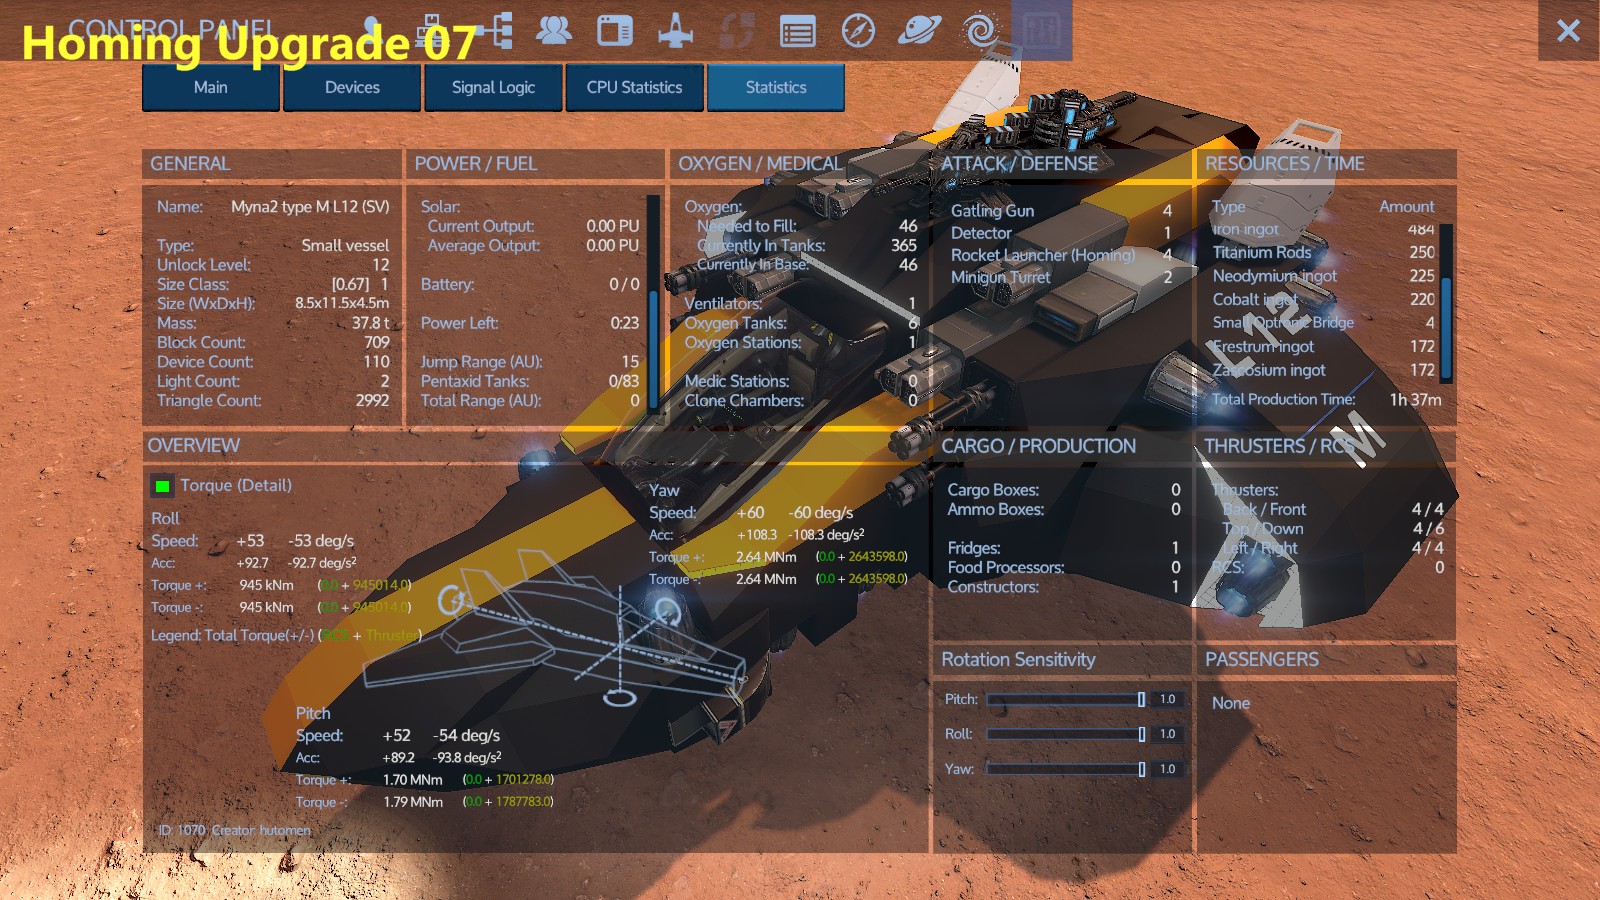
When replacing the rocket launcher of “Myna2 type M” with a homing rocket launcher, please refer to the screenshot to set up signal control for the homing rocket launcher. (ScreenShot:HomingUpgrade 01-07)
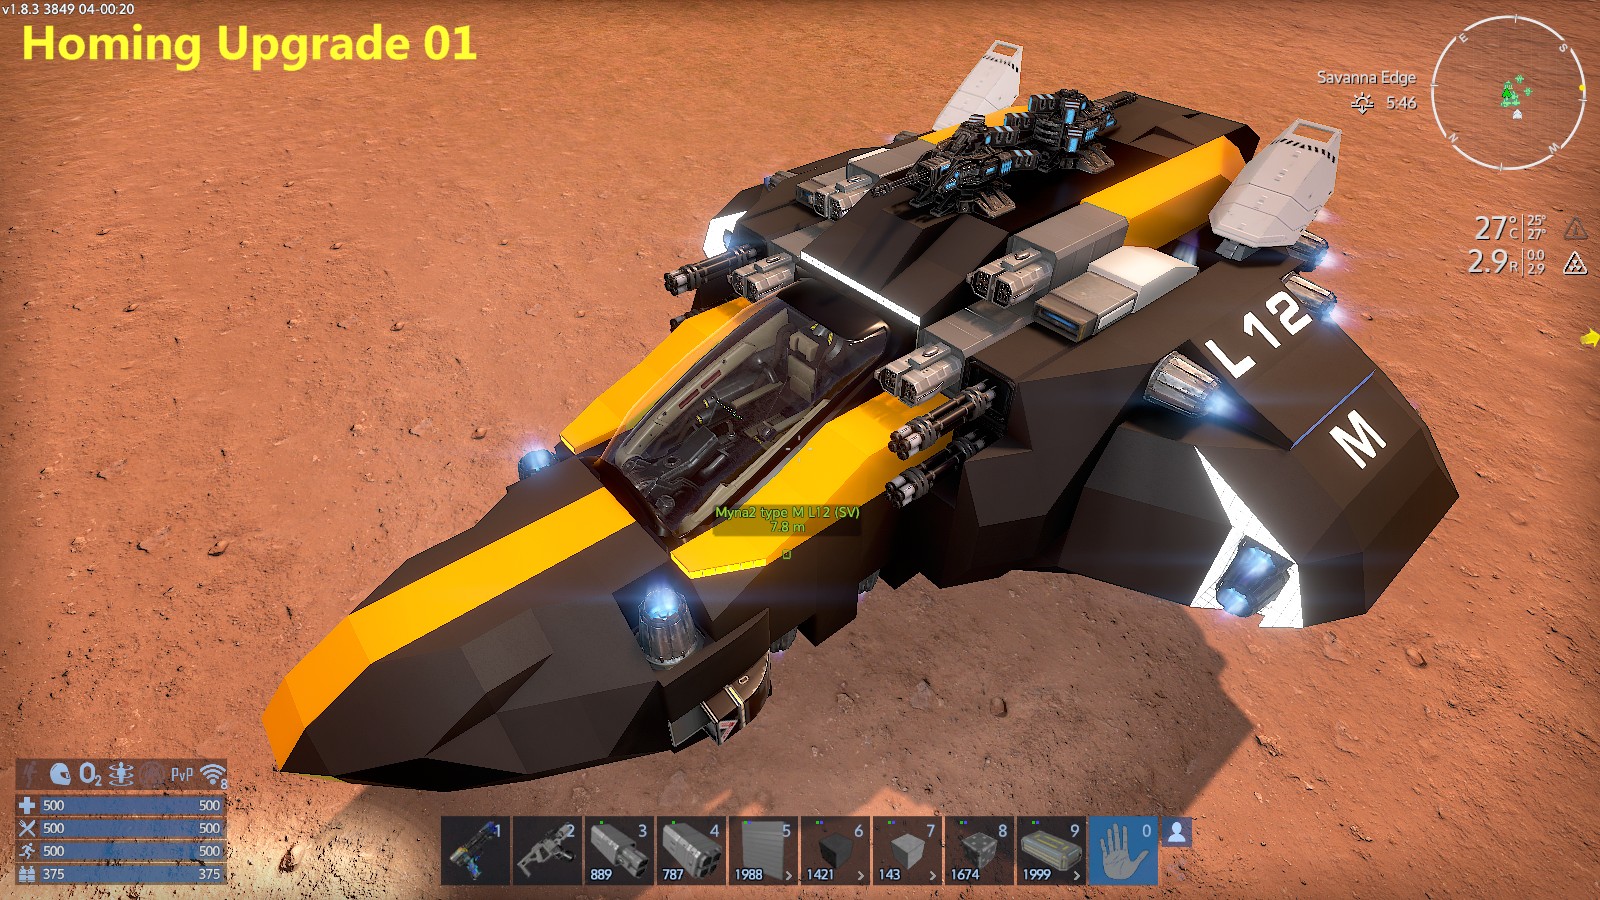
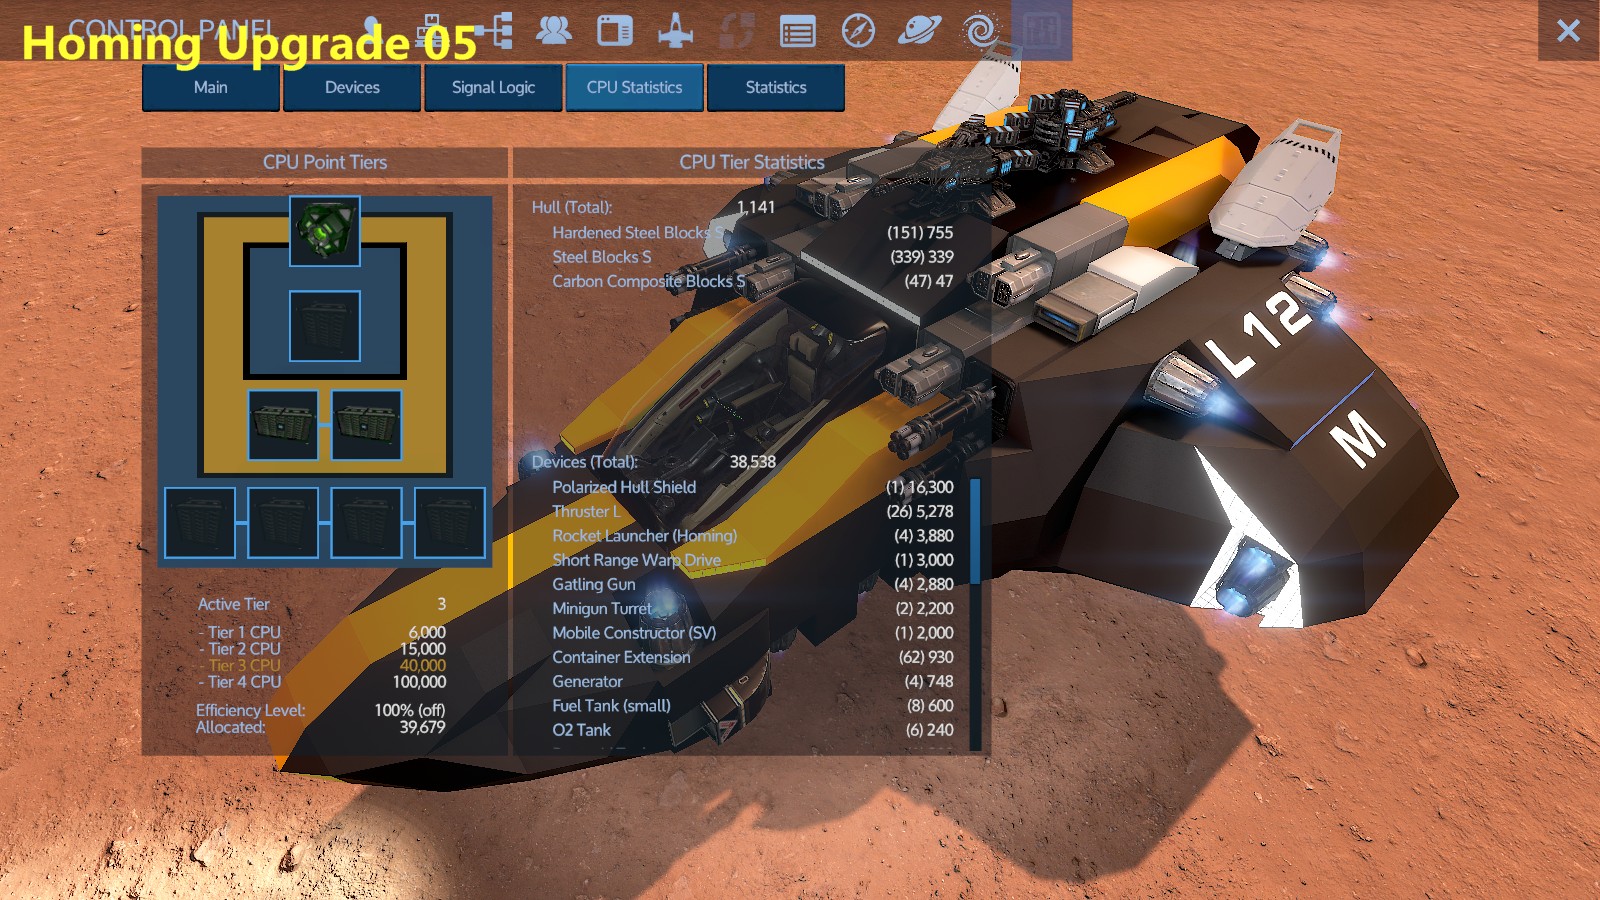
After the replacement, there will be a little CPU left over.
If you are considering customization using the extra CPU, please refer to the customization for type H and try customization. - Weapon exchange(type H)
“Myna2 type H” can exchange the Gatling Gun for Plasma Cannon without having to be aware of the CPU. В этом случае, please refer to “Rocket Launcher Replacement (type M)” and set the signal for the Plasma Cannon.
Также, since the Harvest module is used for the container controller, it is possible to replace the weapon with a laser drill. (Однако, the cargo capacity is low). - Thruster Upgrade(type H)
If you value mobility more than armament, you may upgrade the thrusters.
In the original version of Myna, upgrading Thruster L to Thruster L(Т2) was not recommended, but in Myna2, a slight performance improvement can be expected in some places, perhaps due to the pursuit of weight balance.
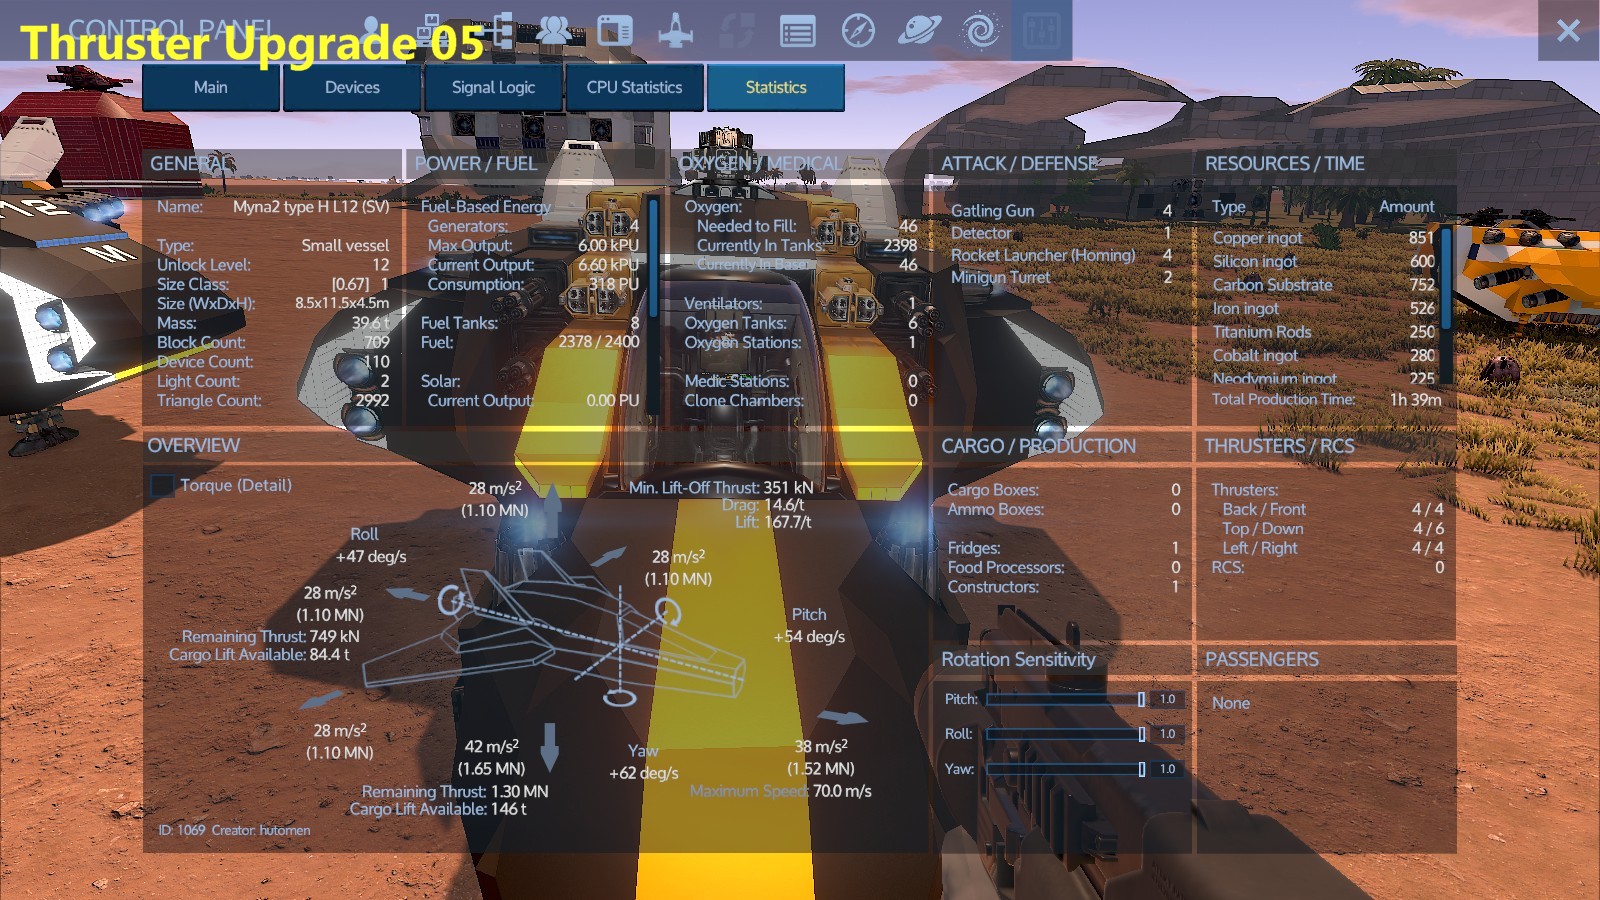
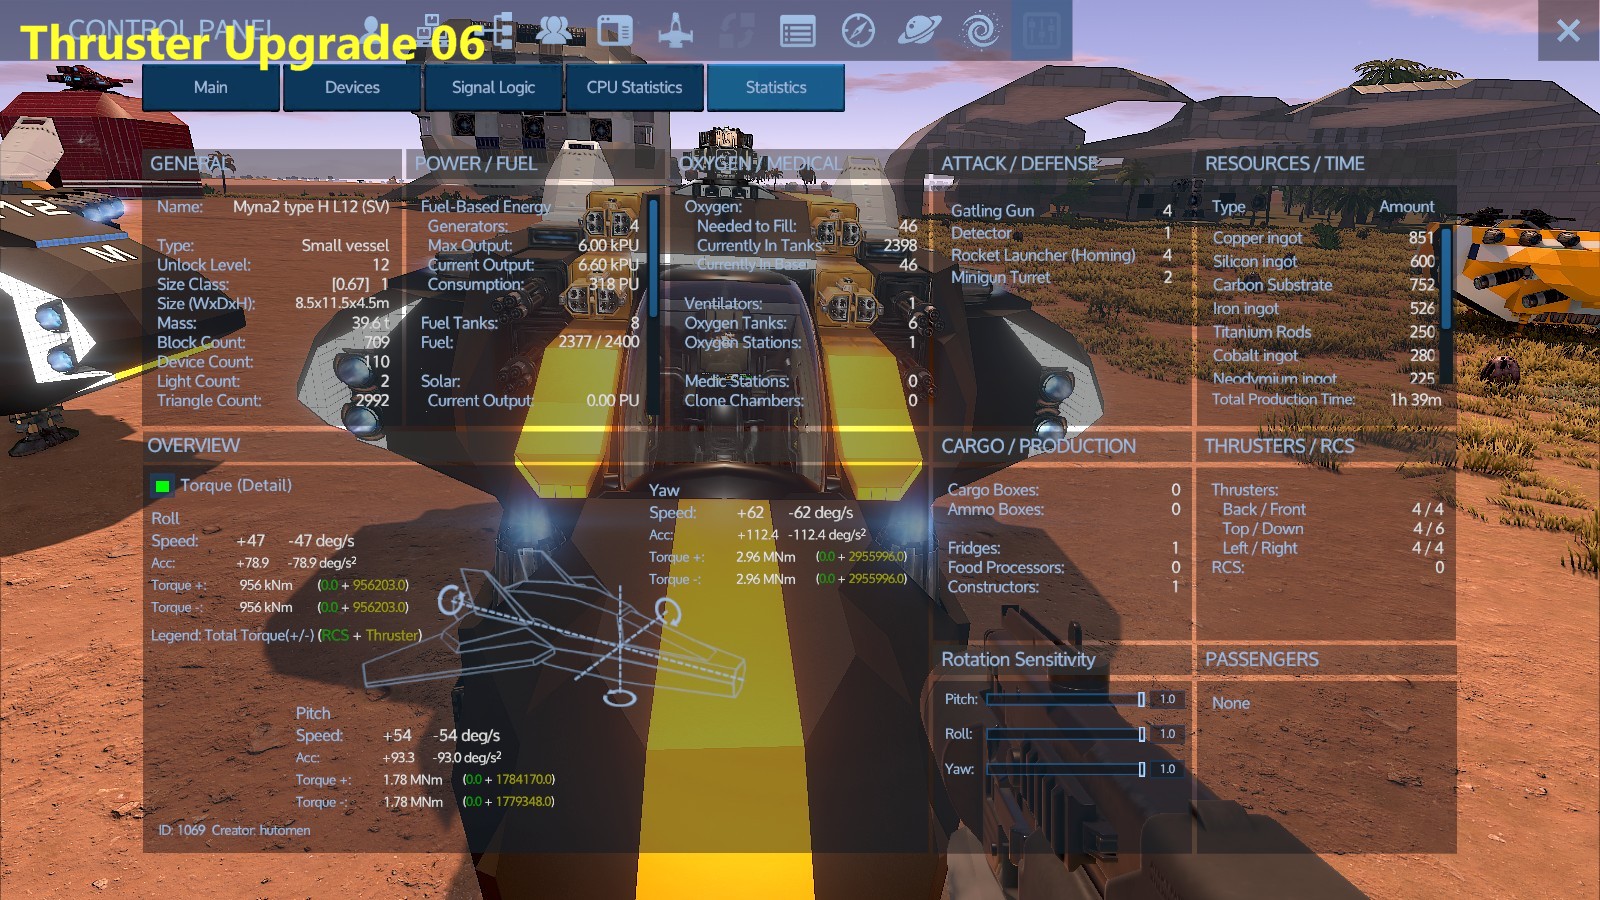
Within the CPU limit, four Thruster Ls can be upgraded to Thruster L(Т2), but the following three upgrade locations are recommended. Однако, no matter which of the three locations is selected, acceleration performance in other directions, maneuverability of the Pitch and Roll axes, and cargo lifting ability will be slightly reduced. Other locations are not recommended due to noticeable deterioration in various performances.- Four thrusters on each side(ScreenShot:ThrusterUpgrade 01-03)
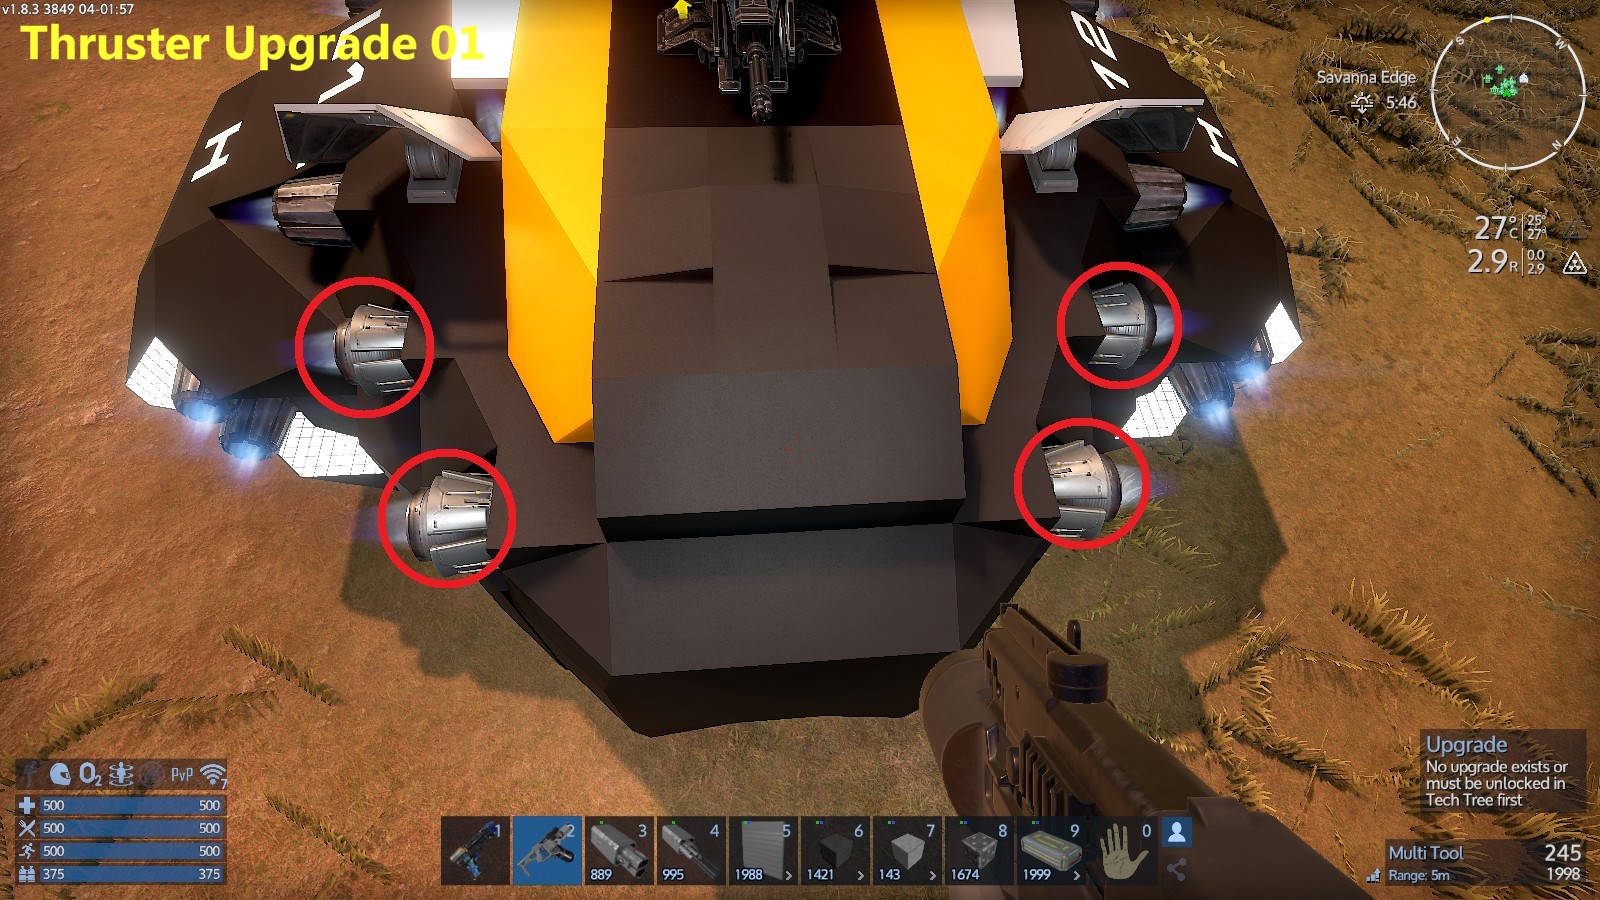
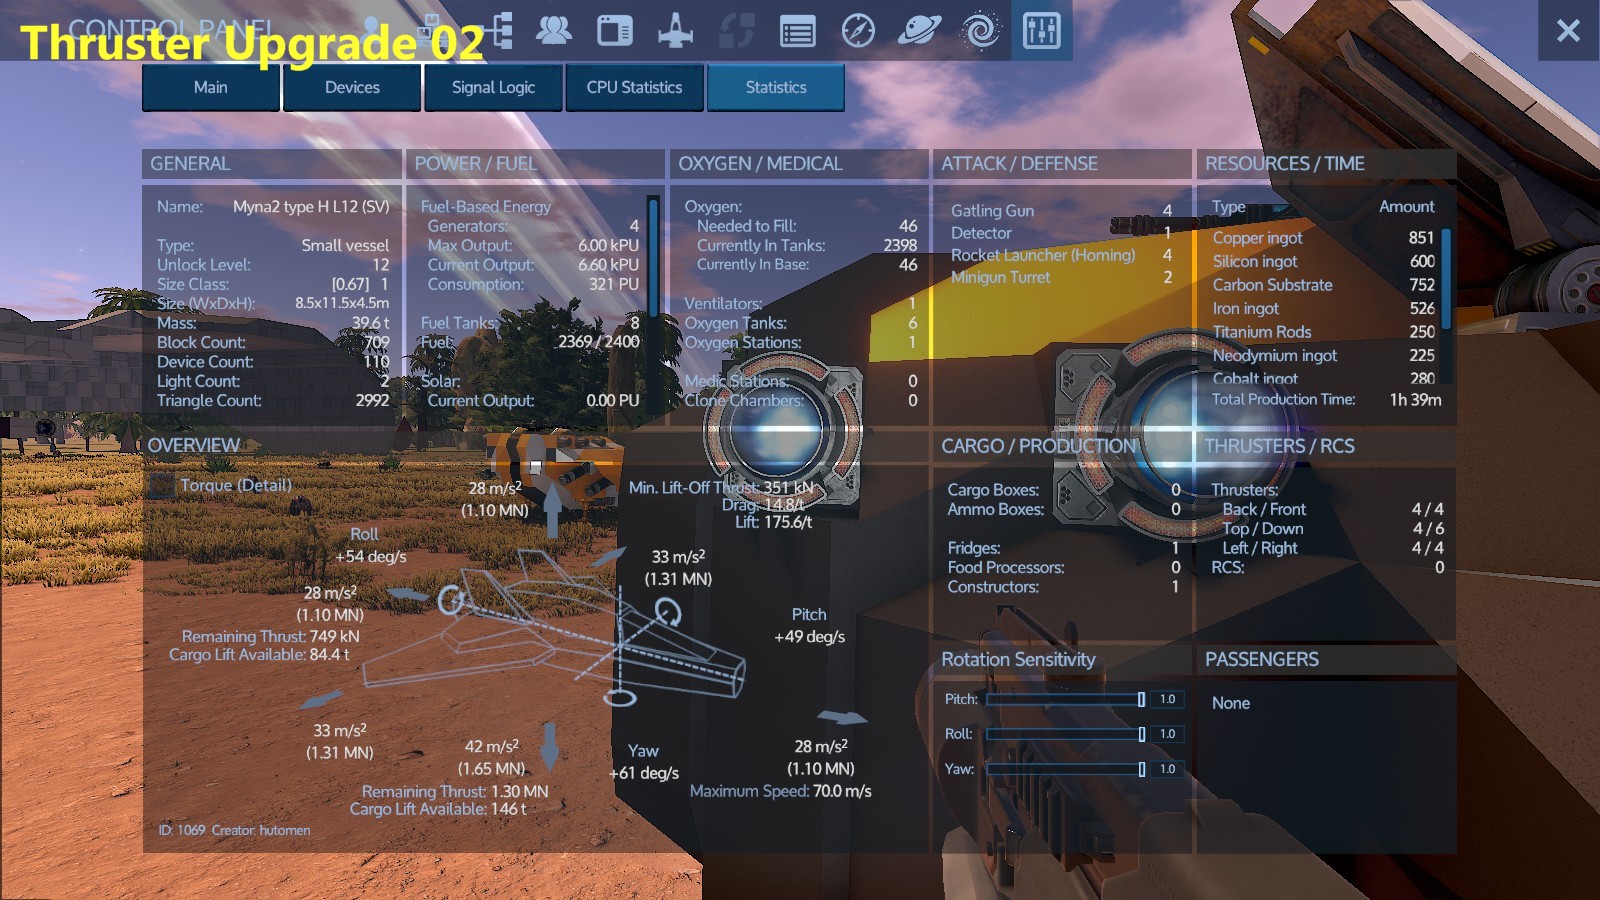
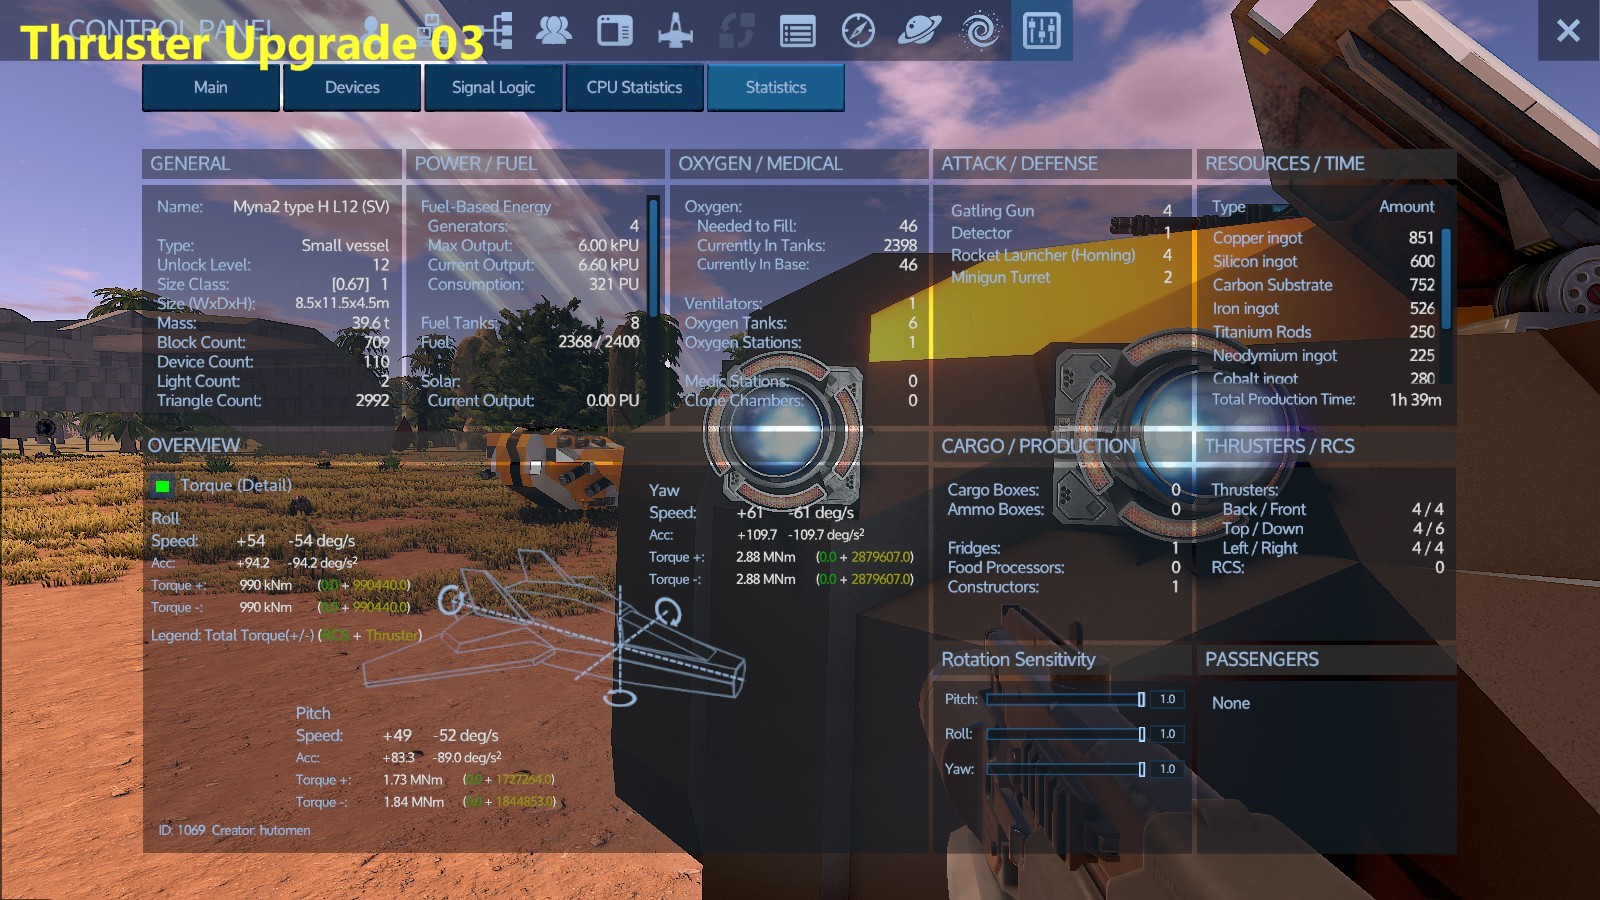 This is a well-balanced upgrade location for anti-POI combat.
Upgrade two rear thrusters on each side.
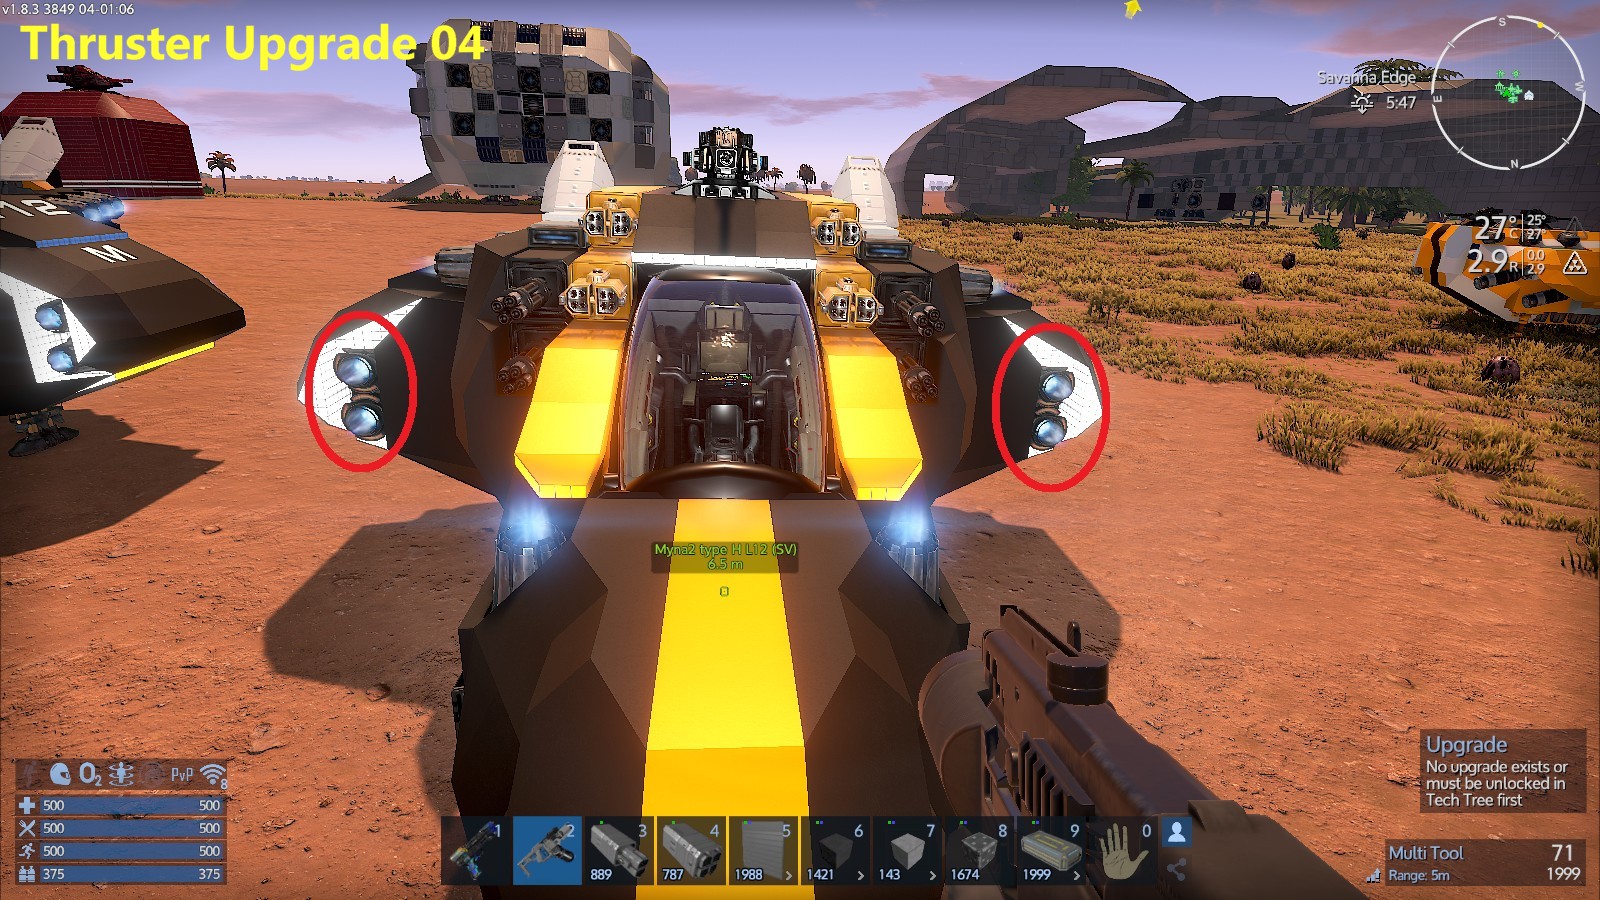
Increases acceleration performance in the left and right directions and improves Yaw axis rotation speed to 61deg/s. - Four FRONT thrusters(ScreenShot:ThrusterUpgrade 04-06)
 This is the optimal upgrade location in terms of weight balance.
Backward acceleration performance is increased and Yaw axis rotation speed is improved to 62deg/s. - Four BACK thrusters(ScreenShot:ThrusterUpgrade 07-09)
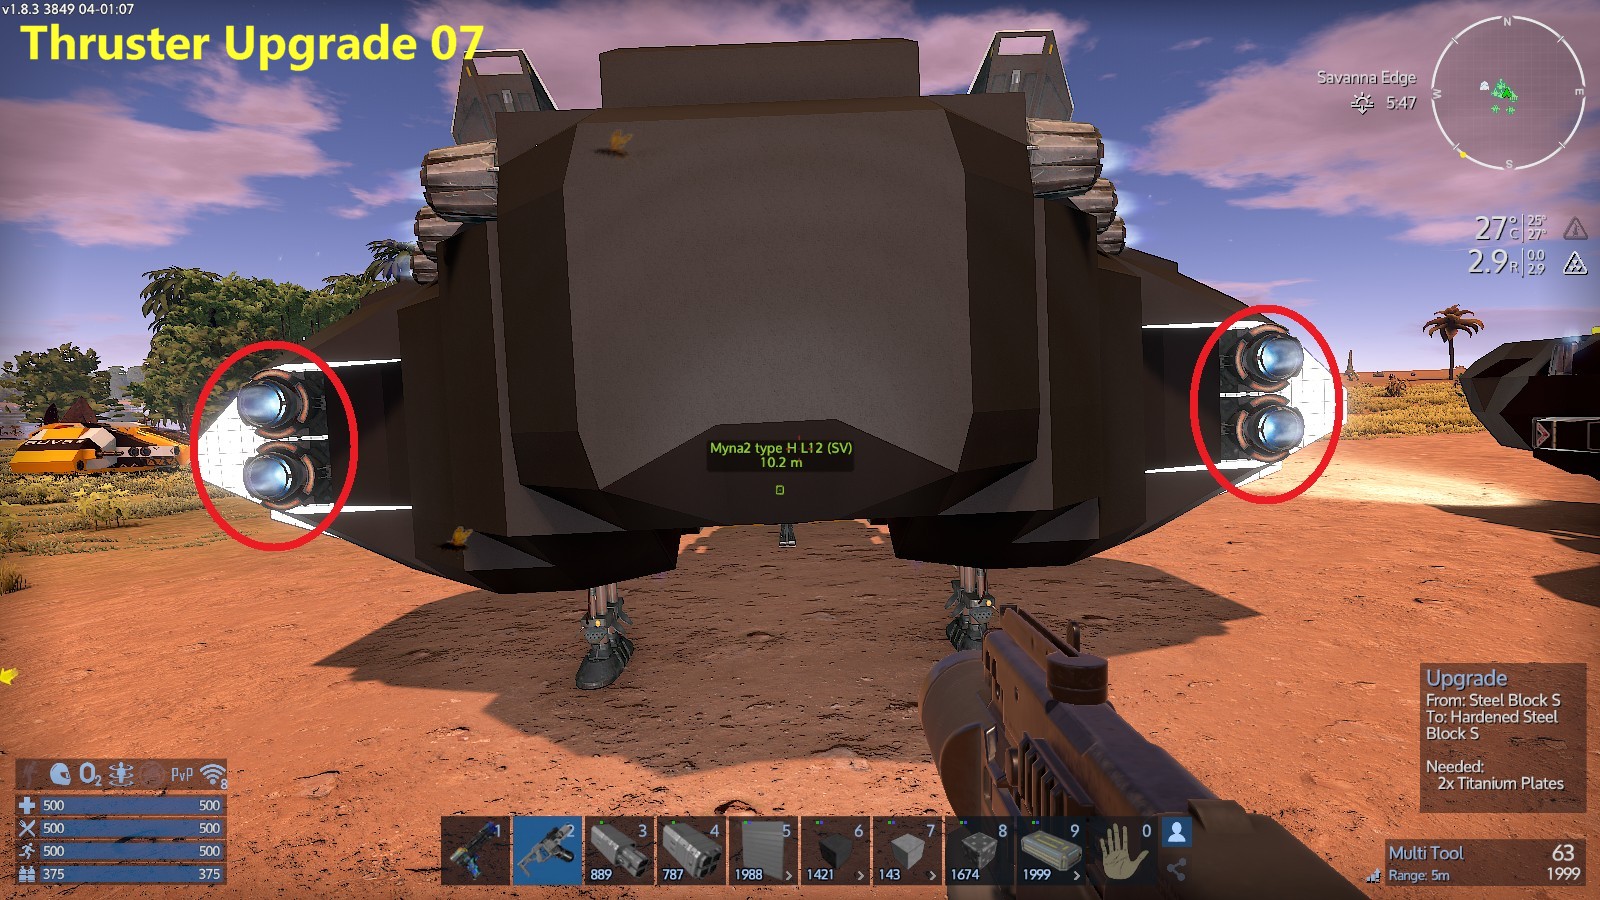
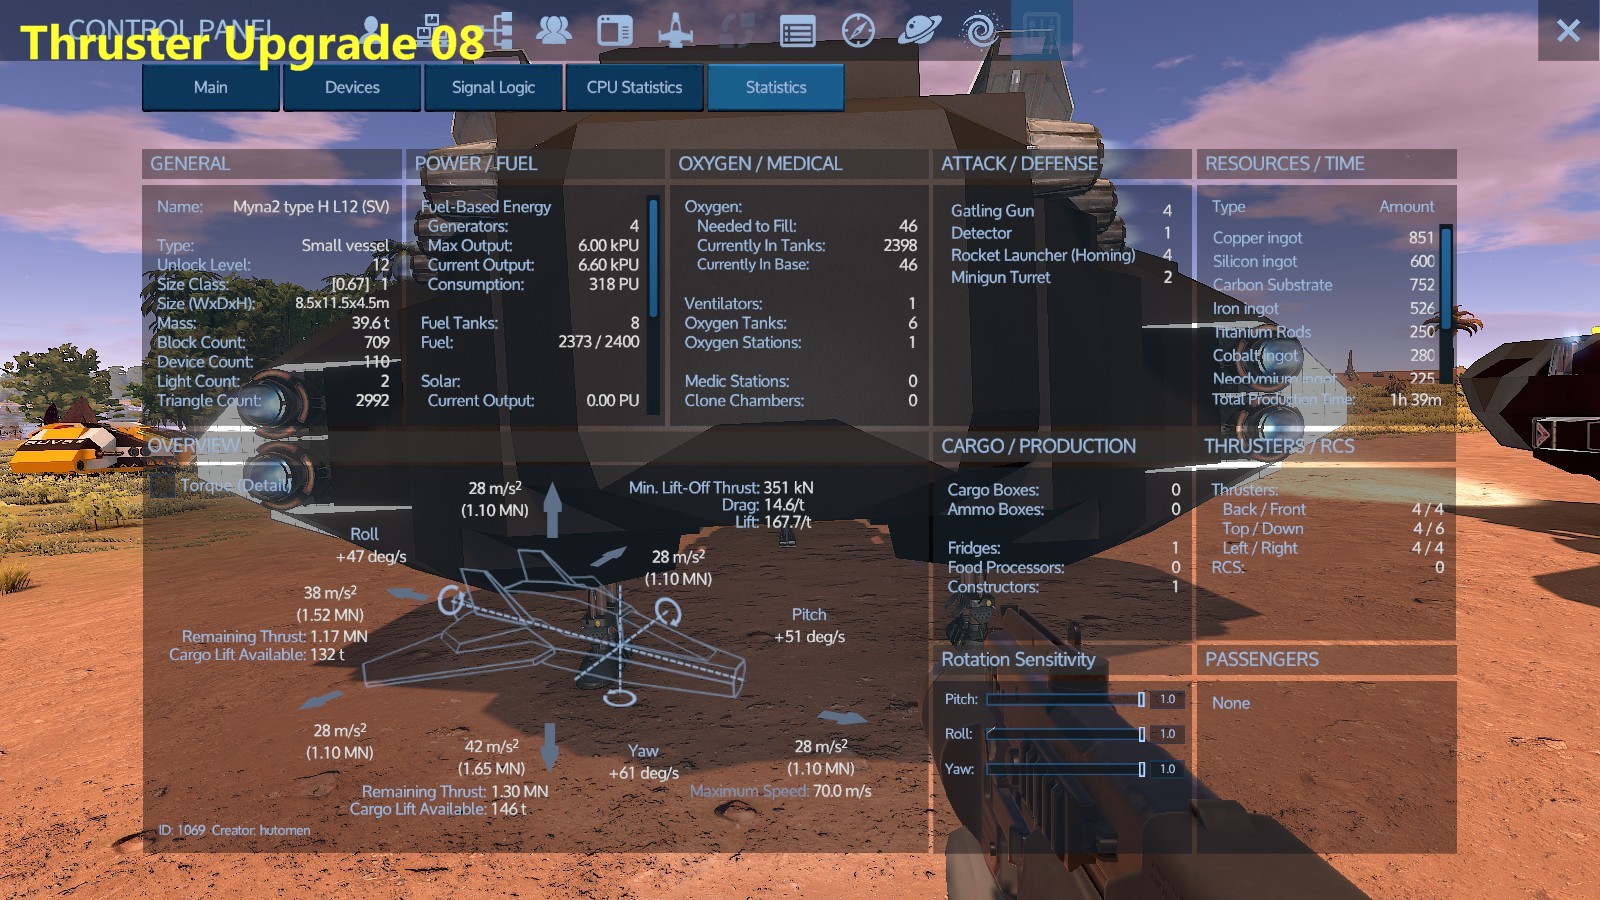
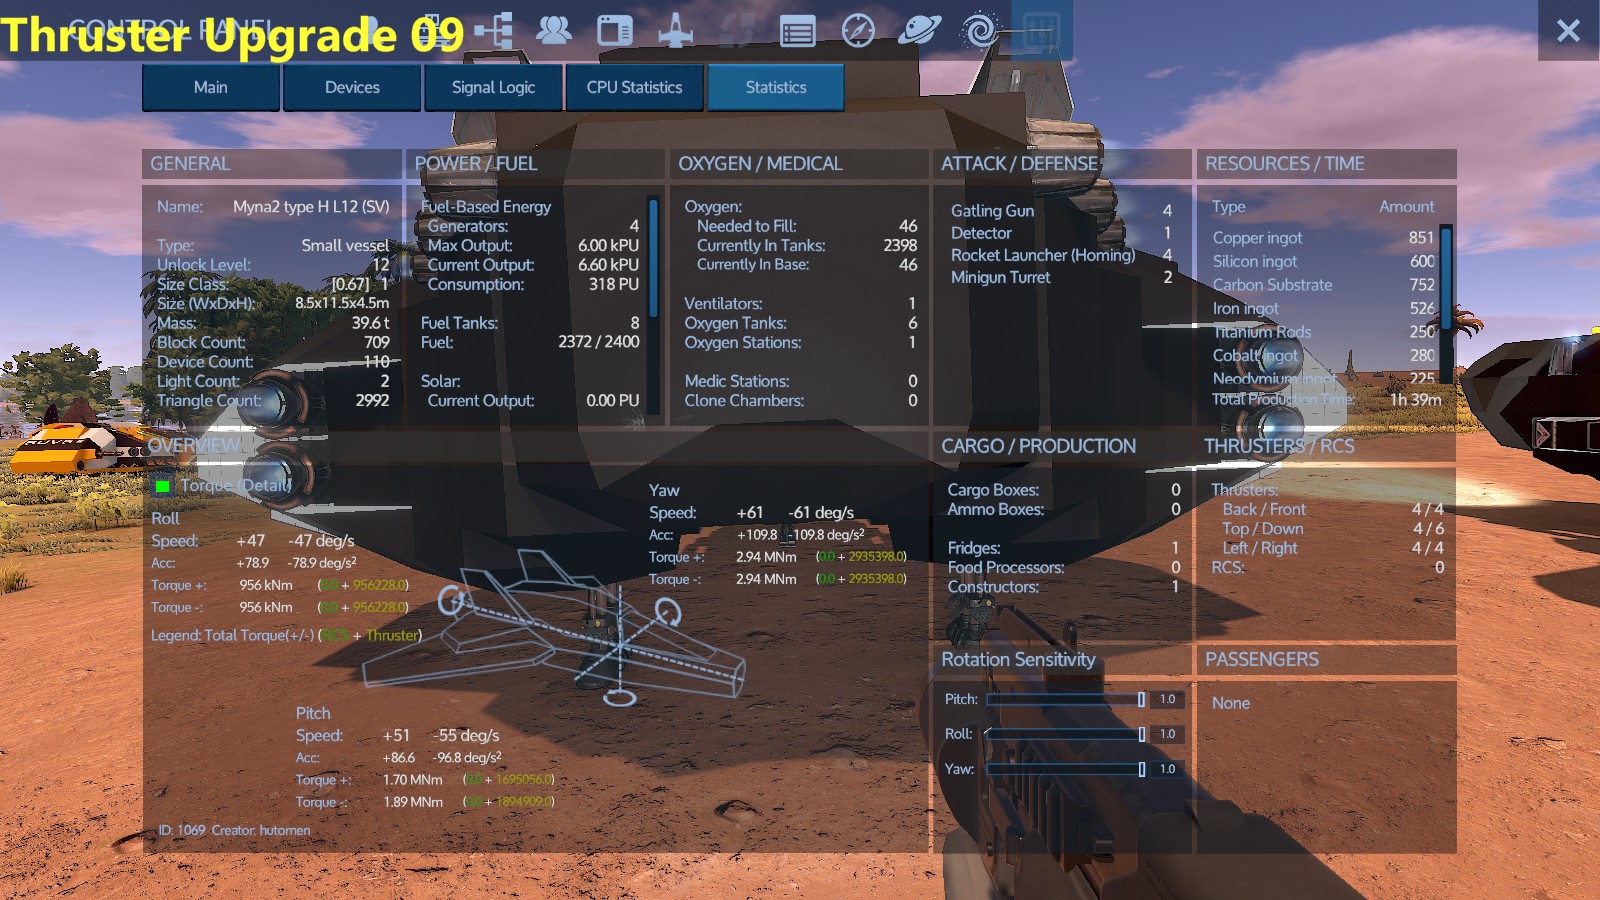 Forward acceleration performance is increased and Yaw axis rotation speed is improved to 61deg/s.
- Four thrusters on each side(ScreenShot:ThrusterUpgrade 01-03)
- Tweak distribution of cargo capacity.(type M / type H)
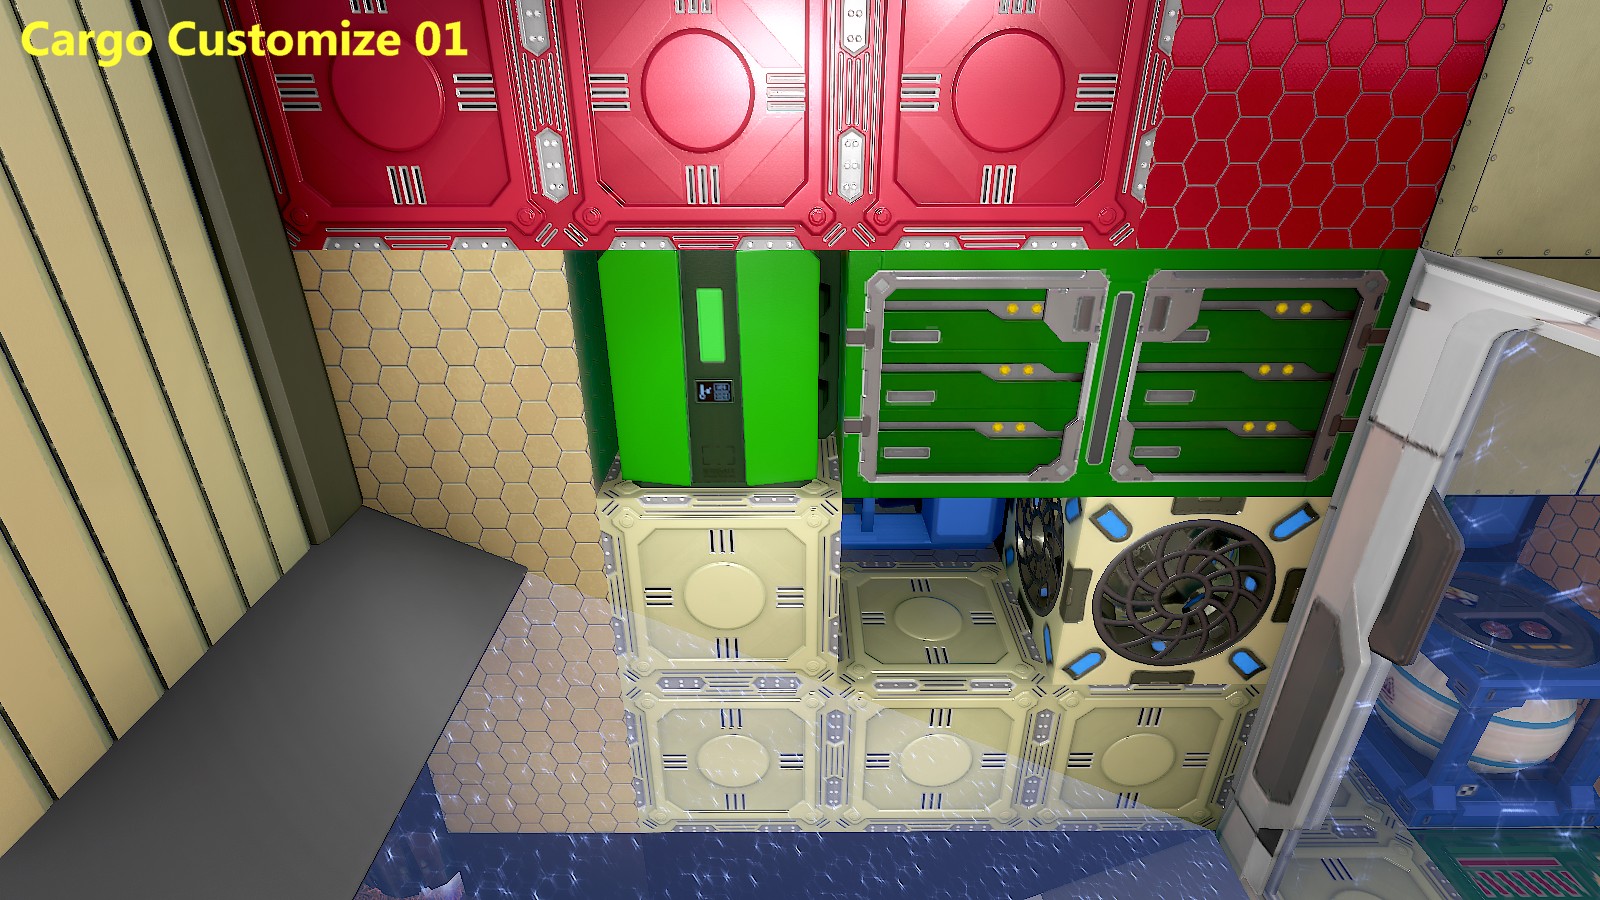
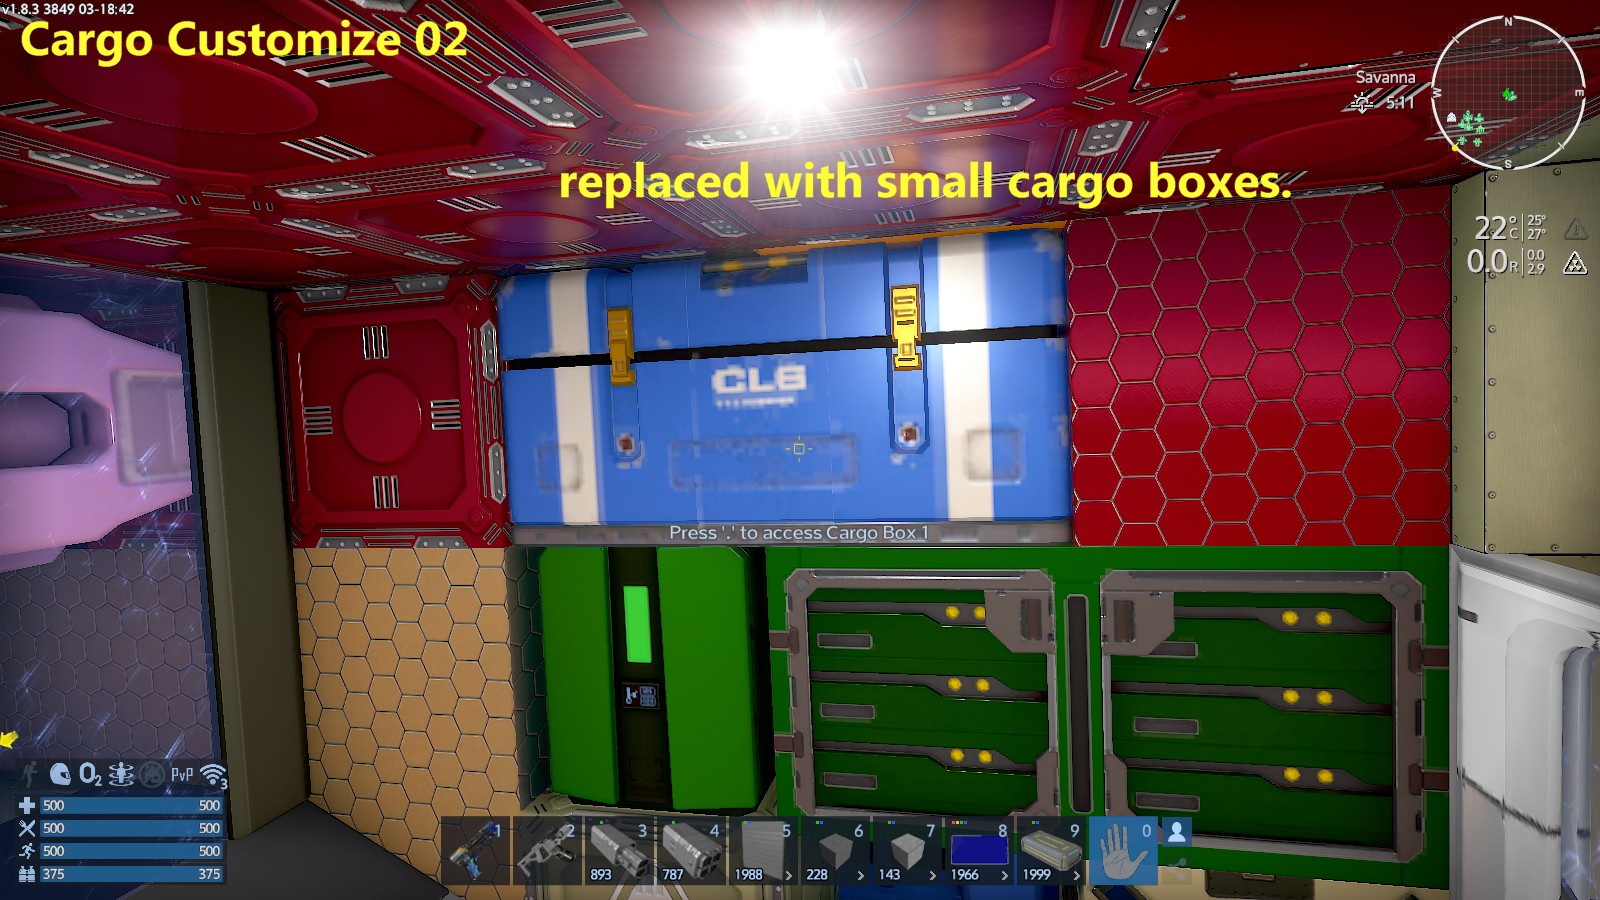
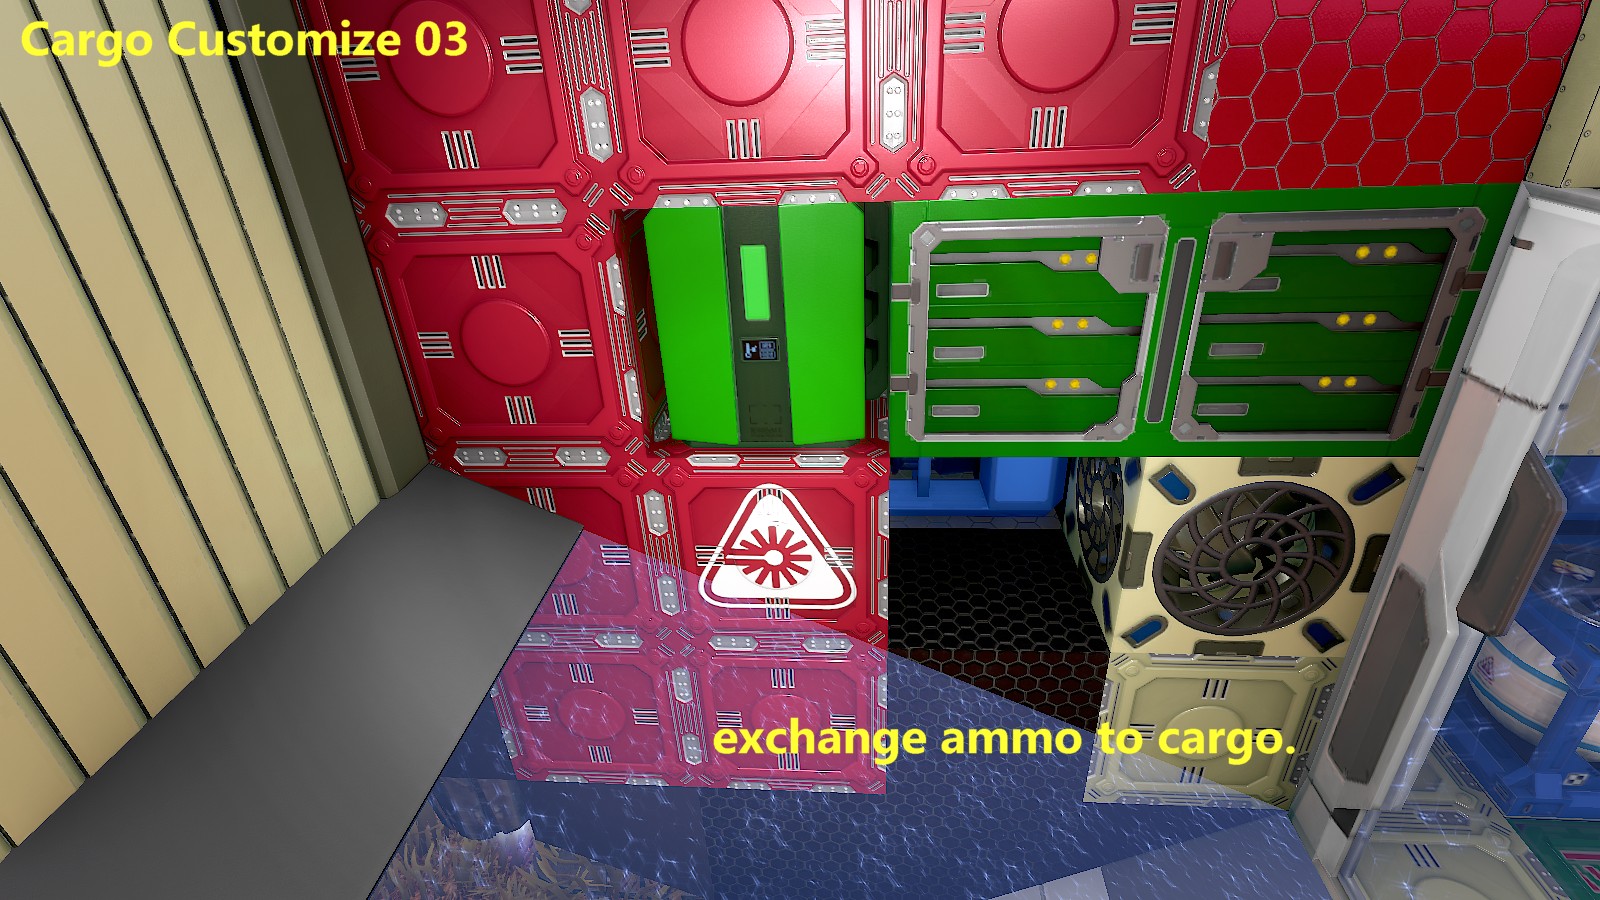
Cargo extensions are located on the walls and ceiling of the maintenance room and can be replaced with smaller capacity cargo boxes. (В этом случае, choose a position that does not disconnect the cargo expansion.) Также, the cargo and Ammo capacities can be tweaked without significantly affecting maneuverability. Although the design has equal distribution of cargo and Ammo extensions, you may change the distribution according to your preference. The red expansion boxes on the walls and ceiling of the maintenance room are the cargo expansion and the black and beige expansion boxes are the Ammo expansion. (ScreenShot:CargoCustomize 01-03)
- Reinforced armor(type H)
Upgrading armor will have a negative impact on maneuverability, so choose the location carefully and strengthen it only to a limited area.
Since the vehicle is equipped with a shield, other customizations are recommended rather than upgrading the armor.
Часто задаваемые вопросы
- вопрос) My head is stuck in the bottom of the vessel and I can’t reach the bottom boarding ramp.
А) Please press C key to crouch down and go through the bottom of the vessel. - вопрос) I cannot climb the bottom boarding ramp.
А) Depending on the attitude of the SV at the landing, it may not be possible to climb the boarding ramp due to the steep slope. В этом случае, you can still access the rear of the cockpit and board if you can get close enough to the manual door.
To avoid this situation, please land on a level surface as much as possible. - вопрос) Room light does not turn on.
А1) The light turns off during Sleep.
А2) The room light is automatically turned on by the LandingGear’s ground signal. Поэтому, if the LandingGear is not grounded, the room light will not turn on.
А3) The room light will also not turn on if all LandingGear is destroyed.
- вопрос) The shield meter does not reach 100% even when the signal “Щит” is turned on.
А) Shield deployment consumes Pentaxid(изысканный). Pentaxid(изысканный) is also used as fuel for warp drive, so it is recommended to buy it in bulk when you see it in the shop. - вопрос) The boarding ramp on the bottom of the vessel does not open automatically.
А1) Если “Обслуживание” signal is left ON, the boarding ramp will not open. After completing maintenance, be sure to turn the “Обслуживание” signal OFF.
А2) The boarding ramp will also not open if the sensor on the ceiling of the maintenance room is destroyed. В этом случае, please open and close it manually. - вопрос) The rear maintenance hatch does not open when the “Обслуживание” signal is turned on.
А) Когда “Бой” signal is ON, the rear maintenance hatch is forcibly closed for safety reasons. To access the rear maintenance hatch, turn the “Бой” signal OFF. - Signal does not work properly
В некоторых случаях, the signals do not work properly even though the above two cases do not apply. This is due to the fact that the signal cannot be controlled when the ramp or shutter is retracted due to contact with a character, or when the ramp or shutter is manually operated.
<Procedure to restore the signal>
В этом случае, repeatedly move in and out of the detection range of the sensor. The signal will be restored and you will be able to control with the signal again.- Первый, move out of the range of the sensor by moving far enough away from the SV.
В большинстве случаев, the signal will return at this point. - Следующий, enter the maintenance room through the bottom boarding ramp, board the cockpit, exit the cockpit, and go back to the bottom boarding ramp to restore the signal.
(If you touch the ramp or shutter again or operate it manually during this process, repeat the above procedure from step 1.)
- Первый, move out of the range of the sensor by moving far enough away from the SV.
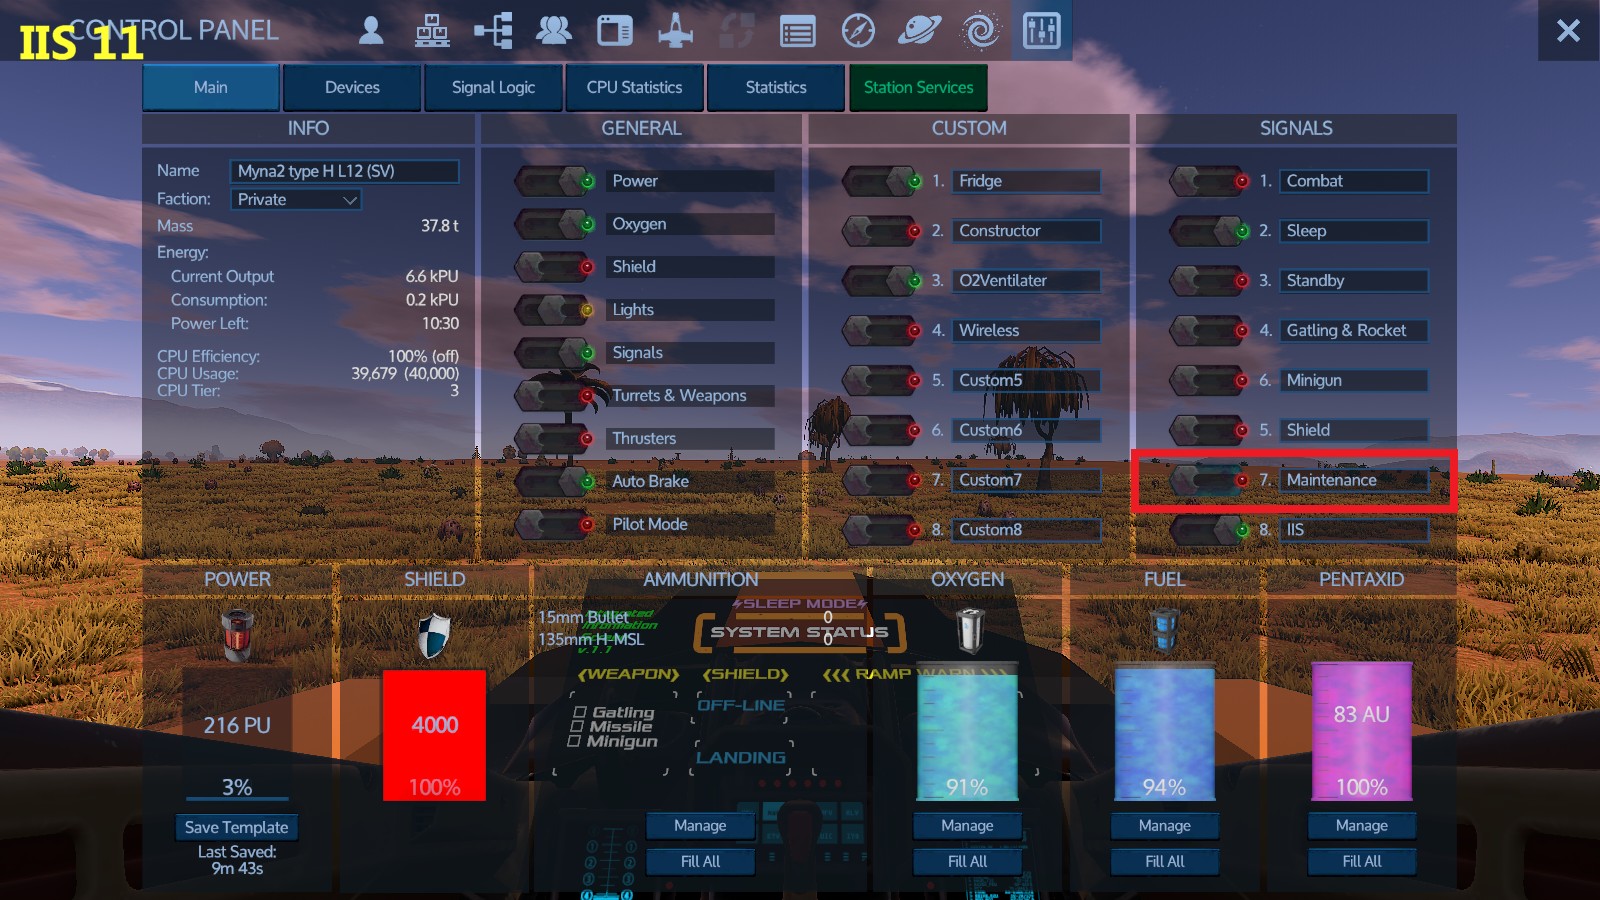
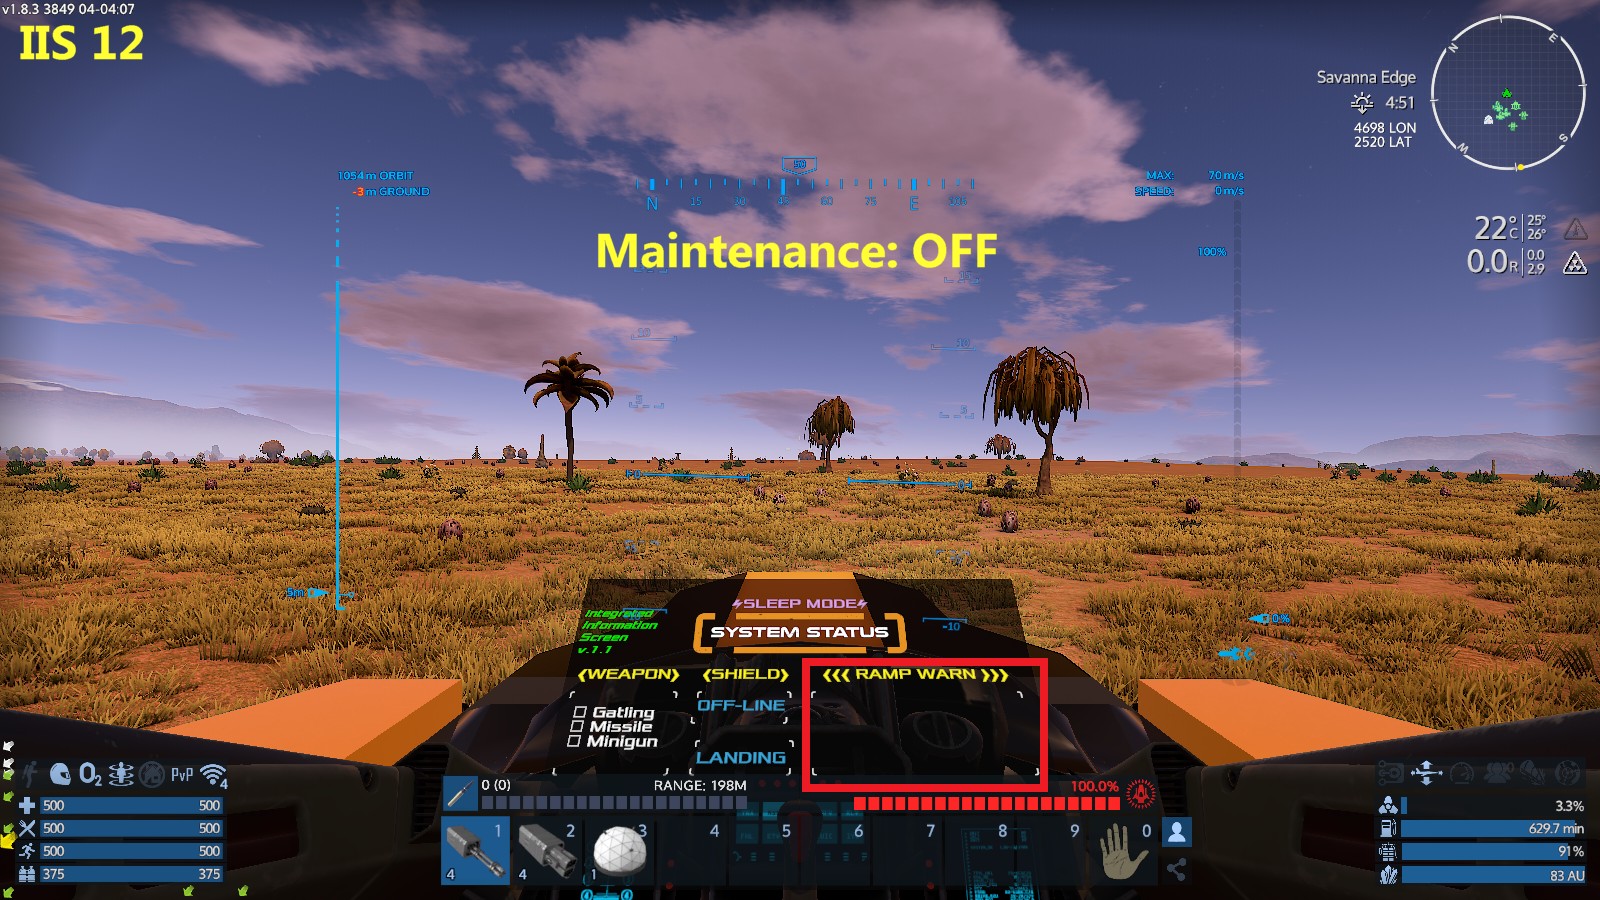
*If the warning message does not disappear from RAMP WARN in IIS.
- The signal “Обслуживание” is left ON.
> Please turn off the signal “Обслуживание”. (ScreenShot:IIS 09-12)

- The RAMP or door was operated manually, like when boarding.
> Please refer to the FAQ <Procedure to restore the signal>. - The character touched the RAMP or door that is being deployed during boarding.
> Please refer to the FAQ <Procedure to restore the signal>.
Это все, чем мы делимся сегодня для этого. Эмпирион - Галактическое выживание гид. Это руководство было первоначально создано и написано хутомен. На случай, если нам не удастся обновить это руководство, вы можете найти последнее обновление, следуя этому связь.