- Заголовок: Пограничье 3
- Дата выпуска:
- Разработчик:
- Издатель:
Информация о Бордерлендс 3 все еще не завершен. Пожалуйста, помогите нам заполнить детали игры, используя это контактная форма.
For those interested in playing Borderlands 3 in Third Person mode, I will provide a detailed text explanation on how to set up and edit a mod to enable this feature. Альтернативно, there’s a helpful Youtube guide created by the developer of OpenHotFixLoader available for reference.
Quick Introduction
Если вы предпочитаете, here is a quick Youtube guide made by the developer of OpenHotFixLoader.
Предварительные условия:
Прежде чем мы начнем, make sure you have 7zip or Winzip installed to extract the necessary files. Both tools are freely available and won’t incur any costs.
Important Considerations:
Please note that there is no toggle between Third Person and First Person modes when this mod is enabled. Также, unlike Borderlands 2 моды, there’s no in-game menu to enable or disable it. If you wish to revert to the original setup or are unsatisfied with the mod, simply delete the associated file. Будьте уверены, this process will not corrupt your game files.
Ограничения:
К сожалению, using mods, в том числе этот, with a cracked version of the game is not feasible. The game’s hotfixes, through which mods are injected, depend on an internet connection. This serves both as an Anti-Piracy measure and ensures that the game remains up to date. Следовательно, a legitimate copy of the game is essential. Пограничье 3, along with all its DLCs, is periodically offered at a discounted price, making it an affordable purchase.
Compatibility with Epic Games:
While the process is expected to work similarly for Epic Games users, some differences might exist. Однако, as I don’t personally use Epic Games, I cannot provide specific details regarding these potential discrepancies.
Multiplayer Functionality:
This mod should function in online play as well since it is client-side and does not alter core gameplay mechanics, such as loot drops. Однако, individual experiences may vary. В некоторых случаях, only the host needs to have the mod files, while in other situations, all players must possess the same mods to play together. К сожалению, I haven’t had the opportunity to test this in multiplayer, as I recently acquired the game and currently lack gaming companions.
Следуя этим инструкциям, you should be able to enjoy the Third Person mode in Borderlands 3 without any major issues.
Navigating to the Correct Folders
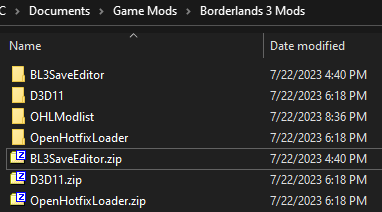
Should you allow me to offer a suggestion, I would propose the following approach: rather than storing files directly on your Desktop, create a dedicated folder exclusively for preserving and extracting mods. Лично, I have chosen my Documents folder on the H:/ drive instead of the C:/ drive for this purpose.
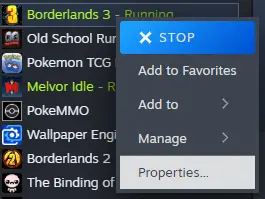
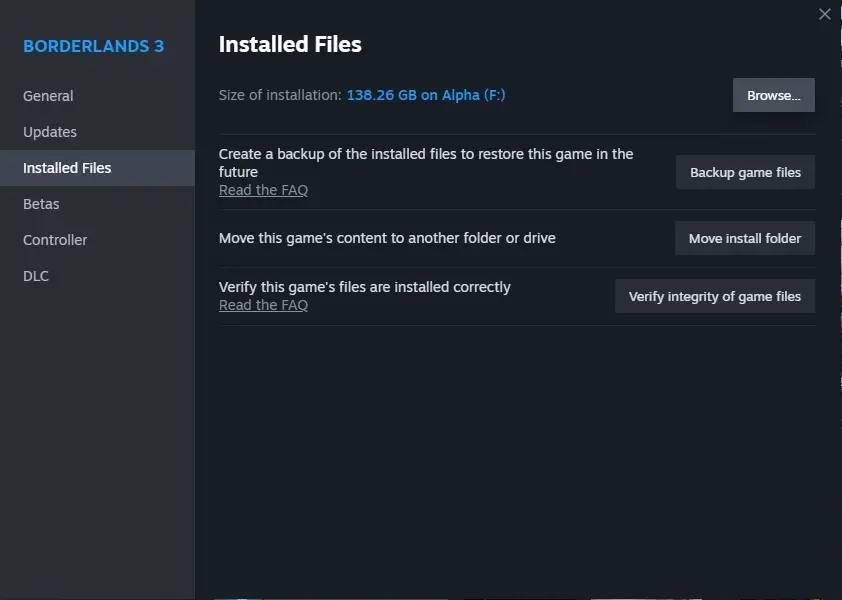
Чтобы начать процесс, prior to downloading any mods and proceeding with their installation, I would advise you to proactively open the relevant folders where you will be dropping the mod files. By right-clicking on Borderlands 3 within your Steam library, accessing Properties, and then selecting the “Просматривать…” вариант, File Explorer will launch, displaying the folder path as “SteamLibrary\steamapps\common\Borderlands 3.”
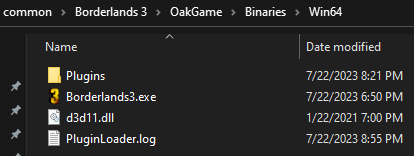
Следующий, navigate to OakGame, then Binaries, and finally Win64. Upon reaching the Win64 folder, you will find Borderlands3.exe as the sole item. Disregard the other files visible in my screenshot, as you will obtain those separately.
В этот момент, you are in the appropriate location to proceed with the downloading process.
Downloading and Installing the Prerequisites
Now that you’ve successfully navigated to the folder you need to be in, you can get to download the mods.

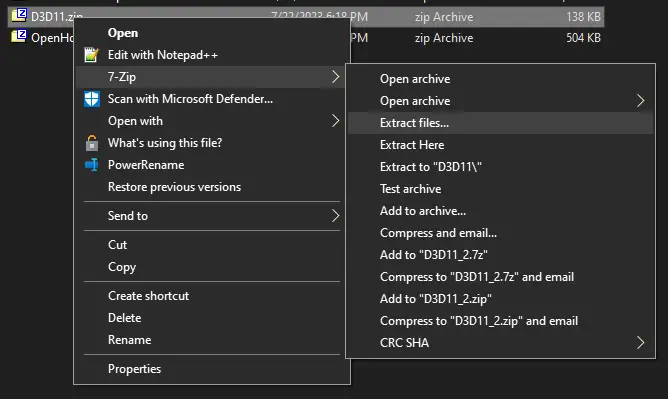
Первый, you’ll need to navigate to the BL3DX11Injection releases page and download the D3D11.zip file there. You do not need to download the source code files, they will do nothing for you.

Kindly locate the D3D11.zip file in your designated storage location. Однажды найденный, proceed to extract its contents, resulting in a D3D11 folder containing a Plugins subdirectory and the d3d11.dll file. You are then required to duplicate both the Plugins folder and the d3d11.dll file and paste them into the Win64 folder that was accessed earlier. В этом контексте, I am employing 7-Zip, although Winzip will yield similar results.
OpenHotfixLoader

For OpenHotfixLoader, you’ll need to do the same thing by navigating to and downloading the OpenHotfixLoader.zip file from the OpenHotfixLoader releases page and save the file somewhere. You do not need to download the source code files, they will do nothing for you.
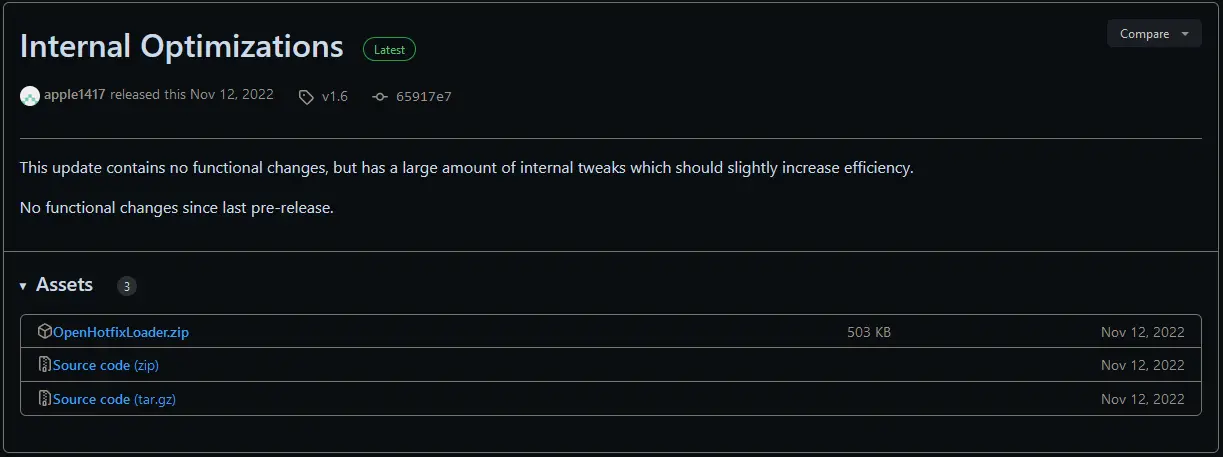
Please proceed with extracting the contents of the provided archive in a similar manner as you did with the D3D11.zip file earlier. Inside this archive, you will come across three distinct items: a folder titled “ohl-mods,” a file named “LICENSE,” и “OpenHotfixLoader.dll” файл. You are required to copy both the “ohl-mods” folder and the “OpenHotfixLoader.dll” file from this archive. После, navigate to the Plugins folder you previously added along with the D3D11 files.
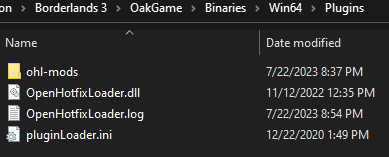
The designated file path for this folder would be “SteamLibrary\steamapps\common\Borderlands 3\OakGame\Binaries\Win64\Plugins.” Once you locate this directory, paste the copied “ohl-mods” folder and “OpenHotfixLoader.dll” file into it. После выполнения этих шагов, the folder should resemble the example image provided below.
Installing the Third Person Camera Mod
И наконец, the part you’ve all been working so hard for, the Third Person Camera Mod. Nothing different here, only what you’ve been doing before.
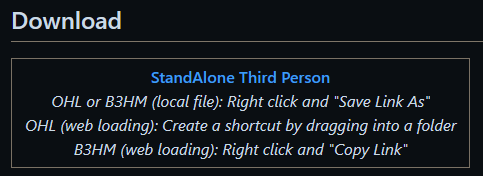
Первый, you’ll need to navigate to the StandAlone Third Person mod page.
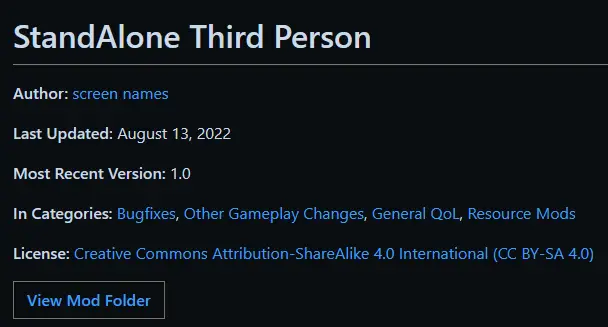
Впоследствии, it is imperative to perform a right-click action on the blue hyperlink text situated beneath the Download box. Thereafter, сделать выбор в пользу “Save Link As…” option to preserve the file. Save it in a location similar to the previous files, and there is no requirement for extraction. The intended file name for saving is “Standalone Third Person.bl3hotfix.”
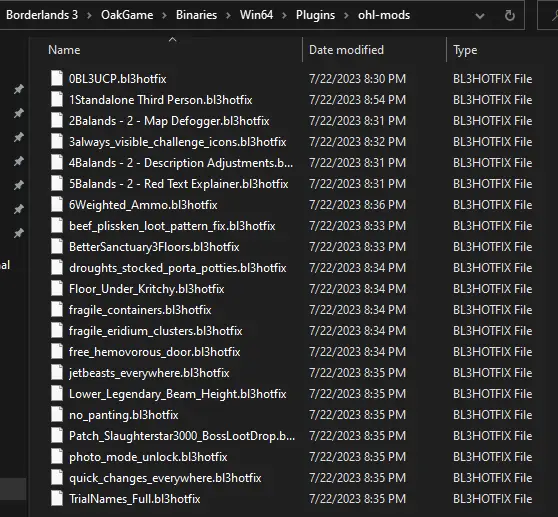
Proceed to access the directory labeled “ohl-mods” в рамках “Плагины” folder as mentioned earlier. The exact path to navigate to is as follows: “SteamLibrary\steamapps\common\Borderlands 3\OakGame\Binaries\Win64\Plugins\ohl-mods.” Once you’ve located the desired folder, proceed to duplicate and transfer the file named “Standalone Third Person.bl3hotfix” в “ohl-mods” каталог. It should be noted that your “ohl-mods” folder might display additional modifications, aside from the one mentioned, as I also possess multiple other mods.
Booting up the Game
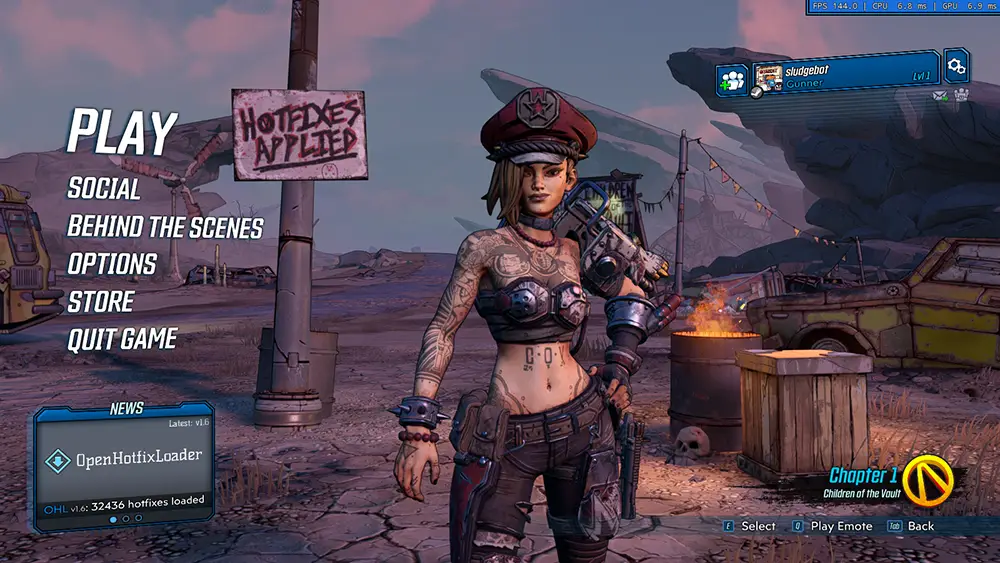
To initiate the game, proceed as you normally would by utilizing the play button within the Steam platform. Upon reaching the main menu, you may observe a notification displaying “HOTFIXES APPLIED” if all updates have been successfully implemented. Однако, should this notice fail to appear, direct your attention to the lower left section labeled “News.” Там, you can ascertain the status of the updates. To confirm the correct installation of OpenHotfixLoader, check for the presence of a grey box.
Если, по любой причине, the grey box does not manifest immediately, exercise patience as it may require a moment to load. If it still does not appear after waiting, consider restarting the game or ensuring that you have correctly placed the relevant folder during the installation process.
Более того, it is advisable to select either your existing character or create a new one and proceed with gameplay. This action will serve to verify the proper functionality of the StandAlone Third Person mod, which should be automatically enabled.
Configuring the Third-Person Mod
How can I adjust the camera’s position, высота, и расстояние?
Now that we have confirmed that everything is functioning correctly, it is time to configure your third-person camera to suit your preferences.
Please note that you will need to close and relaunch the game for the changes to take effect. Although the loading times might be long, once you have fine-tuned the camera settings to your liking, you’ll be all set.
Чтобы продолжить, ensure that you are still within the “ohl-mods” папка. The file path should be “SteamLibrary\steamapps\common\Borderlands 3\OakGame\Binaries\Win64\Plugins\ohl-mods” in case you closed it previously.
Следующий, right-click on the “Standalone Third Person.bl3hotfix” файл и выберите “Открыть с помощью” тогда выбирай “Notepad.” These files are essentially text files, so you can edit them using your Notepad editor. В качестве рекомендации, “Блокнот++” provides a more concise and customizable editing experience, which I have been using.
Though the file may contain large blocks of text, you only need to focus on one particular section, specifically the line under “Special thanks” that states: “Edit the XYZ at the end of the line below to change the camera position.”

Even more specifically, эти 3 цифры. По умолчанию, they are set to (x=-150,y=100,z=0). Don’t edit the x, й, я, or any symbols, you just want to change the numbers here.

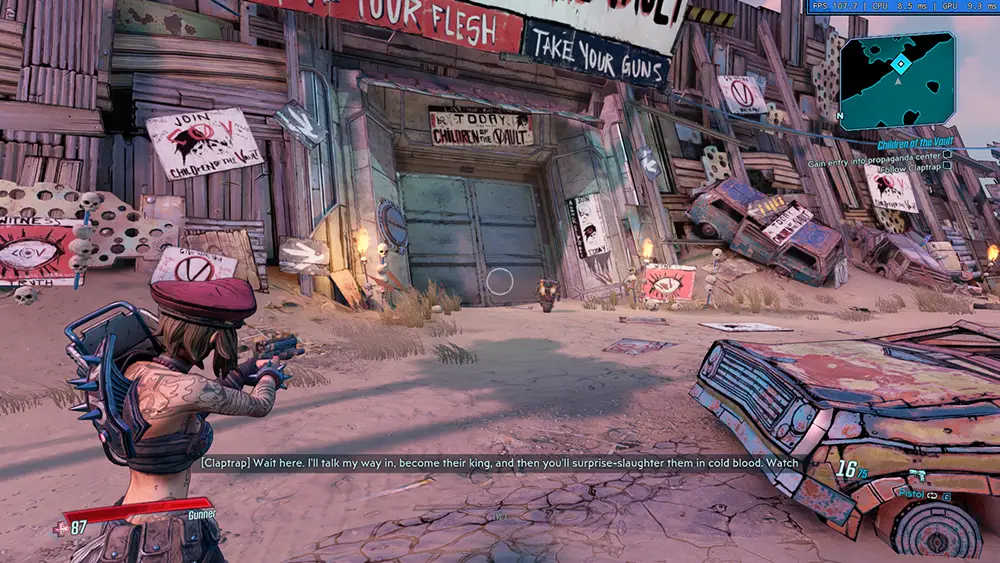
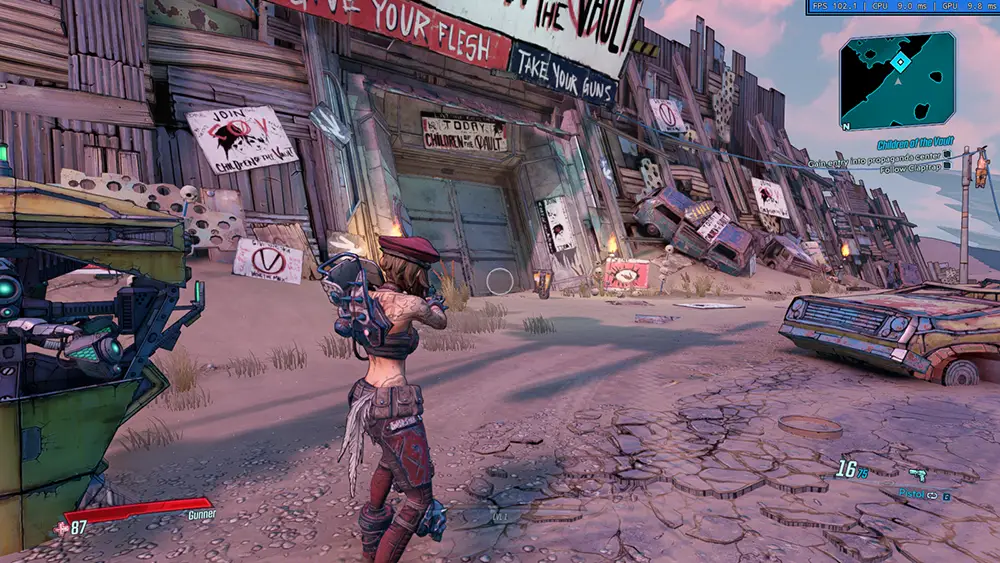
And this is what the camera looks like with those defaults, so you can use this as a comparison.
1600×900 Windowed Mode 90 FOV x=-150,y=100,z=0
The X, Да, and Z values control the camera position relative to the player’s center point, with X representing forward/backward distance, Y representing left/right distance, and Z representing height.
A positive X value places the camera in front of the player’s model, while a negative X value positions it behind the player.
A positive Y value moves the camera to the right of the player’s center point, and a negative Y value moves it to the left.
The Z value determines the camera’s vertical position. A higher Z value places the camera above the player’s center, while a negative Z value positions it below.
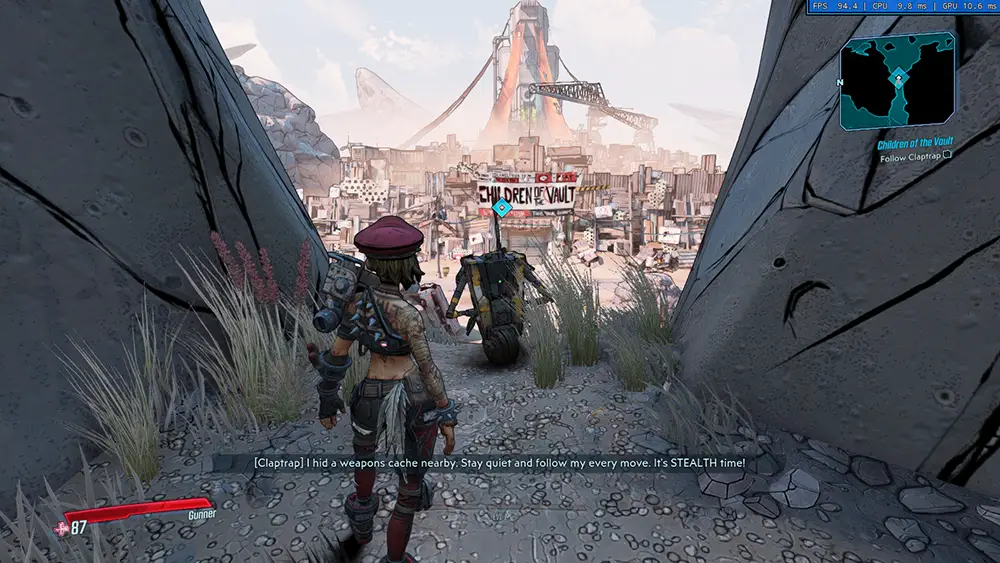
To find the desired camera settings, I experimented with increments of 25, except for the Z value. В конечном счете, I settled on the following camera configuration: 1600×900 windowed mode, 90-degree FOV, x=-225, y=50, z=-20. Below are two screenshots illustrating this setup, one with a gun and one without. For your exploration, you may consider more significant changes initially to observe their effects, but I found this configuration to be the most suitable.
Это все, чем мы делимся сегодня для этого. Пограничье 3 гид. Это руководство было первоначально создано и написано sludgebot. На случай, если нам не удастся обновить это руководство, вы можете найти последнее обновление, следуя этому связь.