- Título: Saga da Vestuário I.: Guerra dos Scions
- Data de lançamento:
- Desenvolvedor:
- Editor:
Information about Vestaria Saga I: War of the Scions is still incomplete. Por favor, ajude-nos a preencher os detalhes do jogo usando este formulário de contato.
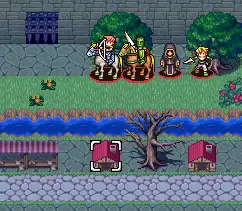
The final map took so long when I played through it and I do not see much information on it. I have created this WIP guide that goes over everything I had to deal with in order to complete that map.
Visão geral do guia
This is my first steam guide. I may put more details into it or format it better in the future if people ask me to. I made this because I haven’t seen much information on the final map which is extremely complex and long as far as SRPGs go. Pessoalmente, my mostly blind run of it took 7.5 hours to finish this map (including resets to save people). I discuss strategies I used and all the data I could uncover when playing through this map. Most if it is via memory so let me know if there are any issues or things I could add to further explain the map.
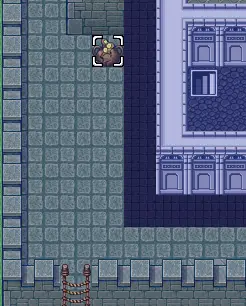
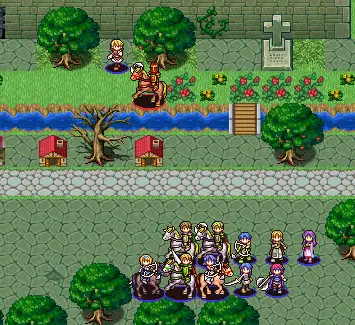
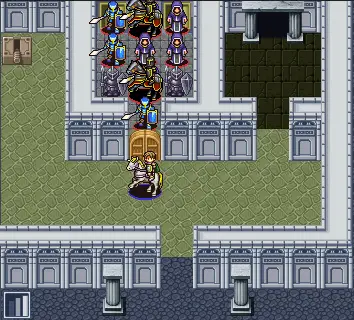
The following image is a compilation of screenshots I did to generate the full map as it appears during the preparations stage:
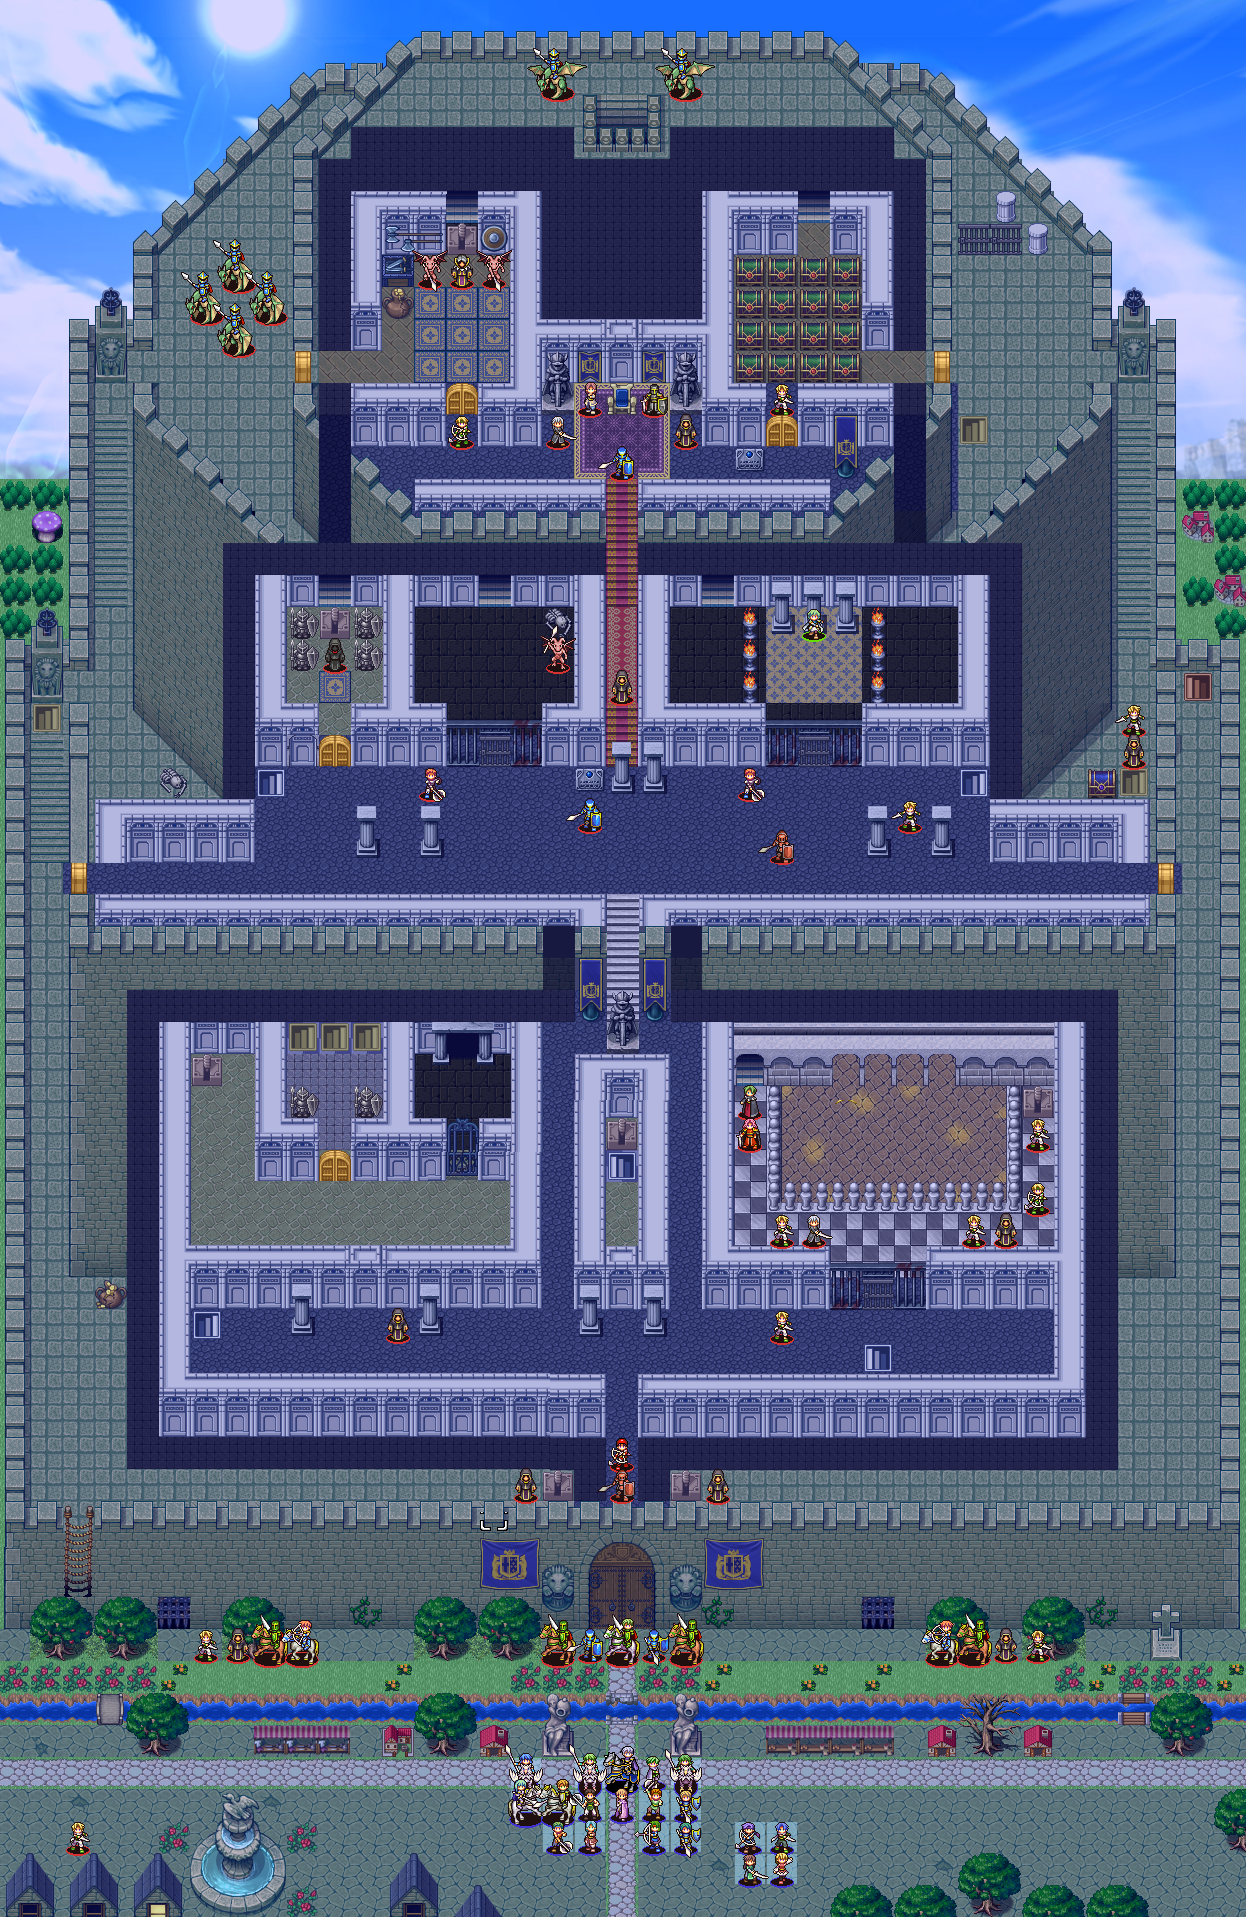
The map changes over time during certain turns. Most of what I am writing in this guide is from memory so I will not have the exact turns it takes for enemy reinforcements to show up, the event triggers for those reinforcements, or even the enemy items.
Map Details
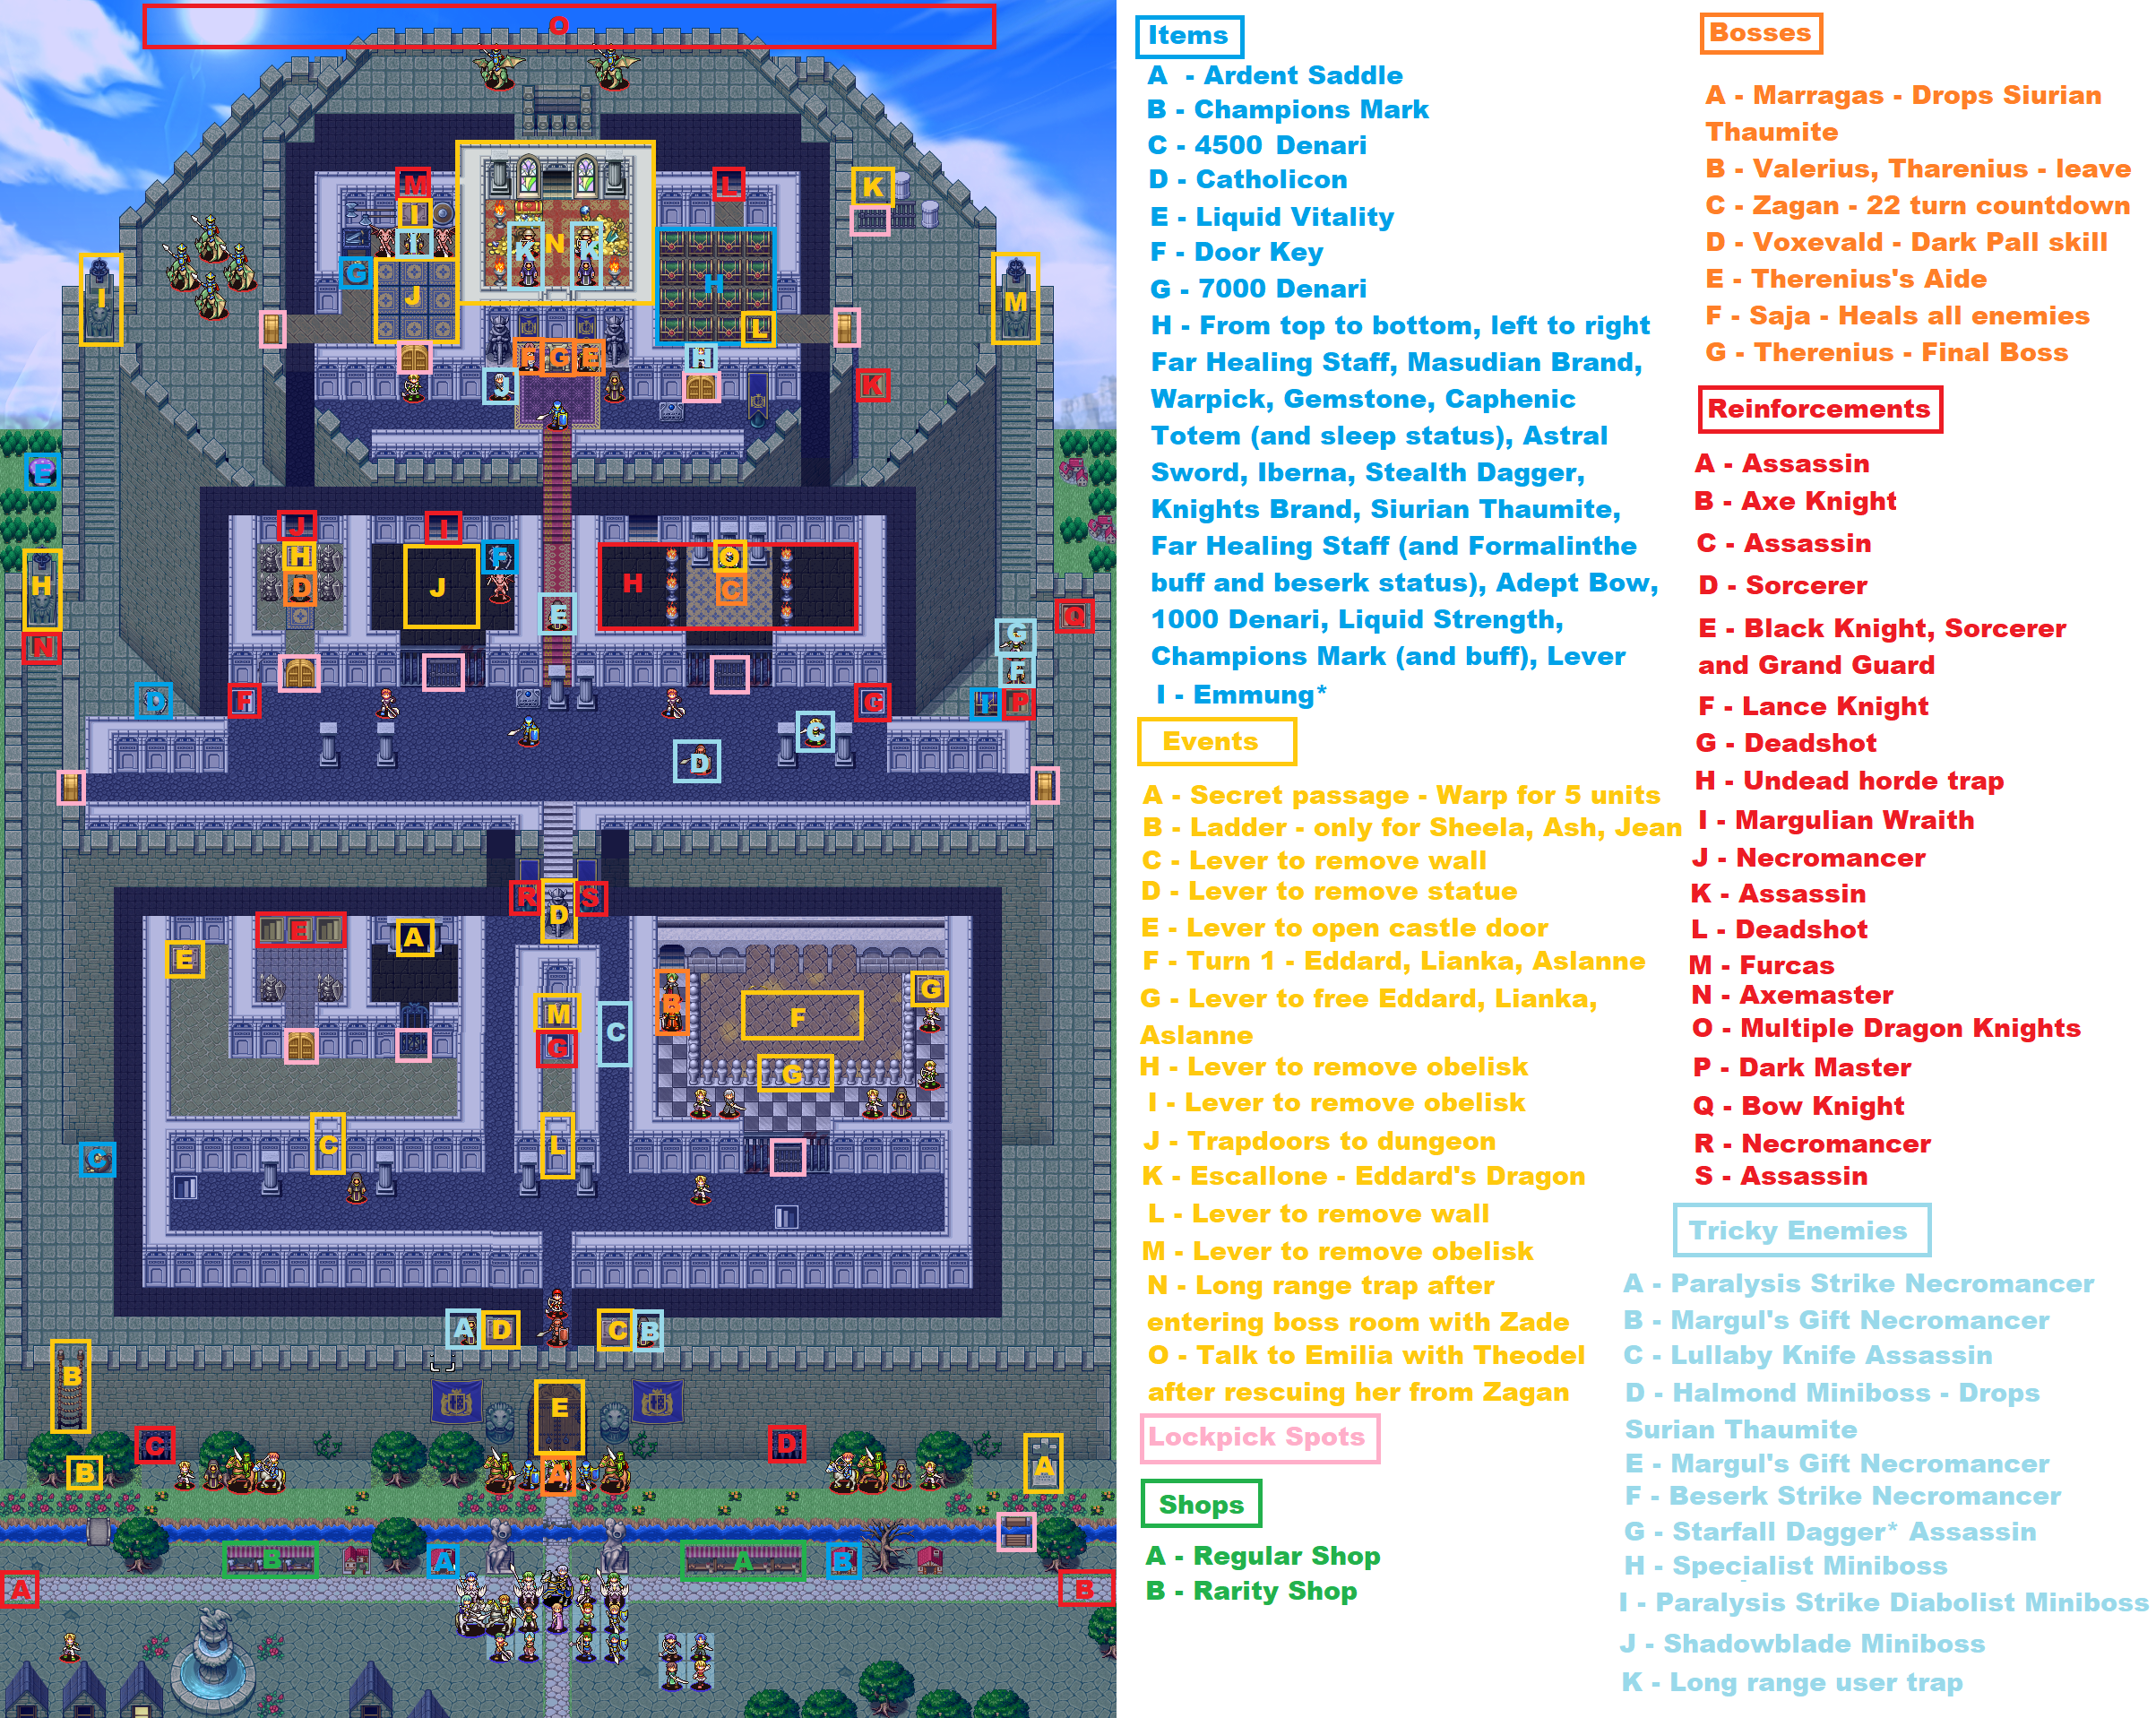
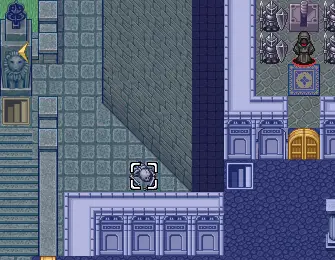
This section is devoted to explaining all of the tricks and things to be aware of when figuring out this map. The following image (I made in MS Paint) contains a list of all the secrets and important things to know about this map:
Unid
The first list will be related to the items hidden in the map:
- The house on the left of the start gives a free Ardent Saddle so make sure to pick it up.
- The house on the right of the start gives a free Champions Mark so make sure to pick it up.
- The gold pile on the castle gives 4500 Denari. Pick it up with a flier or Jean, Cinzas, or Sheela. You can come back for it at the end of the map to if it is to frustrating to get because of the reinforcements on the left side.
- The skeleton on the left side has a full heal Catholicon. Worth getting with one of your cavalry.
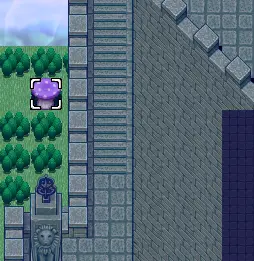
- The mushroom which requires a flier to get has a Liquid Vitality. I don’t feel this is worth it as your fliers should be on the right side dealing with the Berserk mage and getting Zade’s ultimate weapon early.
- The skeleton in the dungeon has a door key which is very useful for this map.
- The pile of gold in the trap room contains 7000 Denari which is great and you have to enter this room anyway for the lever to let Zade into the final boss area. (unless you never promoted him for speedrun strats).
- Ok there is a lot in the treasure room. You can only take 5 baús, the rest will all open after you get your fifth treasure. I will go row by row from left to right to explain this. Some of the chests cause status effects to occur. I noted a few of them but was unsure of the effect sometimes.
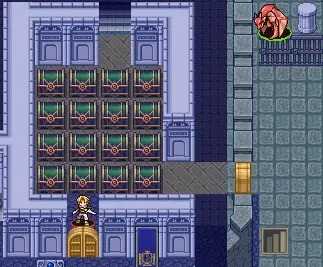 Far Healing StaffMasudian BrandWarpickGemstoneCaphenic Totem (also puts your thief to sleep)Astral SwordTome of IbernaStealth DaggerKnights BrandSiurian ThaumiteFar Healing Staff (and Beserk status and Formalinthe stat buff on your thief)Adept Bow1000 DenariLiquid StrengthChampions Mark (and some sort of temporary buff on your thief)Wall removal lever for center of the map
I personally recommend taking the Adept Bow, Caphenic Totem, Astral Sword, and Tome of Iberna. I recommend taking the Siurian Thaumite or Gemstone last only if you have already gotten Emmung* with a flier. You can buy Chest Keys in the rarity shop if you do not have one. Otherwise you will have to open the lever chest.
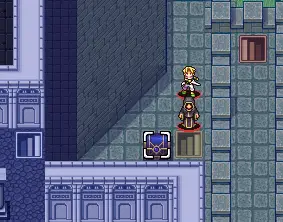
- The chest near the top right stairway of the castle contains Emmung*, Zade’s ultimate weapon. If you don’t have your fliers use a chest key this will be annoying to get.
Eventos
Next I will list every notable event that can occur on the map:
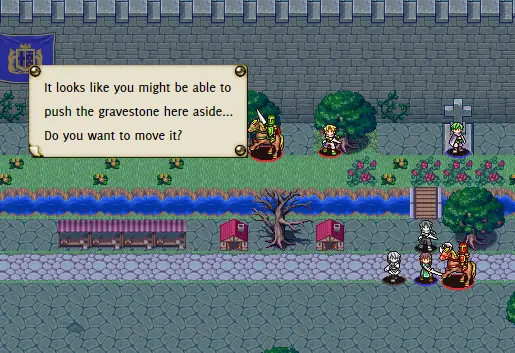
- The secret passage in the Gravestone will allow up to 5 units to teleport over the course of a few turns into a section of the castle that contains the lever to open the main door. They disappear for roughly 2-3 turns when using the passage. You must have Cezar in this group or you won’t be able to open the contraption near the exit of the secret tunnel. Also every unit must enter the tunnel on the same turn. Examining the gravestone gives whichever unit did it their turn back so don’t worry about that.
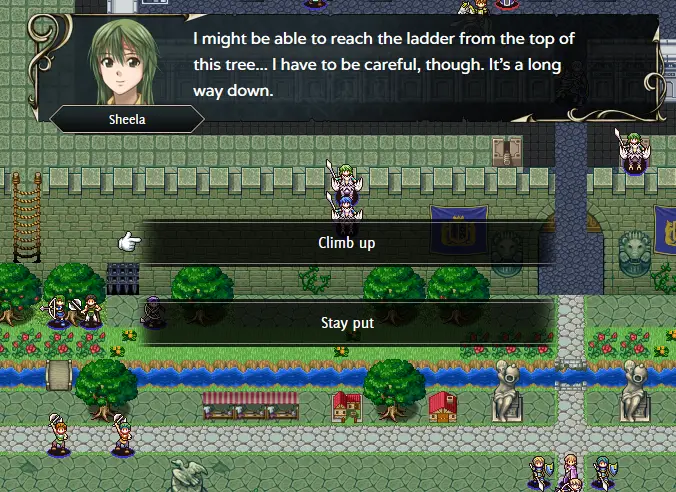
- This one annoys me. The ladder only works for Sheela, Ash and Jean. One of the houses hints at this. If you didn’t level any of them up like I did then this ladder is only “bom” for the enemy Axemasters getting down to fight you. If you did level them up they can help deal with the left side of the map and flip the switch to remove the statue. If you didn’t level up the three fliers or the three of them good luck with the beginning of this map.
- The lever on the right side of the entrance to the castle opens the secret passage area so your 5 unit strike team can enter the main area.
- The lever on the left side of the entrance removes the statue allowing you access to the second half of the map and inner hallway. This is the hardest part of the map imho.
- The lever in the secret passage room opens the door so the rest of your army can enter the castle.
- On turn 1, Eddard, Lianka, and Aslanne spawn in the arena. They have to fight waves of enemies roughly every 4 ou 5 voltas. Aslanne must not die to them btw as that will cause a game over. Also hopefully Lianka still has plenty of uses on her personal weapon as they like going after her.
- The lever in the arena opens the arena freeing Eddard, Lianka, and Aslanne. Therenius will leave the arena when you open the door to the arena or castle I think.
- The lever behind the Voxevald removes the first obelisk on the left side of the castle. You need to remove both to allow your Cavalry access to the rest of the castle. They cannot pass through the central hallway.
- The lever behind the diabolist removes the second obelisk on the left side of the castle. Again needed to allow the Cavalry to access the full map.
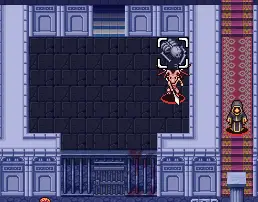
- If you end a turn on some of these tiles you fall down to the dungeon below which continuously spawns a margulian wraith which has a 1HP left if hit tome. Also the door to the dungeon closes every turn if you opened it. Best to avoid the nine tiles. I think the left side is safe mostly.
- Eddard’s dragon is locked on the top right section of the map. If you talk to it with Eddard he will change back to his Dragon Knight class.

- In the bottom right chest in the treasure room is the lever to open the wall in the center of the castle next to the continuously spawning archer. This is unneeded if you have a flier with a chest key.
- In the center room of the castle, the lever here removes the obelisk in the top right section of the map. This allows you access to the chest containing Zade’s ultimate weapon Emmung*. Again unneeded if you got it with a flier
- When you enter the boss room with Zade, Therenius will taunt you and reveal a room containing long range Arbalists and mages. It is annoying but they aren’t much of a threat actually.
- Talk to Emilia with Theodel and she will leave. You will have to rescue her first from Zagan before 33 turns pass (which is relatively easy to achieve).
- Not on the image, Cyltan and his party arrive at some point around turn 10 or maybe triggered off the secret passage. The map turns from night to day and you have the full army to work with now.
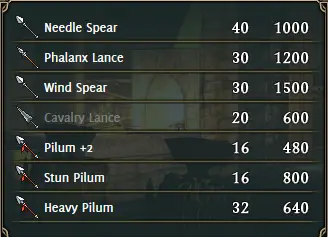
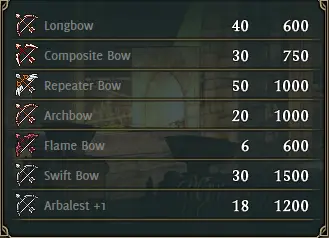
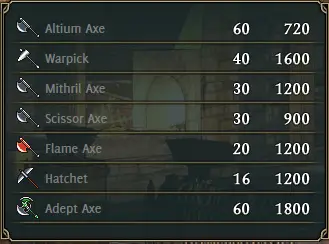
Lojas
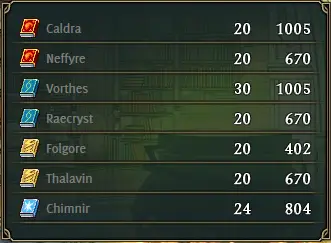
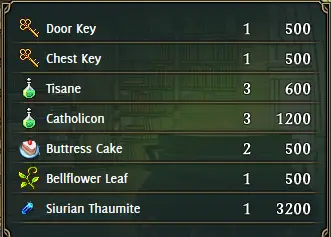
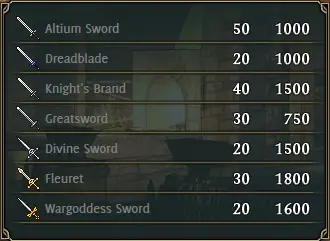
Next I list every notable shop on the map:
The left side of the map contains the Rarity shops you have seen throughout the game. The right side of the map contains shops with every weapon you can buy.
I will post a list of screenshots of all the shops from right to left. Ignore the inconsistency with the prices as some of them I visited with Ma’aya only realizing after the fact that she reduced shop prices by 1/3 due to her skill.

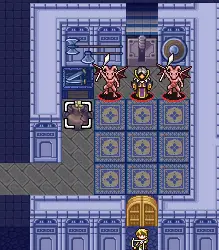
Chefes
Next I will list all the bosses on this map:
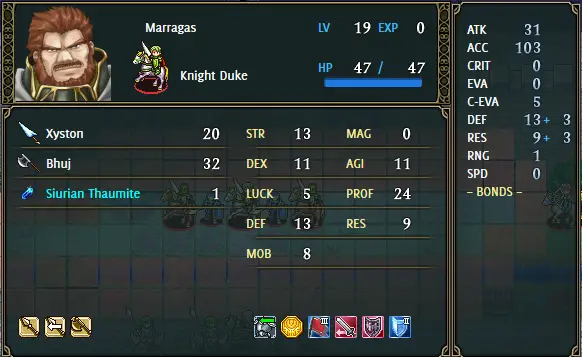
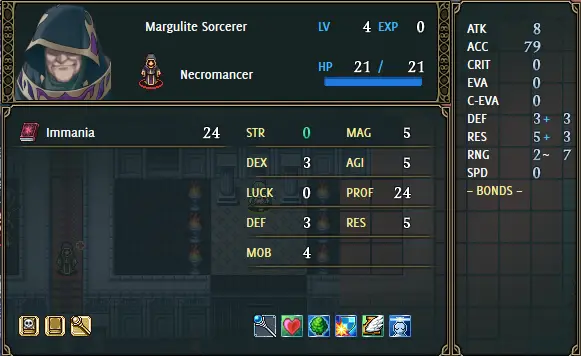
- Marragas – drops the Siurian Thaumite. He uses a Bhuj which hits pretty hard and multiple times. I used Zayid with an at range counterattack to take him out on turn 1.
- Valerius and Therenius – you can see them in the arena but they will leave before you actually enter the arena.
- Zagan – he spawns after 11 voltas. He whips Emilia multiple times throughout the chapter for 1 dano. It is an optional story objective to rescue him with Theodel. Ela tem 22 HP so after 22 turns of this after Zagan spawns you will lose the optional objective.

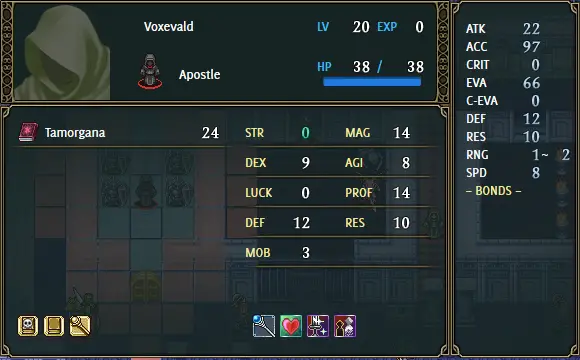
- Voxevald – has the Dark Pall skill which buffs everything on the map. Get rid of him asap to remove the buff. He seems to leave whenever you attack him if you don’t finish him in one unit’s full attack.
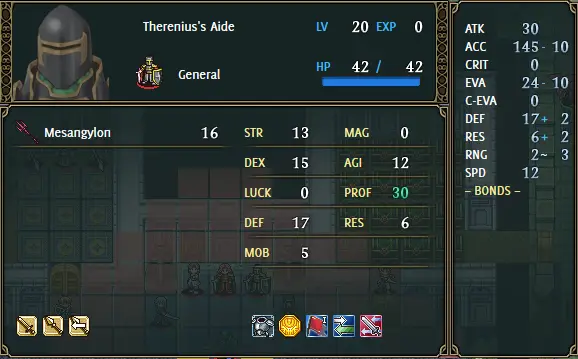
- Therenius’s Aide – He is kinda obnoxious with his powerful defense and weapon but he can’t counterattack from one range.
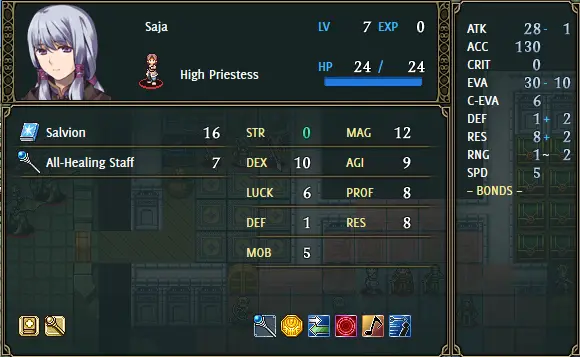
- Saja – Every turn she fully heals all enemies on the map.
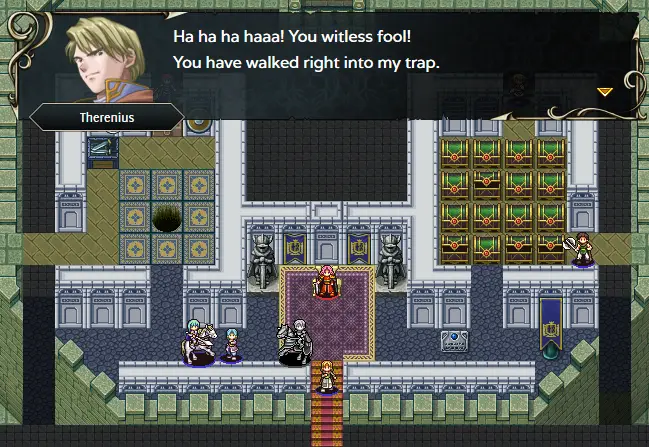
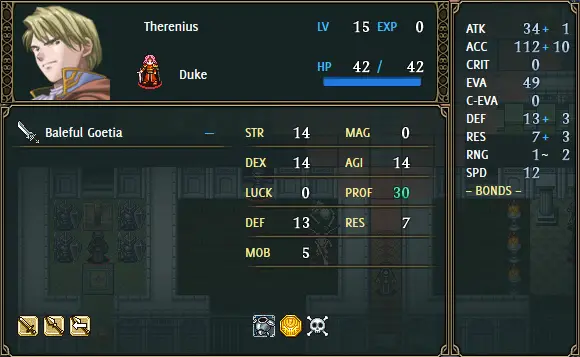
- Therenius – Final boss and actually pretty weak. However he can only be hurt by Emmung*.
Reforços
Next I will list all the reinforcement spawnpoints on this map. If anyone knows the exact triggers or turns these spawn on let me know and I can update the guide:
- Assassin spawnpoint on the left side of the road at the start of the map. This spawnpoint is really annoying as they continuously spawn until like turn 60 ou algo assim. A lot of these assassins are evasive and come with first blood skill. You need someone who can block that spawn or one round a hard to hit enemy.
- Axe Knight spawnpoint on the right side of the road at the start of the map. You cannot block these enemies but you can take them out easily with a Cavalry Lance. You need someone to guard this section since Athol can’t move and avoid them.
- Some assassins come out of the left side of the castle wall. Only a few spawn so I think they are tied to a turn count or until you hit one of the levers.
- Some sorecerers come out of the gate on the right side of the castle wall. Only a few spawn so I think they are tied to a turn count or until you hit one of the levers.
- Three obnoxious enemies (grand guard, black knight, and sorcerer) spawn from these stairs in the secret passage room. Use a ranged unit in your party of five to take out the sorcerer then permanently block the door with another unit. The other two reinforcements will prevent that unit from getting attacked by moving to the door and cannot leave the room. Easiest way to deal with that group.
- Lance knights with Cavalry Lances spawn in the left staircase of the central hallway. They can be very annoying for Zade, Merida, and Troy and make this an RNGfest to survive the hallway the first time you enter it. I recommend entering this section on a turn after you save because of this.
- Deadshots with poison bows and flame bows spawn in the right staircase of the central hallway. Again make this entire section really annoying and the hardest part of the map. Another one with a scorpion and flame bow continously spawns form the center of the map.
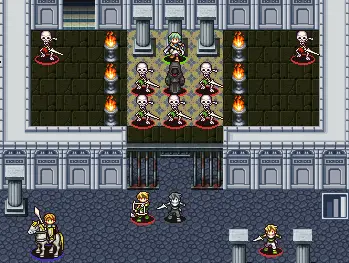
- Opening the door to the room with Zagan immediately triggers a bunch of skeleton enemies which have a lot of dangerous weapons on them. One can drop you to 1HP as well. Have a strong group ready to enter this room and deal with them.
- A margulian wraith continuously spawns in the dungeon. It has a tome that can drop you to 1HP. You can ignore this room however if you land on a trap floor later you could lose a unit.
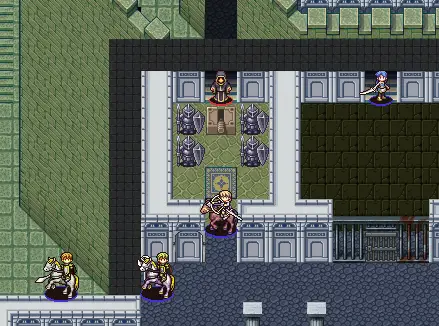
- A necromancer with a long range tome spawns in the statue room. I had Cyltan keep taking out the reinforcement and move back out of the room. He is protected by a bunch of Elden Armors which cannot die and hit hard. You do not want to try to block him, hence why I used Cyltan.
- Assassins keep spawning from the upper right staircase and will move down the castle. Since they are invisible and this map loves to keep throwing assassins at you this staircase should be blocked. Otherwise you can get caught unaware a lot progressing through the map.
- Deadshot archers keep spawning in the treasure room. Block it when you reach it.
- Really bulky furcas keep spawning in the trap room. Block it to stop them from spawning.
- Axemasters keep spawning on the left side of the castle and can take the ladder down to go after Athol. Block them.
- The top section of the map keeps spawning Dragon Knights. They do not have strong weapons but are a pain to deal with. Eddard and Dune or Sheela are good for dealing with each one that spawns every turn once you reach the top.
- Dark Masters spawn near the Emmung* chest. If you got it with a flier like I mentioned earlier you don’t have to remove the obelisk on the top right of the map and they become useless since they cannot go anywhere.
- Mounted archers keep spawning from the rightmost staircase. I blocked it with one of my fliers.
- I forgot about this when I was making the image hence why it is last. When you are going through the middle of the castle a necromancer and assassin pair keep spawning from the walls. It is pretty annoying but easy to deal with.
- Not shown on the image but a group of 4 enemies spawns every few turns in the arena. They like going after Lianka. Freeing everyone from the arena will stop the spawns. The spawns get harder the longer the chapter goes on.
Tricky Enemies
Finally I will discuss all the tricky enemies on this map:
- The paralysis strike necromancer who guards the left lever is really annoying.
- The margul’s gift necromancer who guards the right lever is less annoying as he can really only go after your fliers since only they can reach that side early on.
- There are multiple invisible Lullaby Knife assassins with the First Blood skill in this map, be really careful
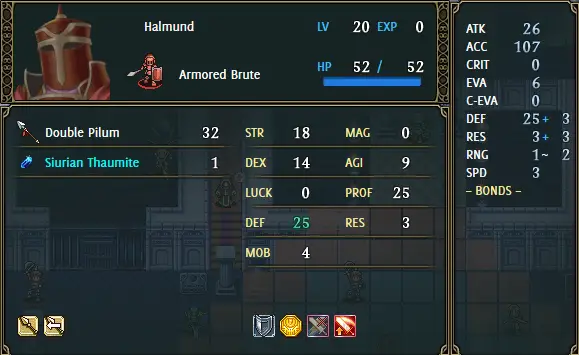
- Halmond – a miniboss who drops the Siurian Thaumite. I should have put him in the boss section honestly but forgot about him. Zade with Edelstein or Emmung*, Accorte, or Theodel can make short work of him.
- The margul’s gift necromancer in the king’s hallway should be dealt with asap as soon as you enter so you have access to healers and mages for the armor knights in here.
- The berserk strike necromancer on the top right of the map is annoying, get rid of him with the fliers to block reinforcements on the right side of the map with your weak units.
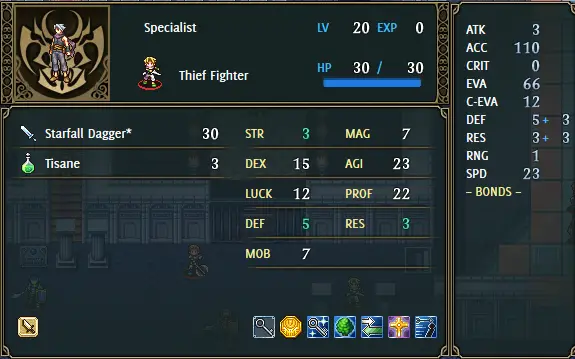
- The starfall dagger thief fighter on the top right of the map is really easy to get rid of from range of the flier. Otherwise he would be dangerous.
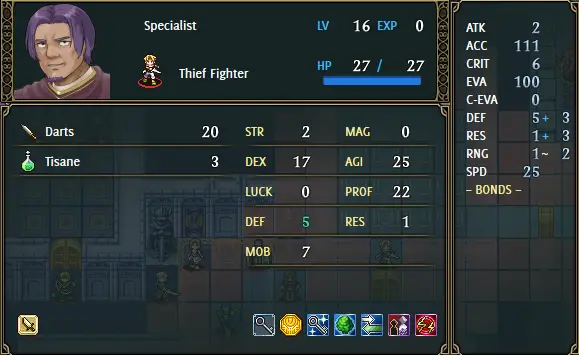
- The specialist in the treasure room is pretty weak, you don’t have to worry about him. He may be a boss but is kind of a joke then?
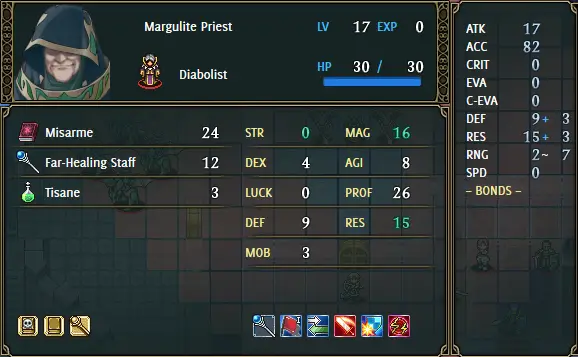
- The Diabolist miniboss in the trap room with paralysis strike isn’t too hard but the trap floors in the room are the real problem.
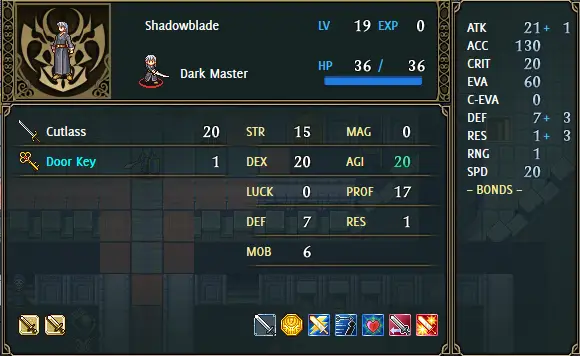
- The Shadowblade enemy in the boss room has a cutlass and is pretty dangerous. I used Haldyn to take him out.
- The long range users in the trap section can be a minor nuisance but at this point you have practically beaten the game.
- Not detailed on the image, the armored knight and deadshot between the two levers and behind the main entrance is really deadly for your fliers. Your fliers cannot canto back after hitting the lever too. It is best to take them out before using the fliers to touch the levers. Cinzas, Sheela, or Jean might be ideal to deal with the armored knight and Slayne for the deadshot. Otherwise you may have to wait for the main door to open and have Zade or a mage deal with them.
Map Progression
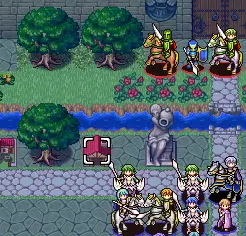
I have broken down how to go through the map and which units I used specifically for each part to give an idea on how to go through this. The following image shows the progression:
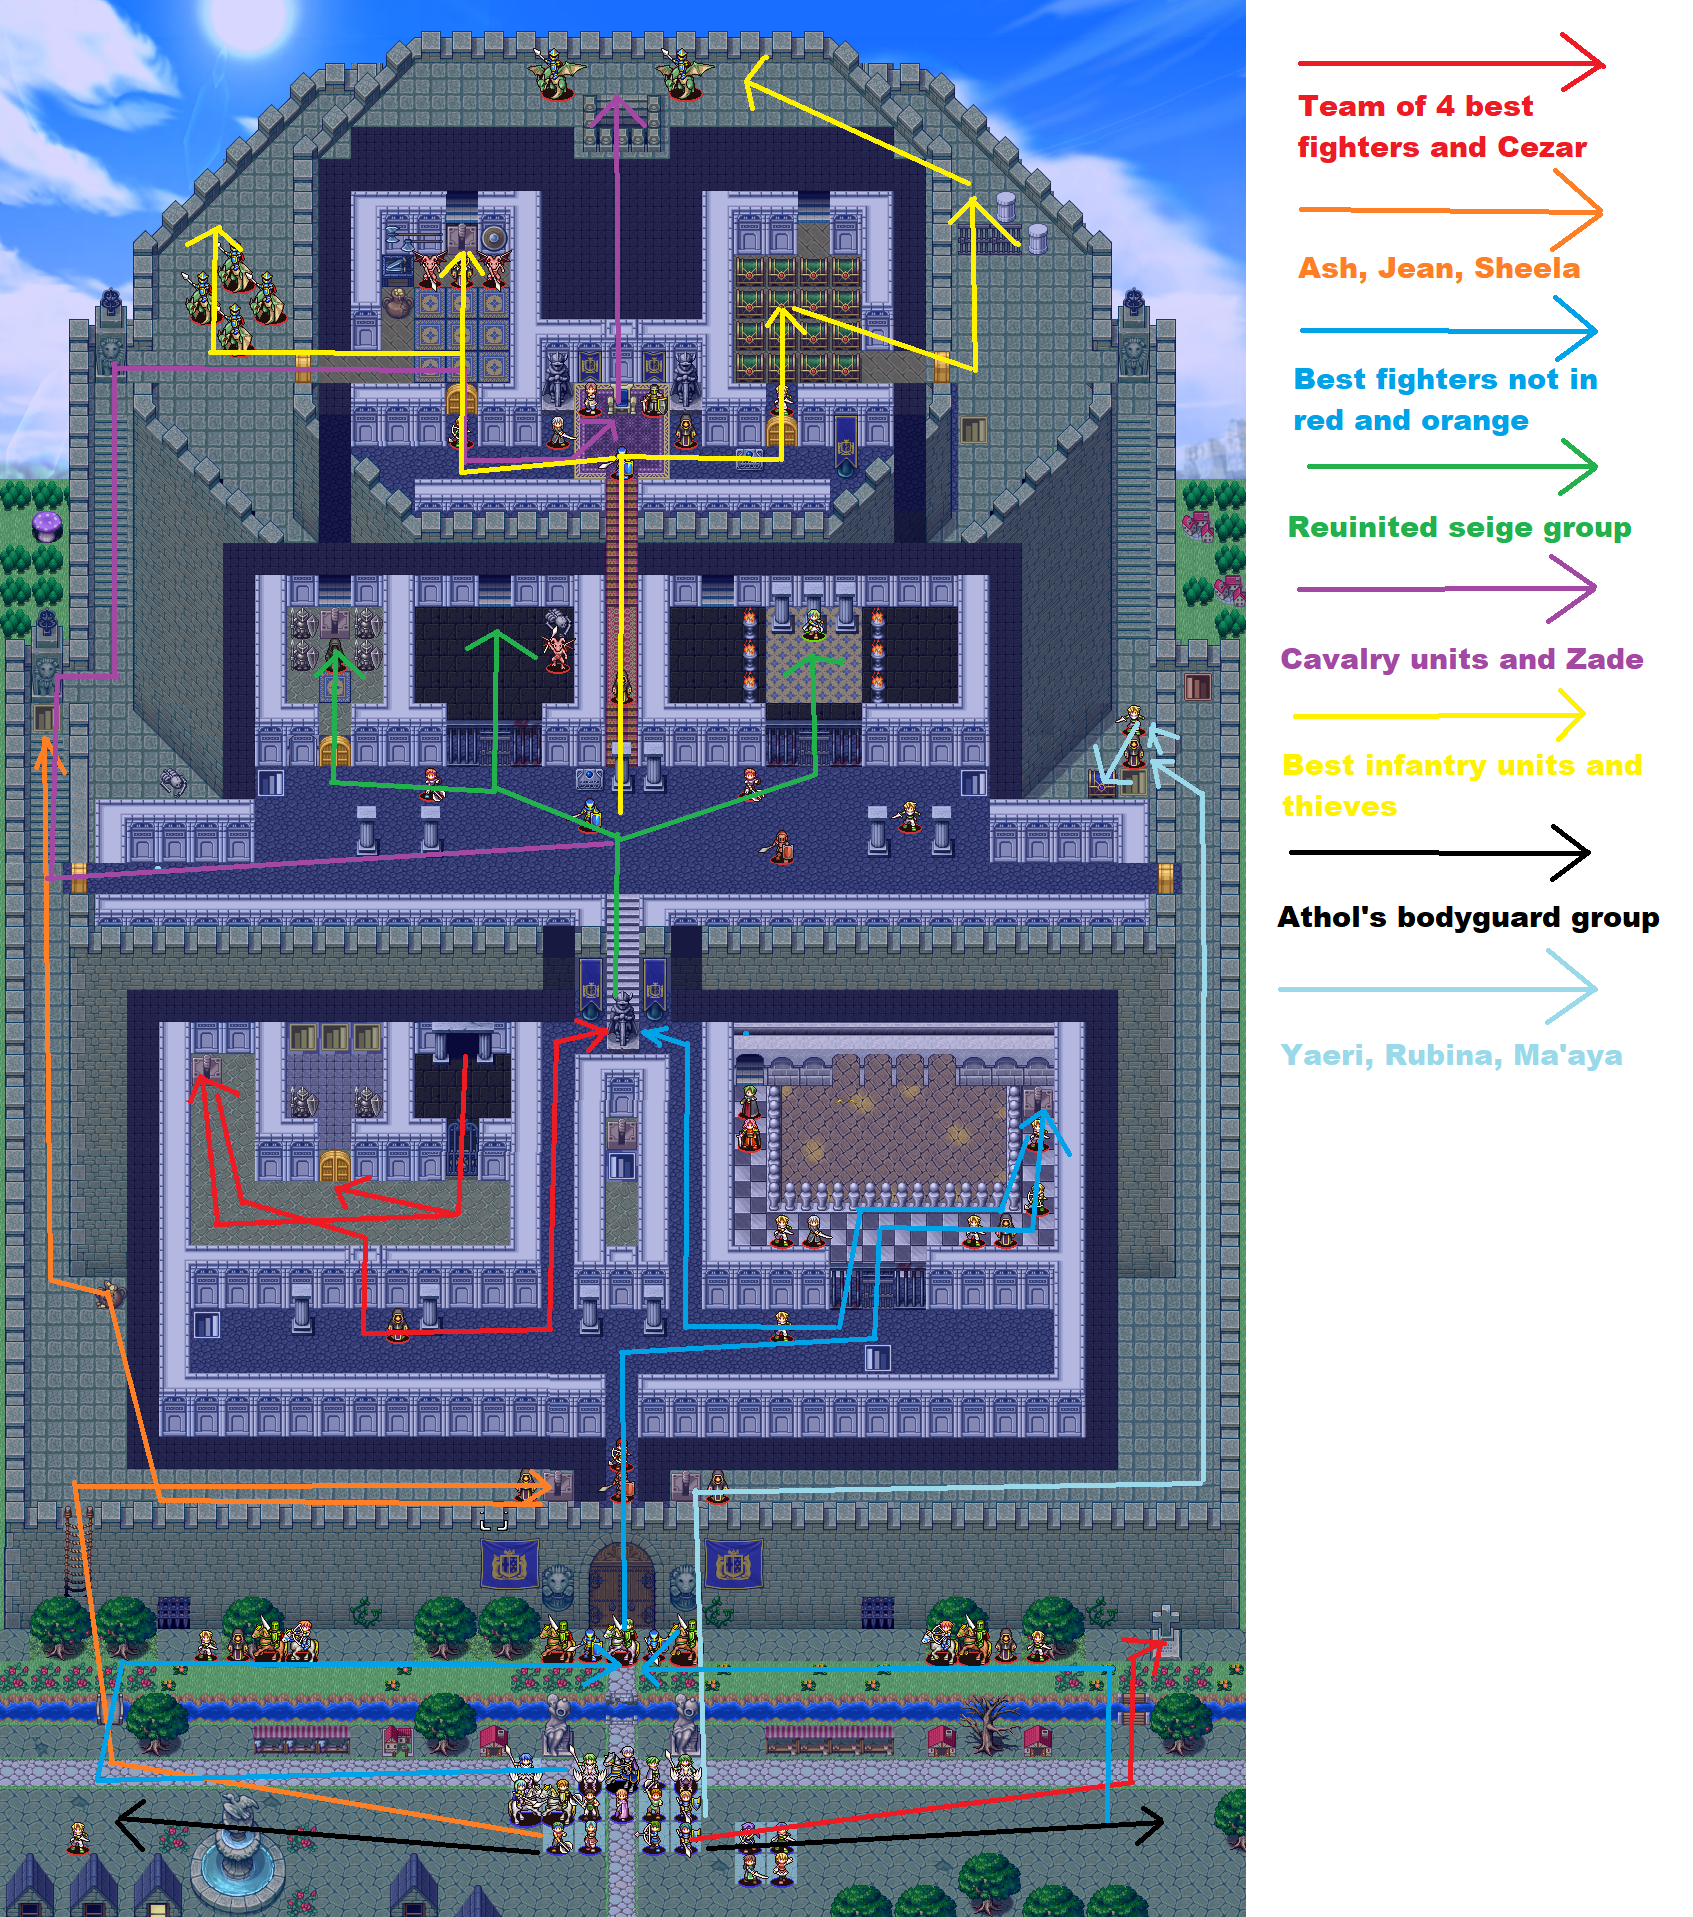
- To start off with head to the right side with some of your 4-5 best fighters and Cezar. For me that was Merida, Haldyn, Theodel and Cezar. Enter the gravestone and get through the secret passage and turn on the lever to let everyone through. I recommend blocking the door where the reinforcements are so that way none of them are an issue for the rest of the map. I personally blocked the door with Haldyn then replaced him with Jamulan later on.
- For the left side you can only use Ash, Jean or Sheela to turn on the left switch. I did not have any of these 3 leveled so I went with my fliers. This will remove the statue for the blockade. You can then use them to stop the reinforcements of Axemasters and Gargoyles that keep spawning on the left side of the map.
- For the right side of the map you want to use your fliers to flip the switch and free the 4-5 best fighters from the secret passage room. Then proceed onward and try to take out the Berserk mage. I gave my mobility upgrade to Yaeri (with a full Double Pilum or Doyenne) to make things like this easy. Otherwise you may have to save scum on a multiple of 5 turn to avoid getting Berserk. Also take out the Starfall Dagger* thief as well. Another good idea is to have one of the fliers buy a chest key and open the chest (and send immediately to stockpile) as it contains Zade’s ultimate weapon and reduces lever puzzle and backtracking complexity later.
- For Athol’s bodyguards move them into the place to stop the Assassin and Axe Knights every turn. These are one of the more annoying reinforcements on the map you constantly have to deal with.
- For the rest of the group including Cyltan’s group when they arrive (around turn 10 Eu penso) head towards the main door of the castle until your 4-5 best fighters open the door. Next go for the arena to free Eddard and others. Once that is done have everyone meet in the hallway to tackle the next section.
- The central hallway is terrible for RNG deaths, I recommend entering it with your best units after saving. After clearing out the central hallway use your thieves to open the doors and destroy all the enemies in each cell except the invincible Elder Armor statues. I used Zade to press the lever in the death room with invincible Elder Armors. Try blocking every reinforcement spot in this hallway with your weaker units to make this map less frustrating.
- Your cavalry cannot head to the boss room, they need to go around the long way. Take your best non-cavalry units through the hallway to the treasure room and the trap room. Open the path for the cavalry to make it around the castle and to the boss room. Have Zade enter with his ultimate weapon and you are almost done. Zade should have no problem picking off the boss.
Softlock warning
You can softlock your game in this chapter. I softlocked myself the first time I tried this map but I rotate saves here and there and made a backup save at the start of every new map so I did not lose much progress.
Softlock possibilites:
- The turn where you can enter the gravestone secret passage is only on one turn. If you entered it without Zade, without someone with the Lockpick skill or didn’t have any units enter then you saved over your only save file; Parabéns, the game is now unbeatable and you will need to restart your entire playthrough. Always have backup saves in games like this because of it.
- If you do not have Yaeri, Rubina, Ma’aya, Cinzas, Jean and Sheela anymore before this map or during the beginning of this map, I do not think this level is beatable as no one can hit the two statues on the castle walls to remove the statue and remove the secret passage room wall.
- If you do not have any fliers Eddard, Rubina, Ma’aya, and Yaeri, and you have not opened the Emmung* chest but opened 5 treasure chests in the treasure room except for the center wall lever chest in the bottom right then you have no way of getting Emmung*. This means you cannot beat the level as Therenius can only take damage from Emmung*.
- I feel like there may be a few other situations where you can softlock yourself but those would be more obvious. Maybe a turn where Zade falls asleep from a sleep mage in some dangerous hallway, or you ignored defending Athol, or you left Aslanne trapped in the arena with Eddard and Lianka for too long and the enemies are getting worse.
Isso é tudo o que estamos compartilhando hoje para isso Saga da Vestuário I.: Guerra dos Scions guia. Este guia foi originalmente criado e escrito por salehtundra. Caso não atualizemos este guia, você pode encontrar a atualização mais recente seguindo este link.