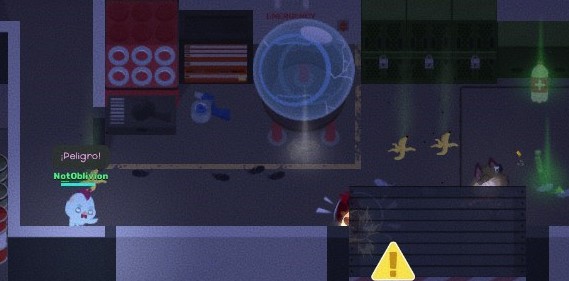
This guide will show you some of the most valuable tips and tricks on how to survive Super Animal Royale’s The Bwoking Dead mode.
The Bwoking Dead Overview
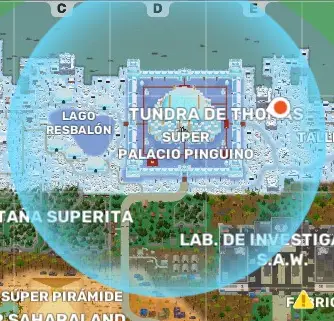
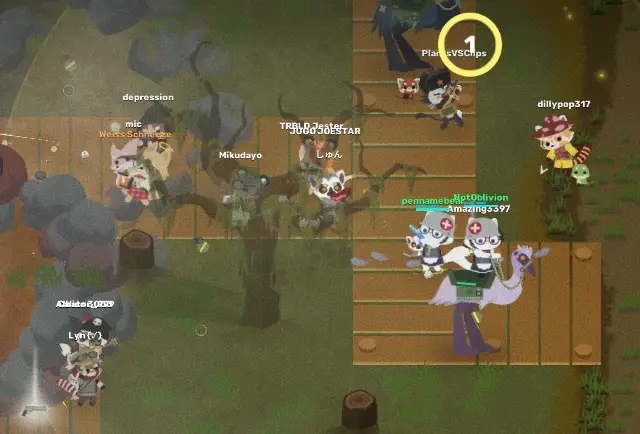
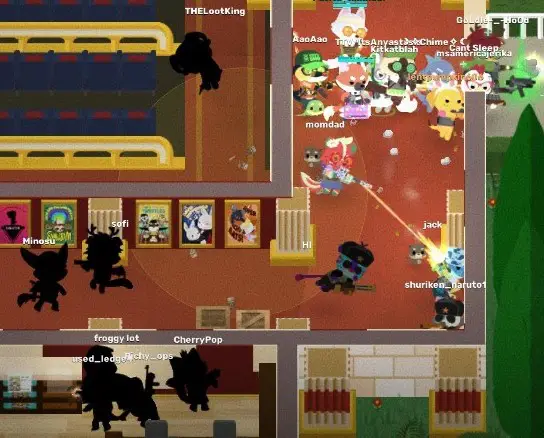
“The Bwoking Dead” modo, which is also called zombie mode or infection mode, is a team game mode that changes every week along with the SAW vs Rebellion mode. In this game mode, há 40 jogadores, and at the beginning, 4 random players become infected. The goal for the infected players is to infect or eliminate the remaining healthy players before they can escape using a giant eagle. Por outro lado, the survivors need to equip themselves and form groups to defend against the waves of zombies that keep coming back and reach the evacuation zone, which is marked by a yellow circle on the map.
Zumbis
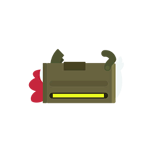
At the start of each game, 4 players are randomly turned into zombies. These initial zombies have some advantages over the later zombies. They have 130HP, while regular zombies have 100HP. Adicionalmente, the initial zombies have a 15% chance to infect an unarmored survivor with a hit, whereas basic zombies only have a 10% chance. You can spot these initial zombies because they are red, while basic zombies are white. All zombies are faster, heal 5HP per second when not in combat, and are not affected by skunk gas. They deal 33 damage per hit to unarmored survivors and reduce one point of armor plus 3 damage to players with any level of armor (com 10% armor penetration).
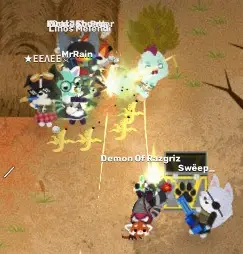
When a zombie is killed, they will respawn at the gas edge after a short time. If they have a fully charged green bar at the moment of death, eles explodem, causing area damage of 30HP to 45HP. Armor cuts this damage in half. You can identify these exploding zombies by green-colored growths on their bodies. They charge their green bar by consuming mushrooms of all kinds, including poisonous ones that don’t harm the zombie, eating coconuts, health fruits, and attacking emus and players.
Zombies can’t pick up weapons, armadura, power-ups, or ride emus or hamster balls. No entanto, they can collect event items.
Armas 1
In this game mode, you can use all kinds of weapons, each with its unique characteristics. No entanto, the best weapons to carry are those with long-range capability, high damage per second, good mobility, a large magazine, and the ability to swiftly deal with zombies. It’s essential to understand that you won’t find a single weapon with all these features, so it’s best to complement your arsenal.
One wise approach is to carry a weapon that offers high damage per second and a large magazine when you are in a group. This will help you when you’re with teammates. Adicionalmente, it’s a good idea to have a weapon that can quickly take down large groups of zombies for situations where you find yourself alone facing 39 zumbis. Então, having a balance of these two types of weapons can greatly enhance your chances of survival.
The Pistol is a strong weapon that can deal a lot of damage quickly. It reloads in just 1 segundo, making it efficient in combat. No entanto, it doesn’t work well when you’re with other survivors because it uses up its ammo rapidly and needs constant reloading. Mas, when you’re the last survivor, it can be handy for taking out individual zombies or small groups while on the move. It also allows you to maintain your speed while using it.
Prós:
- High damage per second
- Fast reload time
- Ability to eliminate small groups of zombies swiftly
- Provides high mobility
- Ammunition is easy to obtain
Contras:
- Limited cartridge capacity
- Short range
- Ineffective when facing groups of zombies
- The noise of the bullets can easily attract zombies.
Dual Pistols are quite similar to the regular Pistol, with the same high damage per second. The main difference is that they reload in 1.3 seconds and have 20 rounds per round, while the Pistol has 10 rodadas. This makes Dual Pistols more useful in groups, and they can handle slightly larger groups of zombies before needing a reload.
Prós:
- High damage per second
- Potential to handle small to medium groups of zombies
- Easy to find ammo
- Provides high mobility
- Versatile in both group and solo situations
Contras:
- Short range
- Zombies can easily hear the gunfire.
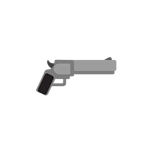
The Magnum is a weapon with high damage per shot but low damage per second. Leva 1.4 seconds to reload, and it’s not very effective in groups due to its low damage output. No entanto, it can pierce one zombie per shot, hitting two zombies at once. This can be handy when you have a line of chasing zombies, but its small ammo capacity limits its use, even in this situation.
Prós:
- Can pierce one zombie
- High damage per shot
- Offers high mobility
Contras:
- Very small ammo capacity
- Ineffective in groups
- Zombies can easily hear the gunfire
- Low damage per second
The Deagle can be seen as an upgrade to the Magnum, sharing similar abilities but with better stats. It has the same 1.4-second reload time, an 8-round cartridge, and significantly higher damage than the Magnum. It shares the same strengths and weaknesses as the Magnum but is only obtainable from mole shipments or rebellion caches. Its shots can be heard over a large area, potentially attracting hordes of zombies.
Prós:
- Can pierce one zombie
- High damage per shot
- Offers high mobility
Contras:
- Very small ammo capacity
- Ineffective in groups
- Attracts hordes of zombies when fired
- Low damage per second
- Only obtainable from mole shipments or rebellion caches
The Silenced Pistol is an incredibly powerful weapon when you’re the last survivor. It has a small 12-bullet cartridge but boasts amazing damage per second. With a 1.1-second reload time, it also has the unique ability of not being heard by zombies, preventing you from attracting hordes when you shoot. It’s exceptionally useful when you’re the last survivor, but like the regular Pistol, it loses its effectiveness in groups due to its small ammo capacity.
Prós:
- High damage per second
- Fast reload
- Potential to eliminate small groups of zombies quickly
- Easy to find ammo
- Offers high mobility
- Extremely useful when playing solo
- Cannot be heard by zombies
Contras:
- Very small ammo capacity
- Ineffective in groups
- Only obtainable from mole shipments or rebellion caches
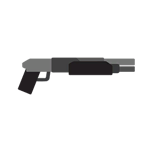
The shotgun is the most potent and effective weapon in this game mode. It can deal significant damage and even kill multiple infected players with just a couple of shots. It has a 5-round cartridge and a 1.3-second reload time. No entanto, its range is limited, and it takes practice to use effectively. It excels in instantly eliminating any infected enemy in its path, making it an excellent choice for the last survivor.
Prós:
- High damage per shot
- Offers great area damage with the potential to eliminate large groups of zombies
- Extremely useful when playing alone
Contras:
- Very small ammo capacity
- Very short range
- Zombies can easily hear the gunshots
The JAG-7 is essentially a stronger version of the shotgun. It allows you to move slightly faster when carrying it compared to the shotgun. It fires more bullets and deals more overall damage, but it has the same 5-round cartridge and a faster 1.1-second reload. It’s undoubtedly the most powerful weapon in this game mode.
Prós:
- High damage per shot
- Offers high area damage with the potential to eliminate large groups of zombies
- Extremely useful when playing solo
- Fast reload
Contras:
- Very small ammo capacity
- Very short range
- Only obtainable from mole shipments or rebellion caches
- Zombies can easily hear the gunshots
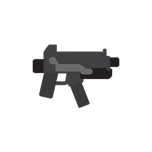
The SMG is a high damage per second weapon that can quickly dismantle zombie defenses. It has a 1.35-second reload time and is quite versatile and powerful. It’s a great choice to carry throughout the game, even when you’re the last player standing. No entanto, be mindful of how quickly it uses up its bullets.
Prós:
- High damage per second
- Potential to eliminate medium-sized groups of zombies
- Easy to find ammo
- Offers high mobility
- Versatile in both group and solo play
Contras:
- Short range
- Zombies can easily hear the gunshots
- Rapid ammo consumption
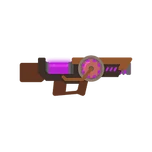
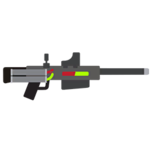
Superite’s laser is the highest damage per second weapon in the game, tied with the minigun. No entanto, it has some unique characteristics. It’s challenging to find its ammunition, has a large cartridge but quickly burns through bullets. There’s a noticeable 0.3-second delay before it starts firing, and it has a slow 1.8-second reload time. It’s a powerful weapon but not recommended for use in the later rounds of the game.
Prós:
- High damage per second
- Large cartridge
- Potential to eliminate large groups of zombies
Contras:
- Quickly depletes ammo
- Difficult to obtain ammunition
- Slow reload
- Delay before firing
- Zombies easily hear the gunshots
Armas 2
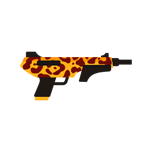
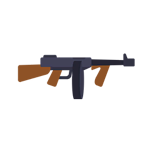
The Thomy Gun is like a better version of the SMG. It has a larger cartridge, high damage per second, and you can easily find its ammo. It has more range and is more effective in groups. No entanto, it’s not as useful when you’re alone because it has a slow reload time of 1.7 seconds and quickly uses up its ammunition.
Prós:
- High damage per second
- Large cartridge
- Potential to handle large groups of zombies
- Easy-to-find ammo
- Useful in groups
Contras:
- Zombies can easily hear the bullets
- Rapid ammo consumption
- Slow reloading
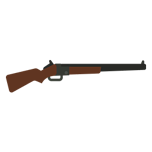
The Hunting Rifle can pierce two zombies, has high damage per shot and range, but it lacks damage per second. It only has one cartridge with a fast 0.7-second reload. No entanto, it’s weak in groups and even worse when playing solo because the gunshot can be heard from a distance.
Prós:
- High damage per shot
- Can pierce two zombies
- Fast reload
- Longo alcance
Contras:
- Low damage per second
- Very weak in both group and solo play
- Very small cartridge
- Zombies can easily hear the bullets
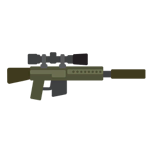
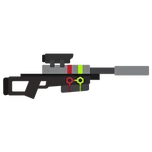
The Sniper is an upgrade to the Hunting Rifle, maintaining the same strengths and weaknesses but slightly stronger. It comes with a 5-round cartridge, incredible damage per shot, and the ability to pierce two zombies per shot. No entanto, it shares the same drawbacks as the Hunting Rifle, and it adds a slow 1.8-second reload and poor mobility.
Prós:
- High damage per shot
- Can pierce two zombies
- Longo alcance
Contras:
- Low damage per second
- Very weak in both group and solo play
- Very small cartridge
- Poor mobility
- Zombies can easily hear the gunshots
- Only obtainable from mole shipments or rebellion caches
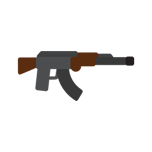
The AK is one of the strongest weapons in this game mode. It’s versatile and solid, a great choice for supporting firepower in groups. It has a long range, a large ammo cartridge, and is quite effective in both group and solo play. It reloads in 1.35 segundos.
Prós:
- Longo alcance
- High damage per shot
- Decent damage per second
- Useful in groups
- Large cartridge
Contras:
- Zombies can easily hear the gunshots
- There are better options for damage per second
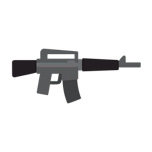
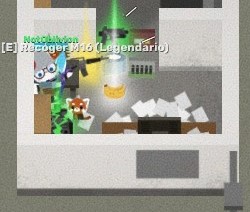
The M16 is an upgrade to the AK, sharing similar strengths and weaknesses. Both weapons are strong and useful in groups. The M16 increases the AK’s damage and range slightly, but it maintains the same cartridge size and reload time of 1.25 segundos.
Prós:
- Longo alcance
- High damage per shot
- Decent damage per second
- Useful in groups
- Large cartridge
Contras:
- Zombies can easily hear the gunshots
- There are better options for damage per second
- Only obtainable from mole shipments or rebellion caches
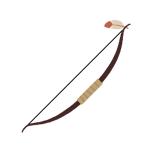
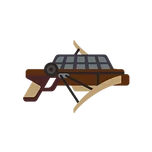
The Bow and Sparrow Launcher share the unique ability to put a sparrow-shaped tracker on players and pierce one zombie, like the Magnum or Deagle. The Bow is somewhat challenging to use and doesn’t have traditional ammo. You load the sparrow and release it when you stop holding the click. It offers high mobility, good damage per shot, and is silent. No entanto, it’s weak in groups and has low damage per second.
Prós:
- High mobility
- Good damage per shot
- Pierces one zombie
- Places a tracker on players
- Zombies can’t hear the shots
Contras:
- Difficult to use
- Low damage per second
- Weak in groups
The Sparrow Launcher is quite similar to the Magnum, but with the abilities of the Bow. It has good damage, a small cartridge, a fast 0.95-second reload, and the ability to pierce one zombie and track the one it hits. It’s also silent, so zombies won’t hear it. No entanto, it’s not very effective in groups and lacks strong damage per second.
Prós:
- Can pierce one zombie
- High damage per shot
- High mobility
- Fast reload
- Zombies can’t hear the shots and can locate enemies
Contras:
- Very small cartridge
- Ineffective in groups
- Low damage per second
- Only obtainable from mole shipments or rebellion caches
Dogna’s Dart Gun inflicts poison on enemies and heals allies. It can also pierce one zombie per shot but has a small cartridge and takes 1.44 segundos para recarregar. It’s a support weapon in groups, helping heal players, but the poison damage is slow, giving zombies ample time to kill the player using this weapon. It needs protection from other players in groups.
Prós:
- Useful in groups for healing
- Pierces one zombie per shot
- High mobility
Contras:
- Small ammo capacity
- Low damage per second
- Not effective when playing solo
Dogna’s Dartfly Gun is an upgraded version of the dart gun. It takes the same mechanics and increases its stats significantly. This gun allows you to hit multiple zombies or allies at the same time, applying poison or healing (each successive player hit receives less healing or takes less damage). It has the same cartridge size and reloads in 1.4 segundos.
Prós:
- Useful in groups to heal multiple players
- Pierces one zombie per shot
- High mobility
Contras:
- Small ammo capacity
- Low damage per second
- Ineffective when playing solo
- Only obtainable from mole shipments or rebellion caches
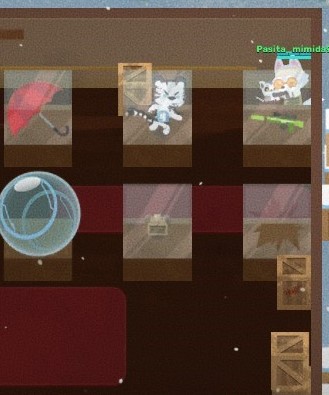
The BCG is a slow weapon that deals incredible area damage and leaves a trail that slows down all players, whether they’re allies or infected. It’s like a mortar, causing substantial area and long-distance damage. It’s powerful in close quarters when you’re in a group, as you can slow down and damage zombies at entrances. It has a slow reload of 1.8 seconds and a 5-round cartridge, but be cautious, as using it too close will damage you from the impact.
Prós:
- Great area damage
- Longo alcance
- Amazing in groups and close quarters
- High damage per shot
- Leaves a temporary area that slows down anyone passing through
Contras:
- Somewhat difficult to use
- Poor at close range
- Slow weapon
- Zombies will hear the bullets
- Small cartridge
- Only obtainable from mole shipments or rebellion caches
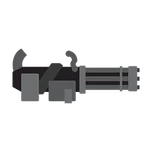
The Minigun is the best weapon for use in groups, and it can keep you alive for quite some time against the hordes. It offers long range, the highest damage per second in the game, a huge cartridge, easy-to-find ammo, and the ability to take out large groups of zombies without any problems. No entanto, it has a slow reload, reduces your mobility when used, has a delay before firing, and zombies can hear the distinctive sound it makes. It’s rarely found in mole shipments and quickly consumes bullets.
Prós:
- Best weapon in groups
- Prolongs your survival when playing solo
- Highest damage per second in the game
- Huge cartridge
- Ammo is easy to find
- Longo alcance
- Effective against large groups of zombies
Contras:
- Slow reload
- Reduced mobility when using it
- Has a delay before firing
- Zombies can hear the shots
- Rarely found in mole shipments
- Rapid ammo consumption
Power Ups
The Claw Boots are handy for cutting grass as you walk, yielding more loot than usual. They also let you move at a regular speed on ice, the BCG yolk, or the coast. They’re useful in this game mode, especially at the beginning when resources are scarce. No entanto, if you become the last survivor, they can become a disadvantage because zombies can spot the cut grass through walls.
The Banana Forker is a tool that allows you to eat banana peels found on the ground, each providing a 25-point health boost. You can use it strategically to recover health in dangerous situations or as part of a broader strategy mentioned at the end of this guide.
The Ninja Boots are custom-made for this game mode. They reduce the sound you make by 50%, prevent zombies from seeing your trail through walls, and boost your speed by 5%. This increase in speed might not sound significant, but it can help you maintain distance from zombies and sometimes outpace them. The feature of concealing your trail through walls, combined with reduced noise, makes it challenging for zombies to chase you inside buildings. It’s considered one of the best power-ups, if not the best.
The Snorkel offers a 10% reduction in damage from the gas and a 25% speed boost while in the gas. It’s excellent for the early game, especially for looting, and can even be used effectively in the final circle if you’re the last survivor.
The Cupgrade is a versatile power-up that’s particularly useful when you’re in a group or need to heal quickly. It speeds up your healing by 25%, allowing you to spend less time healing and more time on the offensive.
The Super Tape, similar to the Cupgrade, is versatile but focuses on repairing your armor 15% mais rápido. It’s handy in moments of urgency and pairs well with the Ninja Boots, making it one of the best power-ups.
The Bandolier is a power-up that increases your carrying capacity for ammo, bombas, and an additional belt. Given the resource scarcity in this game mode, it can serve as a support for the team by carrying extra bullets or ensure that you have enough ammo for yourself.
The Super Juicer allows you to craft your own health juice and increases the amount of juice you can carry up to 300 health units. It’s particularly useful early in the game when you need health juice the most, especially when you return from the gas with low health and no health juice.
Where and How to Loot?
In the early stages of the game, your initial location is crucial for finding good loot. If you start in desolate areas like the snowy north of the map, your chances of finding decent loot are slim. Além disso, your teammates might grab all the weapons and armor in the area. In such situations, você tem duas opções: either head to a nearby large structure or venture into the gas. If you decide to venture into the gas, it’s a good idea to do it right at the beginning of the game. If you lack confidence, you can pick up health juice to have up to 80 health before entering the gas.
I recommend staying in the gas for a maximum of four rounds, which includes two rounds where the gas advances and two where it stops. If you come across a snorkel, you can use it to reduce the damage you take from the gas and move faster within it. Always ensure your health is at 100% before you drop into the red zone. If you have only 25 health juice left, it’s better to take the risk and run rather than healing, as the damage you’d receive and the slower movement wouldn’t be worth it.
The significant advantage of being hidden outside the circle is that it’s very challenging for zombies to chase you since you’ll be far from the main area, and they may think you’ll die due to the distance.
Game Duration
This section is incomplete and may have some inaccuracies due to the challenges in keeping track of the round count for various reasons. No entanto, I hope it can provide you with a rough idea of how long a game typically lasts.
Redondo 1: This round consists of 44 seconds to reach the circle of life, plus an additional 5 para 6 seconds from the moment your character stands up until the countdown appears.
Round 1G: The gas takes 65 seconds to close during this round.
Redondo 2: After the gas closes completely, você tem 27 seconds to get to the next safe area.
Round 2G: Following the previous round, the gas will take 45 seconds to close completely. It’s advisable to finish looting and head to the safe area if you’ve ventured into the gas, as the damage you’ll receive can make searching for items very challenging.
Redondo 3: A partir deste ponto, you enter the middle of the game, e você tem 21 seconds to reach the circle of life. It’s a good time to start forming a group since the number of zombies will increase, e o “snowball” effect will come into play. Save your bullets and bombs because they will be crucial in the late game.
Round 3G: The times for each gas circle from this round onwards may vary. It’s important to study them more thoroughly as there can be fluctuations, which might be influenced by factors like the number of players in the game. Fewer players might result in shorter round times. This is currently a hypothesis.
Redondo 4: By this round, it’s recommended to join up with all the remaining players and form a large group to withstand the upcoming zombie rounds. The round times can vary, variando de 18 seconds to 15 segundos.
Round 4G: As soon as this round starts, you’re officially in the late game. Survivor numbers will start dropping, and you’ll be on your last legs. You have either 30 ou 25 seconds to reach the circle of life as the circle begins to close.
Redondo 5: This round allows you just 15 segundos. Esteja preparado, as it might be the last or the final round before evacuation. If you need to run and hide, there’s still a chance to escape as the last survivor from this point.
Round 5G/Final: This round, which can be the last, requires more research, as the circle may begin to close in 25 seconds or reveal the evacuation zone, providing a final countdown of 30 segundos. The data for this round may not be accurate, but it can give you a rough idea of the time remaining.
Final Round: If the previous round wasn’t the last, this one will give you 30 seconds to escape and flee. Additional information for this round is provided in the following sections. Remember that the bullets you’ve saved will be valuable in this round.
One noteworthy piece of information from the Super Animal Royale wiki is that the reappearance of zombies changes based on how much time has passed in the game. They reappear every 10 seconds in the early game, 14 seconds in the mid-game, e 16 seconds in the late game. No entanto, this information appears to be inconsistent, and further research is needed to explain it more accurately.
Recommended Number of Players
In each game, you will encounter a total of 40 jogadores, comprising both bots and real people. Entre estes, four players are infected by default at the beginning of the game, and additional players may become infected due to disconnection or the initial infection attack. It’s essential to be aware of the number of players in a game and the stage of the game to understand the situation. Here are some “magic numbers” and how to interpret them:
30 sobreviventes: When there are still around 30 sobreviventes, there’s a substantial number of players remaining. If this number is observed in the final rounds of the game when everyone is in a group, you can be confident that they are unlikely to lose.
20 sobreviventes: This is a solid number and is often seen in the middle of the game when the group of survivors is starting to form. If this group sticks together until the end, you won’t need to worry too much.
15-18 sobreviventes: When the player count falls within this range, it’s considered relatively low. You can still survive against the constant waves of zombies, but you need to be cautious about the remaining survivors. If more players die, it can trigger a “snowball” efeito, making survival exponentially more challenging. If you reach the end of the game with this number of survivors, you can win with some minor difficulties.
13 sobreviventes: When you see this number, it’s a sign to run away. It becomes very challenging for uninfected players to survive against the hordes of zombies. The exceptions are if there’s a player who can effectively use a minigun or if it’s the last two rounds. In these cases, you might consider staying to fight, as these conditions can favor group survival for a longer duration before the evacuation.
10 sobreviventes: If there are only 10 sobreviventes, the best course of action is to hide, as there is little chance of salvation.
1 survivor: If you are the last survivor and there’s only one player left, you might want to pray for mercy from Banan, as the odds of survival are quite slim.
Last Circle
When it’s time to evacuate, you’ll find yourself in one of two situations: either you’re with a group of survivors holding out against the ferocious hordes or you are the last survivor. Let’s first discuss what to do when you are in a large group:
Suppose you are in a large group of survivors. Neste ponto, you should stop saving your bullets and use them as much as you can. The group should gradually approach the evacuation circle, avoiding unnecessary stops. Even when walking, you will have more than enough time to reach the circle, but it’s advisable to keep moving to avoid becoming an easy target for zombies. Don’t stay outside the circle when the countdown reaches zero. Stay close to the group and don’t stray away to lead the assault or lag behind, as getting separated can lead to a swift demise. The zombies start to reappear in hordes as the evacuation begins, and due to the limited space, there will be many zombies clustered together. Once you’re in the evacuation zone, throw all your bombs as far away from you as possible, especially in bottleneck areas where many zombies accumulate while trying to attack survivors. Avoid throwing any bombs near yourself, as it can result in self-inflicted damage.
Agora, if your group has 13 survivors or less, you should be more discreet and careful. Keep in mind that this number of players cannot consistently defend themselves against the zombie hordes, especially during evacuation. Stick with your group to withstand the last waves, but be prepared for several casualties, as many may die. Stay alert and move and jump constantly to minimize damage. De novo, use all your available resources, either on the way to the circle or within the evacuation zone itself. If you feel overwhelmed or your group is outnumbered by zombies, you can navigate between obstacles inside the evacuation zone and throw grenades behind you to eliminate the infected. Staying outside the outskirts of the evacuation zone can provide some breathing space and allow you to jump inside at the last moment. You can also separate from the rest of the group if you see that it’s attracting too many zombies, but it’s recommended to do this at the last moment to approach the circle on your own or hide and heal for a moment.
Last Survivor
If you find yourself as the last player standing and it’s time to evacuate or it’s the final circle, you’ll need the following items in order of priority to maximize your chances of victory:
- Uncommon Shotgun (at a minimum) or JAG-7.
- Armor Level 3 sem nenhum dano.
- Ninja Boots.
- 4 Granadas.
- Dual Pistols, Silenced Pistol, Smg, Thomas Submachine Gun, AK, M16 (any of these can work).
These items are absolutely essential for your survival, and not having any of them will significantly increase your chances of defeat.
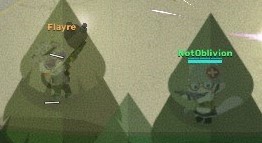
When the number of players drops to 13, your best course of action is to flee to a hidden and remote location where you are not easily visible to others, making it difficult for them to find you. Your main mission is to hide and ensure that no zombies see or hear you. If you don’t have a suitable hiding spot or if the location will be consumed by the gas, attempt to conceal yourself between boxes, obstacles that obstruct your vision, or among trees and pines. If your character’s skin color matches the terrain, you’ll have a slight advantage, as zombies may overlook you. There are some particularly useful places to hide, such as houses or inside Thomas’s workshop. Always stay close to the gas, as most infected will tend to congregate in the center of the evacuation circle. Remember that if you can’t see a player or zombie, they can’t see you either. (Observação: None of these hiding places work effectively against bots, except for obstacles that obstruct your line of sight and that of the enemy.)
While you are in hiding, take the opportunity to reload your weapons and heal yourself if needed. Keep your shotgun in your main hand. If you have a weapon that doesn’t make noise (silenced weapon), make that your primary weapon. The goal at this point is to remain hidden as long as possible until it’s time for evacuation. Once the evacuation countdown starts, open the map and mark the location of the final circle. Make a mental note of its surroundings, such as obstacles or terrain features. Be prepared to switch quickly between your shotgun and your melee weapon or between your grenades and your melee weapon.
The escape plan unfolds as follows: as soon as the final countdown begins, open the map and place a marker where the last circle is. Make a mental note of its location and its surroundings (por exemplo, nearby rocks, edifícios, or forests). Prepare to switch rapidly between your shotgun and your melee weapon or between your grenades and your melee weapon. You can make this easier by assigning a hotkey to your last weapon, allowing you to switch quickly between your shotgun and melee weapon with the mouse scroll wheel (por exemplo, right-click on your mouse). The idea is to switch between your shotgun and melee weapon during your jumps. Shoot the zombies with your shotgun, then switch back to your melee weapon while jumping again. Com prática, you’ll become skilled at this maneuver. Ao longo do caminho, throw grenades as close to you as possible while running.
You should keep a considerable distance from the zombies when reloading your shotgun or other high-DPS (dano por segundo) arma. Only heal if there are no zombies nearby, E se você fizer, use one level of tape and continue running. If there are only a couple of seconds left and you’re still outside the circle with several zombies in the center, move away slightly, move in circles or between obstacles to avoid death, and then quickly enter the circle.
You can start running from your hiding spot when there are about 15 para 10 seconds remaining, depending on your confidence in arriving at the last moment and your distance from the evacuation zone. You can use the game’s music as a cue to know when to start running. O primeiro 11 segundos, characterized by prominent bass in the melody, are your time to prepare. When the bass takes on a more mournful melody from the 12th to the 14th second, it’s time to be ready to run at any moment. As the bass diminishes and the violins increase slightly in intensity from the 15th to the 21st second, that’s when you should start running. When the melody undergoes a dramatic change with a shift in the 22nd to 23rd second, it’s a sign that you won’t make it if you’re too far from the circle. Start running to the circle, culminating in the most heart-pounding seconds of the game from the 24th to the 30th second, trying to dodge, shoot, correr, and throw grenades to reach the evacuation zone as the last survivor.
Alternative Strategies
Here are some alternative strategies that can be used in Super Animal Royale, each with its own unique advantages and challenges. These strategies can be useful in specific situations or provide a different gameplay experience:
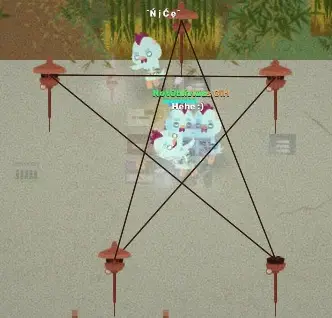
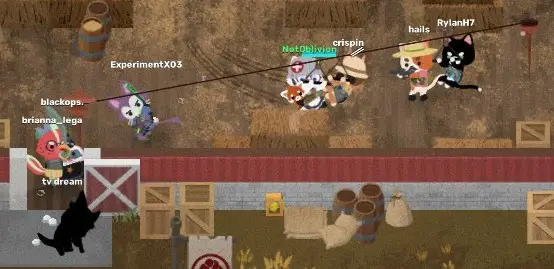
Zip Line Network: Creating a network of zip lines around the center of the map can provide fast travel options for players. No entanto, it comes with the disadvantage of zombies being able to ambush players on the zip lines. Adicionalmente, setting up a zip line network can take time and effort. Another strategy is to create a distracting pattern, like a pentagram, to divert the attention of zombies. This can be helpful when you’re the last survivor as most infected players may be drawn to the zip lines, leaving you with fewer zombies to deal with.
Banana Barricades: Using bananas to block entrances or create slippery surfaces can be an effective strategy, especially with a reliable partner who can replenish the bananas. No entanto, there’s a risk that other players might unintentionally or deliberately remove the bananas, or explosives can clear your defenses. Using this strategy in a controlled environment, like the SAW security room, with trustworthy teammates who carry bananas can make it more effective. Adicionalmente, using bananas strategically to make zombies slip can provide you with breathing room to reload and eliminate them, but you must be cautious not to slip on your own banana peels.
Bow and Sparrow: Utilizing the Bow and Sparrow as the last survivor can be a mobile and effective strategy. It allows you to shoot and move continuously, piercing zombies in your path. No entanto, this strategy requires skill in using the bow effectively and can be challenging to master. The Bow and Sparrow has some weaknesses, so you must be cautious when employing this strategy.
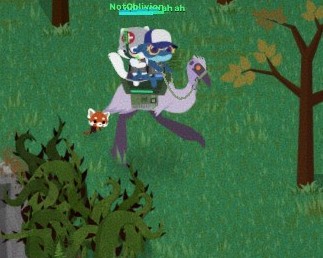
Fast Emu Escape: Using a fast emu with a partner for escape is a powerful strategy. One player drives the emu while the other player continuously uses the speed boost. This strategy allows you to consistently outpace infected players. No entanto, it requires proficiency in handling the emu, as losing it means both players will be vulnerable to the zombies. This strategy works best with the fast emu variant.
Snorkel Instead of Ninja Boots: While the Ninja Boots are generally preferred for their sound reduction and increased speed, the snorkel can also be used as the last survivor. No entanto, it comes with the challenge of taking significant damage from the gas during the final circle, leaving you in a vulnerable state. You’ll need to be highly skilled at avoiding damage from zombies to make this strategy effective. Adicionalmente, evacuation zones are often positioned away from the gas, making it challenging to reach them without the speed boost provided by Ninja Boots.
These alternative strategies offer different approaches to gameplay and can be effective in specific situations. It’s essential to practice and adapt to various strategies, as Super Animal Royale provides a dynamic and unpredictable gaming experience. Never give up and keep improving your skills in the game!
Isso é tudo o que estamos compartilhando hoje para isso Super Animal Royale guia. Este guia foi originalmente criado e escrito por NotOblivion. Caso não atualizemos este guia, você pode encontrar a atualização mais recente seguindo este link.

