- Título: Espeleologia 2
- Data de lançamento:
- Desenvolvedor:
- Editor:
Information about Spelunky 2 ainda está incompleto. Por favor, ajude-nos a preencher os detalhes do jogo usando este formulário de contato.
This guide is a collection of knowledge to help new players get further in the game.
First Things First
- Go to controls in options, and change default movement to ‘walk.’ This will give you better control of your character.
- Próximo, go to gameplay options and turn on ‘Instant Restart.’ It’ll save you time.
O Básico
- Your main goal for every floor is to get to the exit and there’s normally a direct path to the exit that usually doesn’t use any resources(bombs/rope). Straying off this path usually WILL require resources, so if you do, make sure you have enough to avoid getting soft-locked.
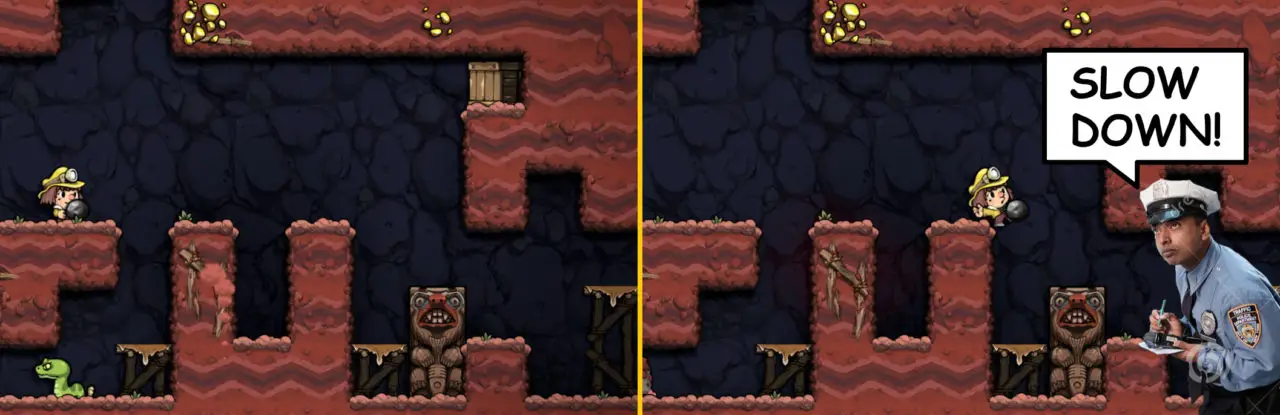
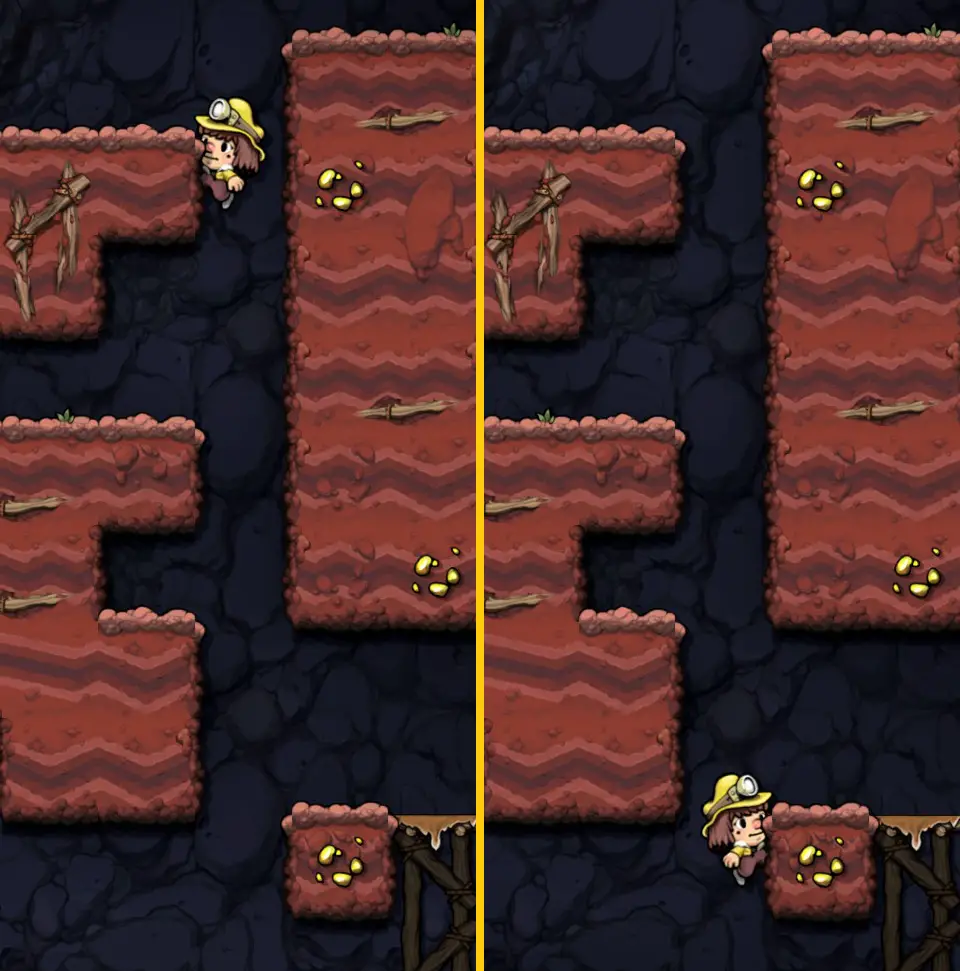
- Holding run allows you to move faster on the ground and in the air. You can even run through gaps like these as if the gaps were never there:
- In order to get on ropes, vines, or ladders, you overlap them with your character and hold them up or down, but when you’re in the air you can only grab them by holding up. You can even grab them as you’re attacking in the air.
- You can pick up and drop items by standing over them and pressing down + ataque, and you can drop backpack-style items like the Jetpack and Powerpack with down + RB/R1(the same button you use to enter doors and buy items in the shop). When you’re holding an item in your hands, you can throw it by pressing the attack.
- Holding up allows you to look and aim your throws above you, and holding down allows you to look and aim your throws below you. Use these often to help plan your route.
- Holding down while on the ground also makes your character lay down, and if you also move left or right, you’ll crawl.
- Laying down allows you to place bombs more precisely.
- Além disso, você pode “cozinhar” bombs since you can pick them up and throw them like any other throw-able item. This will allow you to bomb areas and enemies as if you had sticky bombs. Por exemplo, you can use this method in order to get items like crates embedded in the dirt above you.
- If you move too close to the end of an edge/precipice like in the above 1st picture, you’ll go into a balancing animation as if you’re trying to keep yourself from falling off, and if you’re holding an item and stay in this animation too long, you’ll drop the item. So to stop this from happening, you need to stop the animation by either moving a bit away from the edge or laying down.
- When you lay down near an edge, you can drop a rope down, and you can drop items off the edge to move them down lower, drop them on an enemy, or set off arrow traps.
- You can also whip most items like rocks, corpos, and even gems and gold of an edge, so keep this in mind before you collect any treasure.
- One item you can’t whip off the edge, are vases that break on impact and will either contain gold or enemies, so it’s best to throw them away from you, throw at enemies, throw something else at them, or use them to trigger arrow traps.
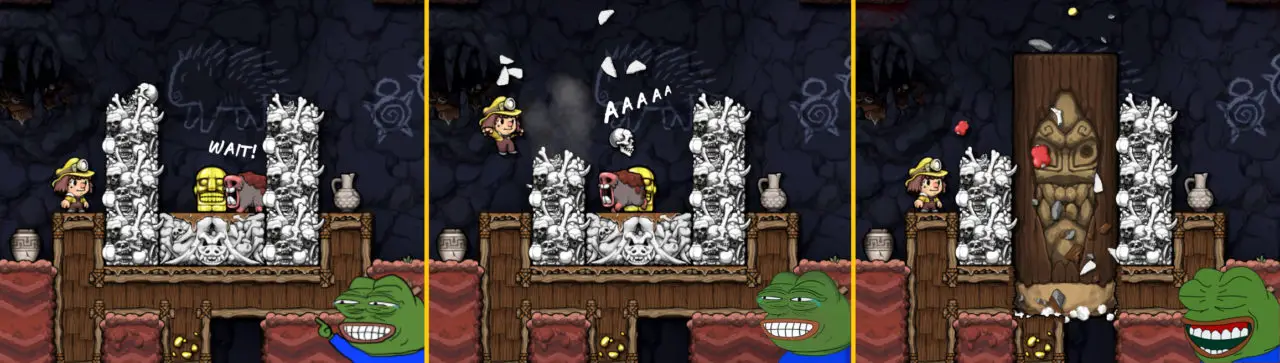
- Another type of vase is cursed vases with a ghost symbol on them. Breaking them will drop a valuable ghost diamond but will also immediately summon the ghost that normally arrives at the 3 min mark on a floor. These vases are on every floor, except boss floors, so if you want to get its diamond, your best bet is to bring them near the exit before breaking them.
- The ghost will chase you relentlessly and touching them will kill you instantly, but if you’re skilled enough, you can guide the ghost through normal gems to turn them into pricier ghost diamonds.
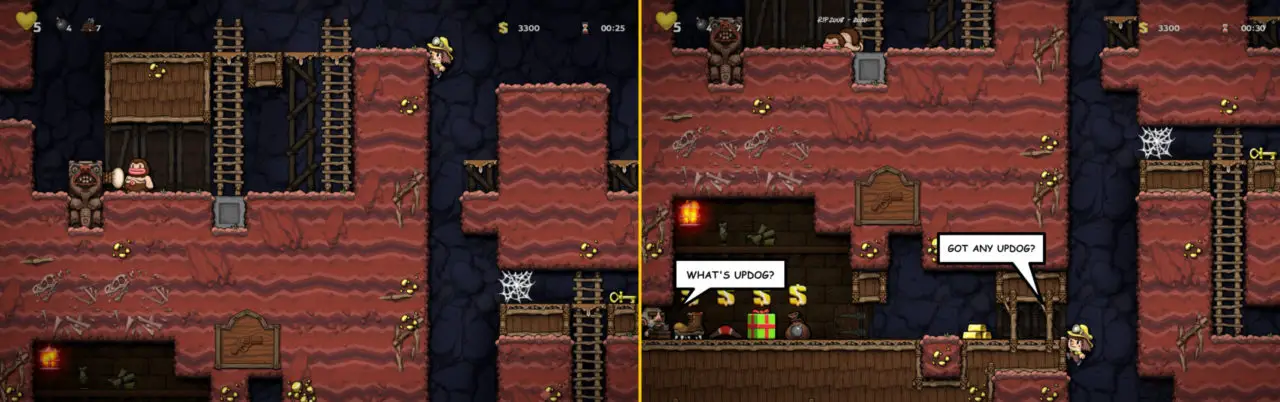
- Another thing you’ll come across on every normal floor is pets in the form of either cats, cães, or hamsters, which you can specify in gameplay options. Getting these pets to the exit will reward you with +1hp as you go into the next floor. Each pet has 3hp and only 1 will spawn every floor, but sometimes shops can also have them up for sale.
- Normally when you 1st encounter a pet it will be stationary, but once a pet is struck or picked up, it will start moving on its own. This means when you place it down, it’ll start moving in the direction it’s facing. One situation you can take advantage of this behavior is when you’re above the exit but you still have other things to do on the floor. If you see your pet can safely walk to the exit, then you can put it down and let it walk to the exit by itself. Another situation is when the pet is perched up high on a ledge. If you have enough space, instead of using rope, you can throw an item such as a rock or body to hit the pet, which will cause it to walk off the edge by itself.
- Now just like anybody that stays on-screen after death such as cavemen, turkeys, and moles, carrying a pet dead or alive will tank arrow shots for you. In comparison, a lizard vanishes on death, so carrying it will not tank arrows for you.
The ABC Rule
- Due to the abundance of arrow traps in the 1st area, I highly advise sticking to the ABC rule which stands for: Always Be Carrying an item such as a rock, vase, or body, in order to trigger arrow traps. If you’re carrying a breakable item like a vase, you can trigger a trap with it, and use the arrow from the trap as your carried item.
- Bodies are particularly useful since you can trigger traps with them like a rock, and carrying them can tank arrows for you, whether they’re dead or alive. Here the dead caveman I’m carrying tanks an arrow shot as I pass through:

- Another reason to follow the ABC rule is that enemies normally don’t take whip damage while stunned, but throwing items at them still deals damage. So if you’re carrying a rock or body, you can stun them with it, pick it back up, and throw it again and again till they’re dead. The only item that I know of that won’t deal damage is a broken arrow.
- Now if you’re facing an arrow trap without an item, you can still whip gold/gems off edges to trigger them, you can use rope or bombs to trigger them, if you’re far enough you can safely drop past them, and if you can time it right, you can even WHIP arrows!
The Whip
- Our whip not only hits in front of us but also behind us and above us. But since the hitbox above us can be hard to time, it’s best to go with what we can visually see, and what we see when we go for an attack is that we 1st throw the whip back behind us, and then before going forward, we throw the whip above AND behind us.
- This upper hitbox is pretty decent in size, so when it comes to attacking enemies above us, it’s usually best to turn away from them and attack them using this upper hitbox, like when bats are flying towards us on their patented annoying angle.
- E sim, this means that you can even whip arrows behind you, so if you mess up and didn’t see an arrow trap last minute, throw your whip out so you at least have a chance to deflect it whether it’s approaching from the front or the back.
- Extra: Ropes have attack hitboxes that can hit directly on top of you and above you, but they’re only active when you initially throw them out. Since this uses resources, it’s usually used as a last resort. A situation when you would need to use this would be in the jungle, where a monkey is on you and if you don’t kill it with a rope, they can knock you down into spikes or a man-eating plant. Mais tarde, you’ll learn how useful this can be against shopkeepers.
On Enemies
- When you’re unarmed, the fastest way to kill multi-hit enemies like cavemen and lizards is by either using the environment like throwing them into spikes or other traps or by knocking them down and repeatedly throwing a rock or body at them, since thrown items deal damage even when enemies are stunned. Having a shotgun, machete, or power pack will also allow you to damage them while they’re stunned as well.
- With moles, you generally just want to keep track of them especially when they’re above you and can drop down at any moment. They can only move through dirt, so you can actually trap them by throwing them in areas enclosed in wood, pedra, etc. Here a mole traps itself in a trap:
- Skeletons only activate when you’re nearby, so it’s a good habit to jump on every skull you can. Jumping is better than whipping, at least in the 1st area, because it preserves the skull as a carry-able item which you can use to trigger the many arrow traps in the area. You can also tell a skull is an enemy when it’s placed near a totem-like trap by itself and the trap keeps activating towards it.
- One enemy you can find in vases is scorpions which can poison you. Being poisoned is a status effect that deals damage over time and the most common way to cure it is to get a pet to the exit. This is another reason why you want to either throw vases away from you or throw something else at them to break them.
- Another status effect you can come across is being cursed, which will keep you at 1hp until you find a cure, and the most common way to cure it is by making sacrifices on Kali’s altars. Normalmente, when you make enough sacrifices you’re rewarded an item, but when you’re cursed, you get cured instead. Another cure can be found by completing the challenge room in the Temple area, and the last known way is a bit of a spoiler, but as a hint, is connected to an item from the 1st game.
- De qualquer jeito, it can be difficult, so you want to in general avoid being cursed, and one of the ways you can be cursed is by the witch doctor’s hovering skull. When you’re near, it’ll start moving towards you, so don’t let it touch you. Stunning or killing the witch doctor will make the skull disappear, but if you can’t do either of those, then you’ll want to avoid them.
- Another enemy that can curse you are the mummified cats in the Temple. When they die they spray ash/dust on the left and right sides of their body, and touching this will curse you, so you don’t want to whip them or kill them up close. Em vez de, you’ll want to either kill them from very far away, stomp on them, or avoid them.
- Speaking of avoidance, it’s one of the best things you can do. If an enemy isn’t in your way, isn’t following you, and doesn’t pose a threat, then if you can easily avoid it, faça isso. I know it can be fun to kill everything and go on a killing spree, but your main goal is to get to the exit. You can lose life, tempo, recursos, and throw the whole run away by going for unnecessary kills, so keep that main goal in mind.
- Sometimes you’ll come across really dangerous situations that you’ll want to avoid and will force you to use resources. An example in the jungle would be a bed of spikes with monkeys on the vines, followed by a boomerang guy, a witch doctor, com 2 mosquitos flying around, and a man-eating plant nearby. Now I doubt you’ll come across this specific situation, mas se você fizer isso, then uninstall the game 🙂 No actually if you do, then if you need 1 ou 2 bombs to get to a lower level on the floor, use-os. Se você precisar 3 bombs and have a bunch, use-os, or maybe cook them and throw them at the devils themselves. No matter the case, don’t be afraid to use resources to avoid or neutralize dangerous situations.
- Extra: A lot of dangerous situations have to deal with traps, so if it’s the main threat, destruí-lo. Like in the above example, if you were to find that situation at the bottom of a floor in front of the exit, you can bomb the spikes to simplify the situation. You can also alternatively go back up the floor and bomb down directly above the exit.
iHop
- Another way you can kill enemies is by stomping on them, which also saves you from fall damage.
- Holding the jump button as you stomp on an enemy, bounces you harder off of them, which can help you reach higher places, e por sua vez, save resources. You can also do this while on a mount.
- Por exemplo, instead of using rope, you can re-position multi-hit enemies to places where you need that extra lift. Flying enemies like bats can be guided to these places and since they’re already higher up, they’ll allow you to reach even higher.
- Shooting a shotgun and jumping at the same time can also make you jump higher:
- Extra: Sometimes you’ll come across a situation where a crate, item, or pet is on a ledge right above 2 bone pile tiles. Here you can break the 2nd bone tile right underneath the ledge in order to use the 1st tile to get up the ledge for free. You can easily break this top tile by pressing attack + jump at the same time:
The Secret Art of The Ledge Grab
- Crawling off an edge will make your character ledge grab.
- You can also ledge grab by walking or running off the edge and immediately moving back towards the edge.
- Once you’re grabbing a ledge, you can hold up or down to look above or below you. You can hold or press down + rope or bombs to throw them directly under you unless you have sticky bombs which will instead stick to the edge. And if you’re carrying an item in your hands, you can drop it by pressing the attack.
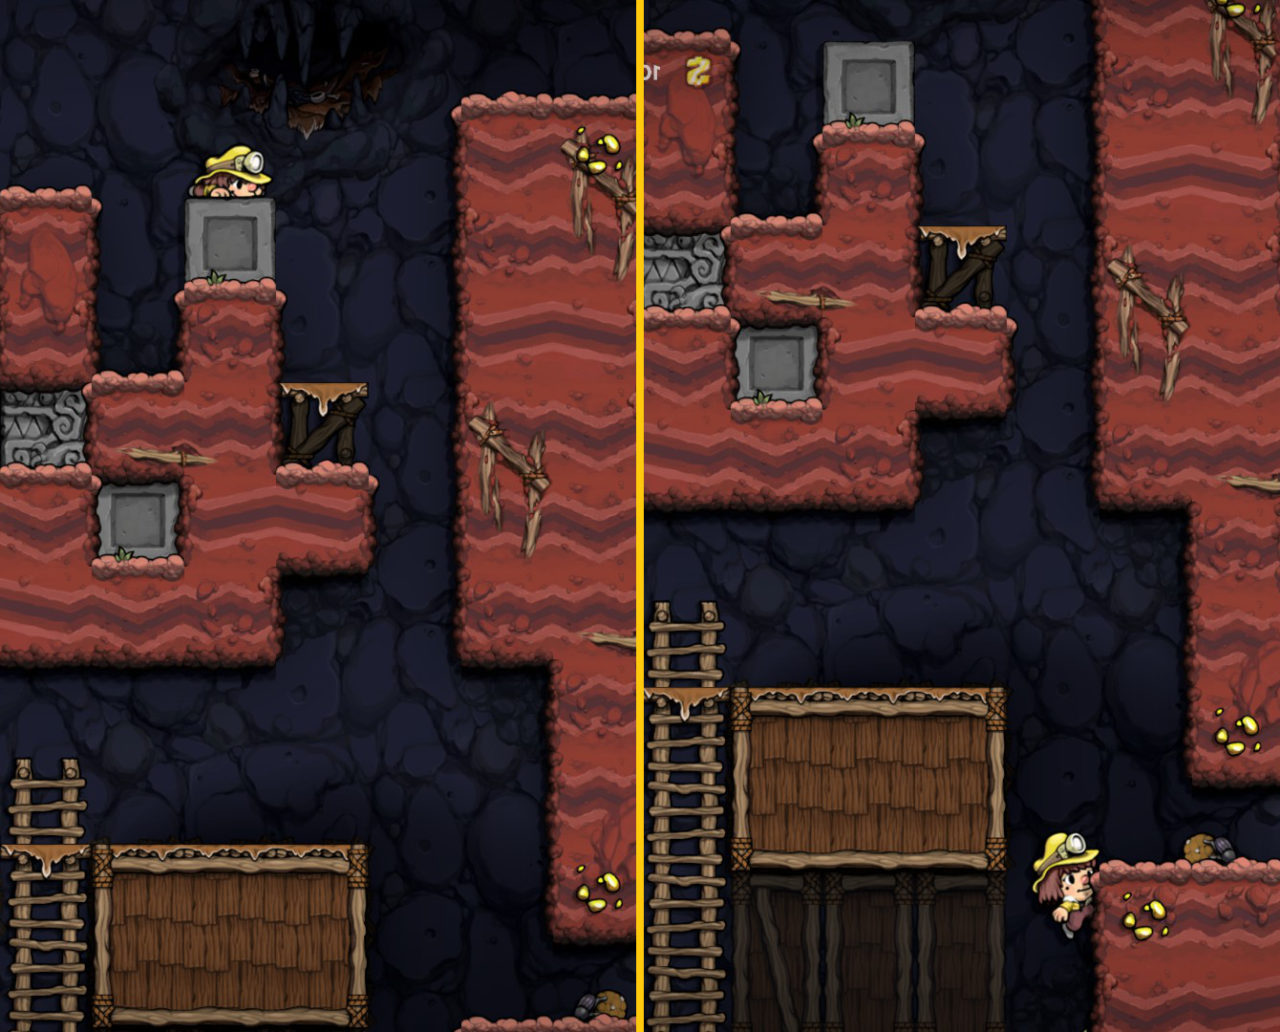
- A key trait of ledge-grabbing is that you auto-grab ledges. Meaning if you were to visualize the game as a grid of tiles, then if there is a ledge directly under you on the same column, dropping down directly onto it will auto-grab that ledge no matter how far down it is, even if it’s off-screen! The key to this though is that you need to drop directly down, without moving left or right. Então por exemplo, you’re grabbing a ledge and look down to see another one directly under you near the bottom of your screen. All you have to do now is drop directly down by pressing down+jump and that’s it. Don’t move left or right, and you will auto-grab that ledge. This can help save your life, tempo, and resources. Um exemplo:
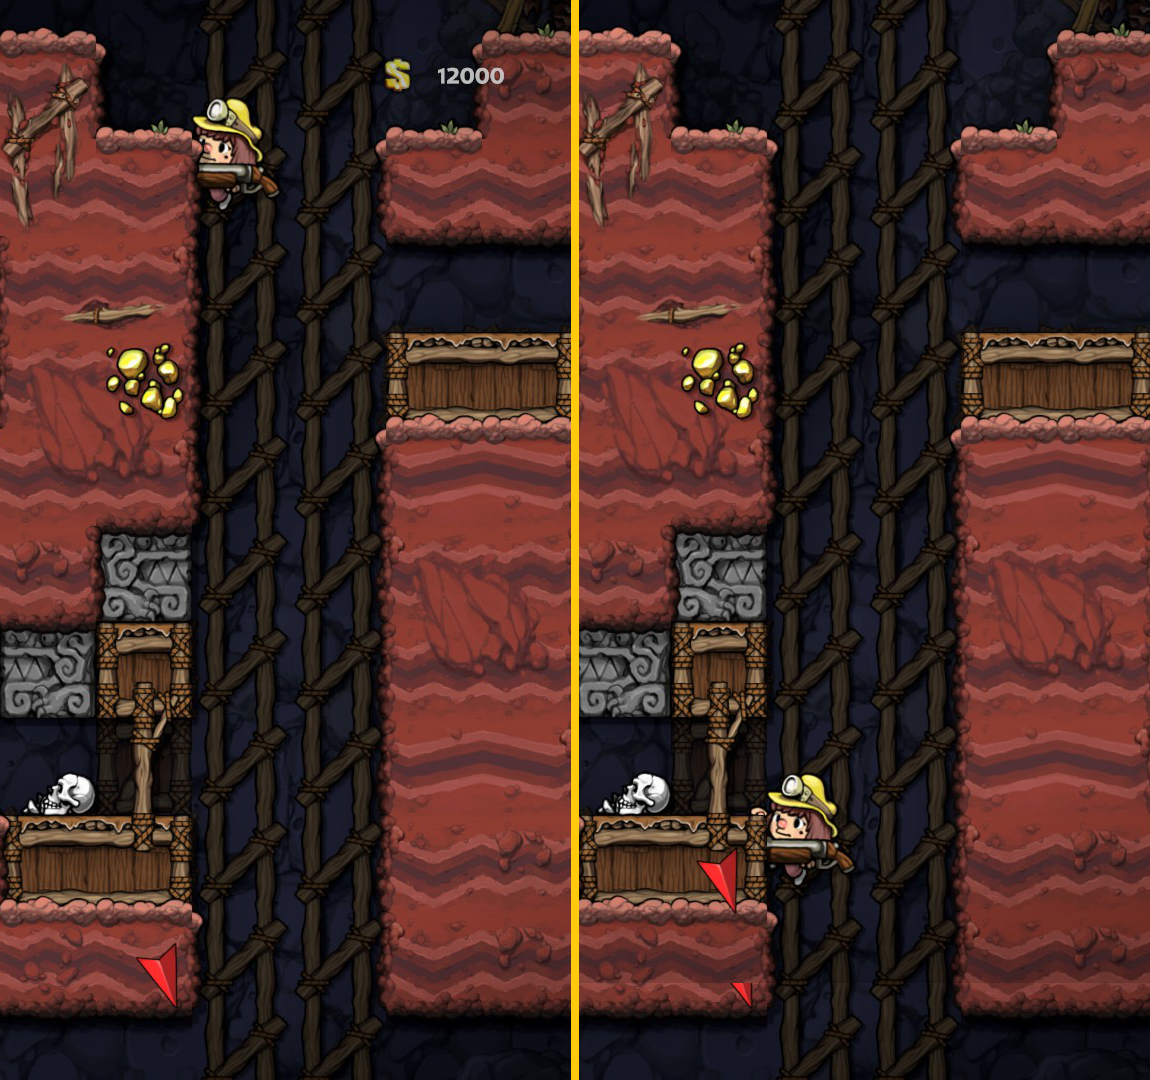
- And another one, but with the ledge off-screen. The shop’s position told me there was a ledge there.
- Now if a ledge isn’t directly under you and is instead across from you, then what you can do is see if there’s a wall on the same column as that ledge. If there is one, you’ll want to drop down or run off the edge to move towards the wall. You’ll usually want to hold run as you do this since it makes you move faster in the air. Then once you’ve touched the wall, let go of your controls, and the reason we do this is that hugging the wall will align us perfectly with the ledge, so moving left/right afterward will mess up this alignment and likely lead to fall damage. So again, once you’ve bumped into the wall, let go of your controls, and you’ll auto-grab the ledge. Here I dropped down to move to the right wall, and as soon as I bumped into it, I stopped holding right:
- Here’s one for a ledge nearly off screen, and this time I run to the right wall. Again as soon as I touch it, I stop moving:
- Por outro lado, if there isn’t a ledge under you, another way you can get down is by landing on an enemy. Most of the time you’ll need to time it right, but landing on one will break your fall and save you from fall damage (unless it’s a man-eating plant).
- One big negative of using the crawl method to ledge grab is that if you’re holding an item, you’ll drop it as you get into position, so if you want to keep your item, you’ll want to use the walk/run method. A situation where you’ll NEED to do this is when you have a breakable item such as a vase or skull and you want to trigger an arrow trap, but the layout is in a way that simply dropping the item off the edge will lead to it breaking before it reaches the trap. Nesta situação, you’ll want to use the walk/run method because once you’re in the ledge grab position, you can drop the item directly beneath you to trigger the trap. Just remember not to press down as you’re doing the walk/run method since doing so can easily turn it into the crawl method which will cause you to drop your item.
- Pressing whip while ledge grabbing propels you away from the edge, which can be a quicker way to get off the edge, especially if you’re heading that direction anyway.
- If you ever need to get down to spikes that are 1 tile beneath you, you can use the crawl method to ledge grab and safely drop down to the spikes. You can only use the crawl method here because using the walk/run method will make you airborne and impale you immediately on the spikes.
Spikes Forever
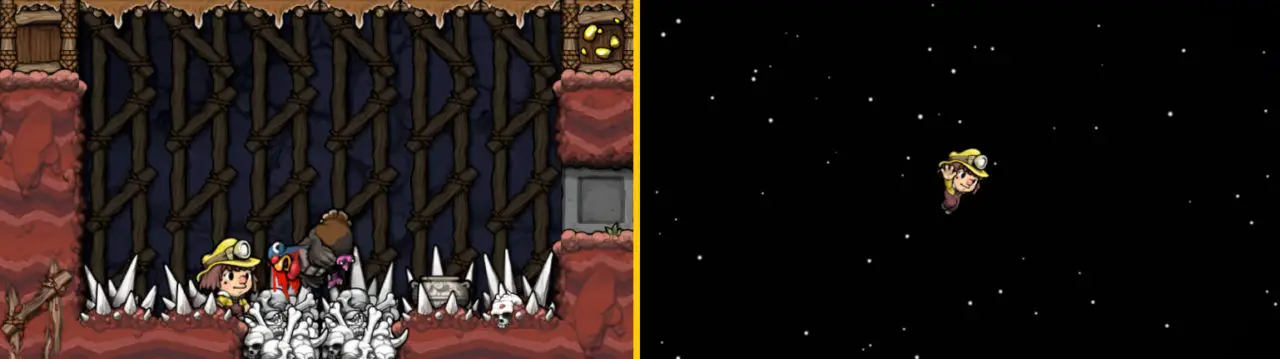
- Jumping or falling onto spikes will kill you immediately, but you can safely walk through them.
- If you need to get down onto spikes, you can rope down and climb it down safely, you can float down safely with either a cape or turkey, and if the spikes are one tile underneath you, you can crawl off the edge to ledge grab and drop down safely.
- Quando você estiver lá, you can rope and climb out, you can use bombs, and you can even jump out, as long as you don’t land back on spikes.
- If you need to get on a platform above you that has spiked, you can ledge-grab and mini-jump safely onto the platform. As long as you’re not jumping too high, you’ll be fine.
- Por último, falling onto spikes while on a mount will save you from death, as the mount will take the blow and die so you can live
Mounts on Mounts
- Mounts are ride-able creatures you’ll come across your journey, and in order to tame or take control of a wild mount, you’ll need to hop on one and ride it until it loves you, just like in real life. Once you hop on, it’ll usually 1st move towards the direction it’s facing which can lead to some sketchy situations, so it’s a good idea to make sure the area is safe before riding. De outra forma, you can stun them and bring them to a safer location. After you’ve ridden them for a while, they’ll stop moving and you’ll have full control.
- You can get off a mount by pressing down + jump on the ground, and you can jump off a mount anytime even mid-air by pressing up + pular. Every mount can double jump, and you can still jump off the mount during either jump, so you can in total, triple jump, which can help you access high ledges with items like crates and pets.
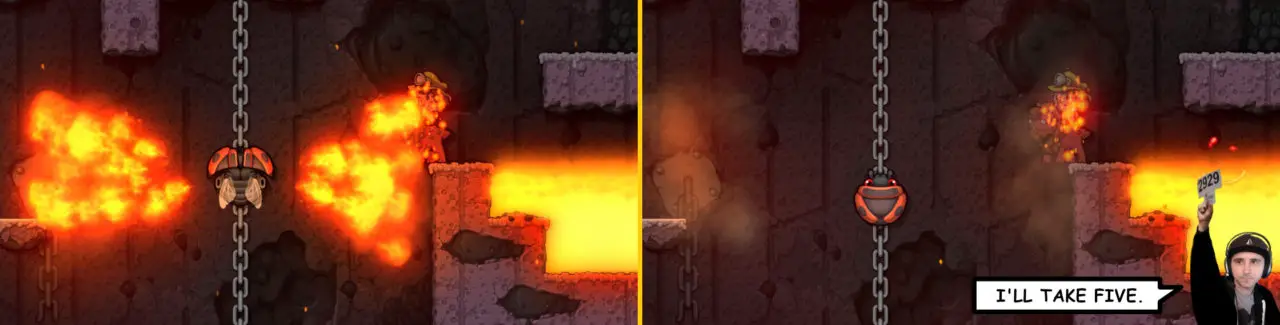
- Every mount also has its own attack and ability, like rock dogs make you immune to fire and can shoot fireballs, and turkeys can headbutt and float down (which you can do by holding the jump button after you double jump). Rock dogs give fire immunity:
- Just like on the ground, you can carry any item while on a mount, including other mounts, so you can have mounted on mounts.
- Mounts can tank damage for you, but doing so will knock you off the mount. When carried, they can tank arrow shots whether they’re dead or alive, and falling onto spikes while on a mount, will save you from death.
- A key trait of turkeys is that killing them with any source of fire such as a bomb, a lit torch, or your whip when you have the Powerpack, will cook the turkey into food that can be collected for +1 HP.
- Extra: Being on a turkey will allow you to walk on the thorny vine tiles in the jungle. Having either the Spike Shoes or Spring Shoes will also give you this ability.
Shop Respect and Disrespect
- Shops are common NPC spots you’ll come across where you can spend gold for bombs, ropes, Unid, mounts, and pets.
- As a beginner, I highly advise against robbing shops until you’re more familiar with the game, because once you’ve either stolen, chocado, or killed a shopkeeper, or destroyed part of a shop, then every shopkeeper going forward will not only attack you on sight but will also guard every floor exit. So you want to first obtain familiarity with the game mechanics and different areas before making any attempts because it’ll only make an already challenging game even more difficult.
- In Spelunky HD it was pretty much mandatory to rob shops in order to get further into the game especially if you were going for the alternate ending. That’s changed for Spelunky 2, as it’s become much more viable to stay clean since you can usually acquire enough gold to get what you need.
- Com isso dito, there are times where you’ll come across a Jetpack that’ll make your run easier, or maybe you have few resources and gold, and a shop has everything you need. In these cases, robbing the shop can be necessary, but before we get into it, we need to know one important thing: There’s a hidden wanted system.
Por exemplo, if you can rob the shopkeeper without killing them, then they can forgive you if you can pass 1 floor without stealing or hitting a shop or shopkeeper. The current floor you steal on doesn’t count, so if you steal on floors 1-2, then you’ll have to pass the next floor(1-3) without stealing or hurting a shop or shopkeeper so that they can forgive you on the floor 1-4. De outra forma, you’ll have to pass on the next floor 1-4 in order to be forgiven on 5-1, etc. If at any point you kill a shopkeeper, you CAN be forgiven, but you’ll have to consecutively pass even more floors cleanly to do so, which can be pretty difficult, so try not to 4Head.
- So how exactly do you rob a shop without killing the shopkeeper? Well i think the most reliable way to do this is through the rope method, which starts by 1st positioning your character so that they’re overlapping the shopkeeper. Then once in position, you press Rope, which will instantly knock the shopkeeper down and give you enough time to escape. You usually want them to fall deeper within the shop and you control this by how you overlap them. If you want the shopkeeper to fly towards the left of your character, all you have to do is overlap them so that their body is still sticking out on the left side of your character. If you want them to fall to your right, you want their body sticking out on the right side of your character. É isso.
- You usually use this method with the item you want to steal already in your hands so you can just run out the door without stopping, but the thing is, you can actually steal more items this way. You’ll notice that a few items that you can find in a shop are ones that you’d normally absorb just by touching them, but since they’re in a “comprar” estado, you can’t absorb them even when you pick them up. These items however, revert back to their normal absorb-able state as soon as your rope hits the shopkeeper in the face, so if you pass through these items on your way out, you’ll collect them instantly.
- So this means, if all the items you want are absorb-able, then you won’t need to pick anything up and you can just rope the shopkeeper in place where he’s normally standing in the corner, since you’ll collect everything instantly on your way out. Other times, you might have to place the absorb-able items closer to the exit, because picking up items makes the shopkeeper follow you and this can mess up the orientation. De qualquer jeito, as long as your knocking the shopkeeper back deeper into the shop, you should be able to collect all the absorb-ables fine.
- Now if you don’t have any resources or gold, one thing you can try is to throw an item like a rock or body at the shopkeeper in order to lead them out and on to a lower level on the floor. That way you can rob the shop safely, but the challenge then would be getting to the exit without killing them. This is why i prefer the rope method the most as it puts you ahead of the shopkeeper, and they could very well end up staying in the shop as you head for the exit. This is also why I recommend always having at least 1 corda, so you always have the option of robbing a shop safely.
- The downside to both of these methods is that if the shopkeeper we’ve struck somehow dies before we reach the exit, then we’ll be accused of their murder. This is why if there’s spikes out in the open near the shop, you’ll want to destroy them before robbing it. The rope method, depending on the layout, may make it less likely for them to follow you, but you usually still want to destroy spikes just in case. De qualquer jeito, you’ll want to get to the exit fast.
- Now what if you don’t mind killing shopkeepers and dealing with them for the rest of the run? Well in that case, what you 1st want to do is look for items in the shop that can kill them. Items like the machete, freeze gun, and shield can do this easily and are what you mainly want to look for, but if those items aren’t there, then you can use the rope method. The big difference here is that instead of running away, we’ll be picking up the shopkeeper’s shotgun and shooting them with it, but before you do so, you’ll want to 1st move the shop items around since you can easily miss the shotgun and pick up something else. You want to especially move explosive items like bombs or electronics like the Powerpack away from your eventual line of fire, since shooting them will kill you both. Then once you’ve cleared the area, use the rope method to pick up their shotgun and kill them.
- Ok so you’ve robbed a shop. Now wot? Bem, if you’ve killed a shopkeeper you’ll now have to deal with them on every normal floor’s exit, and in that case you’ll want to ideally take them out from a distance, either using a shotgun or bombs, especially sticky bombs. From the side, you should be able to shoot and kill them if you can get line-of-sight on the exit from far away. If you can’t then you can use rope or bombs to level yourself with the exit. If you’re attacking from above, you can ledge grab above the exit and drop bombs with down+bomb, or you can rope and throw bombs from it. A riskier play but one that will save you resources, is timing a stomp on them, which will stun them and give you enough time to either kill them or exit. You can also just time an exit which is what you’ll need to do with the pacifist route:
- Now when you’re trying to get forgiveness, you can’t hit a shopkeeper at all, so instead of timing a stomp on the shopkeeper, you’ll want to time an exit. From the side this can be difficult because the layout may make it so the shopkeeper can follow you as soon as you alert them, but if they can’t follow you, it’s a valid approach especially when they can end up moving far away from the exit. I personally like approaching from above since you can just drop directly on the exit and leave ASAP. De qualquer jeito, you’ll want to 1st alert them, which means you might have to throw a rope down in order to get close enough to get them moving. Then as soon as they move and face away from the exit, you drop directly on the exit and leave. You may also want to wait for them to fire a shot as they’re facing this other direction since they have a cooldown after every shot and this can provide an extra bit of security. De outra forma, that’s pretty much it. It’s simple but it can take a bit of practice and experience, and when you do it right, you should get this message on the following floor.
Olho por olho
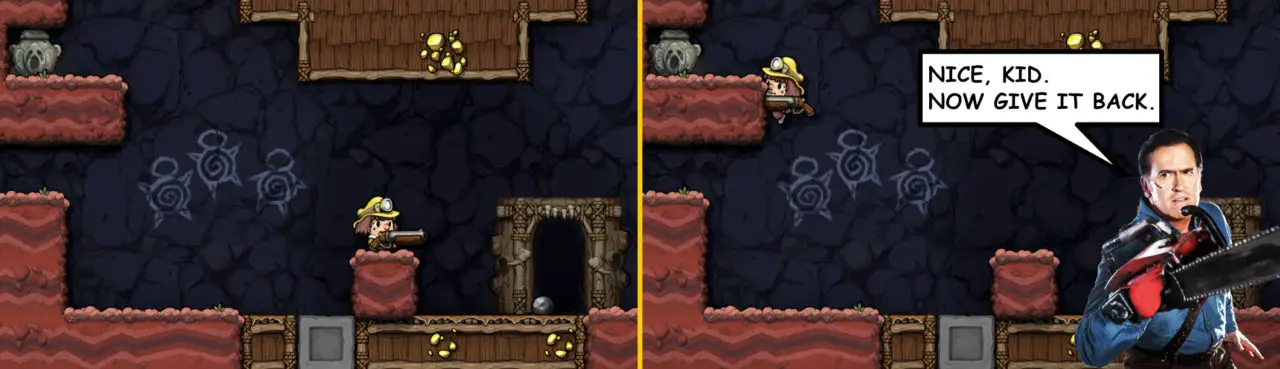
- The Dwelling will always spawn both a golden key and a room with a golden chest on either floor 1-2 ou 1-3. You can only open the chest with the key, so if you find one, either room or key, then the other is somewhere on the same floor, and you might need to use resources to access both.
- Opening the chest gives you the Udjat Eye, which allows you to see treasure embedded in the environment and will also help you access secret areas in either the Jungle or Volcanna.
- Dica: If you want to find the secret area in the Jungle, keep an eye on the eye.
Altar Andy
- Another thing you can come across is bloody altars with Kali standing behind them in the background.
- You can sacrifice anybody you can carry, by placing them on the altar. This includes cavemen, animais de estimação, lizards.. and maybe even yourself.
- These sacrifices earn favor from Kali and when you gain enough favor you’ll be rewarded an item like Climbing Gloves or Spring Shoes in return, BUT if you’re Cursed, any reward you earn will be a cure instead. This is the most common way to cure the Cursed status effect.
- Live sacrifices are better than dead ones, and if you sacrifice enough, you’ll get the Kapala, but what exactly does the Kapala do? Bem, I’m sure you’ll figure it out. Afinal, what else would you put in a cup-shaped out of a skull?
- Dica: cups are meant for drinking… and beer pong.
Isso é tudo o que estamos compartilhando hoje para isso Espeleologia 2 guia. Este guia foi originalmente criado e escrito por Ryuze. Caso não atualizemos este guia, você pode encontrar a atualização mais recente seguindo este link.