- Título: Piecewise
- Data de lançamento:
- Desenvolvedor:
- Editor:
Information about Piecewise is still incomplete. Por favor, ajude-nos a preencher os detalhes do jogo usando este formulário de contato.
With my experience of over 2,000 hours on Piecewise, I decided to write a series of guides to help new users understand and navigate the program. This first guide aims to provide a simple explanation of how to create your first bot and get it up and running. It specifically focuses on assisting users who may find the program’s interface and layout confusing.
Opening Piecewise
Congratulations on becoming a proud owner of Piecewise and showing enthusiasm to create and launch your own bot! Before we dive into the guide, take a moment to explore the diverse range of blocks available in Piecewise. Familiarize yourself with the program to make the most of this tutorial.
When you open Piecewise, a “Welcome to Piecewise” popup will greet you. By acknowledging this popup, you have already completed the first step towards getting your bot started. Although the popup offers various templates for exploration, this guide will concentrate on teaching you the basics of Piecewise, including block manipulation, dragging, and other valuable features.
Adding Blocks
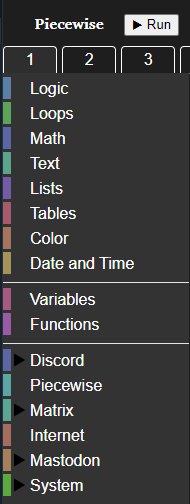
A fundamental aspect of using Piecewise is becoming comfortable with dragging blocks. Piecewise eliminates the need for excessive keyboard dependence. On the left side of your screen, you will find a sizable sidebar that houses your blocks. Clicking on any of the options will reveal the corresponding blocks that can be dragged. Simply hover your mouse over a block, clique, and drag it onto the canvas.
Deleting Blocks
If you accidentally add more blocks than necessary, não tema! The trash bin is here to help. To remove a block, drag it to the bottom right corner of your canvas, and the trash bin will take care of the rest. alternativamente, you can right-click on a block and select “Delete Block.” If multiple blocks are connected to the selected block, the option will be “Delete # Blocks.”
Prefer a simpler method? Too much movement and clicking? Just press the backspace or delete key, and the blocks on your canvas will vanish.
Moving Around
As you work, you might find yourself running out of space. Or do you? Navigating within Piecewise is as simple as dragging down on an empty area and moving your mouse. The canvas will expand and reshape itself as you place blocks. Your task is to organize the placement of your blocks while Piecewise takes care of the rest. If you need to zoom in or out of your canvas, you can do so by using the “+” e “-” buttons located at the bottom right corner. In case the canvas becomes overwhelming, the next section provides a simple solution.
Workspace Tabs
You may have noticed some workspace tabs at the top of your screen. (If you cannot see workspace tabs, ensure you are using Piecewise.) These tabs are designed to help you organize your blocks as you build your project. Similar to code, blocks can become messy and overwhelming. Utilizing these workspace tabs throughout your work allows you to isolate different functions of your project, aiding in maintaining organization. Each workspace tab acts independently, meaning variables and other components do not carry over between tabs. This allows you to reuse variable names without conflict. Por exemplo, a variable named “mesa” in one workspace tab will not interfere with a variable named “mesa” in another tab.

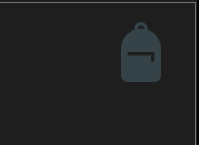
Mochila (Saving Blocks)
Located at the top right of your canvas, the backpack is a convenient tool within Piecewise that allows you to save blocks for future use. Para usá-lo, simply select the desired blocks and drag them into the backpack. The backpack will store your blocks indefinitely until you choose to delete them. This feature proves helpful for reusing sets of blocks across projects or when you consistently use a specific set of blocks. It’s an incredibly useful tool.
To delete blocks from your backpack, right-click on them and select “delete.”
Using blocks from the backpack does not remove them permanently.
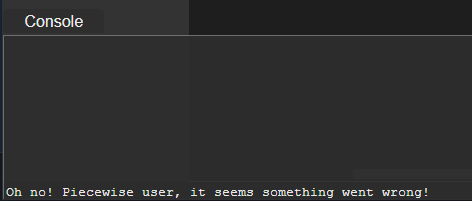
Console
The console can be found at the bottom of your canvas. Inicialmente, it will remain blank unless an error occurs with your bot. Errors can happen, and checking the console can provide insight into what went wrong, assisting you in troubleshooting. While Piecewise does a good job of preventing the connection of blocks that would cause errors, some blocks that can connect may still generate errors. When a console error occurs, the console button will display a number next to it, and if you are running your bot through Piecewise, the Piecewise taskbar icon will flash.
Hello World!
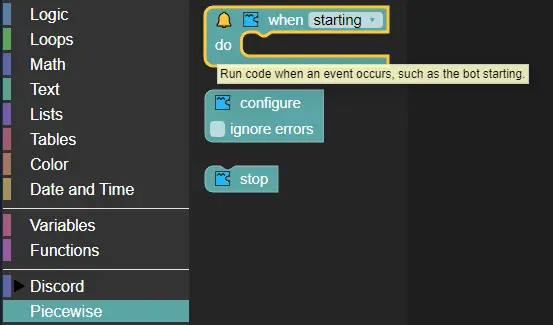
Agora, let’s take a step further and bring your creation to life. You have grasped the basics of Piecewise and navigation, so let’s print your first “Hello World!” to the console. It only requires two blocks. Vamos começar. Primeiro, open the Piecewise category in the toolbox (the left sidebar).
Próximo, drag the “when starting do” block onto the canvas.
Depois de fazer isso, localize o “print” block within the Text category of the toolbox and add it to the previous block.
Replace the default text “abc” com “Hello World!”, and you’re all set!
To see the result, simply click the “Correr” button at the top. If you haven’t saved your project, you will be prompted to do so. Parabéns! You have created your first Piecewise creation, or shall we say, bot?
De fato, it may not be a fully functional bot, but what matters is that you’ve accomplished something. You now possess a solid understanding of the basics of Piecewise and how to utilize its features.”

Isso é tudo o que estamos compartilhando hoje para isso Piecewise guia. Este guia foi originalmente criado e escrito por Kori. Caso não atualizemos este guia, você pode encontrar a atualização mais recente seguindo este link.