
This guide will walk you through the step-by-step process of how to properly setup a Microsoft Azure dedicated server for Palworld.
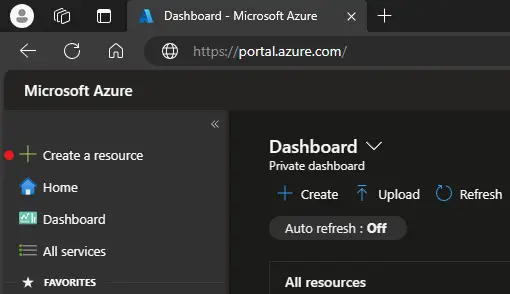
Creating an Azure VM
Para começar, we need to set up a brand-new server on Azure. This server will be a Microsoft Azure Virtual Machine, often called Azure VM. It will operate using an image of Windows Server 2022.
Begin by heading to Microsoft Azure. Log in using your Microsoft Account that has an Azure Subscription, e selecione “Create a resource.”
In the search box, enter Virtual Machine, search for it, e escolha “Create.”

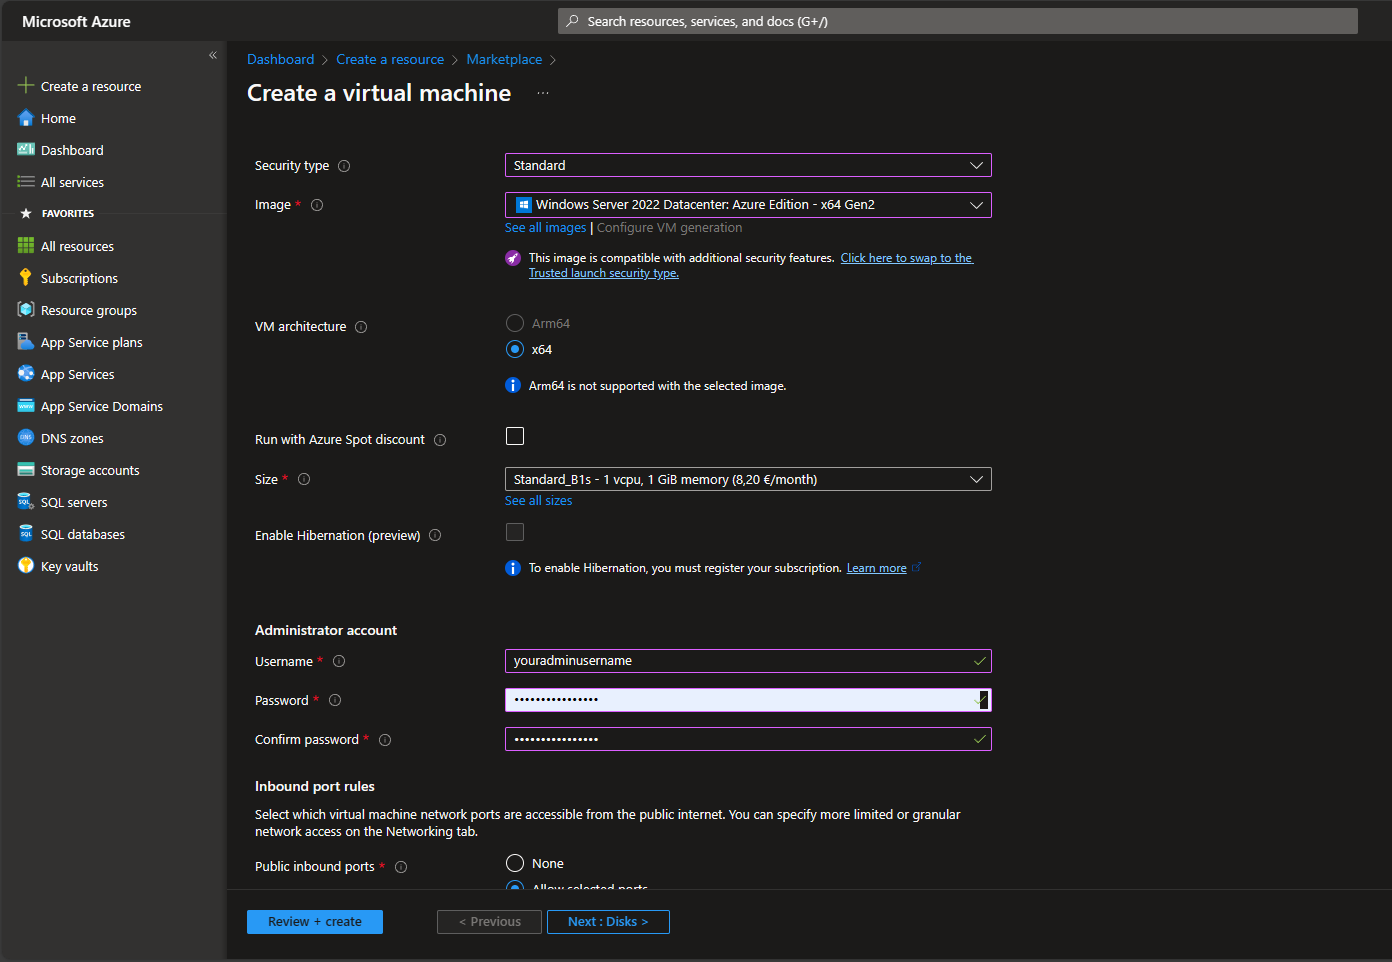
Agora, let’s set up the Azure Virtual Machine (Azure VM) by providing the necessary details according to the instructions below:
- Begin by choosing the subscription and creating a new resource group. Specify the virtual machine name.
- Selecione o região that is closest to your location. Pick an Availability Zone (1 AZ is sufficient), and choose the Security Type (Standard is acceptable).
- Para o imagem, you should find “Servidor Windows 2022 Datacenter: Azure Edition – x64 Gen2” na lista. Se não estiver visível, clique “See all images” and search for it.
- When it comes to selecting the tamanho, procurar “Standard_B1s” na lista. If not found, clique “See all sizes” and locate it. If you have a larger budget or don’t need your server to be running 24/7, consider a VM size with at least 8 GB de RAM. Keep in mind that you’ll only be billed for the hours when your Azure VM is not stopped.
- Clique no “Review + criar” button to proceed.


After clicking the “Review + criar” botão, you’ll encounter the Validation test results and the review page. Simply click on the “Criar” botão.
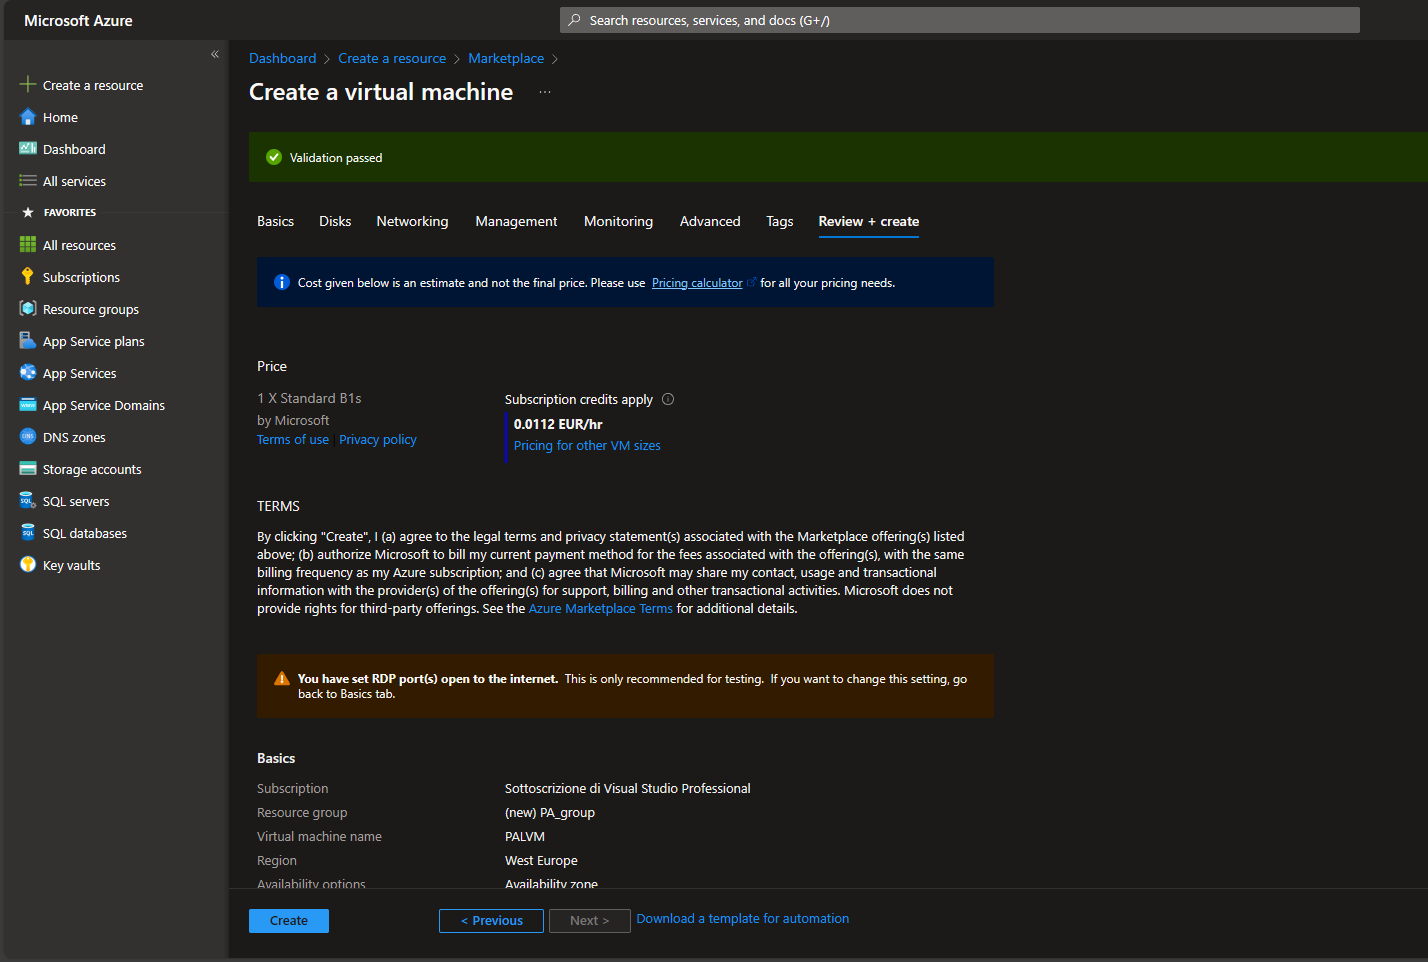
Uma vez que “Criar” button is clicked, patiently wait for a few minutes as the deployment process takes place.
Opening Ports 8211 of the VM
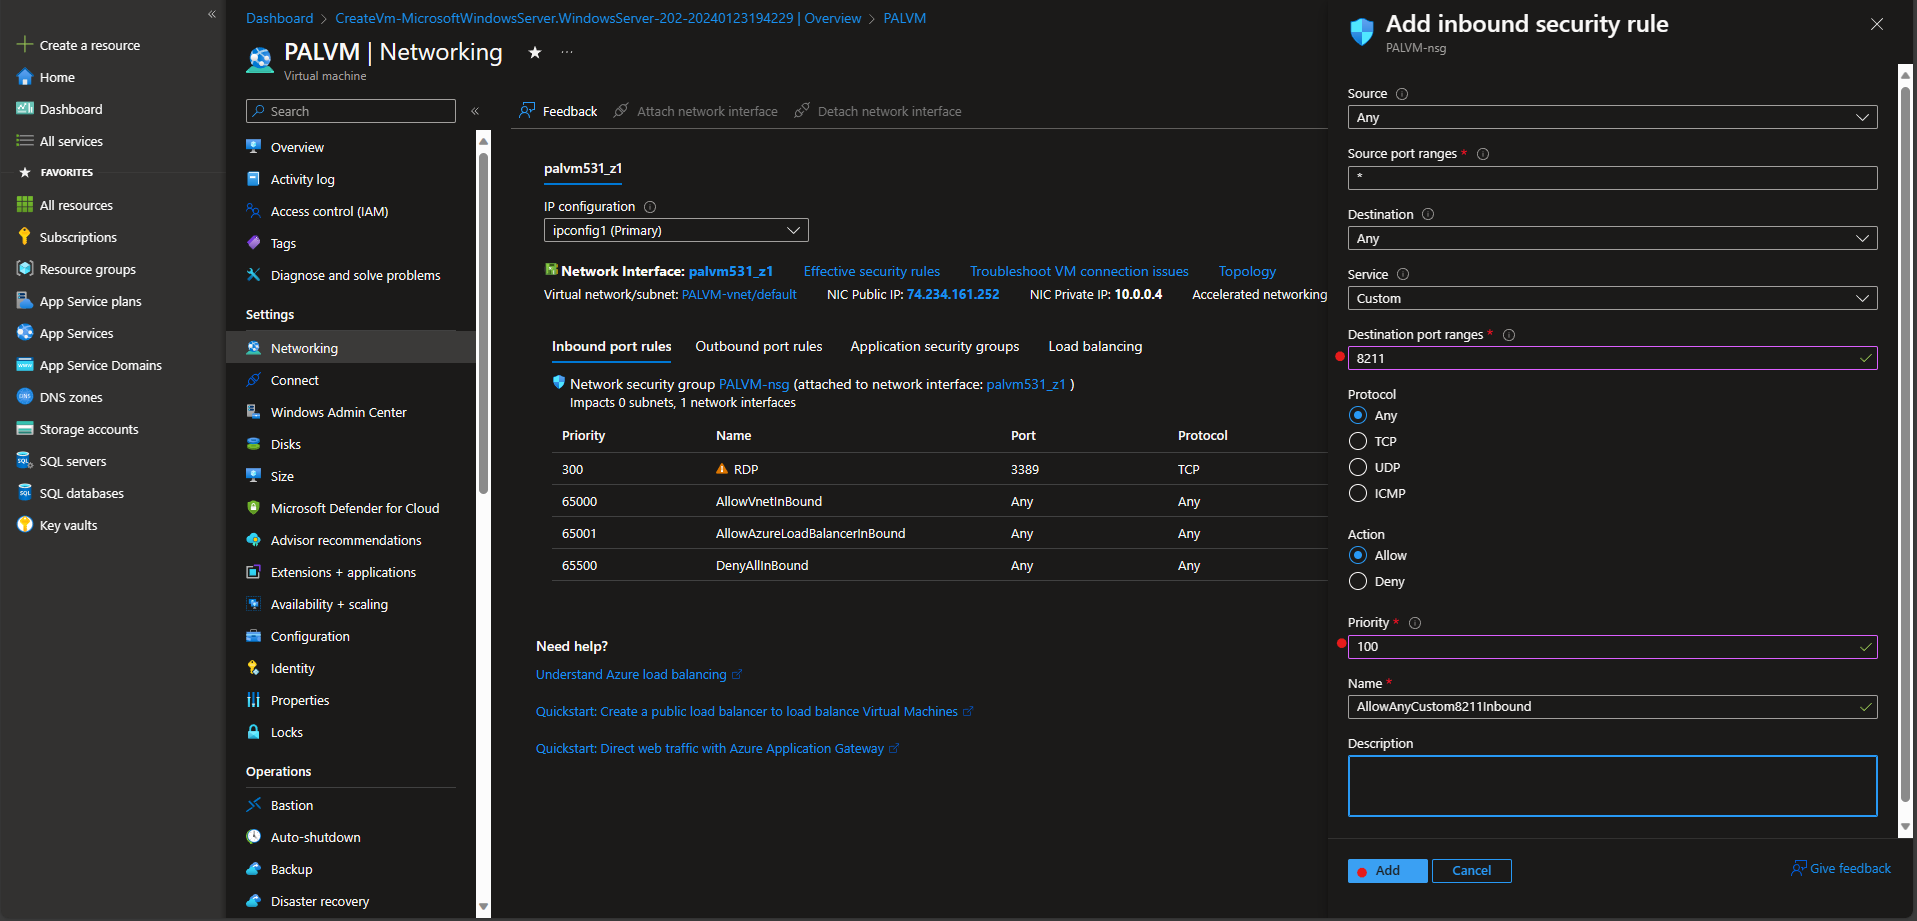
Proceed to your new VM page and navigate to “Networking.” Clique em “Add inbound port rule.”
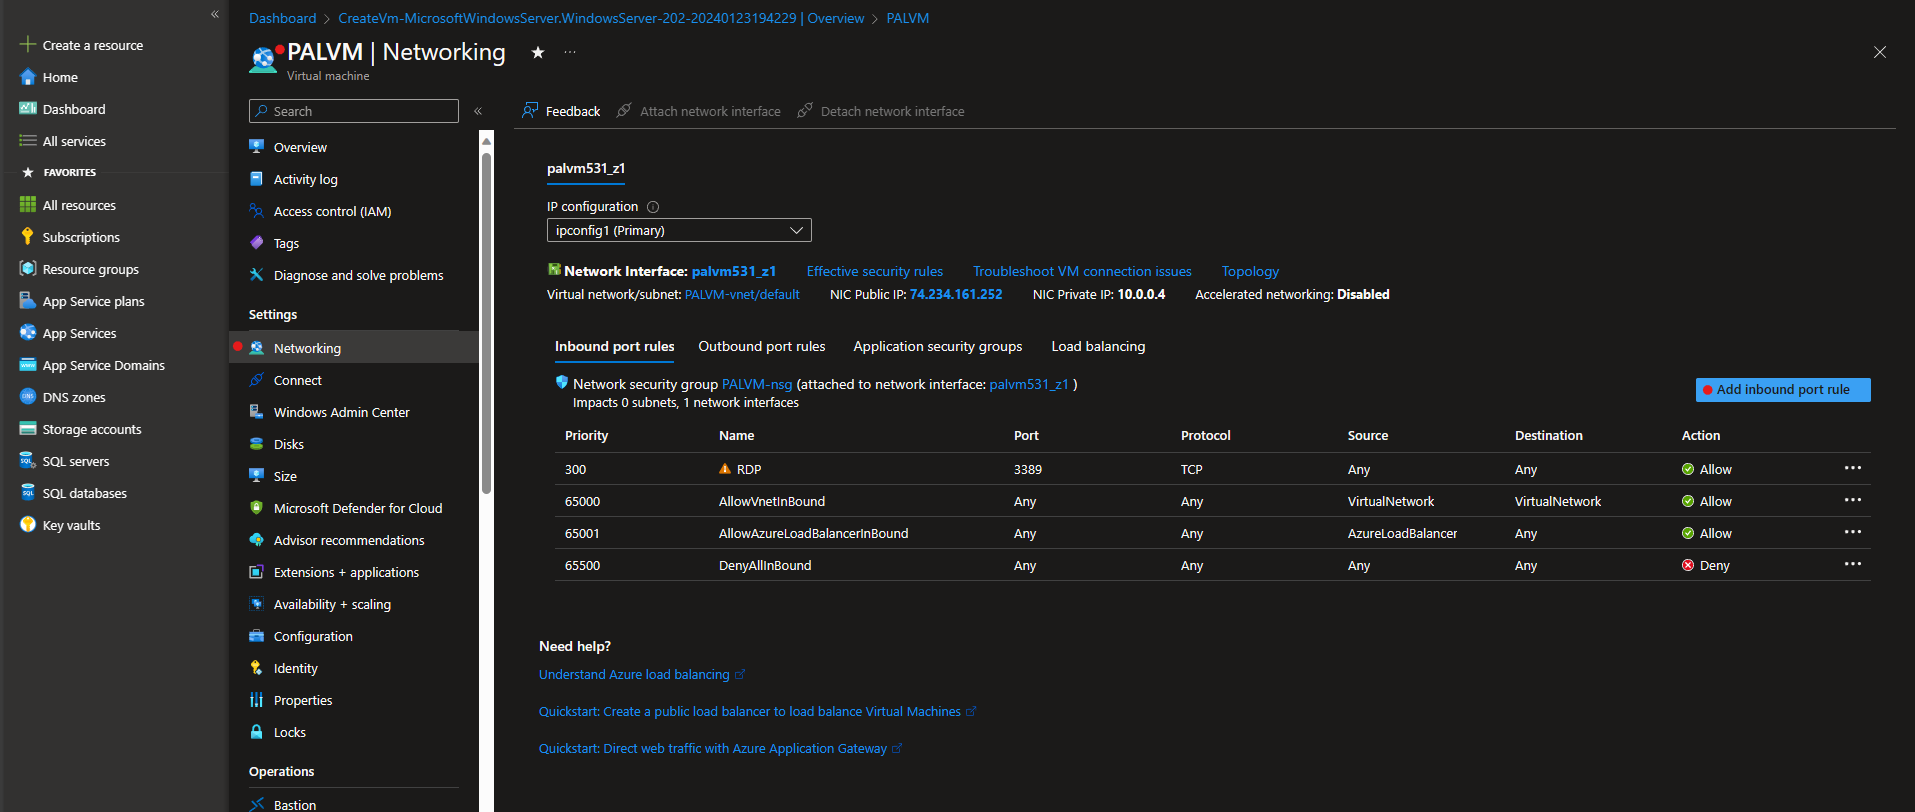
Open port 8211 with the following settings: Fonte – Qualquer, Source port ranges – *, Destino – Qualquer, Serviço – Personalizado, Destination port ranges – 8211, Protocol – Qualquer, Ação – Allow, Prioridade – 100, Nome – AllowAnyCustom8211Inbound.
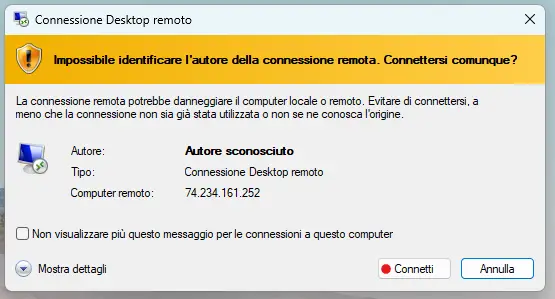
Clique “Adicionar” to implement the new rule for opening port 8211. Agora, you can connect to the VM. On the VM page, clique “Conectar,” então “Download RDP file.” Depois de baixar, open the file.
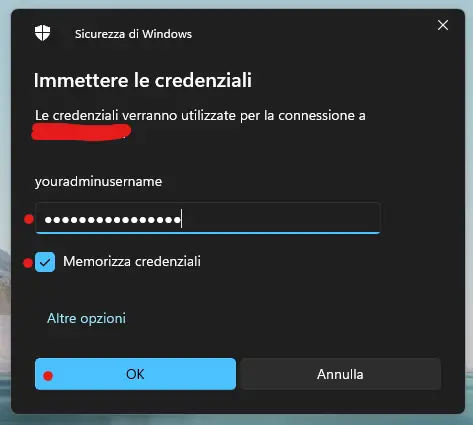
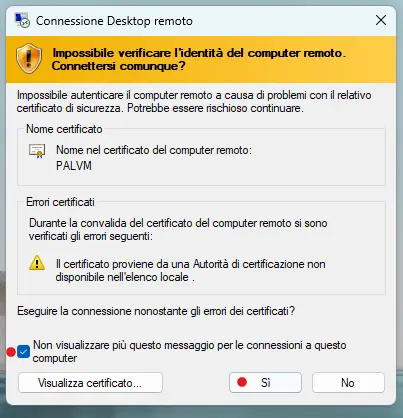
In the Windows dialog, input your username (if required) and the password you selected earlier. This action establishes the connection to the server.
Agora, you are inside the newly opened VM with Windows Server. Navegue até “Windows Firewall with Advanced Security tool” and add a new Inbound Rule for UDP Port 8211.

Install Software and Palserver Files
To run the Palworld dedicated server on your VM, you must download and install the following software:
- SteamCMD for Windows: Obtain and install SteamCMD for Windows on your VM. You can find the installation package on the official SteamCMD website.
- DirectX 9.0: Search for the DirectX 9.0 package online. Note that Microsoft websites may provide downloaders instead of the actual .exe. If the downloader doesn’t work, search for the real .exe from an alternative website.
- Visual C++ for x64: Baixe e instale C ++ visual for x64 on your VM. You can find the necessary package on the official Microsoft website or through other reliable sources.
Agora, let’s proceed to run your Palworld dedicated server (PalServer) on the VM. Siga estas etapas:
- Instale Steamcmd: Double-click on steamcmd.exe to initiate the installation.
- Open Command Prompt: In the same directory as steamcmd.exe, open a new Command Prompt (not PowerShell).
- Enter the following commands:
steamcmd +login anonymous +app_update 2394010 validate +quitcd .\steamapps\common\PalServerPalServer.exe
Executing these commands will ensure the PalServer is properly installed and ready to run on your VM.
Joining the Server
Open Palworld and go to the main menu. Selecione “Play Multiplayer.”
Enter the IP address of your Azure VM, seguido pela “:8211.” Então, clique no “Connection” botão.
In case you face some crashing issues while playing Palworld on your dedicated Azure server, Por favor, consulte o nosso Palworld troubleshooting guide.
Isso é tudo o que estamos compartilhando hoje para isso Palworld guia. Este guia foi originalmente criado e escrito por Falkons. Caso não atualizemos este guia, você pode encontrar a atualização mais recente seguindo este link.