
- Título: Mirror's Edge
- Data de lançamento:
- Desenvolvedor:
- Editor:
Information about Mirror's Edge is still incomplete. Por favor, ajude-nos a preencher os detalhes do jogo usando este formulário de contato.
This guide will help you set up the hidden map editor for Mirror’s Edge, so you can browse through the pre-built maps or even make your own!
Introdução
This tutorial will help you set up the built-in map editor for Mirror’s Edge. Mirror’s Edge was built on Unreal Engine 3 and the developers weren’t so sneaky and forgot to remove the ability to access the level editor. The files required are not present so we need to acquire them from elsewhere.
Observação, this guide applies to all versions of Mirror’s Edge, not just the Steam version. Embora, the file directories I show here are specific to Steam.
Getting Required Files
Para prosseguir, we’ll need to obtain two folders that contain the required files to boot up the editor. To get these files, you’ll need a copy of Unreal Tournament 3, ou, you can find them on the internet in places such as the Mirror’s Edge Archive.
Especificamente, we’re looking for the folders wxRC and wxRes. With these two folders acquired, head to your Mirror’s Edge game directory. Para mim, and probably you, também, está localizado em
C:\Arquivos de programas (x86)\Steam\steamapps\common\mirrors edge\
then head into the Binaries folder.
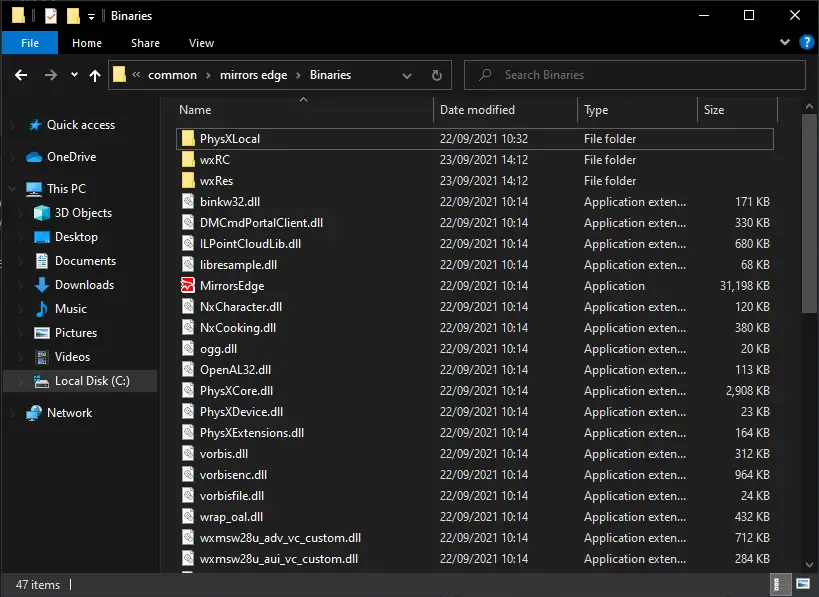
It’s here where you need to place the wxRC and wxRes files, como mostrado acima.
Preparing Editor
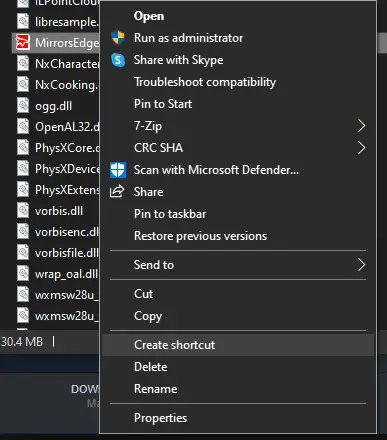
With the required files placed in the binaries folder, we now need to create a shortcut to the MirrorsEdge.exe file. We create a shortcut since that allows us to add some launch parameters that tell Mirror’s Edge to launch the editor. Right-click on the MirrorsEdge.exe and press ‘Create Shortcut’ como mostrado abaixo.
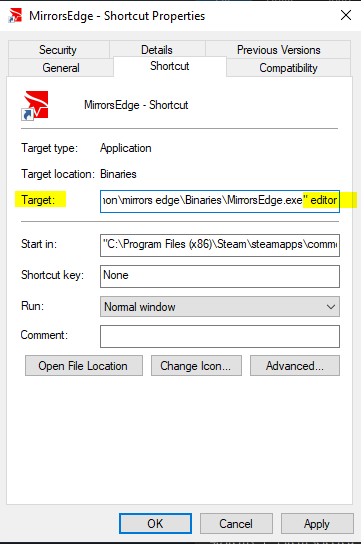
Então, with the new shortcut, right click on that, and then select Properties. This will open a new window. We need to modify the ‘Target’ entry. Add a space between the executable path, and then type in ‘editor’, all lowercase, and no more spaces.
Então, you can move this shortcut to wherever you want. Pessoalmente, I place it on the desktop, and I rename it to Mirror’s Edge editor. Mas, you can keep it in the Binaries folder if you like.
Ainda não terminamos, no entanto. There is still a bit more work that needs to be done.
Configurar
Because we have ripped the editor files from UT3, they are not exactly designed to work with Mirror’s Edge. Não tema, no entanto. We can still make maps as good as, if not better than the in-game maps, but this takes a bit of a work-around.
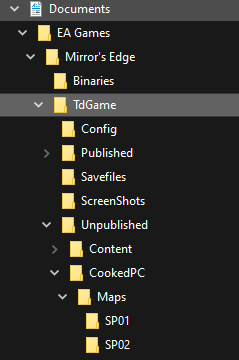
The first thing you need to do is go to your Documents folder and back up the Mirror’s Edge folder inside EA Games. It’s unlikely something will go wrong, but it’s better to be safe than sorry. Venture into the Mirror’s Edge folder, and then into TdGame.
Some interesting information about this folder. If you have ever downloaded mods for Mirror’s Edge and been told to place them into a ‘Published’ folder into your Documents, this is because the game reads any files from the Published folder instead of the main game, if the two files have the same name. Por exemplo, if you have a map called ‘Edge_p’ inside the Published folder, Mirror’s Edge will load the copy inside the Published folder instead of the standard Prologue. It means we don’t have to modify anything inside our game folder.
The editor works in the same way, mas em vez disso, it reads from an ‘Unpublished’ pasta. Go ahead and create an ‘Unpublished’ folder inside the TdGame directory. This is crucial as failure to do so will mean you’ll overwrite files inside the main game folder. Inside the ‘Unpublished’ pasta, create a folder called ‘CookedPC’, and inside that, create another folder titled ‘Maps’. If you look at the TdGame inside the main game folder, you’ll notice they follow the same line of folders.
There is another problem though. The editor will only load maps that follow the same naming convention as the main game. Por que? Não sei. It’s just another fault with using foreign editor files in Mirror’s Edge. This means you’ll need to follow the standard file tree as the same game when making maps. The community has done this for us, no entanto. Esse article tells us all the folder names and map names. What I personally do, is I always create my maps as ‘Edge_p’. The prologue is boring, nobody needs it.
Inside the ‘Maps’ pasta, create another folder named ‘SP01’. You’ll need to always save your map as ‘Edge_p.me1’, and NOT as a umap file. Mirror’s Edge ONLY READS .me1 files.
First Launch
When you first launch the editor, you’ll see three windows. Um, an error, dois, a Tip of the Day, and three, a content browser.
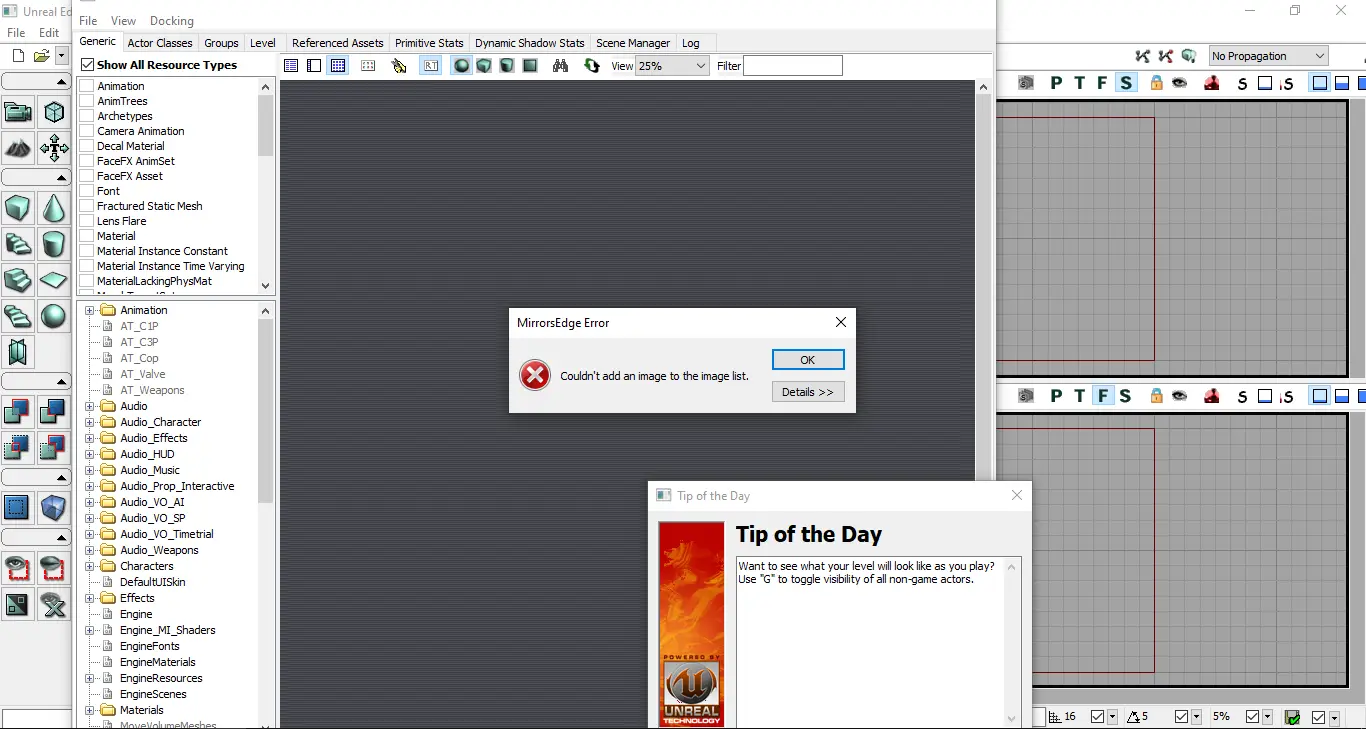
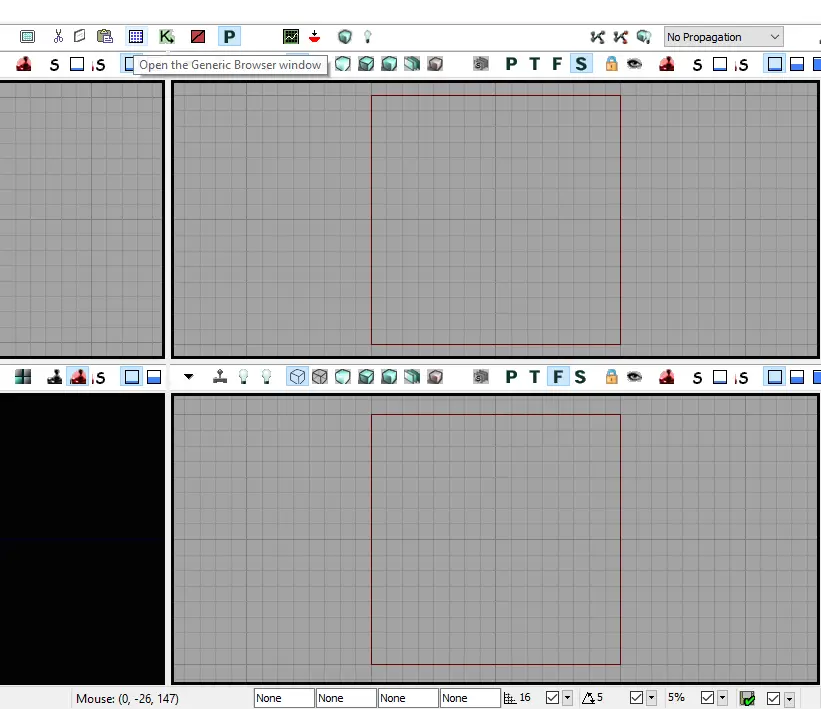
We can dismiss the error since it doesn’t affect anything. The tip never actually changes, and the content browser is not important right now. Mas, to access it again, press the button shown below (once it’s closed).
Agora, click File and then Open. Se você fez tudo certo, the Editor will normally open the ‘Unpublished’ folder inside your Mirror’s Edge document directory. This means you’re on the right track. If you want to get started making levels now, then great, you’re done!
Para começar, press ‘New’ and then press OK. When the Editor prompts you to choose between Additive and Subtractive, you can leave it on Additive. Additive works better for Mirror’s Edge (na minha opinião), but the difference is that you’ll be using the CSG: Add or CSG: Subtract in the lower-left corner for Additive or Subtractive. Agora, this is not a UDK tutorial, so it’s not my place to speak on that just yet.
Your journey begins now. Google ‘udk tutorials’ or ‘mirror’s edge editor tutorials’ for more help. O Mirror’s Edge Modding wiki is a great place to get started.
Why are you still here? Oh, you want to browse the game’s pre-built levels. Tudo bem, continue ahead.
Checking Built-In Maps (and other QOL Stuff)
Então, you want to browse the in-game maps and not do any work. It’s alright. It’s pretty fun.
What you need to do is go to the Maps folder inside the (TdGame folder inside the CookedPC folder inside the) installation directory. Então, se você é como eu, that’s at
C:\Arquivos de programas (x86)\Steam\steamapps\common\mirrors edge\TdGame\CookedPC\Maps
If you read the tutorial in full, you’ll know that I linked to the article on map names. Ou, you can find it aqui. Create a folder inside your Unpublished directory called ‘SPxx’, with the xx replacing the number of the level you want to browse. Por exemplo, browsing any of the Shard levels would be SP09. Então, head to the SPxx folder inside the installation directory, and copy the map into your Unpublished copy.
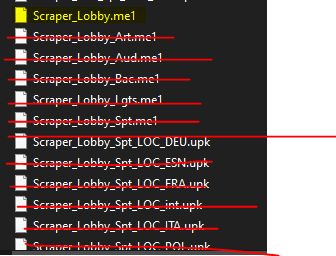
It can be tricky to differentiate which one to browse when you have six or seven copies of one segment, with things like ‘Bag’ or localisations. You want to copy either the basic one (por exemplo. Scraper_p or Mall_p) or the one which has NO ADDITIONAL information, like Scraper_Lobby.me1. In terms of Scraper_Lobby.me1, the ‘Scraper’ is the LevelName, while the ‘Lobby’ is the SegmentName. Using this logic, you only want .me1 files with LevelName_SegmentName.me1. Do not copy maps that have, por exemplo, _Lgts.me1
Basicamente, just use a bit of common sense. On lower-end machines, you can adjust the quality in editor and in-game by clicking ‘View’ and then ‘Detail Mode’.
Isso é tudo o que estamos compartilhando hoje para isso Mirror's Edge guia. Este guia foi originalmente criado e escrito por Arte. Caso não atualizemos este guia, você pode encontrar a atualização mais recente seguindo este link.