
Beginning a fresh game in Love & Sexo: Second Base might seem a bit overwhelming, especially if you’re someone who likes things to be just right or wants to maximize everything. This guide aims to give you all the essential information for starting the game smoothly. Geralmente, starting a game can be tricky for many players who want to avoid wasting time or losing stats. The goal here is to guide you through the initial choices that will suit you best.
Começando
This guide assumes that you’re playing on Normal difficulty with Randomness turned off. Easy difficulty amplifies all non-character exclusive stat changes (like LP, CP, etc., but not Kylie’s YP or Morgan’s MP). It also boosts needs gain, making actions like drinking coffee restore more energy. Adicionalmente, Easy mode eases financial concerns by increasing earnings from work and reducing weekly rent costs. Por outro lado, Difficult mode works oppositely, adding extra time to playthroughs. In Difficult mode, achieving date-specific milestones becomes challenging, often causing you to miss out on events due to struggling to raise a girl’s LP in time.
Por exemplo, Bree’s second event, which raises her maximum LP from 20 para 30, needs to be done in the Arcade on a Saturday afternoon. Difficult mode makes it exceedingly hard, if not impossible, para chegar ao 20 LP threshold by the first Saturday. This holds true for various events like Harmony’s bible study. Ainda, the advantage is a reduced likelihood of multiple character events occurring simultaneously, preventing unexpected chain reactions where Mike goes through events with different girls unintentionally. Lembrar, as with everything else in this guide, a escolha é sua.
The randomness setting influences two aspects based on its configuration. If set to Schedule, all the girls in the game have an equal chance of being in various alternate locations during each hour of the day. If set to Full, this effect remains, and an element of chance is introduced to all of Mike’s need gains. Describing it through text can be challenging, but comparing screenshots should help illustrate.
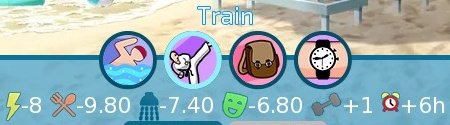
With randomness set to Off, taking a bath on Normal results in this:

No entanto, on Full, you get a different outcome:

This introduces an element of unpredictability to the game, making it enjoyable for casual play by adding variety. If you have specific objectives like achievements, speedruns, or any goals that might be affected by these randomness elements, it’s recommended to set it to Off. There isn’t a randomness setting that keeps the girls’ schedules fixed while also introducing randomness to Mike’s needs gain; the options are neither, schedule, ou ambos.
It’s important to note that using the in-game cheats is generally not recommended. Activating them will prevent you from earning achievements, unlocking the gallery, or using the save file for new game plus. While cheats can be useful for testing and casual exploration, they are not necessary for regular gameplay.
Por último, be aware that spoilers will be present in this guide. Presumivelmente, if you’re reading a guide, spoilers might not be a concern, but it’s worth mentioning just in case.
Name and Date
Once you click “Começar” on the main menu, you’ll be prompted to choose a character. Opt for Mike, as character creation differs here, and BreeMC currently has less content.
As for your first and last name, they’re flexible, allowing you to choose whatever you like. The game even accepts symbols, adding a touch of humor potential; por exemplo, characters might formally address you as “Senhor. :P.”
Próximo, you’ll be asked to enter your birthday by selecting both the day and season. Clique “Feito” to confirm. If you don’t make selections, the game sets them randomly. The game follows the real-life cycle of spring, summer, autumn, e inverno, with each season lasting exactly 31 dias, fornecendo 124 days in an in-game year.
Pessoalmente, starting on Spring 1 or a bit earlier, like Winter 15, é recomendado. This timing allows you to gain momentum, work towards promotions, and build up savings. alternativamente, you can utilize the pool location for sunbathing to boost Charm right away, along with partying or acquiring other helpful boons before delving into character storylines.
The First Question
You start this short section on Monday at 10 sou, com 10 in all four of your needs, 0 on all three of your stats, e $500. Bree will be your first interaction, asking, “Do you like sports?”
Your potential responses are displayed in the table below. I will evaluate them on a scale of one to three hearts. Keep in mind that these ratings are quite subjective, and if you have a different preference, feel free to choose accordingly. The choices provided are my personal favorites, refined through multiple restarts and hours spent understanding the game mechanics to enhance the beginning of each new game.
| Habilidade | Descrição | Available in-game? | Avaliação |
|---|---|---|---|
| Artes marciais | Cuts the Fitness needed in half for certain challenges, essential for surviving an event in Cassidy’s história. | Sim | ❤︎❤︎❤︎ |
| Golfe | Sem efeito | Não | ❤︎♡♡ |
| Discreet | Lowers the risk of getting caught spying on roommates. | Não | ❤︎♡♡ |
| Culinária | Doubles the points gained from sharing meals with roommates at home. | Sim | ❤︎❤︎♡ |
| Dança | Alters the conversation in one of Palla’s events. | Sim | ❤︎♡♡ |
| Tiroteio | Prevents you from losing KP in one of Aletta’s events and slightly boosts LP gain in one of Camila’s events. | Não | ❤︎♡♡ |
| Não, Eu não’t | Doesn’t grant a specific skill but enhances all your stats. | N / D | ❤︎❤︎♡ |
I highly suggest choosing Martial Arts at this point. If you skip it, the alternative method involves Mike heading to the beach during Summer, requiring an investment of $100 per lesson, $200 for a swimsuit, and an additional $500 for a bicycle to access the beach. Learning the skill this way demands Mike to deplete almost all of his needs across five separate days, with each training session increasing the skill by 20%. It often necessitates a complete overhaul of your routine due to its demanding nature. Adicionalmente, using the bicycle consumes four hours for a round trip to the beach, unless you have the regular car, which you can acquire by choosing Cars in question #2, allowing you to trade the time loss for another more manageable drawback, but I’ll elaborate on that later.
Agora, assuming you’re playing on Normal difficulty and opting to learn Martial Arts, here’s what it takes for a single training session:
For the Difficult setting, felizmente, you don’t have to meet these extensive needs; it will simply reduce your needs by the following amount:

Note that in my setup, randomness is turned off, leading to minimal Fitness gain, prompting the game to resort to a coin flip for earning a single point of it.
Perform this process five times, then have the final encounter with The Master at the beach to officially acquire Martial Arts. Felizmente, this sixth meeting is less taxing on your needs compared to the intensive five training sessions. The dialogue during events is entertaining, providing a unique experience. No entanto, for a practical playthrough, Martial Arts is the most advantageous choice, allowing you to bypass this intricate routine, especially considering it can only be learned in Summer.
Regarding other options, Golf doesn’t offer any significant benefits, so I don’t recommend choosing it. Discreet is rarely useful unless you frequently spy on your roommates after Minami moves in. Shooting plays a crucial role in one of Aletta’s events, preventing a significant KP drop. Sem isso, maintaining her submission becomes challenging, but you can recover after reaching an early point in her series of events and begin intimate actions in the office. It also provides a slight boost to Camila’s LP, though it’s minimal and lacks other in-game advantages. Dancing has limited utility, introducing dialogue changes in one event in Palla’s storyline and can be learned immediately after that event.
Culinária, available through a skill book in-game, earns its ranking due to its frequent effectiveness, making it the second-best choice. No entanto, Martial Arts remains the top pick, as Cooking can be easily learned with the skill book available on any Wednesday. It may be beneficial for players on Difficult mode who want to gain 1 LP from eating with roommates in the kitchen instead of the usual half LP.
Por último, escolhendo “Não, Eu não” provides an even distribution of stats for Mike at the beginning of the game. Geral, if you don’t mind starting without Martial Arts or Cooking, this option serves as a versatile backup choice.
The Second Question
“Do you have a hobby to relax with?”
| Habilidade | Descrição | Learnable in-game? | Avaliação |
|---|---|---|---|
| Comida | Raises your maximum Hunger to 15, up from the default 10. | Não | ❤︎❤︎♡ |
| Video Games | Enables you to earn KP by playing video games with Bree and is essential to initiate the Gamer Bree story path. | Sim | ❤︎❤︎♡ |
| Fitness | Doesn’t grant a specific skill, only a boost to your initial Fitness stat. | N / D | ❤︎♡♡ |
| Partying | Similar to the above point but with Charm instead. | N / D | ❤︎♡♡ |
| Working | Accelerates Mike’s work promotions, adicionando +5 to the maximum number of promotions and another 5 if Mike reaches the CEO position. | Não | ❤︎♡♡ |
| Carros | Commence the game with the Sports Car, but with an additional +$200 of weekly debt on top of the regular weekly rent. | N / D | ❤︎❤︎❤︎ |
| Reading | Reduces the in-game time passage when using a book by half. | Não | ❤︎❤︎♡ |
| Guitarra | Required to kick off the Band Harem. | Sim | ❤︎♡♡ |
| Not really | Doesn’t provide a skill, but enhances all stats. | N / D | ❤︎♡♡ |
There are several good choices here, but my clear favorite is Cars. The Sports Car stands out as the most expensive item in the game, costing a hefty $20,000 if purchased conventionally. Having it from the start is an enormous advantage, eliminating the need for a bicycle. The downside to picking Cars only affects your starting cash before your income surpasses the increased weekly debt, which gains momentum quickly. In New Game Plus, where items are wiped but money remains, it’s more prudent to buy the sports car normally for $20,000, a sum you likely accumulate by the end of any new game. Without Cars, you may end up buying a bicycle at some point, and with only a bicycle, going to or coming back from the beach or forest consumes two in-game hours.
Geral, the weekly debt is entirely manageable. Even if you can’t pay it when due, you’ll only incur an LP hit with Bree and Sasha, which can be easily compensated for. The debt stops once you’ve paid a total of $10,000 through it, tirando 50 in-game weeks, resulting in obtaining the most expensive item in the game at half the regular cost, spread thinly enough to remain easily manageable. Notavelmente, if you plan to enter New Game Plus, your items will be wiped, but money, habilidades, and stats carry over. If you’ve saved up enough, you can choose something other than Cars initially and buy the sports car normally on your second cycle. Having the sports car is also necessary to raise Kleio’s KP cap to 100, a minor benefit amid the myriad advantages of choosing this trait.
Selecting Food boosts your maximum Hunger from 10 para 15, more useful than its simplicity might suggest. On Normal, a meal in your kitchen restores 9.2 Fome, meaning unless you bring it down to zero, locking out all activities except eating, you’re wasting a small portion of that Hunger gain. Hunger is the only need not gradually boosted to a cap of 15 by working on Mike’s stats; it can only be instantly and permanently raised by picking Food here or in New Game Plus. The added flexibility that Food provides, potentially allowing you to work three times a day without eating again until 20:00, is quite beneficial. On Difficult, where eating increases Hunger by 4.6, Food becomes even handier, allowing you to space out four to six meals a day to keep your Hunger comfortably in check.
Video Games was my initial pick when I was new to the game, but I soon realized it’s generally not the best choice. While having the Video Games skill is necessary to follow the Gamer Bree path instead of defaulting to the Maid Bree path, it’s easy to learn by purchasing the Z-box and playing it 100 times yourself. No entanto, the Gamer Bree path locks her maximum KP at 50, preventing you from collaring her, as her KP must be 75 or higher to accept it. Adicionalmente, Gamer Bree’s halved KP cap only allows you to form the Home Harem with her and prevents you from ever collaring her. If you want to pursue the Gamer Bree path quickly, it’s a viable choice, but buying the Z-box yourself and using it before Bree’s LP hits 40 is a more efficient approach, triggering an event that splits her potential story paths.
Fitness and Partying, offering a stat boost to Mike without providing any skills, aren’t the most favorable choices, so it’s advisable to pick something else.
While Working may seem appealing, money becomes easily sustainable once essential initial expenses are covered. Even without Lucky, weekly expenses limit your starting purchases, but by the time you reach the increased promotions cap, money shouldn’t be a concern. The accelerated promotions speed introduces Lavish, Cassidy, and Alexis earlier in the game, but focusing on boosting stats allows you to breeze through other events more efficiently. Charm and Knowledge influence your earnings and success with the “work hard -> work fast” opção, making them more valuable choices.
Reading is useful for saving time with various books in the game, especially rotating skill books in the bookstore. No entanto, its usefulness diminishes once you’ve gone through all the skill books. Sem isso, and especially without Lucky for a starting cash boost, it’s better to pick up the necessary skill books first and read them when you have some free time. Reading provides the single largest stat boost in the opening sequence, concessão 8, 15, ou 30 Knowledge based on your chosen difficulty, along with a slight immediate boost to Bree’s LP.
Choosing Guitar isn’t ideal since its skill book is available on day two, allowing you to learn it well before it becomes relevant at Sasha’s branching path during her 30 LP event.
Outra vez, there’s an option to forgo picking any skill and instead gain a stat boost across the board, a choice I strongly discourage.
The Third Question
“Can you tell us something bad or shameful about you?”
| Habilidade | Descrição | ||
|---|---|---|---|
| Não, nada… | No drawbacks, but you won’t receive the fourth question, preventing you from choosing a third positive skill. | N / D | ❤︎♡♡ |
| I am unlucky | Lowers your chances of winning the lottery at the pub and makes it harder to encounter Emma. | Não | ❤︎♡♡ |
| I have some big debt | Requires a weekly payment of $200 para 50 in-game weeks until a total of $10,000 has been paid off. | N / D | ❤︎❤︎♡ |
| Animals hate me | Raises the likelihood of Mike being attacked by animals. | N / D | ❤︎❤︎♡ |
| I have a small penis | Decreases the chance of pregnancy, and intimate interactions with most girls lead to a significant increase in DP. | Sim | ❤︎❤︎❤︎ |
| I am prone to erectile problems | Slows down Mike’s sexual stamina recharge considerably. | N / D | ❤︎♡♡ |
Outra vez, the option to pick nothing is available, but this time it will cost you the chance to choose a third positive perk from another unique set. If there’s ever a time to avoid skipping a choice, it’s now.
Unlucky is undeniably the least desirable choice here. Unlocking Emma requires increased luck, and having the Unlucky trait means you’ll need both luck boosts available in the game – obtaining Lavish’s lucky panties from her storyline and using a lucky clover found by searching the park early in the morning, lasting only the remainder of the day. It also significantly reduces your chances of winning the pub lottery.
Debt burdens you with the same $200 weekly in-game payment until $10,000 is paid off, akin to picking Cars. This downside is manageable, especially if you didn’t choose Cars, don’t mind starting without a high libido, and want a positive option from question four.
For the last two choices related to Mike’s intimate anatomy, small penis is the winner for me. It’s the least damaging negative trait overall, even offering the upside of reducing the threshold for Emma’s various sex scenes. The penis size can be modified using smaller/bigger staff pills available from the drug store for $5,000 cada, allowing you to eventually avoid the DP hit from below-average proportions.
The last option is low libido, causing Mike’s sexual stamina to recover more slowly. This trait can be challenging, potentially preventing you from engaging in intimate activities even after a significant time has passed. While the blue pill from the drug store instantly restores stamina, it leaves a permanent invisible debuff to natural recovery speed. Relying on frequent intimate interactions and using sexperience books from the bookstore on Thursdays is the main way to counteract low libido’s effects if you choose it.
The Fourth Question
“Do anything of note, or is corporate lackey all there is to you?”
| Habilidade | Descrição | Obtainable in-game? | Avaliação |
|---|---|---|---|
| I won a marathon | No specific skill, but boosts Fitness. | N / D | ❤︎♡♡ |
| I am a people person | No particular skill, but enhances Charm. | N / D | ❤︎♡♡ |
| I won an eating contest | Decreases natural Hunger loss by 25%. | Não | ❤︎❤︎♡ |
| I am pretty lucky | Improves your odds of winning the lottery and aids in unlocking Emma. | Yes* | ❤︎❤︎❤︎ |
| I was the best in my class | No specific skill, but enhances Knowledge. | N / D | ❤︎♡♡ |
| Eu não’t sleep | Lowers the number of hours Mike needs to sleep to regain Energy by 1. | Não | ❤︎❤︎♡ |
| I am hung | Raises the chance of pregnancy, and intimate interactions with most girls lead to a KP gain. | Sim | ❤︎♡♡ |
| I have a very high libido | Speeds up Mike’s sexual stamina recharge considerably. | Não | ❤︎♡♡ |
* Lucky can be obtained during regular gameplay by earning Lavish’s lucky panties through a specific event. Para acionar este evento, Lavish’s LP and KP must be at least 50, the date should be either Mike’s birthday or Christmas, and you should have already received Lavish’s tie. Once you complete this event, você receberá um +1 boost to your luck, which remains in effect until the next new game cycle.
My preferred choice here, and my single favorite starting trait in the entire game, is Lucky due to three effects in ascending order of importance. Primeiramente, it allows you to unlock Emma, which would otherwise require obtaining Lavish’s lucky panties or, if Unlucky was chosen initially, using a four-leaf clover found by searching the park in the early hours of the morning (though temporary). Em segundo lugar, it increases your chances of winning the pub lottery, providing a helpful boost if you ever urgently need a potential maximum of $10,000. Mais importante ainda, you start the game with an additional $2,500, granting significant financial freedom from the start. Choosing Lucky enables you to purchase the luxury bed, the best items in the clothing shop, one copy of each daily book from the bookstore, and still have money for nightclub visits to pump Charm or Knowledge. Even if Cars or debt was chosen, there’s little risk of running out of money with Lucky, except for specific situations like using the three stat machines at the electronics store or encountering events causing a loss of money.
The slowed-down Hunger drain from choosing the eating contest isn’t bad, but if easier Hunger management is desired, picking Food allows it to reach 15 along with other needs once stats are maxed, providing a nice even fifteen across the board.
“Eu não’t sleep” is a decent runner-up. It reduces the amount of sleep Mike needs by one hour. Normalmente, there is a warm-up period requiring Mike to sleep for two hours before each subsequent hour of sleep provides 1 Energia. The luxury bed reduces this warm-up period to one hour, and when stacked with “Eu não’t sleep,” it eliminates the warm-up completely, allowing Mike to restore 1 Energy for each hour of sleep. While it saves time in the long term, the luxury bed already reduces the warm-up period, and with increasing Fitness, you have flexibility in when and how long to sleep.
Finalmente, high libido isn’t a favorable choice because its impact on Mike’s stamina recharge speed can be replicated simply by accumulating sexperience, which is easy enough without picking this, though it might be useful on Easy difficulty, where all non-character unique stat gains are doubled, leading to more frequent events, many of which involve sex.
My Preferred Choices
At the start of a new game, my typical choices are as follows:
- Artes marciais
- Carros
- Small penis
- Sortudo
Helping Sasha Move In
Once you’ve made all your initial choices, you’ll be thrust directly into a brief event with Sasha where you’ll lend her a hand moving in. In this event, you’ll encounter two decision points, with additional options available based on your current stats. Any undesirable outcomes here can be compensated for later.
| Opção | Fitness requirement | Stat Change |
|---|---|---|
| Invite her in | 0 | 0 |
| Ajude -a | 0 | 3 LP (Fácil)/2 LP (Normal)/1 LP (Difficult) |
| Take the boxes from her | 5 | 3 LP (Fácil)/2 LP (Normal)/1 LP (Difficult) |
| Go grab more boxes outside | 0 | 2 LP (Fácil)/1 LP (Normal)/1 LP (Difficult) |
Interessantemente, ambos “Ajude -a” e “Take the boxes from her” have positive effects, but only the latter has a stat requirement.
| Opção | Charm requirement | Stat Change |
|---|---|---|
| Be awkward | 0 | DP gain (2 Easy/5 Normal/8 Difficult) |
| Rir | 4 | Nenhum |
| Piada | 8 | LP gain (2 Easy/1 Normal/1 Difficult) |
No meu caso, the choices I made resulted in 0 Charme, 10 Fitness, e 0 Knowledge on Normal difficulty. Consequentemente, I consistently experience a small DP gain at this point, which tends to delay certain events like Sasha’s b0objob in my usual preferred progression. No entanto, considering all factors, this remains my overall preferred starting approach in most circumstances when playing Amor & Sexo: Segunda base.
The End of the Beginning
The game officially begins at 11 am on a Monday, and your chosen traits and stats are reflected. It’s advisable to purchase the luxury bed on the first day and set your alarm for 6 sou. This allows you to take a shower right away, have a meal at 7, and then plan your activities at 8. In the long term, it’s recommended to only buy skill books that are needed early, such as the guitar skill book for the Band Harem, and sexperience books, as acquiring them early increases their usefulness. Geralmente, it’s not recommended to buy the three stat machines available in the electronics store, except for the charm machine if you received Lucky’s starting cash boost and have already purchased the essentials.
Regarding stats, prioritizing Charm early is preferred. Reaching a Charm level of 100, even if artificially boosted by wearing fancy clothes and a luxury watch for +20, is incredibly helpful. This early attainment is crucial for obtaining the hypnosis book, which aids in faster stat manipulation. Each use of the hypnosis book also passes one in-game hour, making it useful for time management. It’s generally recommended to focus on Charm while alternating between Fitness and Knowledge to increase the maximum cap of their corresponding needs. This approach enhances flexibility and proves valuable for specific events.
É isso! Esperançosamente, with this guide, you now have a highly considered but efficient long-term save file started.
Isso é tudo o que estamos compartilhando hoje para isso Amor & Sexo: Segunda base guia. Este guia foi originalmente criado e escrito por ThePostalGamer. Caso não atualizemos este guia, você pode encontrar a atualização mais recente seguindo este link.