Este guia fornece insights abrangentes sobre como superar o chefe formidável, Pesadelo Rei Grimm, enquanto compartilho minhas estratégias e observações pessoais da melhor maneira possível. Vou me aprofundar nos vários ataques do chefe, oferecendo orientação sobre como evitá-los efetivamente, identificar oportunidades para contra-atacar o Nightmare King Grimm, e identificar momentos para cura potencial.
Adicionalmente, Descreverei minha própria estratégia e equipamento para enfrentar esse adversário desafiador, elucidando a razão por trás de minhas escolhas. É importante notar que posso não estar familiarizado com outras estratégias ou configurações existentes, e pode haver alternativas superiores ou indivíduos que possam otimizar minha abordagem. Constructive feedback on both the setup and the overall quality of this guide is welcome, and if you have any questions regarding its content, please don’t hesitate to reach out—I’m here to assist. Também, I apologize for any suboptimal quality in the screenshots I captured during my own battles with the boss; some of them may not be ideal due to a delay issue.
Nightmare King Grimm Attack Patterns
When facing Nightmare King Grimm, you’ll encounter six distinct attack patterns, each more challenging to dodge than those of the regular Grimm due to increased speed or unique mechanics. To keep this guide concise and assume familiarity with the regular Grimm fight, I won’t draw direct comparisons. No entanto, it’s essential to note that all of Nightmare King Grimm’s attacks inflict 2 masks of damage, unlike the regular Grimm encounter.
Please understand that the names I’ve assigned to these attacks are my own, and they might differ from any official designations. If you’re unsure which attack I’m describing, please refer to the provided image references.
For convenience, I’ll simply refer to Nightmare King Grimm as “Grimm” throughout this guide, as our focus is solely on this iteration.
Ataque de traço
Grimm starts this attack by hovering at the top of the screen, then rapidly descends (often towards you) before dashing forward directly at you. The dashes leave behind flame trails that can harm you upon contact. After the second dash, Grimm promptly teleports away.
Uppercut Jump Attack
This attack commences with Grimm teleporting to the ground, usually in close proximity to you. He quickly swipes at you with his hand, moving directly towards you but not as far as in the dash attack. Então, he swings his arm forward and upward, executing a swift jump to the top of the screen while moving slightly forward. As his hand begins to leave the screen, Grimm teleports away, dispersing approximately six large flame balls across the arena at specific distances from his teleportation point.
Ranged Projectile Attack
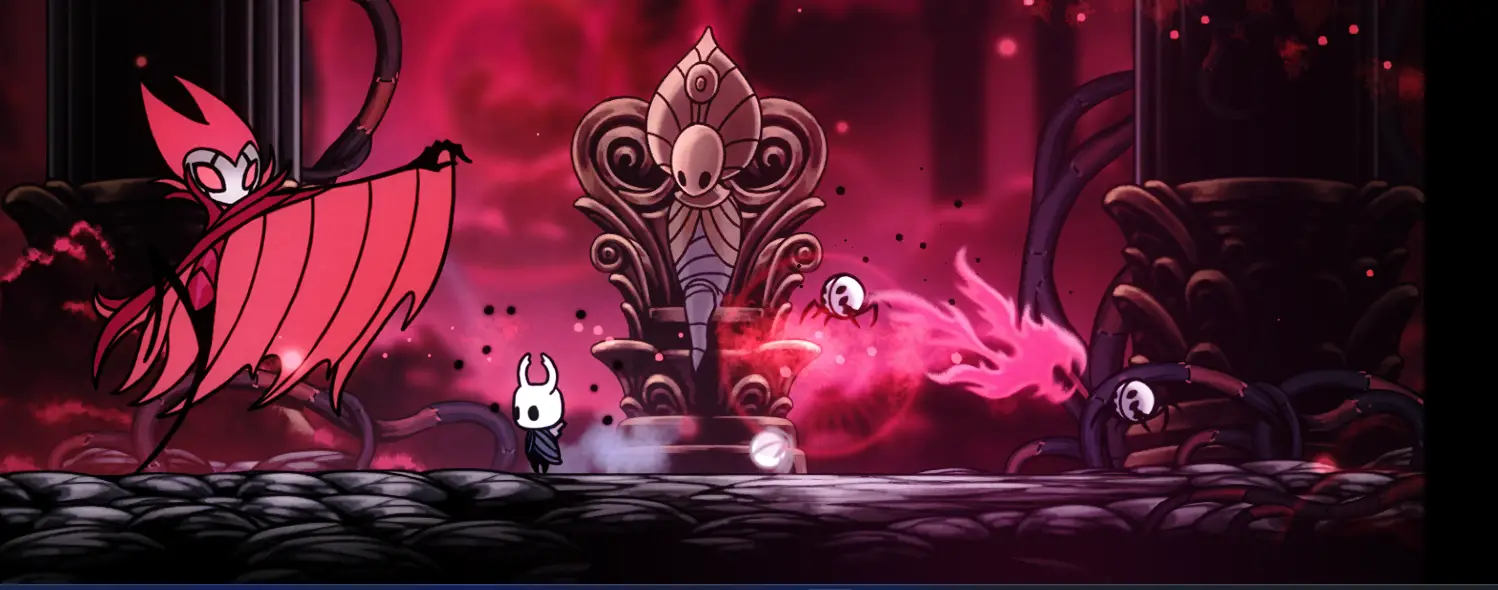
Grimm begins this attack by teleporting to the floor, often at a distance from you. He extends an arm outward, clutching his cape, and immediately fires four fast-moving projectiles in a specific pattern: the 1st and 3rd projectiles are in the air, while the 2nd and 4th projectiles stay close to the ground. Grimm teleports away approximately 1-3 seconds after launching all four projectiles.
Spikes Attack
In this attack, spikes gradually emerge from the ground, swiftly shooting up to the top of the screen. These spikes only inflict damage once they reach the top of the screen; everything prior serves as indicators to give you time to prepare. Grimm remains off-screen throughout this attack, unique to this particular attack pattern.
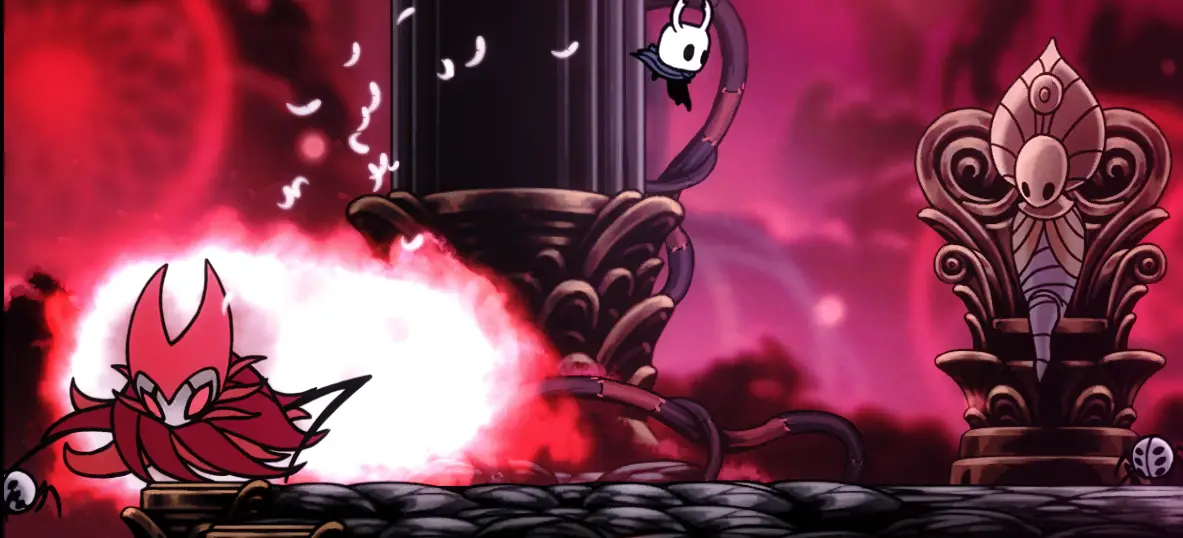
Flame Pillar Attack
Similar to the dash attack’s start, Grimm initiates this attack by teleporting to a location in the air. No entanto, during this attack, Grimm remains stationary in the air. Over the course of the attack, four flame pillars consecutively erupt from the ground at your location, ascending from the bottom to the top of the screen. They then reduce to scorched areas on the ground that can still harm you. Grimm teleports away shortly after the fourth pillar emerges.
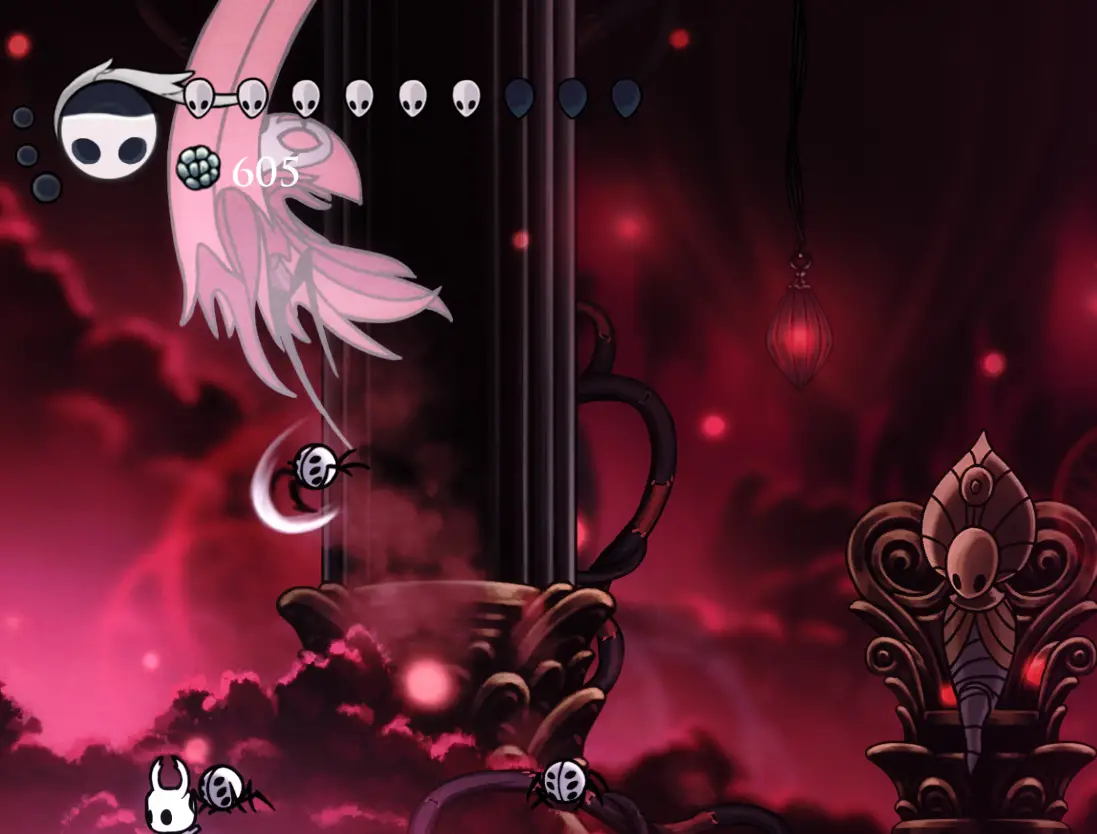
Pufferfish Attack
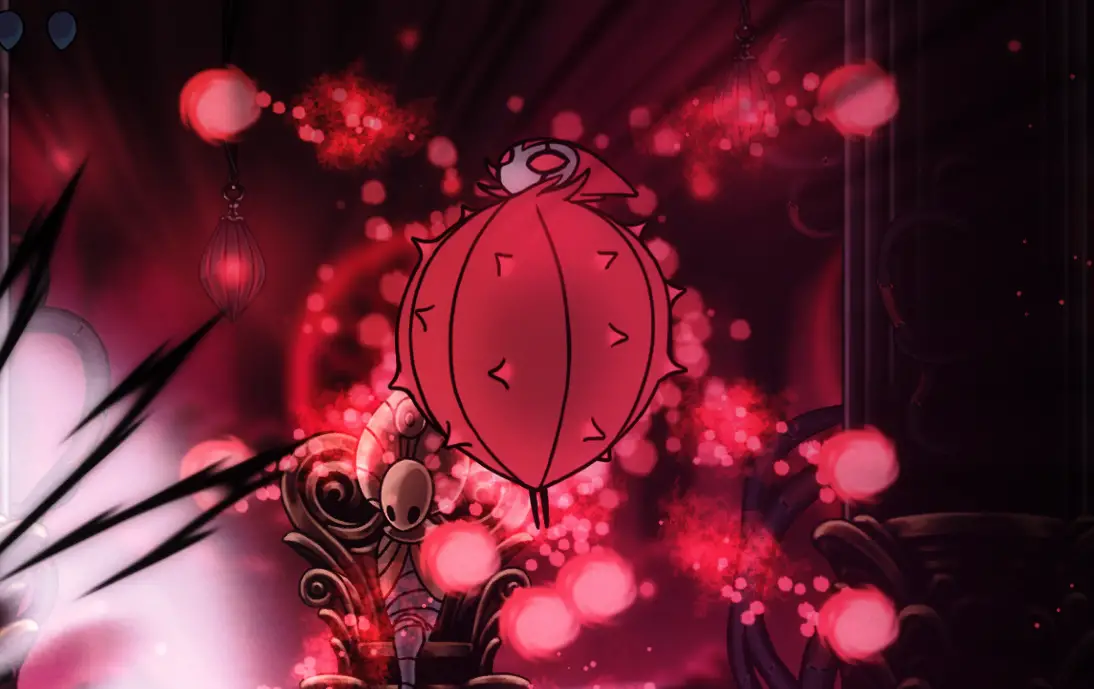
This attack begins with Grimm teleporting to the center of the arena in the air and transforming into a prickly circle resembling a pufferfish. While in this state, it’s impervious to nail attacks but vulnerable to magic attacks, although this approach carries some risk. It releases flames in various directions, often following a pattern as they move towards the right or left sides of the screen. These flames move rapidly, testing your ability to execute quick jumps and short hops to avoid them. After the attack concludes, Grimm teleports away and uses this attack when his health reaches 75%, 50%, e 25%, serving as a progress marker in the boss fight.
Charm Setup

The image displayed above showcases my chosen charm setup for combatting Nightmare King Grimm. I’d like to provide a detailed explanation for the rationale behind this setup, with the exception of the Void Heart charm, which is self-explanatory for those who have reached this stage in the game’s progression.
- Sharp Shadow Charm: This charm serves a dual purpose in my setup. Primeiramente, it enhances my damage output when I need to dash through Nightmare King Grimm, providing a valuable offensive boost. Em segundo lugar, and perhaps more importantly, it grants a 40% increase in dash length when combined with the Shadow Dash ability. This extended dash length is instrumental in various situations, enabling me to more effectively close the gap between myself and Nightmare King Grimm or create distance when necessary.
- Glória do Nailmaster: Este pingente é parte integrante da minha configuração devido à sua notável aceleração da velocidade de carregamento da Nail Art. Dado que confio principalmente nas artes das unhas para a minha abordagem ofensiva, o aumento da velocidade no carregamento dessas técnicas é inestimável, permitindo ataques rápidos e poderosos contra o chefe.
- Canção Grubs: Embora Grubsong forneça alma ao receber dano, seu objetivo principal em minha configuração reside em sua sinergia com o encanto Weaversong. Os tecelões convocados por Weaversong ganham a habilidade de coletar almas ao causar dano aos inimigos quando combinados com Grubsong. Esta combinação não apenas aumenta minha produção de dano através dos tecelões, mas também contribui para os recursos da minha alma., permitindo-me utilizar feitiços e habilidades de forma mais eficaz.
- Feitiço de Corte Rápido: In situations where executing nail arts is not the preferred option or time is limited for charging them, the Quick Slash charm becomes indispensable. It allows for a rapid succession of melee attacks, enabling me to land numerous hits in quick succession, effectively dealing damage to Nightmare King Grimm.
- Longnail Charm: The extended range offered by the Longnail charm provides a crucial advantage in my strategy. It enables me to attack Nightmare King Grimm from a safer distance, reducing the risk of taking damage while maintaining consistent pressure on the boss.
- Weaversong Charm: This charm plays a pivotal role in my setup. The weavers summoned by this charm not only deal additional damage on my behalf but also, como mencionado anteriormente, benefit from the Grubsong charm’s synergy by gathering soul from their attacks. This combination enhances my overall damage output and soul generation, contributing significantly to the effectiveness of my strategy against Nightmare King Grimm.
Nightmare King Grimm Fight Strategy
Here’s a breakdown of my battle strategy against Nightmare King Grimm. It assumes that you consistently have a nail art attack charged and ready, except during the pufferfish form attack. I typically begin charging the next nail arts attack immediately after executing the previous one, unless I need to heal or during the pufferfish form attack.
Ataque de traço:
- For the dash attack, I usually leap over the initial dash.
- Então, I have two options: either dash through the flame trail using the shadow dash to create distance or perform a great slash on Grimm from slightly above him, just high enough to evade the flame trail. (Observação: Great slash has more vertical range than one might expect.)
Uppercut Jump Attack:
- If Grimm is at a distance, I unleash a great slash just before he jumps upward.
- If he’s too close for this to be safe, I opt to dash through him to avoid the attack.
Spikes Attack:
- The strategy for this attack is straightforward: I simply move away from the spikes.
- Durante este ataque, there’s not much else one can do unless healing is necessary.
Flame Pillar Attack:
- My approach during this attack is to minimize movement while avoiding the flame pillars as they emerge.
- I gradually close the distance to Grimm with each pillar, and after the final one appears, I deliver a great slash.
Pufferfish Attack:
- For the pufferfish attack, my primary focus is on evading the flames; I usually refrain from attempting to attack Grimm during this phase as it involves a higher level of risk.
Ranged Projectile Attack:
- As the attack initiates, I advance towards Grimm.
- I leap over the second projectile and, while still in the air, dash over the fourth projectile.
- Immediately after, I strike Grimm with a charged great slash or dash slash, followed by regular nail attacks until he teleports away.
Resumindo, my strategy centers on caution and maximizing the use of the great slash nail art whenever an opening presents itself. This approach allows for a balanced offensive and defensive playstyle when facing Nightmare King Grimm.
Potential Openings to Heal During the Fight
While healing in the Nightmare King Grimm boss fight is challenging, there are several potential opportunities to restore your health, albeit with varying degrees of risk. Here are the main moments when you can attempt to heal:
- Stagger or Stun Phase: When you stagger or stun Nightmare King Grimm (though the terminology might not be entirely accurate, it conveys the idea), you have a window to heal approximately three times consecutively. To maximize healing, refrain from attacking and focus solely on replenishing your health. This is the safest time to heal since there is no immediate risk.
- Spikes Attack: During the spikes attack, there is an opportunity to heal once, possibly more if you’re already positioned safely when the attack begins. This moment provides a relatively safe window for healing.
- Uppercut Jump Attack: Em alguns casos, during Nightmare King Grimm’s uppercut jump attack, you may be able to heal once or even twice if you’re already positioned outside the path of the descending flames when he starts jumping upward. No entanto, esta é uma manobra arriscada que requer prática e habilidade para evitar o ataque.
- Flame Pillar Attack: Há uma breve janela de oportunidade para curar imediatamente quando o quarto pilar de chama irrompe. Este é provavelmente o tempo mais curto e arriscado para tentar a cura e pode ser ainda mais desafiador sem o feitiço Cura Rápida.. Testes adicionais podem ser necessários para determinar sua viabilidade.
Resumindo, a cura nesta luta contra o chefe é desafiadora e muitas vezes arriscada, mas pode ser estrategicamente cronometrado durante fases específicas da batalha para ajudar a manter a sua saúde. É essencial praticar essas oportunidades e avaliar o risco versus recompensa durante a luta. Se possível, consulte um guia visual ou vídeo para uma compreensão mais abrangente do tempo e da execução desses momentos de cura
Isso é tudo o que estamos compartilhando hoje para isso Cavaleiro Oco guia. Este guia foi originalmente criado e escrito por Jogos de Nates1111. Caso não atualizemos este guia, você pode encontrar a atualização mais recente seguindo este link.