If you want to unlock all the achievements in Eldritchvania, este guia ajuda você! Whether you’re stuck on a particular achievement or just need a nudge in the right direction after completing the game, you’re in the right place. While some achievements are straightforward and hard to miss, I’ll quickly run through them to offer some hints in case you’re feeling lost.
Eldritchvania Achievements Guide
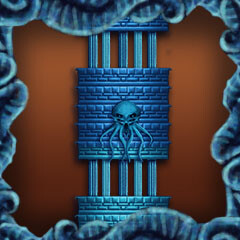
The Obelisk Garden
Enter into the Obelisk Garden
When you’re done chatting with the priest, head down to the room below. There’s a pressure plate on the right side. Step on it, e pronto! Welcome to the obelisk garden!
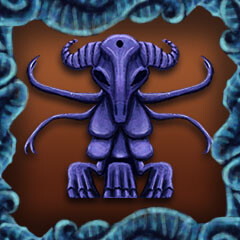
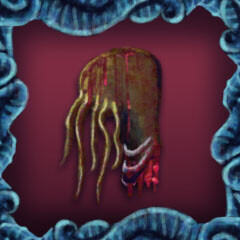
Necronomicon
Find the Necronomicon
If you haven’t stumbled upon it yet, it’s in the room just below the first moving spike block. To crack open the chest, head left into the next room. Trigger the collapsing floor trap in the top row, then fall and move right into the middle row. Push the block to open the chest.
Eldritch Blast
Learn the Eldritchblast Spell
Beyond the azathoth mural room, look for a pressure plate in the top right corner. Para alcançá-lo, head down, então certo, Suba a escada, and navigate past the disappearing blocks. This action fills the room below with water, unveiling a path by lifting the wooden platform. Dive into the water, swim right, then down, and claim the spell.
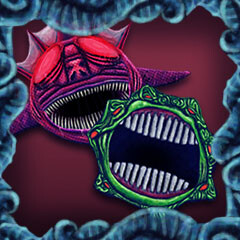
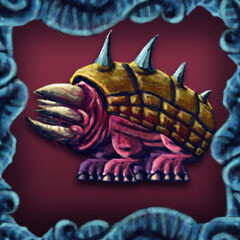
Watch Ended
Kill the Nullug Watcher
Boss time! The Nullug watcher comes in three parts: the foot (for mobility), the torso (projectile launcher), and the head (creep spitter). While you can technically damage the torso from the get-go, start by focusing on the foot. The boss’s movement can make dodging the other projectiles tricky. Keep a sharp eye on the splitting projectiles—they’re the main threat. Ser paciente; if the creep blocks your path, hang back until it clears.
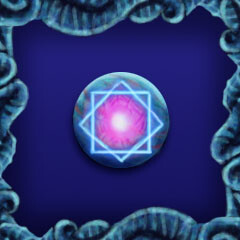
Kadathian Sphere
Find the Kadathian Sphere
After defeating the Nullug watcher, your prize is the oblivion steed summoning spell. Use it on the altar in the room with the Jesus painting (maybe heal up first!). Once the beast appears, approach it (DON’T turn around), swing your weapon three times in front of its head (not directly at it!), then turn around. When the creature bows, approach it, and embark on a somewhat challenging platforming gauntlet. Depois de uma breve cena, claim the sphere.

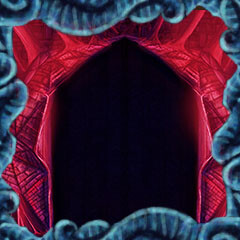
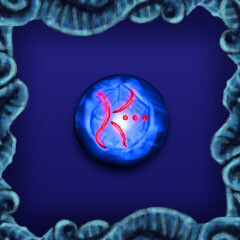
The Voynich Glade
Enter into the Voynich Glade
Getting into the glade offers two paths. The simpler option? Unleash an Eldritch Blast on the red skull in the room marked by Yig’s symbol to swing open the gate. alternativamente, tackle the more intricate route by piecing together the key shattered by Maurice (refer to the achievement below). Once assembled, use it on the corresponding door to grab the prism. This handy tool grants passage through the barrier in the room haunted by ghosts, just before the showdown with the Nullug watcher boss.
Cultist Key
Assemble the Cultist Key
All three fragments of the key reside within the obelisk gardens. The initial piece hides to the right of the shop. Employ your sword to strike the wall until it yields. The second fragment rests in the inaugural underwater chamber. Direct an Eldritch Blast at the left wall’s statue to reveal it. The ultimate segment lurks in the room above the Nullug watcher. Venture into the green mist, promptly deploy your glasses on the wall’s aperture. Cuidado, the mist saps your health swiftly!
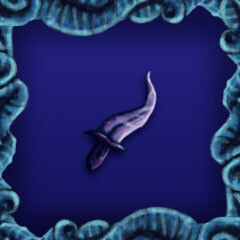
Sacrificial Dagger
Find the Sacrificial Dagger
This achievement necessitates both the Eldritch Blast and the Kadathian Sphere. In the Obelisk gardens’ right section, ascend the ladder within the uppermost chamber. From the ladder’s perch, unleash an Eldritch Blast at the red skull. This action activates the mobile platform. Posteriormente, repel the airborne adversary with either another Eldritch Blast or a well-timed sword swing to stave off its assault on the platform.
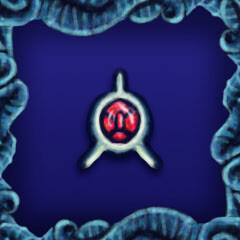
Nullug Talisman
Find the Nullug Talisman
To access the room obstructed by the boulder in the Voynich glade, adhere to the directives outlined in “The Nullug Mating Ritual” tome:
- Shift the tall statue two tiles to the right.
- Relocate the small statue one tile to the left.
- Return the tall statue to its initial position (two tiles leftward).
- Shift the small statue one more tile to the left. This sequence should unveil the chest, granting you the coveted talisman.
The Children of Yig
Solve the puzzle of the six snake heads
In the Voynich Glade, a stone tablet provides the sequence to deactivate the furnace by striking snake heads in this order: 6 4 5 1 2 3, starting with the fourth head and ending with the leftmost one.
Priest Protector
Help Bruce return to the Blackhorn Church
Bruce is imprisoned within the Voynich Glade. To locate him, enter via the prism barrier, progress until reaching a room requiring crawling, with spiked columns. Some columns can be broken, including the floor before the door if you swing your sword while ducking. Dentro, release Bruce by cutting the rope.

Worm
Learn the Worm Spell
Another encounter in the glade involves an elder Ngaro, found through the second entrance. Remind him of the nullugs by showing the nullug talisman, and he’ll reward you with the worm spell.
The Yig is up
Kill the Wrath of Yig
Use o “summon wrath of Yig” scroll in the upper room of the glade to face another boss. Equip the sacrificial dagger for increased damage despite reduced range. Dispatch small snakes with ease and time jumps to avoid ground-level ones. Save healing spells for the bouncing snake heads, the toughest part of the fight. Keep swinging the dagger to fend off the boss effectively.
The Sunken City
Enter into the Sunken City
The Sunken City offers two entrances. In the Obelisk Garden, after unlocking a path with the nullug talisman, you’ll encounter a puzzle room featuring ancient numbers. Cycling the buttons alters their corresponding number slot. Align symbols for 3, 7, 1, e 0 in that sequence, referencing stone murals and “The Nullug Race” book for guidance.
alternativamente, access the city via the Voynich Glade. Employ the worm spell and navigate to the room housing three sorcerers (where the wrath of Yig scroll resides). Smash the top right wall, then enter the subsequent room and take a leap! The impact will reveal a new path forward.
Main achievements, papel 2
Parental Issues
Defeat Father Dagon and Mother Hydra
In the sunken city, you’ll tackle two bosses, dividing it into “garden side” for father Dagon and “glade side” for mother Hydra.
To face both bosses, ensure you have either the sphere of Dagon (details in the “optional achievements” seção) or the water-breathing pill (purchased from the scientist in the glade-side city). On glade-side, utilize the ngaro talisman to access the underwater path. Descend to the bottom to confront mother Hydra, whose tentacles hurl projectiles. Destrua-os, but they regenerate quickly. The dagger is effective here for swiftly dispatching tentacles and defeating mother Hydra.
For father Dagon on garden-side, employ the nullug talisman. Navigate past the mine field to encounter him. He’ll circle the arena, but attacking with the dagger pushes him back, keeping distance. Dodge his poison breath and swiftly deal with the merfolks. With perseverance, father Dagon will be defeated.

Spellbreaker
Defeat Cultist Leader Maurice
Once you’ve got the sacred ceremony words from the city, head back to the obelisk garden. Take a dip in the starry circle underwater to reach the cultist hideout. Upon using the ceremony words in front of the mural to the right, Maurice will swoop in and snatch the veneraxxi talisman! Boss fight alert! Maurice may look fancy, but he’s got a hefty health bar and some souped-up spells compared to other bosses. He’s even got a knack for using the infinite money spell to zap you! Watch out for his speedy dashes around the arena. Stick close to a wall and time your jumps to dodge. When he crashes into a wall, seize the chance to land some hits. Também, he’s got a version of the healing spell, but guess what? You can nab the healing orbs before he does, and they’ll patch you up instead! Once you’ve dished out enough damage, he’ll tire out and unleash his ultimate move:
…the worm. His kryptonite? A shoe to the face. Vitória! Use a holy beacon to exit, or open the shortcut to the left (this also leads to Father Dagon, mas cuidado: if you forgot to unlock the path above and lack a holy beacon, you’ll be stuck and need to reload your last save!).
O Portão
Reach the gate
Once you’ve bested Maurice and snagged the veneraxxi talisman, return to where you faced Mother Hydra. Upstairs in that room, use the talisman. Fácil!

Wide Open
Break the seal of The Gate
To find the locks inside the ruins, start by checking the hints near the gate and grab the silver key conveniently placed nearby.
- Surface Area Lock:
- Head back to the game’s starting point and dive into the water.
- Use the ngaro talisman near the ngaro mural to uncover the lock.
- Open the door with the silver key and enter a room with a block-pushing puzzle.
- Solve the puzzle by following these steps:
- Push the left block in the middle row to the 3rd plate.
- Move the middle-right block into the opened hole and onto the 4th plate.
- Push the top-left block onto the 1st plate.
- Maneuver the other left top block to the left and onto the 2nd plate.
- Place the remaining top block on the 6th plate and the last block on the 5th plate.
- Touch the red orb that appears upon completion.
- Obelisk Garden Lock:
- Use the Azathoth idol on the trumpet player to reveal a ladder.
- Enter the next room and solve a puzzle to obtain an optional item or proceed directly to the lock.
- In the subsequent room, avoid fireballs for about a minute and touch the red orb that materializes afterward. It’s a challenge to stay alive!
- Voynich Glade Lock:
- Find this lock in the room above black Tsathoggua, leading to the king in yellow.
- Step on the platforms in a specific order: fundo, canto superior direito, canto superior esquerdo, far left, far right, inferior direito, canto inferior esquerdo, remaining right, and remaining left.
- Ensure you have enough semblance for the speed spell to reach some of the top platforms.
- Sunken City Lock:
- Visit father Dagon’s arena and locate the cultist’s hideout.
- The lock is in the first room you enter.
- Prepare for an underwater puzzle akin to the lost woods.
- Follow the air bubbles’ direction, which might appear normal initially but will guide you correctly.
- Reach the final red orb, but if you lack the sphere of Dagon, watch your oxygen during the cutscene.
Once you’ve tackled all these challenges, return to the gate and unlock it to progress. Boa sorte!
Gatecrashed
Survive the Horror of The Gate
Prepare yourself for this showdown: gather all the stat upgrades, locate hidden items and spells (more details on these in the optional achievements section), and stock up on semblance. Doing so should put you in a good position for the fight!
Facing off against Fergus isn’t too challenging. The main attack to watch out for is when he combines red projectiles with falling black holes. Adicionalmente, he may bump into you, so it’s wise to maintain distance using either the whip or eldritch blasts. Feel free to unleash some spells during this phase, as defeating Fergus will also yield semblance.
Next up is Veneraxxi. Inicialmente, the battle is straightforward, with Veneraxxi launching triple projectiles or employing slow-moving tentacles to inflict damage. Dodging the triple projectiles is as simple as tapping the left or right key at the right moment. No entanto, this maneuver may become more challenging as the fight progresses. Another attack to anticipate is when two tentacles emerge on either side of the screen; you’ll need to jump to avoid their collision. As the boss sustains damage, additional creatures will join the fray, firing their own projectiles. Merely ducking won’t suffice; you’ll have to crawl to evade the incoming attacks. Dealing with these enemies swiftly is advisable, as they regenerate quickly, leading to chaotic situations with multiple foes on screen. Por último, beware of the green orbs that spawn from Veneraxxi’s shoulder; while they can be destroyed, they leave behind lingering poison. Don’t hesitate to use all your resources during this intense encounter. And even after defeating the boss, the challenge isn’t over yet…

Parabéns
Complete the Game
Rapidamente, heed this warning! The temple is collapsing! Make a swift escape!

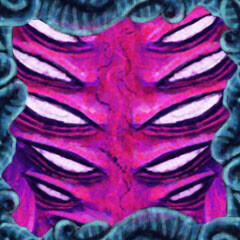
It had skulls coming out of it!
Die a painful death
Para desbloquear esta conquista, simply walk into the green mist and let yourself perish. It’s as easy as taking a stroll in the park, just with a more misty outcome.

Journal Novice
Adicionar 20 entries into the journal
If you haven’t been doing it already, make sure to pick up every note, check every mural with the glasses, and read every sign or stone tablet. You can even snag this achievement just by exploring the obelisk garden.

All Hail
Die a painful death
Para este, walk in front of the black tsathoggua statue in the voynich glade and let the dark mist claim you. It’s a dark but straightforward path to success.

Death by boulder
Die a painful death
Como o nome sugere, you’re gonna want to let the boulder roll over you. Just keep in mind that this can only be done once, as the boulder will be gone permanently after you dodge it!
Why are you running?
Kill a Genk before it can run away
The simplest way to grab this is by using the genk at the entrance to the voynich glade. Enter from the obelisk garden, dodge the genk to reach the next room, then return to face it as it charges. Attack it before it reaches you to not only halt its advance but also shove it into the hole. This traps it and busts open the wall, granting you access to the voynich glade map! Então, you can finish it off safely. alternativamente, you could ignore all that and whip it out near the end of the game, but it’ll require some patience.

Spectral Suspension
Kill a spectre in the obelisk garden.
Kill the spectres in the rooms before the nullug watcher by hitting them with an eldritch blast.

Light From Above
Use a holy beacon
Snag one from Bruce for just 5 moedas. They’re super handy and save you heaps of time you’d otherwise spend backtracking.

Part of the congregation
Get healed by Priest Marcus 20 vezes
You’ll need a total of 40 moedas, but if you’ve been playing normally, you might already be close to snagging this achievement.
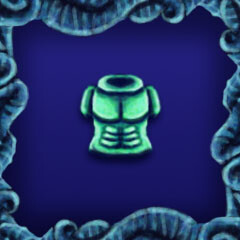
Armadura
Find the Armour of Protection
This one’s tucked away in the room where you solved the six snake heads puzzle. To nab it, dive back into the water in the previous room and unleash three eldritch blasts on the lower part of the right wall. This breaks down the wall and grants you access to the armor.

Maximum Fortitude
Find all health upgrades
There are three health upgrades scattered throughout the game:
- The first upgrade awaits in the obelisk garden. Just step on all four trumpets in the azathoth room.
- The second one sits atop Blackthorn Church. Climb the ladder after obtaining the Kadathian Sphere.
- The final upgrade lies in the Sunken City. Directly beneath the room housing the scientist shop, there’s a concealed path accessible only by transforming into a worm. Brave the challenging platforming section reminiscent of Super Meat Boy, and you’ll earn your last health upgrade.

Maximum Sanity
Find all Sanity upgrades
Outra vez, there are three sanity upgrades waiting to be uncovered:
- The initial upgrade is tucked away in the obelisk garden, beyond the treacherous mist-filled corridor. Employ a barrier spell to navigate through with minimal harm, but remember to reserve some sanity for the return journey (or consider utilizing a holy beacon, talvez?).
- The second upgrade is a complimentary gift in the furnace room of the Voynich Glade, awarded after successfully deciphering the snake heads puzzle.
- The last upgrade lies within the Sunken City, concealed in a secret chamber to the right of the room with the rock-spewing hole. Strike the right wall to unveil the hidden chamber, then read the tablet while completely drained of sanity. This action will not only reveal the final upgrade but also unveil a healing spring where you can replenish your health for a mere 5 moedas.

Maximum Semblance
Find all semblance upgrades
This time around, there are four upgrades waiting to be discovered:
- The first upgrade can be purchased in the Obelisk Garden for 15 moedas.
- The second upgrade is hidden in the surface area and requires the Stigmata Gloves. Head to the secret area near the starting point, Suba a escada, and then strike the wall to your left to reveal a concealed chest.
- The third upgrade awaits in the Voynich Glade. In the room above Black Tsathoggua, strike the top right wall to uncover a secret path leading to a chest.
- The final upgrade lies within the Sunken City. Enter from the Voynich Glade side, traverse the deadly mist, and utilize the Ngaro Talisman on the wall to the right to unlock the chest in the same room.

Under water breath
Kill Hydra and Dagon without the Sphere of Dagon
Skip the hassle and use a liquid breath pill from the scientist instead.
Sphere of Dagon
Collect Sphere of Dagon
In the Sunken City, trigger an ancient evil by shattering the crystal beneath the Tsathoggua mural. Once it starts pursuing you, make your way to the Tsathoggua statue in the glade and wait for the spirit to attack the statue instead. Então, simply attack the skull and claim your reward.

Uma mão amiga
Recieve help to break the cycle
The requirements for this achievement are a bit murky, but here’s what worked for me: Begin a new save and venture into the Obelisk Garden. Attempt to drain all your sanity without succumbing to death (though I’m not certain if that’s necessary—feel free to correct me if I’m wrong). Reach the second save point in the garden (the one in front of the Nullug mural). Take damage from the spike blocks until you’re one hit away from death. Salve seu progresso, then perish via the spike block. Repeat this process until a shadowy figure appears beside you. Engage in conversation with it and accept its offer (this will cost you all your coins). It’s surprisingly challenging to obtain given how early it’s available in the game.
Optional achievements, papel 2

Expedient Excursion
Escape the island in less than two hours
Reserve this achievement for a subsequent playthrough of the game. Since nearly every puzzle has the same solution, you can preemptively note them down and solve them without seeking hints in the ruins. Save frequently and don’t hesitate to reload a previous save if you feel you’ve wasted too much time. Even while pursuing optional items, I managed to secure the achievement with 15 minutes to spare.
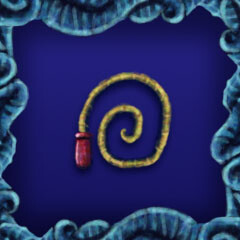
Chicote
Find the Whip
As primeiras coisas primeiro, acquire the nine-sided star. It’s concealed in the Sunken City, within a room featuring the statue of Cthulhu (look for a pressure plate behind the statue). Once you’ve obtained it, you’ll need to utilize it at nine specific locations scattered throughout the entire game. These locations are:
- The Cthulhu statue in the room where you found the star.
- The Shub Niggurath statue at the entrance of the Obelisk Garden.
- The Azathoth mural, also located in the Obelisk Garden.
- The Nyarlathotep mural, situated in the hidden room above the Azathoth mural. Employ the Azathoth idol on the trumpet player to reveal a ladder.
- The loathsome forgotten mural, found in the first room with ghosts in the garden.
- The black Tsathoggua statue in the Voynich Glade.
- The Yig statue in the arena where you fought the Wrath of Yig.
- The King in Yellow statue, positioned in the Voynich Glade room unlocked by using the silver key.
- The gate (sim, em “the gate”…).
Once you’ve completed all these steps, the star should transform into a vibrant red hue. Head to the Sunken City and, in the room housing the scientist shop, employ the star in front of the top left wall. Enjoy wielding the most potent weapon in the game!

Exame completo
Beat the game with 100% conclusão
To achieve a 100% save in the game, you need to acquire various elements including spells, armas, usable items, regular items, mapas, and upgrades for health, sanidade, and semblance. Let’s break down each of these components:
Feitiços: Obtaining spells is crucial. The healing spell is easily found in the first chest located in the obelisk gardens. Activate the skull in the top right corner, but beware of the collapsing floor! The eldritch blast and the worm visage spells are mandatory, each with their own achievement. After acquiring the worm visage spell, return to the ngaro elder with the ngaro talisman to obtain the barrier spell. De forma similar, use the veneraxxi talisman to acquire the aura of agony spell. Return to the surface with the prism and dive into the water at the beginning of the game to discover a secret area. Solve the block puzzle to obtain the sprint spell. The infinite money spell, while optional, can be found in the sunken city. In the room before the Cthulhu statue, locate a seemingly inaccessible chest. Navigate through the room below and jump through the ceiling to reach the chest easily. The summon oblivion steed, summon wrath of yig, and sacred words of ceremony spells are mandatory and cannot be overlooked.
Armas: The sword is essential and cannot be missed, as you cannot commence the game without it. The sacrificial dagger is also necessary for certain puzzles and has its own dedicated section in the guide. Refer to the instructions provided above for obtaining the whip.
Unid: Several items are indispensable for progression. The kadathian stone, prism, stigmata gloves, and Fergus are all vital and must be acquired. The necronomicon and armor of protection have their own achievement and are discussed in other parts of the guide. Fibrous soles are purchasable in the obelisk garden for 20 moedas. Locate the boots of fleeing at the lower entrance to the voynich glade. To solve the block puzzle, adjust the blocks to activate the pressure plates, allowing access to the chest.
Itens utilizáveis: The charm of health and charm of power are both available for purchase from the ngaro merchant for 20 coins each. Locate the merchant in the room adjacent to where you found the boots of fleeing. Bruce at the church sells the ring of Jesus for 20 moedas. To find the mark of resolve, summon the steed of oblivion again and follow the steps until you reach the ladder. Instead of climbing, utilize the worm spell to access the hole at the bottom of the wall. Aqui, you’ll discover the mark along with remnants of the nullugs. Obtain the bracelet of vanquishing in the obelisk garden by presenting the Azathoth idol to the trumpet player and striking the red skull 6 times while dodging projectiles from the Nyarlathotep mural. The serum formula is sold by the scientist in the sunken city, although its necessity for 100% completion is uncertain due to its consumable nature. Other usable items include the glasses, cultist key, nullug talisman, ngaro talisman, sphere of Dagon, silver key, holy beacon, laudanum, liquid breath pill, Azathoth idol, veneraxxi talisman, and the nine-sided star, most of which are crucial for progression or achievement.
Mapas: Four maps are available, each corresponding to different areas: surface, obelisk garden, voynich glade, and sunken city. Obtain the surface map by striking the large block with a symbol drawn on it located on the screen with the jump tutorial. In the obelisk garden, find a small space at the bottom of the wall on the far right side to access a secret room with an easy puzzle, rewarding you with the map. In the voynich glade, after entering through the top entrance, lure the genk to fall down and run into the broken wall. To acquire the sunken city map, locate the fish with a giant skull in its mouth and hit the skull three times. Repeat this process in the room to the left to reveal a chest at the top of the screen, accessible from the room above. These maps are essential for navigation and exploration.
Journal Entries: The completion of journal entries is crucial for an achievement and may require its own section in the guide due to space limitations. Stay tuned for more details in the dedicated part of the guide.

Journal Savant
Complete the journal
If you’ve braved La-Mulana, encountering Eldritchvania’s “Archaeological Authority” achievement might stir up some haunting memories. But fret not! Eldritchvania improves upon the formula in three significant ways:
Primeiramente, the journal feature is a lifesaver! It tracks everything you’ve investigated, sparing you from revisiting the same spots endlessly in fear of forgetting something. Mais, it flags any missing entries and pinpoints their locations within each area.
Em segundo lugar, unlike La-Mulana, there are no permanently missable journal entries (unless you’re attempting this during the escape sequence, which begs the question: por que?).
Em terceiro lugar, Eldritchvania is notably shorter, boasting only five areas in the journal, and one of these can be fully explored right from the get-go.
These tweaks transform what could’ve been a grueling ordeal into an enjoyable treasure hunt (bem, Pelo menos na minha opinião, your mileage may vary). Agora, onto the comprehensive list of journal entries, with a little extra tidbit for good measure!
Blackthorn Isle:
- Jesus painting
- Star above the ruins entrance
- Ngaro mural in the seaside cave
- Tablet beside the Ngaro mural
Obelisk Garden:
- Three pages of Fergus’s journal (one near the entrance, one near the waterfall, and one near the lower Voynich Glade entrance)
- Five cultist signs (one at the start, four providing info about cultist key parts)
- Four tablets (near Azathoth, in the water area, in the hidden sanity upgrade room, and in the room with the Oblivion Steed statue)
- Shub Niggurath statue at the ruins entrance
- Trumpet player statue
- Azathoth mural
- Circle of stars underwater
- Markings on the wall of the hidden room containing the map
- Three murals in the second save room (one for Nullug, one for Ngaro, one for Veneraxxi)
- Mural in the room to the left of the second save room
- Unidentified mural in the first ghost room
- Four number murals (before Nullug fight, subaquático, next to top entrance to Voynich Glade, and in the room left to the main entrance)
- Oblivion Steed statue, along with markings on the wall beneath it
- Nyarlathotep mural above the Azathoth room
- Three books sold in the secret shop
Voynich Glade:
- Two Fergus journal pages (one in the Tsathoggua room and one above Bruce’s trapped room)
- Nine tablets (various locations: top entrance room, Nullug puzzle room, near broken Yig statue, in front of Tsathoggua, near the first goat, in front of snake heads puzzle, lower entrance room, room right of top save point, room near city entrance)
- Broken Yig statue under the boulder room
- Dark mural above the Sunken City entrance
- Ngaro symbol (in the room between three sorcerers and broken Yig statue)
- Mural in the room right of the three sorcerers
- Tsathoggua statue (presumably still functional even if broken?)
- Furnace in room right of elder Ngaro
- Ngaro statue next to Ngaro shopkeeper
- King in Yellow statue in the Silver Key room
Sunken City:
- Two Fergus journal pages (one in the first room from Obelisk Garden and one in room before gate)
- Nine tablets (near Tsathoggua statue replica, room where you get map, room to its right, near Dagon mural, near Hydra mural, in Planets room, first room from Glade, room with money spell chest, Cthulhu room)
- Symbol above elevator in garden entrance room
- Tsathoggua statue replica
- Message underwater before Mother Hydra fight
- Planets mural in Glade entrance room
- Cthulhu statue in hidden room right of money spell room
- Dagon mural in money spell room
- Hydra mural in room under scientist shop
- Larger Dagon and Hydra murals in respective arenas
- Circle of stars in cultist hideout exit
- Veneraxxi mural in Maurice boss fight room
- Veneraxxi statue in room before gate
E agora, for an intriguing bonus:
You might’ve glimpsed a peculiar red-and-black circle in Voynich Glade during your escape from the ruins. Bem, losing all sanity doesn’t just up the game’s difficulty—it unveils secrets, including more than just a sanity boost! During regular play, you can stumble upon these secrets by roaming with 0 sanidade. While not essential, they’re delightful Easter eggs to hunt for!
These are the four circles I’ve uncovered:
- In the room where you acquire the sprint spell on the surface
- Behind the faux wall leading to the book shop in Obelisk Garden
- In the room above Sunken City entrance in Voynich Glade (visible during escape)
- In the whip room in Sunken City
Isso é tudo o que estamos compartilhando hoje para isso Eldritchvania guia. Este guia foi originalmente criado e escrito por mojowavv. Caso não atualizemos este guia, você pode encontrar a atualização mais recente seguindo este link.