Are you dreaming of creating tall towers, castles, and taverns but feeling unsure about where to start? Bem, você está com sorte! This guide is designed especially for beginners. It will assist you in transitioning your dwarves from the muddy ground to the expansive sky.
Introdução
Building above-ground structures in Dwarf Fortress can be challenging for new players, as it differs from many other colony building games. This guide is here to make things easier for beginners and help you understand the construction system in the game.
As an illustration in this guide, we’ll focus on creating a straightforward two-story house. When constructing above ground, it’s typically simpler to build one layer at a time. That’s the approach I’ll be demonstrating in this guide. As you become more comfortable and confident, you can start building in the way that suits you best!
Etapa 1: Materiais de Construção
Before we start building our above-ground structures, we first need to gather the necessary materials. You can construct walls, pisos, and ramps using five different materials:
- Madeira
- Pedra
- Metal
- Cerâmica
- Vidro
Each of these materials will create one tile’s worth of wall, ramp, or floor (or half a constructed staircase spanning two floors). Por exemplo, to make a wall that is four tiles long, you would need four wood logs. As you can imagine, creating an entire log tower would require a substantial amount of logs!
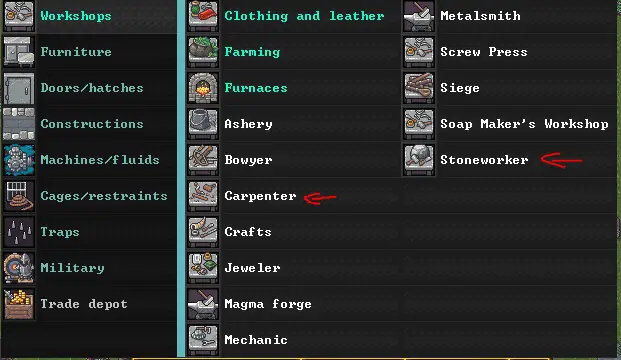
No entanto, there’s a clever workaround to significantly increase our construction supplies for wood and stone – turning them into blocks! Every stone boulder or wood log can be transformed into four blocks using the carpenter’s or stoneworker’s workshop.
Once the workshop is built, you can set up a work order to produce as many blocks as needed or set the job to ‘repeat forever’ in the workshop. Work orders are generally more efficient for this task. Para fazer isso, navigate to the work orders screen and search for ‘Rock Block’ or ‘Wooden Block’ (as required) and select it.
Próximo, choose the material you want to use by clicking on the magnifying glass and selecting the desired material. Por exemplo, if you have an abundance of apricot wood, choose that.

If you’ve selected the correct material, you should see the work order change on the left.

Each time a dwarf creates a wooden block, it produces four, so in my case, it will generate 40 apricot wood blocks. Blocks can be stored in bins (unlike logs and stones), making them easier to store. Creating a stockpile near your construction area is a smart idea to reduce travel time.
Etapa 2: Building Walls (Térreo)
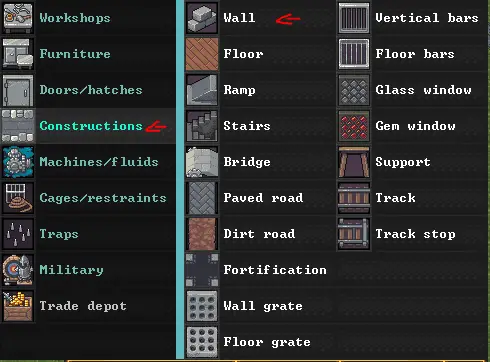
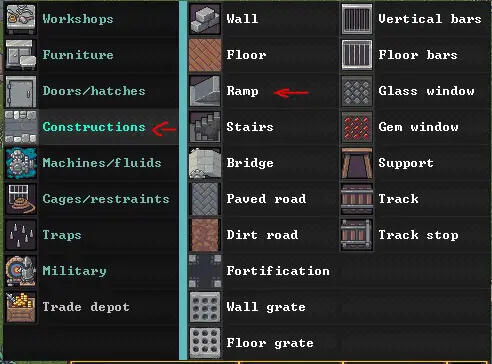
To begin constructing your building, head to the construction menu.
Make sure to enable ‘select material after placement’ so you can instruct your dwarves on the materials to use. Também, keep the option ‘keep building after placement’ selected if you plan to build more than just a line.
Start by creating a line (not a square) and then click on the material you want to use, selecting ALL. After this step, a ghost outline should appear on the map. Feel free to continue building, leaving a gap for your door. You can leave a larger gap if needed (useful for merchant carts), and upper floors won’t collapse as long as one wall tile remains connected on the lower floor.
When designating wall orders, consider that dwarves need to access the tile where the wall is being built from the north, sul, leste, or west. They cannot build the wall if the only way to access it is DIAGONALLY.
No meu exemplo, this isn’t an issue because it’s on the ground level, and the dwarves can access either side. No entanto, if I were building the next floor up, the dwarves might not be able to build the corner pieces if they construct the adjacent walls first. Para evitar isso, you can suspend construction on the walls next door by clicking on the ghost outline and suspending construction.
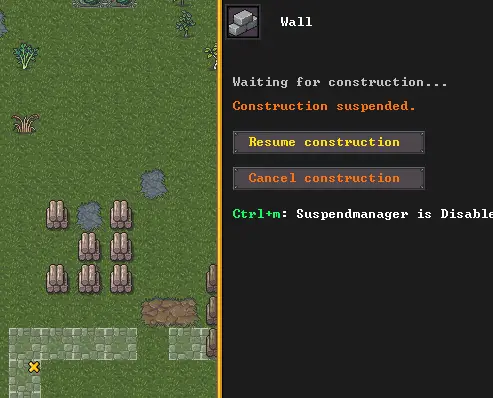
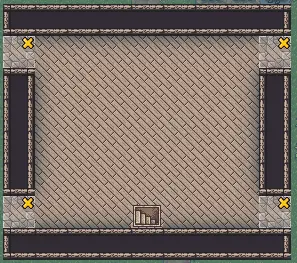
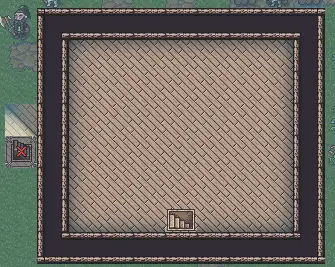
Na imagem acima, you can see the ‘x,’ indicating that construction is suspended. You can resume construction in the same way when you are ready. This menu also allows you to remove ghost construction. Atualmente, there’s no ‘mass’ removal option, so be cautious to avoid mistakes, unless you enjoy a lot of clicking!
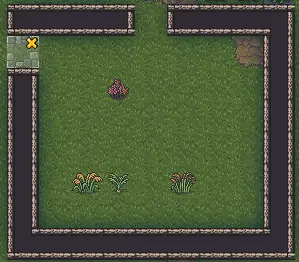
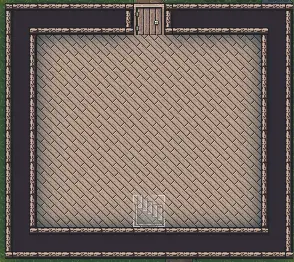
In the image below, my dwarves have built all the walls except for the suspended one. Empregos (quase) feito!
Solução de problemas
- Walls must be built on top of a floor (ou seja, the tile below it cannot be open air). If you can’t build a wall on a tile, build a floor first.
- Be cautious about walling/cutting off dwarves. If they get stuck, it can be challenging to get them out, especially if they are high up!
Etapa 3: Building Floors (Térreo)
Constructing floors on the ground floor is straightforward, especially if you are building them over the earth. Let’s go through the process quickly.
Walls use the same materials as before and are designated in the same way as walls.

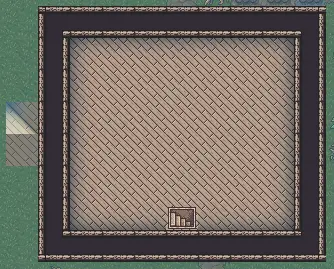
Simply drag the floors over where you want them built on the ground floor. If you want the entrance as a floor tile, designate that as well.
Floors cannot be built if furniture or doors are on the tile. Então, if you want to put floors under existing furniture, you’ll need to remove it from the tile. Click on the furniture in question and then click on the deconstruct icon. Não se preocupe, this won’t destroy the furniture, and once the floor is done, you can put it back in its place.

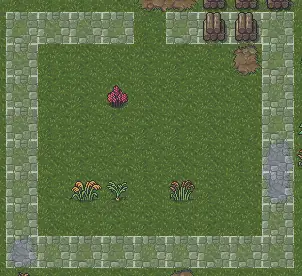
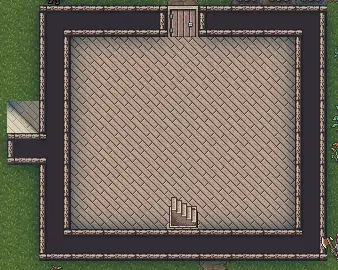
In the middle of my construction, all the plants will be removed as part of the process, requiring no further input.
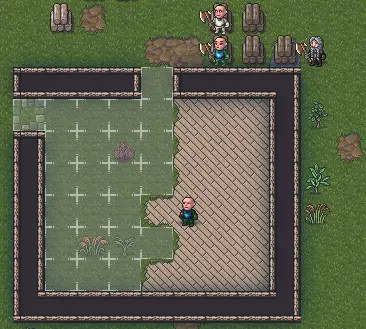
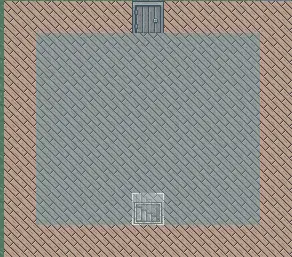
And here is the finished construction of the first floor! Claro, this building has no roof, so any dwarf inside is going to get pretty wet. We will address this in due course.
Etapa 4: Building Stairs
Agora, it’s time to take things to a higher level—literalmente! To build the next floor, we need to move our dwarves up a ‘z’ nível, representing the vertical plane. We have two options for this: ramps or stairs. Ramps on a tile allow a dwarf to move diagonally up or down a ‘z’ nível, while stairs enable a dwarf to move vertically up or down a ‘z’ level within the same tile. As we’re aiming to build another floor, let’s focus on stairs.
Constructed stairs differ from the stairs you might have dug out of the earth before. Here are a few distinctions:
- Constructed stairs cannot be built on tiles without a floor, which is crucial, especially if you’re replacing dug-out stairs, as dug-out stairs remove the floor on the ‘z’ level they are on.
- Constructed stairs cannot be built down into the unknown (dug-out stairs can).
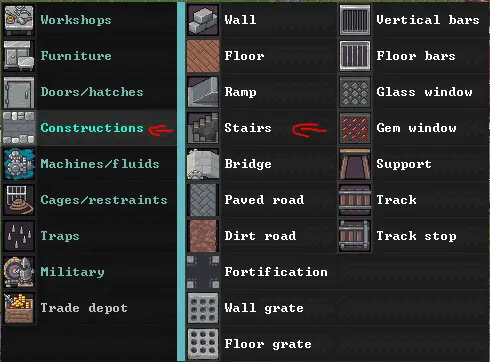
You can find constructed stairs in the construction menu under stairs.
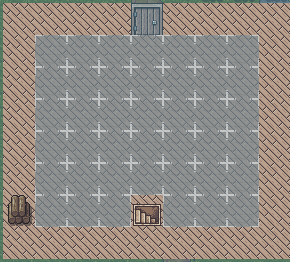
To build the stairs, start on the ‘z’ level where you want them to begin (ground floor in this case) and scroll up to the next ‘z’ nível. You should see ghost stairs on both ‘z’ níveis.
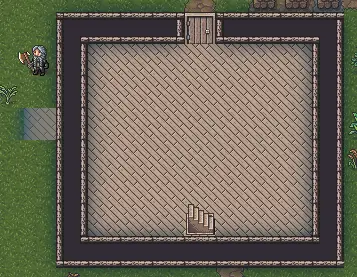
If you have keen eyes, you might notice that the walls we built in step 1 have created ‘floors’ above them. Dwarves can walk on walls as they act as floors on the ‘z’ level above.

With the stairs built, the dwarves can now access the next floor, e no meu caso, can even walk on the walls if they wish. Don’t worry if you built your stairs away from the walls; you can still build out from the stairs, as they act as a kind of ‘walk-through floor’ on the ‘z’ level they are on.
Etapa 5: Building the Next Level
Let’s get this floor of our building sorted! The good news is that both walls and floors can be built on any tile, as long as they have a north/south/east/west connection with a wall/floor on a neighboring tile. That means we can build our floor tiles above thin air as long as they are connected!
Start by designating all your floor tiles to be constructed. This shouldn’t get any of your dwarves stuck, but you may encounter the odd suspended floor construction if they try to construct in a weird order. Unpause these as and when they can access the tile.
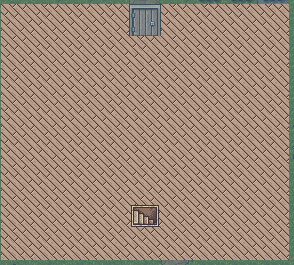
Neste ponto, you might have figured it out, but it’s worth stating: in Dwarf Fortress, you do not build roofs as such; em vez de, you build floors on a higher ‘z’ nível, which acts as a roof to the lower ‘z’ nível. With these floors built, our ground floor is now safe from rain.
Once all the floors are built, we can construct the walls for this floor. Remember that your dwarves cannot access the outside of the building on this ‘z’ nível, so be cautious of stuck dwarves and your corner wall pieces. Suspend constructions as required to get the job done safely. You can also build a wall on this ‘z’ level even if the below tile doesn’t have a floor, as long as they are connected to the floor by another tile. This means I can build a wall over my door even though that tile doesn’t have a floor.
In the picture above, note my suspended wall constructions, allowing the corner walls to be constructed without issue.
Feito isso, the floor has been constructed. We could keep going up and up, mas em vez disso, let’s finish this building off by constructing a ‘roof.’
Etapa 6: Building the Roof (with Ramps)
Como mencionado anteriormente, in Dwarf Fortress, you don’t build ‘roofs’; em vez de, you construct floors on the ‘z’ level above. Doing this can be tricky. While we could continue our indoor staircase up, it would leave a hole if we deconstructed the staircase (not to mention a dwarf stuck on the roof!).
I’d like to point out that you could (and probably should) just build a constructed staircase from the ground going up alongside the building to where you want to build the roof. Once the ‘roof’ is built, deconstruct the staircase bit by bit, starting at the top. It’s faster than the ramp method, but I’ll explain the ramp method below to provide options.
In cases like these, it can be useful to think about real life. In real life, what do builders do to access high places? They build scaffolding! We can do something similar in Dwarf Fortress by using ramps.
Ramps are a bit like stairs, but instead of dwarves going up to the next ‘z’ level directly, they go diagonally up. The tile with a hex in it is ‘half filled’. Ramps are already all over the world, but we can construct our own, e o mais importante, they can be deconstructed without having a dwarf stuck on the roof.
Go back to the ground floor, open the construction menu, and click on the ramp.
Now select a tile next to a ground floor wall tile and double click (no scrolling!). This will build a ramp on this ‘z’ level going up to the next. Material doesn’t matter; we are going to remove these when we are done.
With the ramp built, on the same ‘z’ nível, build a wall next to it to act as our ‘scaffolding.’
Now scroll up a ‘z’ level and build another ramp on the wall we just built, in the same way we built the previous ramp. This will build a ramp on this layer.
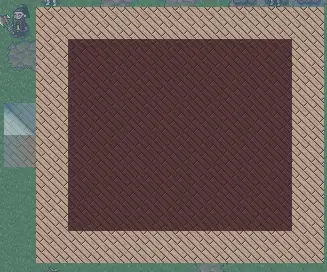
You now should have access to the top of the building! Designate the empty areas for floor construction. Remember you have a wall on the outer part of the building, so you won’t need to put a floor on them, but you can if you want to change the color. Below is my finished roof (with a different color to prove I filled it in!).
Em teoria, we could keep going up and up if we wanted to using this method.
With the roof filled in, we can deconstruct the scaffolding piece by piece in the REVERSE order to how we built it.
Etapa 7: Deconstruction
If you want to make changes to your construction, like removing flooring or scaffolding, you can use the ‘deconstruct tool’ found under mining/digging orders.

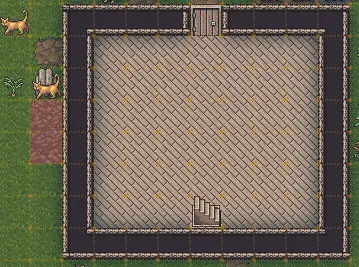
Para usá-lo, simply choose what you want to remove, and your dwarves will start working on it. When removing scaffolding, it’s a good idea to do it piece by piece from the top down to avoid dwarves getting stuck. Lembrar, if you’re on the roof level, the deconstruct tool won’t work. In the image below, I’m only removing the final ramp we built.
After taking down all the scaffolding, you’ll see the final image. Notice the two ‘dirt’ floors that were created. Even though they might not look great now, over time, grass or loam will ‘grow’ over them, making them blend in seamlessly.
Resumo
E é isso! You’ve successfully built a straightforward house with multiple stories and a roof, e espero, no dwarves got stuck on the roof or in the walls.
There’s a lot more you can explore with outdoor construction, but that’s beyond what we’ve covered in this guide. Let your imagination soar! Também, remember that the skills you’ve gained here aren’t limited to above ground. You can use them to construct walls, ramps, and floors underground as well!
Isso é tudo o que estamos compartilhando hoje para isso Fortaleza dos Anões guia. Este guia foi originalmente criado e escrito por Slippy. Caso não atualizemos este guia, você pode encontrar a atualização mais recente seguindo este link.