
- Título: Despot's Game: Dystopian Army Builder
- Data de lançamento:
- Desenvolvedor:
- Editor:
Information about Despot's Game: Dystopian Army Builder is still incomplete. Por favor, ajude-nos a preencher os detalhes do jogo usando este formulário de contato.
A version 1.0+ quick and dirty guide to getting your runs started the right way: by absolutely annihilating the first four levels!
Introdução
I decided to write this guide for three reasons:
Primeiro, the game has been out officially for over two months now and with Season 5 approaching is far overdue for a guide update. The last guides that cover this type of approach are over a year old, they are outdated or do not provide a good idea of what specifically to be getting and when.
Segundo, to help those out who are new or may have now gotten themselves in a league above their skill level, and to raise the skill floor of the community and see what wild teams unfold.
And finally to hopefully cut down the amount of reviews complaining about the food system, which is not an issue at all once you know how to efficiently approach the game. I can sympathize with the devs when users not only misunderstand why a choke exists, but then whine loudly and incessantly because they cannot figure it out. The answer is high speed, low drag.
As this game is very heavy on RNG, I am not going to provide an exact step-by-step breakdown of every floor, as it would be impossible to predict. I am also not going to address every single aspect or spill all of the secrets, as the game is competitive after all.
By the end of this guide you should have a general understanding of what is required to clear the first biome as efficiently as possible and have a solid setup for approaching the rest of the game.
The Equalizer
With the release of version 1.0, you can obtain one of two ‘buttons’ at the start of your run if your previous attempt beat the boss on Floor 4.
The first button is The Equalizer, which has two charges when used deals 500 damage to all units on the level, but can not kill. This is enough damage to be able to 1-shot almost every non-boss enemy on the first three floors, allowing some hyper-efficient and safe clearing with only two units.
The second button is Archived Newbies, which also has two charges and produces three free newbies on use. I would consider this the min-max option, as you can clear the first three floors without the Equalizer. Isso é 6 free units (a 12 token value!) that can be turned into 24 food in addition to tanking in a pinch or wearing items.
If you do not choose or have access to the Equalizer, I will provide advice for that scenario in each floor. If you do not have buttons at the start, restart until you are next to a mutation room.
Mode and Team
The recommended game mode for this guide is Mutagens, which doubles the amount of mutations you get in a run. These are incredibly powerful and doubling the amount of them you get is amazing. While some of the other modes have a chance to recover the items from dead units, you should not be losing more than two units intentionally in a run, three MAX. This guide budgets in losing your initial tank, and potentially shredding your other starting unit eventually, so this means you have a margin of 1. Seems difficult, but is trivial once you know what you are doing.
The recommended team for this guide is Special Magic. The T3 mage does enough damage to easily handle the first three floors with a single frontline unit. The mage is also great because it’s food cheap, does not lock you into a particular class, and is a huge bonus if you decide to pursue mages as your primary unit for the run. Additionally the three extra newbies you start with provide bonus food and can tank the first floor.
Once you learn the ropes from this guide, feel free to experiment with other options. The advice can be adapted to any starting team or normal KotH mode.
Chão 1
First thing’s first. Make sure to click the slot machine (see cursor in screenshot below) to choose the appropriate class quest for the second floor. These exist on floors 1, 5 e 9 and you should always do this first to form a habit. You don’t want to lose a run because you forgot this step, especially on the later floors. If you are not after a specific class skill, set this to whichever is the most efficient for movement/food purposes.
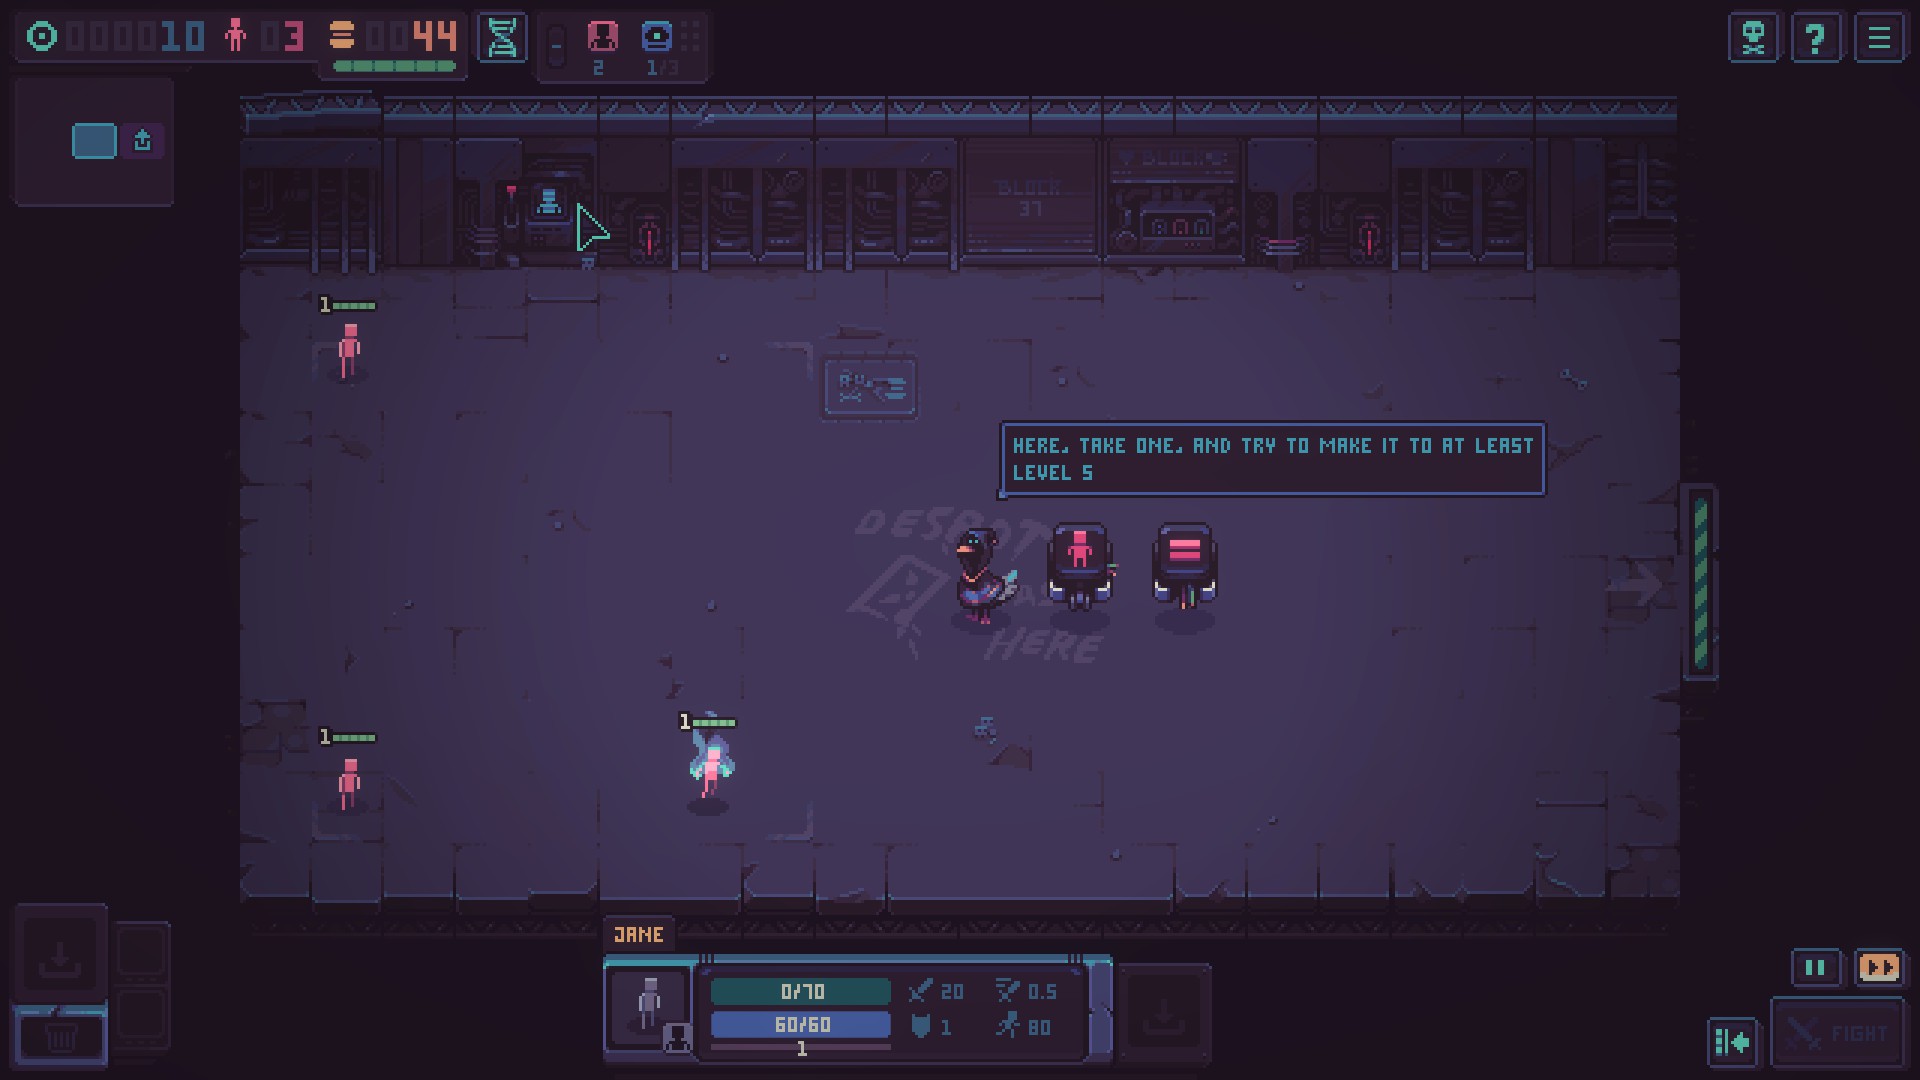
Segundo, choose your button if available, shred one human, and arrange your team as in the screenshot. This formation works well against most rooms on this floor, though I would advise moving a newbie up to tank item shop rooms.
Now move into the first room and determine what your first floor enemies are based on their layout and pattern, Daleks or Drones.
IF YOU HAVE THE EQUALIZER:
Daleks – Use the equalizer, shred a newbie. The mage can solo the floor before the boss without taking damage and does not require newbie tanking.
Drones – You can use the equalizer, shred a newbie. Use the remaining newbie to tank the item shops. Optimally, you should save it and apply the non-equalizer strategy as this is an easy floor.
IF YOU DO NOT HAVE THE EQUALIZER:
Buy the Health Multiplier Lv1 upgrade. Tank item shops with newbies if you can keep one alive, preserve the mage as much as possible but tank one room if necessary. It’s not a big deal if you lose both newbies before getting your frontline unit, but is obviously less than optimal.
Your goal now is to get either a T2 or T3 tank or a T3 fighter. These are the only units in the price range that have enough armor to adequately tank and survive the first four floors.
At your first shop upgrade it once. If you do not get your unit here, save the second shop as the last room if possible to build up tokens.
At the second shop, if your unit is unavailable/unacquired, buy the Thrill Addiction Lv1 upgrade. Re-roll until you get one of the mentioned units. Your shop re-roll budget for the first biome should optimally be 10 tokens or less.
Mutation wise, all of the available ones on the first floor are good, but I feel that Living on Scraps is in a tier all its own. Summon Drone is also good for frontline preservation and Nanominesweeper annihilates the deadly catbots, but these two tend to fall off after the 4th floor.
You should now be able to clear the floor boss with a scratch or two on your frontline.
Chão 2
Your goals on this floor are simple, but the priority depends on circumstance and enemy set:
-Upgrade the shop to max.
-Get the Sale! Lv1 and Armor Bonus Lv1 upgrades. Consider Health Multiplier Lv2.
-Add an extra unit to your team if necessary.
IF YOU HAVE THE EQUALIZER:
Daleks – Use the equalizer if not used on Floor 1. Prioritize mutation and shop upgrades. You may not need to add another unit.
Drones – Save the equalizer. Igual ao acima, do not add any units.
Catbots – Use the equalizer. Prioritize Health Multiplier Lv2 and shop upgrades. You may want to add another unit to deal with the Samurai boss and not risk losing your T3 mage.
IF YOU DO NOT HAVE THE EQUALIZER:
Daleks – Prioritize Armor Bonus Lv1 upgrade and then the shop. Your tank might get a little beat up, but you can get by without adding units.
Drones – Cakewalk. Upgrades only, do not add units.
Catbots – Pesadelo. Adding a unit may be a necessity and anything less than a T4/T5 is usually a waste. You may struggle to preserve your units while you collect tokens to get shop upgrades and one or two units. Losing units here is almost always a reset.
Mutation wise, you want to be aggressive with the re-rolls and try to get at least one top-tier ability that also lets you determine which types of units you are using. Things like Vampirism, Evasion and Resurrection or class spells like Sword Dance and Chain Lightning are high priority because they are effective in PvE and PvP. Getting generics like leftover Floor 1 mutations are suboptimal, but aren’t terrible if you are trying to force a specific composition or you run out of re-rolls.
If you don’t need to add a unit on this floor, only consider buying a T4/T5 weapon if you catch it on sale and it’s what you’re running. Save shop re-rolls until absolutely necessary.
Chão 3
By now everything should be moving smoothly and the BGM mood should be positively funky. You should have an idea of which units you are using. Your goals on this floor are:
-Adicionar 1-2 units to your team, preferably T5/T4. Você deveria ter 3 units on this floor for efficiency, or a max of 4 for synergy (ex. +2 mages to get Thunderbolt online).
-Continue spending as cheaply as possible while climbing in the mutations tree, getting at least one level in Wide Selection and working towards More Mutations.
If you still have an Equalizer fire it off.
At this point your team should be competent enough to handle the floor with or without the equalizer. If you don’t have an equalizer and it’s the catbot floor, correr 4 unidades.
Mutation wise, same as the previous floor. Top-tier mutations are a priority, and you can now fund additional re-rolls with Wide Selection. I would not advise going past Wide Selection Lv2 at this point for economic reasons.
You may also have started running out of food by now, there should be room in the budget for two Sweet Rolls, but don’t buy the second unless it’s necessary. Fighting hungry without the Hungering Fury mutation is a bad idea early game.
Chão 4
The goal on this floor is simple, kill the octoboss.
This floor isn’t terribly difficult, but you will likely need to re-arrange your units to deal with the Samuraii and the boss.
The number of units you should run on this floor largely depends on upgrades and composition with food efficiency being the priority. Your tank, your mage and a mix of 2-4 T4/T5 units can clear the floor.
The absolute maximum should be 7 assuming you are running a tank and 6 mages with full synergy for two Thunderbolts. I would not recommend running anything under T3 for the other classes, you will likely lose them immediately in the next biome unless you know exactly what you are doing.
More Mutations and the End of Floor 4
At the end of this floor, if you’ve been following this guide you will likely have enough tokens to get the More Mutations upgrade. While this is an absolute top-tier monster upgrade, you need to consider your situation going into the second biome as it is a huge jump up in terms of difficulty. If your tank is still alive, they won’t be for much longer.
The first goal in the next biome is a rush for sustaining your team. This is done either through getting a Vampirism altar mutation, or through the mutation tree in either Energy Vampirism or Regeneration. Healers are suboptimal in that they cost food upkeep, die easily and are unpredictable; they can be used if you are competent but I would still recommend supplementing them with one or more backups or not using them entirely.
This will put you in one of three scenarios:
1. You managed to get Vampirism for your primary class. You can breathe easy and likely get More Mutations without issue, and will not struggle if you bolster your team with a few more units to tide you over until you can supplement them with health upgrades and then Energy Vampirism or Regeneration composition depending.
2. You did not get Vampirism for your main class. You have gotten some good offensive mutations such as Bash, Critical Strike or Evasion. In this case you can risk going for More Mutations, but might struggle to survive long enough to reach self sustain. Prioritizing Health Bonus Lv1, Health Multiplier Lv3 and bolstering your forces will be tricky. You might be better off going for Health Bonus Lv1 and then getting More Mutations safely on Floor 5 after assessing the situation at the cost of a single mutation.
3. You didn’t get Vampirism on your main, or you can’t afford More Mutations, or you got mostly suboptimal/oddball mutations like Super Punch or Mana Burn. Much like the above, it’s not the end of the world if you miss a single mutation from not having More Mutations. Dito isso, from here your team’s mileage may vary depending on your amalgamation of skills and what enemy pattern you get on the next floors. The good news is you can now restart the run, acquire the starting buttons and try again to get better rolls. Otherwise you can press on and learn what works and what doesn’t in the second biome, and you still get your restart buttons if you can’t recover it.
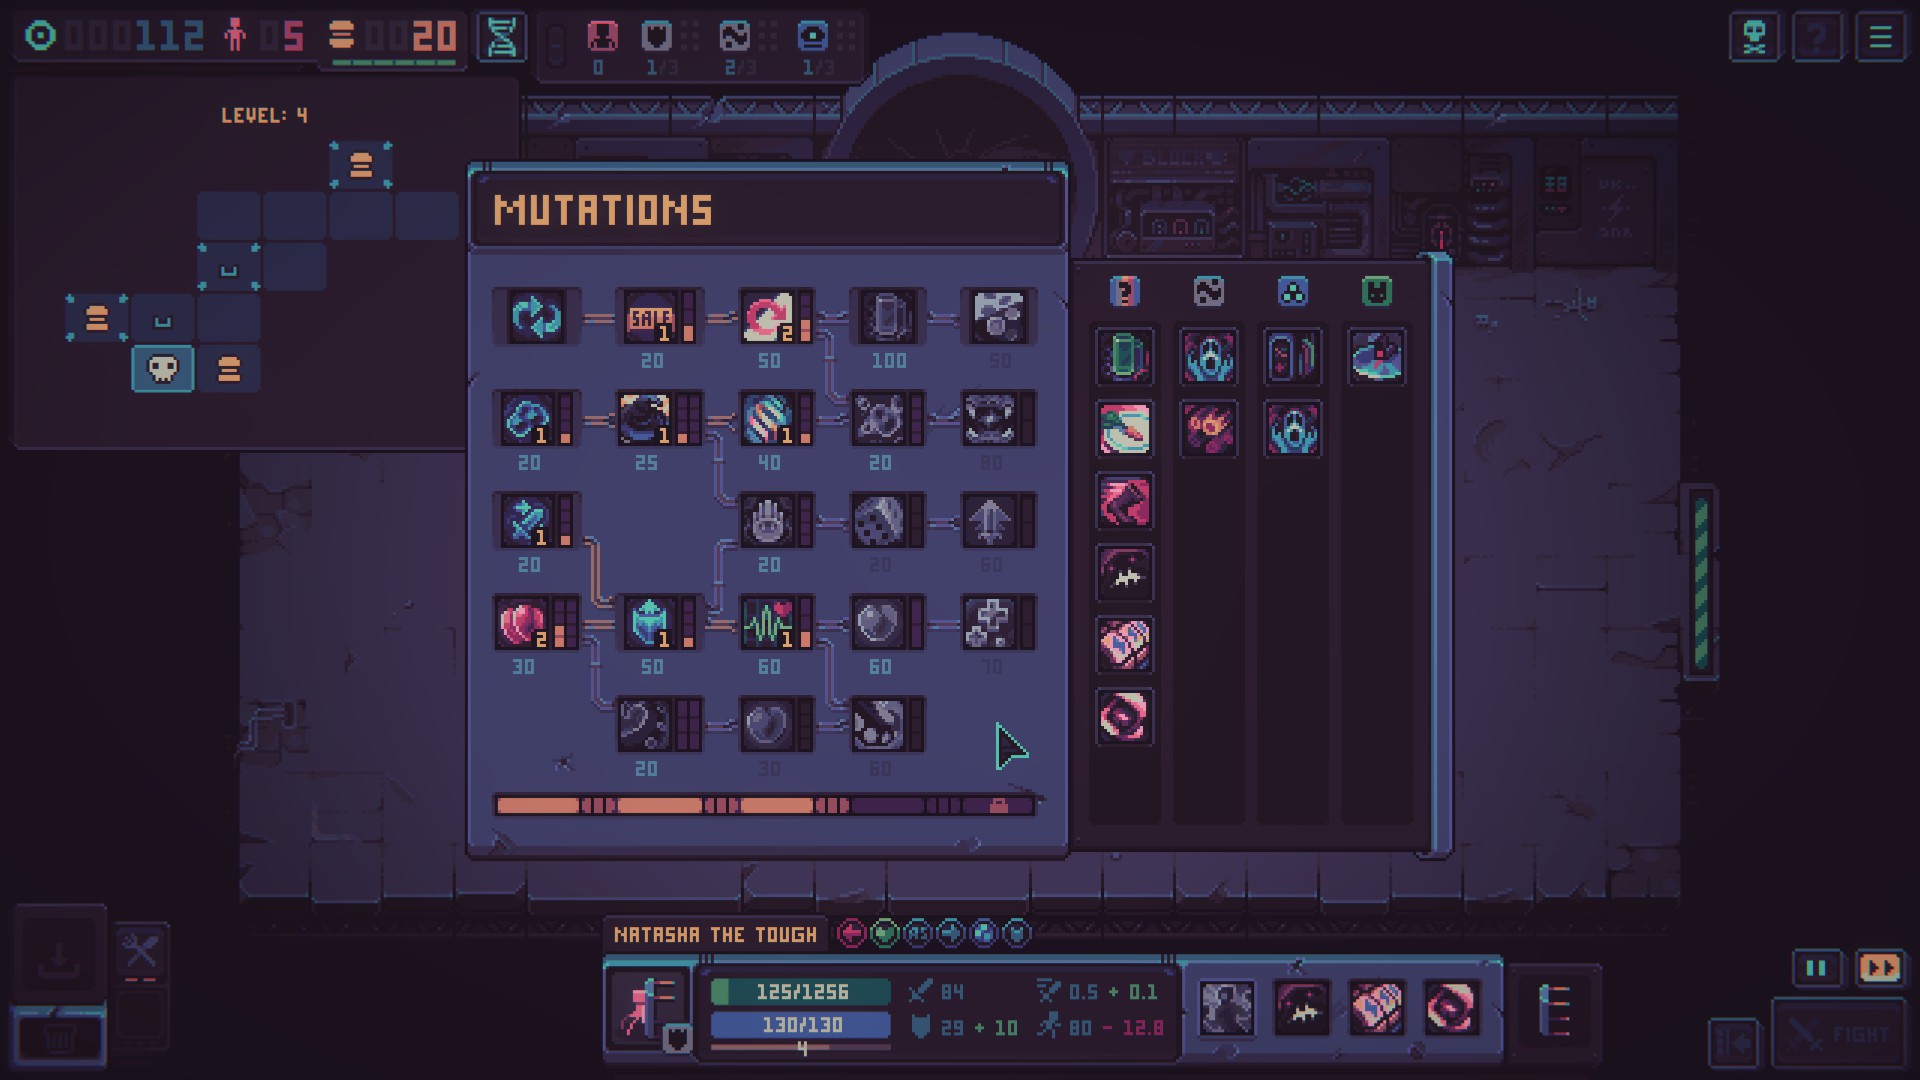
The above screenshot is what I would consider a scenario 3 and an excellent restart candidate example. I have enough tokens for the More Mutations upgrade, but the mutations I have are less than ideal, and my team of T3 mage, T2 tank-on-deathbed, two T5 and one T4 fighter are likely going to have a rough time without *very* good luck on the next floor.
Bioma 2 e além
And this is the conclusion of the guide. The only remaining pieces of advice I will part with are:
1. Do not forget to set you class quests on floors 1, 5 e 9. Something about 7 também, keep your eyes peeled, there’s some cheese left in the shredder…
2. Do not ever run more than 10 units until floor 11. Mutations and upgrade power far outweigh the cost of units and their food upkeep.
Obrigado por ler, and see you on the hill!
Isso é tudo o que estamos compartilhando hoje para isso Despot's Game: Dystopian Army Builder guia. Este guia foi originalmente criado e escrito por 1grampo. Caso não atualizemos este guia, você pode encontrar a atualização mais recente seguindo este link.