
Um protetor simples de surto pode proteger suas caixas de junção carregando suas baterias em barotrauma.
Como funciona
O circuito determina a diferença entre a saída e a carga e ajusta a taxa de carga da bateria para evitar a sobretensão.
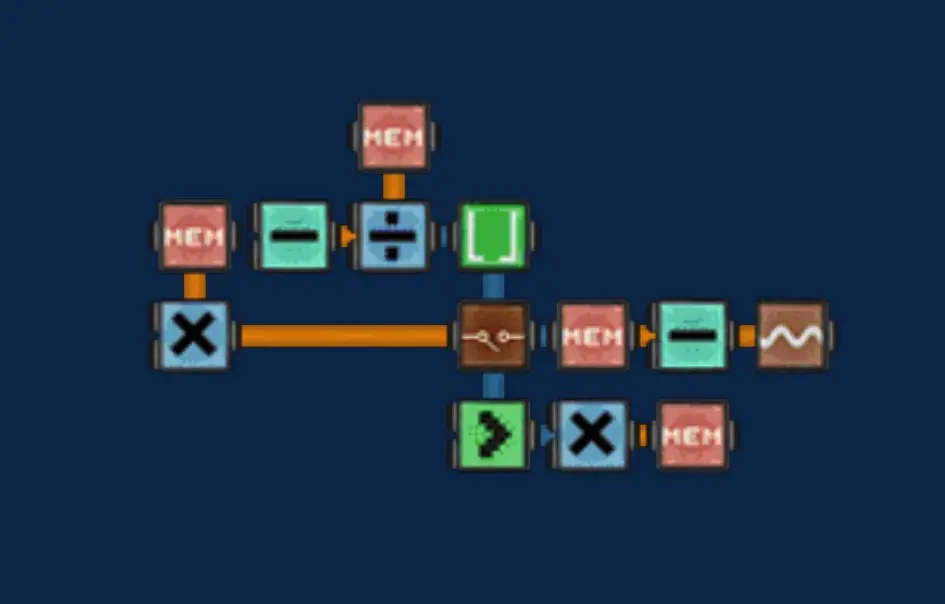
O circuito consiste em três partes principais: o topo, meio, e inferior. A peça superior calcula a taxa de carga da bateria. A parte do meio reduz gradualmente a taxa de cobrança para 0% em um ritmo consistente. A parte inferior ativa o circuito quando a sobretensão ocorre.
A calculadora de taxa de carga
Para esta parte, você precisará:
- Subtraia o componente
- Divida o componente
- Componente de memória
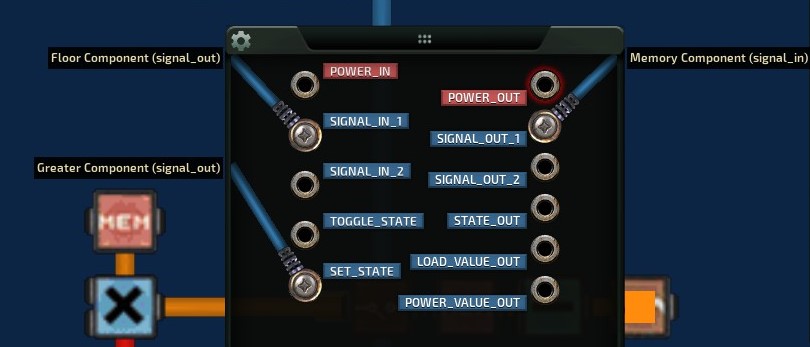
- Componente de piso
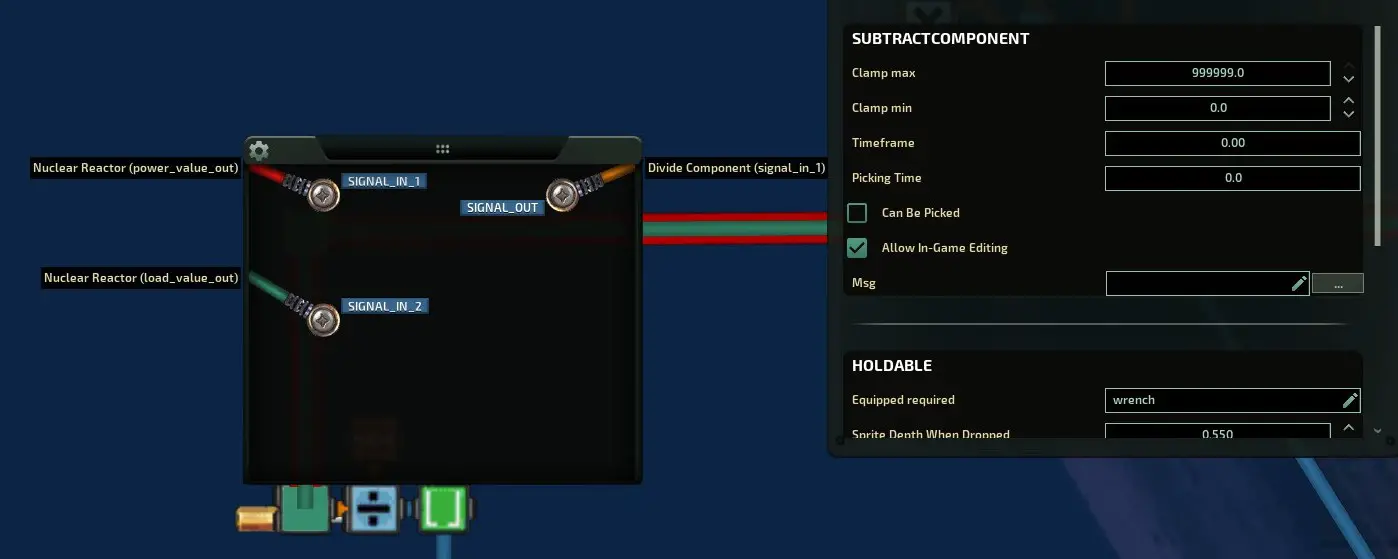
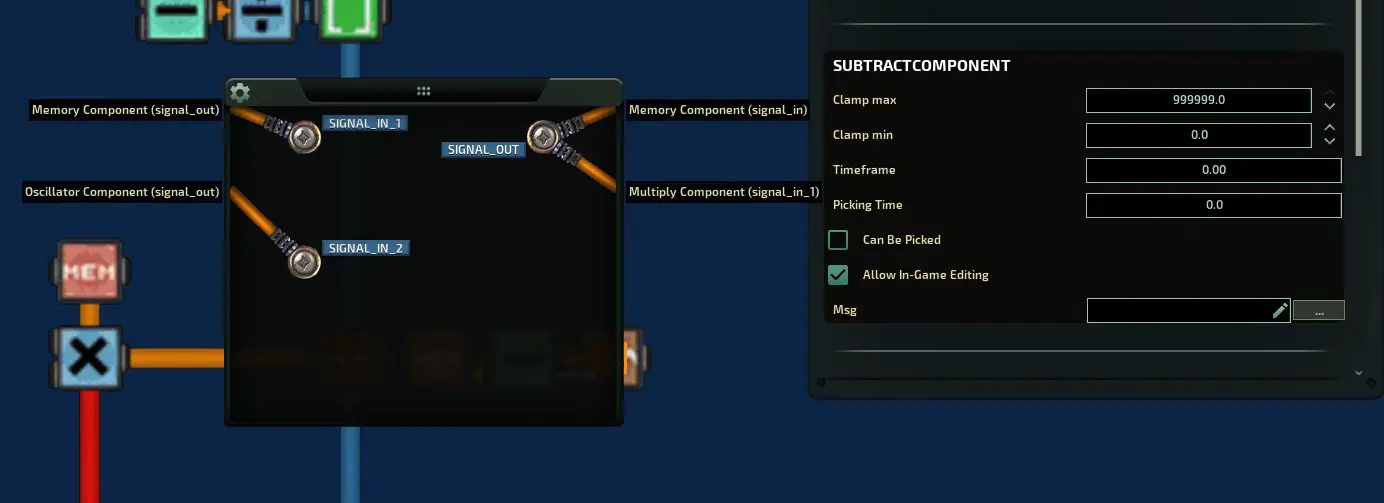
Comece usando o componente subtraído e conecte o Power_value_out do seu reator a Signal_in_1 e o load_value_out a Signal_in_2. Então, Defina o valor do minuto de grampo como 0.
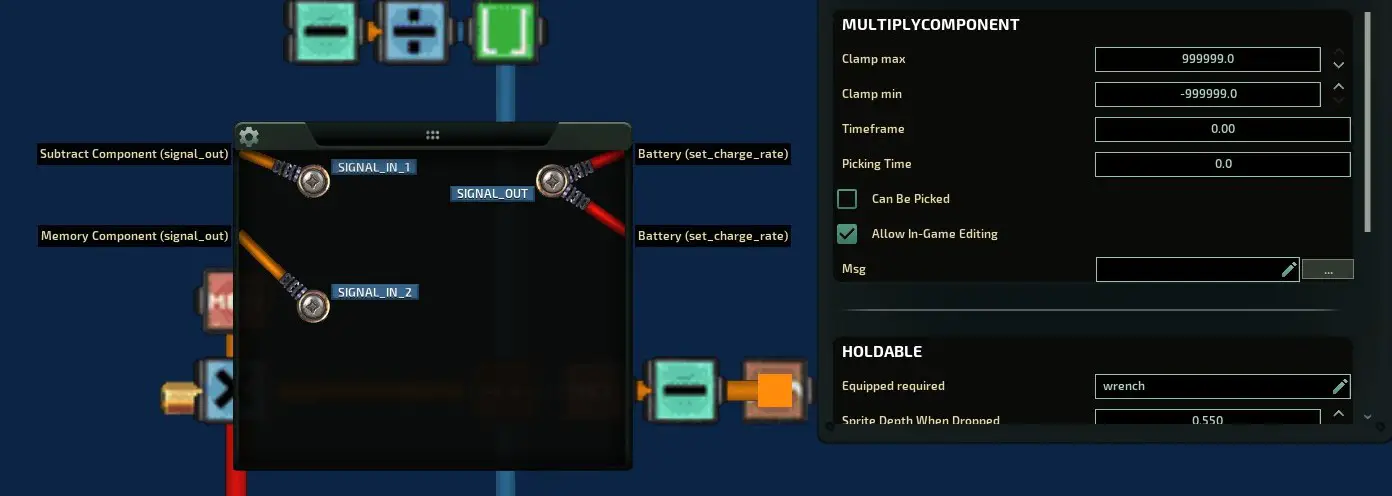
Próximo, Conecte o Signal_out ao Signal_in_1 do componente Divide.
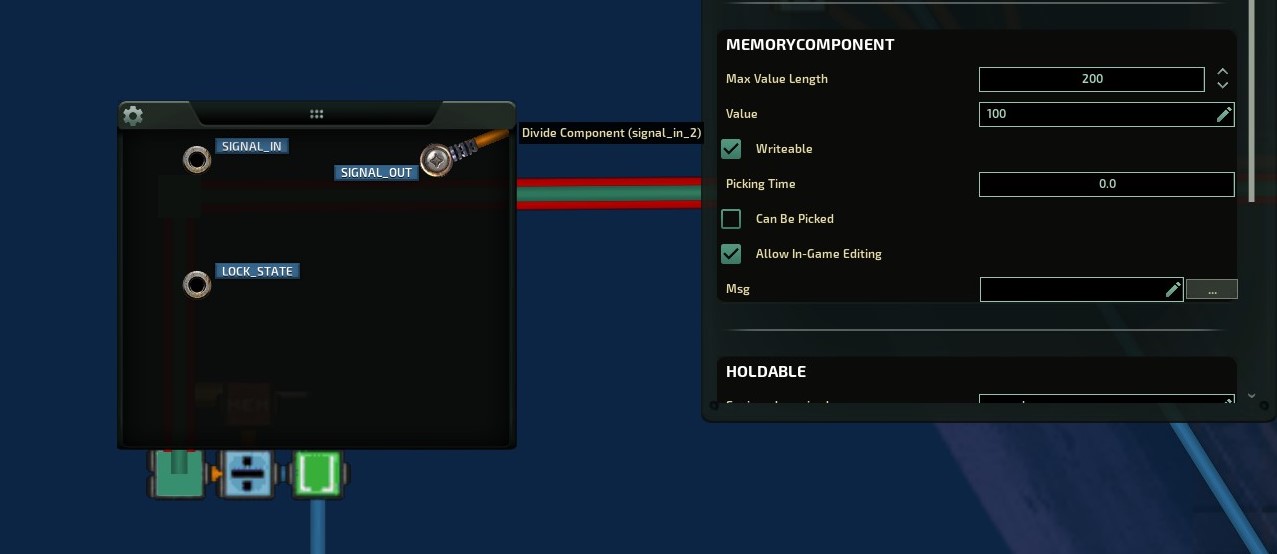
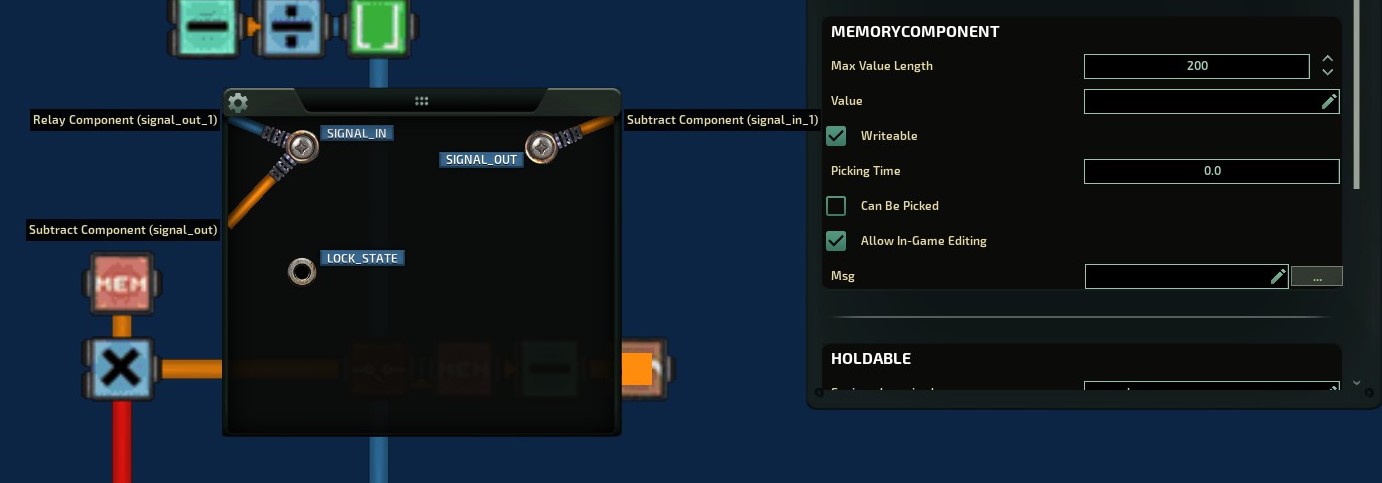
Configure seu componente de memória com o valor sendo 10% de suas baterias combinadas poder de carregamento (Então, se você tiver duas baterias com velocidade de recarga máxima de 500kW, cada uma que seria 50 + 50 = 100kW).
Conecte o sinal_out do componente de memória para o Signal_in_2 do componente Divide.
Defina o componente de divisão max para 11 e o grampo min para 0. Conecte seu sinal_out ao componente do piso.
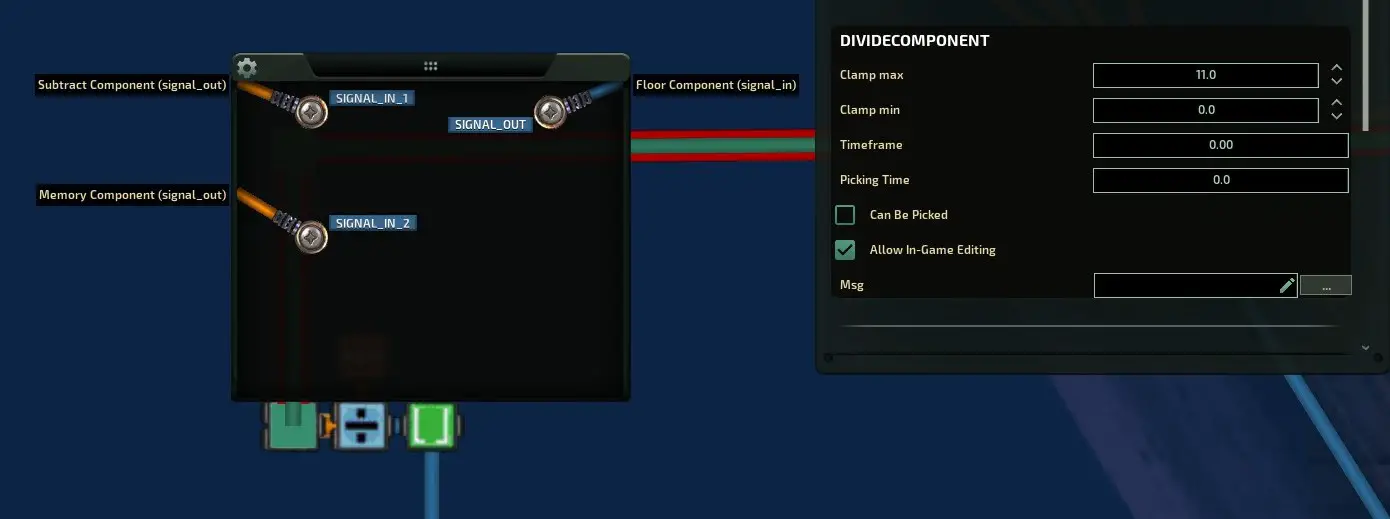
Isso completa a calculadora para a taxa de carga. Vamos multiplicar por 10 mais tarde, então ele define a taxa de cobrança corretamente, mas por enquanto você deseja que isso esteja entre 11 e 0.
Desça do circuito
O objetivo deste circuito é aumentar a taxa de carga do valor inicial feito pela calculadora de volta a zero. Então, se a calculadora enviar um 10 Tudo o que faz é contar para baixo até 0.
Você vai precisar:
- Subtraia o componente
- 2x componente de memória
- Multiplique o componente
- Componente do oscilador
- Revezamento
Comece com o relé e conecte o sinalização_out do componente do piso da calculadora em Signal_in_1 do relé. O Signal_out_1 entrará no Signal_in do componente de memória.
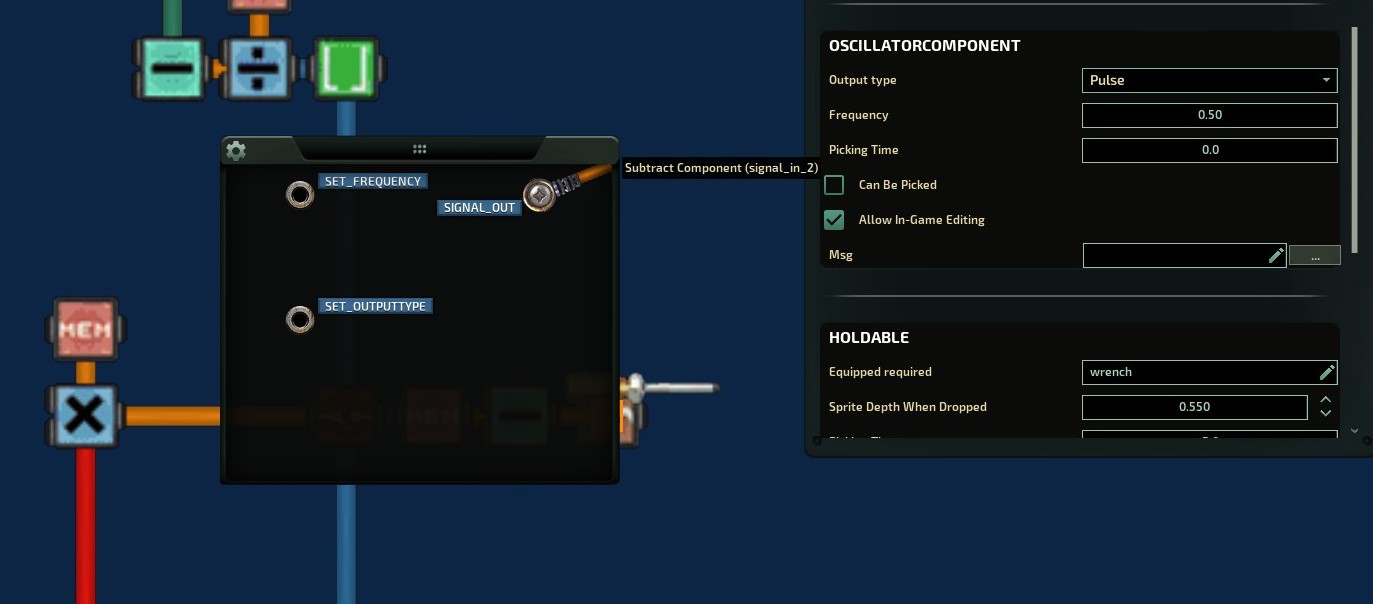
Vamos deixar isso sozinho por enquanto e passar para o componente do oscilador.
Deve ser um tipo de pulso de saída com uma frequência de 0.5 e conecte seu sinal_out no sinal_in_2 do componente subtraído. A frequência é o quão rápido ele mudará a taxa de cobrança, então brinque com esse número para encontrar uma velocidade que você gosta.
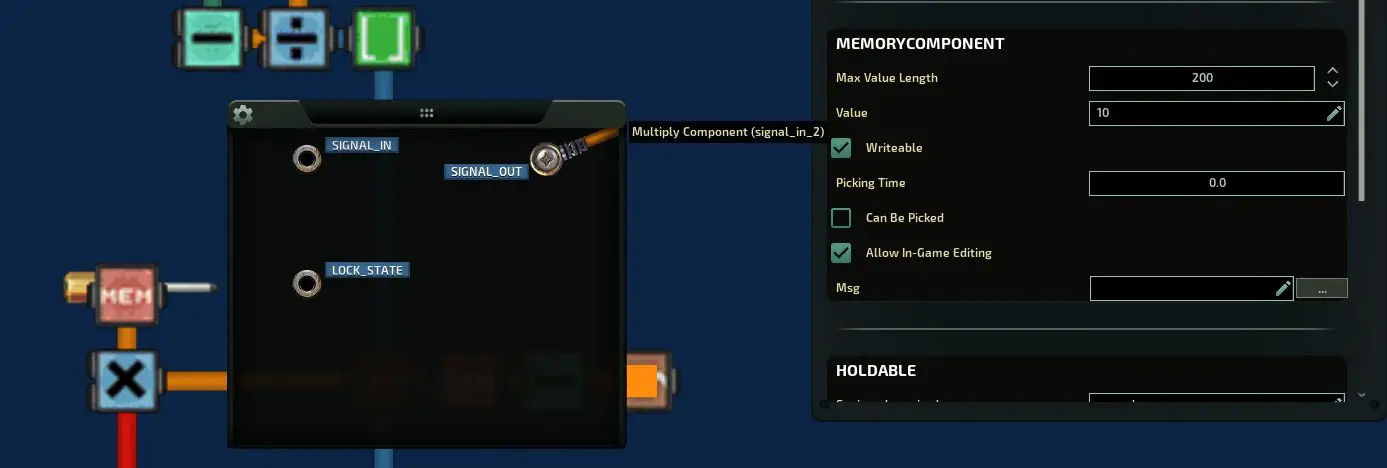
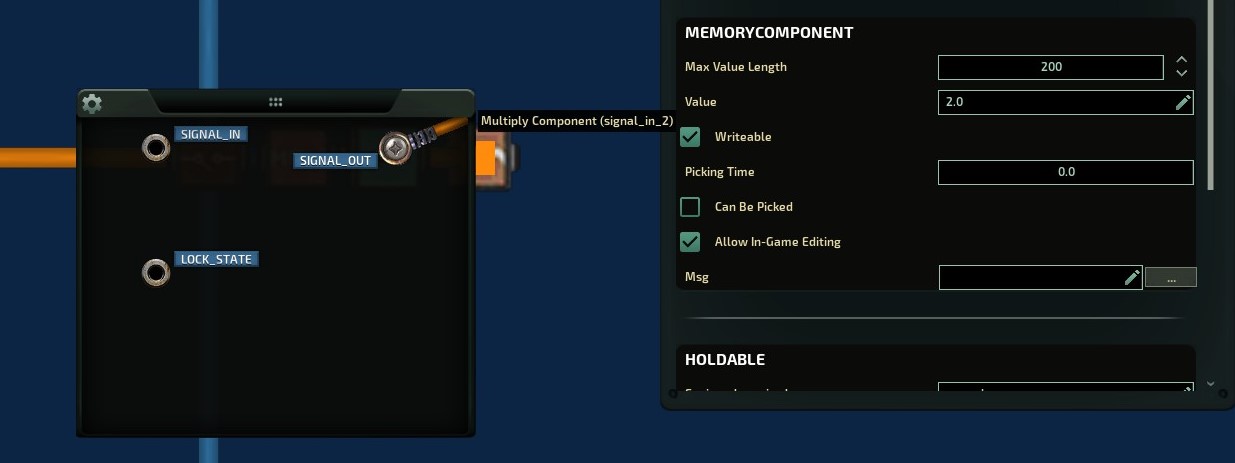
Agora de volta ao componente de memória. Conecte seu sinal_out no sinal_in_1 do componente subtraído. Em seguida, conecte o sinal_out do subtração de volta ao sinal_in do componente de memória. Defina o minuto de pinça do subtrair 0. Isso vai tirar o valor inicial da calculadora e continuar subtraindo 1 a partir disso.
Também conecte o sinal_out do componente subtraído em Signal_in_1 do componente multiplique. Defina seu 2º componente de memória como um valor de 10 e conecte -o ao Signal_in_2. Então o sinal_out da multiplicação entra no set_charge_rate de suas baterias.
Isso transformará seu valor de volta em uma porcentagem, para que a taxa de cobrança seja definida corretamente.
Detector de sobretensão
A última parte disso tropeçará no circuito quando uma certa quantidade de sobretensão for alcançada.
Você vai precisar:
- Componente de memória
- Multiplique o componente
- Maior componente
Se você é um engenheiro afiado, deve ter notado que a calculadora da taxa de cobrança está constantemente calculando a taxa de carga, o que faz com que a taxa de cobrança salte enquanto a carga pega a saída.
Este circuito levará o valor da taxa de carga quando a saída estiver em um determinado valor sobre a carga. Você vai querer alterar esse valor, dependendo do sub que você está usando.
Primeiro defina o valor do seu componente de memória, Este valor variará! Uma caixa de junção padrão tem uma tensão de sobrecarga de 2.0 o que significa que a saída deve ser 2x a carga para a caixa de junção para causar dano. Este valor é diferente entre os subs de baunilha, por exemplo, o dugongo é 1.7 Enquanto o Typhon é 1.5. Carregue o sub que você está usando no editor e verifique o valor da tensão de sobrecarga. Este será o valor do seu componente de memória. Nesse caso, vou usar o padrão 2.0 valor.
Conecte o sinal_out do componente de memória para o sinal_in_2 do componente multiplique. Em seguida, conecte o load_value_out do reator em Signal_in_1. Defina o máximo de multiplicação para a saída máxima do seu reator, Nesse caso, é 5000kW.
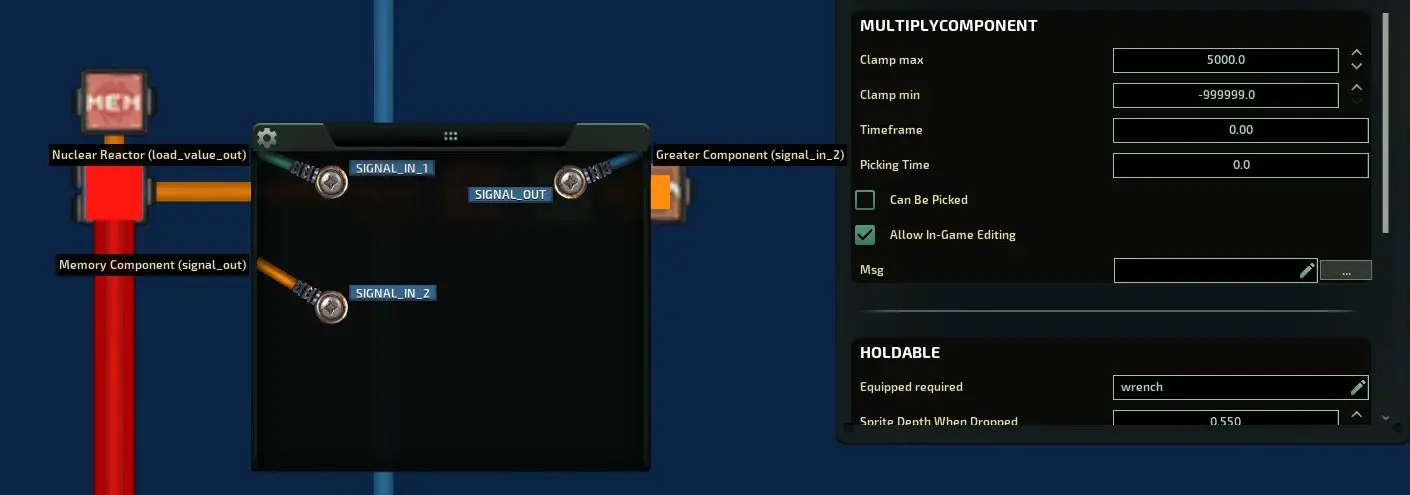
Pegue o Signal_out do componente multiplicado e conecte -o ao Signal_in_2 do componente maior. Em seguida, conecte o Power_value_out ao seu Signal_in_1. Defina a saída do componente maior como 1 e sua saída falsa para 0.
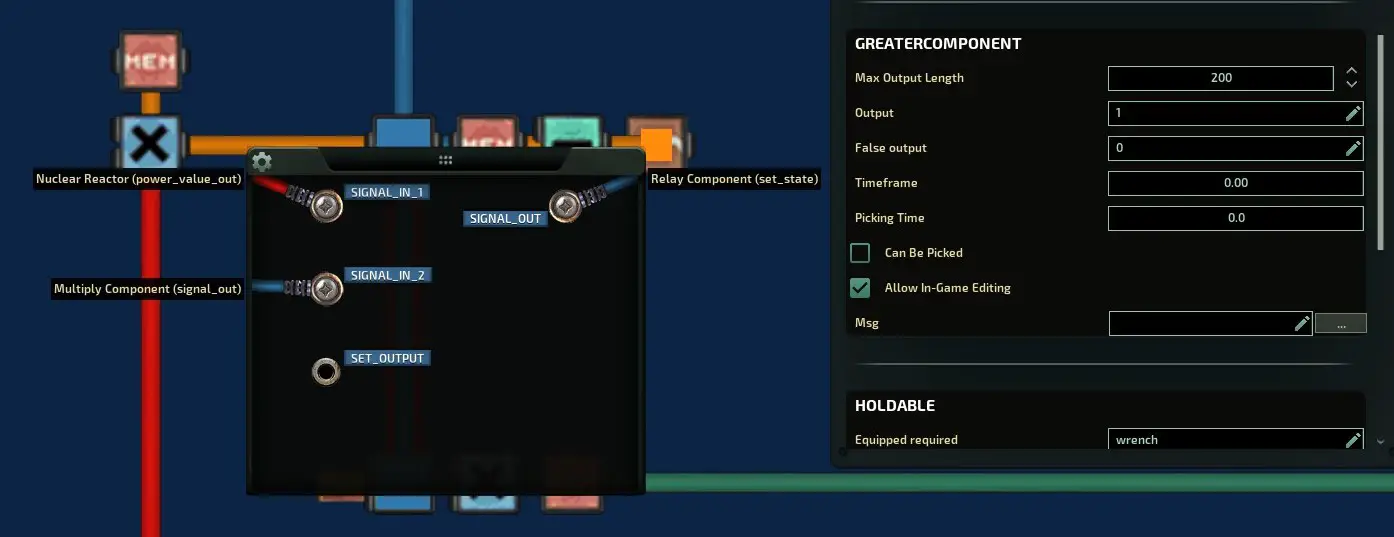
Por último, conecte o sinal_out do maior para o set_state do relé de antes e terminar!
Problemas e informações extras
Alguns problemas com este circuito são que as baterias não podem estar cheias para que isso funcione corretamente e o circuito não desative assim que as viagens. Portanto, se o seu capitão passar de velocidade máxima para morta, o circuito será executado, mas se ele acelerar novamente, o circuito ainda seguirá seu curso, mesmo que não haja mais tensão para explicar. Você pode conectar uma segunda verificação para isso, se quiser, mas eu achei que não é um problema.
Agora, Você deve ter notado na calculadora da taxa de carga que o grampo max vai para 11 o que seria 110% taxa de cobrança que é impossível. A razão pela qual eu o defina para 11 é por causa da maneira como o componente do oscilador funciona. Já que está sempre pulsando, dependendo do momento de quando o circuito viajar, poderia marcar bem quando viajar, fazendo você pular 100% taxa de cobrança e vá direto para 90%. Começando em 11 o torna um pouco mais consistente e você pode até aumentar esse número se quiser que as baterias fiquem com carga máxima por mais tempo.
Para a frequência do oscilador, eu encontrei 0.5 Para ser um bom número, pois oferece bastante tempo para a saída se atualizar se você estiver executando controle automático. Se você quiser cobrar por mais tempo ajustando o número ao seu gosto.
No detector de sobretensão, Você pode definir o valor do componente de memória um pouco menos do que o valor definido pelas caixas de junção, se você quiser que ele tropeça no circuito um pouco mais cedo. Definindo o valor para 1.6 em um dugongo com um valor de sobrecarga de 1.7 por exemplo. Como leva cerca de meio segundo para o circuito para ajustar a taxa de carga no início, você pode evitar todos os danos dessa maneira, mas deve levar muito pouco dano se você não fizer isso.
E é isso que é à vontade fazer qualquer pergunta ou me avisar se eu estraguei em algum lugar aplausos!
Isso é tudo o que estamos compartilhando hoje para isso Barotrauma guia. Este guia foi originalmente criado e escrito por Daballa261. Caso não atualizemos este guia, você pode encontrar a atualização mais recente seguindo este link.