This guide has the most crucial advice, particularly tailored for the Honor mode in Portão de Baldur 3 to enhance survivability and increase the likelihood of completing a run successfully (whether aiming for achievement or other goals). It covers general tips, party suggestions (including builds), and playthrough strategies.
Dicas gerais

- If you haven’t finished the entire game on an easier difficulty, it’s best to steer clear of Honour mode. Unless you enjoy experiencing multiple lengthy failures. Since you can’t load saves, avoiding fatal errors is nearly impossible without a solid grasp of the game mechanics (unless you resort to cheating). Adicionalmente, if Tactician mode posed significant challenges, Honour mode might not be the best choice.
- Each of your four party members should carry at least one invisibility potion at all times. These come in handy for retreats from battles. In case of such retreats, a surviving hero can head to Withers to resurrect the entire party (with their inventory safely stored in camp). It’s a basic precaution to prevent the party from being wiped out in combat.
- In boss fights and encounters before reaching level 5, make extensive use of consumables and buffs. This includes potions, elixirs, coatings, pre-buffs, fãs, pergaminhos, and arrows. Items that enhance attack rolls, such as Oil of Accuracy and Elixir of Battlemage’s Power, are particularly useful in Honour mode. Consider using Bless just before major fights; it’s a solid option for clerics or paladins, especialmente no início do jogo. While using consumables and buffs is generally advisable on lower difficulties as well, it’s even more critical in Honour mode. Take the time to familiarize yourself with your inventory, utilize alchemy, purchase from vendors, and distribute consumables among your companions.
- Before engaging in battles, carefully examine the description of each boss’ legendary actions (specific to Honour mode). You can do this by using the “examine” feature in-game or by researching them online before starting the fight. Adicionalmente, always check the boss’ regular resistances and immunities to better strategize your approach.
- Deploy a charismatic leading character proficient in persuasion skills to circumvent boss fights whenever feasible. Despite the randomness of dice rolls, don’t underestimate the power of persuasion in Honour mode. It’s entirely possible to overcome chance without resorting to exploits. Essential strategies include managing inspiration points, reserving them for crucial dialogues, utilizing spells like Friends (but be cautious as NPCs may turn hostile after the effect wears off in Honour mode; consider using Enhance Ability instead), and leveraging bonuses from Guidance and Bardic Inspiration. By avoiding challenging battles, you increase your odds of survival in your Honour run.
- Opt for an easier route by embracing an evil Dark Urge character. Some fights are more manageable on the evil path, while others can be entirely avoided. Adicionalmente, there are bonuses tied to certain origins, and you won’t need to concern yourself with saving NPCs; you can simply eliminate them in homage to Bhaal. No entanto, it’s advisable to spare Volo in both Act 1 and Act 3, as he provides a significant buff for the final battles. Também, consider tieflings if you’re utilizing a cantrip sorlock build and desire the Potent Robe.
- Certain dice checks, including those in dialogues, are repeatable for each party member. If all four party members fail an important check, consider creating a specific mercenary to maximize your chances of success. Adicionalmente, incorporate a bard for Bardic Inspiration and utilize Enhance Ability. No entanto, this tactic isn’t necessary for digging chests; you can simply use a shovel without a successful survival check if you can deduce where to dig.
- Commence battles from stealth whenever possible, ideally with a stealth expert, to potentially catch your foes off guard, granting you the advantage of a missed turn for them. After the first companion initiates combat, have the remaining three join from stealth as well, allowing you to position them strategically before they enter the fray.
- Equip the Alert feat for all offensive builds, except for ranger-stalkers who possess a similar bonus from their subclass. This feat is indispensable when your party acts before the enemies. With strong offensive builds, you can eliminate or incapacitate most dangerous foes before they have a chance to act, thereby averting challenging encounters. Pair this with the mobility of melee characters, with Misty Step being an optimal choice obtainable through various means, including items.
- Assemble a well-balanced party comprised of overpowered (OP) constrói, incorporating respecs and substitutes as needed. Let’s delve deeper into this concept for further clarity.
Party Tips (Construções)
You can complete Honour mode with any well-rounded party; there’s no need for strict limitations, and no mandatory builds or classes. It’s even possible to solo it with just Tav. No entanto, for the safest and most straightforward experience, I recommend the following balanced party. Not only is it highly efficient, but it’s also enjoyable and incorporates a significant portion of the best companion-related content. I personally utilized this party as an evil Dark Urge in my Honour mode playthrough.
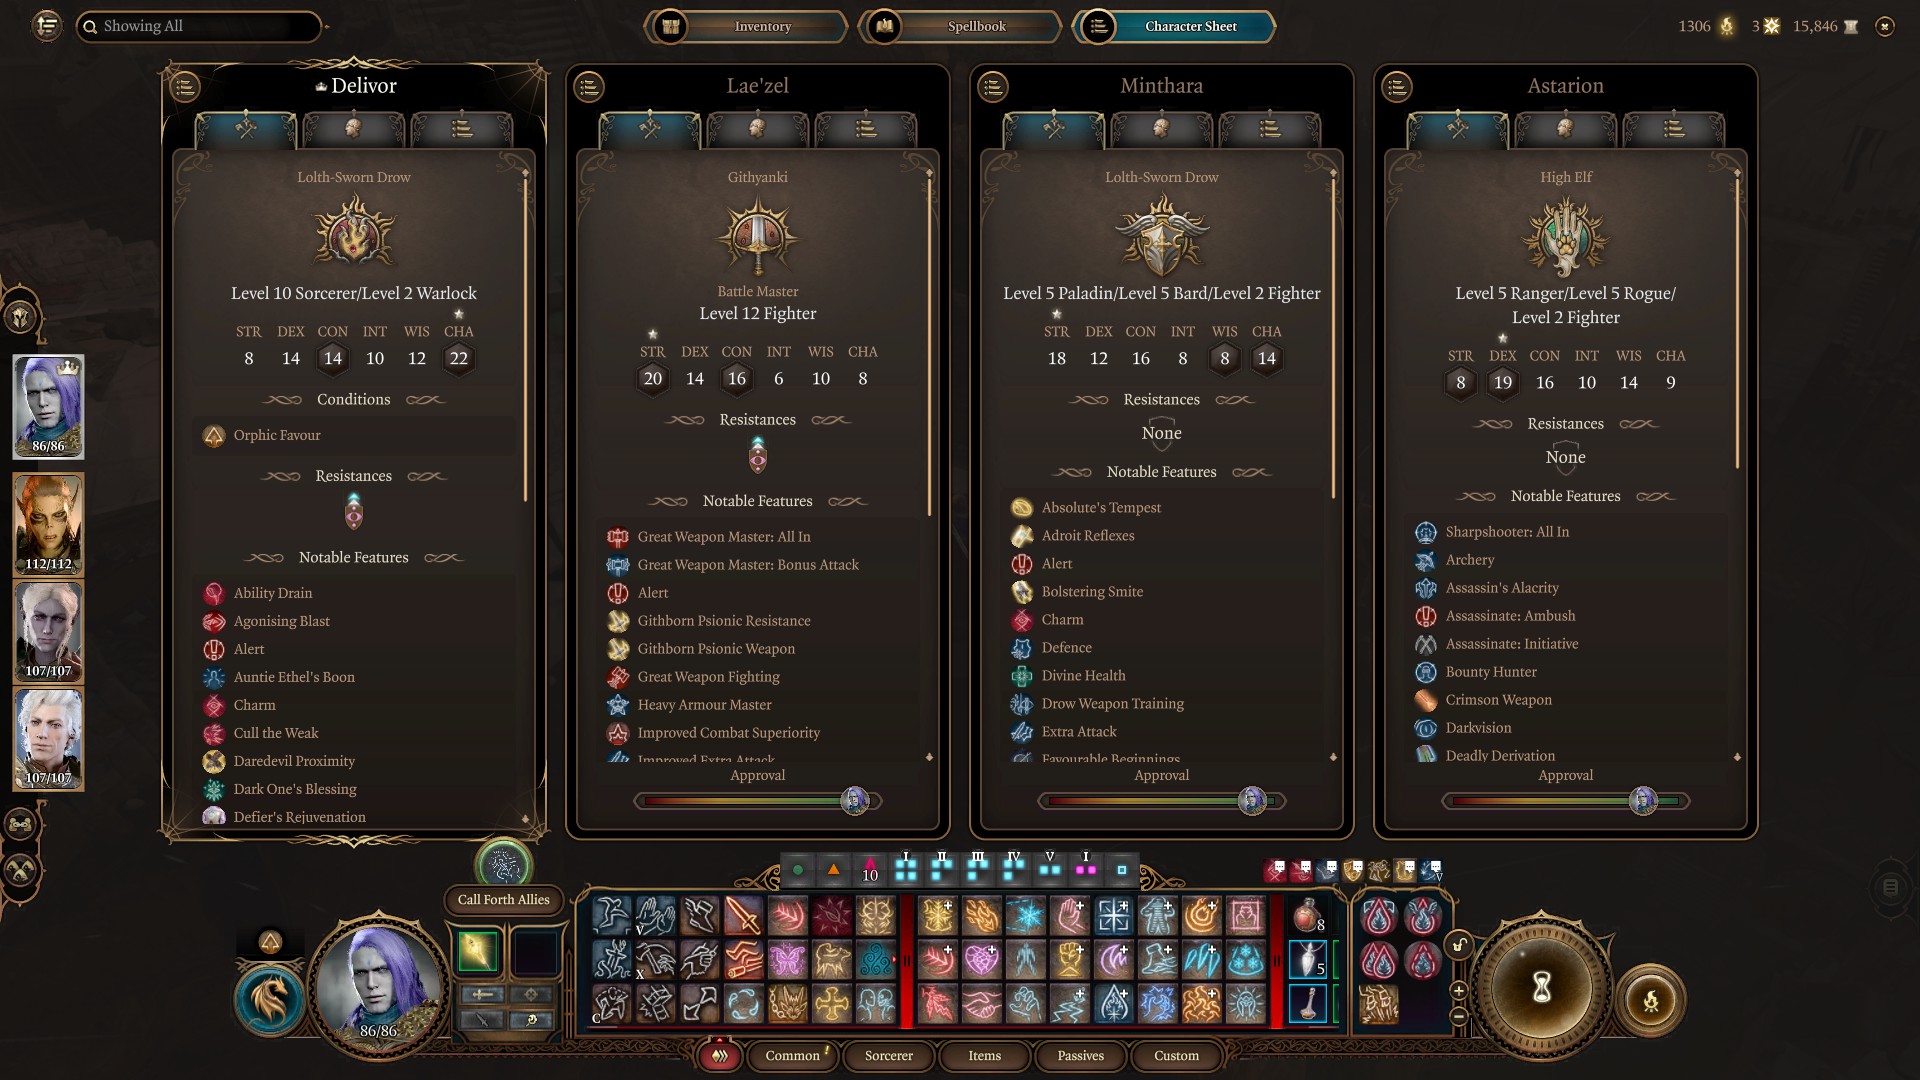
Principal (durge/tav) – Sorlock – Feiticeiro 1 / Bruxo 2 / Feiticeiro 9
For your main character, consider the Sorlock build, a combination of Sorcerer and Warlock classes. Distribute your ability scores accordingly, prioritizing Charisma for spellcasting effectiveness. The recommended stat array could be 8/14/14/10/12/17 for a focus on non-combat and roleplay aspects, ou 8/14/16/8/10/17 for maximum survivability.
The Charisma score of 17 implies acquiring a +1 Charisma bonus, which can be obtained from a hag.
This build excels at dealing significant damage through the synergy of Warlock’s Eldritch Blast cantrip and Sorcerer’s metamagic options and passives. Adicionalmente, it offers versatility in spellcasting and proficiency in persuasion skills.
Begin as a Sorcerer with the Draconic Bloodline subclass for additional AC and HP benefits. While ancestry isn’t crucial, White ancestry can provide access to spells like Armor of Agathys and Ice Storm, while Red ancestry enhances spells like Fireball and Fire Wall. Ensure to select cantrips like Friends, Fire Bolt, and Magic Missile, along with proficiency in Persuasion, Decepção, and Intimidation. Perception and Insight are also valuable, with Medicine being an alternative for a durge character. Race choice is flexible, but options like drow offer bonuses to Perception, which can be advantageous in dialogues.
Multiclass into Warlock at levels two and three, selecting the Fiend subclass. Core abilities include Eldritch Blast, Hex, Agonizing Blast, and Repelling Blast. From level four onwards, focus on Sorcerer levels. Prioritize metamagic options like Distant, Twinned, and Quickened, along with feats such as Alert and increasing Charisma to 20. Utilize Enhance Ability for additional bonuses.
The Potent Robe is the ideal item for this build, obtainable in Act 2 at the Last Light Inn if tieflings were rescued in Act 1 and Alfira is alive. Daredevil Gloves, purchasable in Creche during Act 1, are also beneficial. Em ato 3, consider acquiring a +2 Charisma hat (Birthright) from Sorcerous Sundries.
While there are alternative build variations like 6/6, 8/4, or incorporating levels in the Fighter class, o 10/2 split between Sorcerer and Warlock is recommended. This distribution maximizes the passive bonuses to cantrip damage at Sorcerer level 10, ensures consistent acquisition of sorcery points, and unlocks level 5 feitiços. Though builds like 8/2/2 Fighter offer high initial damage output, the versatility and scalability of the 10/2 Sorlock build outweigh these alternatives in most situations.

Lae’zel – Fighter Battle Master 12
Lae’zel is optimized as a Fighter specializing in the Battle Master archetype. Distribute her ability scores with emphasis on Strength for combat effectiveness. A suggested stat array could be 17/14/16/8/10/8 or similar.
Utilize the Great Weapon style and prioritize feats like Great Weapon Master and Alert. Since Strength is 17, consider selecting a feat to increase it further, such as Heavy Armor Master or Athlete. Mais tarde, invest in another +2 Força. alternativamente, you can adjust her Strength lower if compensated by bonuses from items or elixirs. Optimal maneuvers include Precision Attack, Resposta, Trip Attack, Disarming Attack, and Menacing Attack.
Astarião – Ranger Stalker 5 / Rogue Assassin 3 / Lutador 2 / Por conta própria 2
Astarion is built as a versatile character combining Ranger, Por conta própria, and Fighter classes. Allocate his ability scores with a focus on Dexterity and Constitution. A suitable distribution might be 8/16/16/8/14/8 or similar.
This build excels at securing ranged kills on the first turn, especially targeting casters before they can act. It also provides pre-fight stealth capabilities, potentially granting the party a surprise advantage. Commonly known, this build prioritizes feats like Sharpshooter and +2 Destreza. Sleight of Hand proficiency is crucial for managing locks and traps, so consider selecting Urban Tracker at level 1 and gaining expertise in Sleight of Hand and Stealth when multiclassing at level 6. Attempt to acquire +2 Dexterity from Shar’s mirror in Act 3 to further enhance Astarion’s effectiveness.
Shadowheart – Cleric Life Domain 12
Shadowheart is tailored as a Cleric specializing in the Life Domain. Allocate her ability scores with a focus on Wisdom and Constitution. Consider a distribution like 10/14/16/8/16/8 or similar.
This build prioritizes being an effective healer and wearer of heavy armor. Essential feats include War Caster and increasing Wisdom by +4.
Starting from Act 2, it’s advisable to have another offensive build capable of substituting for the cleric or stalker-assassin depending on the upcoming battles. Excellent options include a pure Vengeance Paladin or, for more versatility and enjoyment, a Bardadin. Both fit well with Minthara (if she’s alive). alternativamente, you can respec another character or employ a mercenary. Substitute the cleric if combat needs to be neutralized quickly, or the stalker-assassin for prolonged battles with minimal use of stealth.
Minthara – Bardadin – Paladin Vengeance 5 / Bard Sword 5 / Lutador 2
Minthara is designed as a Bardadin, combining Paladin Vengeance, Bard Sword, and Fighter classes. Distribute her ability scores with a focus on Strength, Carisma, and Constitution. A suggested array might be 16/14/14/8/8/14 ou 16/12/16/8/8/14.
This build excels at tanking, dealing substantial melee damage through Paladin smites and Bard flourishes, and providing both combat and non-combat buffs. It functions as a versatile support character, offering healing capabilities in emergencies. Consider utilizing the Savage Attacker feat or Large Weapon Master for additional effectiveness. Various build variants, como 8/4, 4/8, 7/5, 5/7, 6/6, 2/10, ou 2/8/2, can also be viable, but prioritize acquiring an extra attack (at Paladin level 5 or Bard level 6) if not respeccing late in the game.

For pivotal dialogues, having both a Cleric and a Bardadin in your party is advantageous, as it allows you to benefit from both Bardic Inspiration and Guidance (or Enhance Ability). This combination can prove particularly useful when facing bosses in Act 2.
In combat situations where battles are not expected to be swiftly neutralized or require significant healing, having a Cleric in your party remains crucial, especially if extensive healing is needed or if potent AoE effects like Spirit Guardian are desired.
Ocasionalmente, substituting the stalker-assassin with a second offensive caster, preferably a pure Sorcerer or a 10/2 Lutador, can be beneficial for increased AoE damage and summons. This substitution may be advantageous in specific battles such as those against Viconia and her acolytes.
In battles where offensive casters or ranged damage dealers are less effective, it can be advantageous to replace or respec them with tanky melee damage dealers, particularly those supported by a Cleric. The Bardadin is an excellent choice for such situations, especially when facing enemies like Grym.
Other highly effective offensive builds suitable for Honour mode include the berserker-thief-fighter (thrower), monk-thief, and pure Paladin Vengeance. No entanto, it’s worth noting that the Padlock (Paladin/Warlock) or Lockadin is less effective in Honour mode due to the lack of synergy with the second extra action.
There is no definitive “melhor” party composition as it varies depending on the specific encounter and the importance of non-combat aspects. Portanto, don’t hesitate to experiment and be creative with your party composition to adapt to different challenges effectively.
Prólogo e ato 1 Pontas
In the final battle of the prologue, an important strategy involves using Shadowheart’s Command spell on the cambion to potentially acquire a fire sword (com um 50% chance, allowing for two attempts). This opportunity is significant enough that some players might consider restarting an Honour run if they fail to secure the sword, although it’s not mandatory.
Once the party is assembled and Withers is recruited, the primary objective is to reach level 5, as each listed build becomes significantly stronger at this point. Before reaching level 5, it’s advisable to avoid certain challenging encounters, such as those with the hag, spider matriarch, githyanki, beholder, Meu, and Grym. No entanto, it’s feasible to complete the Grove-Minthara fight, especially if following the evil path. Keep in mind that ensuring the survival of tieflings to obtain the Potent Robe in Act 2 is beneficial, particularly for a cantrip sorlock build. Adicionalmente, consider starting the second gnoll fight from inside the cave for an easier encounter. Purchasing Gloves of Thievery and the Titanstring Bow in the Zhentarim hideout after returning their shipment is highly recommended for mitigating randomness in Honour mode.

With a level 5 festa, it becomes safer to confront challenging foes like the hag and other adversaries in Act 1. No entanto, it’s wise to exercise caution when deciding whether to free Nere, especially if persuasion attempts with the duergars were unsuccessful. Grym’s fight poses significant risks, particularly in terms of retreat, so it may be preferable to avoid engaging him unless fully prepared. Moonlight is a safer destination to access from the Mountain Pass.

Agir 2 Pontas
Make sure to take out Kar’niss (the drider) before reaching the tower, no matter if you’re on an evil path, side with the Harpers, or going solo. Se você não, he’ll join the fight on the roof later.
Durante o ato 2, you can defeat four bosses through dialogue options if you use inspiration points wisely. You can also skip a stage of the final fight in the act with persuasion. This makes your inspiration points replenish to about four each time. Dealing with Thisobald at the pub is easier for a bard (consider respeccing), or with a sorlock using Gloves of Thievery for Sleight of Hand checks. No entanto, be cautious on the third check, as drinking is a safer option.
In the good path, the fight at the Haslin portal against shadows might pose a challenge. It’s recommended to start with a party of level 8 or higher and include a cleric for Spirit Guardian support.
During the battle on the roof, prioritize taking out the mage first and disable some of the smaller mobs. Ketheric is tough and distant, so focus on the others first. A cleric is very helpful here, especially with turn undead abilities. A stalker-assassin may be less useful, so consider substituting with a bardadin or another melee character.
De forma similar, the final battle of the act can be tough. The key is to keep the apostle blinded with darkness or fog throughout (he can still attack but less effectively and can’t utilize necromites). Bludgeoning weapons are effective, and abilities like smite, radiant damage, cura, and summons work well. Focus on eliminating the mind flayer early. You can also opt to use a fireball to deal with the first four necromites, but you can largely ignore them and focus on distracting them with summons. Consider recruiting Us for this purpose. Ensure that the first successful attack on the apostle each turn comes from a summon or someone immune to fear, or the least valuable companion.

Agir 3 Pontas
If you want to breeze through to level 12 in the game without much hassle, prioritize that milestone. Depois de atingir, you can relax a bit and focus on finishing the game without worrying too much about messing up due to bugs or random errors.
Choosing to align with Gortash is a simpler route, especially if you don’t want to lose Karlach. Skip the factory, water prison, and avoid fighting Gortash (even if you’re leaning towards a good path, it’s better to go along with Gortash until you’ve taken down the factory).

Make sure to complete Shadowheart and Astarion’s quests, especially if you’re playing on an evil path. Try to gather all available allies for the final battles, though there might be fewer options in an evil playthrough. Useful allies include Florrick and Nine-Fingers for summon spamming, Volo for buffs, and the hag for invisibility. Astarion becomes more valuable if you complete his quest in an evil manner, involving a ritual and summoning for the final fights.
The Cazador fight is relatively straightforward. You can tackle it early using Otto’s Dance and Day Light scrolls. Inicialmente, leave Astarion out of the fight, but bring him in before interacting with the sarcophagus.
Shadowheart’s quest can be simplified on an evil path. If she hasn’t turned against you, succeed in persuading her first, then suggest that Shar, not the Absolute, granted her power. This approach makes the subsequent fight easy regardless of your level. No entanto, engaging in a full-scale fight with Viconia in a good path is more suitable for later in the game, se for o caso.
It’s not advisable to take on Ansur unless you’re confident in your abilities. It’s a risky move, especially before reaching level 12.
Da mesma maneira, with Raphael, while the rewards may be tempting, it’s a risky endeavor. If your primary goal is to complete the game safely in Honor mode, it’s better to skip it or make a deal with him or side with the emperor. If you do decide to face Raphael, ensure you clear out all regular mobs in the House of Hope, including spheres, without relying on invisibility tactics. Economize 4 inspiration points to persuade Yurgir, and consider using Otto’s Dance scrolls for temporary assistance.

If you’re taking on Orin as Dark Urge, avoid engaging her in a duel, as it’s a common pitfall for Honor runs lately. Em vez de, enter the battle with your other companions when the duel initiates. Durante a batalha, prioritize managing your sorlock or other casters to act before other damage dealers. Use two magic missiles to strip her defense, allowing your allies to potentially eliminate her in one turn. If your sorlock doesn’t have Alert (which would be a mistake), consider using an Elixir of Vigilance. alternativamente, your companions can join the battle after her defense is removed, but this approach is riskier and not recommended for Durge.
In the final part of the game, there are multiple strategies that work. Opting to fight one additional mind flayer is easier, as it replaces four dream-mobs with four more dangerous slow-casting mobs. No entanto, it requires passing two difficult persuasion checks to keep Lae’zel in the party and to avoid another battle. When facing the dragon, avoid direct confrontation due to its high durability. Em vez de, distract it with summons and focus on swiftly eliminating all four or five mind flayers (ideally by the end of turn 2). Ignore everything else before reaching the portal, utilizing helpful spells like the hag’s cast of improved invisibility (5x). Ensure all party members are gathered close enough before activating the portal. Be cautious with the platforms in the final stage, anticipating which ones will fall next turn; equip everyone with Misty Step or similar abilities for quick movement.

While there may be concerns about bugs or repeatable crashes, completing the game with a single save is feasible without resorting to exploits. Although there were some unpleasant bugs and crashes encountered, particularly from the Lower City onwards, they were not game-breaking or save-damaging in nature (played in February 2024, Agir 1 in Patch 5, Acts 2-3 in Patch 6). If you have any questions or disagree with any points, feel free to ask or offer corrections in the comments.
Isso é tudo o que estamos compartilhando hoje para isso Portão de Baldur 3 guia. Este guia foi originalmente criado e escrito por Delivor. Caso não atualizemos este guia, você pode encontrar a atualização mais recente seguindo este link.