This guide helps you navigate through the beginning stages of the game and find all the essential resources spread across the world.
Pamiętać o, ten przewodnik jest w toku. Wkrótce, we’ll include images of the resources and possibly tips on which blocks to dismantle for materials. We’ll also strive to update it regularly to match any changes in the game.
Zaczynam
Naciskać “Patka” to open the menu (WSZYSTKO: Check what button this is on controller)

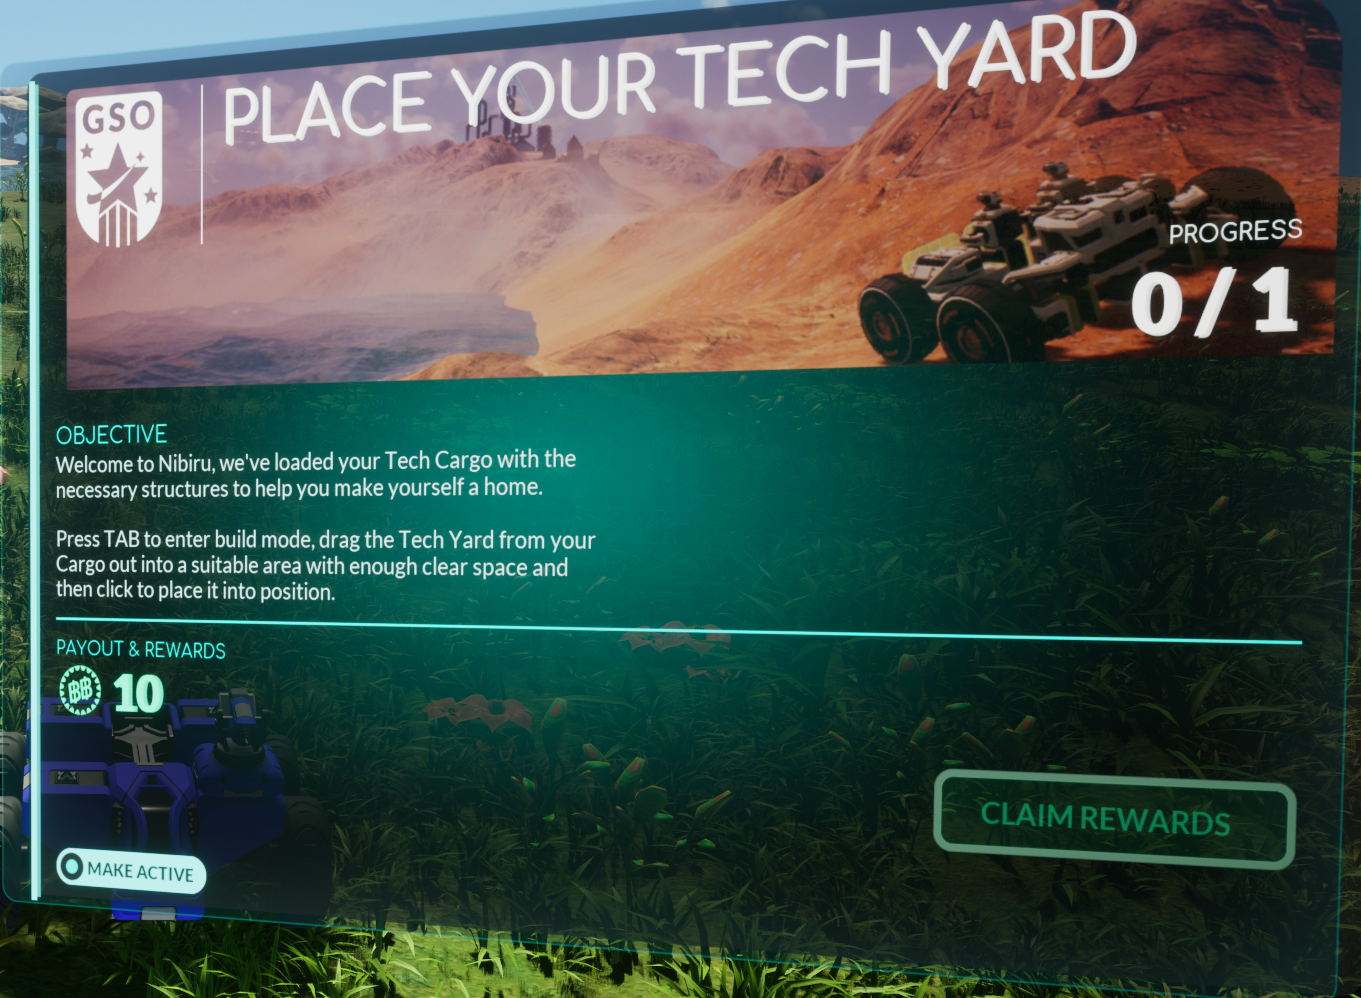
Your first objective is to place your Tech Yard, but before that lets first do something the game really should’ve told you about beforehand:
Click this button to open the “Cele” menu
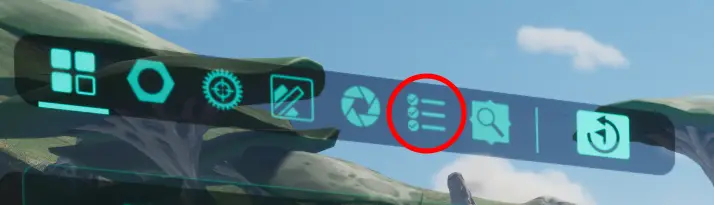
There are four main types of objectives you’ll encounter:
- Certification: These objectives unlock new features and clarify game mechanics.
- Opierać: These objectives assist you in establishing and organizing your base.
- Zasoby: These objectives focus solely on gathering extra currency to unlock additional “Licenses.”
- Bezpieczeństwo: These objectives offer rewards for defeating other techs.
Teraz, back to the main topic at hand.
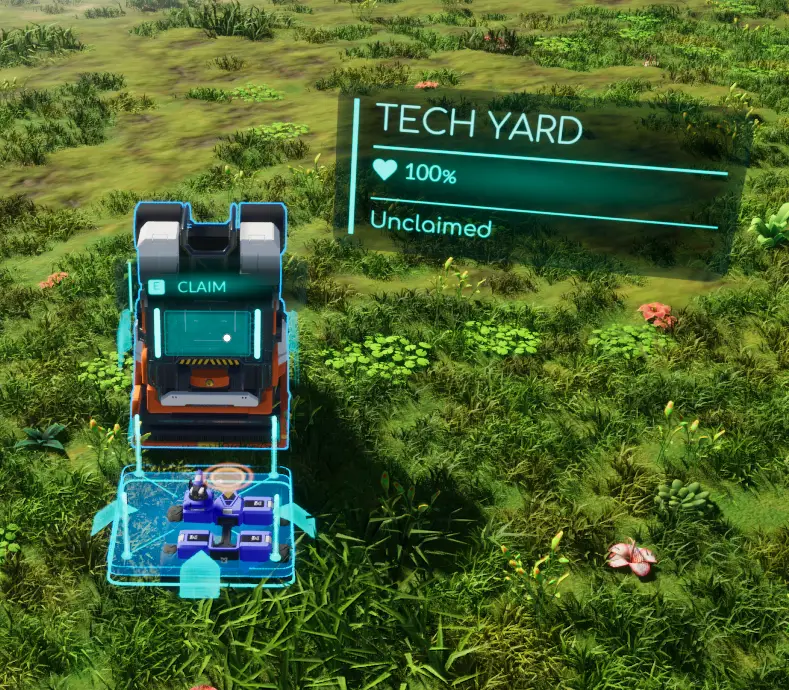
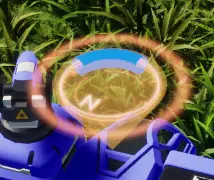
Just plop it down, drive into the hologram, i naciśnij “mi” to claim.
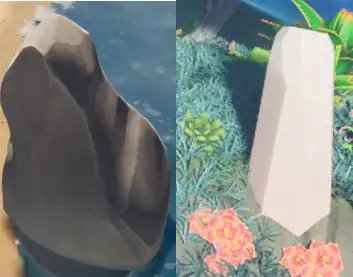
Our first material is “Krwawień”, this is more commonly known as “Ruda żelaza”. Wygląda tak
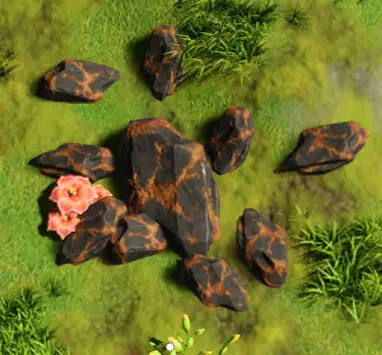
When mining ores like this one (and many others), you’ll typically find one large chunk and several smaller ones. To break the small ones, simply aim your resource laser and click until they shatter.
Jednakże, with the big chunks, you’ll want to focus on their “Seam.” Every resource larger than those tiny chunks will have a seam. Here’s what it looks like when you shoot it.

To locate the seam, simply tap the fire button on different spots until you find it. It’s usually somewhere perpendicular to the longest side of the object. Here’s a little illustration to help you visualize it:
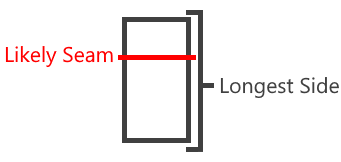
Cutting up larger chunks before destroying them will enhance your resource output.
Further details on how material health and yield stats function will be provided later in the guide. Na razie, disregard them since optimizing them is only achievable by cutting on the seam.
Our objective might be to gather 10 Żelazo, but we’re aiming higher. Instead of stopping at 10, let’s gather enough to complete the entire rest of the tutorial in one go. Więc, gather 72 Iron instead.
Również, if you find yourself lost, remember that the compass “halo” on your vehicle has a blue section indicating the direction of your claimed tech yard.
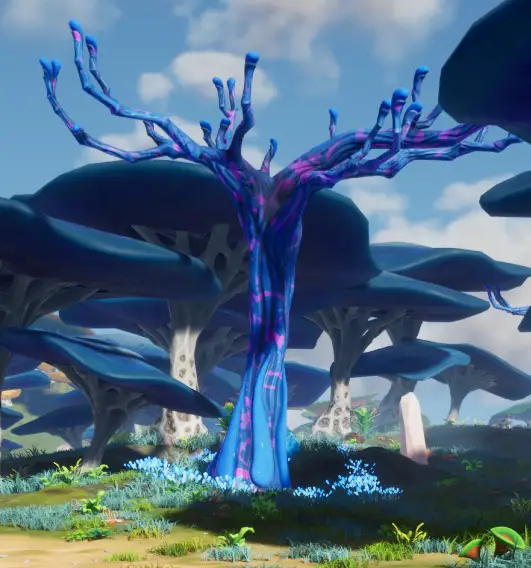
Now we gather Carbon, which is most readily available from trees, these have TWO (lub więcej, often more) seams you can cut, as shown in this hastily edited image

So gather about 60 Carbon (more never hurts, we use it primarily to fuel the generator), now we need to gather all the other stuff we’ll need later.
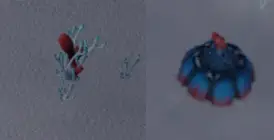
Potrzebujemy 75 Miedź, which can be obtained from Cuprite on mountains/hills and looks like this:

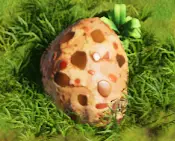
Potrzebujemy 27 Aluminum, which can be obtained from Bauxite in flat areas and looks like this:
Now for the worst one, potrzebujemy 21 Silicon which can be obtained from Boulders on the beach (each one will only drop like 2-3 chociaż) or from Quartz (which gives way more), quartz can be found by looking around for an area with BLUE mushroom trees and driving around over there. Don’t worry you can drive over shallow water without any difficulty, only thing to worry about is enemy techs might be wandering around that area.
Ok one more but this one is quick, we need Chlorine which can be found on the beach as a shiny blue rock buried in the sand called “Halite”. We only need 1 Chlorine.

If you’re running out of space, feel free to drop any Debris you’ve picked up.
Here’s the total you should aim for: 72 Żelazo, 60 Carbon, 75 Miedź, 27 Aluminum, I 1 Chlorine.
All set? Świetna robota! That’ll save a lot of trouble later on. Teraz, drive back to your tech yard. Our next objective is to craft Di-Platforms. Let’s make 3 z nich.

Craft a Ramp as well (it’s right next to the platforms)
Now a Workbench and a Generator (We’re crafting literally everything in this menu but the Tech Yard). Plop them down, make sure they’re all connected to each other (this is what the platforms are for)

Don’t worry about powering up the workbench yet; it would just waste power.
Następny, let’s create a Supply Fabricator. Aby to zrobić, interact with the workbench by pressing “mi” on it while in “Build Mode” (A.K.A. the inventory menu), then click on the Supply Fabricator.
Teraz, insert one carbon into the generator, and it’ll craft your fabricator.
Potem, place down the fabricator and click on “Light Ammo” 5 czasy. Add some extra carbon into the generator (you’ll probably only need 2 więcej), and wait for it to finish.
Teraz, let’s craft a Refinery. Head back to the Workbench, click on it, and drop another carbon into the generator if needed. Następnie, place down the refinery.
We need to refine 5 aluminium. Just click the icon for it 5 czasy, and it will use the necessary 15 aluminium. Kiedy to się skończy, claim them and click on the “Refined Copper” ikona 5 czasy.
Teraz, for the part that has caused a lot of negative reviews: crafting a Small Cargo Block. Follow these steps carefully:
- Park in the hologram of your tech yard and open your objectives menu.
- Claim the reward from “Collect Refined Copper”. You might as well claim all the others you’ve completed while you have it open.

- Open the Refinery and refine 15 MORE Refined Copper (so you should have 20 całkowity) I 9 Refined Iron.
- Head back to the Workbench and craft the Block Fabricator.
- Remove the Workbench and Supply Fabricator from your base and set them aside.
- Place the Block Fabricator down and craft the Cargo Block. Consider adding it to your tech as well.
- Park in the tech yard hologram once again, and claim the “Receive A Small Cargo Block” objective to obtain the battery license.
- Craft the small battery.
I z tym, you’re finally done with the intro quests! Next up is destroying 3 enemy techs, but that’s beyond the scope of this guide. Just aim your laser at their cockpit and shoot them until they’re no more. You’ll do fine.
Bill of materials:
- 3 Di Platforms – 9 Żelazo, 18 Carbon
- 1 Ramp – 3 Żelazo, 6 Carbon
- 1 Stół warsztatowy – 6 Żelazo, 6 Carbon
- 1 Generator – 6 Żelazo
- 1 Supply Fabricator – 9 Żelazo, 6 Carbon
- 1 Refinery – 12 Żelazo, 9 Miedź, 12 Aluminum
- 20 Refined Copper – 60 Miedź
- 9 Refined Iron – 27 Żelazo
- 5 Refined Aluminum – 15 Aluminum
- 1 Block Fabricator – 9 Refined Iron, 15 Refined Copper, 21 Silicon
- 1 Small Battery – 6 Aluminum, 6 Miedź, 1 Chlorine
- 1 Small Cargo – 5 Refined Aluminum, 5 Refined Copper
- Generator Fuel – 24 carbon (just an estimate to make sure you have extra)
Całkowity: 72 żelazo, 36 carbon, 27 Aluminum, 75 Miedź, 1 Chlorine
Materials and Where to Find Them
This area is being worked on actively but does contain at least basic info on the location of each material type. This will be in the order you see them in the Refinery
Żelazo
Ruda: Krwawień
Lokalizacja: Forest and Plains
Wygląd: Black rocks with copper-colored veins
Miedź
Ruda: Cuprite
Lokalizacja: Hills and Mountains
Wygląd: Gray rocks with dark green patches
Aluminum
Ruda: Bauxite
Lokalizacja: Forest and Plains
Wygląd: Beige and Orange colored mass, almost clay-like
Silicon
Ruda: Quartz and Boulders
Lokalizacja: Blue Forest and Snow (Kwarc), Beaches and Swamp (Otoczak)
Wygląd: White crystalline structures (Kwarc), Large Gray Boulders (Otoczak)
Złoto
Ruda: Kwarc
Lokalizacja: Blue Forest and Snow
Wygląd: White crystalline structures
Notatka: This is a secondary product, the Fragmenter is going to be significantly better for obtaining this than just harvesting directly.
Carbon
Ruda: Any plant matter
Lokalizacja: Wszędzie
Wygląd: Varies
Lit
Ruda: Hostile Plants in the Forest area
Lokalizacja: Las
Wygląd: Widzieć “Hazards”, you’re looking for Bumpers and Spitters
Chlorine
Ruda: Halite
Lokalizacja: Buried in the beach areas or near Zappy Trees (Widzieć “Hazards”)
Wygląd: Blue cubic rocks
Sodium
Ruda: Halite
Lokalizacja: Buried in the beach areas or near Zappy Trees (Widzieć “Hazards”)
Wygląd: Blue cubic rocks
Phosphorus
Ruda: Hostile Plants and Mines found in the Swamp
Lokalizacja: Bagno
Wygląd: Widzieć “Hazards”, you’re looking for Spread Spitters, Mini Bumpers, Rust Flowers, and Mines
Tantalum
Ruda: Tantalite
Lokalizacja: Bagno, often near Spread Spitters
Wygląd: Slate rock with clay-like deposits on the edges
Niobium
Ruda: Tantalite
Lokalizacja: Bagno, often near Spread Spitters
Wygląd: Slate rock with clay-like deposits on the edges
NOTATKA: This can ONLY be obtained by putting Tantalite into the Fragmenter, using the regular harvesting laser to break it will not drop Niobium
Strontium
Ruda: Hostile Plants in the Snowy Area
Lokalizacja: Snowy Area
Wygląd: Widzieć “Hazards”, you’re looking for Sneaky Bumpers and Sniper Spitters
Tungsten
Ruda: Wolframite
Lokalizacja: Snowy Area
Wygląd: Black rocks with yellowish crystals embedded in them, often guarded by Sniper Spitters
Tytan
Ruda: Wolframite
Lokalizacja: Snowy Area
Wygląd: Black rocks with yellowish crystals embedded in them, often guarded by Sniper Spitters
NOTATKA: This can ONLY be obtained by putting Wolframite into the Fragmenter, using the regular harvesting laser to break it will not drop Titanium
Biomes
There are currently three biomes in the game; we’ll call them Forest, Bagno, and Snow.
The categories of resources are:
Rudy – Any material readily found therein
Secondary Ore Resources – Any material only obtainable using the Fragmenter
Uncommon Ores – Other resources that can be found in multiple biomes but require unique conditions
Hazards – Any hazardous plants or other threats
Plant Material – A material that will drop when destroying any destructible hazard.
Las
Rudy: Żelazo (Krwawień), Miedź (Cuprite), Aluminum (Bauxite)
Secondary Ore Resources: Nic
Uncommon Ores: Kwarc (Blue Mushroom Area only), Halite (Beach and near Zappy Trees only), Głazy (Beach only)
Hazards: Spitters, Bumpers, and Zappy Trees
Plant material: Lit
Bagno
Rudy: Tantalum (Tantelite)
Secondary Ore Resources: Niobium (from Tantalite)
Uncommon Ores: Nic
Hazards: Spread Spitters, Mini Bumpers, Rust Flowers, and Mines
Plant material: Phosphorus
Śnieg
Rudy: Tungsten (Wolframite)
Secondary Ore Resources: Tytan (Wolframite)
Uncommon Ores: Kwarc (On hills)
Hazards: Sniper Spitters and Sneaky Bumpers
Plant material: Strontium
Hazards
Bumpers

These plants are the most common hazard in the early game. Danger Rating: Bardzo niski
When collided with or shot they will inflate like an airbag and launch anyone nearby, this can be a good way to toss a chasing enemy away.
They CAN be destroyed (it took 28 shots from the M18-VINDUR with no damage bonuses) and will drop a few Carbon and some Lithium
Spitter Plant

These plants spit projectiles at you that do a surprising amount of damage. Danger Rating: Average
They shoot you when you’re within range (similar range to the basic resource laser) and will also shoot enemy techs as well, this is why you’ll often see parts that have fallen off of other techs near them.
They CAN be destroyed with any weapons fairly easily, it just takes a few moments. Similar to bumpers they will drop Carbon and Lithium.
Zappy Tree
These trees will kill you extremely quickly with lightning. Danger Rating: Highest
A lightning rod can protect you as long as you’re holding down the button for it (which will drain your battery quickly). If you are trying to get the Halite it guards you need to be fast
They MIGHT BE able to be destroyed but I couldn’t manage it
Mini-Bumper

These are functionally identical to bumpers, just smaller and they drop Phosphorus instead of Lithium.
Landmine

These little bombs are deadly but very easily avoided or disposed of. Danger Rating: Niski
They spawn in clusters all over the Swamplands. Don’t run over them, you’ll have a bad time.
They are easily destroyed by any contact or projectile and will drop Iron and Phosphorus
Rust Spewer

These plants will cause a shockwave when you get close that causes you to rapidly gain stats of the “Rdza” efekt (more info in the “Environmental Hazards” section at the end.
They CAN be destroyed but will explode. They drop Phosphorus and Iron.
Sneaky Bumper
These are like other bumpers, but they’re very sneaky and hide in the snow.
Oh and they drop Strontium instead of Lithium, which is real cool.
Sniper Spitter

These are similar to regular Spitters but they fire faster and have longer range.
I assume they also drop Strontium but haven’t killed any yet.
Environmental Hazards (WIP)
Heat/Cold
Getting too hot will make batteries more prone to exploding and can also start to damage you
Getting too cold will make your guns turn slower and can also start to damage you
Woda
Water is extremely slow to drive through, consider making a bridge
Rdza
Rust makes your tech more vulnerable to damage and stops flatbeds from working.
To wszystko, co dzisiaj udostępniamy w tym celu TerraTech Worlds przewodnik. Ten przewodnik został pierwotnie stworzony i napisany przez Plan A to Y. Na wypadek, gdybyśmy nie zaktualizowali tego przewodnika, możesz znaleźć najnowszą aktualizację, postępując zgodnie z tym połączyć.