- Tytuł: Kukui
- Data wydania:
- Wywoływacz:
- Wydawca:
Information about Kukui is still incomplete. Pomóż nam wypełnić szczegóły gry za pomocą tego formularz kontaktowy.
Szczegółowy przewodnik po osiągnięciach i solucja, dzięki którym zdobędziesz swoje 100% tak szybko i bez wysiłku, jak to możliwe. Instrukcje krok po kroku.
Plan działania
- Szacowana trudność: 2.5/10
- Szacowany 100% czas: do ustalenia.
- Osiągnięcia offline/online: 3 nieaktywny / 0 w Internecie.
- Liczba przejść: 1 minimum.
- Zakłócone osiągnięcia: 1. Sneaky Sneaky.
- Osiągnięcia możliwe do pominięcia: All of them.
Osiągnięcia

Światła
Beat Level 1 Without Using A Flashlight
This is actually a bit tougher than it sounds, simply because the map can be fairly dark and you’ll need to rely on lamps spread around the map as well as the vague outline of dimly lit halls to navigate. My best advice if you’re struggling to find a certain turn is to orient your camera towards any discernable light or hall and move in the direction you need to go while looking at the light to gauge distance.

YOU ARE GOLDEN
Find The Golden Corn In Level 2
I searched the entire level using my map and an image editing software to trace my route. I couldn’t find any golden corn. Maybe it doesn’t stand out as much as I think it does, or maybe I was staring at corn so long I simply overlooked it. If anyone knows where this is, Proszę, poinformuj mnie!

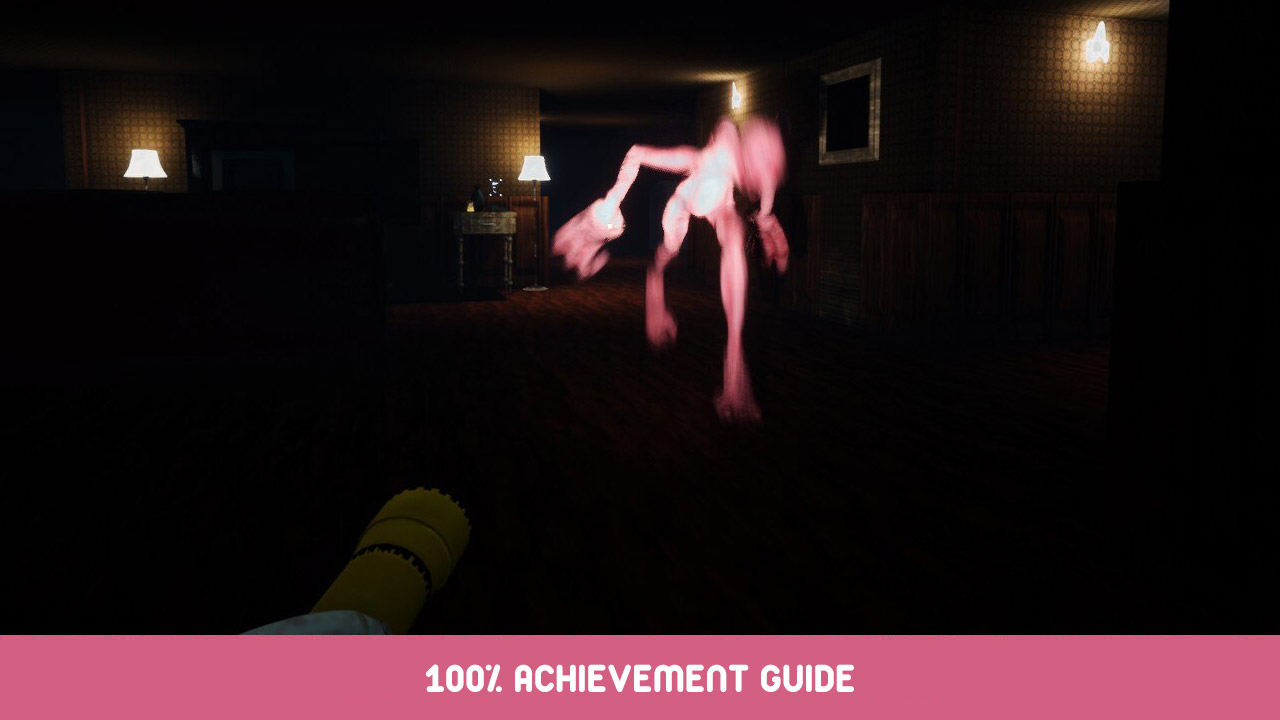
Sneaky Sneaky
Beat The Game Without Kukui Seeing You In Levels 1 Lub 3
BUGGED AND CURRENTLY IMPOSSIBLE TO EARN! This achievement is much easier than it sounds.
- The Kukui is completely blind and only responds to sound. If you hear it gurgling nearby, stop moving and take your hand off the keyboard (poważnie, I died to him by pressing E on thin air, which caused the character to freak out). You can move your camera around to check where he is, just don’t press any keys. Once you can’t hear him anymore you can continue moving.
- Don’t be afraid if he’s moving right at you. He’ll either phase right through you, or get stuck on you, in which case you’ll just need to rotate your camera for him to slide on by. He can only kill you if he’s actively hunting for you.
- You don’t need to turn off your flashlight, W rzeczywistości, he can hear you turning it on/off if he’s close enough.
Rozdział 1 Mapa
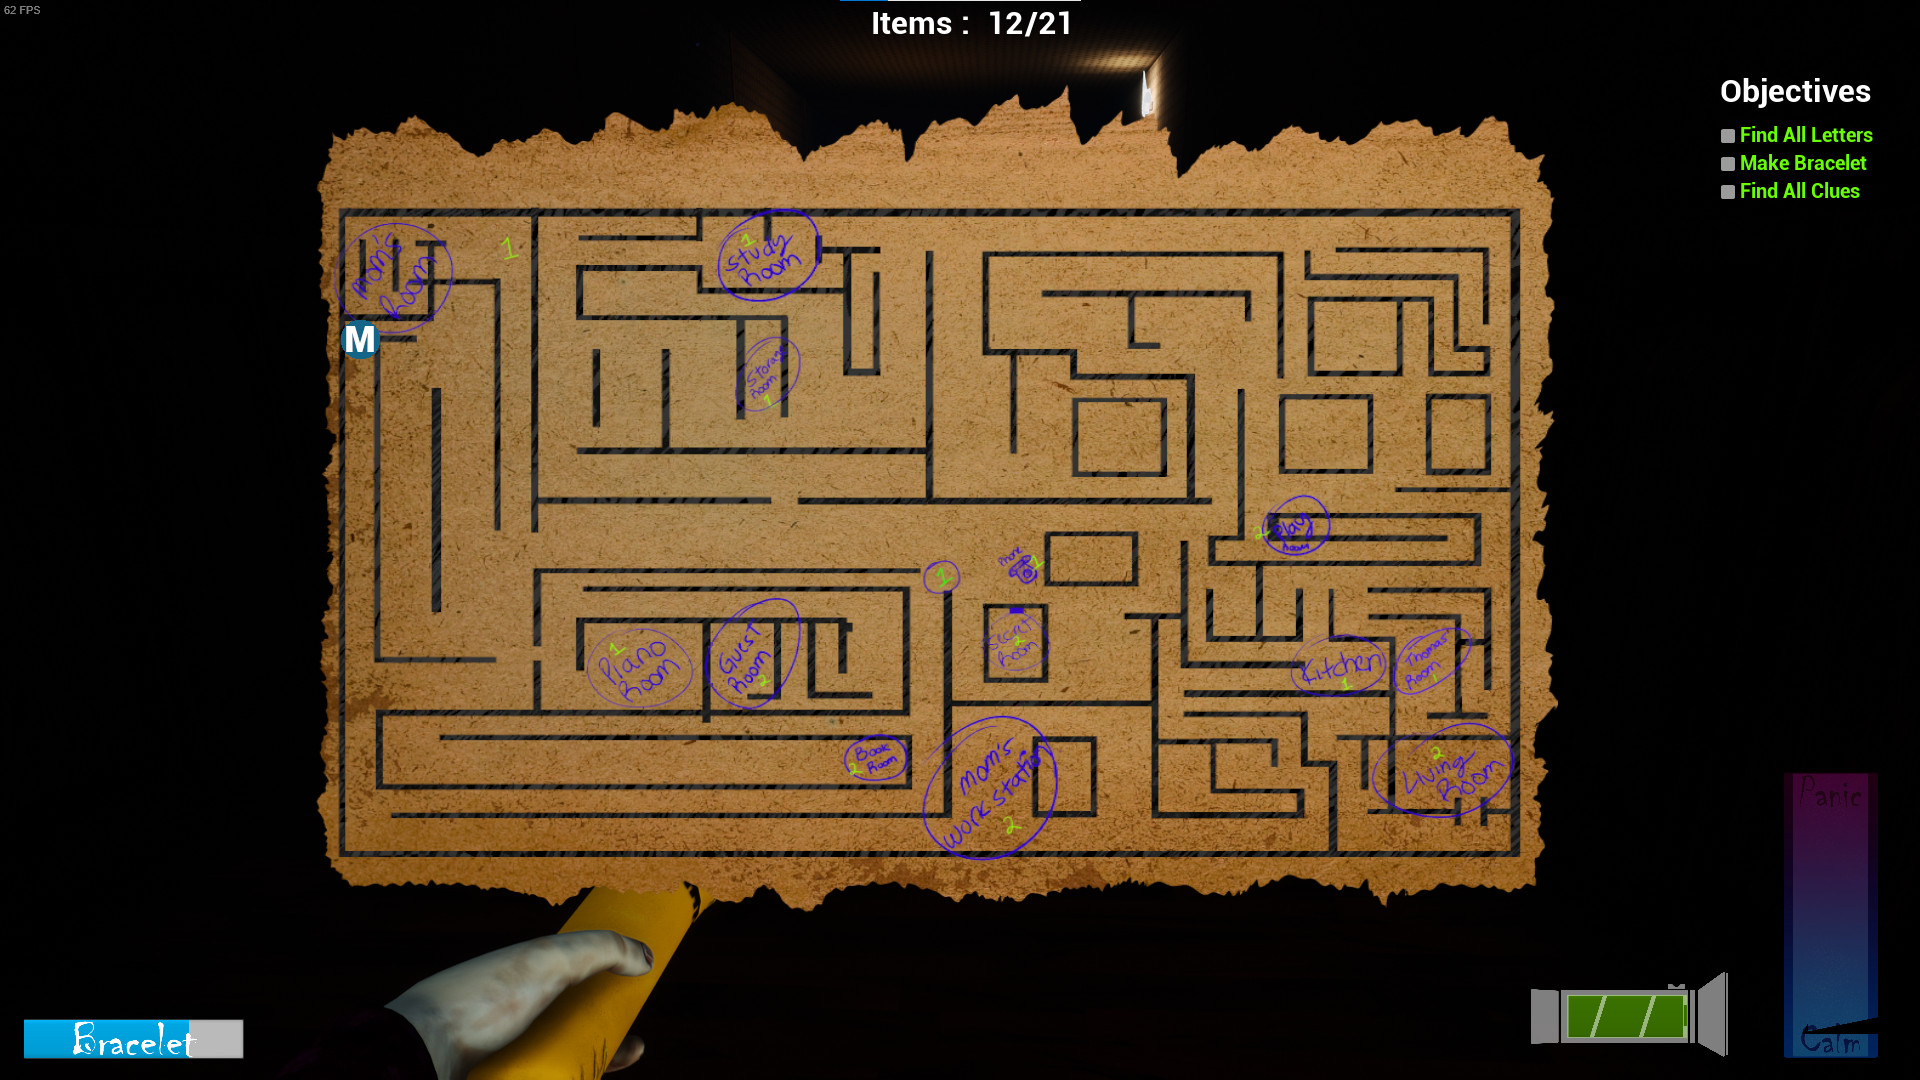
This is the in-game map for chapter 1. It’s located at the blue dot with the M, but you don’t need to find it yourself to progress. It displays the room name and the amount of items found there. If it’s hard to read, they are:
- Salon – 2
- Kuchnia – 1 + 1 bracelet bead
- Tomasz’ Pokój – 1
- Play Room – 2
- Telefon – 1 + 1 bracelet bead
- Sekretny pokój – 2
- Phone Hallway – 1
- Guest Room – 2 + 1 bracelet bead
- Piano Room – 1
- Book Room – 2
- Mom’s Work Station – 2
- Hallway to Mom’s Room – 1
- Study Room – 1 + 1 bracelet bead
- Storage Room – 1
Notatki:
- You spawn in the Living Room.
- The 2 items in the Play Room is a little misleading. There’s a note in front of the toy chest, but the other item is a pill bottle on a tabletop before you enter the Play Room.
- The item at the Phone is the phone itself. Not sure what the deal is with the stuffed bunny nearby.
Rozdział 2 Mapa
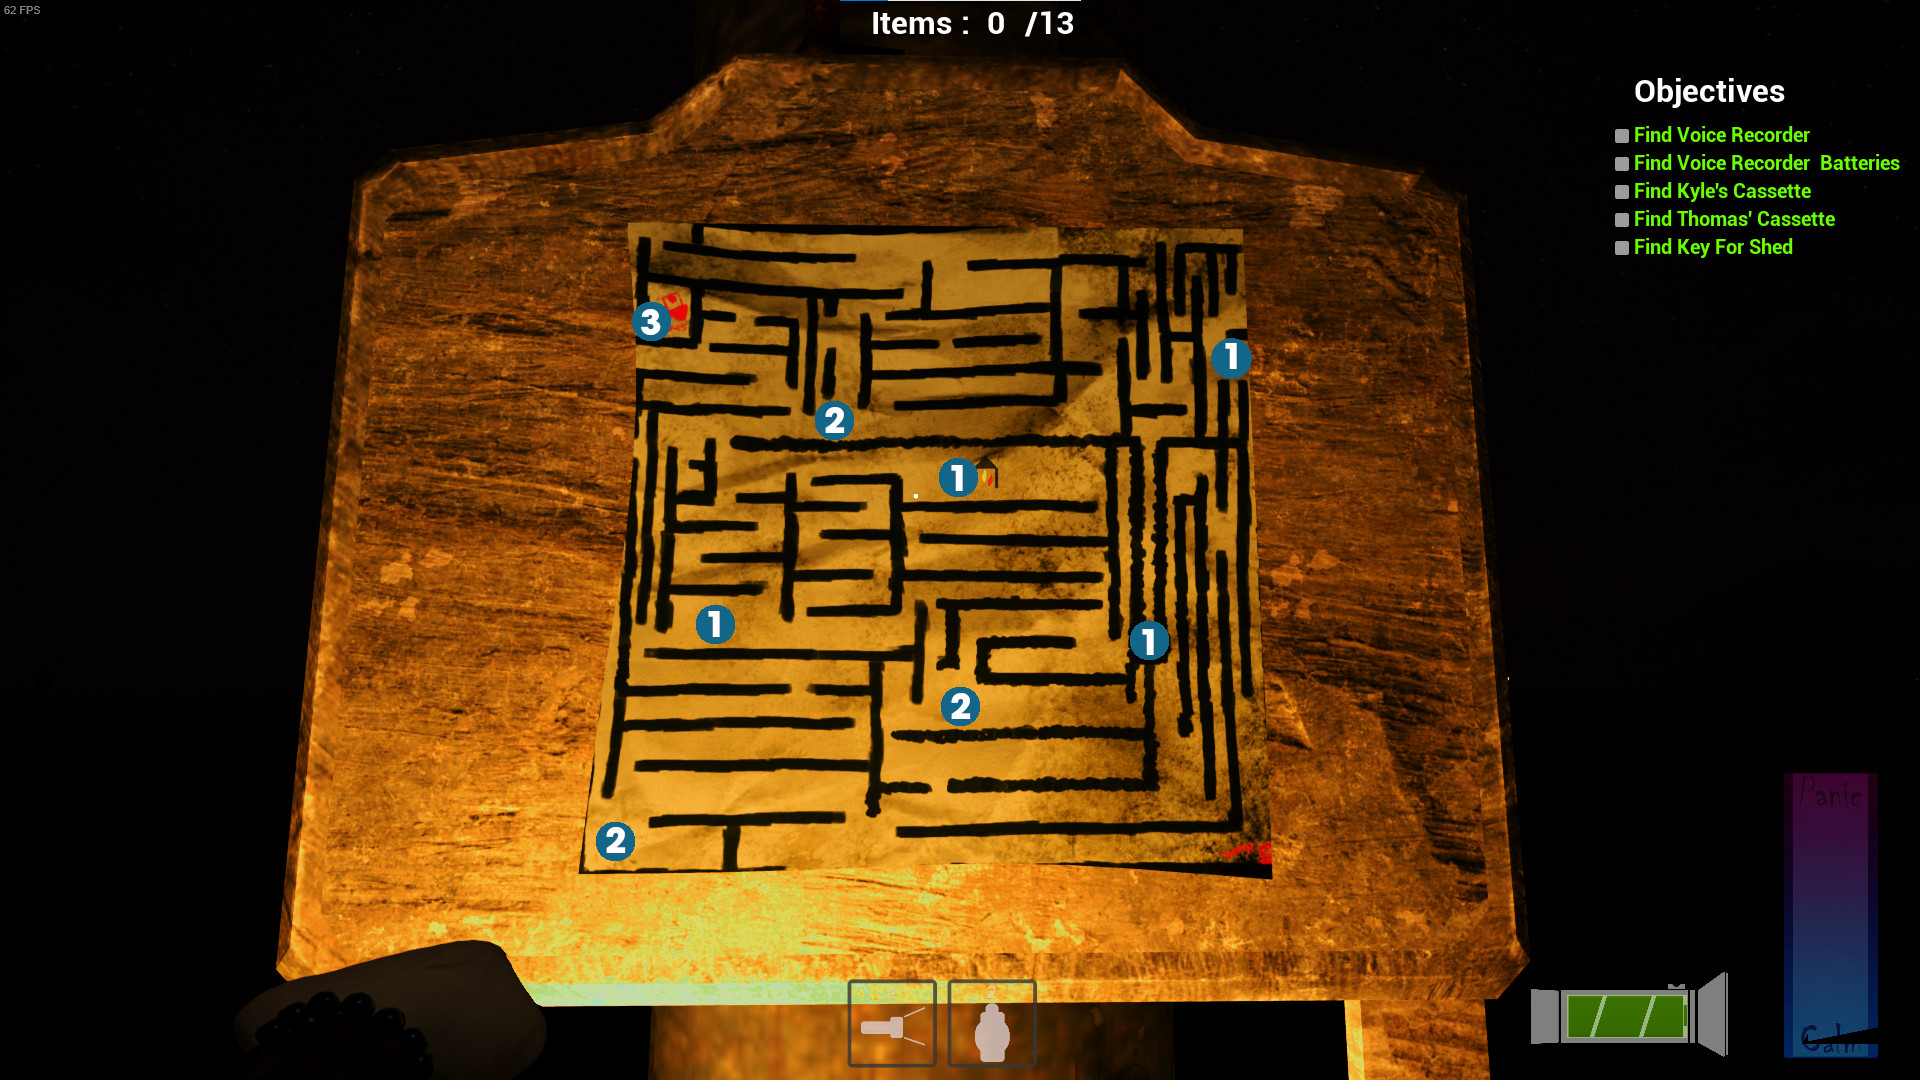
- You spawn at the fire pit near the center of the map.
- The blue dots on the map represent the key areas where you will find the items you need to progress, and the number is how many items are there.
- The item near the fire pit is under the moped. You need the fuel from the shed to move it.
- There’s one item outside the shed (the fuel), I 2 more inside it once you find the key.
Rozdział 3 Mapa
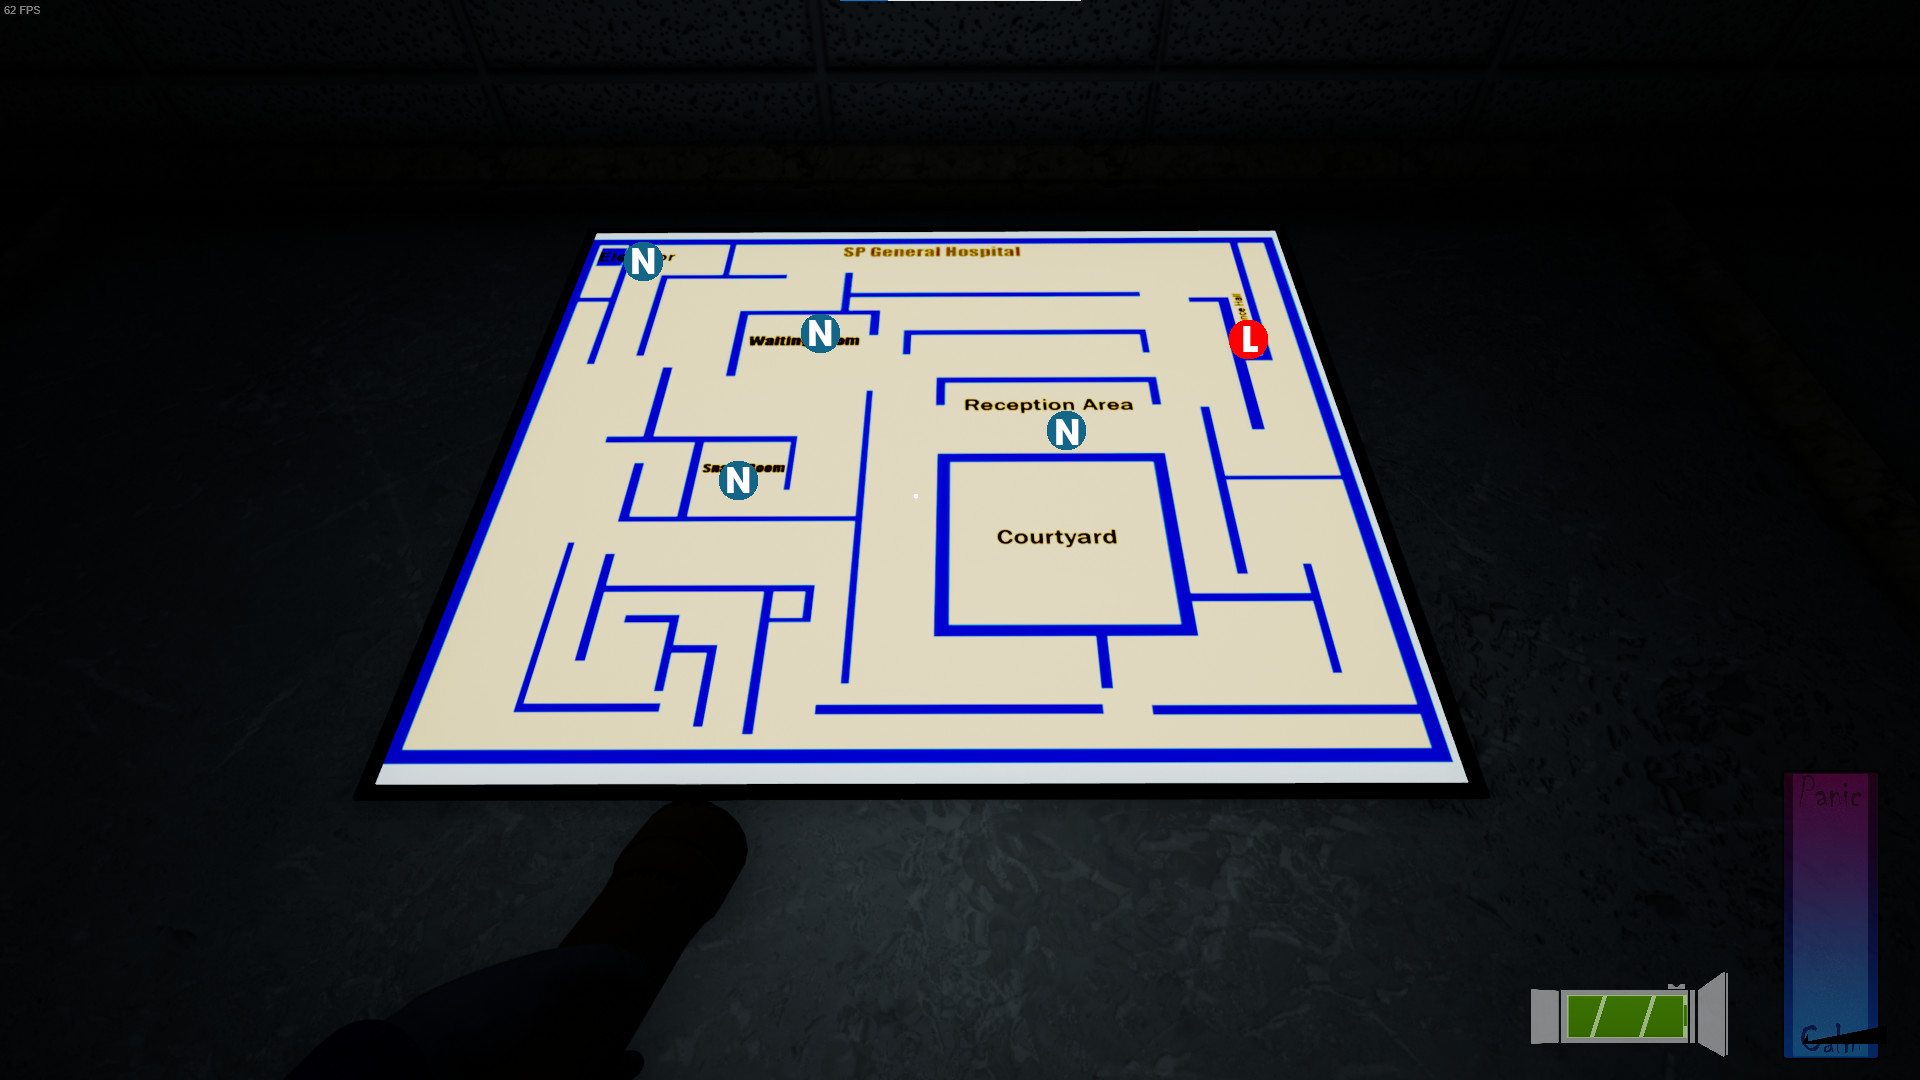
- You spawn in the Reception Area.
- The blue dots with an N are notes, while the red dot with an L is the level to activate the elevator. You need to collect them in the following order: Przyjęcie, Snack Room, Waiting Room, Elevator, Lever.
To wszystko, co dzisiaj udostępniamy w tym celu Kukui przewodnik. Ten przewodnik został pierwotnie stworzony i napisany przez Stef. Na wypadek, gdybyśmy nie zaktualizowali tego przewodnika, możesz znaleźć najnowszą aktualizację, postępując zgodnie z tym połączyć.