
Feeling jittery about facing off against those ogres in Act 1’s honor mode in Brama Baldura 3? Bez obaw! I’ve got a slick strategy that helped me take them down without even rolling for initiative. Tylko głowa do góry, chociaż: this approach might get patched later on or might not suit your playstyle. W każdym razie, keep your wits about you, and may luck be on your side as you chase after those coveted gold dice!
Faza 1
This plan needs 3 pismo, but you can use the fourth for simplicity and speed. When ogres appear during a cutscene near you, plan your roles ahead. You can swap the third role with more barrels in phase 2 jeśli potrzeba. Note that roles 1, 2, I 3 (if used) must be different characters. Dialogue stats are irrelevant in this strategy. Some steps may seem excessive, but it’s honor mode, and there are no retries if a streamlined version fails.
ROLES:
- Cutscene initiator
- Digger (Tak, you read that correctly). The character with the highest survival check, if not needed for the glyph role.
- Glyph of warding caster
- Camp squatter to send barrels to other characters
ITEMS NEEDED:
I used 2 firewine barrels, 1 oil barrel, I 1 cast of glyph of warding, ogień. You can adjust with more barrels (instead of the glyph), placing bombs, or other modifications.
Faza 2
- Teleport the group to the blighted village and then ungroup.
- Send the camp squatter to camp and move them near the chest.
- Send in the bait, I mean cutscene initiator.
Some might wonder if this puts them in the blast radius. Are they being sacrificed? Początkowo, that was the plan, but thanks to the digger, that should only happen if they patch this interaction in a specific way. Conflicting cutscenes have the newest one take control, and that’s what we’ll exploit.
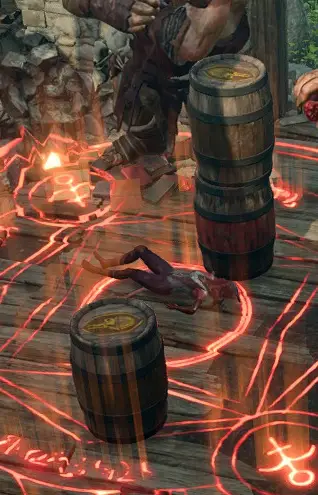
- Have the digger walk right into the middle of the ogres (they are already in a cutscene) and send any barrels you want to them for placement.
- Once the barrels are placed, send that character through the hole in the western wall of the building.
Faza 3
When the digger moves close enough, they should see the lovely chest that needs digging up. Zacząć robić, dig it up, and then try opening the red chest, which belongs to an ogre.

Doing this triggers a new cutscene, warning you not to touch things that aren’t yours. It also ends the initial cutscene, allowing the character to escape to safety. Once you select the “Zostawić” dialogue option, the digger is also free from the cutscene. It might be wise to hide them at a safe distance, crouched, just in case things go wrong.
Faza 4
After the first two characters safely retreat, send in the third and final character to cast the glyph. Make sure all three ogres are standing on the glyph. Once cast, a cutscene will start, warning you not to cast any more magic or things will go wrong. Agree to this warning, trzask “Zostawić,” and exit the area.
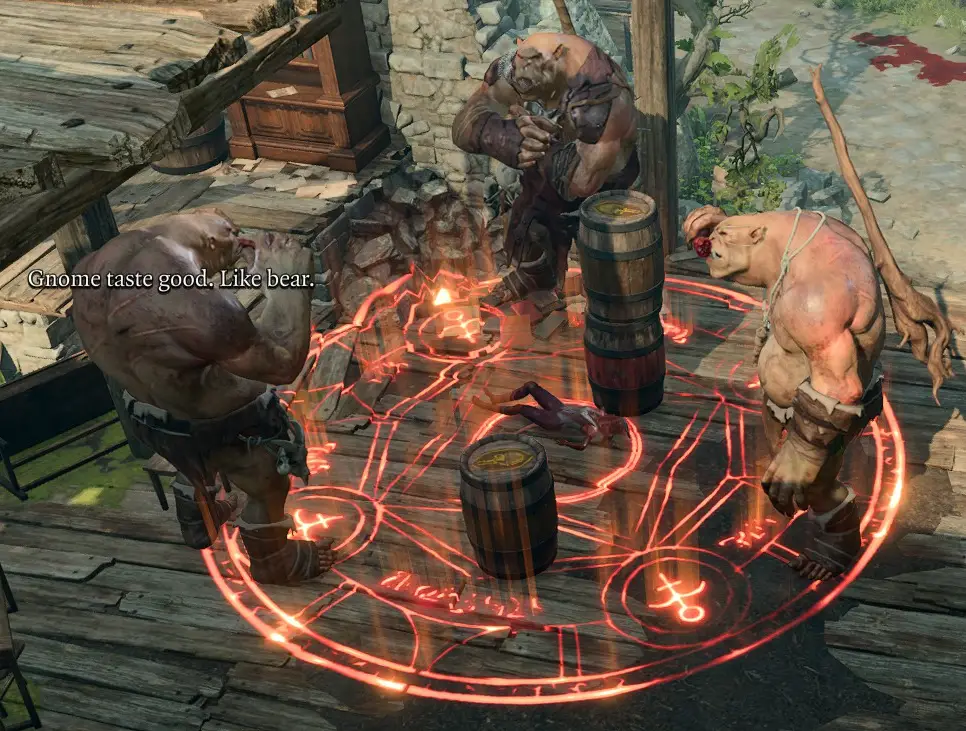
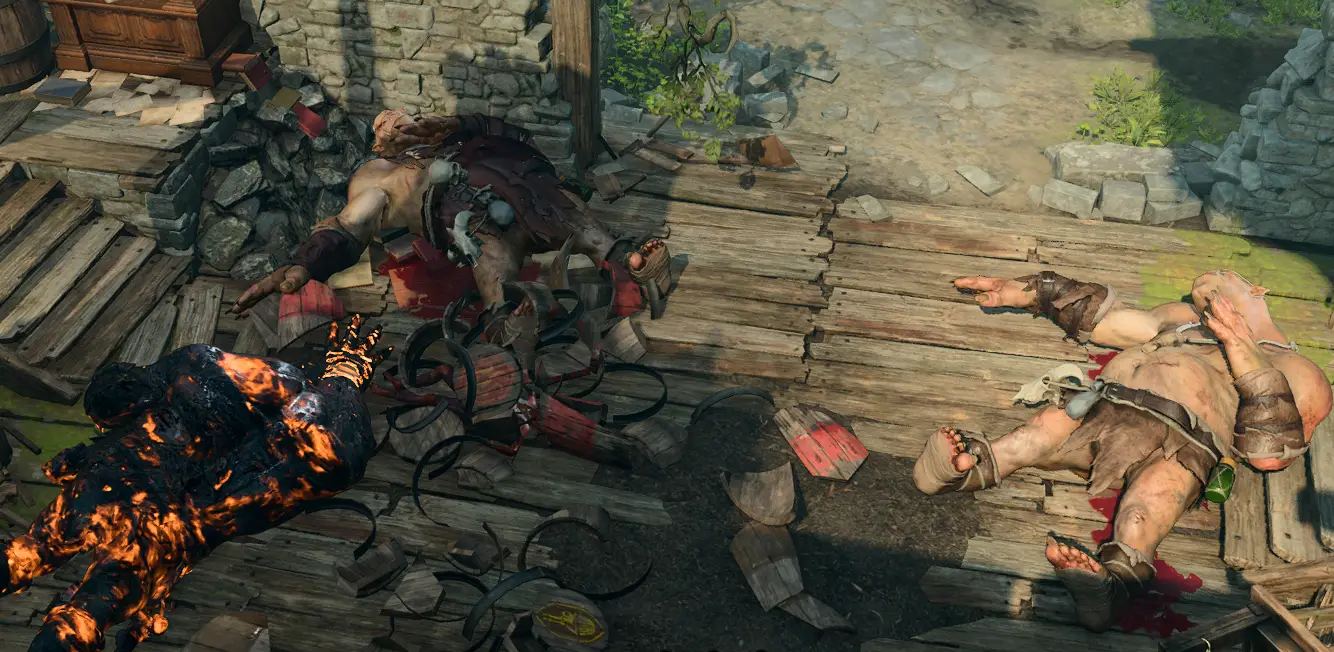
Once you’ve completed these steps, simply use any fire spell on the barrels. This action will trigger all the elements you’ve placed there. Nagle, the ogres will turn into foes for some unknown reason, activating the glyph. As you bid farewell to their ashen bodies, you can let the fire die down and collect your spoils.
To wszystko, co dzisiaj udostępniamy w tym celu Brama Baldura 3 przewodnik. Ten przewodnik został pierwotnie stworzony i napisany przez Devanshire. Na wypadek, gdybyśmy nie zaktualizowali tego przewodnika, możesz znaleźć najnowszą aktualizację, postępując zgodnie z tym połączyć.