This is a beginner’s guide for Astrea: Six-Sided Oracles. W tym przewodniku, you will be able to learn the game’s basics, mechanika, and fundamentals of how the game works.
About Astrea: Six-Sided Oracles
Astrea is a game where you collect special dice cards to make a powerful deck. The main goal is to have dice cards that work well together and also work with your character. With this deck, you fight tough bosses as the game gets harder.
But today, we’re not going to dive into the super hard stuff. We’ll talk about the basic things in the game and the decisions you can make.
Po prostu wiesz, this guide won’t go over the absolute basics. I’ll assume you’ve done the tutorial and played a bit on one character.
The Starting Choice
Dobra, let’s talk about the first big choice you make in Astrea once you reach level 1 with a character.
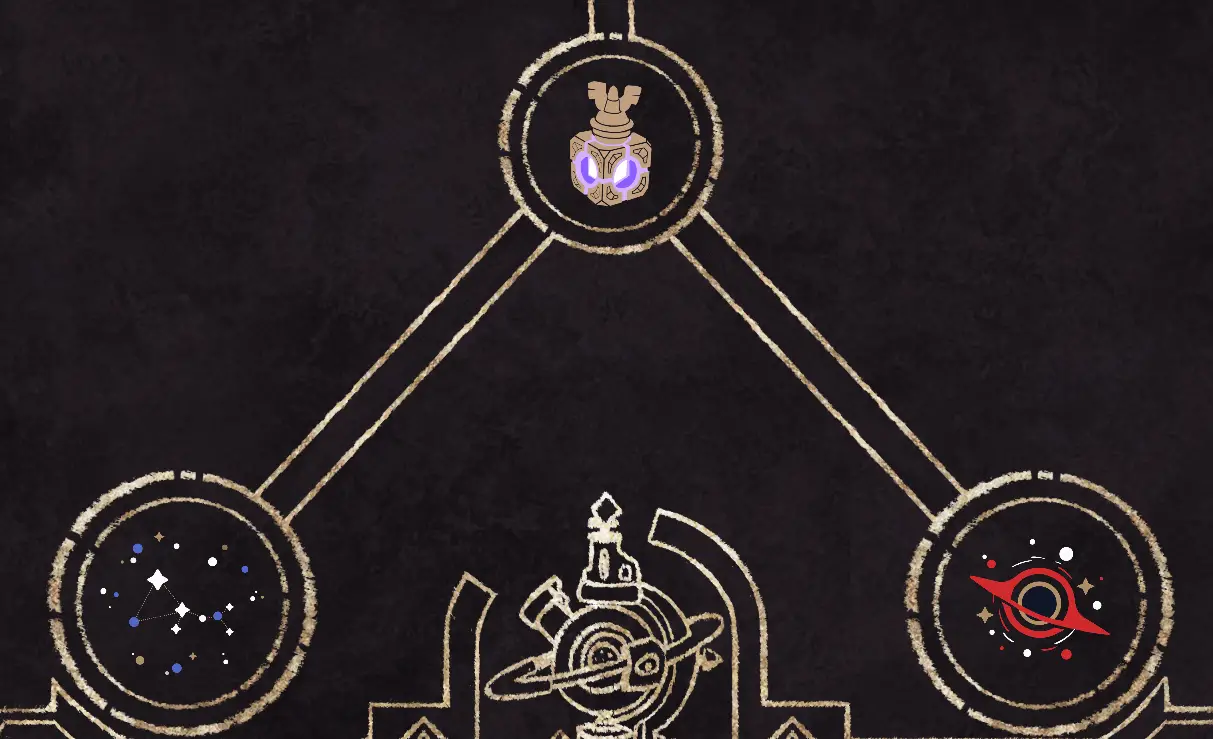
Kiedy zaczynasz nową grę, you have to decide between two kinds of blessings: Star Blessings on the left or Blackhole Blessings on the right.
Star Blessings are like picking the good stuff. They only bring good things to your game; no bad surprises here. Z drugiej strony, Blackhole Blessings offer a tempting upside but also a downside, kind of like a gamble.
Teraz, I’m a strong believer that going for a blessing with a downside in the first act of the game is usually a bad idea. Oto dlaczego:
- Your starting deck doesn’t have a clear purpose or any special combo yet. Picking something that could give you a major problem when you can’t finish battles quickly is a surefire way to end up stuck in Act 1.
- Star Blessings help you build synergies in your deck or set up a strategy. They make your deck better. Blackhole Blessings don’t do that.
Let’s take an example: Cellarius, also known as The Shark, has a Star Blessing called Tamed Remoras. This blessing makes waves bounce to other targets when one dies. It’s fantastic for fights with multiple enemies and a great way to start building a Wave-based deck.
Many blessings are like this, and they’re all Star Blessings.
That’s why I highly recommend, zwłaszcza na wyższych poziomach trudności, not going for the Blackhole Blessings when you start a new run. All three of them might turn out to be totally useless or even hurt your character or build ideas. Star Blessings, z drugiej strony, are always helpful in some way.
Więc, if your goal is to get really good at this game and start winning a lot, steer clear of those Blackhole Blessings when you begin a new run. Managing your luck with RNG is a crucial skill in Astrea.
Fundamentals of Combat
W porządku, let’s dive into the basics of combat in Astrea, focusing on the essential concepts and ideas that you need to know to optimize your battles effectively. This is going to be broken down into parts, so stay with me.
Podstawowe zasoby: Corruption & Czystość, The Dual Blades:
First up, we’ve got the fundamental resources in the game: Corruption and Purity, also known as the Dual Blades. Think of them like two sides of a blade.

Czystość: This is the good side of the blade. It heals you and hurts the enemy. It’s your primary way of dealing damage and recovering lost HP. Purity can also heal your companion sentinels.
Corruption: Z drugiej strony, we have Corruption. It hurts you but heals the enemy. It’s the main way to hurt yourself in the game, which is necessary for using Virtues outside of the enemy’s turn.
Oto umowa: You’ve got to play an action with Corruption in it before ending your turn, unless you use a specific keyword. This is where that RNG management from the previous section comes into play.

Light Shield: It’s like your trusty “blok” in other games. The Light Shield stops Corruption from wherever it’s coming, whether it’s you trying to hurt yourself or the enemy trying to hurt you.
But here’s a cool twist: You can also slap that Light Shield onto the enemy. Tak, it’s true. Kiedy to zrobisz, the enemy can’t heal themselves by dealing Corruption to themselves, and they can’t Overcorrupt either. Plus, you prevent yourself from healing or dealing any Corruption to them. It’s a tactical move worth considering.
Let’s break down what RNG is first. RNG stands for Random Number Generator. It’s the fancy term for when something has an unpredictable outcome, like a six-sided die. Wiesz, the kind with numbers from 1 Do 6. Each side of the die has an equal chance of showing up, but they have different values to players. Na przykład, 1 might be the worst outcome, I 6 could be the best (or it might be the other way around in different situations).
Więc, it’s called RNG because each roll of the die gives you a random number between 1 I 6. Got it? Świetnie, let’s get back to the guide.
Teraz, RNG management in this game is all about controlling or changing the outcomes of dice to land on the side you want or to turn a bad outcome into a better one. Risky dice in this game usually have 4 sides that are bad for you and 2 sides that are really good. The “RNG” here tends to lean toward the bad side, stąd “risk.” Więc, how do we remove that risk from these dice?
To make sure the good outcomes happen where we want them, we’ve got tools and choices for RNG management in the game. Here are some of them:

Reroll: When you reroll a die, you’re basically giving the RNG another shot at deciding the outcome. The chances of it landing on the same side again are pretty small, but it’s still possible. If you only have one way to reroll, and it lands on the same side, it might not be enough to change the outcome.

Cleromancy: This is a bit of a safer method. Cleromancy allows you to discard dice equal to the number you want to change and then draw the same number of dice. It’s a more reliable way to ensure that the outcome you want is gone, instead of just rerolling. Teraz, you don’t want to go around discarding dice left and right, but when you’re in a tight spot, it’s a useful tool to have.

Konwertować: W tej grze, conversion means turning a die with a corruption source into a purity source of equal value and type. Na przykład, if you have a die showing an Area Corrupt side, you can use conversion to turn it into an Area Purity side. Moonie, the first character in the game, teaches you a bit about conversion. If a die has a corrupted side, Moonie can ensure that any bad outcome turns into a good one instead. Moonie can do this once per turn for free with the main virtue, so it’s a handy tool when you’re starting out to get the hang of managing your dice.
These tools and choices are crucial for making the best out of your dice and reducing the risk in those risky rolls. Więc, use them wisely!
Teraz, let’s talk about the choices you make on the game board that can also influence RNG management. These choices involve Blessings, Shards (also known as Gold), and Battles.
The very first choice you make in the game, whether to pick a Blackhole Blessing or not, can be considered a form of RNG management. If you chose a Blackhole Blessing and it led to a bad outcome, that’s something you could have done differently to shape the course of your run. This often requires a deep understanding of the game’s mechanics and meta knowledge to determine where things went wrong and why.
You can also influence RNG by making sure you draw more dice and cycle through them or using your virtues strategically to control the outcomes you want.
Another approach is to forge the Risk Dice into something better during the game. Nadgodziny, you can transform those dice and eventually duplicate the “doskonały” version of that die for a fantastic payoff.
Teraz, let’s talk about Shards, or Gold. When you decide to collect more shards and when to spend them is a big part of RNG management in this game. Do you save up your shards for later when things get more expensive? Do you go all-in early to gain a strong start? Or do you spend it all before the first boss to forge or duplicate dice, ensuring you have valuable assets for the rest of the run? The timing of your shard usage can significantly impact your game.
Then there are the monster fights, both normal and elite. Knowing which fights to pick or skip based on your knowledge of the elites in a particular act is another aspect of RNG management. Na przykład, if you have a multi-hit build that’s vulnerable to thorns, it might be wise to avoid elite fights in the last act. Z drugiej strony, if you have a slow-roll deck that gradually gains power over time, skipping elite fights in the ruins might be a smart move. Be cautious of enemies like the cauldron and the apothecary, which can fill your deck with unwanted cards, especially if you have a slow strategy.
Understanding when to skip elite fights is essential, and it depends on your knowledge of the available elites and which builds work best against them.
RNG management is a crucial skill for raising your skill ceiling and improving your performance in the game. When you become proficient at it, you’ll truly feel like you can “GIT GUD” at Astrea, and it will show in your gameplay. Więc, keep honing those RNG management skills!
Virtue Management:
Let’s dive into the Purity Bar and Virtues and how to handle them effectively.
You might be wondering, “What’s the Purity Bar?” Dobrze, here it is:

Purity Bar: The Purity Bar, also known as your HP Bar, is the absolute heart and soul of this game. It’s the only way to keep yourself from meeting a grim end, so you better learn how to manage it properly.
Right above the Purity Bar, you’ll find Virtues, and we’re going to use Moonie as our example character in this section to keep things straightforward and easy to grasp, especially for those who are just starting out.
Teraz, let’s talk about those Virtues. The first virtue, all the way to the right, is unique because you can only use it once per turn unless you have a special keyword called “Refresh.” (Przy okazji, Refresh works even if you’re silenced, and the Blessing that refreshes your Virtues at the start of battle does the same.)
Once you take or heal damage, you can’t use that first virtue again for that turn.
Teraz, each subsequent virtue is connected to different sections of the Purity Bar. In Moonie’s case, it’s linked to the bars at 1, 3, I 5. Więc, when you take damage that depletes the bar to 1, 3, Lub 5, the corresponding Virtue activates. It’s like a safety net to help you out in dire situations.

Teraz, here comes the tricky part, and it’s something that some players may not be aware of. Each Virtue can actually be activated more than once per turn, and I’m going to explain how to do it.
Na przykład, let’s say Moonie is two steps away from activating the “Draw a Die” virtue on the Purity Bar. If you use “Draw a Die,” then heal yourself for 2 so that you align with the virtue, and then take 1 Lub 2 damage again, you can activate the Virtue again to draw another die. This can be repeated as many times as you want, especially if you have two sentinels with low purity/corruption dice that can bounce you back and forth on the Purity Bar.
Here’s how it works step by step:
- Brać 5 damage from an enemy, which activates the “Draw a Die” Virtue.
- Use that die to deal 4 damage to the enemy, which activates the “Deal 4 Szkoda” Virtue.
- Reroll 2 dice, which activates the “Reroll 2 Kostka do gry” Virtue.
- Use one of the dice to heal yourself for 1 and draw 1 die, then deal 1 damage to yourself, which reactivates the “Draw a Die” Virtue.
Więc, in this sequence, you’ve effectively rerolled 2 dice (great for RNG management), drawn 3 dice, dealt more than 4 damage to the enemy, all while using just a single die from your starting hand. Plus, you’ve refilled your hand in the process.
Również, keep in mind that each Virtue is activated again at the start of your turn if your corruption is still below that Virtue on the Purity Bar. This is particularly useful when you’re only taking small amounts of damage from the enemies or none at all.
Using the enemy’s damage against them is an excellent way to manage risk efficiently, ensuring they deal just enough damage to activate all your Virtues at the start of your turn.
This strategy can be repeated multiple times per turn for several turns, and you can also convert the enemy’s dice to make sure they heal you to full afterwards. It’s a powerful technique for maximizing your Virtues and maintaining control over the battle.

Absolutnie, you can pull off some truly devastating moves in Astrea. Converting an enemy’s Area 1 Corrupt dice and then enhancing them to deal Area 6 Purify to all characters is a fantastic tactic. It can turn the tide of battle in your favor and be a game-changer.
This section is a great start, and if you ever feel motivated to expand on it or have more to share, don’t hesitate to come back. Astrea is a complex and intriguing game with many strategies to explore, and your insights are valuable for players looking to improve their skills.
To wszystko, co dzisiaj udostępniamy w tym celu Astrea: Six-Sided Oracles przewodnik. Ten przewodnik został pierwotnie stworzony i napisany przez ZirzoR. Na wypadek, gdybyśmy nie zaktualizowali tego przewodnika, możesz znaleźć najnowszą aktualizację, postępując zgodnie z tym połączyć.