
- Tytuł: 100% Orange Juice
- Data wydania:
- Wywoływacz: Orange_Juice
- Wydawca: Fruitbat Factory
Informacje o 100% Orange Juice is still incomplete. Pomóż nam wypełnić szczegóły gry za pomocą tego formularz kontaktowy.
Welcome to this comprehensive tutorial on character modding for 100% Orange Juice! If you’re feeling overwhelmed by the technical terminology and unsure where to begin, nie bój się! This step-by-step guide is tailor-made for beginners, designed to walk you through the process using straightforward language. Regardless of your experience level with modding, you’ll find this tutorial accessible and easy to follow.
Pierwsze kroki
Before we dive in, ensure you have the following tools ready:
- An archiver software like WinRAR or 7-Zip.
- An image editor that can handle .dds images (np., paint.net or any other program of your choice).
- Your preferred image editor or art program.
- A word processor (Notepad will suffice).
- A pinch of patience.
Please note that this guide primarily focuses on replacing basic textures for characters. If you are already an intermediate or advanced OJ modder seeking more intricate information, like voice, hair color, or cosmetics replacement, this tutorial might not be suitable for your needs.
Part One: Creating Your Mod Folder
Najpierw najważniejsze rzeczy. Navigate here:
C:\Pliki programu (x86)\Steam\steamapps\common\100 Orange Juice\mods

Go to the location where you installed OJ on your computer and locate the directory labeled “mody”.
Create a new directory inside the “mody” folder and give it a name of your choice. Gratulacje, you have successfully completed the first phase!
Następny, access the newly created mods folder and create an additional folder called “jednostki”. This will be used to house your sprites when the time comes.

Once it looks like this, you’re done for now — but we’ll come back to this later.
Part Two: Unpacking Your Images
Navigate here:
C:\Pliki programu (x86)\Steam\steamapps\common\100 Orange Juice\data
Same as before, but now you want to go to the folder named data.

You will encounter a series of .pak files, presented as follows. The assets of 100% Orange Juice are compressed into .pak format. Więc, you will need to extract these files manually to access them.
Proceed to locate the units.pak file and utilize your archiver software to open it.

There are many .dat files in the repository. Dlatego, continue exploring to identify the character that needs to be replaced in your mod. If you have trouble locating them, refer to their unit ID in this resource.
Did you successfully locate the files? Doskonały! Now select the files with names that follow the specified format: [Specify the format here].
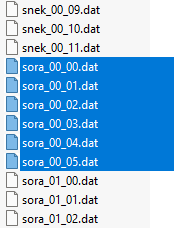
name_00_00.dat
…
name_00_05.dat
The provided graphics represent the default sprites for the selected unit. To access the alternate color schemes and costumes, refer to the files labeled “name_01_00.dat” i tak dalej. You may drag or copy and paste these files to your desktop or other accessible location for convenient access.
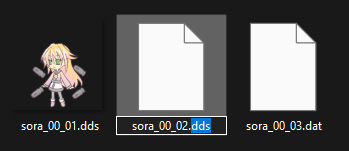
Teraz, rename the .dat extensions to .dds.
Make sure you have filetype extensions visible, and just click on them to edit them. Easy enough, just make sure the file names themselves remain unchanged.
You’ve successfully extracted your character sprites!
Part Three: Editing Your Images
Preparing For Editing
Zacząć, launch paint.net and open each of the recently created .dds files.
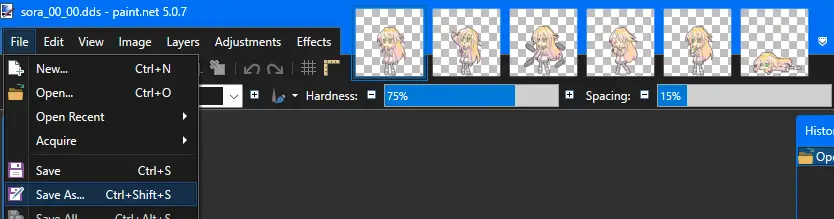
It is acceptable to use any suitable software for this task, but I personally recommend paint.net due to its user-friendly interface, particularly when viewing and editing images in the .dds format.
Po ukończeniu, utilize the Ctrl+Shift+S keyboard shortcut or access the “Zapisz jako…” option under the File menu.

Ensure that you save these modified sprites as .png files, as this will facilitate future editing endeavors. Repeat this process for all your current sprites.
Teraz, recall the units folder you established earlier.
Integrate your new .png images into your mod’s units folder. You can accomplish this either by directly saving them there or by performing a move operation.
Making It Real
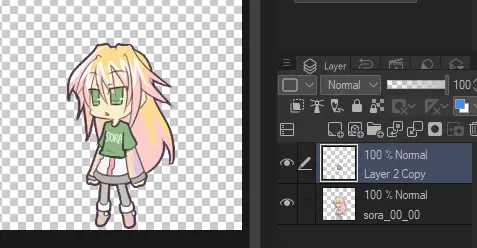
Once you have completed all of the previous steps, you are ready to begin the process of opening your sprites in the editing or art program of your choice. The program you choose should have support for layers and transparency, which excludes options like MS Paint.
From this point on, you have complete creative freedom over your mod. You can add new features, replace the sprites with those from another game, or even create new sprites from scratch. If you decide to replace an entire sprite, it is advisable to set the existing sprite to low opacity first, so that it can be used as a size reference. Kiedy skończysz, you can delete the reference sprite.
Make sure that all sprites are saved with a transparent background.
Now the sky is the limit and you are ready to get creative!


Part Four: Getting The Mod to Work!
Once you have finished modifying your sprites, you need to ensure that your mod is integrated into the game. In order for 100% Orange Juice mods to work properly, you need to provide a .json file that tells the game which assets to replace.
Aby to zrobić, open your favorite word processor and create a new document.
Then paste the provided code into the newly created document:
{
{
    "ModDefinition": {
     "nazwa": "---",
     "description": "---",
     "author": "---",
     "system_version": 2,
     "contest": FAŁSZ
    },
    "ModReplacements": {
     "textures": [
      "units/name_00"
     ]
    }
   }
Please ensure you comprehend the instructions provided. Below are the modifications required:
- nazwa: Select a title of your preference for your modification.
- description: W tej sekcji, elucidate the functionalities of your mod. Na przykład, you can state, “Introduces a stylish hat for Marc,” Lub “Substitutes Poppo with a cabbage.”
- author: Indicate the creator of the mod, which is yourself.
It is important to note that numerous other aspects can be customized using the .json configuration, but for the present, we will retain only the essential elements. Please refrain from removing any of the provided quotations.
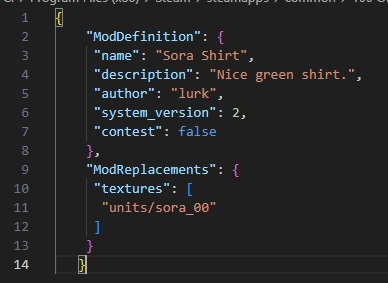
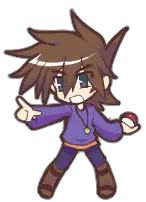
The crucial step is to make the following adjustment under the “textures” sekcja: Substitute “units/name_00” with the specific unit ID corresponding to your sprite. Na przykład, in this scenario, mine would be “units/sora_00”.
You need not enumerate each individual pose that has been replaced. Just providing the name and costume will suffice, and the game will take care of the rest automatically.
Once you have confirmed that everything appears accurate, proceed to save your text document as “mod.json”.
Note that word processors such as Notepad++ or Visual Studio will facilitate this process seamlessly. Jednakże, if you are using a standard Notepad application, simply save the file as “mod.txt” first and then rename it to “mod.json”.
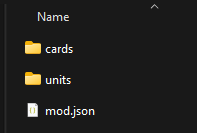
Wreszcie, place the completed “mod.json” file into your mod folder as shown below: [Insert path to mod folder here].

Upon achieving the prescribed folder configuration, the task concludes, and the subsequent step entails the initiation of OJ to assess its functionality. It is imperative to verify the mod’s activation status within the settings menu.
To promptly evaluate its efficacy, one may inspect the character in the Avatar settings or commence a personalized singleplayer game.

Tldr
If you don’t feel like reading all that, here is a condensed (but much less detailed) version of this guide.
- Go to C:\Pliki programu (x86)\Steam\steamapps\common\100 Orange Juice\mods
- Make a new folder inside mody, named jednostki
- Go to C:\Pliki programu (x86)\Steam\steamapps\common\100 Orange Juice\data
- Otwarte units.pak with WinRAR or 7-Zip
- Look for the character you want to replace, then copy the files name_00_00.dat through name_00_05.dat to your desktop
- Rename your .dat file extensions to .dds
- Open your .dds images in paint.net, and export them as .pngs in your mod’s jednostki falcówka
- Edit your .png images however you wish
- Make a new text document
- Paste the following into your text document:
{
 {
     "ModDefinition": {
      "nazwa": "---",
      "description": "---",
      "author": "---",
      "system_version": 2,
      "contest": FAŁSZ
     },
     "ModReplacements": {
      "textures": [
       "units/name_00"
      ]
     }
    }
- Replace the — with whatever you want (don’t remove any quotes)
- Replace name in “units/name_00” with your character’s unit ID
- Save your text document under the name mod.json and put it in your mod’s main folder
- Launch 100% OJ to see if it works, make sure your mod is enabled in the settings
Dodatkowy: Replacing Hyper Card Art
If your intention is to create a lighthearted modification for your private enjoyment, you may cease perusing further. The subsequent section of this guide will exclusively concentrate on adding final touches to your modification.
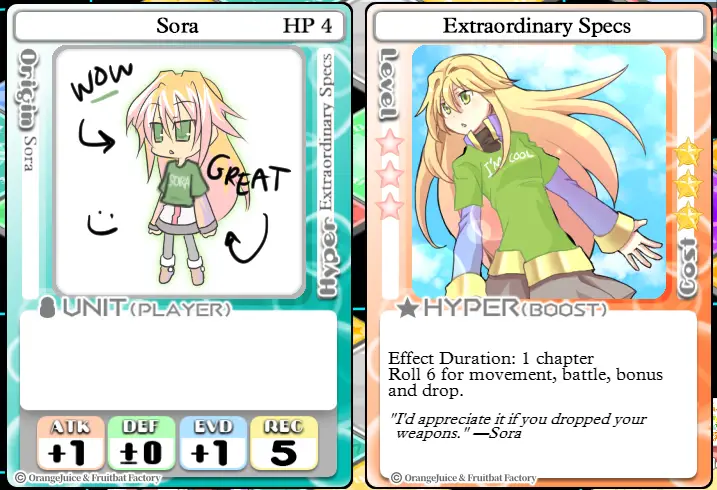
At this juncture, you might interject, “What about the Unit and Hyper cards? The artwork on these cards no longer corresponds to my character!”
Bądź pewien, the replacement of card art can also be accomplished with ease! Regard this segment as an assessment of your knowledge and progress up to this stage.
Pierwszy, make a new folder in your mod directory named cards.
Następnie, go back to the data folder from earlier, and look for the file cards.pak. When you look inside, you’ll see those .dat files again, but now they seem to come in pairs: “128” I “256”. What gives?
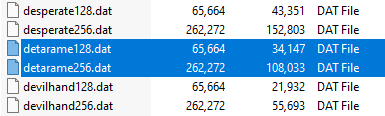
Cards require two different resolutions in order to display properly. One is 128×128 pixels in size, and the other is 256×256 pixels in size. But you don’t have to extract both.
Więc, look for the cards that you want to replace (use this to find the correct ID).
Copy the larger one from the archive — np. cardname256.dat — and rename it to .dds. Then export your .dds again as a .png. Same process as last time.
Teraz, place your .png in your newly made cards folder.
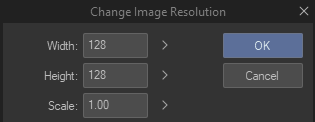
Make whatever changes to it you want to make. After you save it, resize it to 128×128 pixels. Save another version of it ending in 128.png.
W tym momencie, your cards folder might look something like this:

Ready to move on?
Go back and open your mod.json file again.
Pod “textures”, add a comma after your unit from earlier, and type your card(S) in like this:
"ModReplacements": {
     "textures": [
      "units/name_00",
      "cards/cardname"
     ]
    }

Więc, w moim przypadku, tak by było “cards/detarame”, “cards/sora”. No need to add the numbers.
(Make sure that the last texture on the list does not end with a comma.)
Save the changes you’ve made to your .json file, and check to see if it worked! (If you’ve left OJ running, remember to click “REFRESH” in the Mods tab.)
Gratulacje! You can replace the art of any card in the game with this method, so have fun!
Dodatkowy 2: Publishing to Workshop
You’ve decided you want to share your mod with the world (or maybe just your friends, so you can play online with your new characters). Not a problem!
Aby to zrobić, you will need a thumbnail picture named preview.png within your main mod directory. Idealnie, it should be in a 16:9 rezolucja, and it must be less than 1 MB in file size. This is what will be shown on the Workshop page (though you can always change it later).

Once you have that set up, just open up 100% OJ and click on the “Publish” button from the Mods tab. It’ll do the work for you.
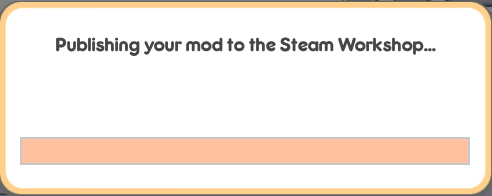
When it’s done uploading your mod, it will redirect you to the Workshop page you just made. From there you can edit the description, visibility, preview images, required DLC, whatever else you want to do. Keep in mind that the visibility will default to public when uploaded.
To wszystko, co dzisiaj udostępniamy w tym celu 100% Orange Juice przewodnik. Ten przewodnik został pierwotnie stworzony i napisany przez lurk. Na wypadek, gdybyśmy nie zaktualizowali tego przewodnika, możesz znaleźć najnowszą aktualizację, postępując zgodnie z tym połączyć.