- Titel: Urbek City Builder
- Releasedatum:
- Ontwikkelaar:
- Uitgever:
Information about Urbek City Builder is still incomplete. Help ons alstublieft de details van het spel hiermee in te vullen contactformulier.
A comprehensive guide for Urbek City Builder, including tips, trucs, layouts, strategieën, how to progress your city, how to win a Path, and much more.
Algemene tips: Food and Work
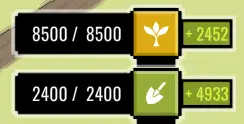
Resource management is one of the basic mechanics of this city builder. In wezen, the player should maintain a healthy balance between Voedsel en Werk(d.w.z., labor force).
Beware of your Food and Work numbers on the upper right UI. Helemaal aan het begin van het spel, you will have more Work (over 2000) than Foods (over 200). Build Fields first, then Housings, then repeat this cycle.
Algemeen, when you have much more Foods than Works, build Housings to generate more Works; when you have much more Works than Foods, build Farming-related buildings to generate more Foods. This Food-Work Cycle is the very engine that pushes your city forward.
Always keep a decent surplus of both Food and Work to deal with the development needs.
There are four different ways for generating Foods: Landbouw, Vissen, Boomgaard, and Research Center. Different maps may vary (bijvoorbeeld, on Desert Maps the Center Pivot Irrigation will largely replace farms), yet they all fit into these four categories.
More efficient buildings and building upgrades for each category will be unlocked gradually during your playthrough.
Landbouw

- Farming Becomes available from the very beginning of the game, being the most basic method for Food generation. Anderzijds, it occupies a lot of space and needs heavy planning.
- Upgrades: Veld – Farm House – Grain Silo – Modern Grain Silo – Farm Shed – Food Plant.
Vissen

- Bereiken 1050 Population allows the players to place Docks, which will turn nearby waterfront Housings into Food-producing Fishermen’s Houses. They provide a large amount of Foods with a very small space footprint, yet require natural bodies of water to work.
- Upgrades: Dock – Fishermen’s House.
Boomgaard

- Bereiken 7000 Population unlocks Orchard. It requires less space, although it needs more Skilled Work and should be free of Pollution. The Research Center route is also locked behind this route, asking players to develop extensive Orchards.
- Upgrades: Boomgaard – Fruit Processor.
Onderzoekscentrum

- Research Center unlocks after having 5 Fruit Processors and 33000 Population, and needs additional Offices in its proximity. It unlocks VERY late in the game (you can already win the game after reaching 33000 Pop.), consumes a LOT of resources, while being the most effective route of producing Foods – 9000 Foods in a two-square space or 21000 Foods in a four-square space.
- You won’t really need it for most of the playthroughs, but very helpful if you need to reach 35000+ population and already run out of spaces for other Food-producing methods.
- Upgrades: (Faculty of Botany) – Food Research Center – Advanced Food Research Center.

Werk (d.w.z., labor force) production is very straightforward: Build more Housing and provide more services. Gradually you will have a huge labor force to play with.
There are three levels of Works, Unskilled, Skilled, en High-Skilled. Different buildings and services require different types of Works.
Housing will automatically upgrade/level when served by more and more services; higher-level Housings will provide both lower- and higher-level Works. It would be better to try to upgrade most of the Housings in your city to Downtown level (see below Housing guides for more details).
Note that Schools do not generate Works by themselves. Instead they increase the maximum amount of Works you can accumulate.
Algemene tips: Energie, Kolen, and Iron
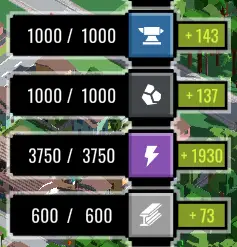
Energy and Coal
Beginning from the early game, nearly all buildings in the city require Energy (electricity, purple symbol) to operate.
In the early game the city’s Energy mostly comes from Wood, in the mid-game then Coal, and eventually Nuclear Power. For most of the playthrough, your city will be powered by Coal Plants and Heavy Coal Plants.
In the early and mid-game, the most efficient way to produce Coal is to surround a Coal Mine with Housing. All street-facing Housings within a 5-square radius of the Coal Mine will turn into Coal Miner’s Houses and eventually 3-Story Coal Miner’s Houses. In the late game, you can replace them with Deep Coal Mines.
Iron and Steel
Two important buildings required for leveling up Housings to the Downtown level, School and Bus Stop, need Iron (blue symbol) and Steel (grey symbol). Iron plus Steelworks equals Steel.
Factories, one of the primary sources of Science in the late game, also require 1 Steel per sq. if the Science-producing Policy is selected.
Like Coal, the most efficient way to produce Iron is to surround an Iron Mine with Housing. In het spel, you can also replace them with Deep/Open Pit Iron Mines.
Algemene tips: The Parking Lot Trap
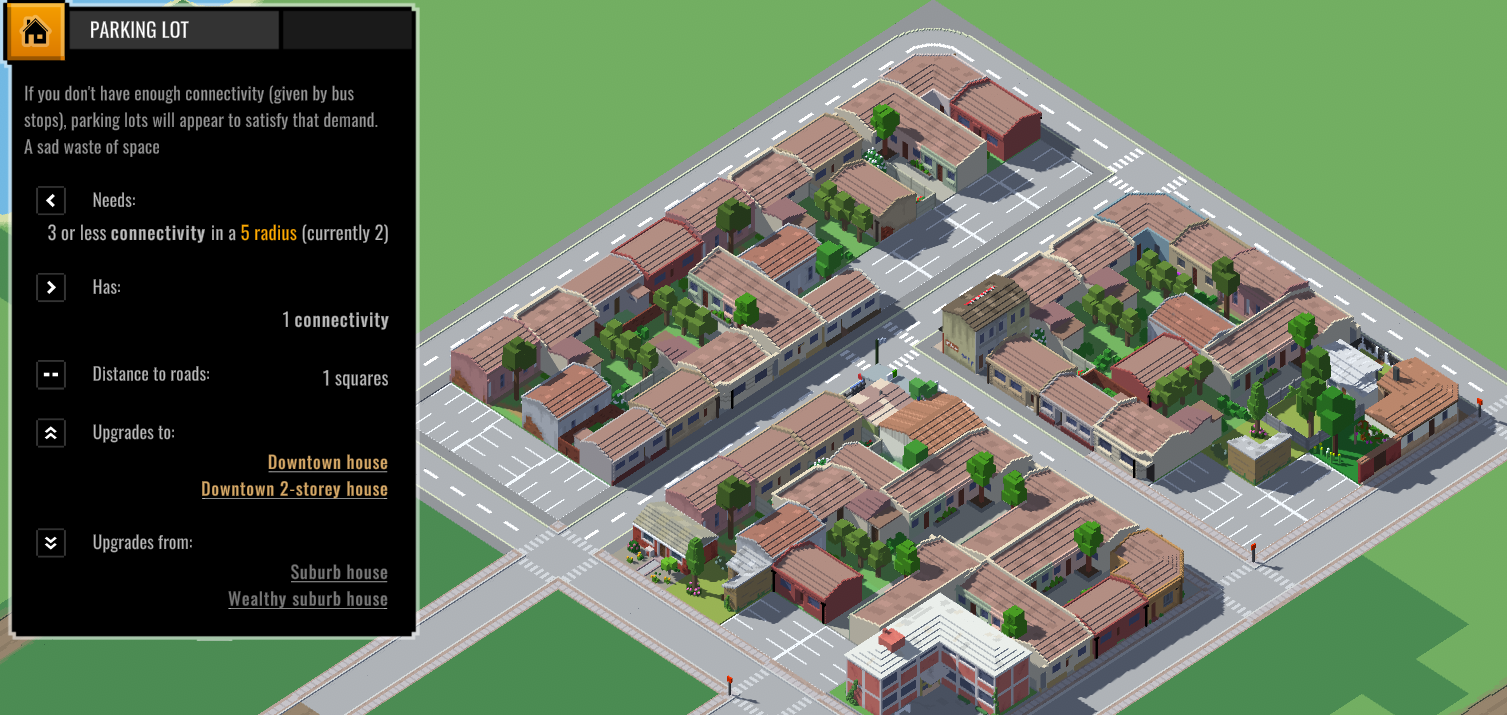
Bereiken 5500 Population unlocks Downtown Houses, which means your existing highest level Housings at the time, Wealthy Suburb Houses, will be upgraded to much better Downtown Houses if there are High School and Repair Shop nearby.
Echter, 5500 Population also unlocks Parking Lots. Downtown Houses require 4 Connectivity, if there isn’t enough Connectivity nearby, Housings will be replaced by Parking Lots to satisfy that demand.
This means your city will suddenly have a severe Work shortage, as Parking Lots (begrijpelijkerwijs) don’t provide Works. If left undisrupted, your city will fall into a Work shortage deadlock in which you can’t build anything to reverse the situation due to lack of Works.
The only way to prevent the Parking Lot from spawning to build Bus Stops, which will provide the 4 Connectivity and force Parking Lots upgrade back to Housing. Bus Stops require Steel.
Kortom, be prepared for the Parking Lot Trap by building Steelworks and having a Steel income when your city reaches about 5000 Population, and began to build Bus Stops on every other street.
Algemene tips: Food Consumption
Beginning from the mid-game, upgrading the city’s Housing will usually result in a sudden, massive increase in Food consumption, as higher level Housings consume more Food.
Try to maintain a Food surplus of at least 2000-3000 in the mid- to late game, acting as a buffer for Food consumption spikes.
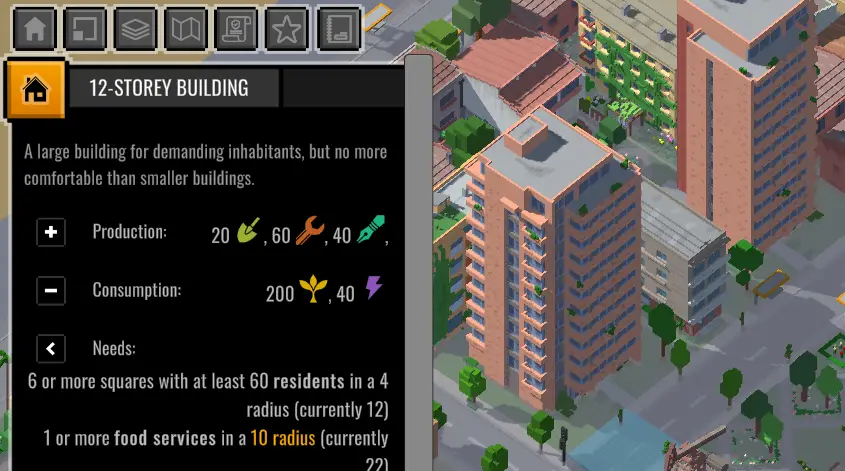
12-Story Building, one of the highest-level Housings, consumes a staggering 200 Voedsel (most of the Housings consume less than 100 Voedsel) to produce 60 H. Skilled Works. The building is essentially trading Food with H. Skilled. Echter, you cannot turn H. Skilled into more Food until very late game through Research Centers; for most of the game, this building is a waste of Food. I would suggest actively preventing 12-Stories from spawning by lowering the Healthcare number below 3 in the city, or building Banks as they can’t spawn near Banks as well.
Another primary source of Food consumption is the Iron/Coal Miner’s Houses; they trade Food with Iron and Coal. You can replace them with Deep Coal/Iron Mines – which do not cost any Food – if you are in dire need of Food.
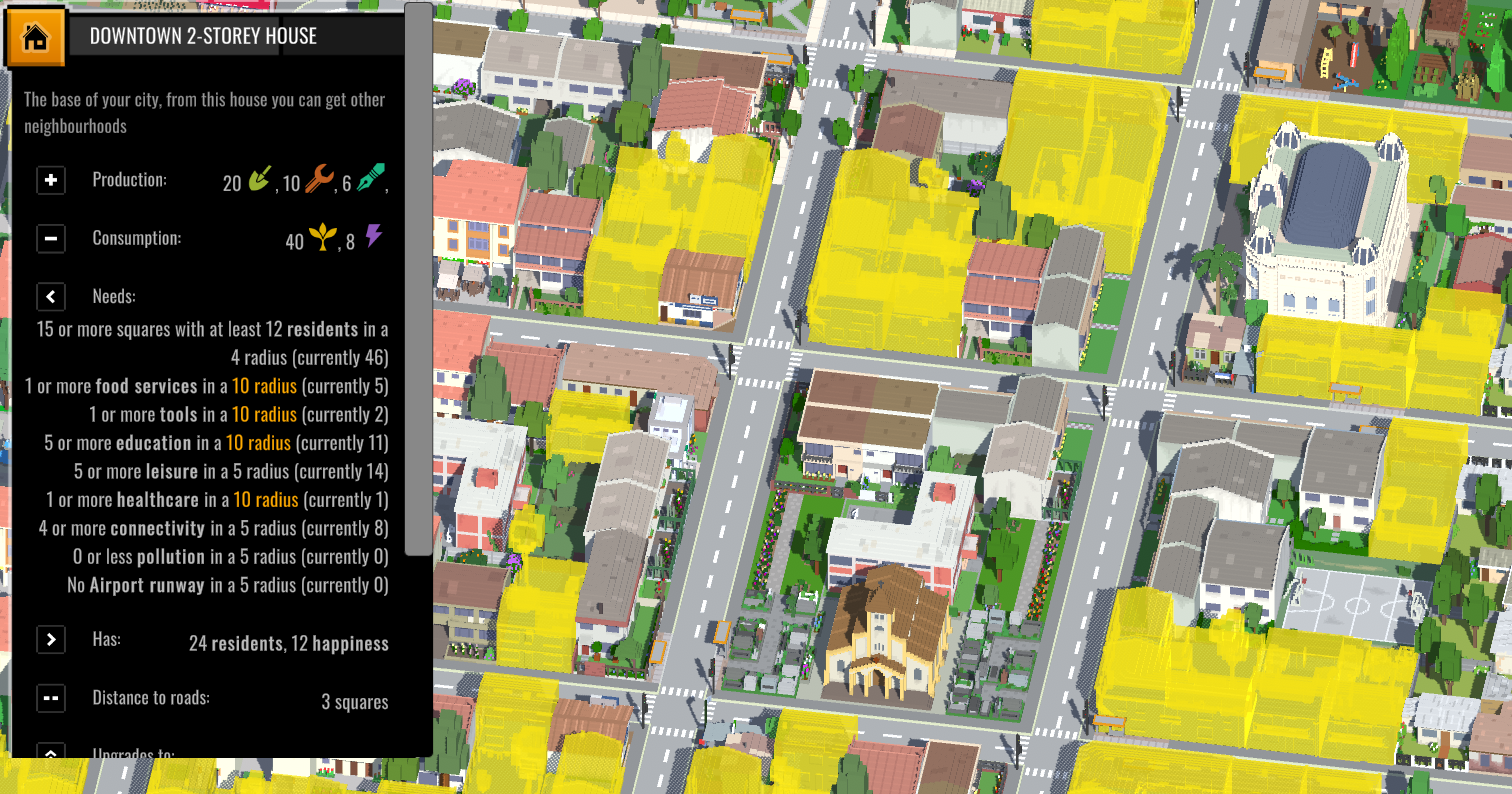
Huisvesting: Het centrum
With below requirements fulfilled near your Housings, you will get Downtown-type Houses:
- 15 Residents in a 4 sq. radius – This means “density,” or large street blocks full of Houses.
- 1 Food services in a 10 sq. radius – This means Food Market or Fish Market.
- 1 Tools in a 10 sq. radius – This means Repair Shop or Hardware Shop.
- 5 Education in a 10 sq. radius – This means High School.
- 5 Leisure in a 5 sq. radius – This means Bar and/or Cabaret.
- 1 Healthcare in a 10 sq. radius – This means a Clinic.
- 4 Connectivity in a 5 sq. radius – This means Bus Stop.
- 0 Pollution in a 5 sq. radius – This means at least 5 tiles away from an Industrial building.
Downtown Houses will produce most of the city’s Skilled and H. Skilled Works. Aanvullend, all the various neighborhoods, as well as high-level Housings, need to be upgraded from the Downtown 2-Story Houses. Kortom, it would be better to have at least 1/2 of the urban area in your city dedicated to Downtown Houses.
With better connectivity services (Metro) and Retail services, Downtown Housings could be further upgraded to higher-level buildings. These high-level buildings fall into two types,
Residential en Mixed.
- Mixed Buildings require Banks nearby, while require very little Healthcare. Residential Buildings dislike Banking in their proximity, and require much better Healthcare. Both also require Retail.
- Mixed Building can provide Retail, Tools and Food Services by themselves. Once you build up an area full of Mixed Buildings, Food Markets and Hardware Shops are no longer necessary in nearby street blocks.
The highest level of Residential Buildings is the 12-Story Building. It produces the largest amount of H. Skilled Works (20 Unskilled, 40 Skilled, en 60 H. Skilled Works) of all Housings, while also cost a lot of Food (200 Voedsel).
Downtown Houses will eventually upgrade to 12-Story Buildings if there is Hospital and enough Leisure nearby.
The highest level of Mixed Buildings is the 8-Story Mixed Office-Commercial, and it produces the most variety of stuffs (30 Unskilled, 27 Skilled, en 35 H. Skilled, while also providing Retails, Hulpmiddelen, and Food Services) with relatively less Food (120 Voedsel).
Downtown Houses will eventually upgrade to 8-Story Mixed if there are Banks and Metro Stations nearby, with Airport and Airport Runway in the city.
It is also the only Housing categorized as Office, essential for placing Research Center for late-game Foods. Recommend having at least one dedicated area full of 8-Story Mixed in your city.
Opmerking: The models of all the Downtown and higher level Housings are either 1×1, 1×2, or 2×2.
Huisvesting: Downtown Variants
Downtown Houses can also upgrade to two variants: Artist Neighborhood and Night Life Neighborhood.
Artist Neighborhood
Downtown 2-Storey Houses with turn into these by having Bookstores, Libraries, en 1 Sculpture nearby.
Compared to normal Downtown Houses, they provide more (13) Happiness and 2 extra Cultures per sq.
Night Life Neighborhood
Downtown 2-Storey Houses with turn into these by having Leisure Buildings and 1 Cool Park nearby.
Compared to normal Downtown Housings, they provide more (13) Happiness and 2 extra Night Lifes per sq.
Echter, they also consume Goods; hence the upgrading cost of Night Life Nbhd. is much higher than Artist Nbhd.
Strategy Note: Both Artist and Night Life Neighborhoods can withstand Pollution, even though Downtown Houses can’t bear Pollution.
You can build up an area to Downtown level, turn it into Artist Neighborhoods, then grow Industries in its proximity, rather than having a 5-sq. buffer zone between your residential and industrial area.
Huisvesting: Shanty Town/Social Building

Shanty Town – Blocks
When there is Pollution (usually from Industries) near Housings, they will turn into Shanty Town (slums) with very low Happiness.
Clusters of Shanty Town will generate Rebel houses, the earlist source of Self-Organization in het spel.
Enough Self-Organization will unlock buildings such as Anarchist Bar (higher Night Life), Self-Managed Bookstore (higher Leisure), and eventually Anarchist Commune (higher Happiness residential).
Shanty Town will also upgrade into Blocks if provided with Food Services, which will house more Population while still having very low Happiness.
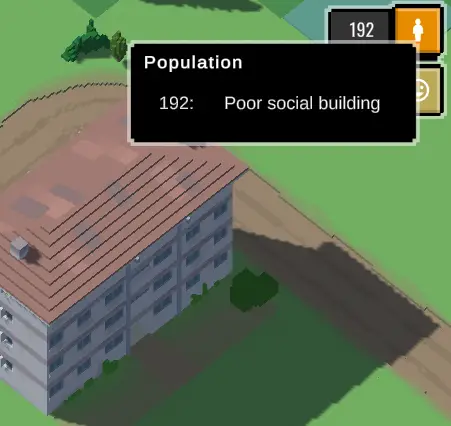
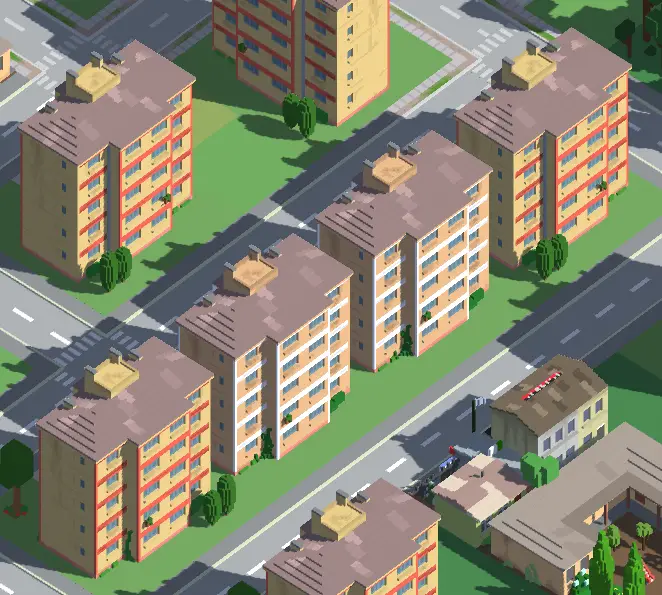
Social Buildings
Bereiken 8000 Population unlocks Social Buildings (social housing). Unlike regular Housings, Social Buildings can withstand Pollution and house much more Population than Blocks (one Social Building heeft 192 residents; the UI only shows 48).
It is recommend to eventually replace all the Shanty Towns and Blocks in your city with Social Buildings.
Bovendien, Social Building is the only Housing that doesn’t have a density requirement. They can fill the edge of your city’s urban areas when only basic Wooden Huts will appear there due to lack of neighbors, and also trigger nearby Houses to upgrade by providing high-density neighbors.
High-Level Social Buildings
Poor Social Buildings can be upgraded into Medium and Comfortable Social Buildings, if provided with Education, Food Services, Healthcare, and Leisure.
The Comfortable Social Building has a standard Happiness value (10 Hap.) and can still withstand Pollution, very important for Path of Leisure victory (see below sections).
Huisvesting: Happiness Housings
Two routes of Housing upgrades have much more Happiness than others, although they have specific requirements.
Villa – Herenhuis
Villa is unlocked from the very early game; Mansion is unlocked after reaching 10 Happiness and 6500 Population.
Basic Housings (Wooden Huts) will upgrade into them with Green Areas (Parks) nearby. In aanvulling, Villa requires no other Housing in a 4-sq. radius, and Mansion requires no other Housing in a 1-sq. radius.
Both Villa and Mansion provide the highest Happiness in the game (13-14 Hap.), at the cost of being very low-density and offering less Skilled Works.
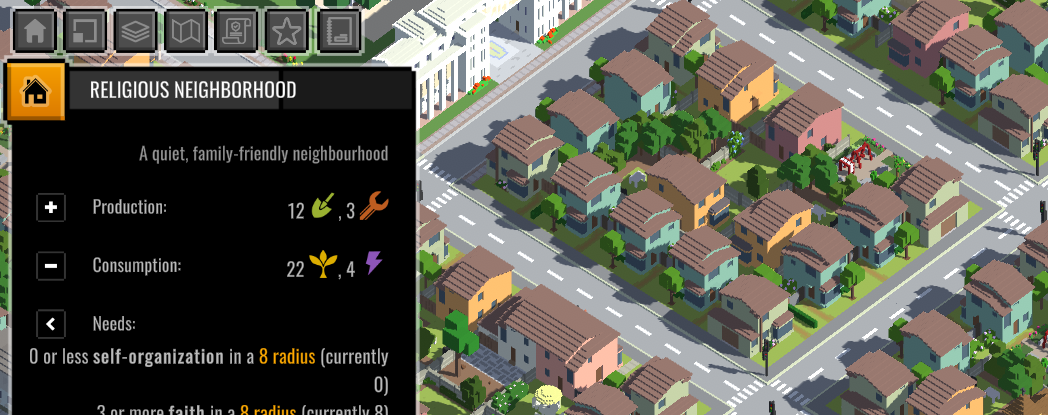
Poor Suburbs – Religious Neighborhood
Bereiken 2200 Population unlocks Poor Suburbs; basic Housings with a 1 Sq. condominium nearby will turn into Poor Suburbs. It is a cheaper way to get more Unskilled Works (14 Unskilled while cost 10 Voedsel) in the early game. Anderzijds, Poor Suburbs can only upgrade to Religious Neighborhoods.
With a Police Station (unlock with 6 Faith and 8000 Population) and Chapels/Churches nearby, Poor Suburbs will turn into Religious Neighborhood. Religious Neighborhood also provides much more Happiness (14 Hap. vergeleken met 10-12) than standard Houses.
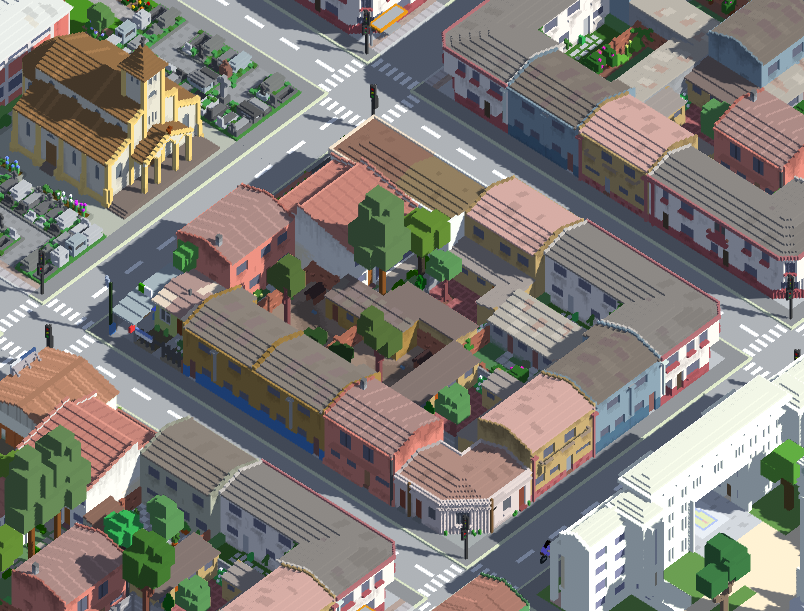
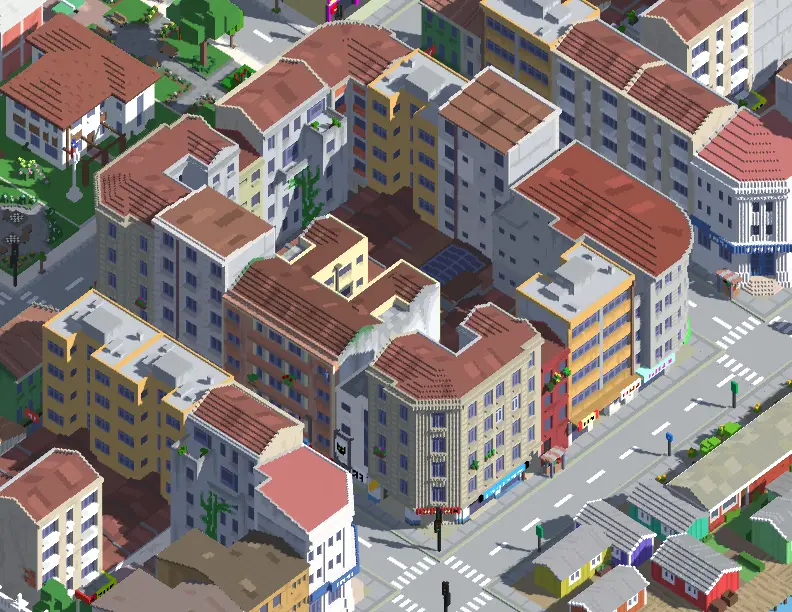
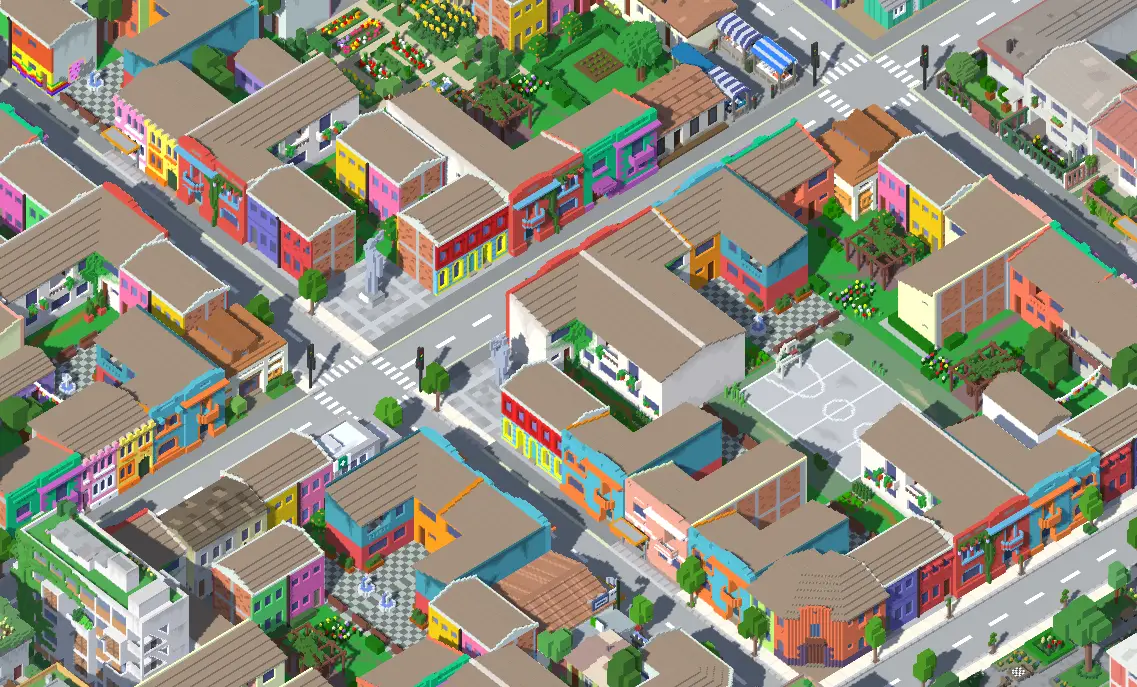
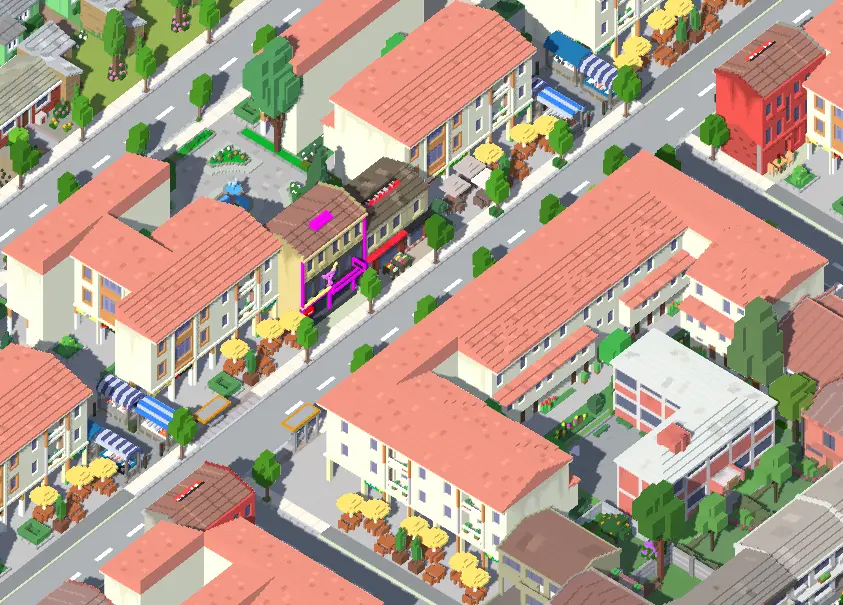
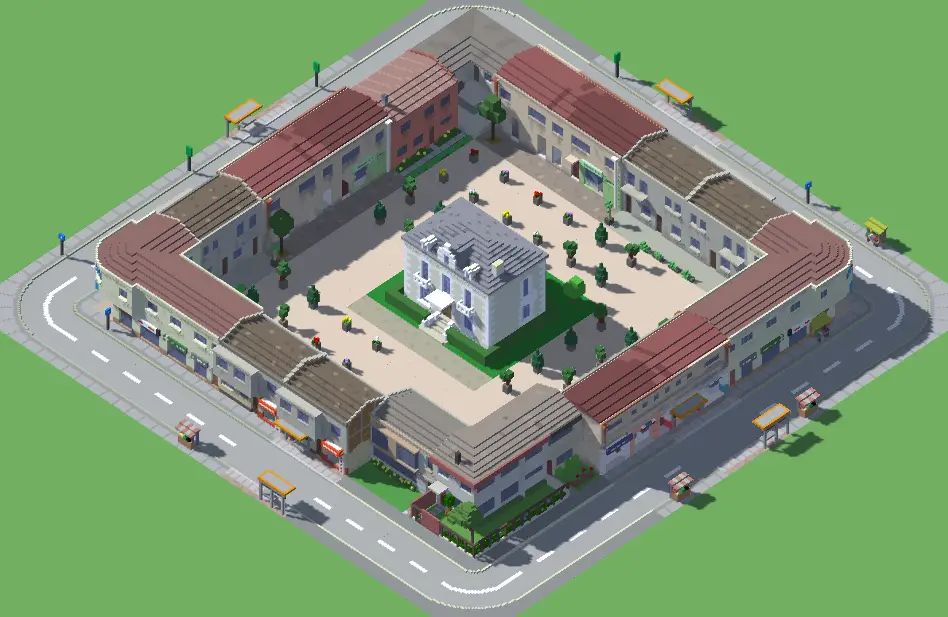
Indeling: Het centrum
This should be the most common urban layout throughout the city. Plopping down corresponding service buildings will upgrade all Housings to the types you want, whether high-level residential, high-level mixed, or Downtown variants.
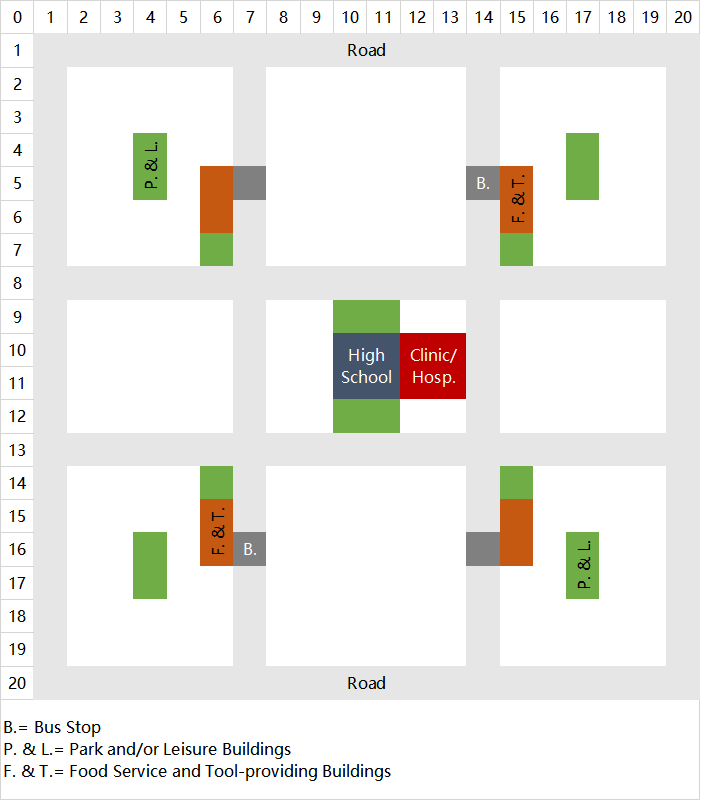
This layout is based on the coverage of High School; every Housing within the area will fall under the High School’s and the Clinic’s coverage.
An example of the layout with a developed Downtown:

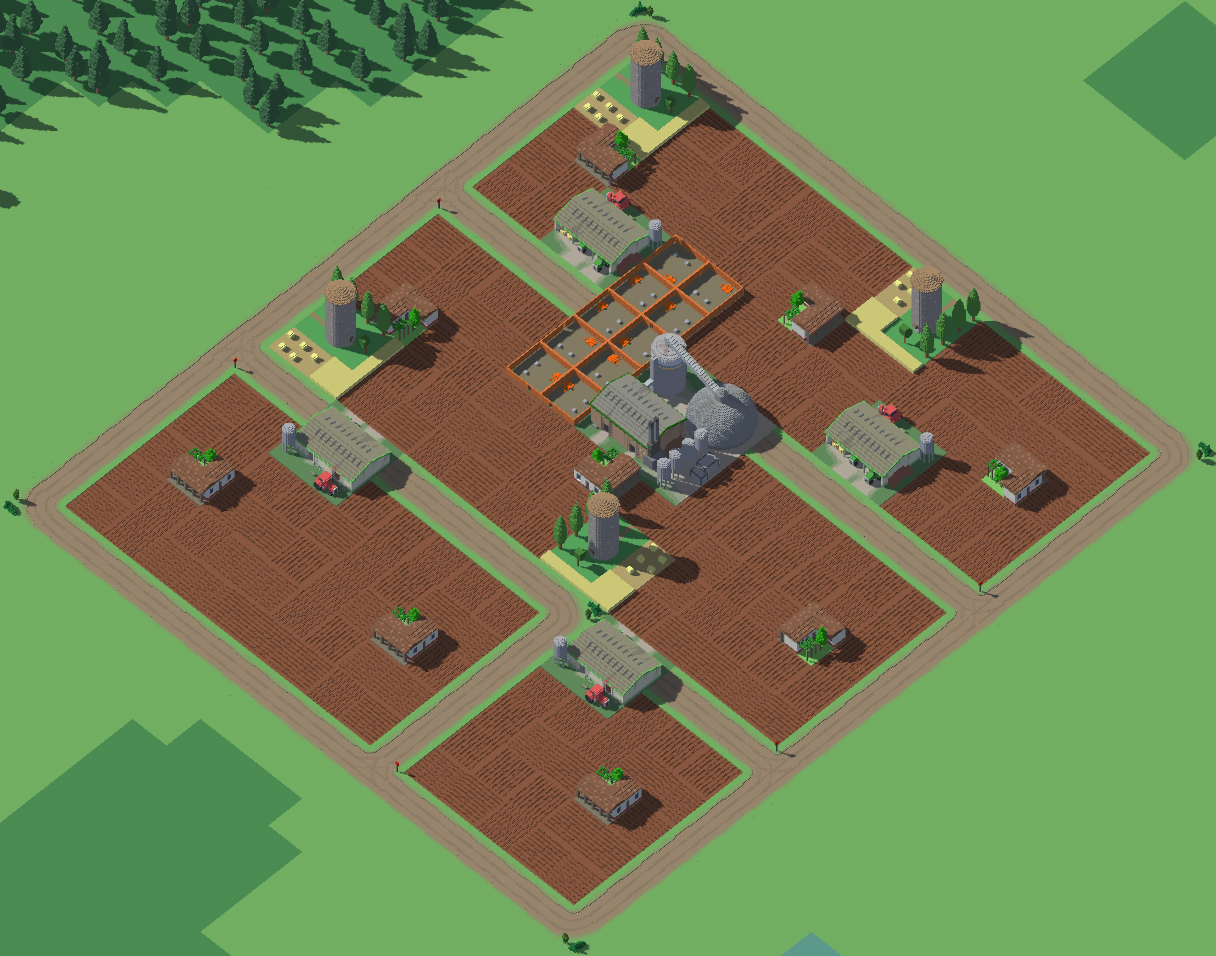
Indeling: Farming and Orchard
Two generic farming layouts. Different maps have different terrain realities and different ways of Food production, while the general logic behind the layouts remained the same.
Landbouw

Boomgaard
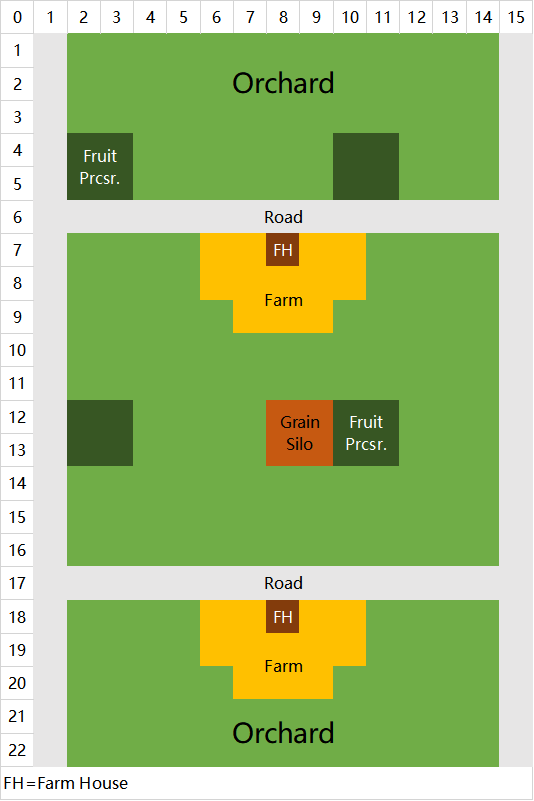
An example of the farming layout:
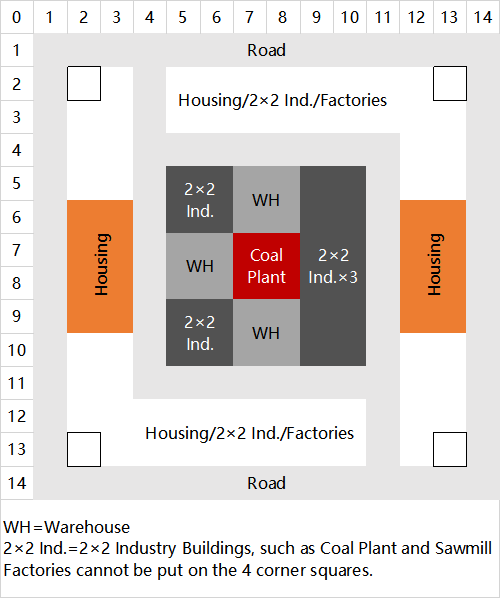
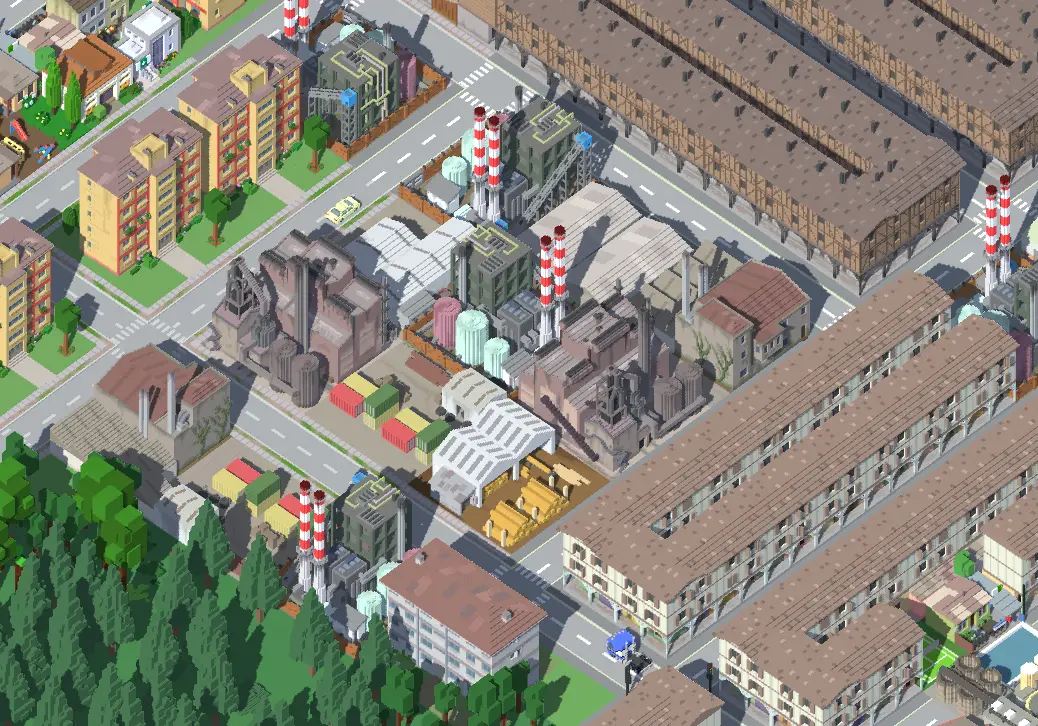
Indeling: Industrial Zone
The Pollution layout.
Certain Industrial buildings require residents nearby, thus this layout includes Housings. In aanvulling, some Industrial buildings (such as Coal Plant and Steelworks) can be upgraded to better versions when there are Warehouses and residents nearby.
The layout in practice, with Coal and Iron Miner’s Houses acting as nearby residents – these two types of Houses can withstand Pollution, while having good density.
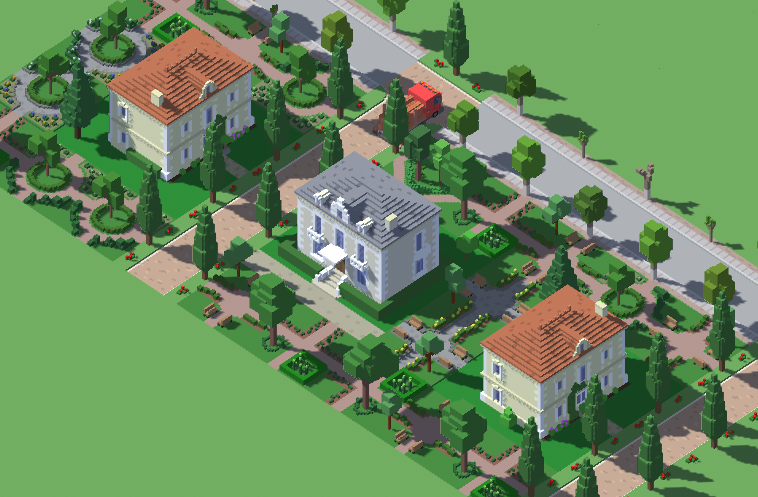
Indeling: Herenhuis
Repeat this layout and get high Happiness en masse.
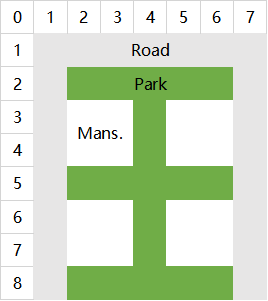
You can also do interesting stuffs with Mansions like below:
Policies
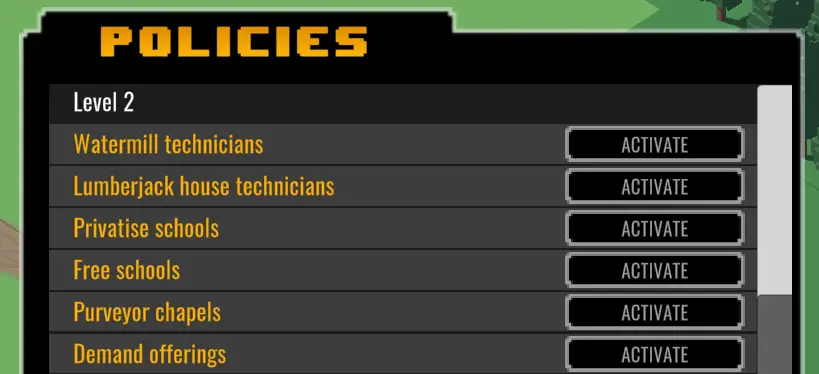
Placing the three policy buildings – Neighborhood Council, City Council, and City Hall– will unlock the ability to pick and change Policies. Higher level policy buildings will also unlock lower level Policies, so you don’t need to build all three.
Almost all Policies have an upside and a downside.
Choosing Policies based on your needs. If you are on the Path of Production or Wealth, then trade Happiness for Food or Energy; if you are on the Path of Leisure, then trade Food or Unskilled Labor for Happiness. Never trade Science until very late game, hoewel, as for the most of the time you will be lacking Science.
Notable Policies
Watermill technicians, Lumberjack house technicians – Nice way to increase Energy production in early and early-mid game. Best for all victories.
Pay miners in tokens – Decent increase in Iron/Coal production if you don’t care about Happiness.
Festivals – Raise Happiness with minimal cost.
Industry R&D – Important source for mid- to late game Sciences. Best for pursuing the Path of Productivity.
Neighbourhood life – This Policy doesn’t have a downside if you don’t rely on Supermarkets and Malls. Raise decent Happiness, best for pursuing the Path of Leisure.
Eating insects – Good for late-game Foods production if you don’t care about Happiness.
Career Path, or How to Beat the Map
Dat kan “win” every map by completing achievements of one of the three Career Paths: Path of Wealth, Path of Productivity, and Path of Leisure.
After completing all eight achievements of a Path, your city will be scored for this playthrough.
OPMERKING 1: Once you finished the initial requirements of a particular Path, your playthrough will be locked in this Path and you can’t choose other Paths. Plan carefully at the beginning of the game!OPMERKING 2: Upgraded version of a building cannot fulfill the requirements. Bijvoorbeeld, if a requirement calls for Grain Silos, having Modern Grain Slios don’t count towards it.

Path Requirements:
- Villa ×4
- Wealthy Village House ×60
- Wealthy Suburb House ×80
- Modern 2-Storey House ×40
- Herenhuis ×3
- Mixed Commercial-Residential ×10;
5-Storey Residential ×10 - 5-Storey Mixed Commercial-Residential ×10;
Bank ×5 - 8-Storey Mixed Office-Commercial x30
This is the easiest Path to achieve.
All the requirements can be met naturally when developing your Downtown to higher level.
The only notable obstacle is the prerequisite for the final requirement (8-Storey Mixed) – the Airport – which means reaching 33000 Population. Grow your city to 33000 Population and you will win this Path.
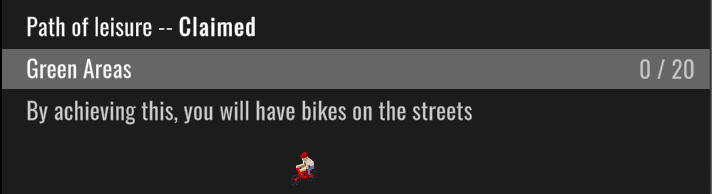
Path Requirements:
- Green Areas ×20
- Sports ×20;
Multisport Court ×3;
Village Bar ×3;
Village Bar 2-Storey ×3 - Green Areas ×40;
Chapel ×10;
Kerk ×5;
Floral Park ×3 - Bookshop ×5;
2-Storey Bookshop ×10;
Bibliotheek ×10 - Artist Neighborhood ×15;
Religious Neighborhood ×15;
Happiness ×11 - Night Life Neighborhood ×15;
Happiness ×12;
Population ×12000 - Comfortable Social Building ×15;
University ×2;
Happiness ×13 - Green 5-Storey Residential ×50;
Museum ×3;
Happiness ×14
This is the medium-level difficulty Path.
Most of the requirements are fairly easy to meet, just that you need to go out of your way to build a variety of buildings (who would normally build 10 Chapels or 3 Museums?).
Anderzijds, Happiness is not that hard to raise, if you can carefully upgrade/replace your low-Happiness Houses to higher Happiness variants, and further employ Happiness-raising Policies. Religious Neighborhoods will be your best friend.
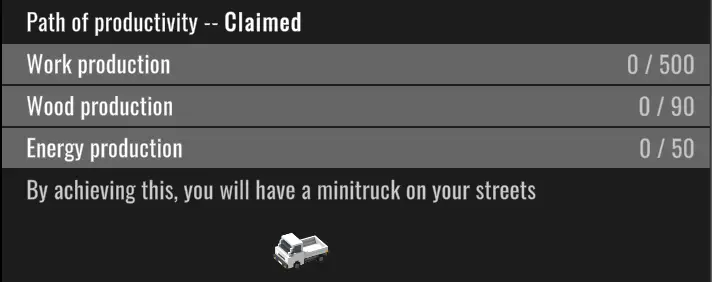
Path Requirements:
- Work production ×500
Wood production ×90
Energy production ×50 - Food production ×1000
Wood production ×200
Energy production ×300
Grain Silo ×5 - Work production ×1500
Skilled Work production ×200
Modern Grain Silo ×5
Zaagmolen ×1 - Energy production ×4000
Skilled Work production ×500
High-Skilled Work production ×500 - Steel Production ×100
High-Skilled Work production ×1500
Goods production ×200
Factory ×15 - Boomgaard ×100
Food production ×30000
Poor Social Building ×10 - Population ×25000
Energy production ×8000
Solar Plant ×20
Wind Turbine ×10
Biomass production ×60 - Population ×50000
Science production ×300
Even though the game’s tutorial guides you to complete this Path, this is actually the hardest Path. The requirements asks the player to produce a variety of stuffs, which further requires lots of Energy, Population, and/or Sciences.
Het belangrijkste is, the final requirement calls for 50000 Population, a massive Population number that needs tons of Foods to achieve; the focus of your playthrough after 33000 Population will be entirely dedicated to raising more and more Foods.
In aanvulling, this Path is very Science Heavy, and Science is always hard to come by. The Industry R&D policy plus Factories will be your best friend.
Two Hotkey Tricks

O: The copy button.
G: This is essentially a search button. Select a building and press G, all same buildings in your city will be highlighted.
Dat is alles wat we vandaag hiervoor delen Urbek City Builder gids. Deze handleiding is oorspronkelijk gemaakt en geschreven door eightroomsofelixir. Voor het geval we er niet in slagen deze handleiding bij te werken, U kunt de laatste update vinden door dit te volgen link.