- Titel: The Lord of the Rings Online
- Releasedatum:
- Ontwikkelaar:
- Uitgever:
Information about The Lord of the Rings Online is still incomplete. Help ons alstublieft de details van het spel hiermee in te vullen contactformulier.
This is a (very-) quick-start guide to using the Reshade app to increase the clarity, sharpness, and vibrance of LotRO’s beautiful Middle-earth!
0) What is Reshade? What is this guide?
It’s an open-source developed app that applies shaders to programs to adjust or enhance the visual appearance of those programs. It works with most programs that use DirectX, OpenGL, and Vulkan to render their graphics.
All the further information is available on the website: Reshare.me
In deze gids, I intend to walk you through the bare minimum steps to apply some of reshade’s features to your LotRO installation to make the game look better by sharpening the textures, brightening the colors, and enhancing the contrast of the in-game visuals.
It’s important to note that reshade allows you nearly limitless customization options if you are willing to dive into it further, and my steps are just to give you an easy baseline improvement to start from!
Get Reshade
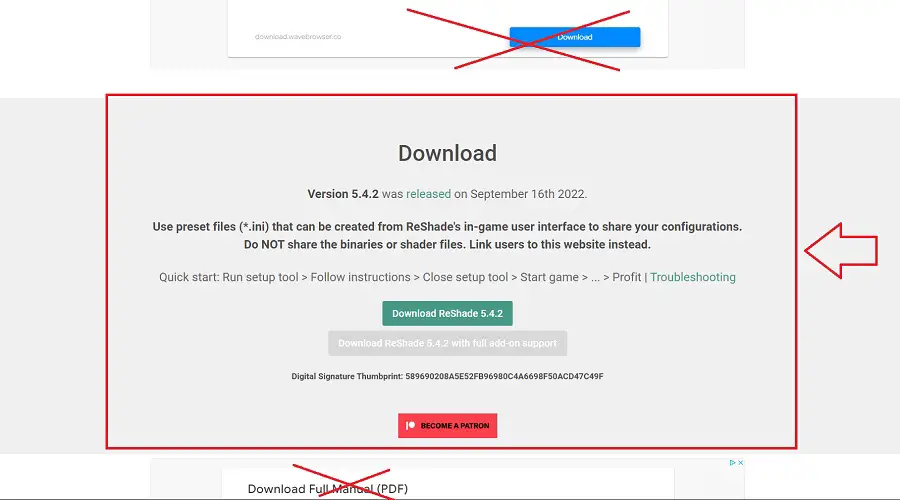
Save that file somewhere permanent. It’s the app itself that you will need to run to apply at least once to each game you want to use it with.
Installing Reshade in LotRO
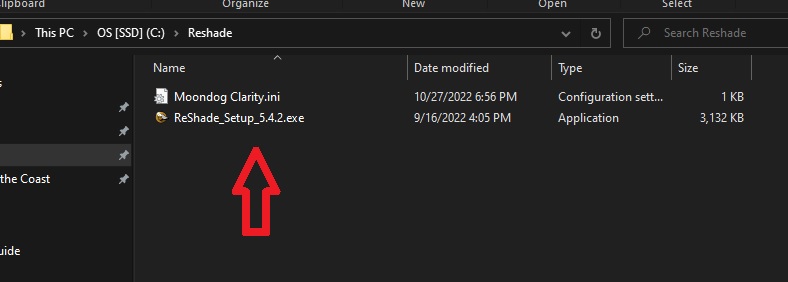
Run the current version Reshade Setup .exe from wherever you have saved it.
Reshade Setup will open and start to populate a list of games it finds on your computer. Ignore this! Just hit the BROWSE button.
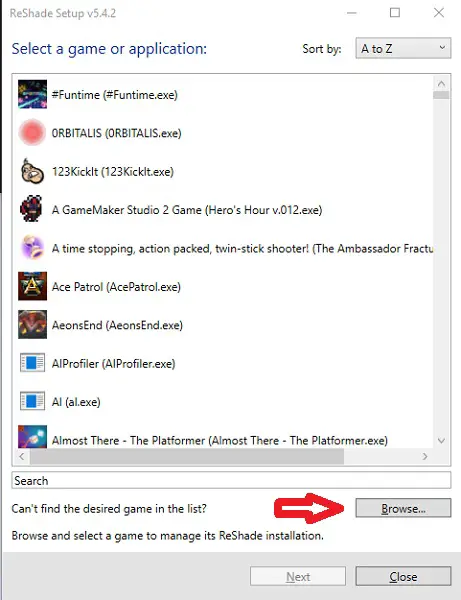
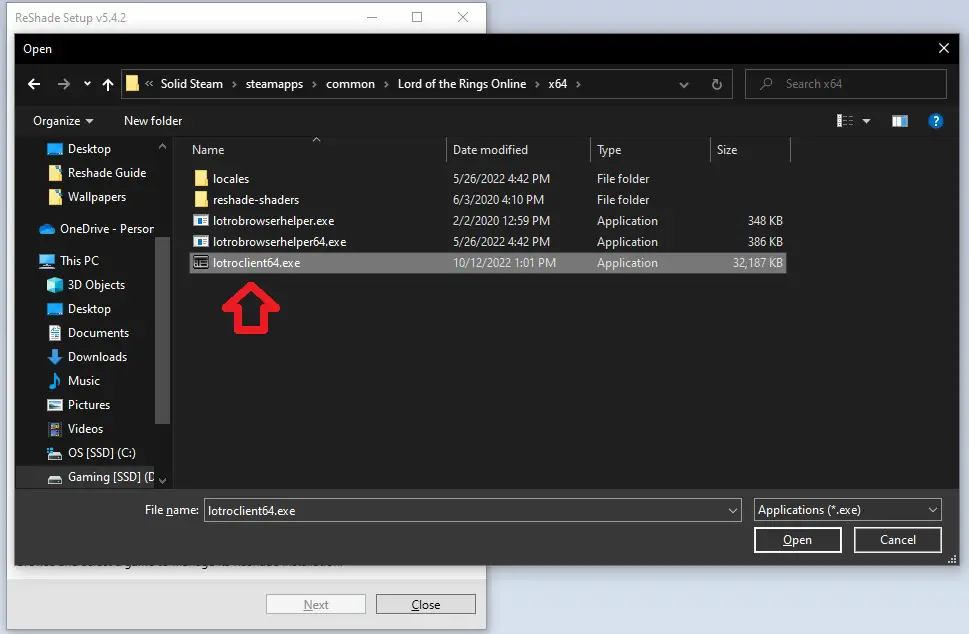
A window will open to select a game .exe to select to apply Reshade to.
This will default to wherever you had the Reshade app file, so you’ll need to navigate in this window to your LotRO installation folder. You need to select the actual GAME CLIENT .exe, not the Launcher. And assuming you are using the 64-bit client (which you need to be anyway unless your computer is too old to run any version of windows released in the last decade) then the file you’re looking for is in the “x64” subfolder of your LotRO installation folder.
Select this file and hit “Open” (or just double-click the file).
Then hit NEXT in Reshade Setup.
Then you will be asked which rendering API the game uses. LotRO uses DirectX10/11/12 unless you are for some reason forced to stick with DirectX9. (check your graphics settings in LotRO if you aren’t sure which you are running).
Select whichever is correct (almost certainly DX10/11/12
Next you will be asked to pick a “vooraf ingesteld” to install. You can read the explanation of what that is, but for now just hit “skip” and it will create a default “Reshade.ini” preset file in the LotRO folder.
Next is the closest thing we have to a tricky part. Picking which effects packages to install. You should feel free to research and explore all your options in the future, but for now I will just tell you my precise recommendations for what to use!
Click the boxes next to “SweetFX” en “AstrayFX” as many times as needed to ensure they have squares (not checkmarks). Make sure all the others are empty (except for “Standaard” which you can’t change).
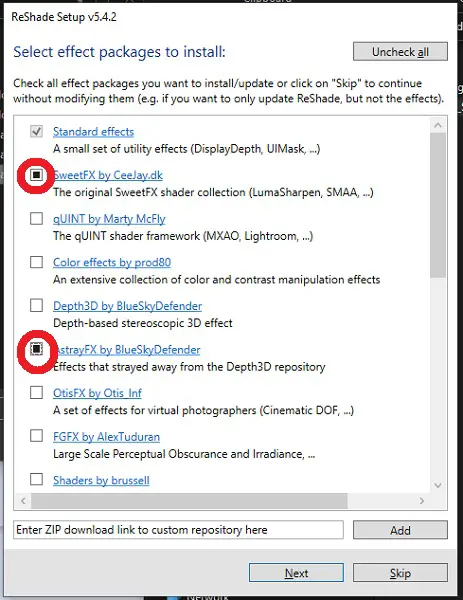
Then hit NEXT
Now it will ask you to select the individual effects you want to use, first from the SweetFX package.
Make sure that only
- CAS
- FakeHDR
- FXAA
- Vibrance
are selected
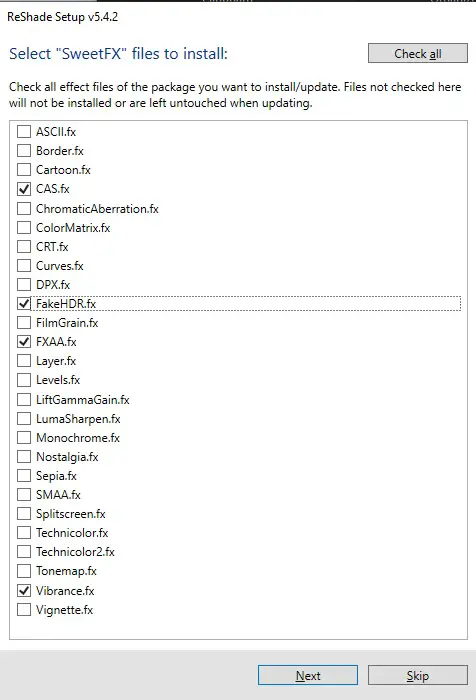
Then hit NEXT
Then from the AstrayFX package make sure that only
- Clarity is selected.
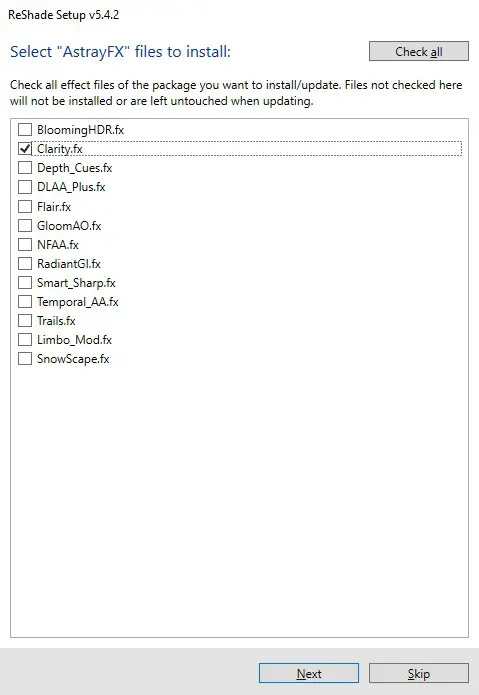
Then hit NEXT
Install is complete! hit FINISHED
Reshade Settings In-Game
Now Launch LotRO!
Around the time you get to the game’s splash screen, you should see some text from Reshade at the top of the screen.
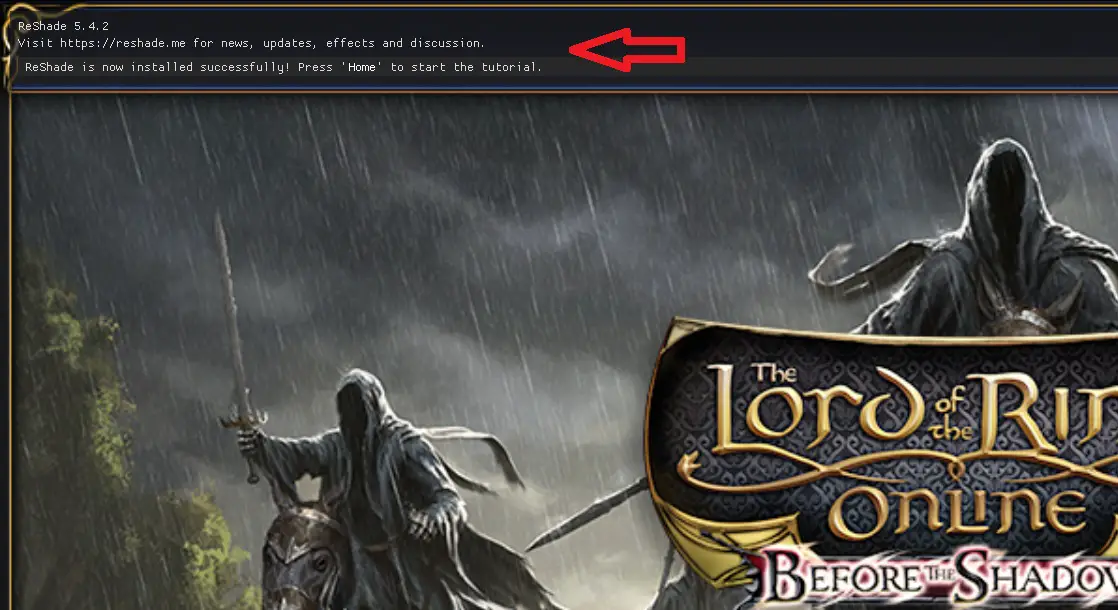
Do like its says and hit the HOME key.
It will open the reshade in-game interface panel. It has a tutorial you can go through for some more information. To can also just skip it for now and use my settings!
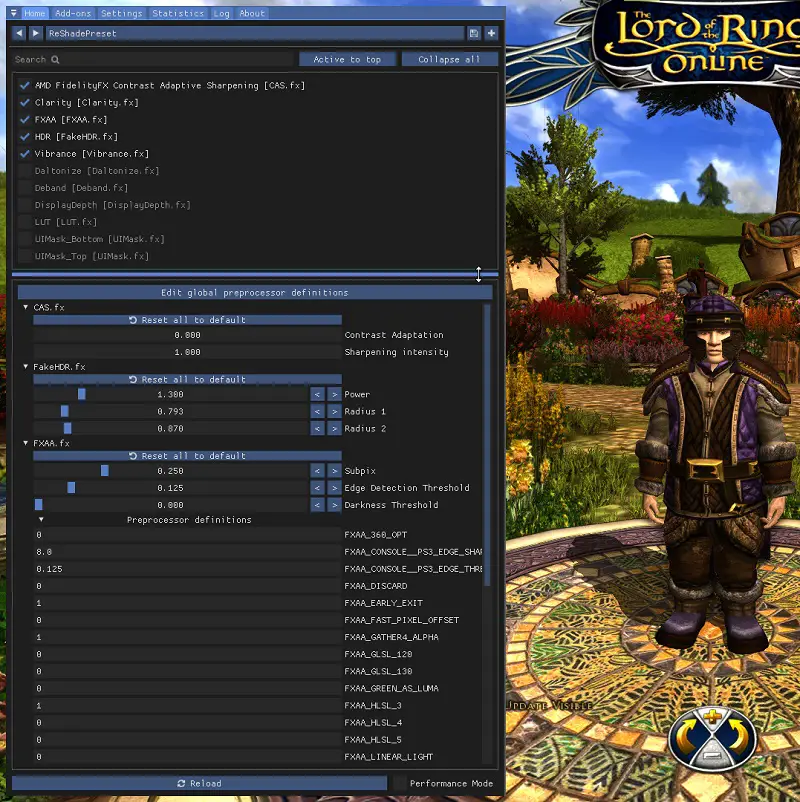
Once you complete or skip the tutorial, you should be looking at the “Thuis” tab which lists the installed effects available.

Hit the check boxes next to
- AMD FidelityFX Contrast Adaptive Sharpening
- Clarity
- FXAA
- HDR
- Vibrance
As you activate each one, you should see the effect that they have on the game image! They will also populate the bottom frame of the panel with individual settings/options for each effect. You can grab the horizontal bar between the panels to resize the frames to get a better look. You can also hit the “Active to top” button to collect all the active effects to the top of the list.
You can fiddle with these settings all you want to get things perfectly to your liking. You can also go discover and install different effects that may do better! But this bit even by default makes a huge improvement in my opinion, so you’re ready to play if you like it!
Make sure to check the PERFORMANCE MODE box at the bottom of the reshade panel. Then press the HOME key to make it go away. Then enjoy a brighter, better, clearer, more vibrant Middle-earth! It really helps to see all the amazing details the designers put into armor textures, in particular, ik denk!
Dat is alles wat we vandaag hiervoor delen The Lord of the Rings Online gids. Deze handleiding is oorspronkelijk gemaakt en geschreven door [DoE] Moondog. Voor het geval we er niet in slagen deze handleiding bij te werken, U kunt de laatste update vinden door dit te volgen link.