This guide will show you how to complete the Treasure Hunt update, as well as the complete locations of all treasures in Shadow Gambit: De vervloekte bemanning. Ahoi, me hearties!
Have you ever felt like you got the wrong treasure map, or maybe your mate sold you some strange dance moves instead of a proper map? Fear not, your friendly pirate neighbor is here to lend a hand before you take a dip off the plank.
I’ve put together a guide to help you uncover all the treasures during your adventures on the Seven Seas and revisit the famous islands. Each “treasure hunt” is detailed so you have a wee hint of what lies ahead. I’ve even included some pictures to guide you along the way.
The pictures are sneakily tucked behind spoiler fields, so you can choose whether to use my hints first or reveal the whole shebang.
I haven’t marked them on the big map because a bit of treasure hunting mystery adds to the fun. Maar maak je geen zorgen, the screenshots are there to rescue you if you find yourself stuck or have been searching for ages.
For those of you keen on exploring on your own and just want some tips, I’ve also added some in brackets and blue to aid you on your quest. Sometimes they’re cleverly hidden behind (hopefully easy) raadsels, while others simply point out what’s nearby the spot.
Feel free to drop a comment, and if you’ve got a riddle for one of the locations, well blow me down, I’ll jot it down here.
Set sail safely, and may your treasure hunting be filled with joy!
Dread Vine’s Cove
Three treasures are hidden, and you can discover them by following the map markings using the hints in your notebook. It’s an enjoyable adventure if you’re patient and keen on exploring the map. I’ve also shared some pictures for the pirates with an old wooden leg or those nearing their pension.
1) Captain Crimsons Soul Cage
The first treasure includes 3 palm trees that you have to find and visit every one with one of your crew members. After that the real treasure appears and can be retrieved.
1st palm tree:
(near a landing spot)

2nd palm tree:
(near an exit spot)

3rd palm tree:
(near an landing spot)
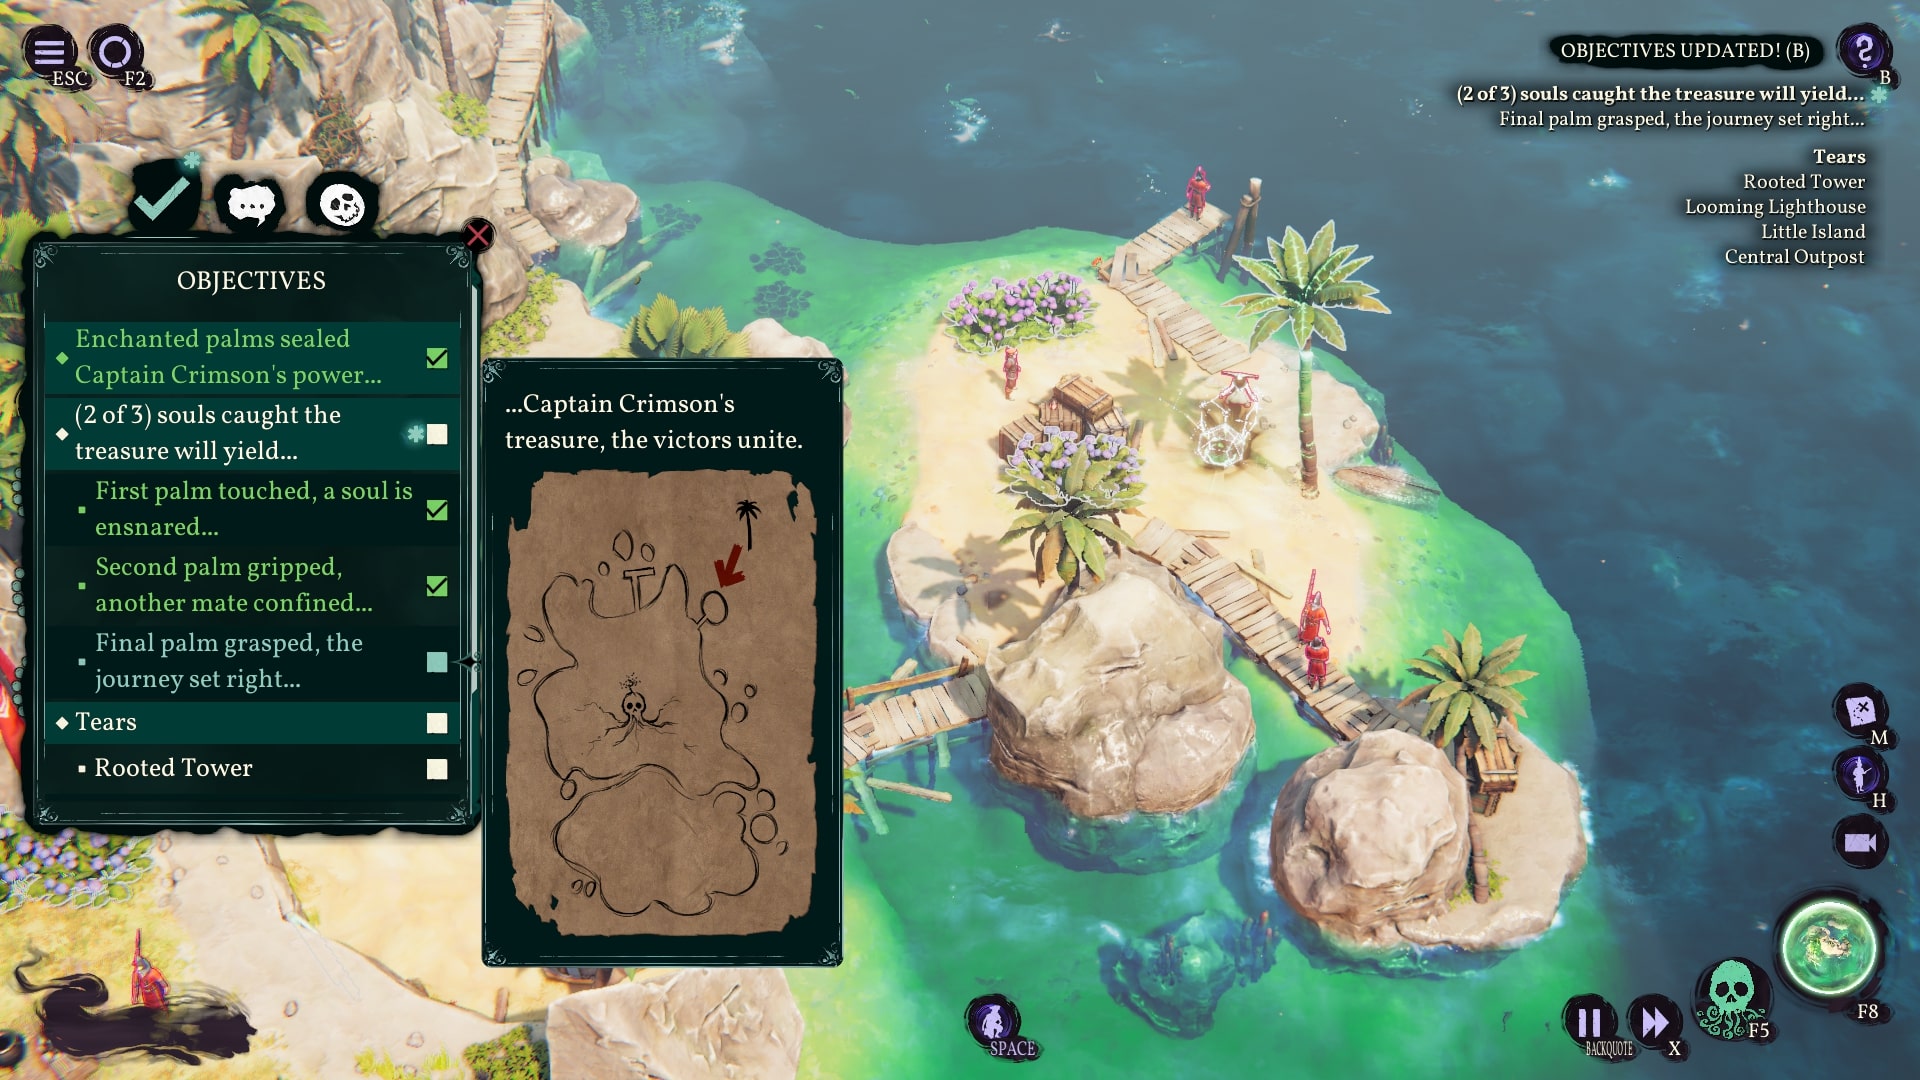
marking (it is also shown in the cutscene):

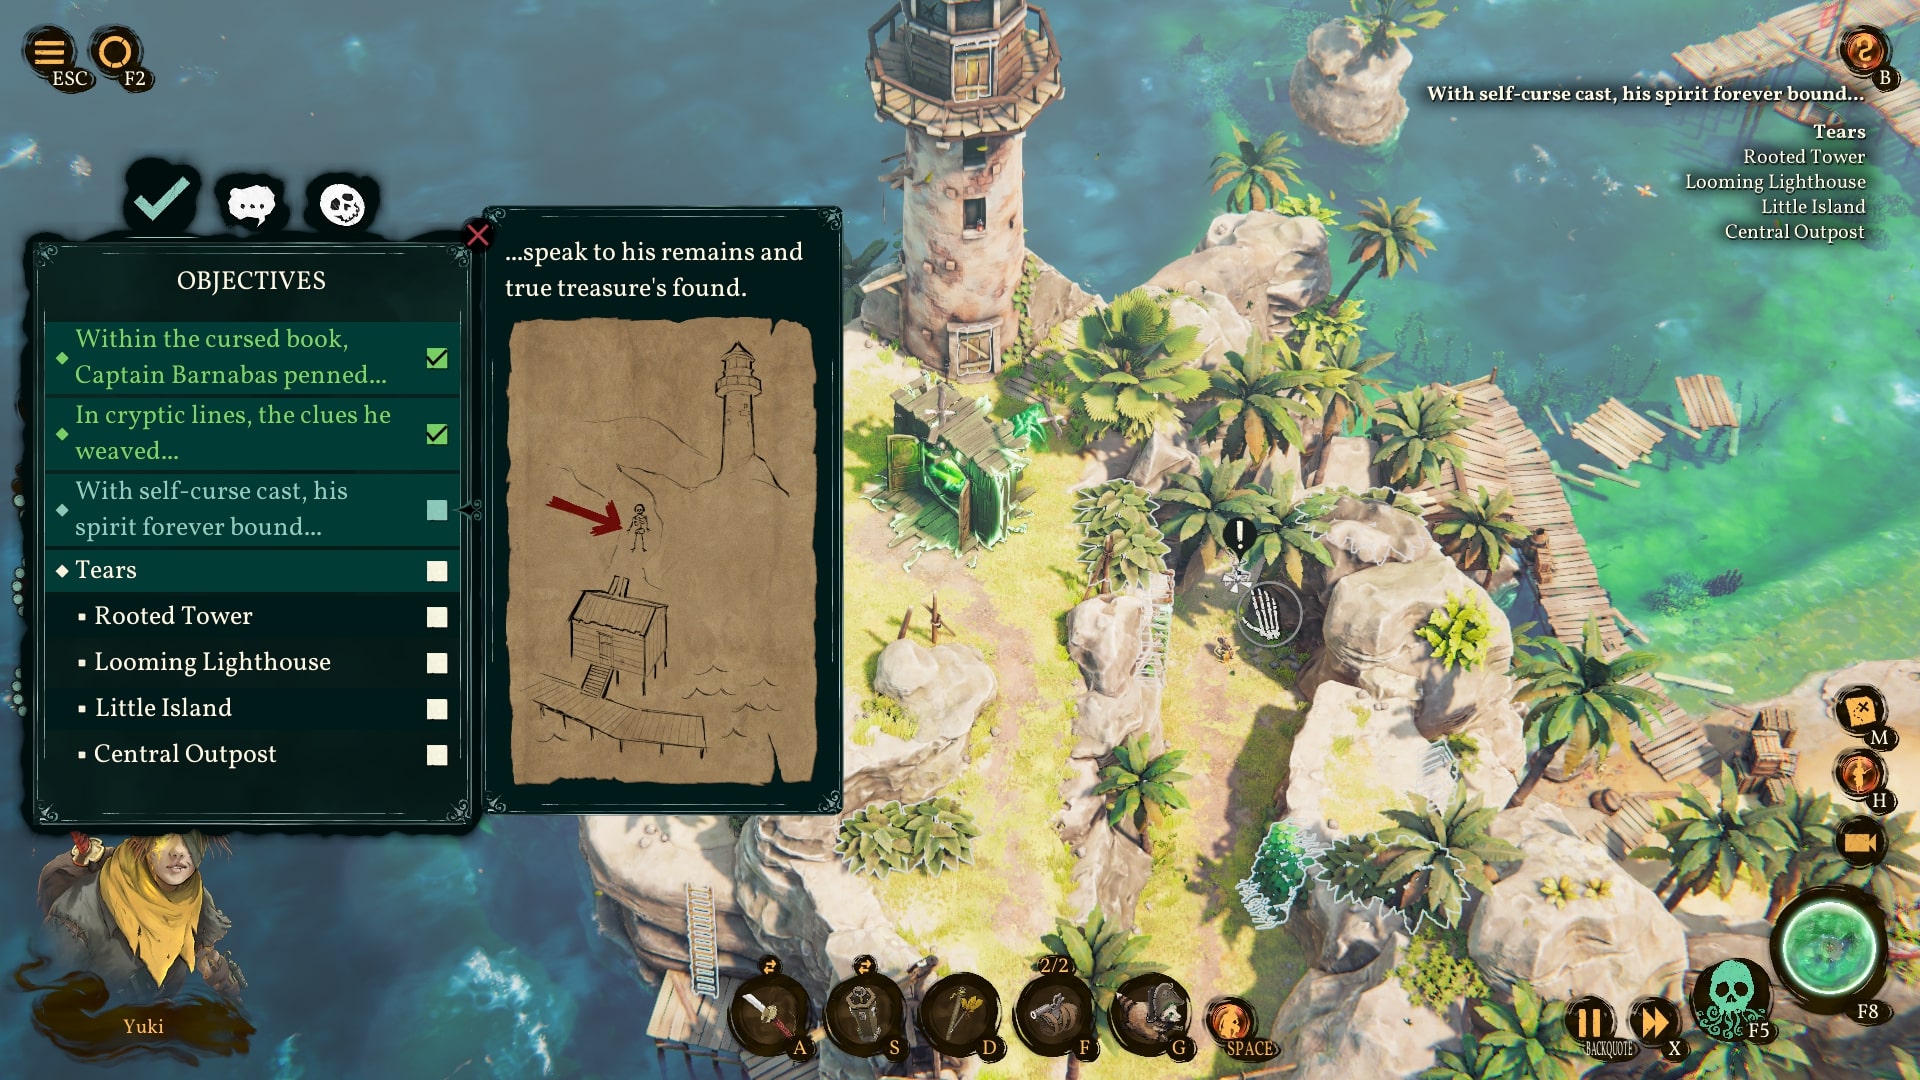
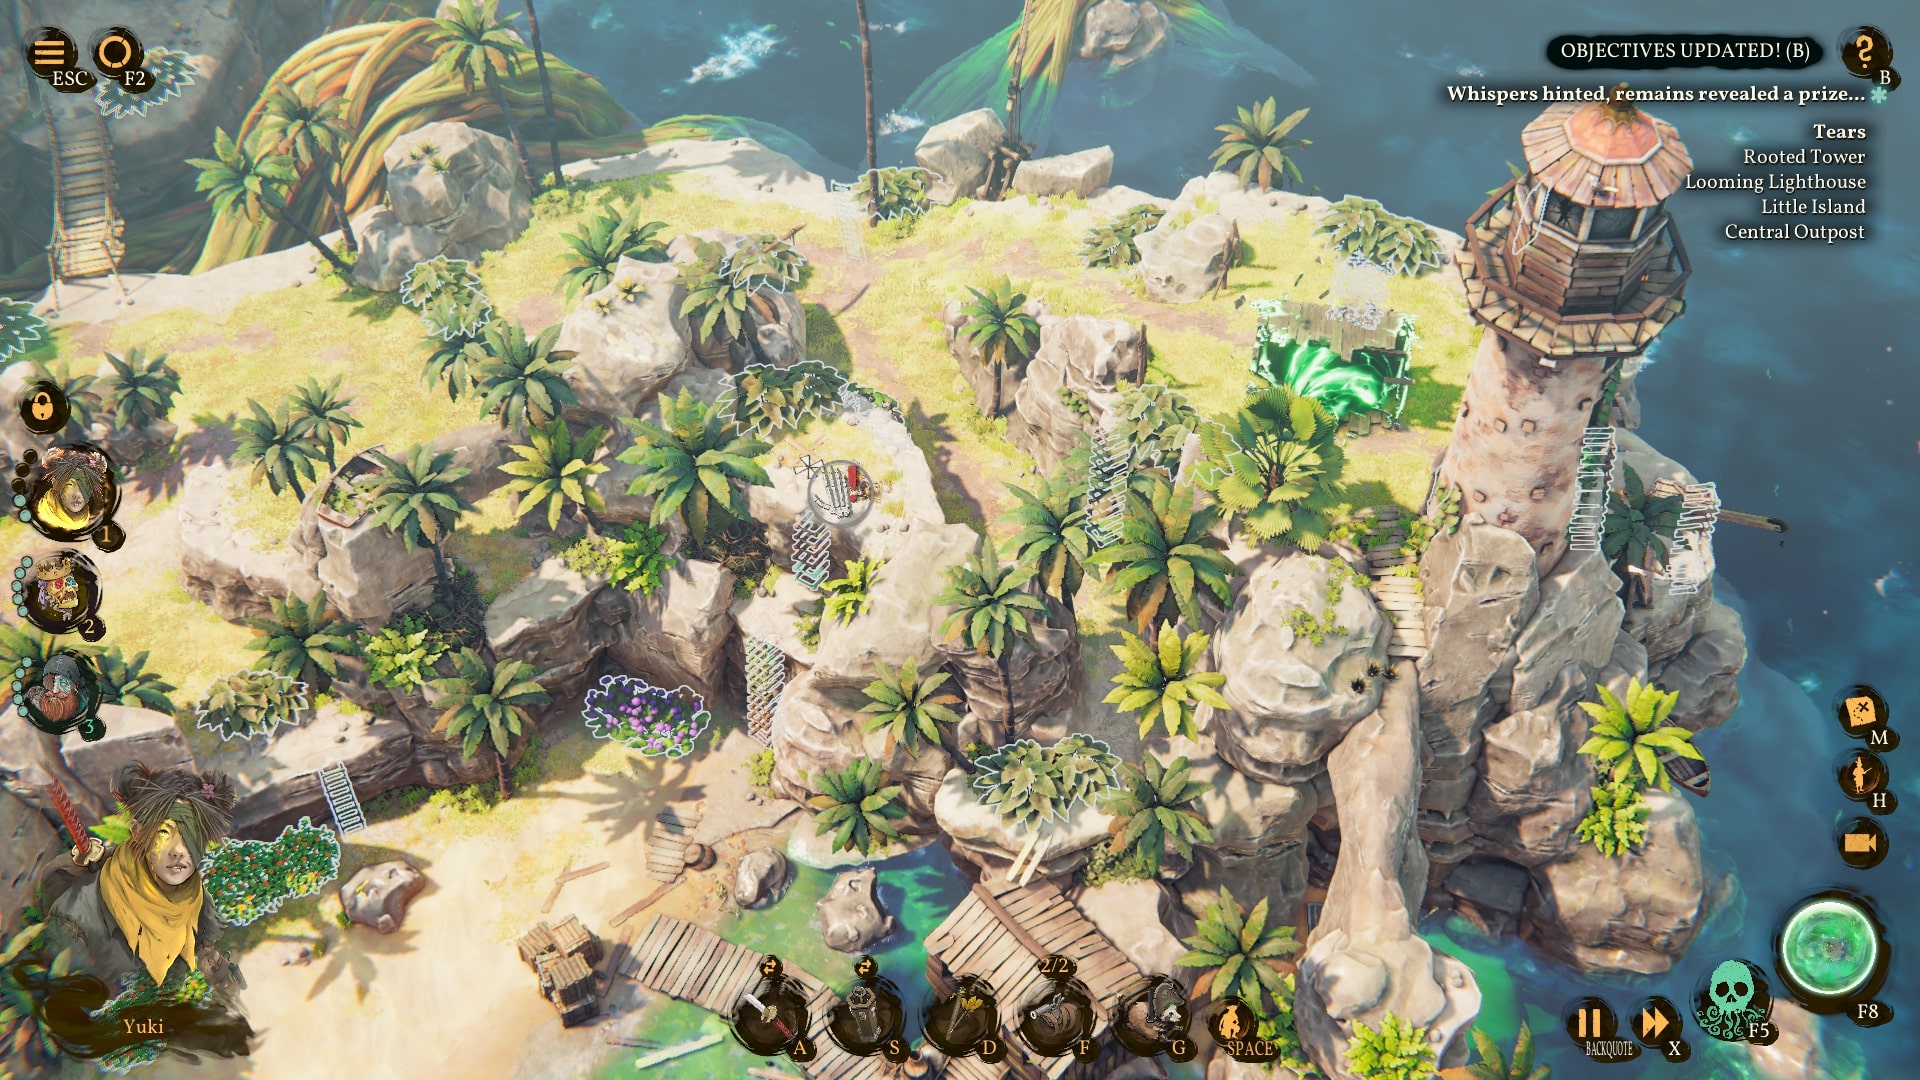
2) Barnabas Gilded Humerus
This one is quite fun if you are into searching the map. Finding the skeleton in the cage was a pain but I was so relieved as I finally found it. After that you have to find a 2nd skeleton and follow it to some locations. In the end the treasure is yours.
location of the 1st item:
(There is one of these called Easter
With statues of faces made of stone
If you were on a desert one
Jij’re probably shipwrecked and alone. Also it is near a landing point)
location of 1st item from another angle:
location of the skeleton:
(You might get to one by airplane
Or you might prefer to go by boat
As it’s surrounded by water
But it’s not a castle with a moat. Also it is relatively near the first location)

location of the 2nd skeleton:
(near this: I am a type of building
And from the top I shine
I warn sailors about rocks
So that ships will be fine)
locatie 1 after you followed it:
(near the previous location)
locatie 2 after another following part:
(near a small bastion)

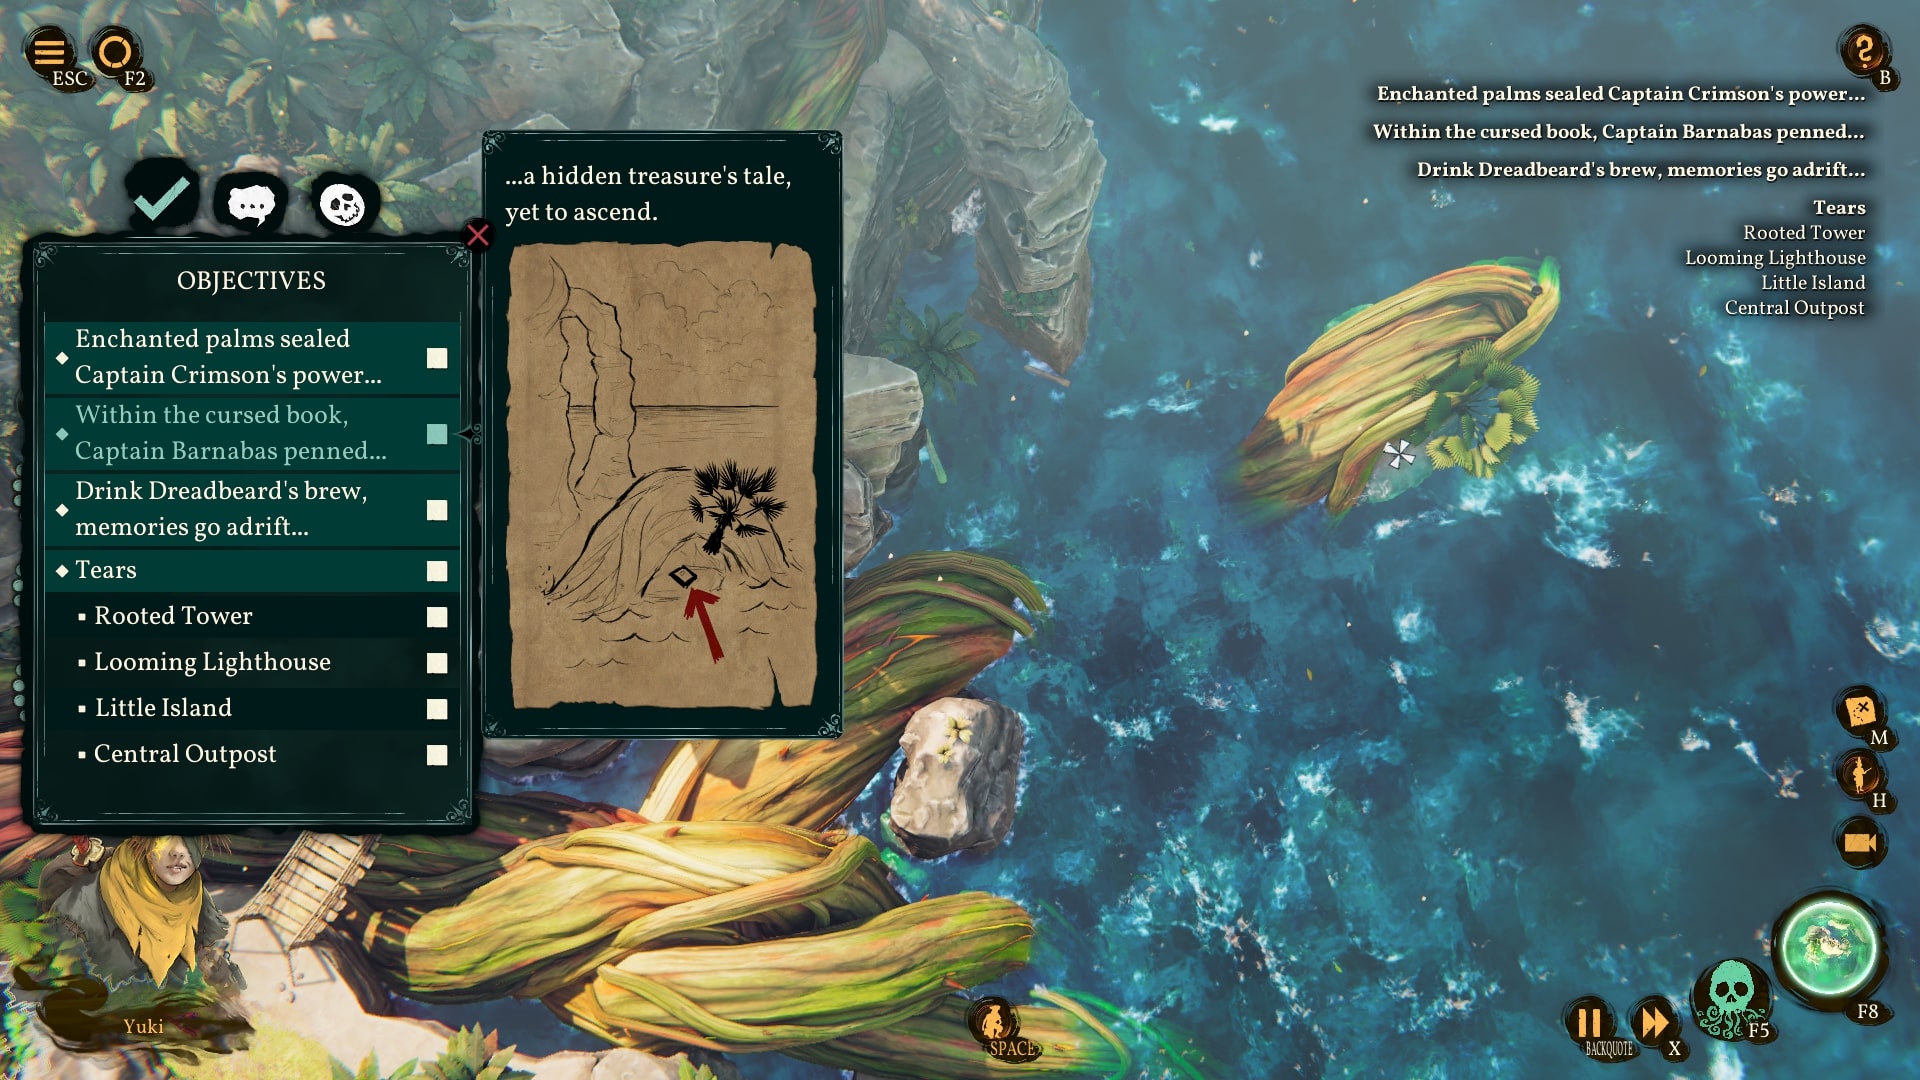
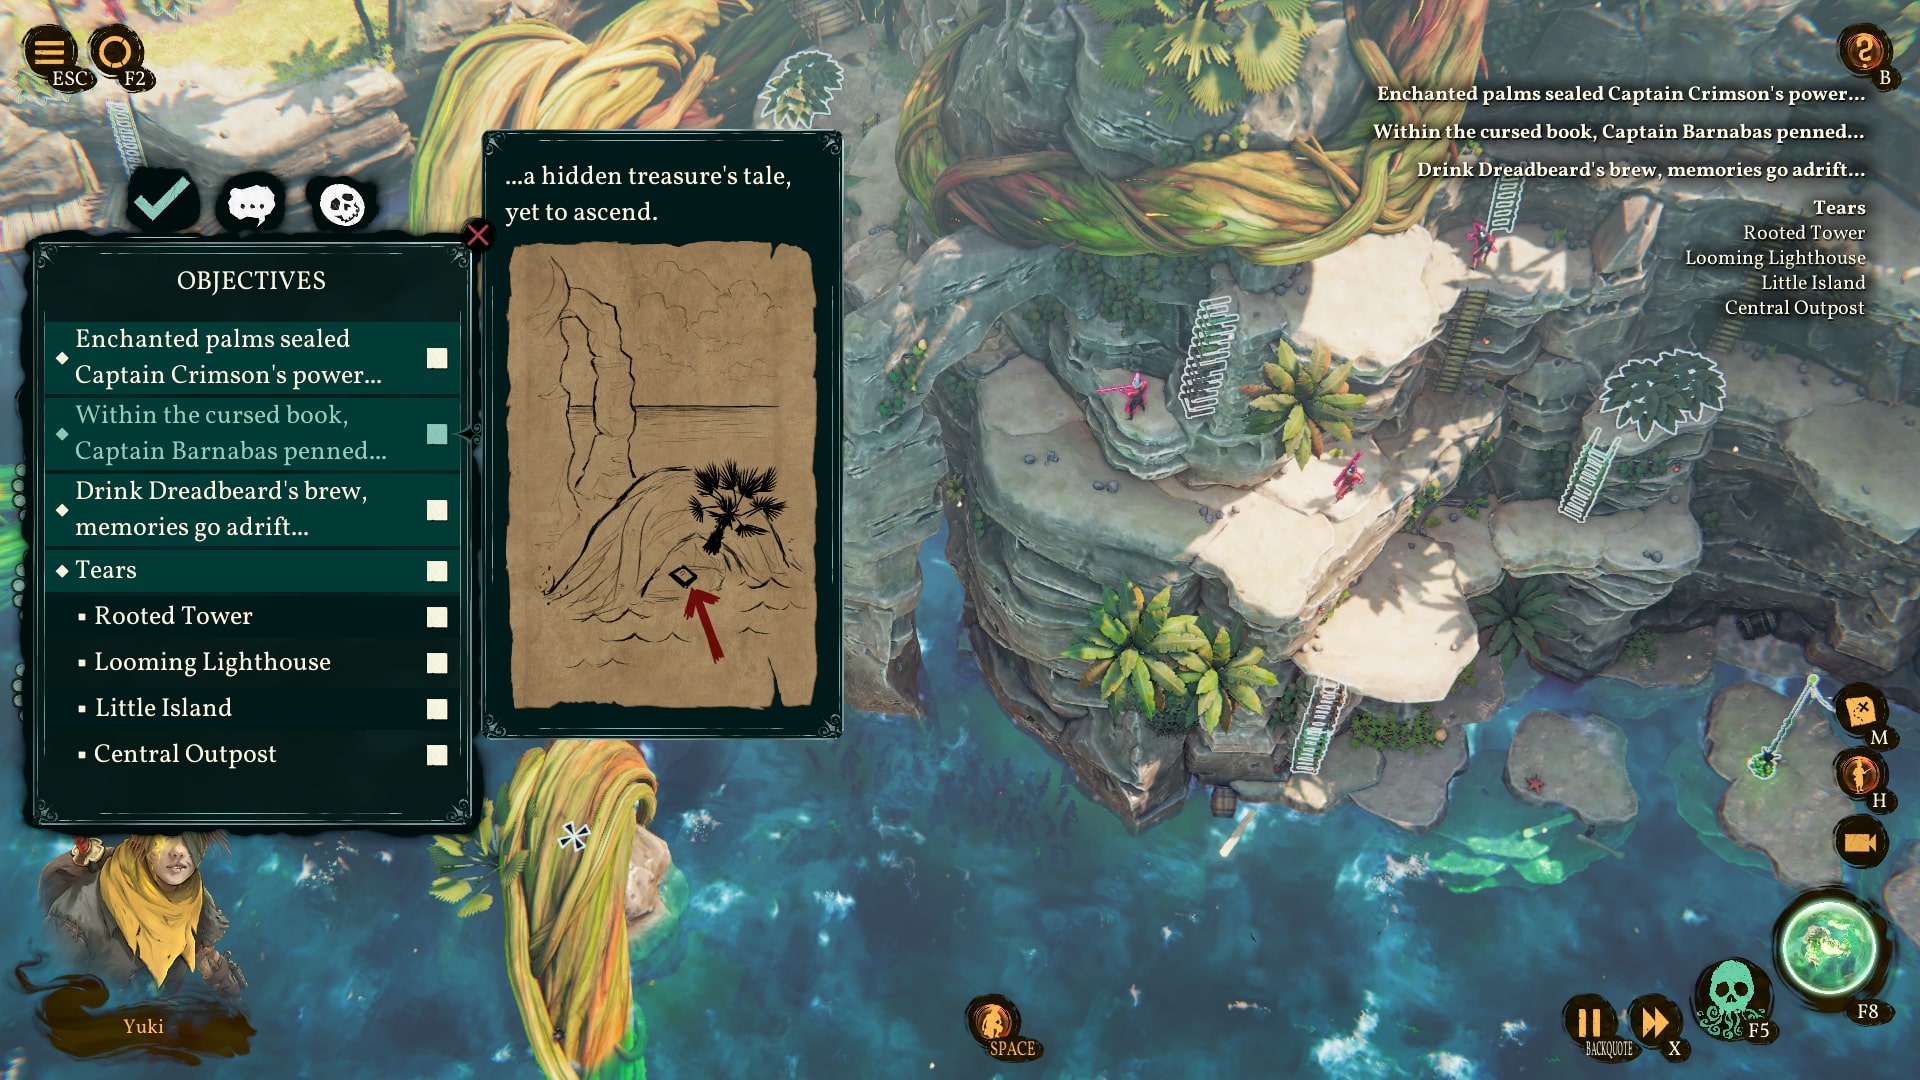
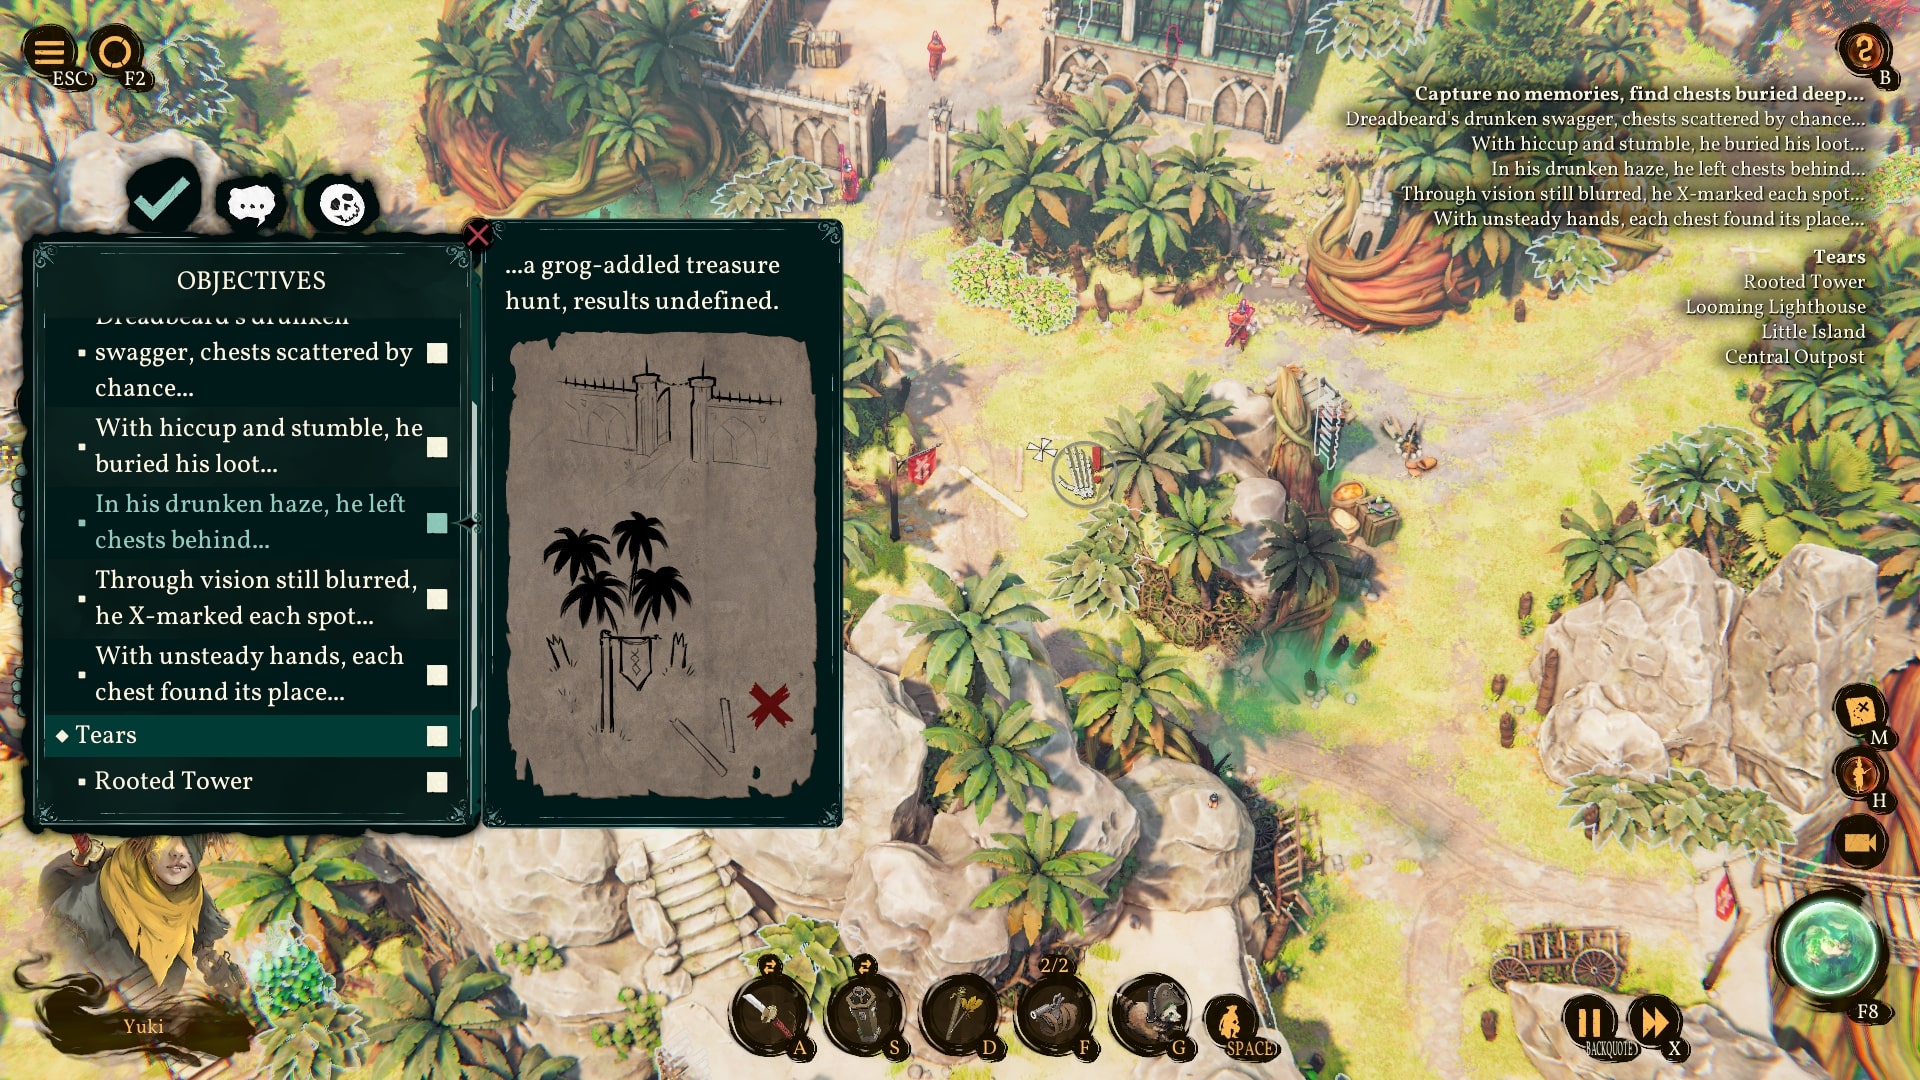
3) Dreadbeards Drinking Vessel
This one is also fun if you are into searching. You have to find another skeleton and after that 5 markings on the map. Fairly to say that the markings are quite near to each other so not that much poking the inquisition is involved 😉
skeleton location:
(near a landing spot)

marking 1:
(near an exit spot)

marking 2:
(near a landing spot)

marking 3:
(near the entrance of a bigger bastion)
marking 4:
(near an exit location and a bigger bastion)

marking 5:
(near where something is burning)

Twins of Nerechtemeresch
1) Shadowstrikes Ethereal Dagger
There is only one treasure chest to be found on this island but this one was the hardest one for me. You can find the chest quite easily but don’t let this fool you. After retrieving the chest you have to kill 25 enemies with it by shooting the chest. When you shoot the chest there will come down a rain of arrows that also can harm/kill you if you are too close to the chest. This took a long time for me, so be warned.
Belangrijk: You can carry the chest around with you but enemies will also see you (I lured some enemies towards the chest via footprints in the sand).
chest location:

New Krucbury
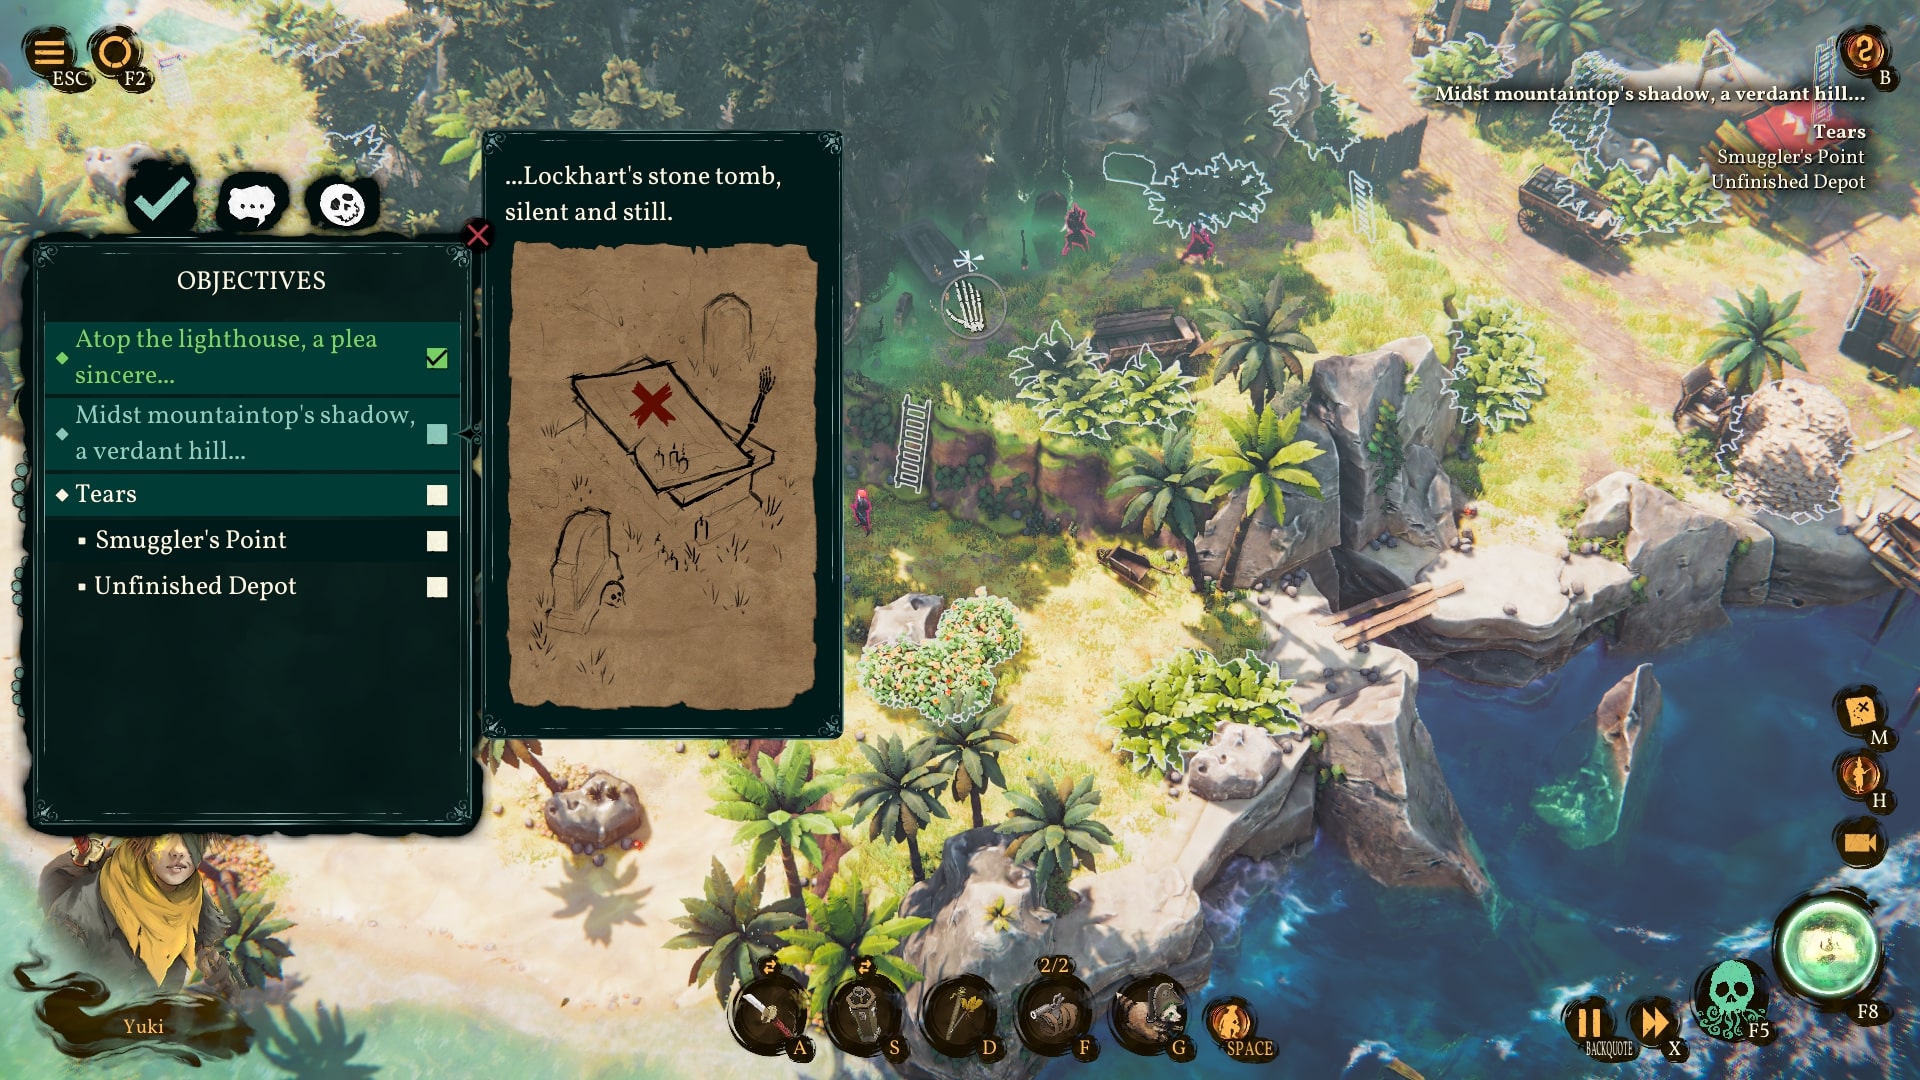
1) Luminous Lockharts Eyes
There is one treasure hidden on New Krucbury. This one is also not that hard. You have to find a letter and visit 2 markings on the map. After that you can retrieve the chest but before gathering the insides you have to kill 10 enemies near the chest. But as the other “missie” you can carry the chest around with you.
location of letter:
(We need to warn sailors
When there are rocks close by
So we build this building
That shines out from up high)

marking 1:
(a strange earthen house brings nought but distain, yet those who stay there never complain)
marking 2:
(near a busy road (at least some time ago it was one))

Iron Bay
On Iron Bay there are 2 treasures hidden.
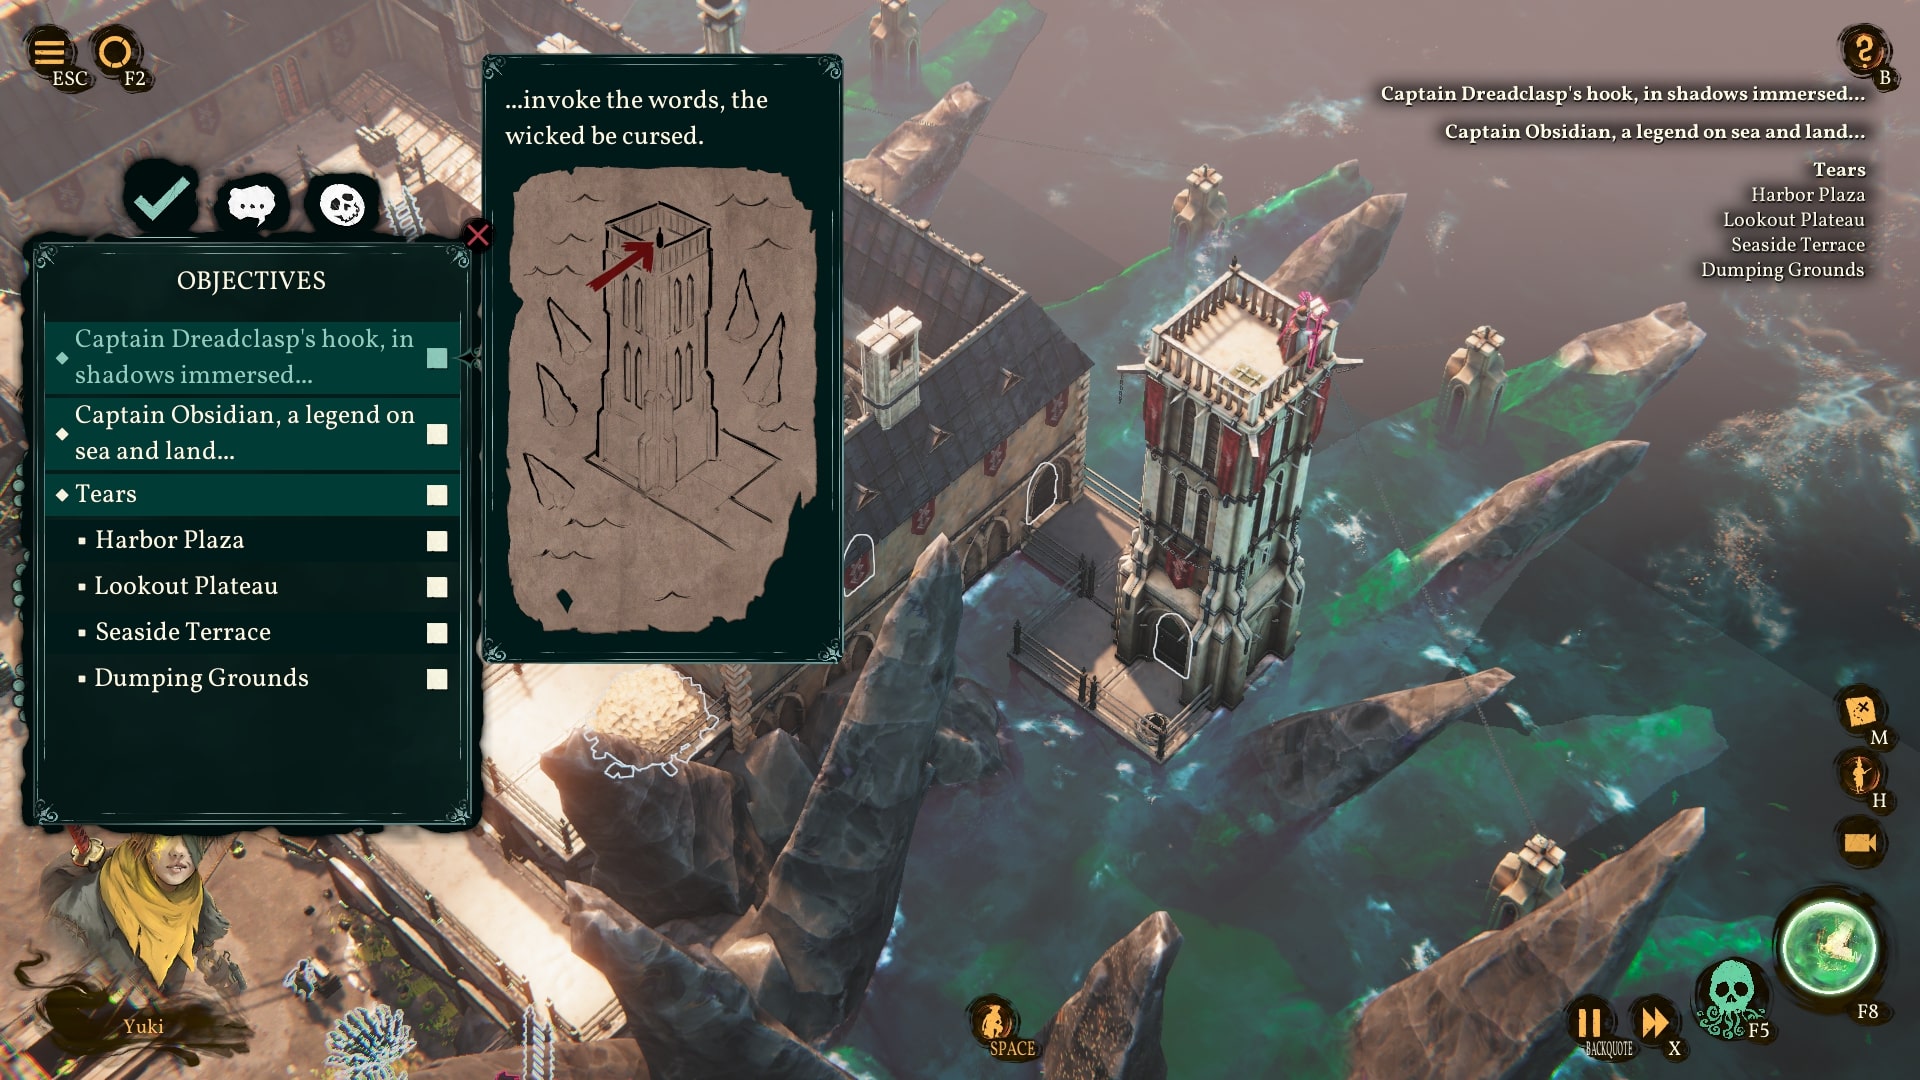
1) Dreadclasps Cursebound Hook
Gather a note and then visit a marking on the map
chest location:
(I’m tall but I’m not a basketball player
I’m thin but I’m not a flagpole
I’m a building but I’m not a skyscraper
I’m near the ocean)
Marking:
(I am near people that are working with stone.
Also I can smell the sea from here and the flowers of the beautiful gardens next to me)

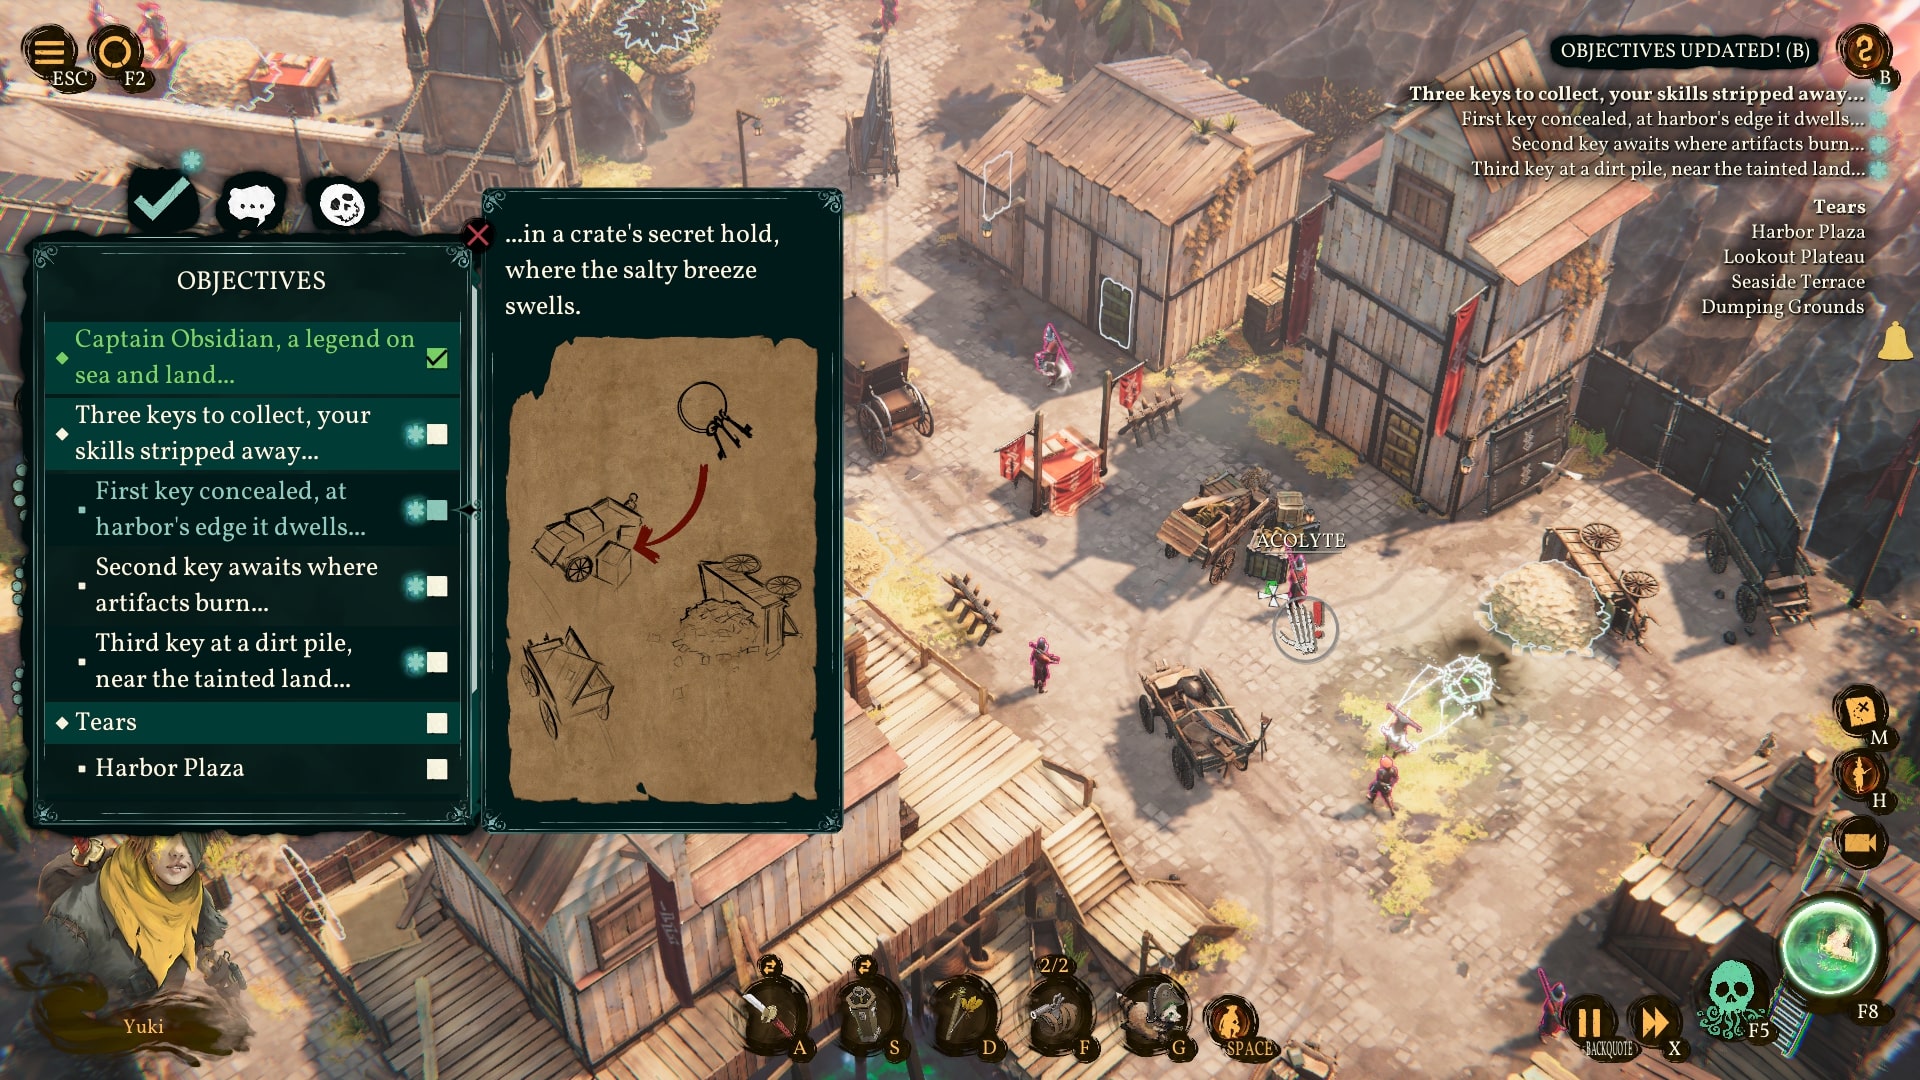
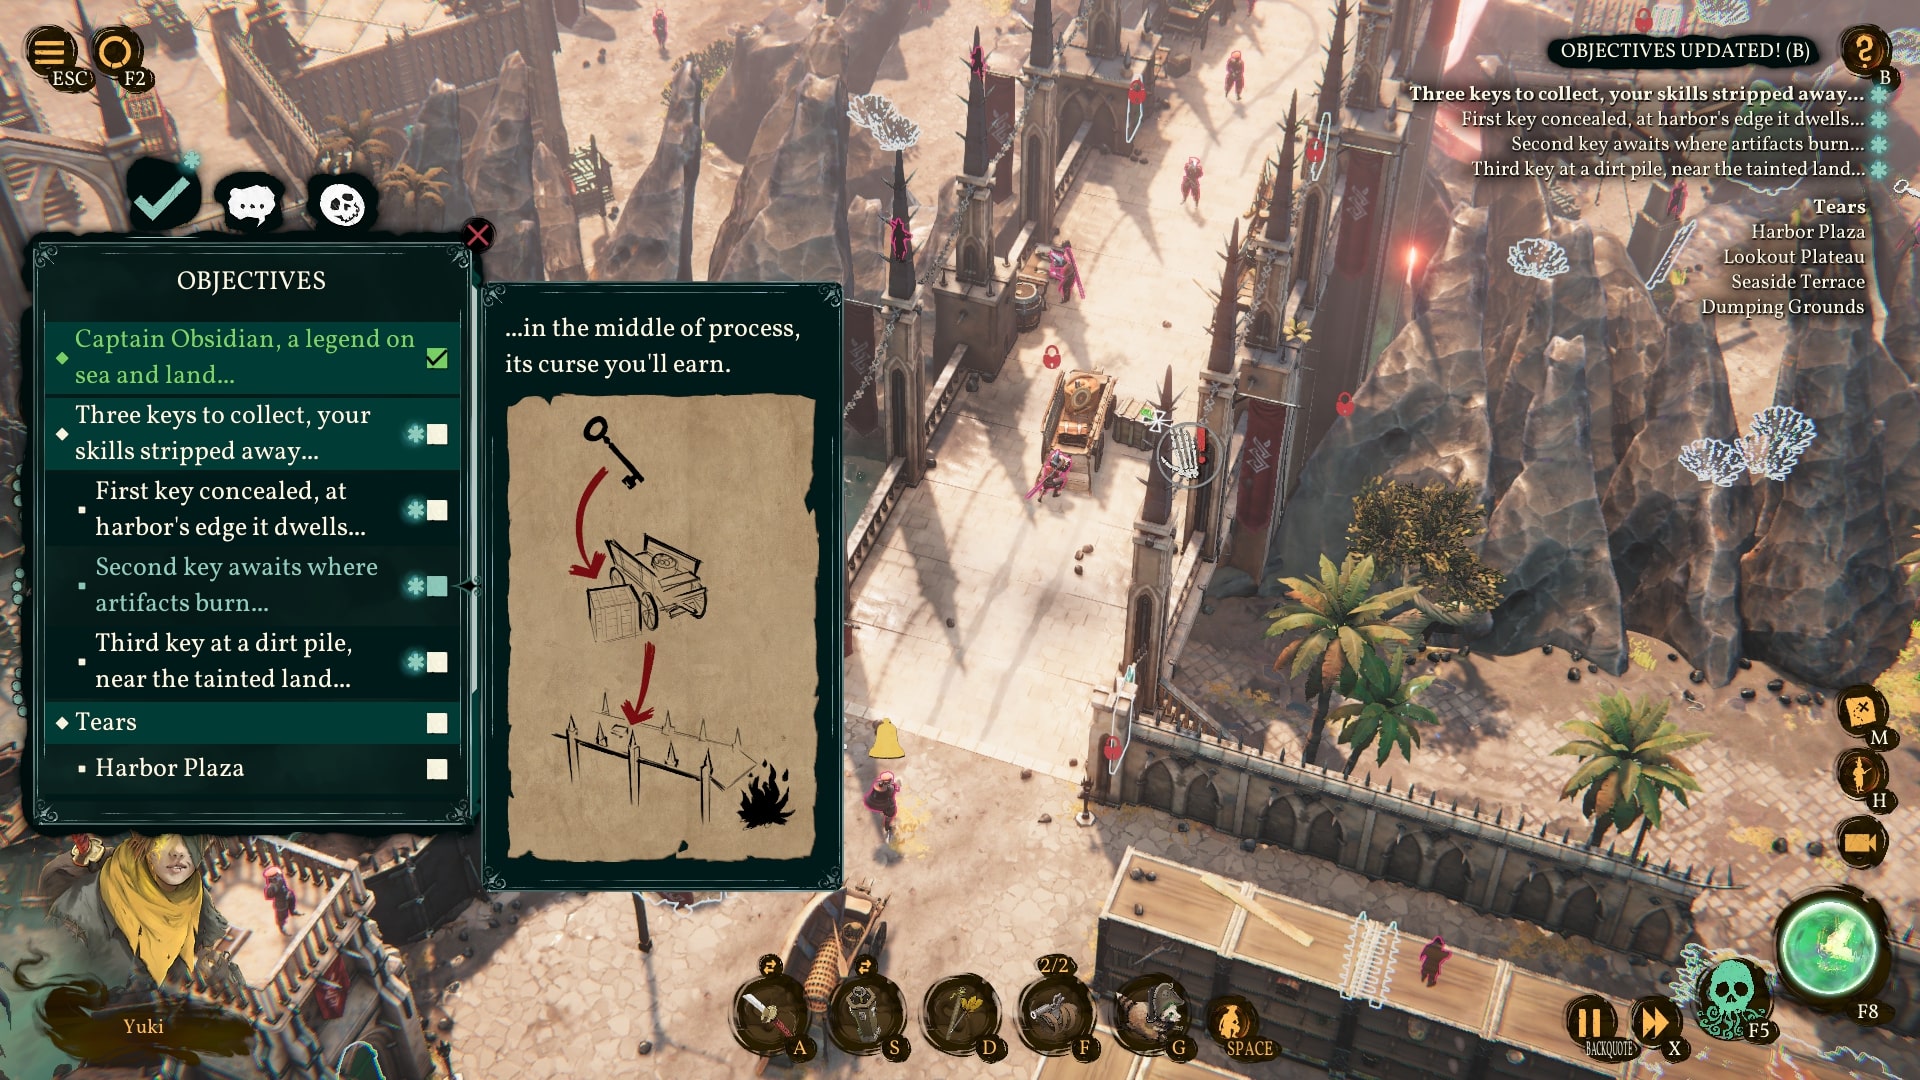
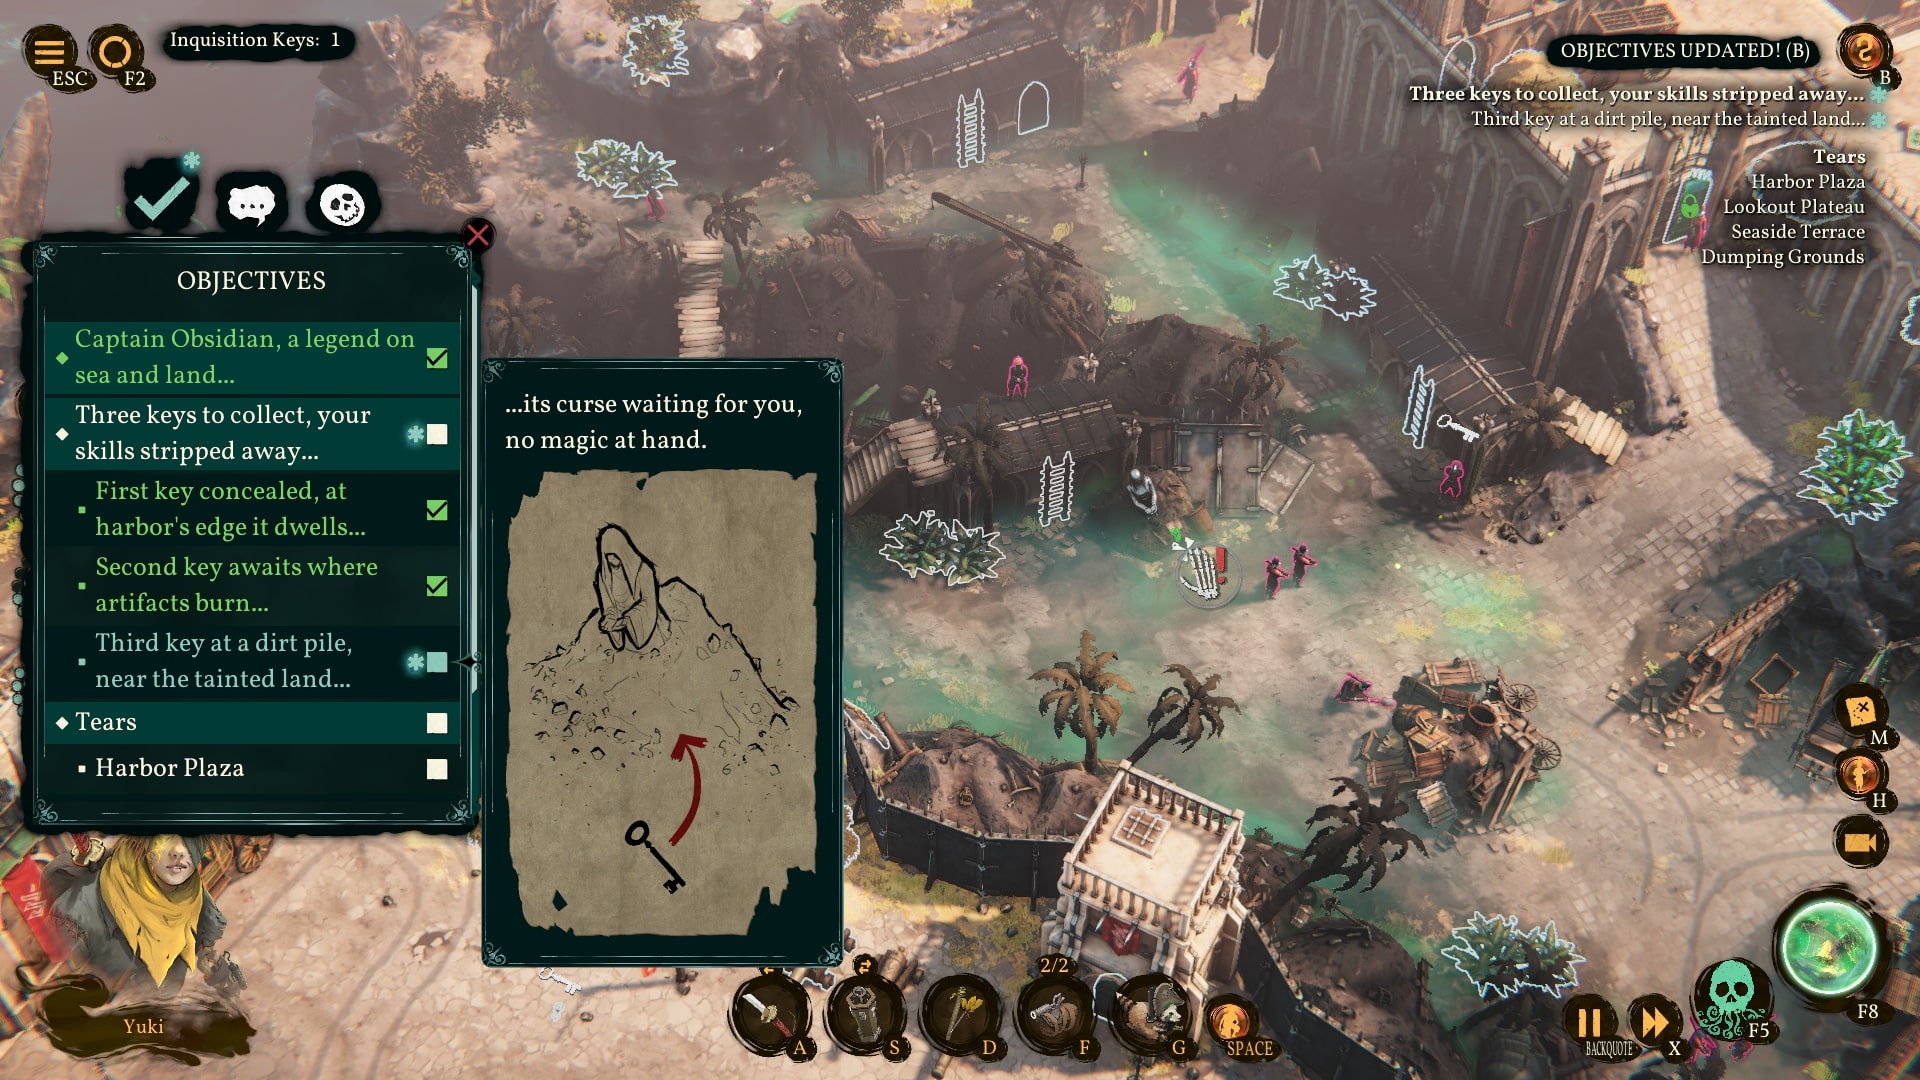
2) Obsidians Skullfire Band
Vinden 3 keychains for the chest and open it (one crewmate only can carry 1 keychain).
Chest location:
(near a beach with dark sand)

Keychain 1:
(near an exit location)
Keychain 2:
(I take you over the water and am used to bringing people closer. I also can be found above or in a ship and you can find me even among teeth or card players.)
Keychain 3:
(near a big something that is weightless and still can be seen by the naked eye. If you put it into a barrel it will become lighter)
Isle of Penance
1) Bloodbanes Crimson Gem
On this island there is also just one treasure hidden. Visit the marking and after that your task is to kill every enemy on the map. After killing every enemy return to the chest location and retrieve your hard earned treasure.
chest location:

Gran Alcázar
Er zijn 2 treasures hidden.
1) Redbeards Fire-Forged Compass
You have to “verzamelen” some different enemy types, binding them up (not killing them) and carry them back near the chest.
chest location:
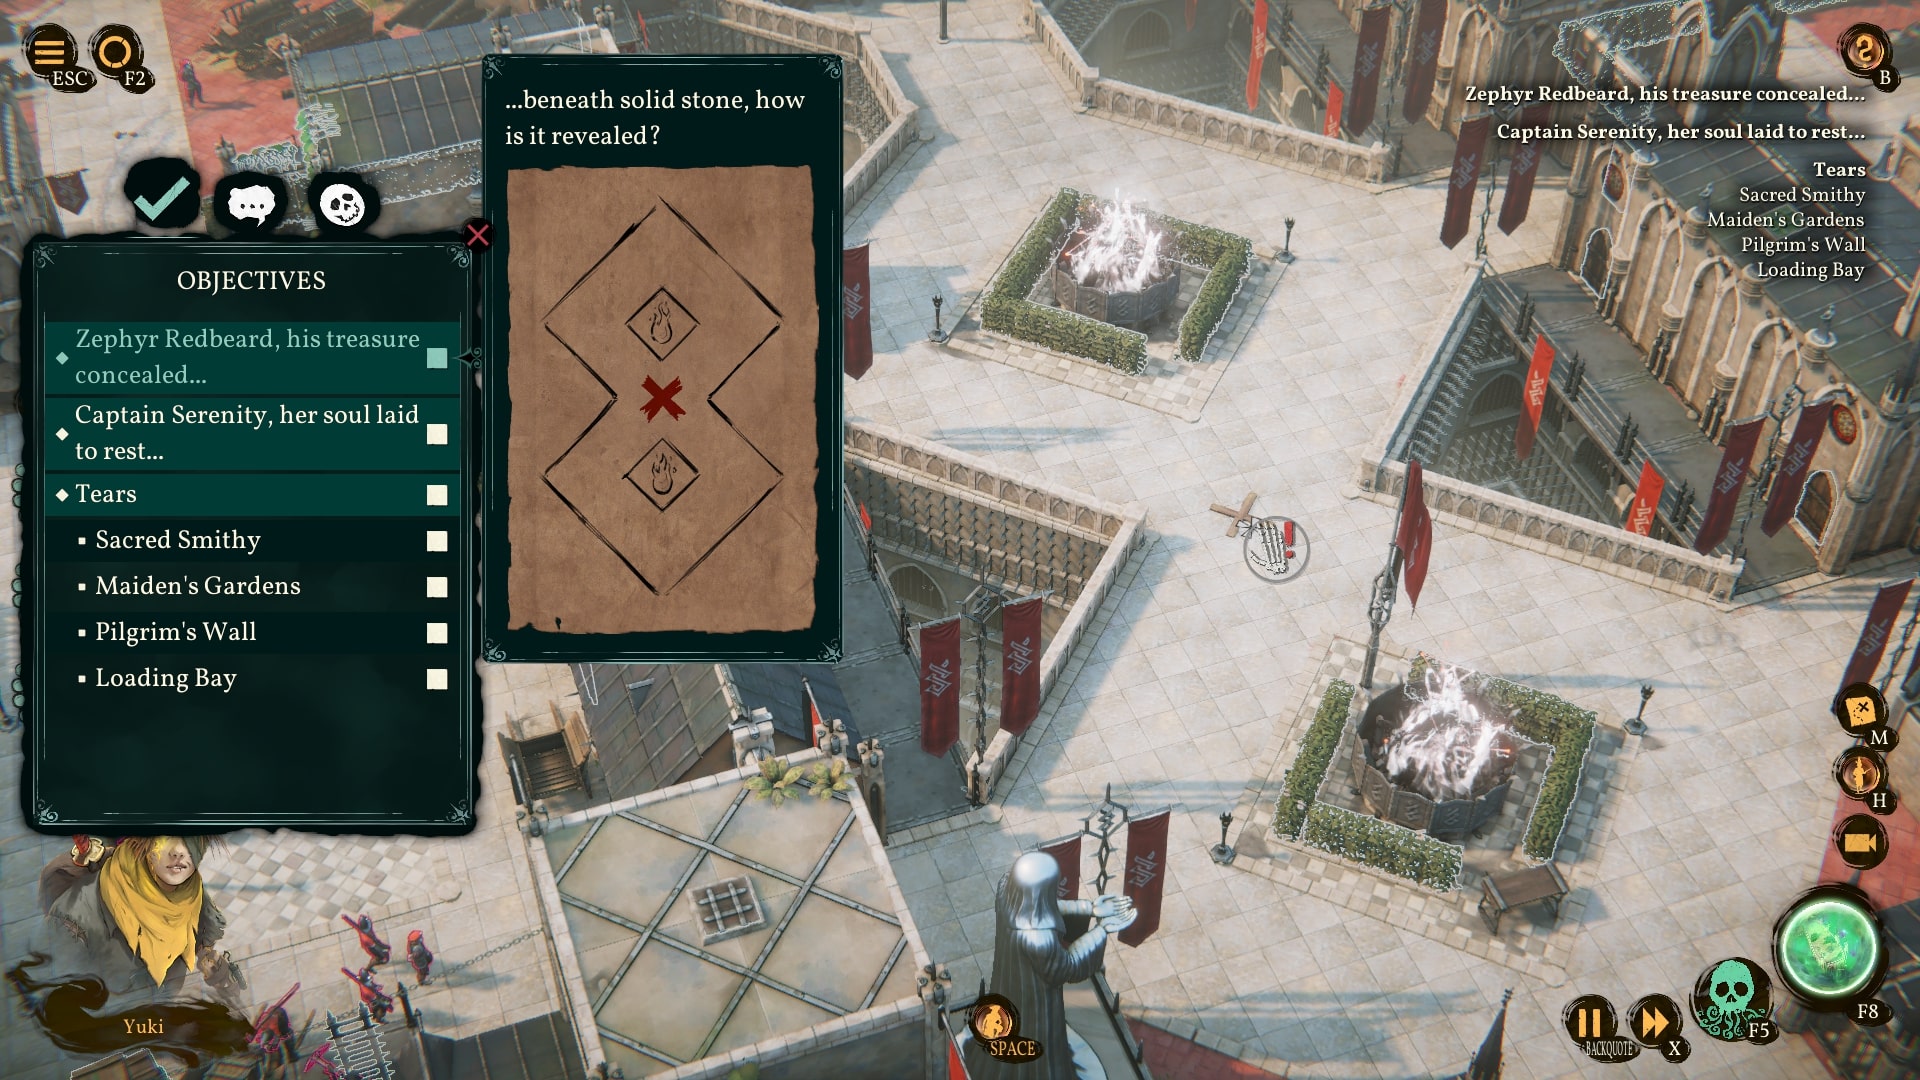
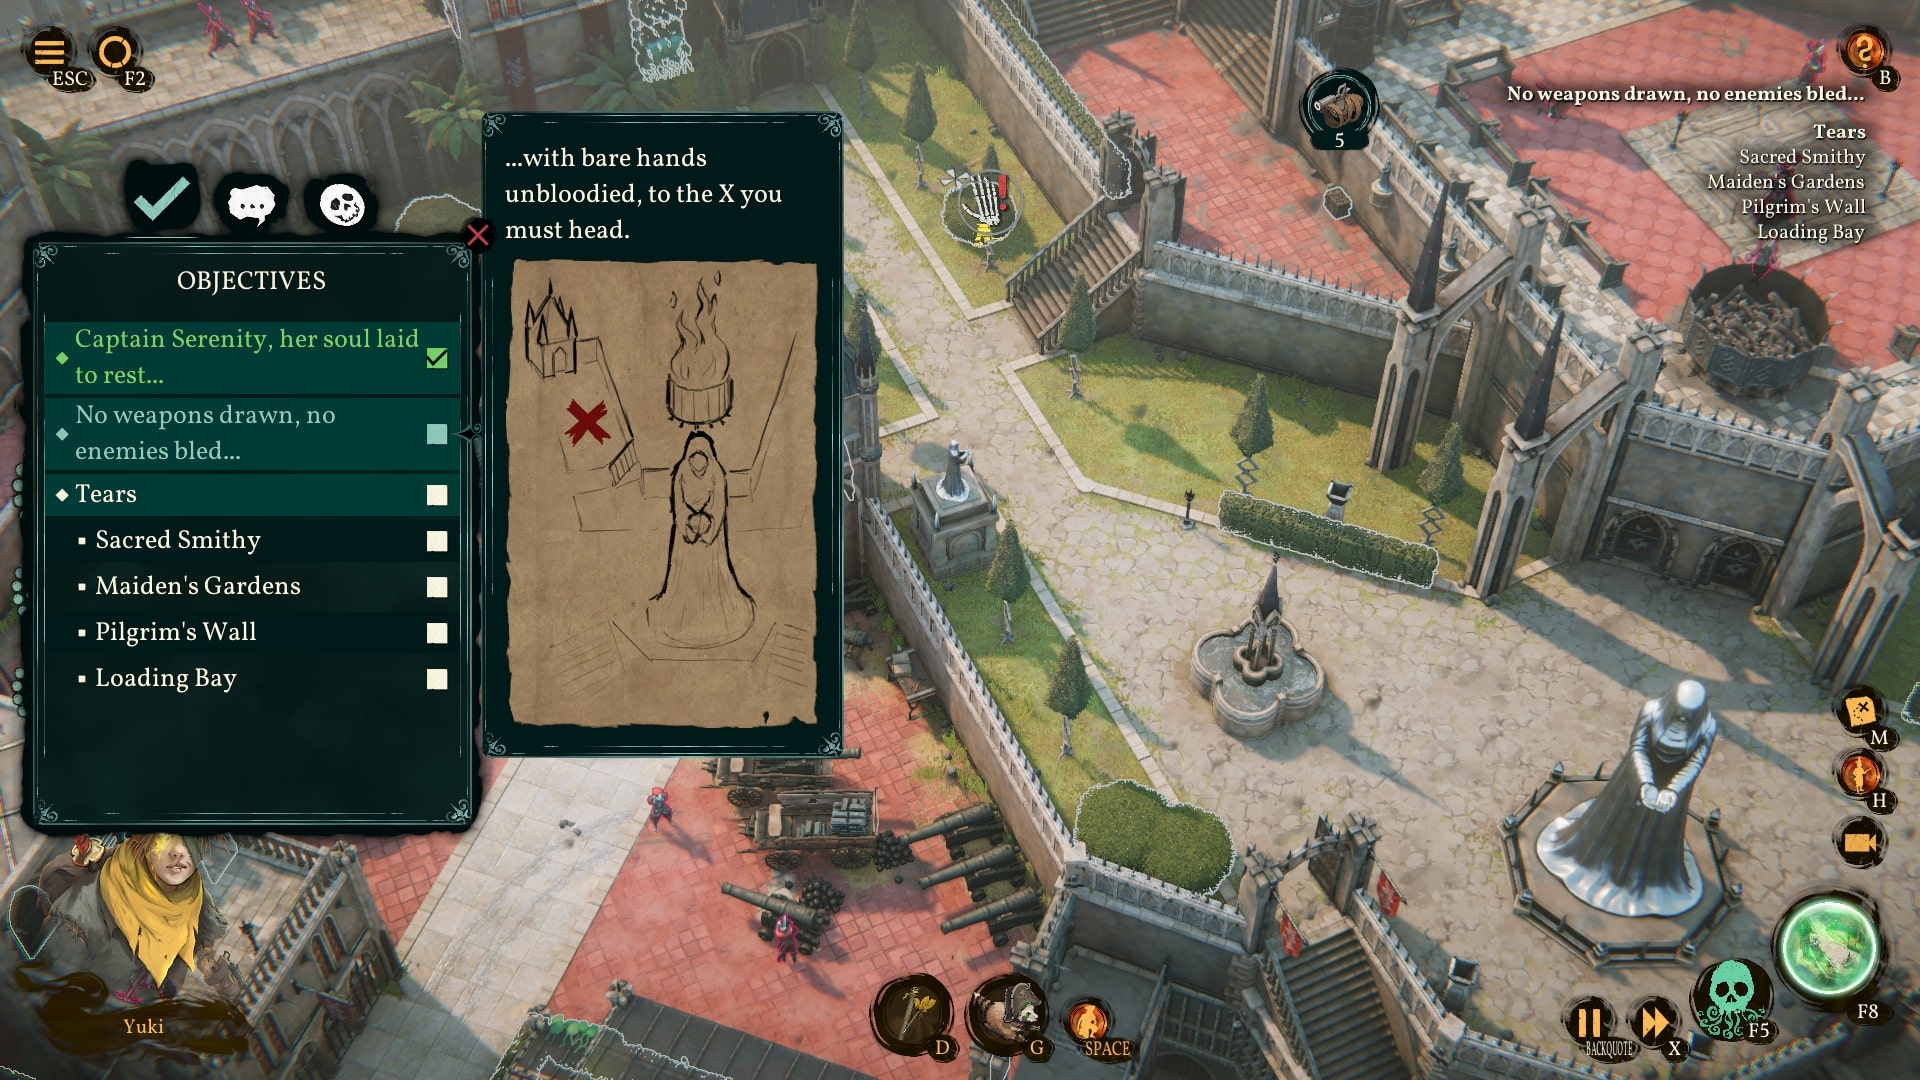
2) Captain Serenitys Rising Sun
You have to find a note and then head to a location on the map without killing any enemies (but you can kill them before gathering the note ;))
note location:
(I can be found near a small island with a tower)

final waypoint to get to:
(it is near many of them: I was used in 1812. I also sound like a product from Fuji. Pachelbel also did me in D)
Angler’s Grave
Er zijn 2 treasures hidden on this island.
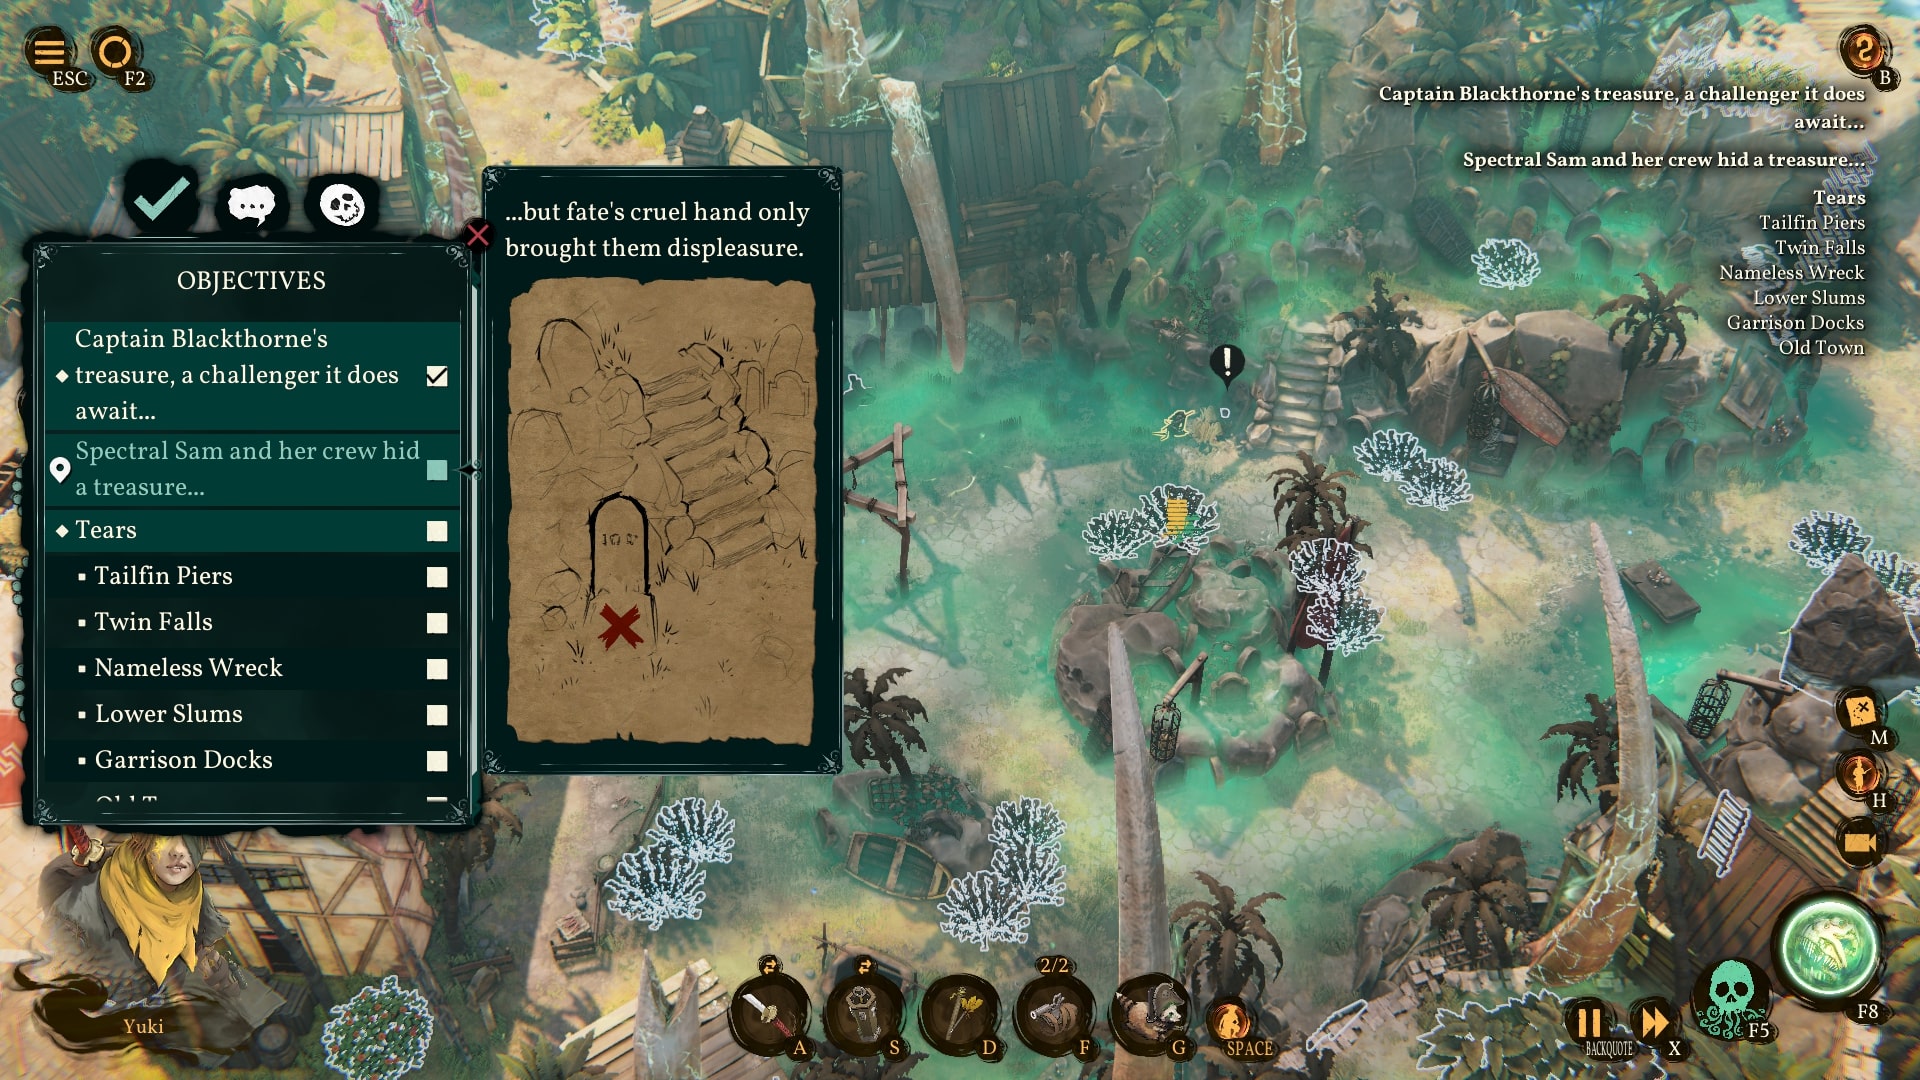
1) Blackthornes Soulseeker
Eerst, locate the grave. Once you find it, collect three scattered bones from around the map. After gathering the bones, head towards the marked location without eliminating any enemies. Herinneren, you have the option to kill enemies, but if you do, you’ll be instantly killed too. Gelukkig, your other crewmates can revive you if that happens.
Grave location:
(What place holds the dead, but is never alive?)
Bot 1:
Bot 2:
(near an exit location)
Bot 3:
Final marking:
(What place holds the dead, but is never alive?)
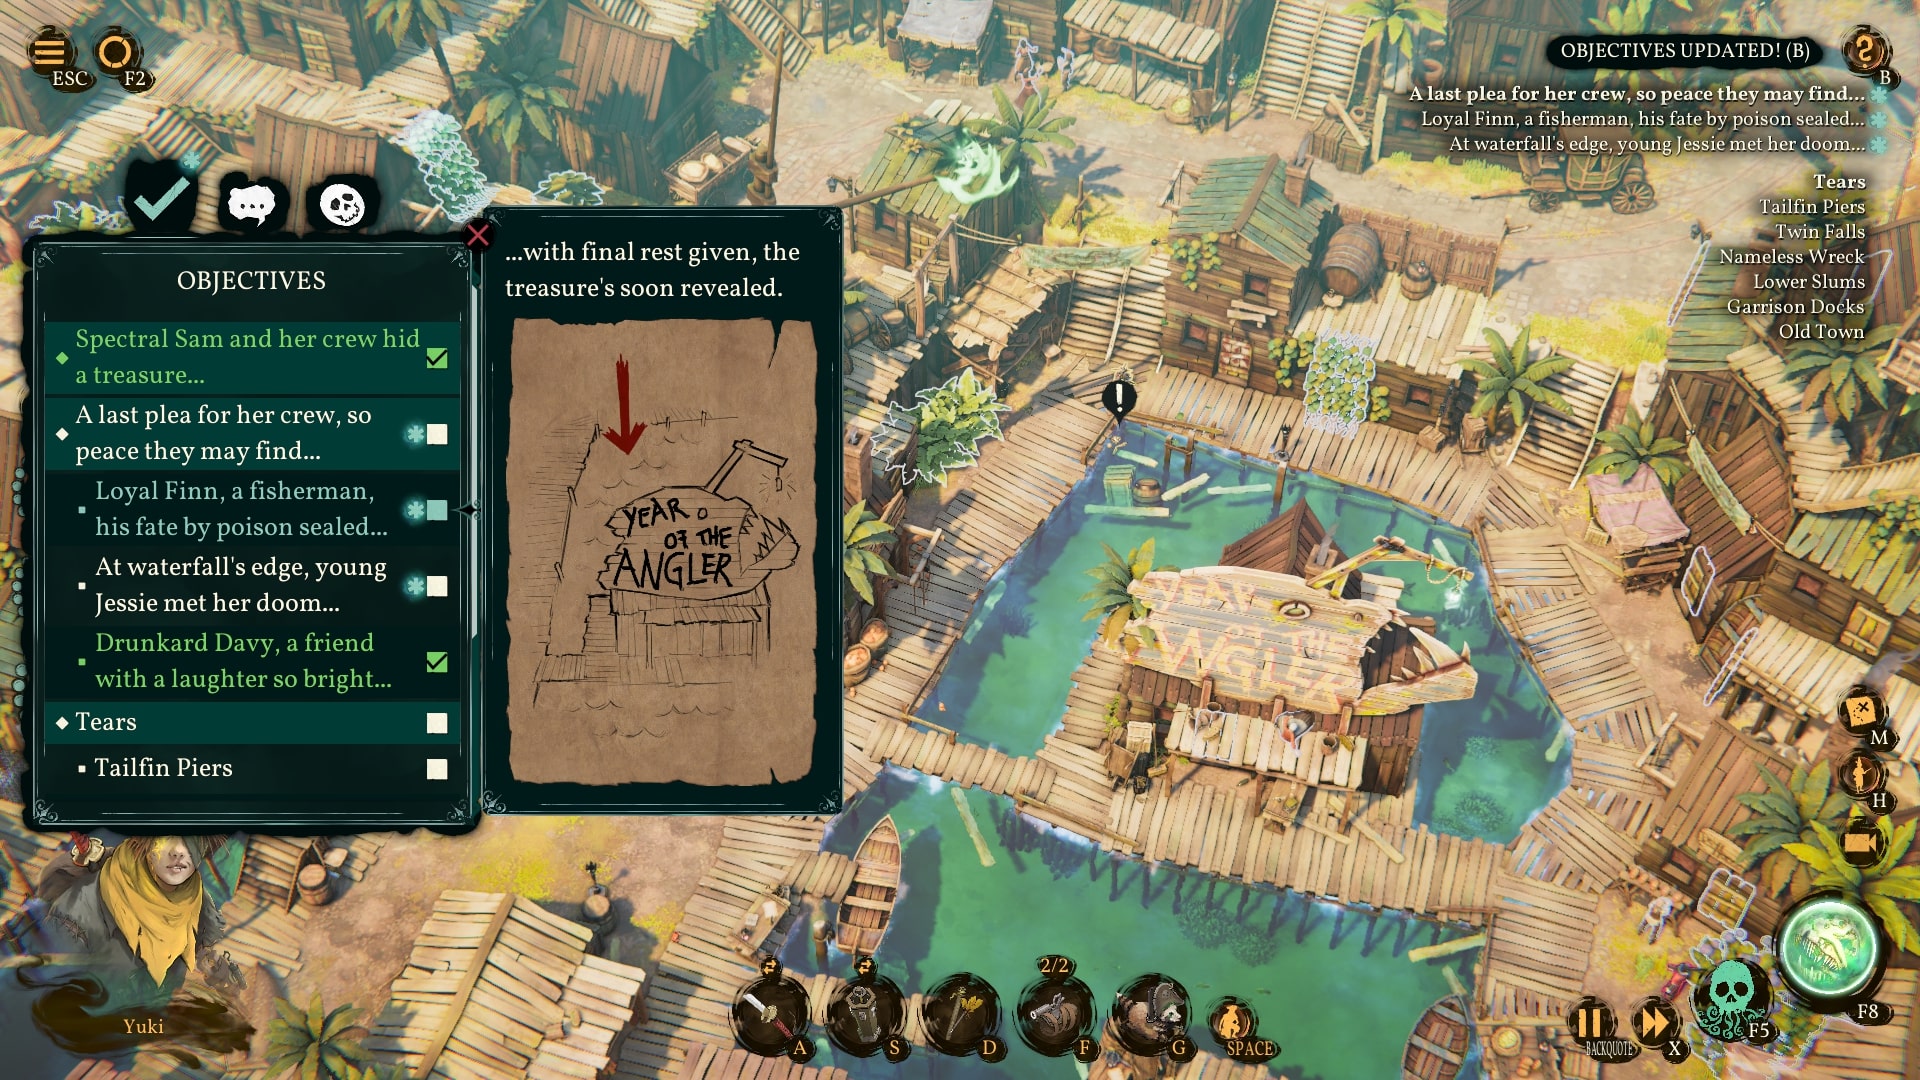
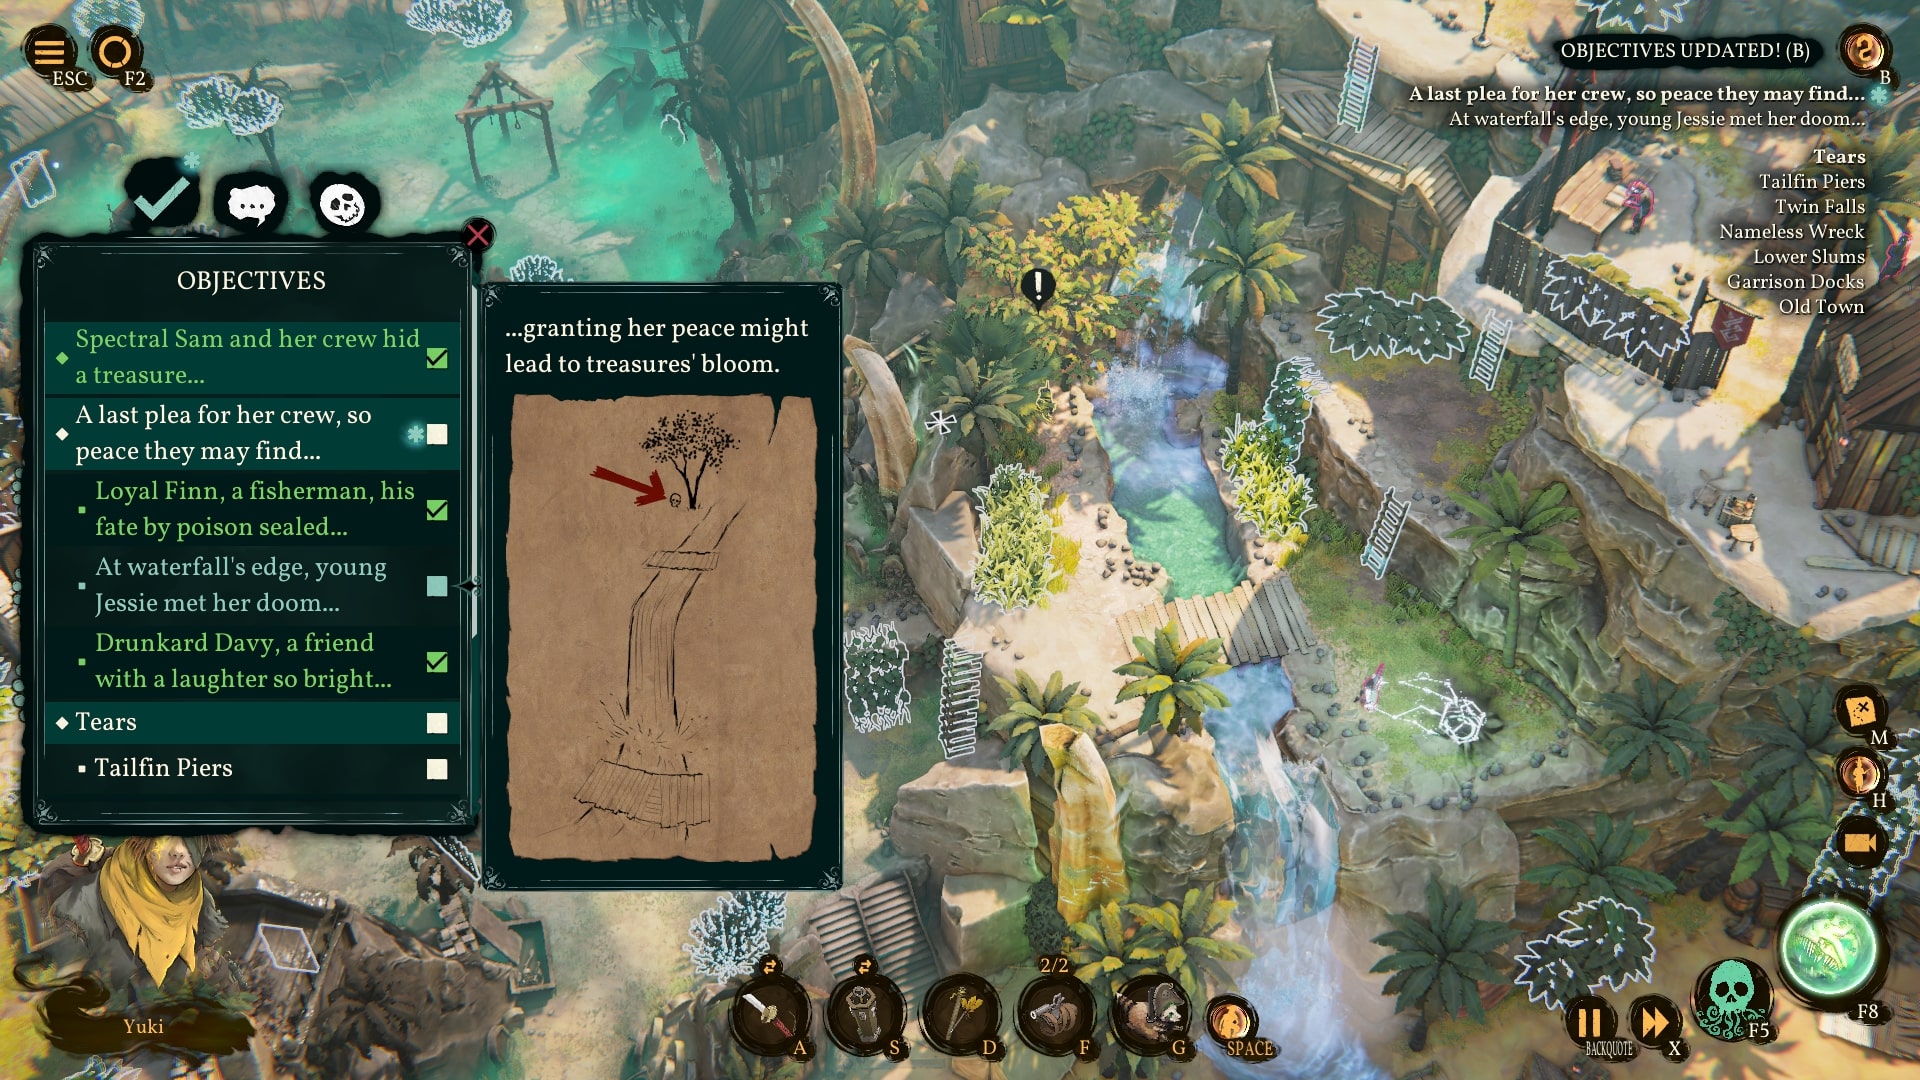
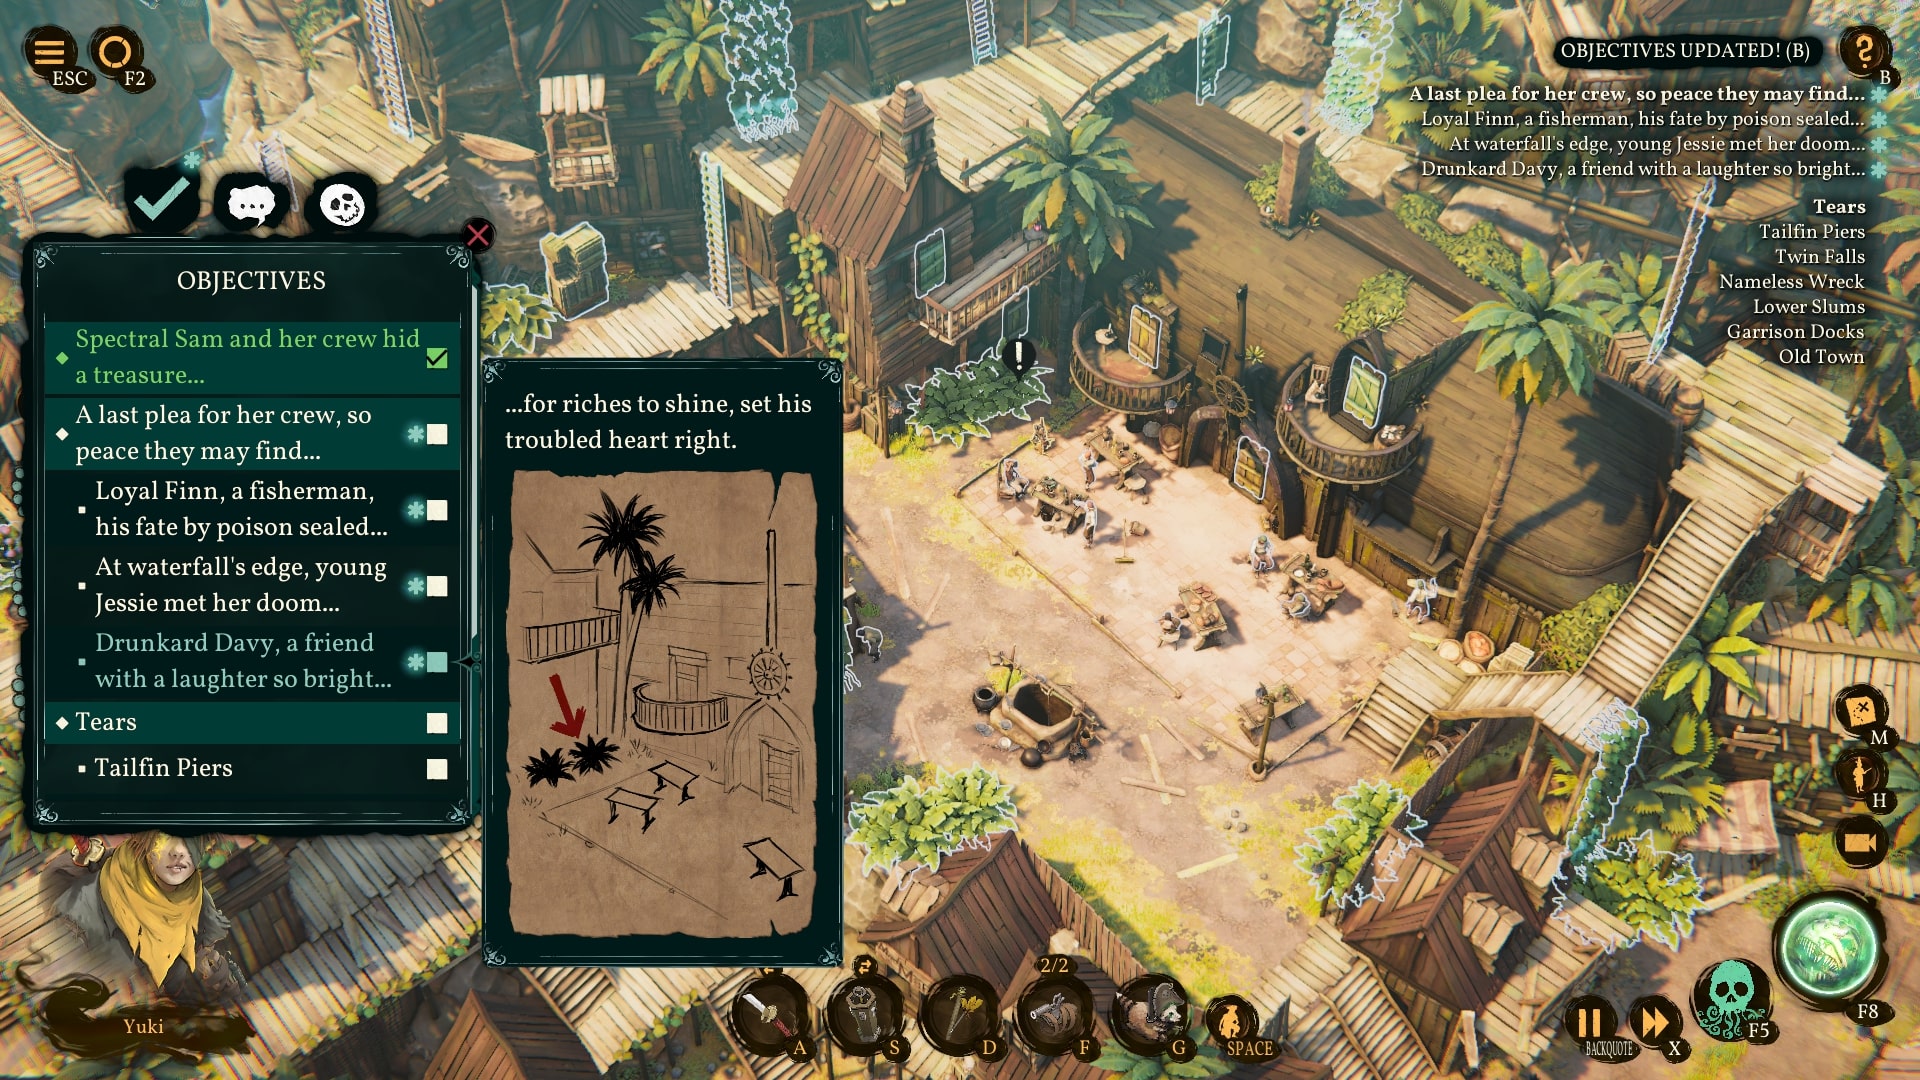
2) Spectral Sams Pearl Bracelet
You need to use a rifle to shoot 37 vijanden. It’s fun because your gun can shoot without waiting. But be careful, keep an eye on your health. Daarna, two Prognostcars will show up near a palm tree, each holding a rifle. Go between them to reach the chest and grab the treasure. During my run, one of the Prognosticars went toward the trail of dead bodies near the chest.
Gun location:

Calamity Reef
Er zijn 2 treasures hidden.
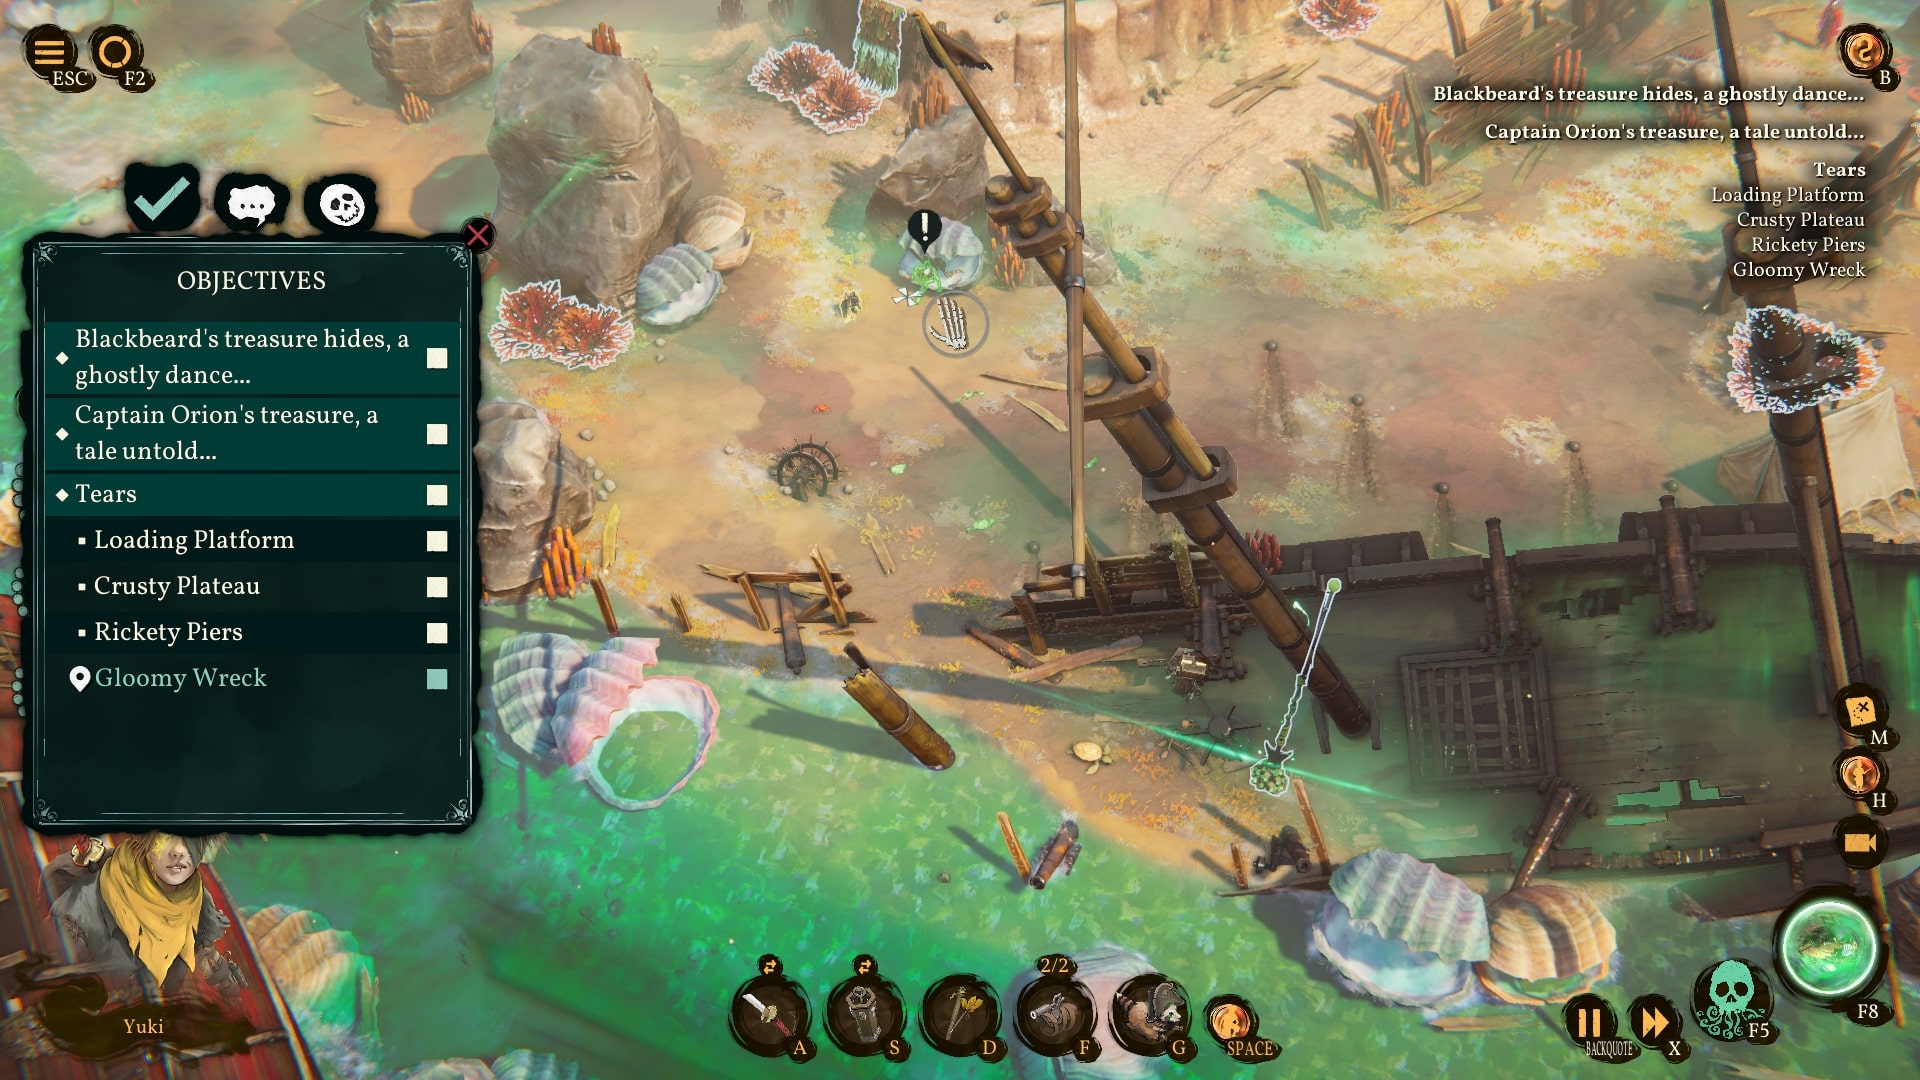
1) Blackbeards Shadowfire Twins
Follow some ghosts that are walking towards a marking and after that you have to do the same but following the direction ghosts are pointing at.
Shell location:
(near a landing location)
final location after following the ghosts:

final location after following the “pointing” ghosts:
(between two broken ships)

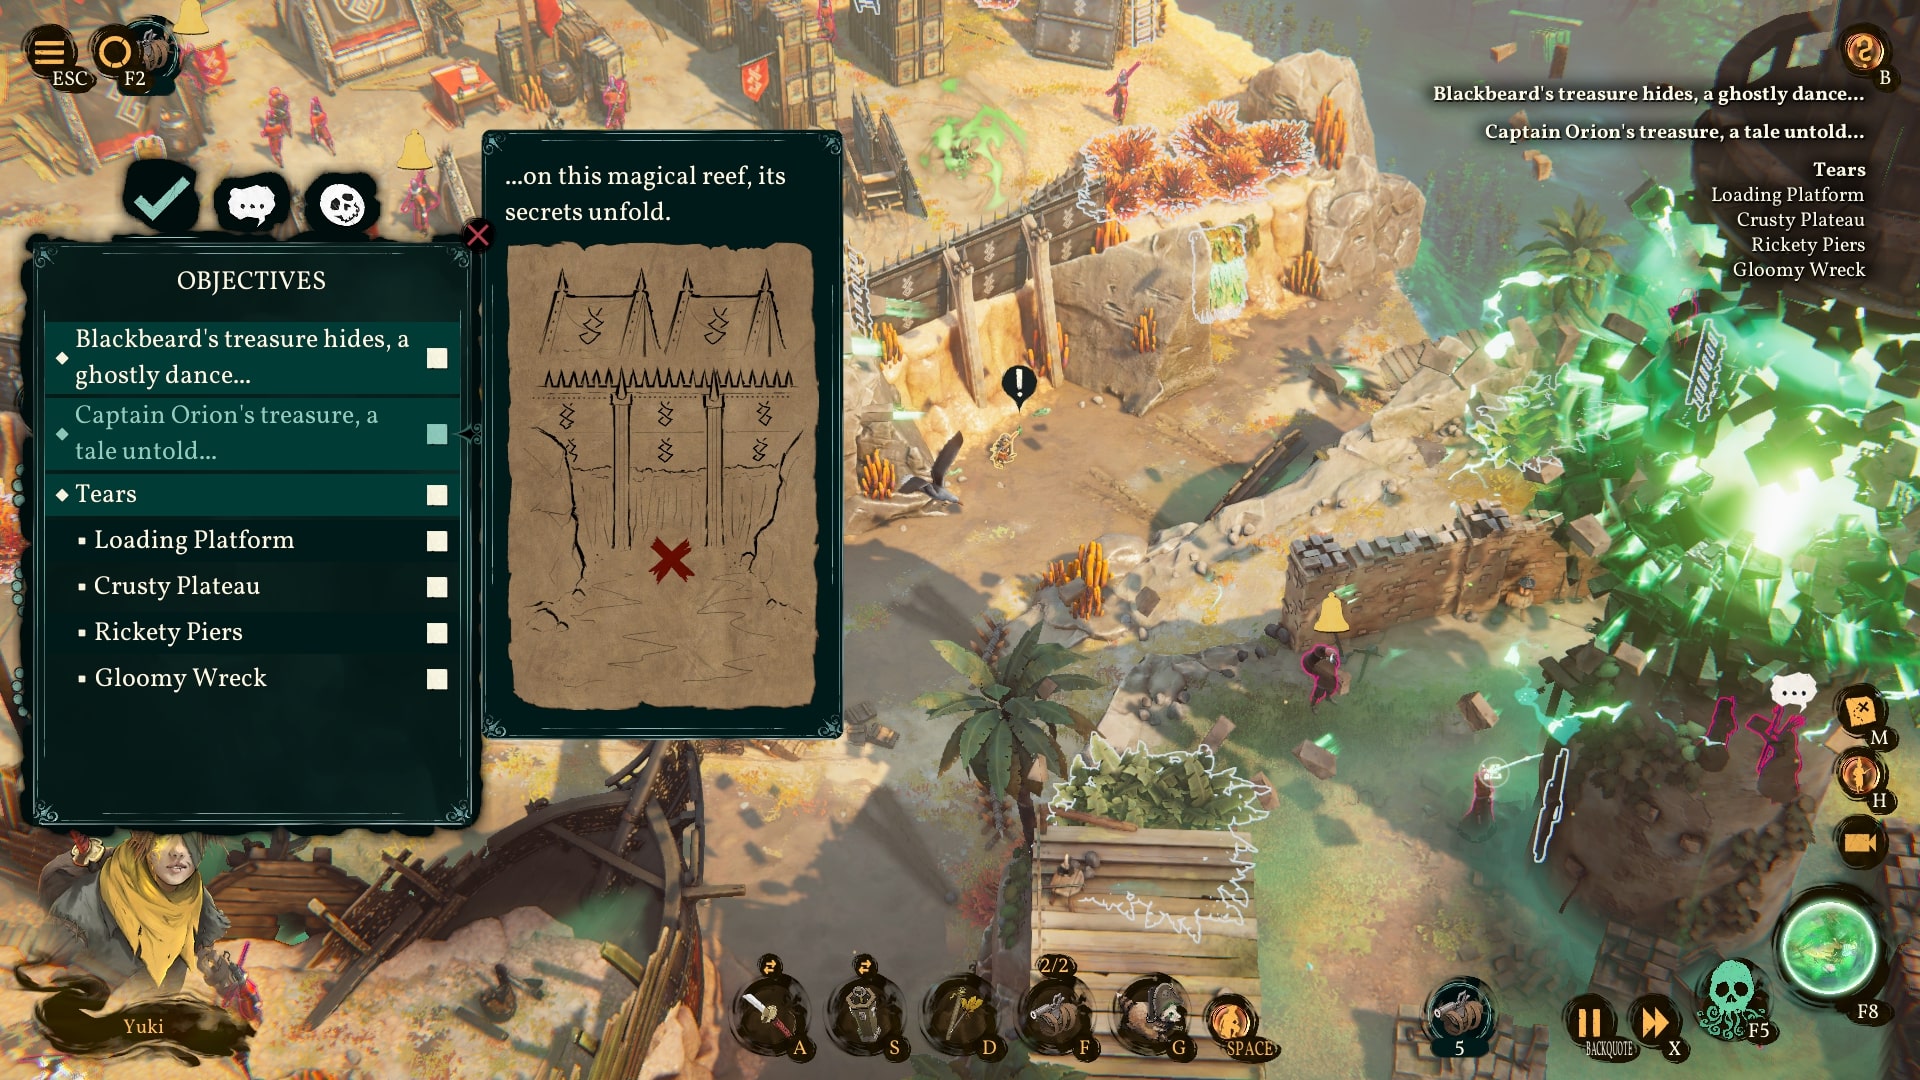
2) Captain Orions Sands of Fate
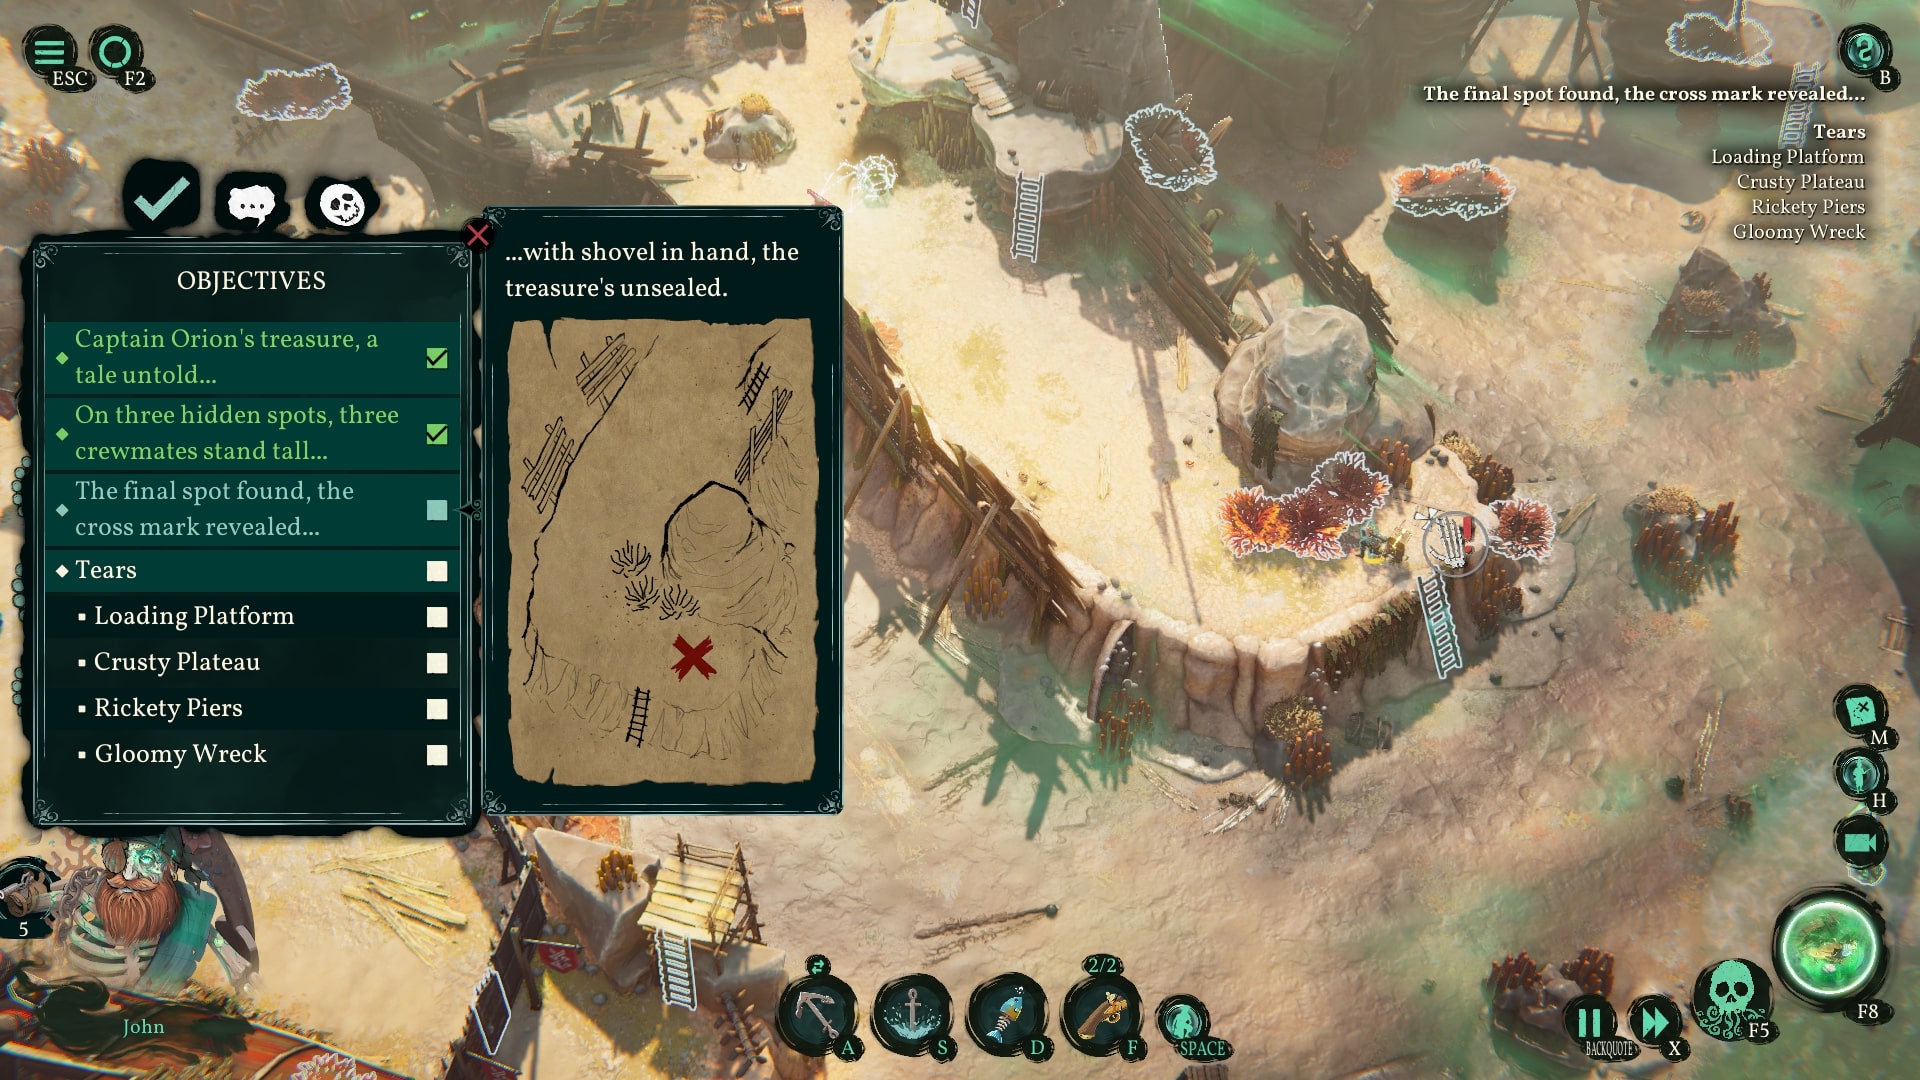
Ga naar 3 different spots on the map with one of your crewmate. After that you get the location of the chest on the map.
Note location:
(near:
I am a type of building
And from the top I shine
I warn sailors about rocks
So that ships will be fine)
marking location 1:
(near the location with the many shells)

marking location 2:
(near a landing spot and also near the location above)
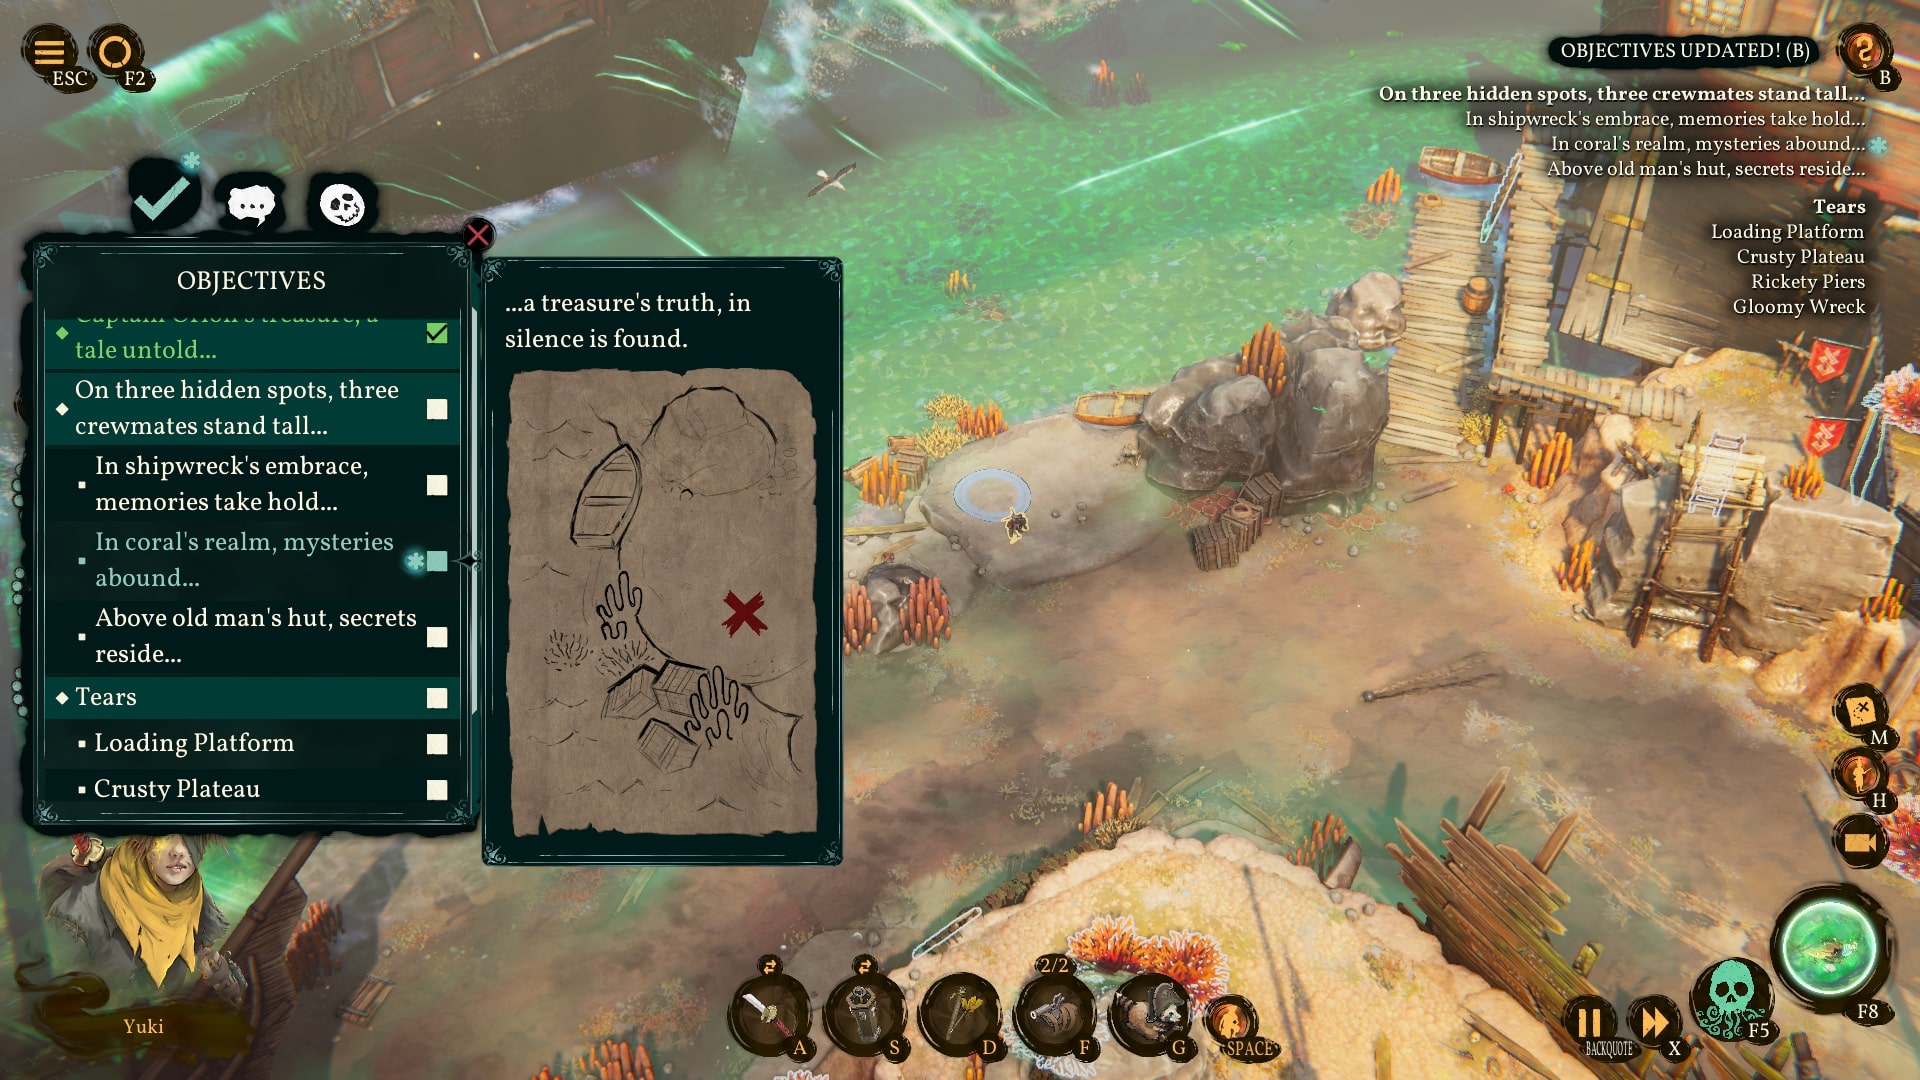
marking location 3:
(near the first location of this treasure)

Final location:
Dat is alles wat we vandaag hiervoor delen Schaduwgok: De vervloekte bemanning gids. Deze handleiding is oorspronkelijk gemaakt en geschreven door Eirnin. Voor het geval we er niet in slagen deze handleiding bij te werken, U kunt de laatste update vinden door dit te volgen link.