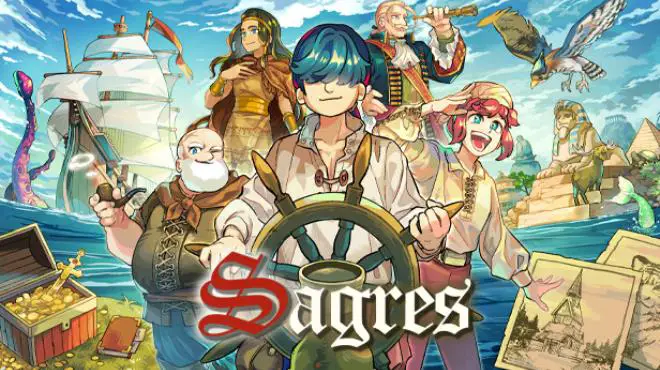
- Titel: Sagres
- Releasedatum:
- Ontwikkelaar:
- Uitgever:
Information about Sagres is still incomplete. Help ons alstublieft de details van het spel hiermee in te vullen contactformulier.
A handbook detailing the key game fundamentals and accomplishments. This guide encompasses advice on gear, wealth accumulation, and various other strategies. Echter, it does not offer a comprehensive step-by-step walkthrough of the primary narrative.
General Guide and Tips
Vaardigheden
When you begin the game, you’ll have a chance to do an interview that affects your starting skills. If you decide to skip the interview, your character will be balanced with 1 uit 3 stars in most skills, which is perfectly fine. Naarmate je door het spel gaat, your skill levels will gradually improve, and you can also hire navigators to gain additional skills.
Echter, if you choose to take the interview, you’ll face 9 vragen, each offering 2 answers that enhance different skills. Here’s a suggestion on which skills to prioritize: Navigation, Leadership, Artillerie, Swordplay, and Logistics, in die volgorde. Navigation boosts your sailing speed, while Leadership decreases morale decline and proves valuable in various random events. Artillery increases damage in sea battles, and Swordplay does the same for land battles but is somewhat less critical. Logistics may seem appealing, but shorter preparation periods aren’t very useful. Medicine, History, Theology, and Science are all equally unimportant.
Here’s the skill-boosting options for each question, with my personal recommendation in bold:
- Swordplay / Artillerie
- Leadership / Logistics
- Navigation / Artillerie
- Leadership / Medicine
- Logistics / Medicine
- Theology / Wetenschap
- History / Theology
- Swordplay / History
- Navigation / Wetenschap
Sailing, Snelheid, and Wind Direction
A significant part of this game involves sailing across the world. It’s crucial to get from one city to another as quickly as possible because each day at sea results in morale loss and supply consumption. This becomes even more critical as you progress in the game and need to cover greater distances.
Your ship’s speed is indicated by colored arrows below your ship icon: Red means slow, orange means medium, and blue means fast. When your sails align with the wind direction, you move fast, regardless of your ship’s heading. The only exception is when you’re sailing directly against the wind. In dat geval, you can either turn your sails 90 degrees to move at medium speed or zigzag your ship to maintain a fast pace. Aanvullend, you’ll move faster in shallow (light blue) waters, so try to stay close to the coast when possible.
Ten slotte, the wind direction in various parts of the world remains constant. Bijvoorbeeld, around Lisbon, the wind always blows east, and once you enter the Mediterranean Sea, the wind consistently turns west. Utilize this knowledge to find the most efficient route for your journey.
Schepen
You can buy bigger ships in places like Lisbon, but they’re quite pricey, especially early in the game. Bigger ships are usually faster, but they have more rooms that can slow them down. Dus, it’s a good idea not to add upgrades to your ship unless you really need them. In het vroege spel, one cannon and one cabin (for an extra navigator) are often enough. If you need more firepower now and then, you can remove the extra cannons later.
It’s recommended to get a Caravel as soon as you can. The selling price is 80,000 goud, but you’ll pay only 53,000 since the value of your current ship is subtracted. Other useful upgrades are the Chart Room (for more speed) and the Cargo Space (for extra gold). The Common Room isn’t very useful since the crew takes up very little space, and it doesn’t affect food and water consumption much.
Getting Around on Land
Your default ride is a donkey, which is slow almost everywhere but relatively fast in the mountains. In some markets, you can buy a horse or a camel for 8,000 goud. Horses move fast on plain terrain and forests, while camels are quick in deserts and mountains. Later in het spel, you can find two special horses. You can switch between animals while riding by pressing F. As the game progresses, moving on land becomes more important.
Making Money Quickly
Completing contracts for the guild will earn you gold, but it’s not the most efficient way to make money. At every harbor, you can trade, and you can usually sell trade goods at a profit in different countries or regions. Make sure to trade goods whenever you can make a profit at each harbor. Higher prices mean higher profits.
To increase your trading profits, you can purchase and install the Cargo Space upgrade on your ship. A profitable trade route at the start of the game is Lisbon to Casablanca. The most profitable trade route in the current game version is Alexandria to Athens. If this changes in a future update, Athens to Istanbul is also very profitable.
Use one of these trade routes when you need gold, but don’t overdo it early in the game. You’ll gain a new skill (and likely a bigger ship) later that makes trading for gold much easier.
Time and Contracts
Most activities, like traveling, entering or leaving towns, and upgrading your ship, take time. You might feel like you’re in a rush, but you shouldn’t worry too much about time. No event is tied to a specific date, and you can take your time exploring and completing expeditions. The only time-sensitive aspect is contracts, but you have more than enough time to finish them, and you can cancel and retry them without much penalty.
You can only accept one contract at a time, but you’re free to complete expeditions without accepting the contract first. It’s a bit challenging since you won’t get any hints, and going back and forth to Lisbon can become a hassle. Gelukkig, a feature is introduced later in the game that allows you to accept and complete expeditions at any guild.
Battle
Fighting in the game is like playing rock, paper, scissors. You start with a deck of 5 rock, 5 paper, en 5 scissors cards. As the game goes on, you can find improved cards. Remember to add them to your deck manually in the Menu under Battle Deck to use them in battles. ‘Mighty’ cards are stronger, dealing 1.5x damage. A card like Rock Destroyer deals double damage but loses to both paper and scissors, so use it when you know the enemy’s card.
Intuition helps you see the enemy’s cards better. Drinking at the tavern regularly boosts this by 10%. You can check the icon in the upper left corner next to the date to see if the effect is still active.
Use intuition with probability calculation to win battles. If your opponent has 5 kaarten, and you can only see 2 van hen, the other cards aren’t completely random. Bijvoorbeeld, if you can see 2 rotsen en 3 question marks, the chances that those question marks are also rocks are smaller, so it’s best to counter them with scissors.
- Sea Fights – Your damage in sea battles is based on your Artillery skill, the number of cannons, and the type of cannon equipped. The Culverin (22 schade) is the strongest cannon in the game. You can improve your ship’s hull to increase durability, but it affects your sailing speed, so do this mainly for challenging battles. Meestal, your ship should be fine without any armor.
- Land Fights – In land battles, your damage depends on your Swordplay skill and the sword you’re using. The Claymore (24 schade) is the most potent sword for most of the game. Plate Mail (17 verdediging) is the best armor. Equipping both of these items should make most physical battles manageable.
Death and Defeat
Losing a battle, whether it’s at sea or on land, results in death, and you’ll receive a ‘game over.’ You’ll be required to return to your last save point, but there are no other penalties for dying.
Passing Out
You can also pass out due to exhaustion. This happens when you run out of morale or supplies on land, or when you run out of crew members at sea. Interessant genoeg, you can keep sailing for a while even after your morale and supplies have dropped to zero, as long as some of your crew is still alive. Unlike death, passing out doesn’t lead to a ‘game over.’ In plaats van, you wake up in the most recent city and face a penalty of losing a fixed percentage of your gold. This means that even if you pass out after a successful expedition, you can still complete that expedition at the guild.
Useful Items
Here’s a list of the best items you can find at the market in various categories:
- Wapen: Claymore (schade 24), found in London for 15,000 goud
- Pantser: Plate Mail (verdediging 17), found in Genoa for 20,000 goud
- Tas: Venetian Merchant’s Bag (capaciteit 16), found in Venice for 50,000 goud
- Cannon: Culverin (schade 22), found in Copenhagen (price not specified)
- Hull: Improved Steel Hull (duurzaamheid +7), found in London (price not specified)
- Figurehead: King Figurehead (battle spoils +15%), found in Lisbon (price not specified)
In het vroege spel, focus on acquiring the Claymore, Plate Mail, and Culverin. The Venetian Bag is crucial for late-game expeditions, and the Steel Hull can be handy in tough battles but isn’t a top priority. The King Figurehead is the only figurehead available at the market and should be purchased if you have the extra gold. More figureheads can be found later in the game through expeditions.
Save File Back-Up (Use with Caution)
The game provides only one save slot, and this can be tricky because of significant story moments. If you want to create a manual back-up of your progress, Hier leest u hoe u het moet doen:
- Ensure the Steam Cloud option is enabled for Sagres in your Steam library > Eigenschappen.
- Save your game at an inn.
- Go to C:\Programmabestanden (x86)\Steam\userdata and copy/paste the maps in this folder into a new back-up folder.
Please be cautious when using this method as it may overwrite other game save files in your Steam Cloud. Avoid using it if you’re playing other Steam games simultaneously. It’s also a good idea to test it on your own PC before making significant changes.
Hoofdverhaal (Going West)
Opmerking: This section may contain spoilers of the game. Lees verder op eigen risico.
Second Archibald fight:
Let’s jump ahead a bit in the game because the beginning is quite simple. You’re on a quest to find Lucia’s father and have encountered some pirate trouble while trying to reach India via the eastern sea route. After defeating Tyler and Amelia, your next target is the formidable Archibald. You discover that he has a secret hideout located north of Dublin. Just before you launch your attack, the game will give you a warning that significant changes are coming, so this is a good time to create a backup of your saved game.
If you haven’t done so already, make sure you upgrade your ship to a Caravel and acquire the Claymore (a weapon), Plate Mail (pantser), Culverin (cannon), and Cargo Space (blueprint). You can find information on where to get these items and the quickest ways to earn money in the sections above.
The second battle against Archibald shouldn’t be too difficult if you’ve prepared well. Echter, some major changes are about to occur that will limit your ability to move around for a while. Aanvullend, during the upcoming event, you will lose all the gold you currently have. Dus, it’s a good idea to spend your remaining gold on items and ship upgrades since you’ll get to keep those. After defeating Archibald, sail back to Lisbon to continue the story.
Murica!
This part has spoilers if you haven’t reached the western continent yet!
Plotseling, you find yourself stuck in the Caribbean with a ship that’s seen better days and a whopping debt of 200,000 gold owed to a native chief. Gathering that much gold can be quite a chore, so here’s the fastest way to do it. If you’ve been savvy, you’ve probably already upgraded to a larger ship and added the Cargo Space expansion. Equip two cannons on your ship to defend against Spanish attacks, and if you have it, install the Chart Room. Include two Storage Rooms, and fill the rest of your ship with Cargo Spaces. If you’re still sailing a smaller vessel, one cannon and one storage room should do the trick. Nu, start shuttling between Havana and Veracruz, trading goods, and put your newly acquired Haggle skill to work to significantly boost your profits. Particularly, the silver from Veracruz sells for a good price in Spanish cities.
Tijdens dit doen, keep an eye out for items to repair your ship at each market. Once you’ve gathered the necessary items and gold, return to the native chief. For your next mission, you’ll want to transform your trading vessel into a warship, so swap out your Cargo Spaces for cannons and begin taking on those Spanish foes!
Back Home (Going Anywhere)
When you go back to Lisbon, you’ll be free to move around as you like. You can explore the main story or go on adventures wherever you want. Following the top-right corner instructions on your screen will guide you through the main story.
Galleon
Nu, about getting a Galleon. This is the biggest ship in the game, and it’s super sturdy and fast. To save up for it, you’ll need at least 200,000 gold and the Haggle skill. When you have enough gold, here’s a good way to set up your Galleon:
- Chart Room
- Canons
- Cargo Spaces
- Six Storage Rooms
- One to Three Cabins (depending on how much you like expeditions)
- One Kitchen (you’ll get this upgrade later in the game)
Wees voorzichtig, hoewel. Adding too many upgrades to your ship can slow it down, so sometimes it’s better to keep some rooms empty. And remember, once you’ve earned lots of gold, you can remove the Cargo Spaces if you don’t need them anymore.
Other things to look out for
Apart from the main story, there are other cool things to do in the game. You can try to finish all 196 expeditions around the world. Don’t forget to visit the Royal library in Lisbon because it has some quests that are not part of the main story. Some expeditions will give you treasures or items that make you better at things, like being smarter or earning more experience. You can see what these items do in your inventory.
Here are some important items to get:
- Red fiery horse: You get this after an expedition in China. It makes you super fast on land, about twice as fast as walking, especially in places like Africa, India, and South America where walking is better than using a ship.
- Spear of Longinus: You get this after an expedition in the Middle East. It’s one of the strongest weapons in the game. It gets even stronger if you have more navigators, and with 3 navigators, it’s about twice as strong as the Claymore.
- A super cute animal: You find this after an expedition in India (if I remember right). It helps keep your crew happy during tough expeditions where you can’t rest.
- Demon Figurehead: You get this after an expedition in South America. We’re not sure what it does, but you’ll need it to finish the hardest achievement in the game. Look at the Achievements section for more details.
Achievements Tips
Great explorer (found all finds)
Dus, to make it simple, you should aim to complete all 196 expeditions in the game. Om dat te doen, you’ll need to find all the guilds around the world and gather info about the expeditions from their libraries. Be on the lookout for guilds in places like middle/northern China, India, and the Middle East. There aren’t any guilds in Africa, Australia, or South America. If you manage to do all this, you’ll automatically finish at least 22 uit de 24 available achievements. There are just 2 achievements you might miss. And then there’s the tricky Ghost Ship achievement/expedition that’s a bit more complicated.
Navigator… Assemble! (hired 3 navigators)
This one isn’t the toughest achievement, but you can get the ‘Great explorer’ without getting the Ghost Ship achievement. To get it, all you need is a ship with three cabins and hire three navigators (your main companions don’t count) all at the same time. It’s a cool achievement to aim for!
Celebrity (was awarded the title of Duke)
To grab this achievement, you have to work your way up to the highest title at the court in Lisbon. But it’s not easy – you’ll need a ton of renown. You might need to finish about 150 expeditions before you’ve earned enough renown to reach that level. It takes some hard work, but it’s a great accomplishment!
Ghost ship (discovered the Ghost ship)
The Ghost Ship expedition is definitely the trickiest one, and you won’t find it in any library. To unlock it, you first need to finish a specific expedition to a waterfall in South America. Daarna, you’ll receive the Demon Figurehead. Install it on your ship, and you’ll see the Ghost Ship contract in your expedition list. But when you try to accept it at a guild, the guy there won’t talk about it and tells you to come back “when the dead and the living meet.”
- Tip 1: “When dead and living meet” means Halloween (oktober 31) or Día de Muertos (November 2). Return to the guild on either of these days, and the guy will tell you that you’ll probably find the Ghost Ship in a place farthest from land.
- Tip 2: There’s a spot in the ocean between South America and New Zealand called ‘Point Nemo,’ marking the farthest location on Earth from the nearest coastline (Bedankt, Googlen!). Sail to the coordinates 48 Zuiden, 123 West and circle around. You’ll get a spooky feeling…
This battle is super tough, so make sure your ship and falcon special attacks are fully charged, equip your best armor and weapons, visit the tavern, and add some cannons for extra firepower. During the first stage, close the gap and deal enough damage to board the enemy ship. Then finish the job with your sword. Even with everything just right, it might take a few tries to win. Succes!
Dat is alles wat we vandaag hiervoor delen Sagres gids. Deze handleiding is oorspronkelijk gemaakt en geschreven door Queremos pausa durante la pausa. Voor het geval we er niet in slagen deze handleiding bij te werken, U kunt de laatste update vinden door dit te volgen link.