Standard character creation provides a limited set of options to create a functional character, but there is no need to limit yourself to that. The game offers an opportunity to delve even deeper and modify almost every aspect of your character’s appearance. You can even transform your initially silent protagonist into a character with their own voice. The best part is that you can change these choices anytime you want. While the extensive customization options are impressive, the only real limitation is your artistic creativity and the time it takes to fine-tune these details.
Visual Configuration
To bring your ordinary character to life and make it truly unique, you can utilize a resource called VRoid Hub. This resource allows you to update the appearance of your existing character with a fresh look. Echter, before you can make use of VRoid Hub, you need to have a character in the first place. Once you have created your character, look for the button located in the lower right corner of the screen to initiate the customization process.
To fully utilize this feature, it becomes evident that having an account with the associated service is a requirement. Aanvullend, the installation of VRoid Studio is necessary. You may have seen this resource being used by streamers as VTubers instead of showing their real selves. Exploring the intricacies of creating a VRoid is better suited for the specific website, so we won’t delve into those details here. Echter, keep in mind that every aspect of your future character’s appearance can be customized, from their facial features to their hair, body shape, and even their clothing. If you’re someone who typically spends hours on character creation in games, be prepared for this process to potentially take days. Remember to save your progress frequently to avoid losing your work. It’s important to note that any changes made in VRoid Studio are only local to the program itself, at least for now.
Once you’re satisfied with the look you’ve created, the next crucial step is to apply the necessary actions to transfer your customized appearance to your character. The Camera/Exporter in VRoid Studio offers an option to upload your creation to VRoid Hub. This process will require you to capture a preview of the full body and a close-up of the face, but this is only for the purpose of previewing your character. For the initial upload, you will need to connect your studio to your hub account, which should be a straightforward and simple task compared to the intricate customization work. After uploading, make sure to check your hub account to verify that your creation is there. Standaard, your new look is set to private, which may be suitable if you intend to use it solely for your own character. Echter, if you wish to utilize designs created by others, you would need to have less restricted access, though the range of options will still be limited to what other users have created, making it less advanced in terms of character creation possibilities.
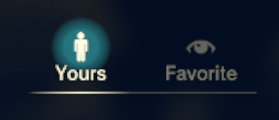
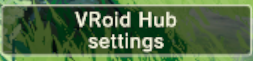
Now that you have completed these steps, you can go back to the game. Assuming you have set everything up correctly, clicking the VRoid Hub Settings button should allow you to choose from your list of characters, provided you are still logged in. Selecting your character will take you to the list of looks you have created in VRoid Hub. This is also where you can access your favorites if you have decided to utilize someone else’s work. Simply choose your desired look, and you’re ready to proceed.
Regarding favorites, here are the requirements:
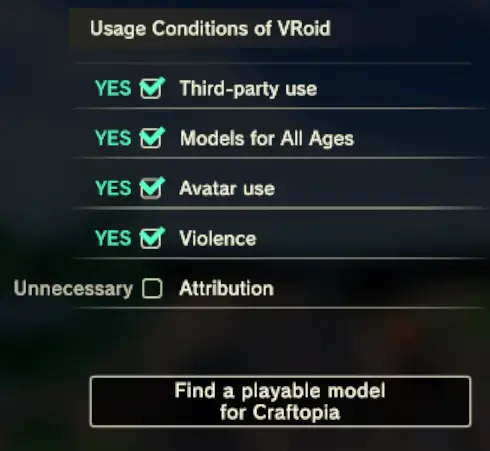
Please note that if you intend to use this customized look in multiplayer mode, it is crucial to ensure that the individuals you are playing with have also signed in to VRoid Hub, even if they are not creating their own custom look. Failing to complete this step means that other players will only see your character’s basic appearance as it was initially created in the in-game character creator.
Audible Configuration
It’s important to note that currently, your silent protagonist in the game does not have any vocal expressions. Echter, there is a mod available that enhances the options for character creation by giving your character an “Action Voice.” This mod provides controls for adding a voice to your character, but by default, it doesn’t make any changes. If you’re interested, you can visit Nexus-mods to find a comprehensive voice mod, but it’s worth mentioning that using someone else’s work doesn’t truly create your own character.
Please keep in mind that this feature does not apply in multiplayer mode, as mentioned earlier. In order for everyone to hear the same voice, all players would need to have the same voice settings. The mod allows configurations to be made by character name, but the prepared files would still need to be manually sent and applied.
The process of how this feature works is well-documented in both the Steam mod and the Nexus mod (you just need to know where to look for both). The feature operates by associating specific actions performed by your character with corresponding audio files. Bijvoorbeeld, the action of jumping in the air is referred to as “Springen,” and the mod looks for audio files in a folder named “Springen” with .wav format, selecting one at random. Standaard, this folder doesn’t exist, so it can be useful to use the “/actLog” command in the game to familiarize yourself with the names the game assigns to specific actions. You can create the necessary folders even if you start with the list provided by the Nexus mod (ensure that the folders are in the correct location, which can be set in the mod’s configuration, typically defaulting to an “ActionVoice” folder in your personal “Documenten” map, which doesn’t exist automatically). It may be easier to use the “+” en “%” characters in folder names, especially when dealing with voices that don’t significantly differ. Bijvoorbeeld, swinging a sword and swinging a katana might involve your character making the same vocal expression for the first swing in a combo. Make sure you understand how the mod handles these features before proceeding, even if you haven’t figured out all the necessary folders yet.
Op dit punt, you will need the actual .wav files to be used. Following the example in Nexus Mods, you can search for other mods in different games and apply them to your own design, as long as they are in .wav format. Another option is to find online services that offer free-use voice samples in a vast library of .wav files, allowing you to assign them as desired. Echter, for a truly customized experience, you may need to consider resources that can alter your own voice or generate speech from text using AI. It’s important to note that specific recommendations cannot be provided, as the quality and availability of these resources may come at a cost. Some concepts to explore include products like “Resemble,” “LOVO AI,” “Voice.AI,” “Uberduck,” “MagicVox,” en “Replica Studios.” While I cannot endorse any specific resource, this should give you an idea of what options are available in the current market. Natuurlijk, another possibility is to know someone who can naturally perform voice acting (or even better, if you can do it yourself). Echter, it can be strange to hear a familiar voice while playing the game.
- If you opt for a resource that modifies a real voice, keep in mind that the alterations you use become part of the character creation process. Design the exact values of the alteration and try to be consistent when producing the .wav files (don’t forget to express emotions effectively for proper impact). This solution provides the most personalized and modified results, aligning with the concept of this guide, but it may feel limited as the root of the result always remains based on the original voice. Creating the voice entirely by yourself would require a significant non-technical effort in terms of vocal practice, starting from where you want to begin and how you want it to be expressed, even before mapping it over to a new voice.
- If you choose a resource that provides text-to-speech functionality, keep in mind that many of the voices you want are expressions rather than words. Your character may grunt in various ways while swinging a sword, but they may simply call out “Genezen” when casting a healing spell. Regardless of the chosen resource, you’ll need to learn how to produce the desired vocal sounds and it would be helpful if the voice could convey emotions such as rage or pain. Gezegde “Hya” properly when starting from written text is not as easy as it may seem, and initial attempts may sound flat or fail to pronounce it correctly, even though it’s not a real word. Dus, creativity is important in this regard.
An advantage of this resource is that modifications made to the .wav files in the folder will update the game in real-time, without the need to restart. Daarom, it may be beneficial to have the game open while recording and applying the actual voices, allowing you to practice with live character motions and make changes on the fly. Just make sure you have enough sustenance to work with during this process or consider using a test character in a creative mode that you don’t mind experimenting with.
This aspect of character creation may not be as streamlined as the visual part in its current design, but perhaps in the future, there will be more integrated solutions to fill this gap. It’s possible that voice acting could be implemented, even using AI solutions as mentioned earlier (Replica Studios supposedly exists for this purpose). When that happens, it would be ideal if the voice could be distinct based on choices of gender and species, and maybe even allowing the selection of voice types. Echter, even with such advancements, it may not be as powerful for creating something as unique and distinct as what is currently achievable.
Dat is alles wat we vandaag hiervoor delen Craftopia gids. Deze handleiding is oorspronkelijk gemaakt en geschreven door Lanie Rubyss. Voor het geval we er niet in slagen deze handleiding bij te werken, U kunt de laatste update vinden door dit te volgen link.