
- Titel: Cattails: Wildwood Story
- Releasedatum:
- Ontwikkelaar:
- Uitgever:
Information about Cattails: Wildwood Story is still incomplete. Help ons alstublieft de details van het spel hiermee in te vullen contactformulier.
This guide is here to assist you in finishing the Main Story ruins! It also provides answers to puzzles and tells you what to anticipate in each room.
How to Unlock the Ruins
The ruins become accessible gradually as you enlist cats. The initial ruin becomes available after experiencing a strange dream, followed by meeting the Forest Guardian in East Forest, who briefs you about it. On the map, these accessible ruins will be indicated by a leaf icon.
E>S>W>N
For your expedition, it’s advisable to bring along offensive skills and a plentiful supply of curative herbs. Vertrouw me, having an abundance of healing items will prove beneficial later on. Some levels entail confronting multiple adversaries, with even bats lurking in the entry corridors, making maneuvering challenging in the confined spaces. Herinneren, you can charge your attacks by holding down the button, transitioning from purple to blue, thereby intensifying your strike. Aanvullend, you can evade using CTRL (PC)!
It’s important to note that time doesn’t progress while you’re in the ruins, so feel free to take your time and explore at your own pace.
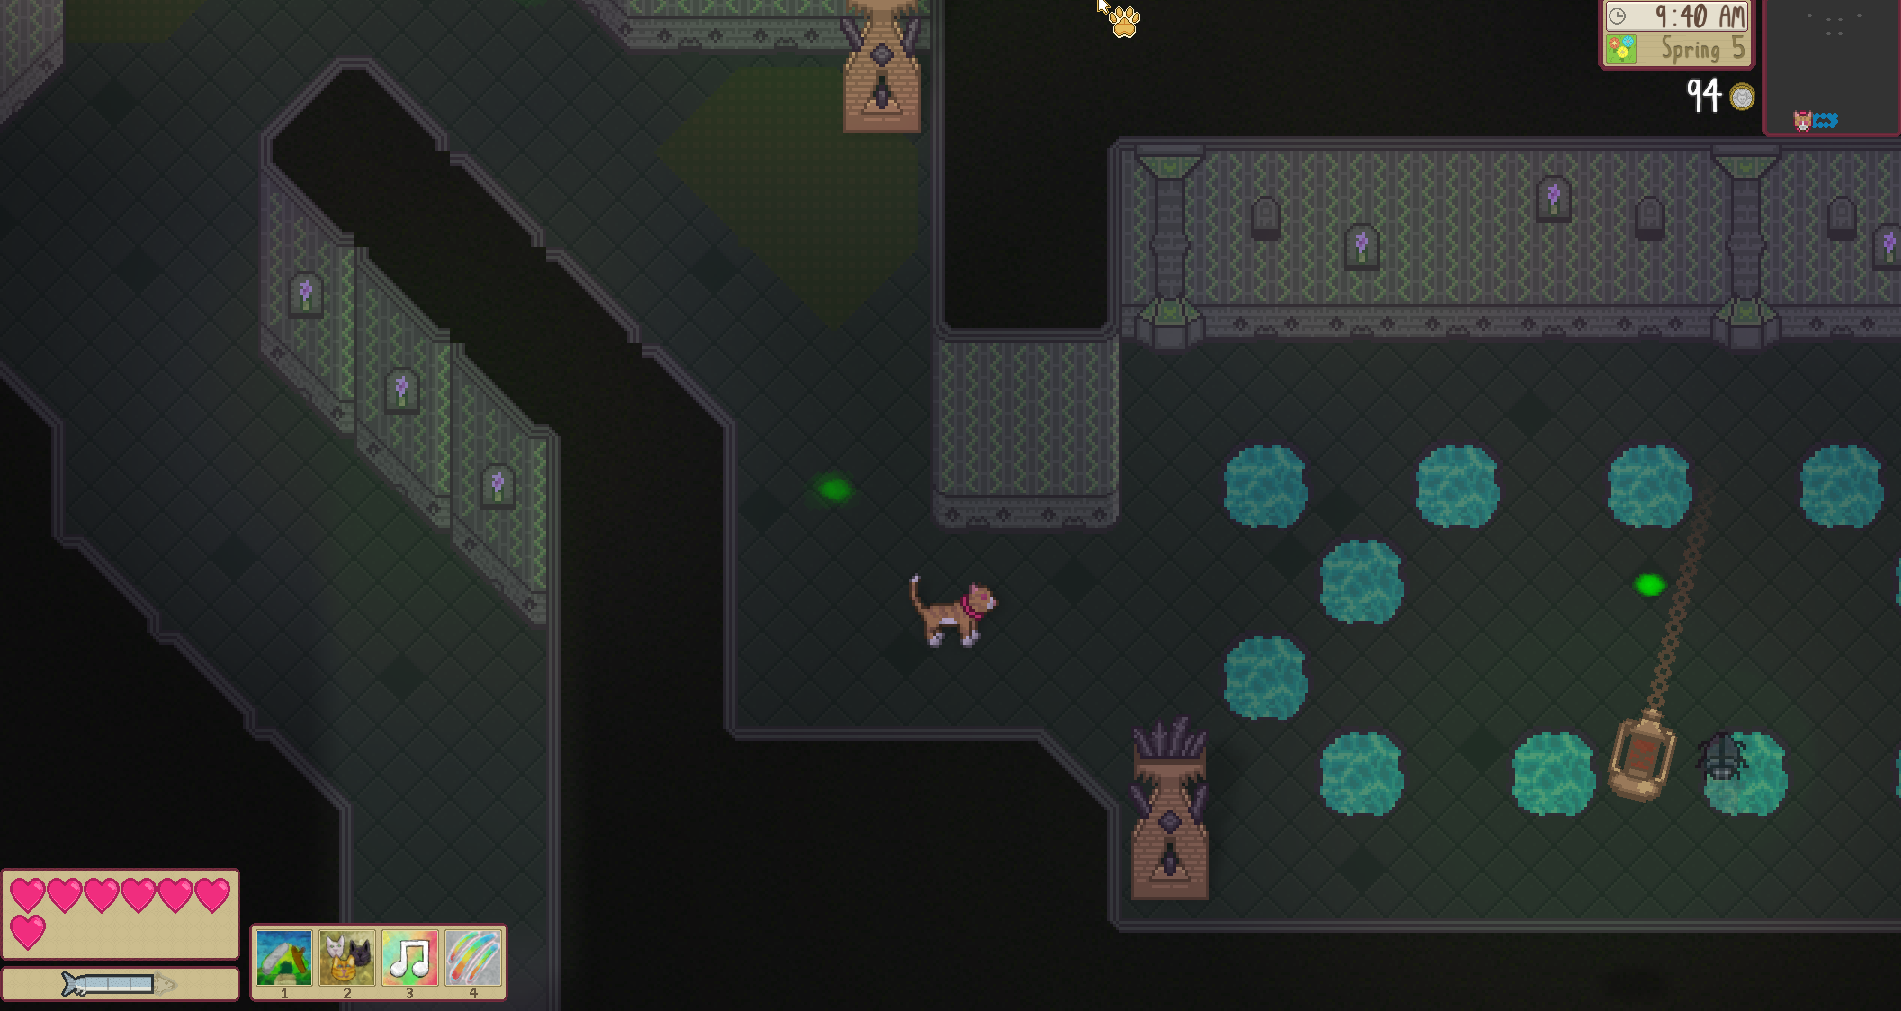
East Ruin
East Forest
Right when you enter, you’ll encounter a group of bats that you’ll need to battle before reaching the puzzle segment.
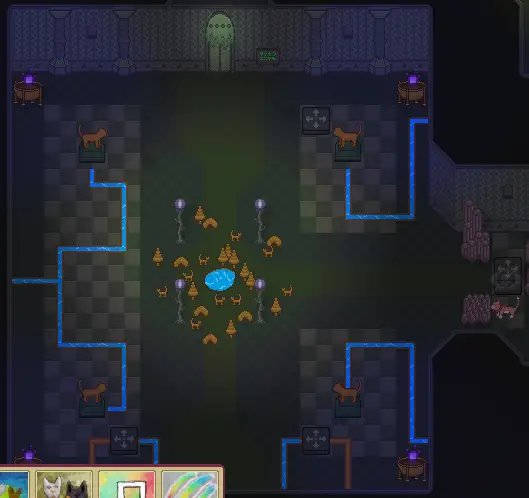
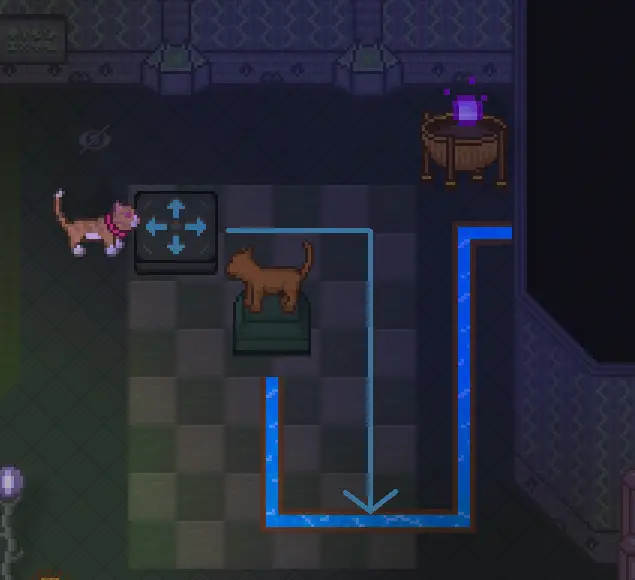
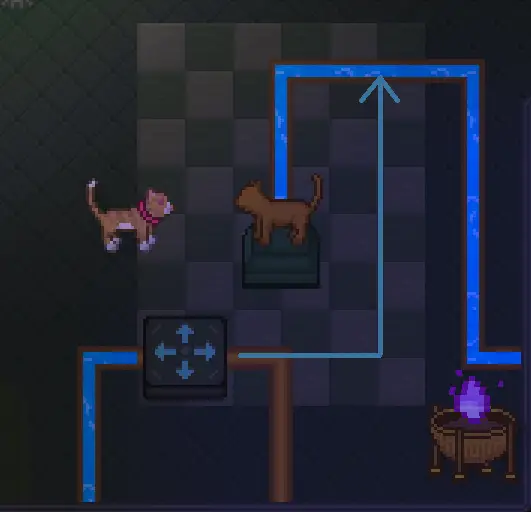
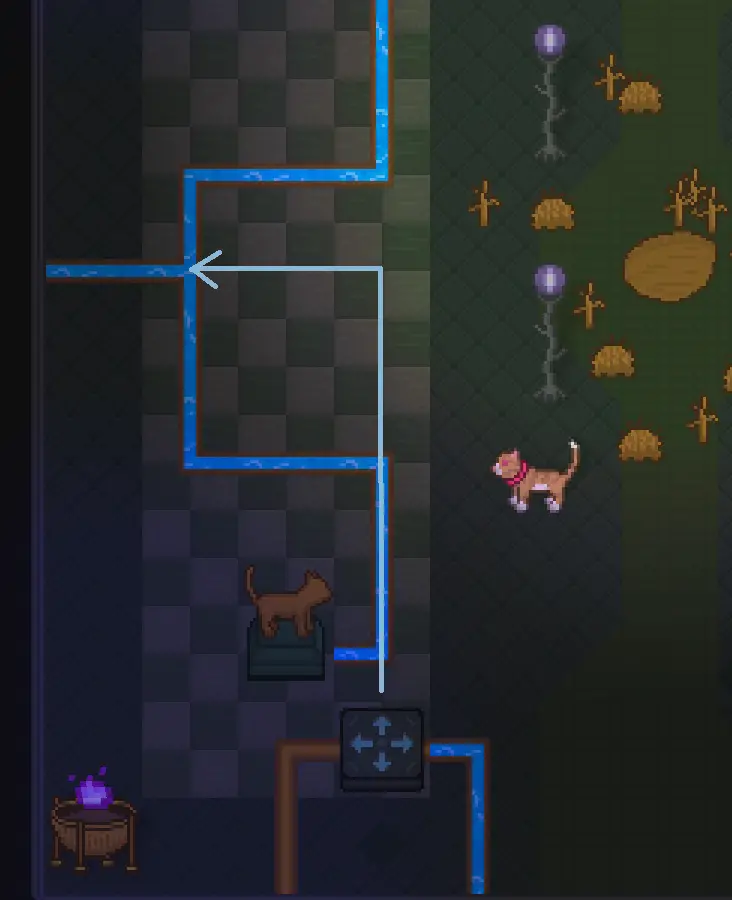
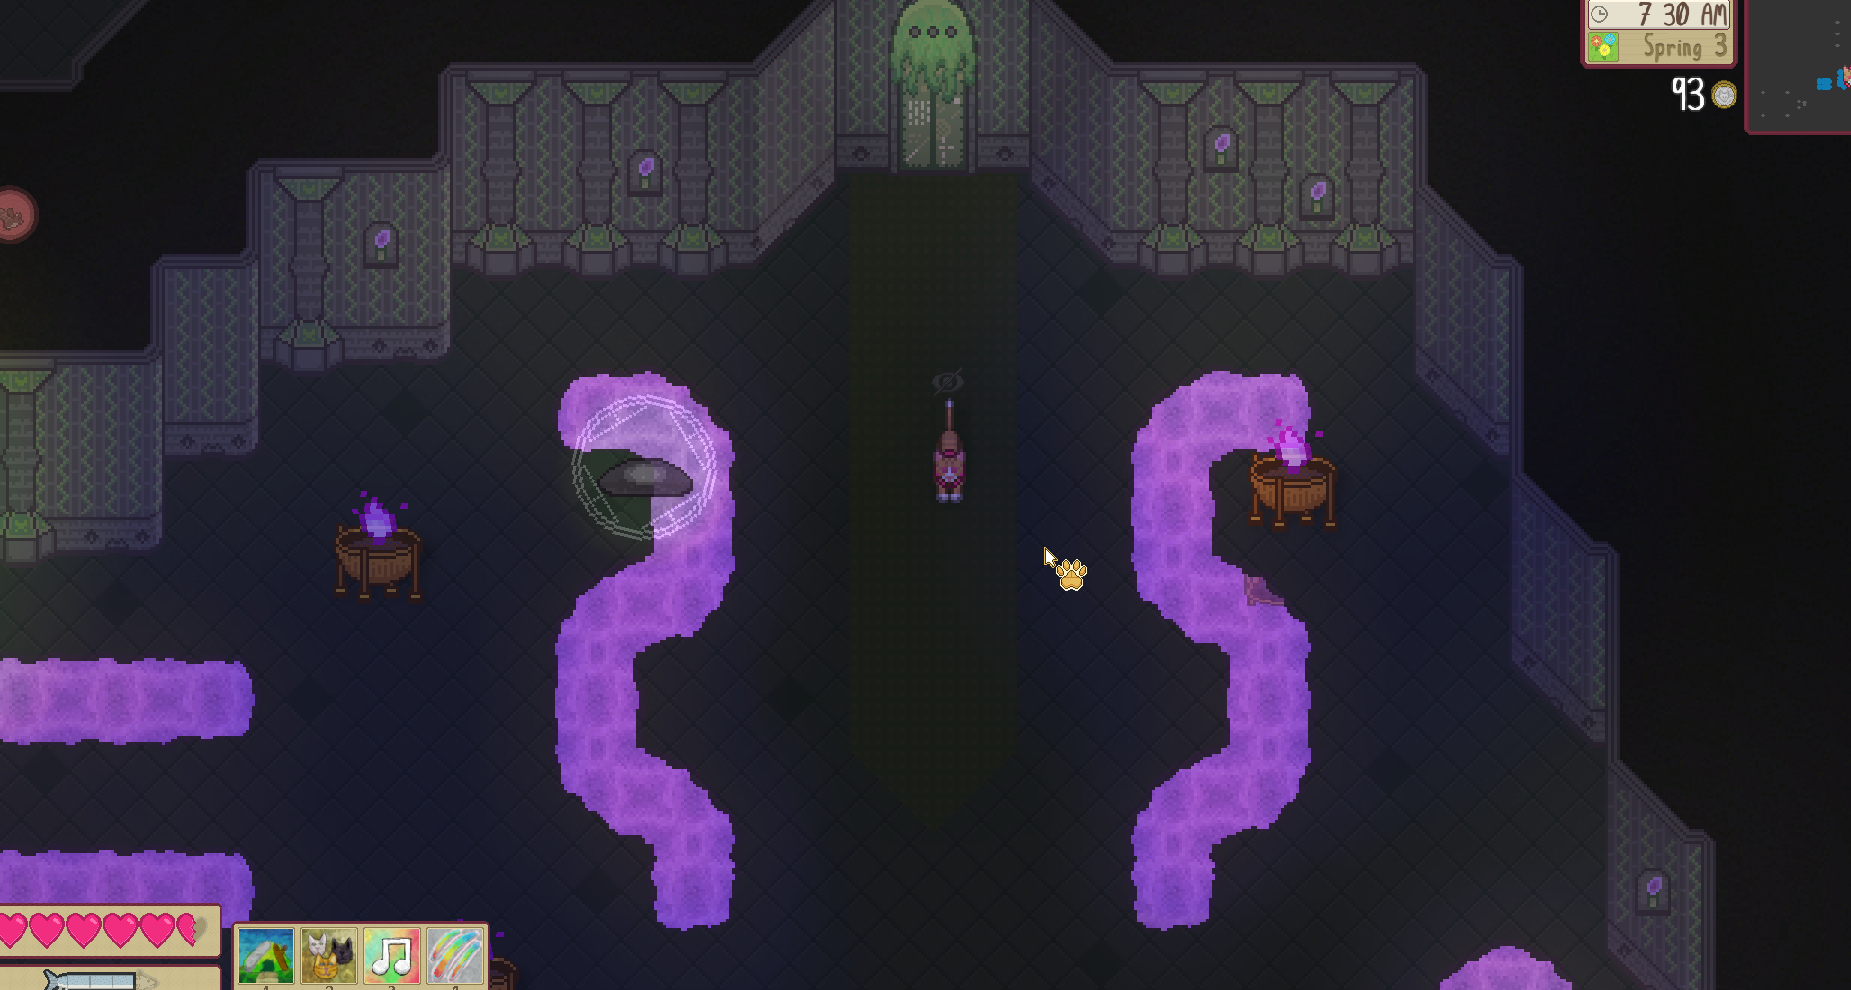
To access the puzzle, attack the block, and a short scene will unfold. Your objective for this puzzle is to use the blocks to obstruct all the flowing water.
Daarna, you’ll enter a room where you must engage in battles against slimes. There are three rounds, with the number of slimes growing as you progress. These slimes split into smaller ones when defeated, although they are not overly challenging to conquer. Aanvankelijk, you can remain in one spot and continuously attack. Echter, as they diminish in number, it’s wise to be more cautious with your offensive and defensive actions.
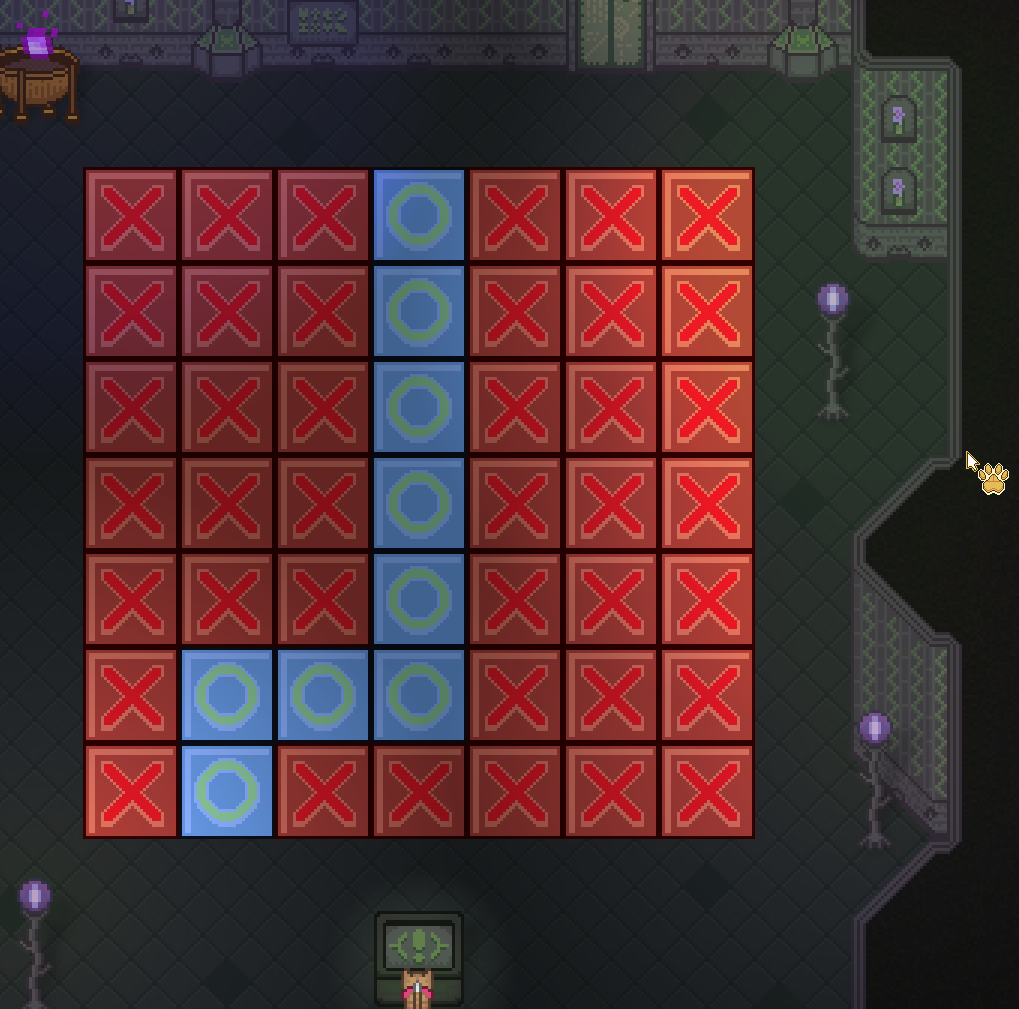
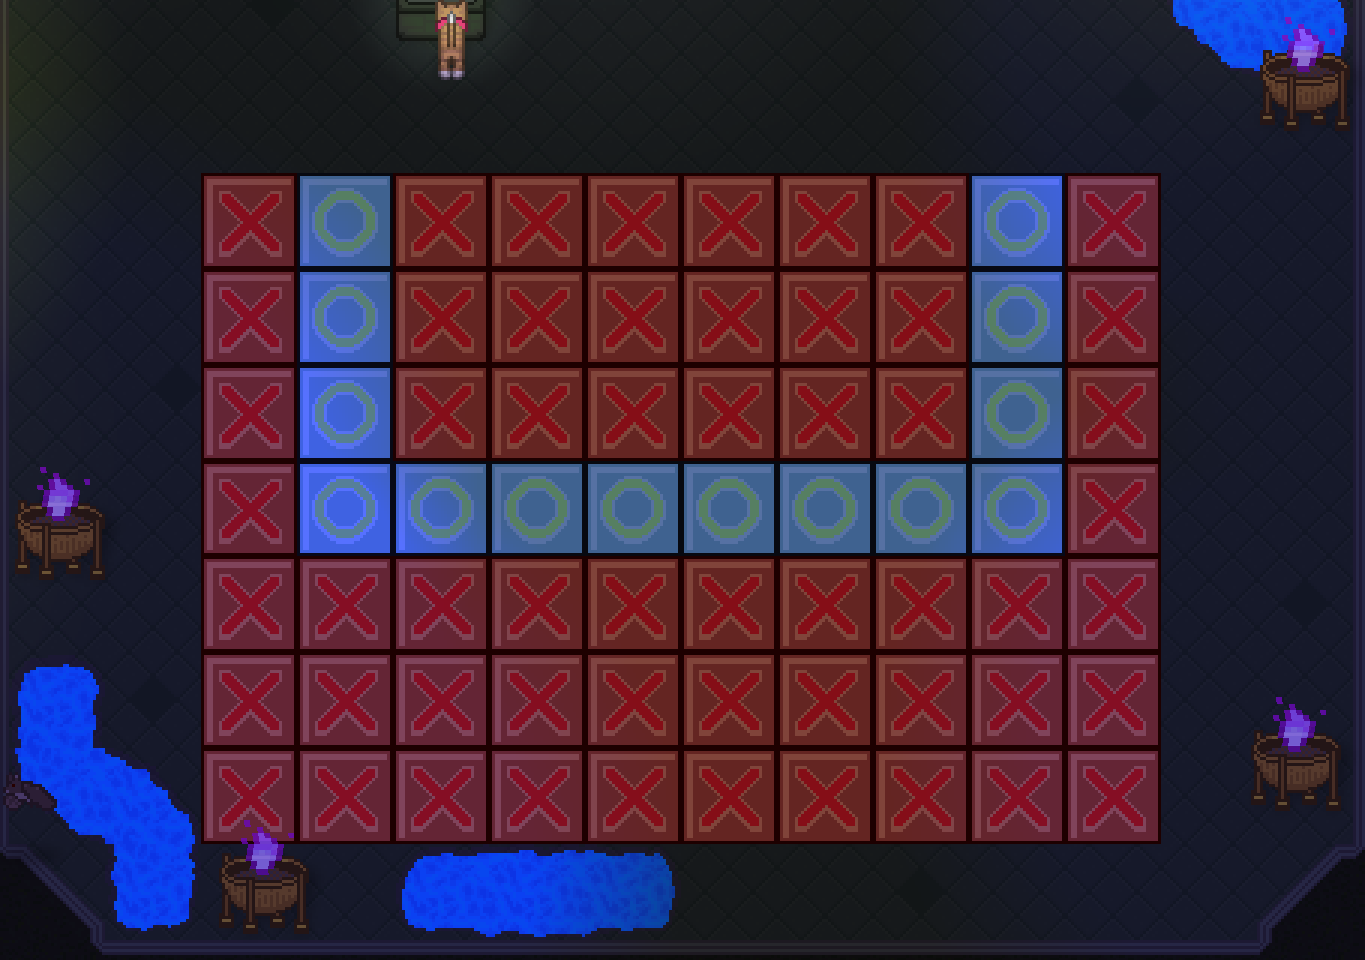
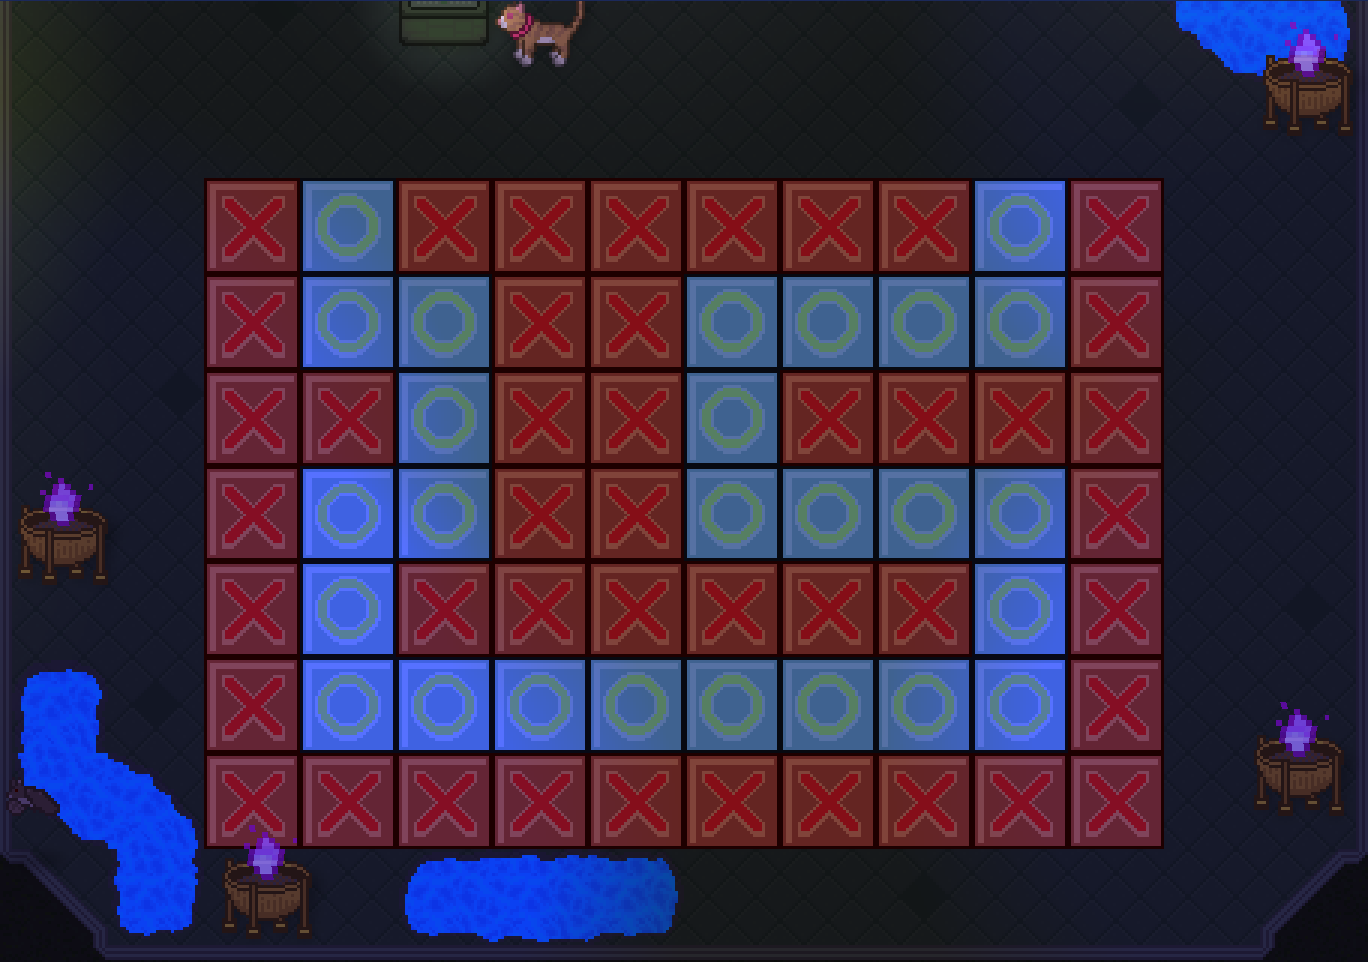
Once you’ve triumphed over all the slimes, the door will unlock, granting you access to a room with blue O’s and red X’s. Your task is to walk on the blue tiles while avoiding the red ones. If you make a mistake, you can return to the green exclamation-marked block and interact with it to reset the puzzle.
1.
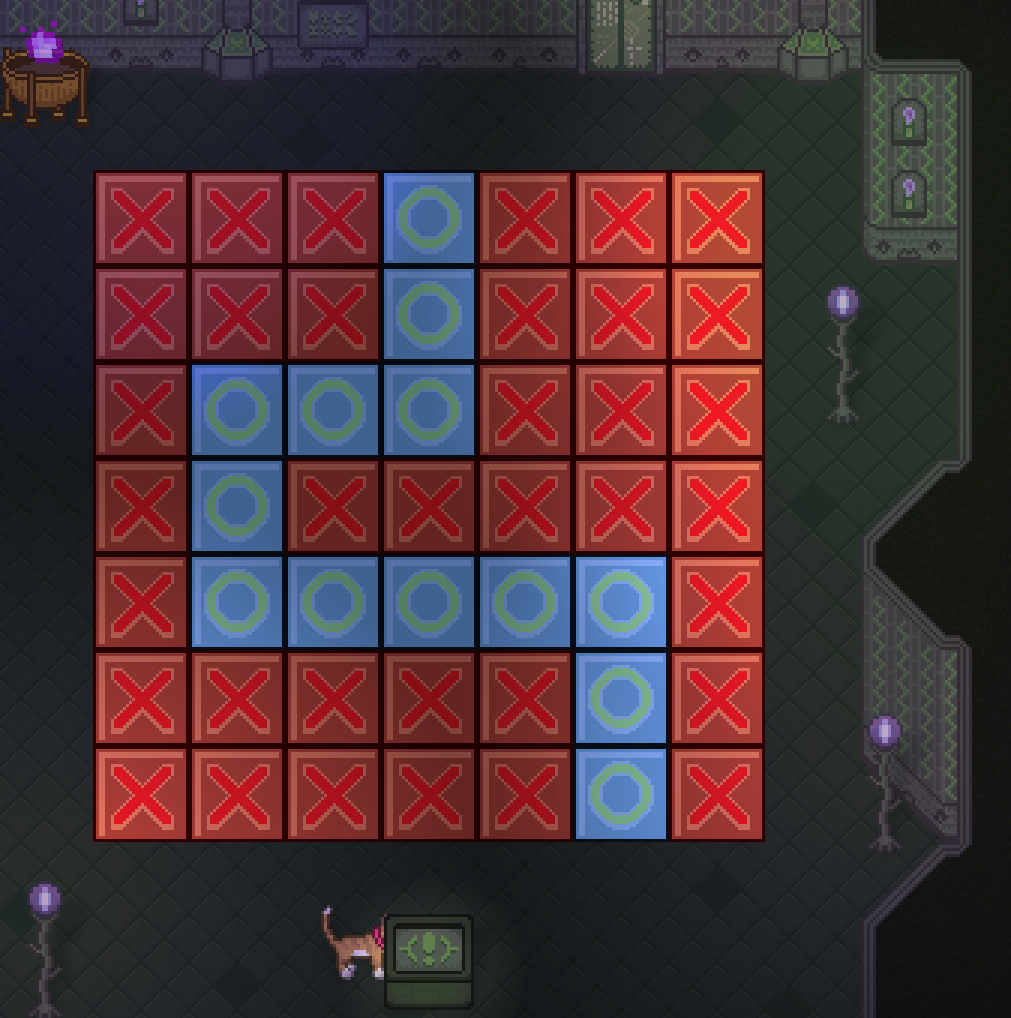
2.
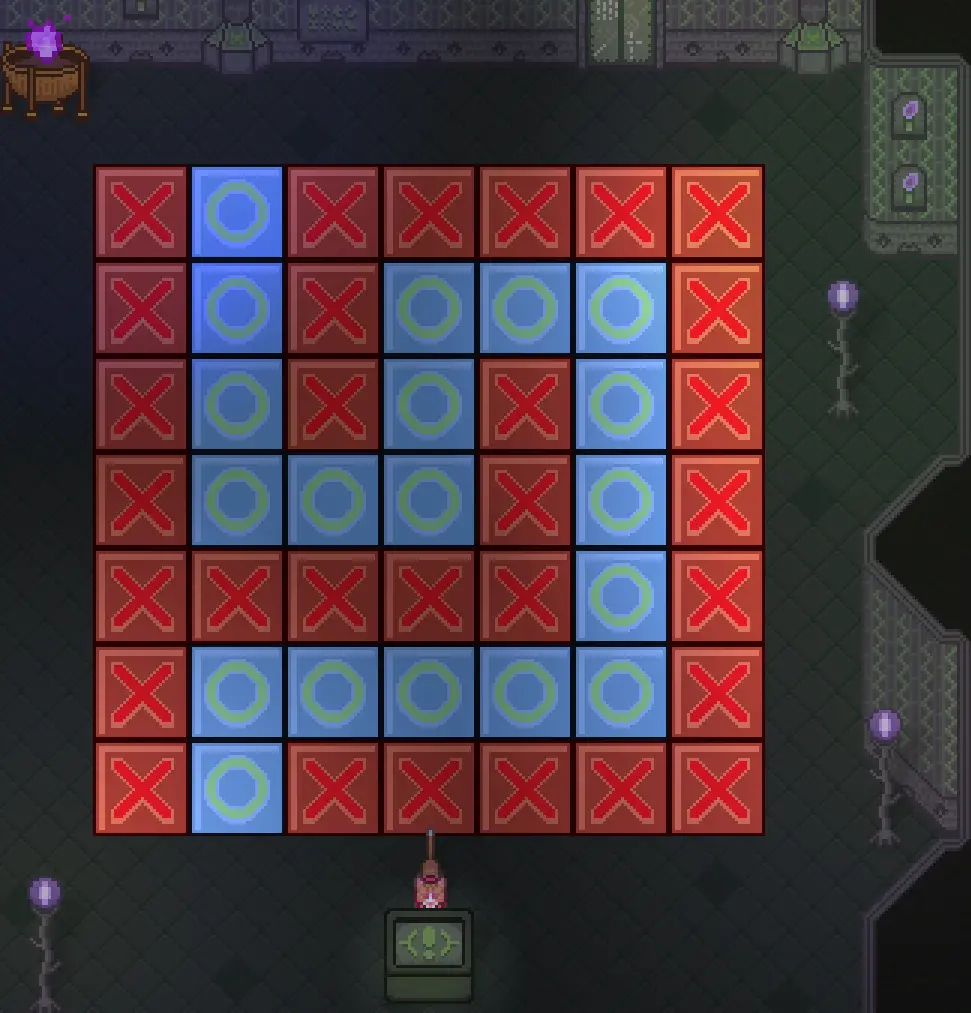
3.
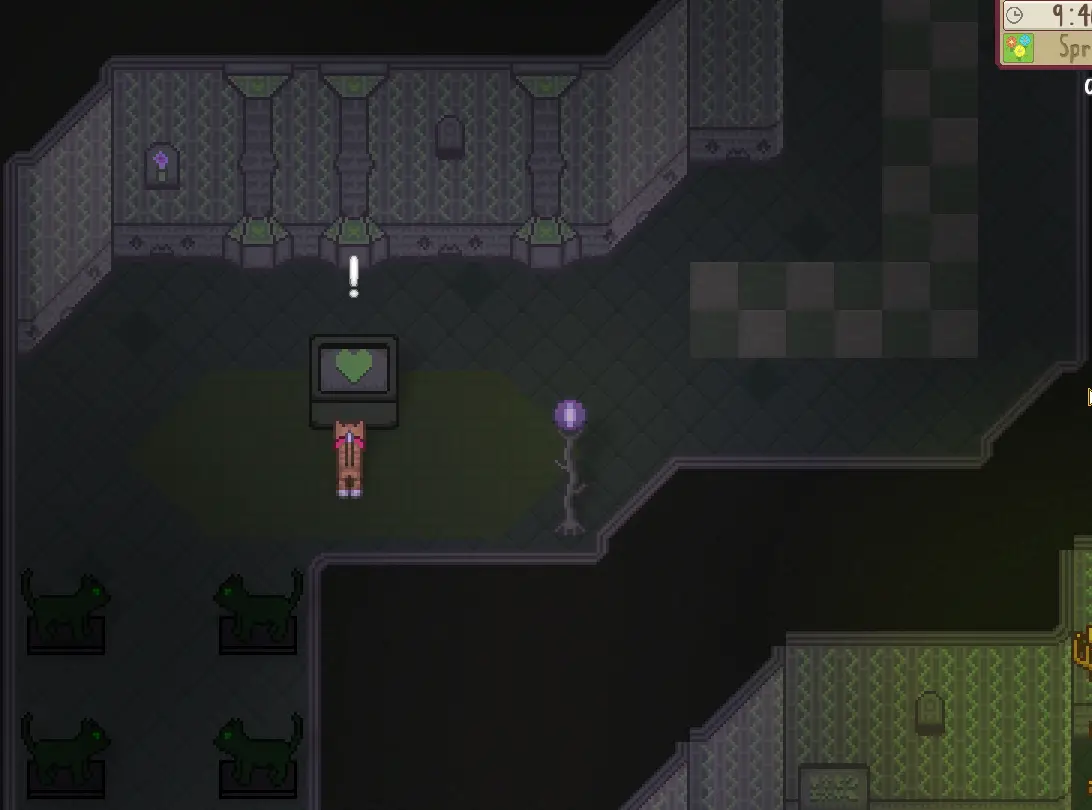
As you advance, you’ll encounter another bat in the corridor before reaching a block with a heart symbol. Interact with it to restore your health. It’s worth noting that there’s another bat just past the block. If your health is sufficient, deal with the bat first, then heal in case you sustain any damage during the fight. Keep in mind that you can only use the healing block once.

Eindelijk, you’ll arrive at the boss room (the boss may differ depending on your settings). Ensure you avoid the cobwebs that the boss throws at you and focus on attacking the cobwebs on the floor connecting to the boss. Once the path is clear, you can assail the boss until it covers itself in cobwebs again, and you’ll need to repeat the process. Voorzichtig zijn, as the number of cobwebs flying at you will increase!
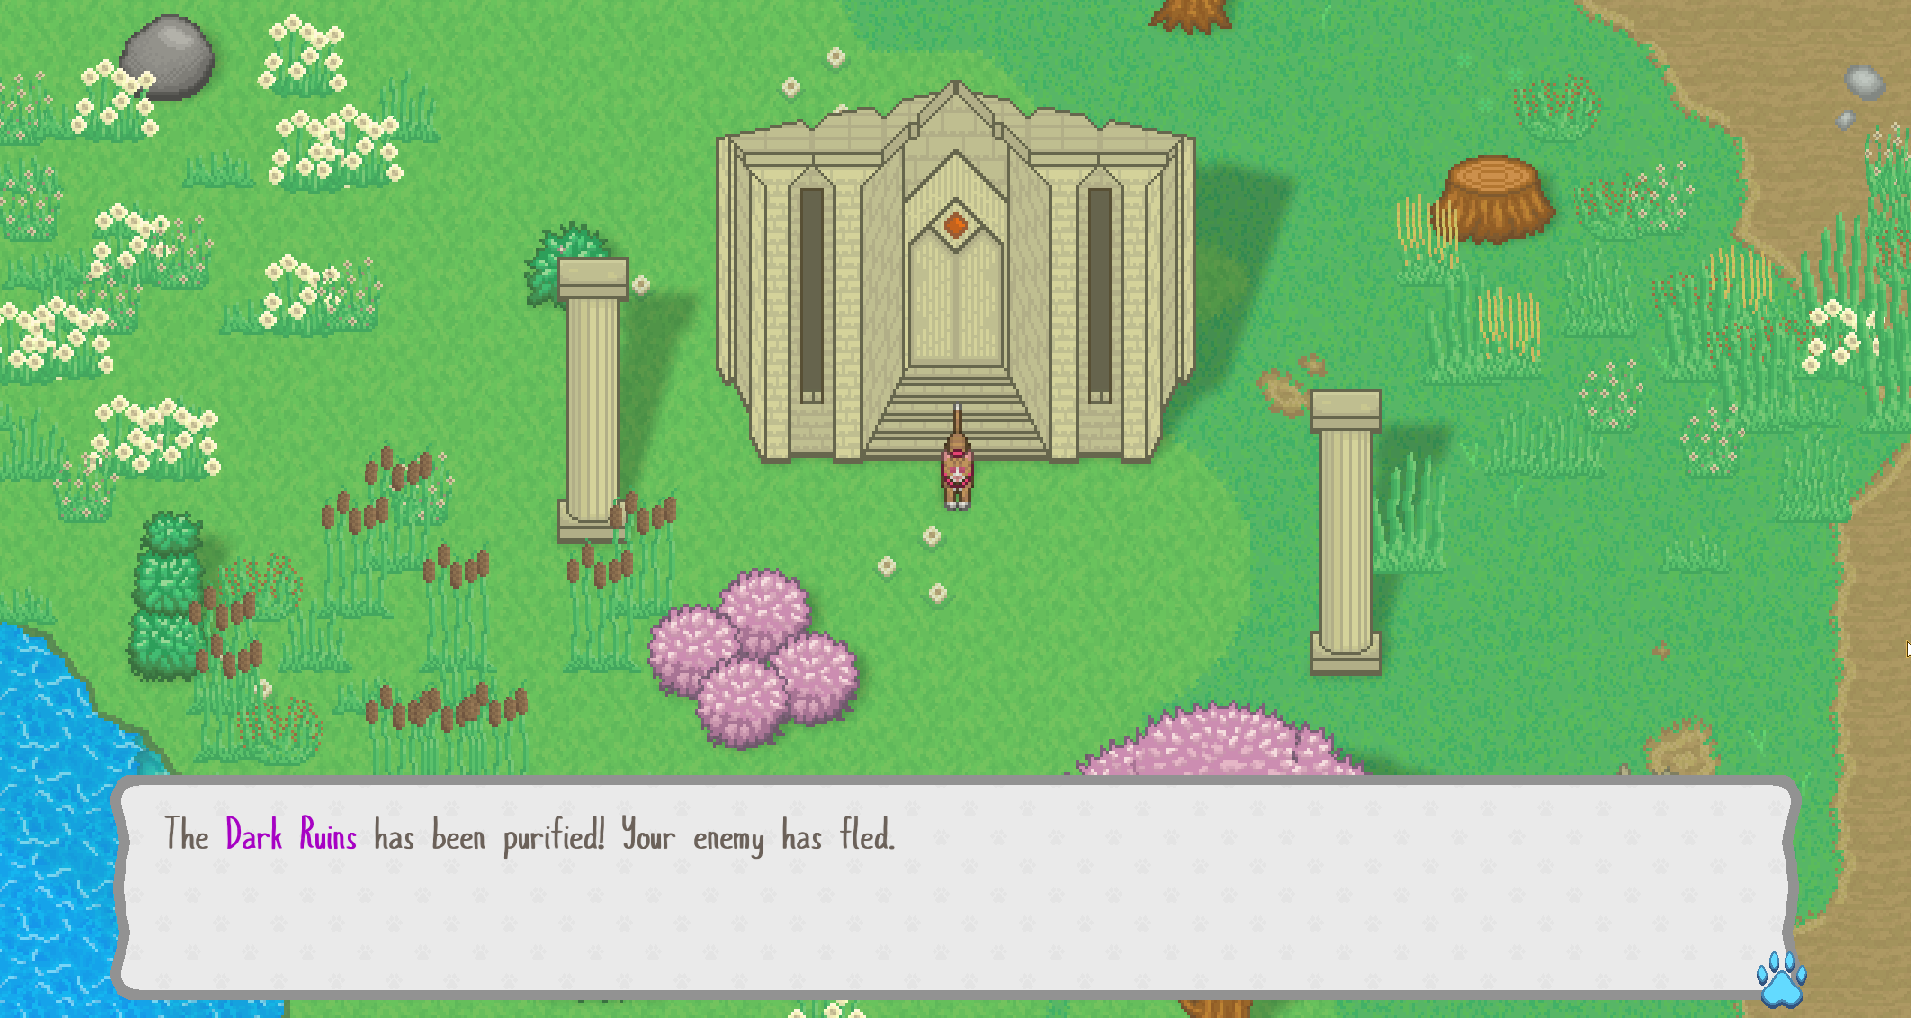
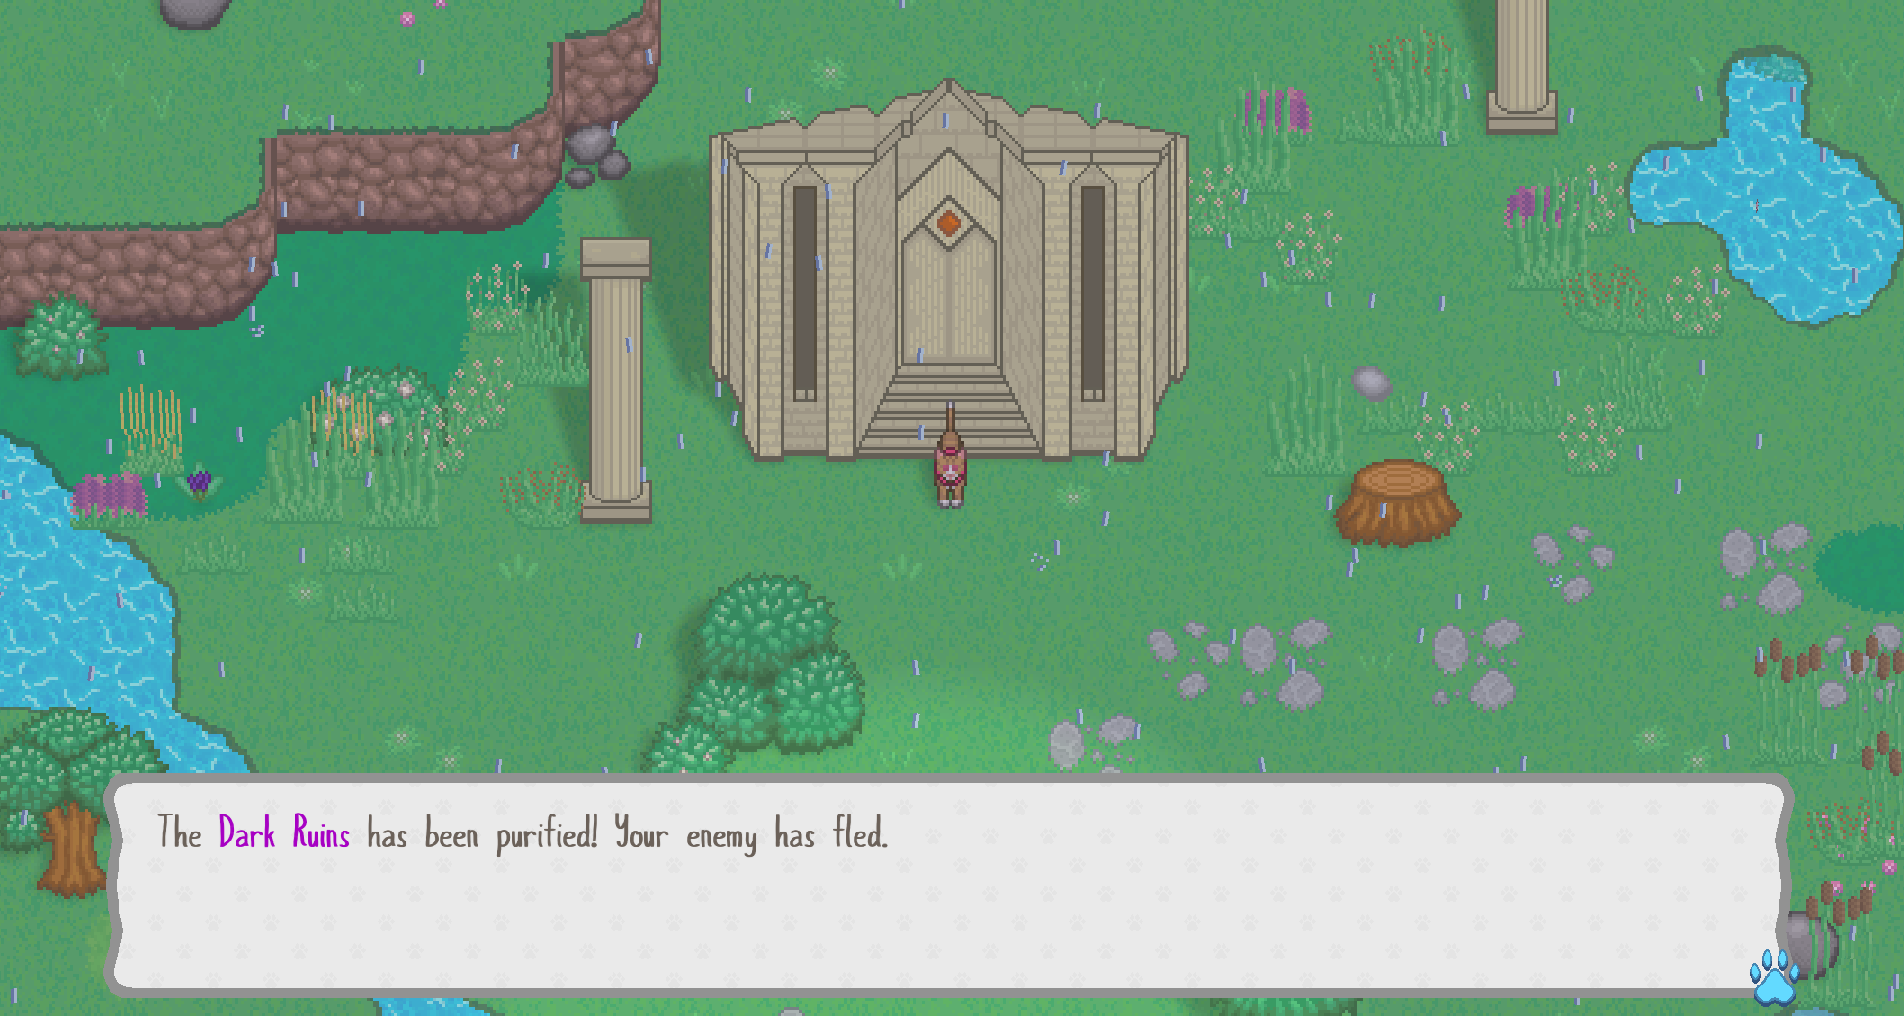
When you’ve depleted the boss’s health bar, you’ve successfully completed the ruin! Gefeliciteerd! Daarna, don’t forget to visit the temple to update everyone on your progress.
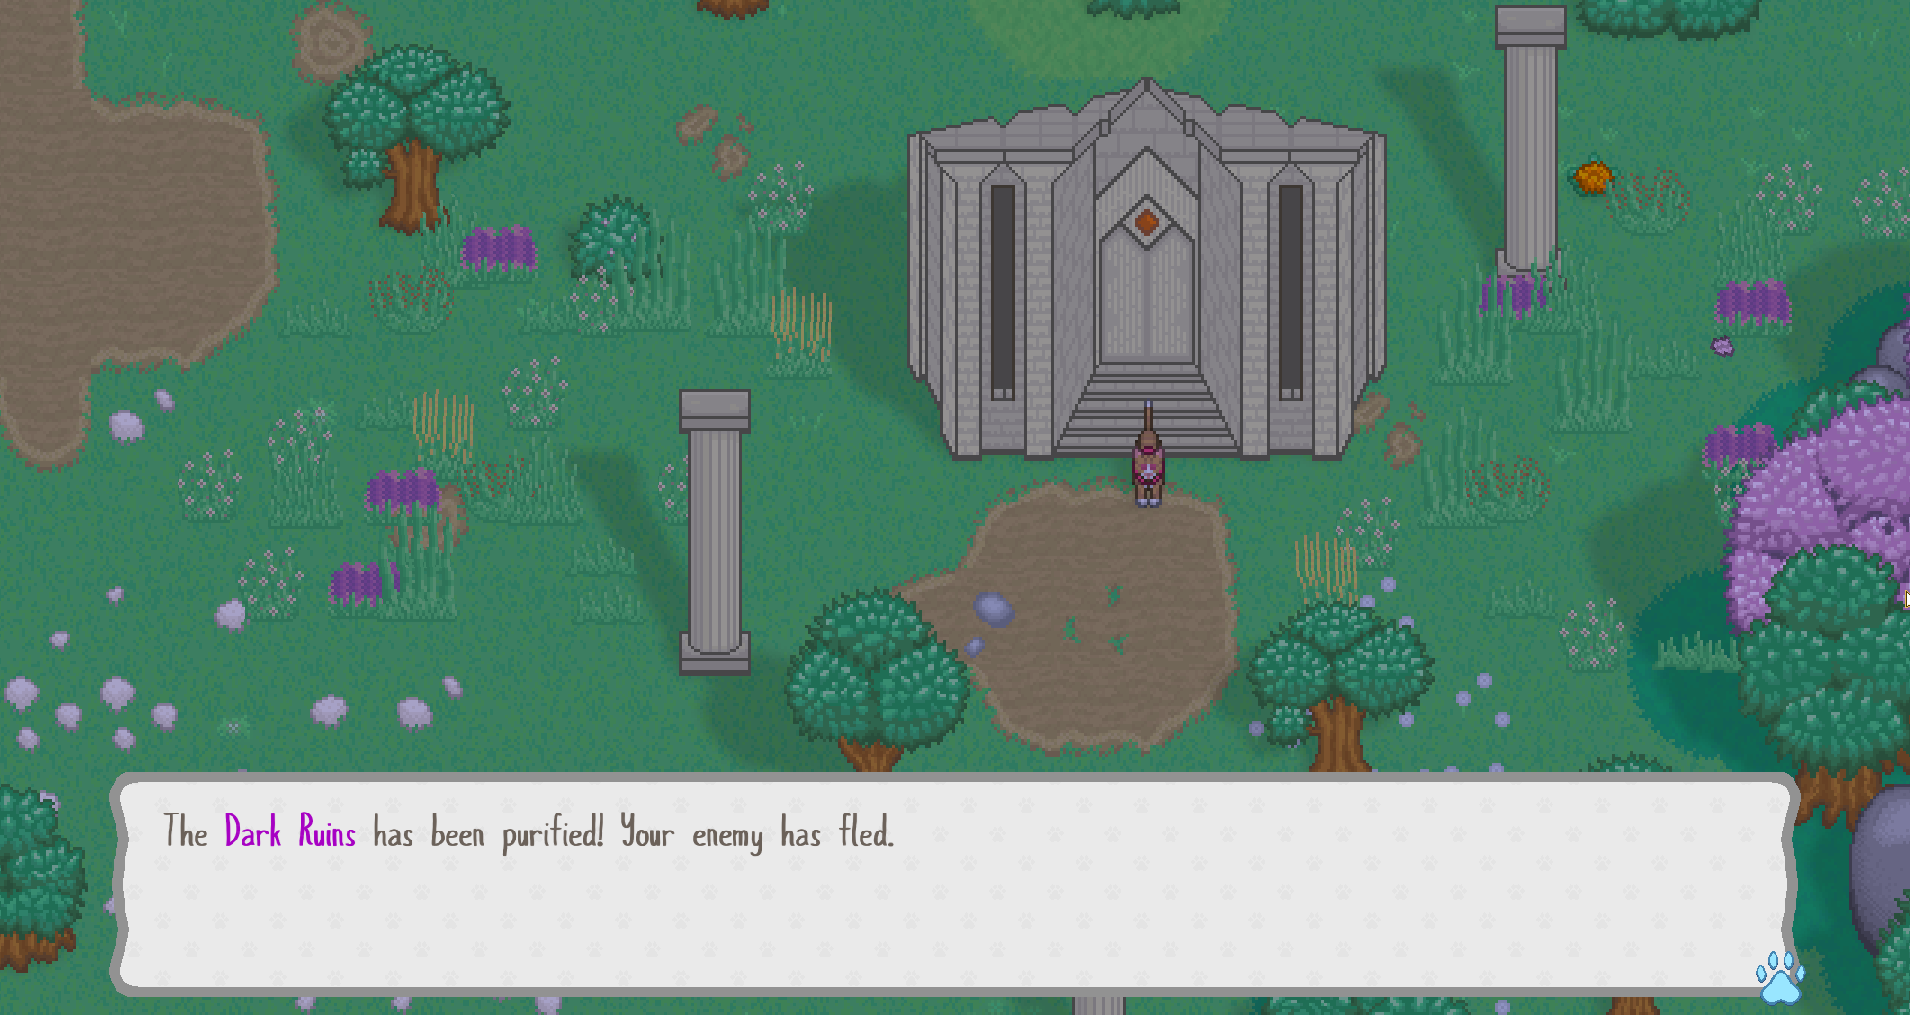
South Ruin
South Glade
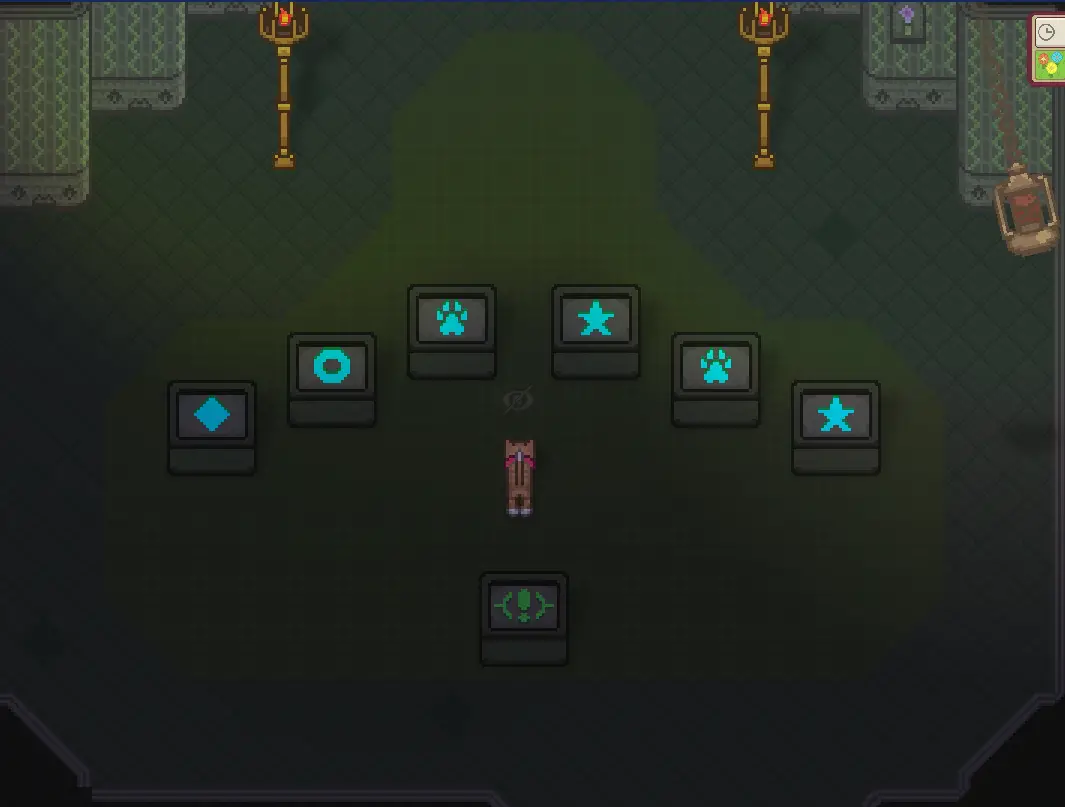
Upon entering this ruin, you’ll encounter another bat and a puzzle room:
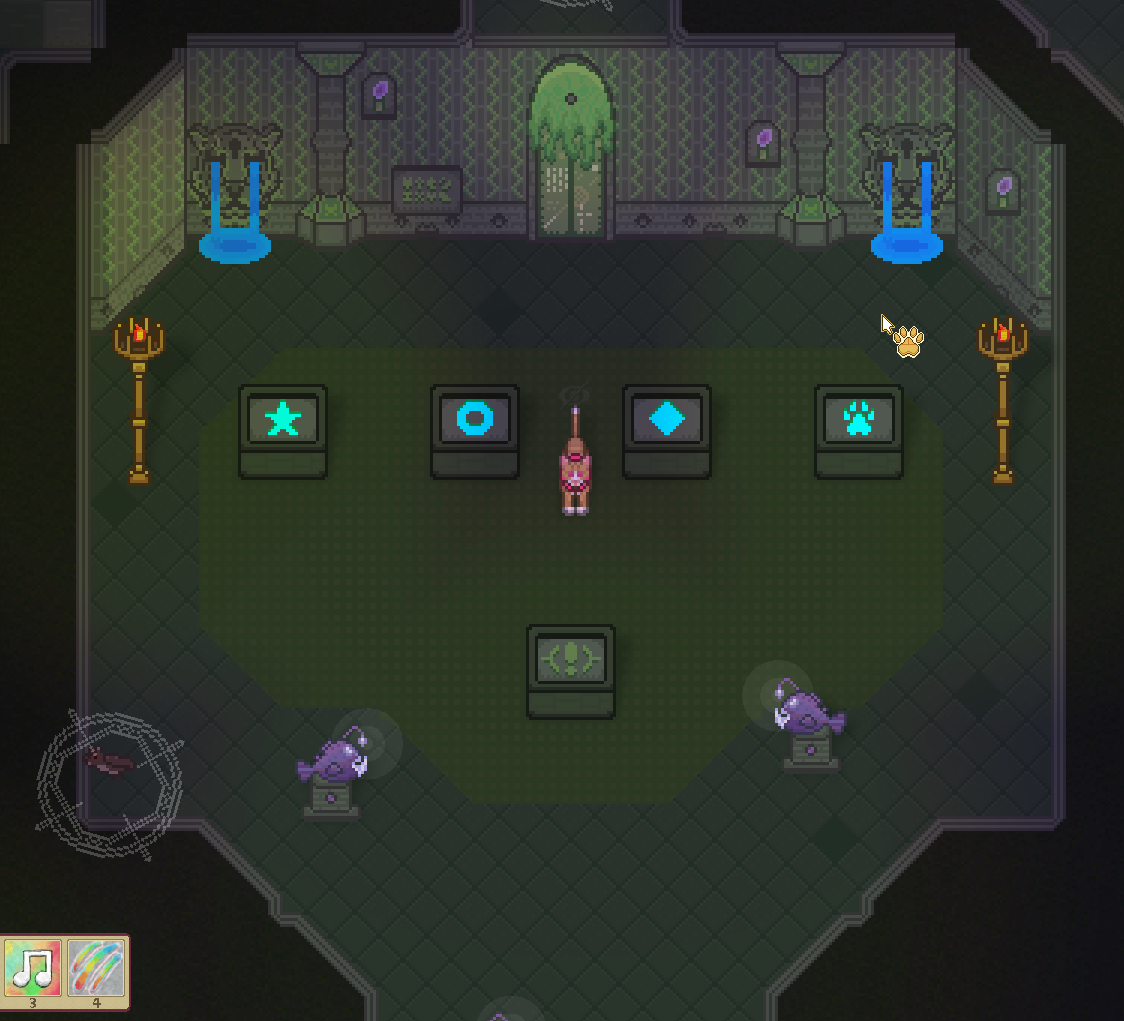
Interacting with the exclamation mark block provides the following clues:
- The Circle cannot be adjacent to the Diamond.
- The Paw extends toward the Diamond but can’t reach it.
- The Star comes before the Circle.
- The Paw is neither at the beginning nor the end.
Hier is de oplossing:
In the hallway, you’ll encounter yet another bat, followed by another puzzle where you must step on specific tiles. Here are the indicated pathways:
1.
2.
3.

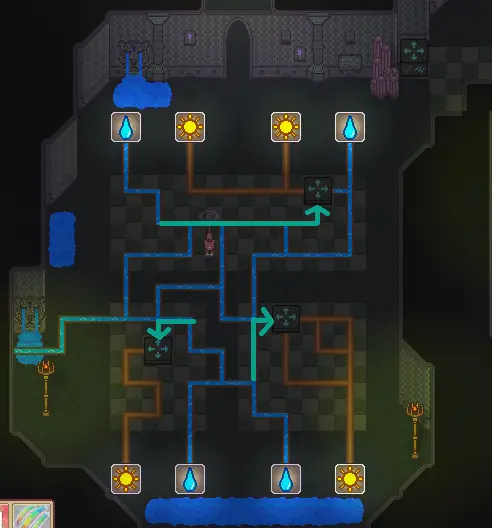
In another hallway, you’ll face more bats, and subsequently, another puzzle! Your objective here is to ensure the suns don’t receive any water, while the raindrops receive water by maneuvering the blocks in a specific manner.
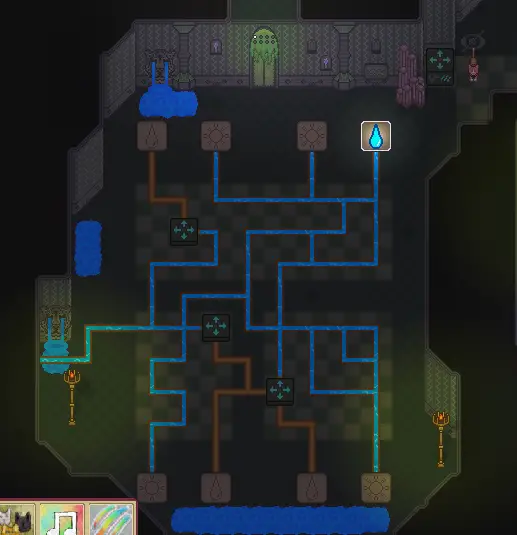
Here’s the solution:
Nu, it’s time for another boss confrontation! Be sure to interact with the heart block to replenish your health. During the battle, evade the boss’s tentacles and the airborne raindrops, then focus your attacks on it when it retracts its tentacles and moves to a floating platform.
Once you’ve depleted its HP, you’ve successfully completed this part of the journey! Goed gedaan! Don’t overlook the temple; make your way there to update your progress.
West Ruin
West Woodland
Bij binnenkomst, you won’t encounter any bats this time. Echter, the next room presents a higher level of challenge compared to the previous ruins. Hier, you’ll face bugs that, after being struck, raise a shield for a brief period before they can be hit again. To make matters more complex, if you get hit, you’ll be poisoned, so I highly recommend bringing some marigold for this journey. There are three rounds, with the number of bugs increasing in each round. Remember to charge up your attacks when possible! Aanvullend, be cautious to avoid the poisonous gas scattered around this ruin.
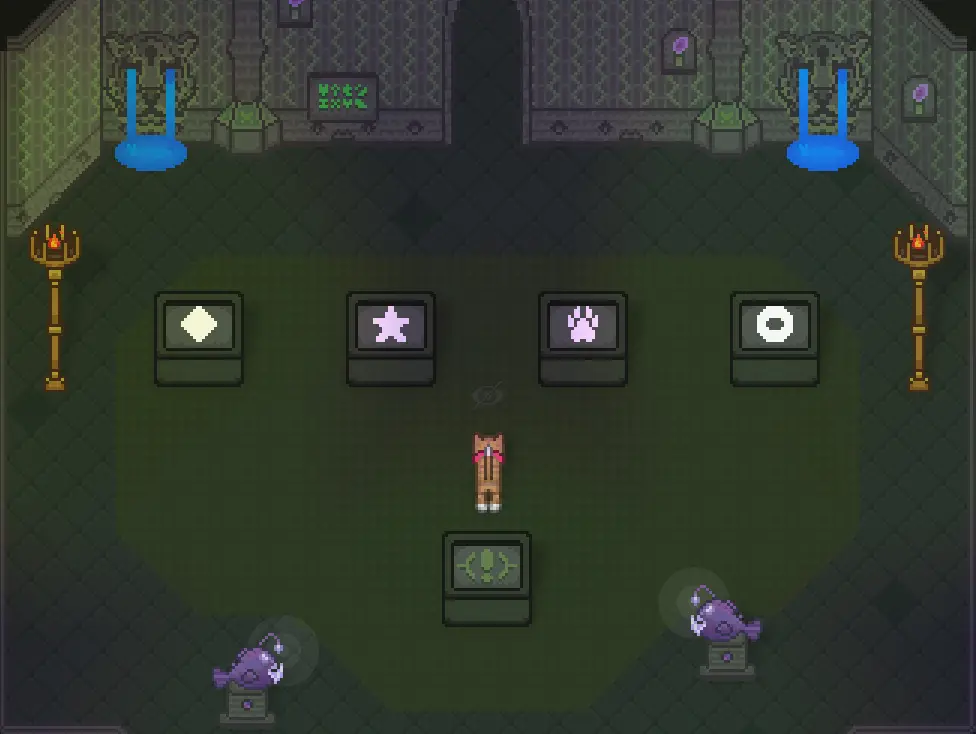
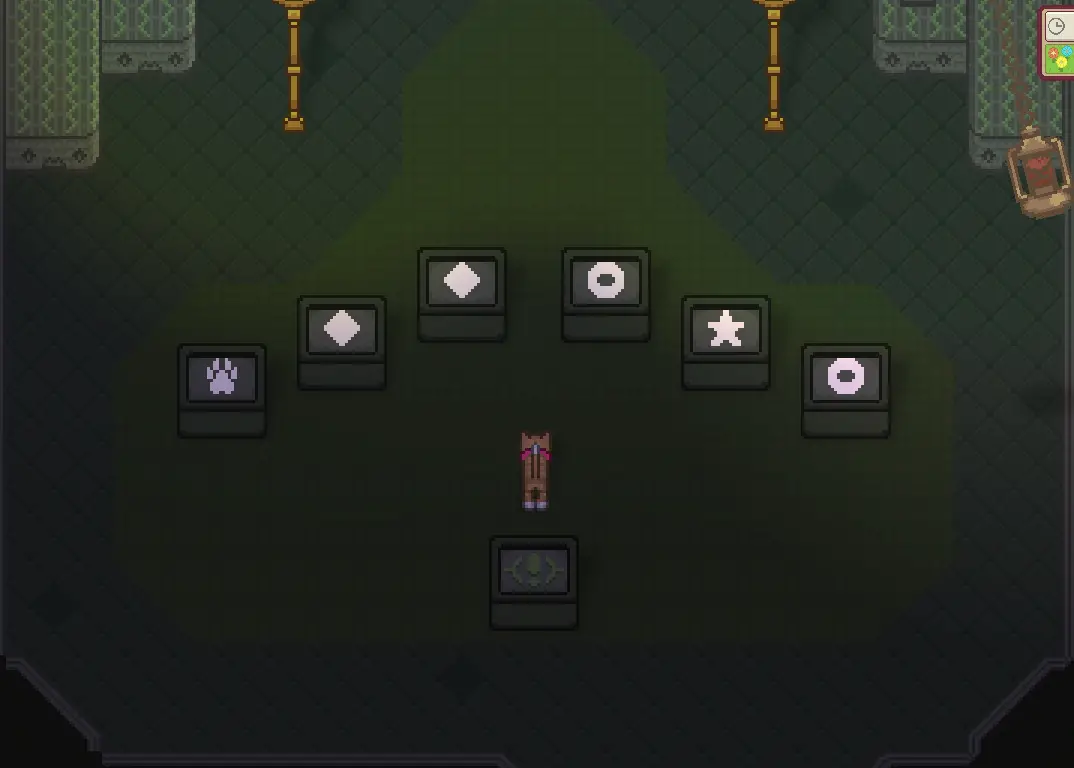
In the following room, you’ll encounter another puzzle where you need to determine the placement of each symbol:
Interacting with the exclamation mark block provides these clues:
- Every Circle must be adjacent to a Star.
- No Diamond can be positioned to the right of any Circle.
- The number of Diamonds is twice the number of Stars.
- A Paw is in the leftmost position.
- There is only one Star and one Paw.
Here’s the solution:
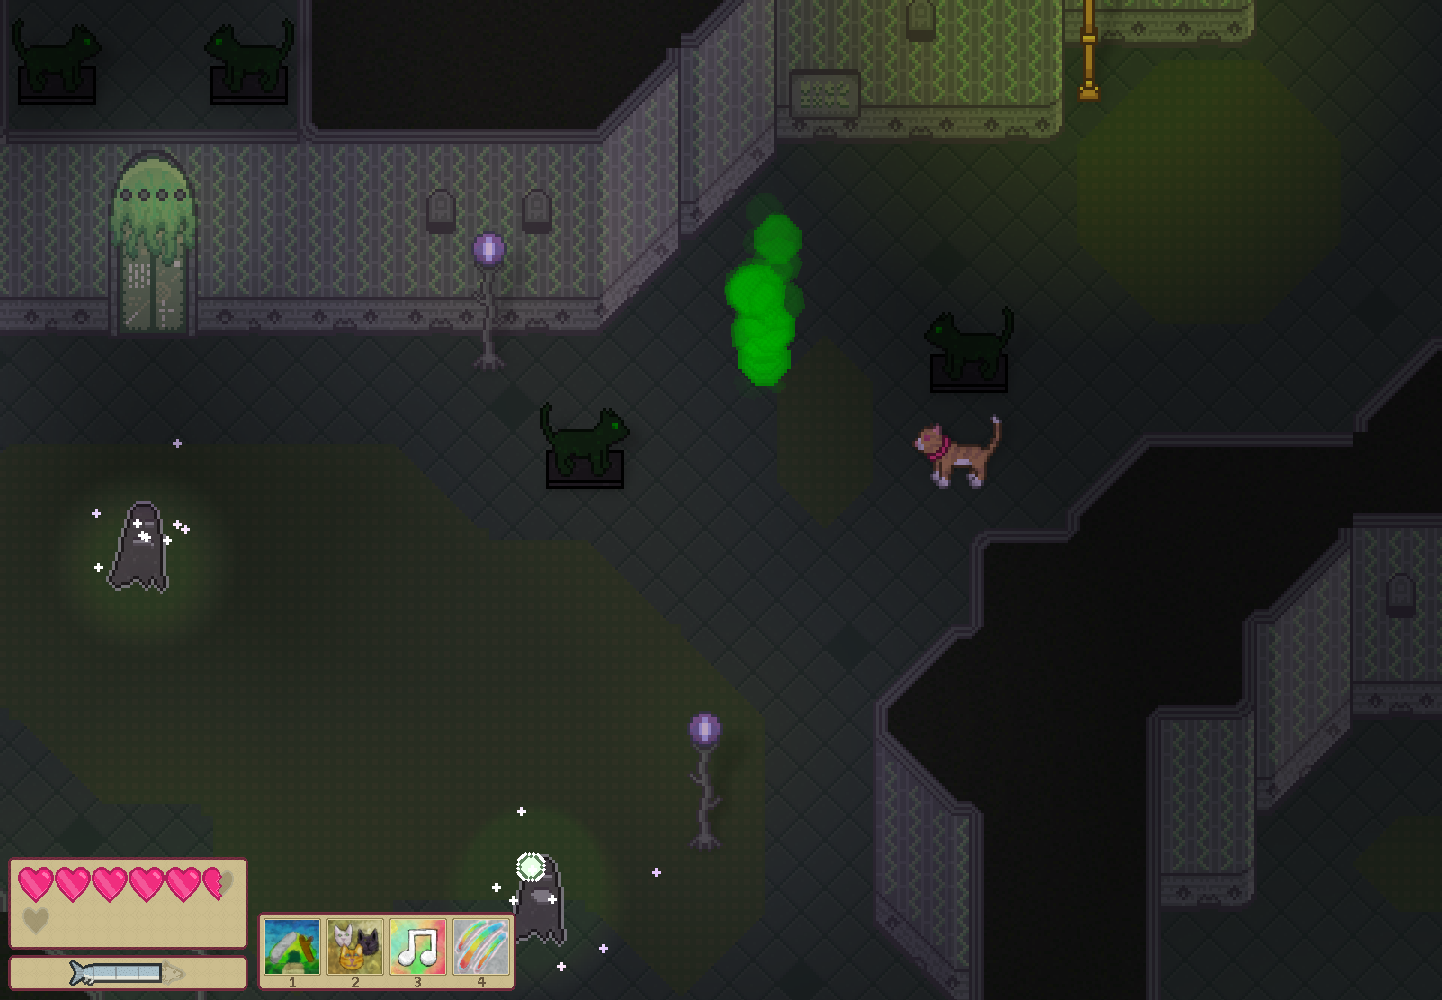
Vervolgens, after passing through the hallway, you’ll encounter another combat room where you must vanquish ghosts. These apparitions shoot projectiles and teleport to a nearby location after a few hits, with their projectiles resetting upon teleportation. There are four rounds, with the number of ghosts increasing in each round. The purple torches can be used to block the incoming projectiles!
En tot slot, it’s time for the boss battle! Ensure you’ve healed up beforehand.
To summon the boss to the center, strike the three bats. Once it’s in the center, you can commence your attack. Beware of the projectiles in the vicinity and take precautions to evade them! The bats themselves can fire their own projectiles and create a circle of harm around them, which should be avoided. They will emit a glow before deploying this attack, signaling when you should step back.
Once you’ve depleted the boss’s HP, Je bent klaar! Fantastic job! Don’t forget to return to the temple to update everyone on your progress once more.
North Ruin
We are still working on this section. Updates will be added as soon as possible.
Dat is alles wat we vandaag hiervoor delen Cattails: Wildwood Story gids. Deze handleiding is oorspronkelijk gemaakt en geschreven door puddie. Voor het geval we er niet in slagen deze handleiding bij te werken, U kunt de laatste update vinden door dit te volgen link.
Please do the north one now