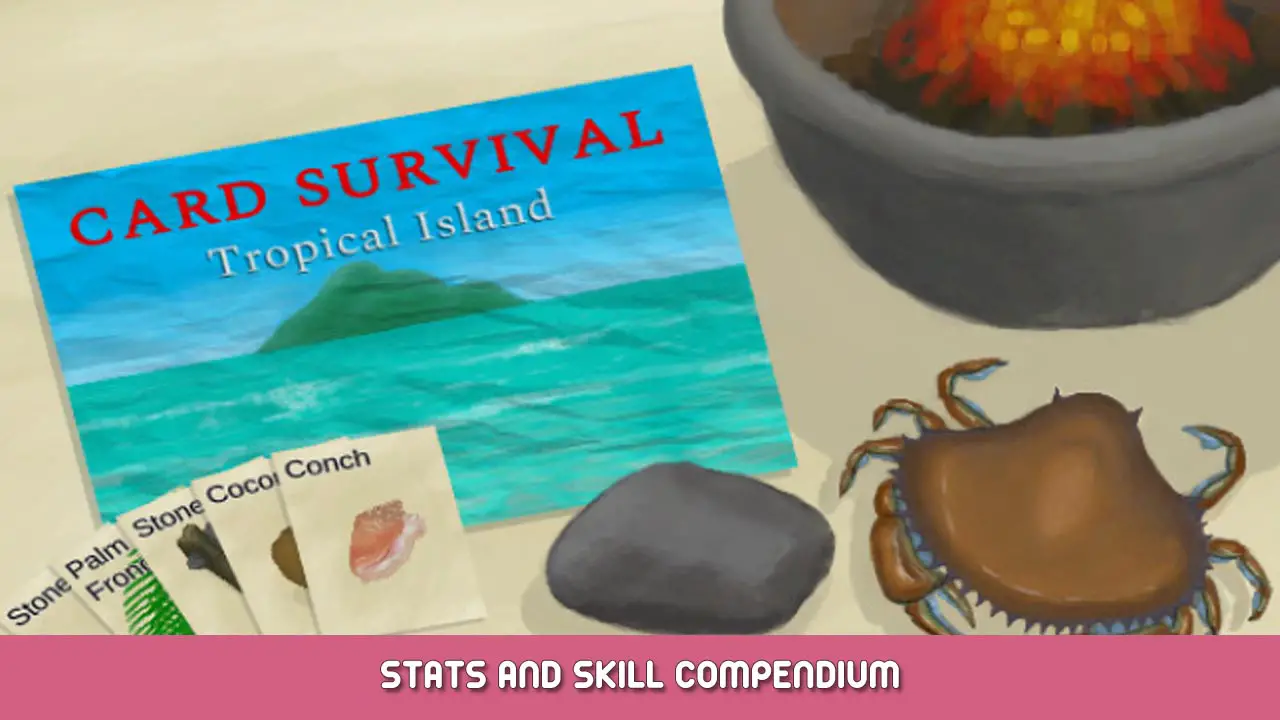
- Titel: Card Survival: Tropical Island
- Releasedatum:
- Ontwikkelaar:
- Uitgever:
Information about Card Survival: Tropical Island is still incomplete. Help ons alstublieft de details van het spel hiermee in te vullen contactformulier.
This guide will explain all the stats the game has.
What they do, how they interact with each other and how to modify them in attempt to raise your chances to survive.
Invoering
This guide will attempt to explain every stat that can be found in Card Survival – Tropical Island, how they can be modified by the survivor and how they interact between them.
To quickly find a specific stat, you can use search typing “-” Eerst, example “-temperatuur” to find the exact part of the guide you are looking for.
Each stat will have a brief explanation of what the stat is, a few tips, what the stats impacts and a table that explains how it naturally increases/decreases every game turn, A 15 minutes interval, and actions that can be performed to modify the stat right away or over time.
As the game does not provide numeric values, the guide will provide approximations or estimation in a percentage of the bar when needed.

The game does contain information about each stat by clicking on the bards on the bottom-left corner of the screen.
The stats will be displayed in the same order as the in-game stats menu, clicking this icon found on the top-left corner of any stat or in the Character screen found by clicking the equipment menu.
Stats will be divided in sections as primary or secondary, because of steam limits and not necessarily by the severity or importance of the stat.
As the game is very complex and has many cards / actions, it is possible certain actions or interactions are missing.
If you find an error, please comment.
Mental stats – Primair
Represents the overall survivor mood.
This stat also directly impacts the survivor immune system, making it easier, of niet, to combat diseases.
Bij 0%, increases Derealization stat and
actions will take extra time so it is important to at least try to have bar somewhat filled.
Boven 0%, lowers Derealization stat
Between 10% naar 25%, Feeling Down: Lowers Immune System, Appetite stats, while raising Morale stat.
Between 25% naar 50%, Geen: Impacts nothing
- Spending time in a comfortable area
- Wearing Necklaces
- Wearing a Hawaiian Shirt
- Psylocibin stat
- Morale stat
- China Rose Effect stat
- Optimist perk
- Doing entertainment actions.
- Cleaning an area using a Broom
- Workplace Stat
- Eating cooked or prepared meals
- Eating sweets
- Drinking Alcohol
- Washing oneself
- Playing a Drum
- Fully exploring an area
- Finding certain landmarks like the Wetlands cavern
- Practice Rock Throwing Skill
- Pain stat
- Blood Lost stat
- Mourning stat
- Food Saturation stat
- Cleaning wounds using salt water.
- Failing to hunt animals.
- Losing items by animal raids.
- Getting a spider bite while sleeping.
- Eating Aloe Vera Gel
Stress is not lethal, but will make survival very complicated and is one of the key aspects to manage specially on the first days of any survival attempt.
If the stat is low, Mental structure goes up.
Around 50%, Morale will start go down.
Around 75%, this stat also raises Nausea and Diarrhoea and and lowers Mental Structure.
If the bar is at 100%, an event will randomly occur that takes away 15~30 minutes to relax, reducing stress a bit, but reducing Mental Structure by a significant amount.
- Hunger stat
- Hydration stat
- Wakefulness stat
- Pain stat
- Blood Lost stat
- Entertainment stat is 0
- Caffeine stat
- Discomfort stat
- Getting a spider bite while sleeping
- Comfort stat
- Jasmine stat
- Analgesia stat
- Alcohol stat
- China Rose Effect stat
- Resting 15 Minutes
- Resting 1 Hour
Wakefulness indicates how awake the survivor is. The stat is not lethal, but as this stat has an impact on stress, is always better to avoid being sleepy.
If it falls bellow 75%, Stress will raise.
- Resting 1 Hour
- Taking a Nap
- Sleeping
- Caffeine stat.
- Staying awake.
- Spending time in a dark area.
This stat will determine how fast the hunger bar goes down.
Can be ignored by the player as this stat is not lethal and this just indicates the survivor eating and activity habits. As a rule of thumb, if you have food available and feel hunger, is better to eat.
- Having satiation stat over 50%
- Stamina Stat bar not full.
- Eating even when not feeling hunger.
- Having satiation stat lower than 50%.
- Pain stat.
- Capsaicin stat.
- Fasting.
A silent stat that impacts stress, having an empty bar on this stat will raise stress.
It does not need to be monitored heavily, but knowing it exist can lead to better chances to survive.
Once a table and a chair are available, carving wood is the most efficient way to raise the stat if only time invested and value increased is considered.
If value is 0%, raises Stress.
Over 0%, raises Morale while lowering Loneliness stat.
- Diving in the sea.
- Building a Sand Castle.
- Carving Wood.
- Playing a Drum.
- Talking to the Grandfather.
- This stat always go down.
Mental stats – Secundair
This stat only matters when some risky or painful action needs to be taken, like washing wounds with salt water or stitching a laceration.
- Pain stat
- Analgesia stat
- Alcohol stat
- Derealization stat
- Brave perk
This stat will not matter on the first or second week on the island, but as soon as the Weston blueprint is available, focus to research and craft the blueprint to minimize its negative effects.
This can be dangerous for survivors who does not start around areas with coconuts and perks that help combat this, like the Tourist or any custom character with a Starting Location perk.
An efficient way to keep this stat low, is to carry Weston in the inventory or inside an equipped or unequipped container. Monkeys can also be carried in the shoulders.
Boven 25%, lowers Morale and Mental Structure.
If it gets to high, speeds up the Isolation stat increase. This can be very dangerous!
- Naturally goes up.
- Isolation stat.
- Comfort stat.
- Weston is in the area.
- Macaque friend(S) is in the area.
- Grandfather is in the area.
- Weston Company stat.
- Entertainment stat.
- Loner Perk.
Getting this stat low will lead to mental events that will put a lot of pressure on the survivor, dramatically raising chances to die. Also raises action times if it gets low.
- Mentral Structure stat
- Isolation Stat
- Camp fever stat
- Playing the Drum.
- Psylocibin.
- Naturally foes down.
- Down to Earth perk
Raises morale and Mind State stat.
- Maxed Morale stat
- Naturally goes down
- Down to Earth perk
This stat represents the hope of the survivor to survive in the island.
It can be a useful stat as it lowers Pain Stat, buying some time to the player to find a solution.
If this stat is over 0, raises Altered Mind State stat, gives Courage and lowers Pain.
- Morale is 0
- Down to Earth perk
Represents the mental well being of the survivor, will raise Altered Mind State and Stress stat if it gets too low.
As being in a dark area lowers Mental structure, is better to sleep in an illuminated area to avoid this decrease.
- Stress stat
- Wearing any clothes
- Down to Earth perk
- Relax event by Stress stat.
- Isolation stat
- Analgesia stat
- Caffeine stat
- Licht (Darkess) stat
This stat will not matter on the first 20~30 days of survival, but after this will have a heavy impact on the survivor.
Not needed to be monitored heavily, but the player should know this exist and prevent it as much as possible as this speeds up the Loneliness stat and increases Altered Mind State stat, while lowering Mental Structure and Morale.
It can’t be decreased in any way, but having a Comfortable Camp and being surrounded by imaginary or real friends will reduce and eventually negate the effects.
- Naturally goes up
- Loneliness stat
Physical – Primair
Hydration most likely will be the N°1 cause of death of the survivor.
The best way to keep this stat up is drinking water and avoid being hot or extremely hot and hyperthermia.
Drinking Unsafe, Toxic or Salt water cards are not recommended as they have negative side effects that in the long can cause Hydration loss. They can be drink only in emergencies.
Bellow 50%, the survivor gets very thirsty, lowering Morale and raises Stress.
Bellow 20%, the game will display a red border as a warning.
Bij 0%, is game over.
- Drinking Water
- Drinking Coconut Water
- Drinking Coconut Milk
- Drinking Sea Water
- Drinking Unsafe Water
- Drinking Toxic Water
- Drinking Palm Wine
- Drinking Rice Water
- Drinking any herbal tea
- Eating Sea Food.
- Eating Aloe Vera Gel
- Eating foods that contains liquids like Coconut Fish or Scrappy Soup.
- This stat naturally goes down
- Temperature stat status is Hot
- Natrium
- Diarrhoea stat
- Alcohol stat
- Fever stat
- Caffeine stat
- Capsaicin stat
- Vomit
Represent how much food your belly and body currently has and the need to eat more.
Bereiken 0 in this stat will not instantly kill the survivor, but will heavily impact the Weight Stat, which will kill the survivor. This stat can reach up to 200%.
The speed this stat goes down depends on the Appetite.
As body Weight stat is gained when eating food, this stat is directly tied to the stat.
Around 25%, this stat will lower Morale and Appetite, Raise Stress and lower all the food Saturation stat.
Over 100%, this stat will lower Morale and raises Appetite and Nausea.
Bij 200%, this stat dramatically raises Nausea.
- Eating any food. Value varies depending on the card used.
- Naturally goes down, depends on it own value
- Appetite stat
Stamina represents the energy the survivor has to do any actions.
Around 75%, raises the Temperature Appetite and Weight stats.
Around 50%, additional Appetite increase.
Bij 0%, the survivor will collapse and be forced to spend 1 hour resting, raising Back Pain stat, recovering Stamina. This will damage equipped glasses.
- Naturally goes up
- Wachten 15 Minutes
- Resting 1 hour
- Lung Damage stat
- Parasite Malaria stat
- Fever stat
- Weight stat
- Doing any physical action, like changing zones, dive, chop wood and trees
- Playing a Drum
- Exploring an area, value depends on the area
- Extra impact while moving Encumbrance stat is over 50% and beyond.
Represents how dirty the survivor is and the chance to catch diseases from bacteria and parasites. specially if the survivor has any wounds.
When the bar reaches around 20%~25%, raises Surface Bacteria and Bacteria Fever.
When the bar reaches around 55%, Parasite stat will go up.
When the bar reaches around 70%, the impact on Surface Bacteria is increased
- Bloeden.
- Exploring certain areas
- Digging up Mud
- Making Clay
- Eating certain foods
- Killing animals
- Climb a palm tree
- Fail a climb attempt
- Applying a mud pile to the body fills the bar
- Puking
- Being exposed to rain
- Washing yourself lowers the bar by around 25%.
Represents the body stored energy. If the stat reaches 0, the game is over.
As this stat slowly changes over time, is kinda difficult to notice when this is reaching a critical level until it is too late.
The survivor should always consider monitoring this, specially if a lot of physical actions are being done, like chopping trees to build the hut.
If this stat is going down too fast or the player considers is becoming a risk, avoid as much as possible actions that consume stamina, or take a break as soon as the Stamina stat is not 100% and try to get food mentioned bellow.
Appetite stat indirectly impacts this stat, if Weight stat is low, try to keep Hunger Bar at 100% as much as possible so the survivor body request more and more food.
If the bar reaches a critical level, rondom 10%, this stat will lower Wakefulness, raises Appetite while lowering the Immune System.
If the bar goes above 100%, the survivor becomes obese and movement actions will take extra time.
- Eating any food.
Vlees, prepared food and specially ones using Oil or Fat are the best.
- Naturally goes down depending on its value
- Having any wounds
- Stamina stat not 100%
- Blood pressure stat is bellow 100% and even more if bellow 75%
- Burns stat above 20%
- China Rose Effect stat
- Fast Metabolism perk
Physical – Secundair
The following stats are present in the Physical stat, but most of them are not displayed in the bottom-left side of the screen as they don’t represent a direct threat to the survivor or they are actually a useful stat that provides some kind of bonuses.
Represents the survivor natural protection against sun.
Is a very useful stat for survivors who plan to spend time in areas without protection to the sun like coastal areas.
This stat will slowly go up the more time and the more exposure to the sun. Just avoid getting sunburn while sunbathing!
- Spending time in areas exposed to the sun
- Sunburn stat
- Naturally goes down
- Pale Skin Perk
Represents the natural protection of the survivor foots.
This stat is useful as this stat acts as another layer of protection against feet damage, akin to equipping foot wrappings.
The only way to raise is damaging the survivor feet to the point they start to hurt, so unequipping any foot protection is recommended to raise this stat, avoid applying aloe vera and raise the Analgesia stat to avoid the Pain bad stat.
As this protection goes up, it will be harder and harder to raise it, because the threshold to raise pain will be higher.
Around 33% en 66% the feet damage will be reduced as if the player equipped some foot wrapping.
- Feet Damage stat reaches around 25%
Represents the natural protection of the survivor hands.
This stat acts as another layer of protection against hand damage, akin to equipping hand wrappings.
The only way to raise is damaging the survivor hand to the point they start to hurt, so unequipping any hand protection is recommended to raise this stat, avoid applying aloe vera and raise the Analgesia stat to avoid the Pain bad stat.
As this protection goes up, it will be harder and harder to raise it, because the threshold to raise pain will be higher.
Around 33% en 66% the hand damage will be reduced as if the player equipped some foot wrapping.
- Hand Damage stat reaches around 25%
Represents the health of the survivor eyes.
This stat impacts the ability to find stuff while exploring.
The stat will be set to 0 if survivor has the Shortsighted perk or has an untreated Cobra Spit wound.
- Equipping glasses if the Shortsighted perk is present
- Reduced by Cobra Spit wound, slowly going up while cleaning the wound.
- Venom Krait Stat.
Represents the condition of the survivor skin.
This stat will be always at 100% until the survivor has any kind of wound, but once the wound is healed this stat will go back up.
- This stat will always go back up until 100% if no wound is present.
- Having any wound
- Having Foot damage stat
- Having Hand damage stat
- Bug bites reaches around 50% of verder
- Sunburn stat reaches around 50% of verder
- Foot Damage stat reaches around 50% of verder
- Hand Damage stat reaches around 50% of verder
Schade – Primair
Pain represents the physical or psychological feeling of discomfort the survivor has.
Having a positive Pain stat will start causing issues in morale and Stress, which can lead to death very fast if not taken care of.
Having any level of pain will lower Morale and Appetite while raising Stress, Altered Mind State and courage. The level of the impact on these attributes will vary depending on the amount of pain.
- Having any wound like bites or sprains
- Foot damage stat
- Hand damage stat
- Bug Bites stat
- Back Pain stat
- Headache stat
- Sunburn stat
- Burns stats
- Food Poisoning stat
- Derealization stat
- Analgesia stat
- Ginger stat
- Alcohol stat
- Caffeine stat
- Applying Aloe Vera to a wound
Represents the damage the sun caused to the survivor skin.
The only way to raise this stat is spending time in areas where there is no protection and the sun is in the sky.
If it reaches around 25%, the survivor will feel pain.
Around 50%, the pain level increases, Skin Integrity decreases and the Burns stat will go up.
Around 75%, the pain level increases again.
- Sun Exposure stat over 0%
- Sun Exposure stat = 0%
- Having positive Tanning stat
- Aloe Vera stat
- Get wet
Represents how comfortable is the place the survivor is using to sleep.
This stat has a buffer of around 40%, at this point it will start causing effects.
Sleeping 8 hours with a bad quality bed most likely will set the stat past the threshold to suffer pain.
The survivor might have a better time taking naps or rest 1 hour instead of sleeping for 8 uur.
The quality of the bed modifies how fast this stat goes up.
If it reaches the threshold, raises Pain.
- Resting caused by Stamina stat
- Naturally goes down
- Rough Sleeper Perk
- Aloe Vera stat
- Taking a Nap
- Sleeping
Represents the total amount of bug stings on the survivor body.
Is a very important stat that should be tracked carefully because once the game starts sending warnings, Pain stat will increase and most likely the survivor will start suffering Camp Fever.
Bij 25%, raises Pain and will cause Camp Fever.
Bij 50%, raises Pain again and lowers Skin Integrity.
- Bug Damage stat
- Aloe Vera stat.
Represents the total amount of damage the survivor foot has withstand.
Around 25%, the Pain Stat will raise and lower Skin Integrity stat.
Around 50%, the Pain Stat will raise again.
Equipping up to two Foot Wrappings or socks will raise the max amount of this stat, making it harder to reach the 25% nodig.
If the Foot Wrappings are removed, there is a chance the Damage threshold would be reached causing pain.
Foot Callouses stat also raises this stat maximum value..
- Explore certain areas
- Move between areas
- Climb a palm tree
- This stat will naturally go down
- Equipping Foot Wrappings
- Equipping Socks
- Equipped shoes
- Aloe Vera stat
Represents the total amount of damage the survivor hands has withstand.
Around 25%, the Pain Stat will raise and lower Skin Integrity stat.
Around 50%, the Pain Stat will raise again.
Equipping up to two Hand Wrappings will raise the max amount of this stat, making it harder to reach the 25% nodig. If the Hand Wrappings are removed, there is a chance the Damage threshold would be reached causing pain.
Hand Callouses stat also raises this stat limit.
- Starting a fire using a Hand Dril
- Using an axe to chop wood or any trees.
- Some blueprints that uses a hammer as a tool
- Grinding plants
- Blueprints and actions that involves the woodworking skill
- Blueprints that involves the Knapping Skill
- Crafting a Sharpened Stone
- Crack a geode
- Training Knapping Skill
- Training Spear Fighting Skill.
- Naturally goes down.
- Equipped Hand Wrappings
- Aloe Vera stat
Caused by any wound that has the bleeding icon, like an untreated laceration or shark bite, once these wounds have some time to close, use a tourniquet for a laceration and use the best bandage available to stop the bleeding. If not treated, this stat will cause death as it lowers Blood Pressure stat.
Once this stat passes around 25%, it will lower Morale and Blood Pressure, while raising Stress and Filth.
- Bleeding wounds
- Treat the Bleeding wound.
Schade – Secundair
Represents damage to the survivor that was not strong enough to cause a wound.
Getting this stat up is way better than getting wounded, so luck is in your side if you got an increase in this stat.
Bij 25%, Pain will increase but it is not enough to reach a threshold.
Boven 25% the Pain stat will raise more, rondom 50% the increase is enough to suffer Pain effects.
- Get bruised fighting animals
- Get bruised in a climb attempt
- Naturally goes down
- Aloe Vera stat
Represents serious damage caused by sun or fire.
Is a difficult stat to raise as the game first raises Sunburn Stat damage, most likely this stat will be an issue with the Sun Allergy Perk.
As soon as this bar goes up, Pain stat will go up while lowering Skin Integrity.
Around 10%, the Pain stat increases.
Around 25%, the Pain stat increases again, and starts decreasing Weight stat.
Around 40%, the Pain stat increases again.
Around 75%, the Pain stat increases again.
- Sunburn Stat
- Sun Allergy Perk and spending minimum time at the Sun
- Naturally goes down
- Aloe Vera stat
Represents the total accumulated damage the survivor had on eyes, most likely from Cobra Spits. This stat has no way to recover it, so avoid areas with Cobras and wash any wound they caused as soon as possible.
It takes around 2 complete days to completely fill the eye damage if the wound is not cleaned. So getting spit 3 of 4 times will not be an issue if the wound is cleaned right away.
Around 25%, reduces eye sight.
Around 50%, reduces eye sight again.
Around 75%, reduces eye sight again. Enough to have eyesight at 0.
- Cobra Spit wound card
This stat represents the damage caused by toxic gases to the survivor lungs and can be lethal.
It slowly heals down and there is no way to speed up the healing, so planning ahead is important to explore the Volcanic areas.
This stat goes up faster the more damaged the lungs are.
Voor meer informatie, check Air Toxicity stat.
Around 25%, Pain stat will increase and lower Stamina.
Around 50%, the Pain stat will be increased again.
Around 75%, the Pain Stat will be increased again.
Bij 100%, is game over.
- Air Toxicity stat
- Naturally goes down
Internal
Represents internal temperature of the survivor towards heat. If the bar is maxed is a game over.
Sleeping is not possible while this stat is not zero and will wake up the survivor.
Check the Temperature stat for details to modify this stat.
Around 25%, lowers Hydration and Morale stat and raises Stress stat.
- Temperature stat is Hot or Extremely Hot
- Heat Insulation stat
Represents internal temperature of the survivor towards cold. If the bar is maxed is a game over.
Sleeping is not possible while this stat is not zero and will wake up the survivor.
Check the Temperature stat for details to modify this stat.
If the bar is over 0, Lowers Morale and Raises Bacteria Fever
Around 50% the game will start to show the danger screen effect.
Around 75% the stats starts to display warning sign.
- Temperature stat is Cold or Chilled
- Cold Insulation stat
Represents the amount of blood the survivor has. Bereiken 0 means a game over.
If the stat goes bellow 100%, Weight stat will start to go down.
If the stat goes bellow 75%, Weight stat will start go down even more.
For more information, check the Blood Loss stat.
- Naturally goes up
- Blood Lost stat
Represents the survivor internal immune system trying to combat diseases.
If the survivor has Fever, rondom 25% it will reduce Hydration, Morale and Stamina and Appetite while raising the Immune system stat.
The impact on these stat will increase as this stat goes higher.
Around 50%, Altered Mind state starts going up.
It can be temporary lowered by getting wet, but this could be also dangerous as being wet raises bacteria fever.
The only way to remove this stat is let the Immune system remove the internal bacteria or any diseases that raised the stat.
- Bacteria Fever stat
- Bacteria Diarrhoea stat
- Camp fever stat above around 10%
- Parasite Malaria stat above around 5%
- Analgesia stat
- Drink Palm Wine
- Wetness stat
Represents physical discomfort that if not taken care will cause Vomit events.
Around 25%, will lower morale.
Around 80%, there is a chance to Vomit! event will occur, which lowers Hydration, Morale and Alcohol stat, raises Filth stat and reduces Nausea stat by around 50%.
As puking will not reduce any stat that was causing Nausea on the first place, the stat will continue to raise again and trigger more Vomit events.
Is recommended to check the stat if it is displayed on the screen and check the reason of the increase and try to fix it.
- Sailing
- Stress stat
- Discomfort stat
- Psylocibin stat
- Satiation stat over 100%
- Alcohol stat
- Sodium stat
- Food Poisoning stat
- Discomfort stat
- Food saturation
- Drink Toxic Water
- Naturally goes down
- Rice Effect stat
- Ginger stat
- Vomit Event
Represents an extra bowel movement of the survivor and add some funny comments and memes to the game.
Around 50%, will decrease Hydration stat, takes around drinking and eating from two coconuts in a quick succession to reach this point.
Most likely at 75% and beyond the decrease in Hydration gets higher.
- Bacteria Diarrhoea stat
- Camp Fever stat
- Drink Coconut Water
- Eat Coconut Meat
- Eat Mushrooms
- Eat Ground Snake Grass
- Eten (Ground) Spider Lily Leaves
- Drinking Palm Wine
- Rice Effect stat
- Ginger stat
- Eating Charcoal
A very silent stat that represents the survivor capability to fight bacteria and diseases.
It does not need to be tracked constantly, but being aware this exist can dramatically increases the chances to survive, specially for survivors not immunized to diseases or with the Weak Immune System Perk.
As a rule of thumb, if your Morale is low or Weight stat reached a critical level, be very aware of bacteria.
Bellow around 10%, this stat does nothing, letting any bacteria or diseases stat go up freely.
Around 10% or above, lowers Bacteria Fever, Bacteria Diarrhoea and Bacteria Cholera, Camp Fever, Parasites and Parasite Malaria.
Higher levels of this stat will raise the effects on the stats mentioned.
- Static 50% for every character
- Fever stat above around 25%
- Antibiotics stat
- Spider Lily Effect stat
- Ginger stat
- China Rose Effect stat
- Morale stat
- Strong Immune System perk
- Morale around 40% or less
- Low Weight stat
- Weak Immune system perk
Represents any head pain the survivor is experimenting.
Any serious disease will raise this stat in accordance to the severity of the disease.
Around 10%, will raise Pain stat.
Around 25%, additional raise of Pain stat.
Around 50%, additional raise of Pain stat.
- Camp Fever stat
- Parasite Malaria stat.
- Naturally goes down
Chemical – First part
Represents if the survivor is receiving the effects of being sedated by chemicals.
As long as the stat is not 0, lowers Pain, Fever, Stress and raises Courage Stat.
Over 25% Mentral structure starts to go down and the Analgesia stat will go lower faster.
Over 75%, additional Pain reduction and Courage stat receives another boost.
- Eating Kava Root.
- Eating Grounded Kava Root.
- Drinking Kava.
- Taking painkillers raises by 50%.
- Naturally goes down.
- Analgesia stat over 25%.
Represents if the survivor is receiving the benefits of consuming Spider Lily Tea.
The only way to obtain this effect is grounding the Spider Lily leaves and mix it with a portion of hot water to brew tea.
Two portions of tea will completely fill the bar, lasting for about 12 uur.
Above around 5%.Boost Immune System stat significantly,
Above around 50%, provides additional bonus to Immune System stat.
- Drink Spider Lily tea
- Naturally goes down
Represents if the survivor is receiving the benefits of consumed ginger.
For best results, is better to grind the ginger and mix it with a portion of hot water to brew tea.
Two portions of tea will completely fill the bar, lasting for about 12 uur.
As long as it is not 0, raises Courage, Wakefulness, Appetite and Immune System while lowering Nausea, Pain, Diarrhoea and all Food Saturation stats.
Bij 50%, the stat changes to a high dose effect.
- Eat Ginger
- Eat Ground Ginger
- Drink Ginger Tea
- Naturally goes down
Represents if the survivor is receiving the benefits of taking antibiotic pills.
The only way to obtain the card to raise this stat is by starting perks.
One Pill raises this stat to 100% and last for a whole day.
As long as this stat is not 0, dramatically boosting Immune System stat.
- Take Antibiotic pill
- Naturally goes down
Represents how drunk the survivor is and raises the game adult rating by a few years.
Increases when the survivor drinks any alcohol.
Palm wine can be made by collecting a Nipa Palm Fruit, putting a container on the tree and once enough sap is collected and leave it alone until it spoils.
Tipsy, above around 20%, lowers Hydration, Stress, Mental structure and Pain stats while raising Morale, Determination and Courage stats.
Drunk above around 50% it also starts to raise Nausea Stat.
Horrible Drunk, when reaches above 75% gives additional Courage and extra Pain reduction.
- Drinking Palm Wine.
- Naturally goes down
- Vomit will lower the stat by around 50%
Represents if the survivor is receiving the negative effects of consuming salt.
This stat will only impact the survivor if for some reason salt water was drink or if around 3 salted fish or meat was eaten in a short sequence.
Over 25%, raises Nausea and reduces Hydration level.
Over 75%, significantly raises Nausea.
- Drink Salt Water
- Eating food cured by salt
- Slowly naturally goes down
- Specialized Kidneys Perk
TBA
Represents if the survivor is under the effects of caffeine.
As long as this stat is not 0: Status will be displayed as Caffeine, reducing Pain, Hydration and Mental Structure while raising Wakefulness, Diarrhoea and Stress.
Best way to raise this stat is brewing Coffee to drink it, a water portion raises this stat by 50%.
A full bar last for about 6 uur.
- Eating Coffee Berries
- Eating Coffee Berry Pulp
- Drink Coffee
- Naturally goes down
Chemical – Second Part
Represents if the survivor is under the spicy effect of eating Chillies.
Eating a Chillies card is enough to raise this stat by 50%.
A full bar last for about 6 uur.
As long as this stat is not 0, lowers Appetite, Temperature and Hydration stats.
- Eating Chillies
- Eating Dried Chillies
- Naturally goes down
Represents if the survivor is under the effect of hallucinogenic mushrooms.
Magic mushrooms can be rarely found in the Eastern Grasslands. One mushroom is enough to raise the bar by around 20%.
As long is its not 0, Minor dose: reduces Pain stat and raises Nausea, Altered Mind Stat, and Morale.
The higher the effect, the faster this effect will be reduced.
- Eat a Magic Mushroom
- Naturally goes down
- Psilocibin stat
Represents if the survivor is under the relaxing effects of jasmine.
The only way to raise this stat is drinking Jasmine Tea, grinding the flower and mixing it with hot water.
One full portion of liquid raises the stat by 50%.
A full bar last for about 6 uur.
Over 0% Moderate Jasmine Effect. Reduces Stress and Wakefulness while raising Morale.
Over 75%: Strong Jasmine Effect.
- Drink Jasmine Tea
- Naturally goes down
Represents if the survivor is suffering the bad effects of eating any item that is poisonous.
As long it is not 0, raises Pain, Nausea and Diarrhoea.
A full bar last for about 12 uur.
- Eat Assorted Mushrooms with a low Herbology Skill
- Drink Toxic Water
- Naturally goes down
Represents if the survivor is receiving the benefits of consuming rice.
As long as it is not 0, lowers Nausea and Diarrhoea.
- Eat rice
- Drink Rice Water
- Naturally goes down
Represents how much Sea Krait poison the survivor has on his body. If the bar is filled, is game over.
This stat is raised by encountering a Sea Krait and get bitten while exploring the Mangrove Forest or diving and spear fishing in the Mangrove Forest and Bay Sea.
Once the survivor was bitten once, this stat will raise up to around 25% naar 30% and then decrease slowly until in this time another Sea Krait event was triggered.
These creatures bites on the legs, Armor stat may help to protect against them.
If encountered while using a skill, the better the skill the better chances to avoid the venom.
Boven 25%, actions that use legs will take additional time.
Above around 40%, Eyesight stat will be reduced.
Above around 60%, Eyesight stat is dramatically reduced.
Above around 80%, Light stat will be dramatically reduced.
If the stat reaches 100%, the survivor will die of asphyxation.
- Bitten recently by a Sea Krait
- Naturally goes down
Bescherming
Represents the protection against hyperthermia.
The stat bar is always empty, so is kinda hard to track the effect.
Being in an area with trees and protected against the environment will raise the protection and wearing a hat will be enough to reach the status of level 1.
As long as status shows as level 1 of meer, lowers Hyperthermia stat.
- Being inside an area protected by trees
- Being inside an indoor area
- Equipped Hat
Represents the protection against hypothermia.
The stat bar is always empty, so is kinda hard to track the effect.
If you are freezing to death, this is the best way to avoid death.
Lit a campfire or a Stove will be enough to reach level 2.
As long as status shows as level 1 of meer, lowers Hypothermia stat.
- Lit Campfire
- Lit Stove
Represents the protection against damage from the sun.
Wearing some clothes, indoor areas and areas with many trees are the best way to raise this stat.
As long as this stat is over 0, lowers Sun Exposure stat.
- Indoors area
- Areas covered with trees
- Equipped Shirt
- Equipped Pants
- Equipped Raincoat
Represents the protection against the rain.
Rain is so beneficial that this stat can be ignored.
This stat could be useful if there is no way to lit a fire and the survivor is forced to stay bellow heavy rains or storms.
As long as this stat is over 0, lowers Rain Exposure.
- Indoors area
- Areas covered with trees
- Equipped Hat
- Equipped Raincoat
Represents the protection against bugs.
This stat is very important for survivors, as bug bites causes pain and transmit diseases.
Best way to get this stat is the Bug Repellent stat and equipping up to two shirts.
As long as this stat is over 0, reduced Bug Damage Stat.
- Bug Resistant Perk
- Bug Repellent stat
- Equipped Shirt
- Equipped Pants
- Equipped Raincoat
Represents the protection in the Foot against wounds.
It does not interact with the Foot Damage stat directly but the effects that raises this stat also interacts with Foot damage.
This stat is important when exploring jungles or the rocks, as is it used in random events and if it is high enough the survivor will avoid wounds.
- Callouses Stat
- Equipped shoes
- Equipped Foot Wrappings.
Represents the body protection against wounds.
This stat seems involved in calculations that causes wounds, like exploring the ship and fighting animals.
- Equipped Leather Pants
Saturation
Represents how weary is the survivor of eating a food category.
All saturation behave exactly the same and are reduced by the same things, the only difference is how the survivor can increase each.
The main strategy is avoid eating the same food right away and wait at least a couple hours to eat it again and try to get food from other categories as soon as possible.
Around 25%, lowers Morale.
Above around 50%, also raises Nausea.
- Eat any Food card.
- Drink some liquid cards.
- Naturally goes down.
- Hunger stat.
- Ginger stat.
Hidden Stats – Enviromental
This section will add every stat that is not in the stats menu and that varies by Area the survivor is currently present and possible by a combination of in-game time, weather and season.
Bug population should be here following this logic, but will be explained in the Hidden Stats – Bugs section of the guide for convenience of the reader.
Represents the good feeling the current area gives to the survivor.
Is a very useful stat to have, specially after surviving for 30 or more days as it only has positive effects and is the best tool to combat Loneliness stat and Isolation effects.
Some of the furniture can be built multiple times, having more than one Stove, Drum and specially Bookshelves can be a good way to raise this stat as Figurines and Calcite Crystal raises the stat by a little amount each.
This stat also has a threshold range where it will not be displayed on the left-bottom stat screen.
This stat also seems to have its maximum increased over time.
This list is ordered in the difficulty to obtain
- Fornuis
- White Washed Walls
- Chair
- Drum
- Tafel
- Deur
- Bookshelf
- Wooden Bed
- Stitched-Hide Floor
- Sea Trophy
- Add Wood Figurines to Shelf or Bookshelf
- Add Calcite Crystal to Shelf or Bookshelf
- Add Coral to Shelf or Bookshelf
- Scented Candles
- Flowers in a plastic bottle or clay jar.
- Collapsed Roof
- Sheltered stat
- Discomfort stat
- Large animal Carcass
Represents the bad feeling and bad smells the current area gives to the survivor.
Boven 0%, Minimal Discomfort: lowers Comfort and raises Nausea.
Boven 10%, Moderate Discomfort: additionally raises Stress and lower Mental Structure.
Boven 50%, High Discomfort: additional Comfort decrease.
Boven 75% Extreme Discomfort: additional Comfort decrease.
- Area Filth value
- Compost Bin
- Manure
- Rotten Remains
- Jasmine Flowers
- Scented Candles.
One of the principal stats to monitor in the game so it will be always present in the left-bottom part of the screen.
Going to any extreme of the bar will raise Hyperthermia or Hypothermia, which are lethal stats.
Most of the time the survivor temperature will be towards hot or extremely hot which impacts hydration stat negatively.
If it gets high, Hot and Very Hot: Raises Hyperthermia while reducing Wetness and Hydration.
If it gets too low: Cold and Chilled: Raises Hypothermia.
- Equipping any piece of clothes
- Clear weather
- Cloudy weather
- It’s between 12:00 en 16:00
- Stamina is not 100%
- Stamina is bellow 50%
- Lit campfire in a sheltered area.
- Wetness stat
- Capsaicin stat
- It’s between 17:00 en 06:00
- Being inside a sheltered area
- Being in a coastal area
- Being in an area covered by trees
Represents how comfortable the area is for crafting.
The way to reach the max is to have a Chair and a Table in the area.
Survivors who starts in the plane, can remove a plane chair and place it back to trigger the bonus.
Chairs and Tables can only be built indoors but once a Chair is craft, it can be picked up and moved to an outdoor area.
Boven 0%, will raise Morale when crafting Blueprints and certain card combinations.
Bij 100%, additionally lowers crafting Blueprints and certain card combinations by up to 15 notulen, with a minimum time of 3 notulen.
- Chair in the area.
- Table in the area
Represents the power of the sun over the area the survivor currently is.
- Clear weather
- Partially clouded weather
- It’s between 18:00 en 07:00
- Tanning stat
- Mud Protection stat
Represents how much exposed the survivor skin is to the effects of the sun.
It can be read as Sun Strength minus Sun Protection stat.
Bij 0%, reduces Sunburn stat.
Over 0%, raises Sunburn, Tanning and Skin Humidity stat.
- Sun Strength stat
- Sun Protection stat
Light represents the amount of illumination the survivor has to see the surroundings.
Most likely the player will only see this stat when there is no light in the area.
The sun provides light to almost every area of the island between 04:00 en 20:00, which is enough to perform any action.
A few areas like the beach, the bay and the Grasslands, when weather is clear will have light even after 20:00.
A Cobra spit wound can reduce the amount of light perceived, and if the weather is cloudy, can be enough to stop the survivor to do any action until the wound is cleaned or the weather changes.
- Time is between 4:00 en 20:00
- Time is between 6:00 en 18:00
- Weather is light cloudy, cloudy or is raining.
- Survivor has a Cobra spit wound.
Represents if a roof is above the head of the survivor.
This stat has two functions, notify the player Sun and Rain will not alter stats and makes it difficult to be in a comfortable area when this stat is 0.
If stat is 0, moderately lowers Comfort.
- Indoor area
- Collapsed roof
Represents the quality of the air in the area the survivor is present.
This will only be an issue when reaching the volcano area or the acid lage.
It is recommended to do short trips in the area this stat is present and wear the appropriate equipment.
Gas Mask can be repaired with a piece of charcoal.
As long this stat is over 0, will raise lung damage.
Being in the volcano will raise this stat to 50%.
Being in the Acid lake will raise this stat to 100%.
- Spend time in volcanic areas
- Equip a Makeshift Mask
- Equip a Gas Mask
Hidden stats – Mental
Represents the pain of the death of losing real or imaginary friends.
Boven 0%, lowers Morale and Mental Structure.
- Grandfather death fills the bar.
- Macaque friend died from Hydration or Hunger.
- Murdering a Macaque friend
- Murdering Weston
- Naturally goes down
Determines how brave is the survivor to achieve his destiny.
This stat needs to reach 100% to be able to reach a game ending that is not a game over.
This stat seems to slowly going up over time but can be increased by the Alcohol stat.
- Naturally goes up
- Alcohol stat
- Brave perk
Represents if the survivor had a pleasant conversation with the imaginary friend, Weston.
This stat is set to 100% when talking to Weston and lasts for 8 hours if the Isolation stat is maxed.
If the survivor wants to lower Isolation stat, the best strategy is to talk to this friend exactly when the bar reaches 0.
Over 0%, Lowers Isolation
- Talk to Weston
- Naturally goes down
- Isolation stat
TBA
TBA
Increases stress and Altered Mind State stat
- Being in a illuminated area.
Hidden Stats – Bugs, Bacteria & Diseases
Represents the amount of bugs in the area the survivor currently is.
The game forces it display on top of the left-bottom stat area as soon this stat is over 0, but is a good idea to check it when reaching a new area or if the stat popped up after a game turn.
Boven 0%, increases Bug Damage stat.
- Current area
- Sun Screen Stat
- Light Rain
- Heavy Rain
- Storm
- Mud Protection stat
- Lit a Campfire
Represents the amount of insect bites the survivor is taking each game turn.
It can be read as Bug population stat – Bug Protection stat.
Check these two stats for ways to minimize or get this stat to 0.
This is the main stat the survivor should track to avoid the bad effects of Bug Bites stat and avoid Camp Fever and Malaria. If it is above 0, plan ahead!
Boven 0%, increases Bug Bites stat.
Boven 50%, increases Parasite Malaria stat.
- Bug Population Stat
- Bug Protection stat
TBA
TBA
TBA
TBA
Camp fever or Typhus is a disease that can be contracted by bug bites as soon as the stat bar reaches a flashing level on the left-bottom side of the screen.
Once the disease is acquired, the stat will go up and up, raising fever, Diarrhoea and giving Headaches over time.
Around 75% will start raise Altered Mind State stat.
To combat this stat, a good Immune system stat is needed, and most likely artificially raising it will be needed.
- Bug Bites reaches 25% eenmaal
- Immune system stat
- Artificially raising Immune system stat
Malaria is a disease that can be acquired by having a big Bug Damage stat for some amount of time.
It can be raised a few points, but once it reaches around 2% of 3% of the bar it will start raising as the stat will increase it own value.
Raises Fever, Diarrhoea, and Headache stats while lowering stamina.
TBA
TBA
Hidden Stats – Chemical and Protection
Represents the amount of chemicals or smells impregnated in the survivor clothes or skin.
As this is a good stat washing yourself should be avoided as much as possible as it dramatically decreases this stat.
A full bar last for around 24 uur.
Boven 0%, raises Bug Protection stat.
Boven 25%, additional increase to Bug Protection stat.
Boven 75%, additional increase to Bug Protection stat.
- Apply Bug Repellent: +90%
- Feed Snake Grass to Campfire: +25%
- Eat Lemongrass: +10%
- Naturally goes down
- Washing yourself: Between -50% naar -75%.
Represents the amount of Aloe Vera applied to the survivor skin.
Its one of the best stat the survivor could acquire, as it helps to decrease many negative stats per turn.
This means this could be used after suffering injuries or to minimize the stat increase per turn.
This is specially useful for Back Pain and Bug Bites.
A full bar last for around 24 uur.
Boven 0%, lowers Sunburn, Back Pain, Bug Bites, Bee Stings, Burns, Bruising, Hand Damage, Foot Damage and Skin Humidity stats.
- Apply Aloe Vera Leaf: +5%
- Apply Aloe Vera Gel: +50%
- Washing youself: Around -55%
Represents if the survivor is under the relaxing effects of China Rose flowers.
China Rose is a quick way to keep Morale and Stress under Control, but should not be abused as it will decrease Weight stat.
Boven 0%, Moderate China Rosse Effect, lower Stress, Wakefulness, and Weight while raising Morale and Immune system.
Is important to note the Immune system raise slowly goes up while under the effect and is not an instant increase like other effects.
- Eating China Rose flowers
- Drinking China Rose tea
- Naturally goes down.
Represents the survivor wetness of the skin.
This stat will be an issue if the survivor has the Permeable Skin Perk.
- Permeable Skin Perk
- Sun Exposure stat
- Naturally goes down
- Wetness stat
- Mud protection stat
Represents how wet the survivor skin and clothes are.
This stat is the most useful way to combat the Temperature stat when it gets hot or higher and most likely the survivor will try to keep this stat always above 0%.
To keep the wetness effect for much as possible, avoid fire sources and wear more clothes before getting wet.
If wetness wants to be reduced as soon as possible, remove any wet clothes.
Boven 0%, lowers Temperature, Sunburn and Skin Humidity
Boven 50%, additionally lowers Fever while increasing Bacteria Fever.
- Rain Exposure
- Equipped wet clothes
- Lit Stove
- Lit Campfire
Represents the protection, or lack of protection, against rain.
It can be read as Rain value minus Rain Protection stat.
Boven 0%, raises Wetness stat
Boven 50%, additionally lowers Filth stat
- Rain Value stat
- Rain protection stat
Represents if the survivor covered skin with mud.
The only way to gain this stat is applying a Mud Pile card to the body which will set the bar to 100% and at the same time fill the Filth bar to 100%.
A filled bar lasts for 12 uur.
Over 0%: Mud Applied, lowers Sun Strength, Skin Humidity and dramatically lowers Bug Population.
- Apply Mud Pile card
- Naturally goes down
- Washing yourself reduced this to 0%
Encumbrance Stat and Equipment slots
Represents the total capacity of cards the survivor can carry.
This stat is not only the weight of the items but also how bulky the item is.
This stat consider the encumbrance of the cards carried in the inventory, equipped items and items in carried containers.
Currently there is no way to increase the maximum Encumbrance, but crafting and Carrying a Basket and Sacks acts as an increase this stat.
Baskets do raise the Encumbrance stat, but the items inside it will not. This amount is even better if its woven with a rope to make a backpack.
Sacks can carry the same amount a Basket does, but when they are empty they will weight less.
Items that can be equipped will raise Encumbrance stat less than what they will do if carried on the inventory slots.
Satchels are light encumbrance cards that can be equipped to carry some light items, very good to have Weston, Handrills and something to lit, candles and bandages in them.
Many items that does not look like an equip can be equipped like Monkeys, Ropes and spears what used a Rope card to craft it, a detailed list can be found bellow.
Around 50%, will cause movement actions like exploring or changing zones to take extra time and additional stamina decrease.
Around 75%, additional impact on the stats mentioned.
Bij 100%, is no longer possible to do these actions.
- Equipping a Backpack
- Equipping a Satchel
- Carry containers
- Grab any card
- Equip items
- Certain wounds
- Drop or trash cards
- Unequip items.
Represents the card slots the survival can equip at the same time.
Not a stat itself, but as this stat is very related to Encumbrance, it could be considered one.
The equipment slots are:
Alleen 1 item, two categories exist:
Backpacks
The survivor can craft a Woven Backack or a (Rood) Backpack if the Tourist perk is present.
Large Backpacks
The survivor can craft a Leather Backpack or a Backpack if the Survivalist perk is present.
Alleen 1 item, only obtained from Perks:
Belt bag, unique to the Tourist.
Military Belt from the Military Perk.
Alleen 1 item, the Rain Coat, only available if the survivor finds a Plastic Sheet.
Alleen 1 item, Glasses, available if the Shortsighted perk is present.
Alleen 1 item, Hand Wrappings, obtained crafting from a Normal sized Cloth.
Alleen 1 item, a crafted Woven Hat or Survival Hat if the Survivalist perk is present.
Alleen 1 item, either a Makeshift Mask, obtained crafting from a Large sized Cloth or crafting a Gas Mask blueprint
Two items, between a crafted Seashell Necklace, a Flower Necklace or Pearl Necklace.
Alleen 1 item, either a crafted Leaf Skirt, Leather Pants or Shorts, depending on the perk combination, Shorts.
Limit is 2 and depends on the Underwear availability.
1 can be obtained depending on the perk combination an an additional one can be found in the luggage obtained by the Plane Crash perk.
Alleen 1 item, a Macaque friend can be carried around as an equipment.
Alleen 1 item, a crafted Shield that raises chances to not get wounded by animals.
Limit is 2, can be a crafted Shirt, a T-shirt depending on the perk combination or a Hawaiian shirt if the Tourist perk is present.
Shirts are a good way to deal against bugs.
Alleen 1 item can be:
Crafted Coconut Sandals or Leather Shoes.
Military boots if the Survival Perk is present.
Flipflops if the Tourist perk is present.
Sneakers if the Plane Crash perk is present.
Tot 4 items, any combination between:
A spear that used a Rope in the blueprint.
Crafted Waterskins
Crafted Satchels
Crafted Quiver
Rope cards
Two items, any combination between:
Socks cards, 1 can be obtained depending on the perk combination an an additional one can be found in the luggage obtained by the Plane Crash perk.
Foot Wrappings, obtained crafting from a Normal sized Cloth.
Vaardigheden – Deel 1
To train a skill, is always better to wait 3 hours between each attempt that raises the skill.
Repeating continuously the
sameaction over and over or between this 3 hours interval will give less and less progress to the point no increase will be gained.
The only exception to this rule are skills that are performed in different areas, Bijvoorbeeld, spear fishing in 3 different zones will give more skill progress than spear fishing 3 times in the same zone.
Climbing skill increases the odds to climb trees, cliffs, shaft and ropes.
The higher the skill, the better chances to succeed the attempt and reduces the chances to get wounded when failing the attempt.
Training the skill has better chances to not get wounded than climbing.
Bij 50% skill can be considered “Goed” to actually climb Cliff or Shafts, but as this is a risky skill, the higher the skill, the better. Even at this skill level, attempting to climb a Palm Tree can cause sprains.
Do not attempt climbing while it is raining as it lowers the chances to almost 0.
Having a Rope Card in any of the 6 inventory cards gives a bonus in the climb attempts.
- Train climbing on a Palm Tree.
- Train climbing on a Cliff
- Train climbing on a Shaft
- Climb a Palm Tree
- Climb up a Cliff
- Climb down a Cliff
- Climb up a Shaft
- Climb down a Shaft
Swimming skills increases the odds to find cards while swimming in any sea card and the chances to swim to or from the Bird’s Rock zone.
The skill also increases the chances to not get wounded exploring the sunken ship or from sea creatures.
Bij 100%
a shortcut can be found at the secret cove to reach a Flooded CavernThe cards obtained diving on the sea depends on the zone.
The chance to go back or forward to the Bird Rock is the survivor swim skill, so at 50% skill level the odds to reach the Bird Rock or go back home are the same as flipping a coin.
- Dive on a sea card
- Attempt to reach the Bird’s Rock
- Attempt to get out of the Bird’s Rock
- Attempt to find something on the sunken ship
Herbology skill allows the survivor to learn different blueprints that involves plants, herbs, bloemen, vegetables, mushrooms and fruits.
The skill also increases the chance to find useful plants while exploring an area and the chance to get poisoned eating Assorted Mushrooms.
A good way to raise the skill is harvesting Snakegrass and grind them. The ground plant is a vegetable that can be eaten.
Another option is harvesting Assorted Mushrooms, as they grow alone over time. As eating those can be dangerous, they make a good bait for traps.
Bij 100%
enables to build the irrigation system zone upgrade
- Harvest any plant, herb, flower, vegetable, paddestoel.
- Harvest from a Snakegrass patch
- Harvest from a Palm Bush
- Harvest from a Spider Lily Plant
- Harvest Assorted Mushrooms
- Harvest from an Aloe Vera Plant
- Grind Snake Grass
Cooking skill allows to learn blueprints for more complex food that provide extra bonuses and better Weight stat management.
This skill is raised whenever anything is cooked in a Campfire or a Stove.
Smoking meat or fish provides additional cooking skill, so building a Stove as soon as possible is a good way to raise the skill.
- Cook anything at a Campfire
- Cook anything at a Stove
- Smoke meat or fish at a Stove
Crafting skill allows to learn more complex blueprints.
It goes up when completing most of the blueprints.
Aside day to day blueprint crafting, a good way to train this skill is to use extra Bird Bones or Bone Splinters to craft needles or hooks.
- Craft Blueprints
- Craft a bone needle
- Craft a bone hook
Tailoring skill allows to learn more complex blueprints.
As a lot of blueprints use cords, this skill will naturally go up as the survivor gets more tools or upgrades.
If the survivor has extra time to kill, a good way to spend it is either getting fiber from Snake Grass and making cord.
If materials are scarce, a way to get experience would be un-weave cloths or Ropes and weave them again,
but this is a bad way to use the survivor timeas this basically gives nothing in the long process.
- Craft a Fiber Cord, combining Fiber + Fiber or using a Spindle.
- Craft a Yard card, combining Fiber Cord + Fiber Cord or using a Spindle.
- Craft a Rope Card, combining Yard + Yard
- Place thread on a Loom, combining Yard + Loom
- Make cloth in a non empty Loom
- Enlarge cloth in a Loom.
- Craft blueprints involving Cloth and leather
Woodworking skills allow to learn more complex and very useful blueprints and the chances to craft a Wood Figurine.
This is one of the most challenging skill to raise as the skill consumes Stamina and needs basic and specialized tools, but the upgrades it provides are the best available.
At the beginning, the best way to raise the skill is to combine Any Axe with a zone card that has many trees, like a Jungle or the Wetlands.
If the survivor has access to a Sharp Knife, the skill can be raised by making Wood Shavings, via the blueprint or combining Wood + Sharp Knife until the Wood Carving blueprint is available and use Wood Carving + Sharp Knife combination.
- Getting wood from Zone Card with any axe
- Attempt to fell a big tree
- Crafting blueprints learned from Woodworking Skill.
- Combine Wood + Sharp Knife to get Wood Shavings
- Combine Wood Carving + Sharp Knife to attempt making a figurine.
Knapping skills allows to craft the most sharp tools.
The first skill increases can only be obtained practicing combining Any Rock + Vuursteen, this combination destroys the flint, so a few pieces will be needed for the first unlock.
After a few practice attempts, the Flint Knife blueprint will be unlocked and the skill can be raised crafting this blueprint.
Flint and Flint Slabs can be found in the Rocks and the Highlands, they can be kinda rare to find, so keep exploring, even if all the landmarks in the area are found.
The Flint Slabs are used to craft the Flint Axes, but the unlock requires quite some training, so breaking the first slab pieces to train the skill can be a good idea as breaking them gives a few flint pieces.
- Practice the skill in a Flint
- Practice the skill in an Obsidian card.
- Craft the blueprints this skill unlocks.
Vaardigheden – Deel 2
Increases the chance to catch animals with traps and to obtain better quality traps.
The Dead fall trap will be most likely the initial way to train the skill until the survivor has access to another trap from a Perk.
The Dead fall trap can be disarmed to recover the Rock, so there is no reason to not set as many as possible of these traps.
For trap baits, Fish scraps, Spoiled food, Bugs, Assorted Mushrooms and Palm Bush Seeds are good cards to use because their avalability, limited uses or they are dangerous to consume them.
A Fish + Knife combination will split a fish into smaller pieces and they can be used in many traps.
Once a trap is baited,
don’t remove the bait, as it will reset it timer to catch something.
- Craft any trap blueprint
- Fail to catch anything on any trap
- Catch any animal on any trap
- Rearm any spring trap
Increases the chance to catch fish and the fish quality obtained. The fish that can be obtained depends on the zone the survivor is fishing.
The skill can be raised when using any fishing line tool on any sea card.
Het neemt 1 hour per fishing attempt so when the skill is very low always use a baited line as this increase the chance to get something.
The first line available can be obtained once the survivor has access to Bird Bones or Bone splints to craft a Bone Hook.
This can be done either by catching a bird with a trap or get a bird already dead while exploring some areas, like the Rocks.
This skill also unlocks the Fish Trap blueprint.
- Fish using any line in any sea card.
Increases the chance to succeed fishing using a spear on any sea card.
The better the quality of the spear, the better the chances to get something.
A fishing spear is one of the best to train the skill as it does not use hard resources to obtain.
Spear Fishing in the Bay or Mangroves should be avoided at the beginning because Sea Krait Poison.
- Combine Spear + Sea card
Increases the chances to hunt animals as well as the chances to get injured while fighting them with a spear.
Most likely, this will be always the highest combat skill for the survivor as a Rustic Spear is easy and fast way to obtain a weapon.
To be able to hunt an animal with the spear, it must be keep in one of the 6 slots in the bottom part of the screen or be equipped if the spear used a rope to be crafted.
Sea Gulls, Partridges and Goat will not fight back, so they can be used safely to train while having a chance to get food.
Monkeys also can be a good way to train the skill, as they can only bite back and the wound heals kinda fast.
The spear itself can be used to train the skill taking 1 hour, but it will be always faster to train the skill by finding an animals.
A shield and leather pants are recommended when fighting animals as they lower the chance to get injuries.
- Train 1 hour with any Spear or Broom.
- Attack any animal
Increases the chance to hunt animals as well the chances to get injured while fighting them.
The same tips to train Spear Fighting can be applied here.
To be able to hunt an animal with the bow. it must be keep in one of the 6 slots in the bottom part of the screen alongside at least one arrow card either in this part or inside an equipped quiver.
Most likely once the survivor has access to a bow and arrow, the spear fighting skill will be quite advanced, but Archery has better chance to get animals without getting wounded.
This skill also useful to get bats from the cavern they live and has higher chance to scare away the monkeys on their den.
- Train 1 hour with a bow and arrows.
- Attack any animal
- Attempt to hunt bats
Increases the chance to hunt small animals throwing rocks at them.
If the survivor finds an animal and has no access to a weapon or does not want to damage their weapon, a rock in the area can be thrown at Sea gulls, Partridges and Goats.
This skill also can be used to try to get bats from their cavern or to try to get a coconut from a Palm Tree.
The chances are very low for any of these actions, until the survivor wants to learn how to craft a sling, is better to avoid this skill and use the wild animals to train spear fighting
- Train 1 hour with a stone
- Attack a Sea Gull, Partridge or Goat
- Attempt to hunt bats
- Attempt to get a coconut from a Palm Tree
Increases the chance to hunt animals throwing rocks at them, but with a sling.
Everything that applies to Rock Throwing applies here, with the exception this has better chances.
- Train 1 hour with a sling
- Attack a Sea Gull, Partridge or Goat
- Attempt to hunt bats
Increases the musical options when playing a drum.
To craft a drum, the survivor must have good woodworking skills.
At the beginning, the only option the drum will have is to practice, once this skill is trained new rhythms will be available.
- Practice with a Drum
- Play any rhythm in a Drum
Increases the chance to not get wounds when escaping from animals.
Every time the survivor retreats from an animal instead of fighting, this skill will go up.
The safest way to train this skill is finding boars, as they will never hurt the survivor until attacked.
This skill can be useful to train before entering more dangerous area with Lizards or Cobras.
- Retreat from any dangerous animal
TBA
- Succeed beating imaginary foes
Dat is alles wat we vandaag hiervoor delen Card Survival: Tropical Island gids. Deze handleiding is oorspronkelijk gemaakt en geschreven door Emaster. Voor het geval we er niet in slagen deze handleiding bij te werken, U kunt de laatste update vinden door dit te volgen link.