
- Titel: Base One
- Releasedatum:
- Ontwikkelaar:
- Uitgever:
Information about Base One is still incomplete. Help ons alstublieft de details van het spel hiermee in te vullen contactformulier.
This is a quick guide to starting a custom game in Easy mode. Most of it is also applicable to the higher difficulty settings, although there are important differences once you hit the second day.
1st Build Phase
Goal: To start research and order extra supplies and crew.
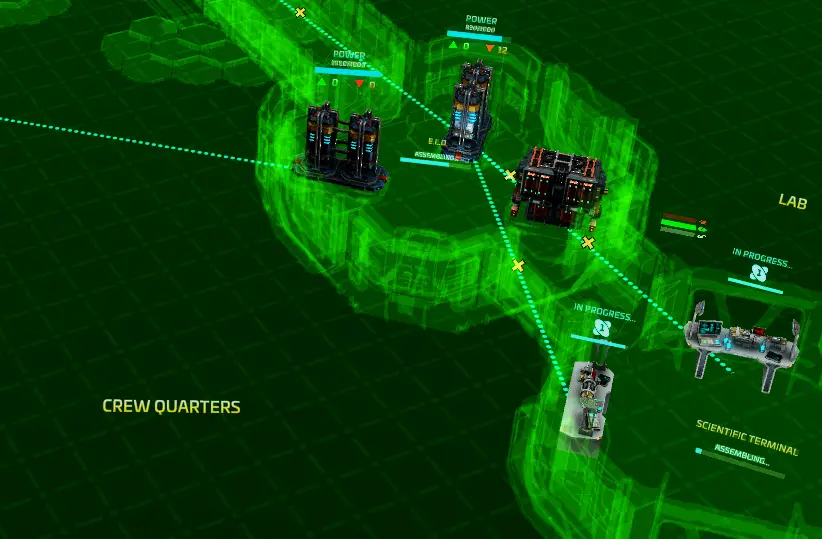
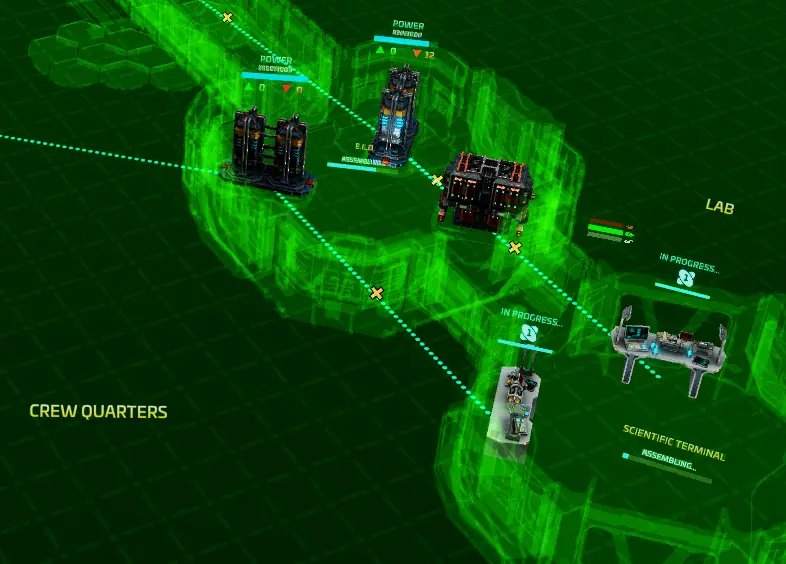
Build Lab module on the first arm, Transceiver on the second arm. Attach Small Life Support then Solar Panels to the Lab module, Docking Bay to the Transceiver.
Installeren 1 battery, 1 ELD in the Life Support module. Installeren 2 Science Terminals in the Lab.
1st Supply Order
- Order extra scientist & technician (cheapest)
- M & D parts; 1:2 (100:200 are enough)
- Dranken
You can max out the order, but since you can earn a discount on your purchase price reasonably quickly, save the bigger orders for later.
[You can order additional technicians (whom you will eventually need anyway) and scientists (who will become redundant by the end of Day 3), but this is not necessary.]
Check the Communications tab to see if the nearby stations have work for you. There are usually at least two decent research contracts for techs that you need anyway. Take whichever is the most suitable. The Loyalty Points (LP) are your currency, and by completing contracts you improve your standing, which increases the value of your LP when you cash them in, either for discount purchase prices or for straight-up cash exchange.
Once the supply mission arrives, both science terminals should be nearly complete. Re-schedule your scientists’ work time to start work immediately, and max out the new scientist’s work time; leave 9 hours free in the first scientist’s work time.
Re-schedule your technicians’ time so that each has at least six hours off, but that you always have at least two workings simultaneously. Your starting personnel can work 24 hours a day, but they will eventually suffer fatigue and injury, so it is better to adjust their schedules as soon as you can.
2nd Build Phase
Build Canteen on the third arm.
- I try to keep the fourth arm free for later development into the drone/manufacturing hub. Keeping an area dedicated to these modules is helpful, particularly in larger stations, when you need to supervise the manufacturing devices without scanning all over the station.
Install Food Dispenser, Beverages Dispenser, Tafel (one is sufficient, to begin with. Dan, a new solar panel (connected to the first), 2nd battery, 2nd ELD. Crew quarters, beds, Lounge, & 2 sofas (connect the 2nd ELD to the Crew & Lounge modules).
Once the second battery is installed, connect it to one of the science stations and disconnect the first battery. (Equalizing the power drain on batteries helps to keep everything operational.) Make sure to connect the second battery to the second ELD. (Depending on the relative skill of the technicians, the second ELD may be complete before the second battery; zo ja, the second ELD auto-connects to the first battery, which is liable to drain that battery over time.)
Not this:
Dit:
Onderzoek
1st option comes at 10 punten, rondom 2:00 a.m. The available options are Adaptation, Advanced Life Support (ALS), Defense Systems, and Manufacturing. The last two aren’t relevant yet (and Defense is barely relevant at all in Easy mode), so it’s a choice between Adaptation (which unlocks critical techs to the Gym, Training Center, and Medbay) and ALS. To build a large station quickly, you’ll need ALS to unlock Recycling (showers/baths are necessary for larger populations). To build a little slower but with the happier crew, go to Adaptation in order to unlock Gym. (Aside from needing a place to sleep, the next crew complaint to appear will be “What about gym training?”)
If playing in Normal mode or higher, your crew will become sick relatively quickly, so you should prioritize the Medbay (and hire medics) and then the Gym.
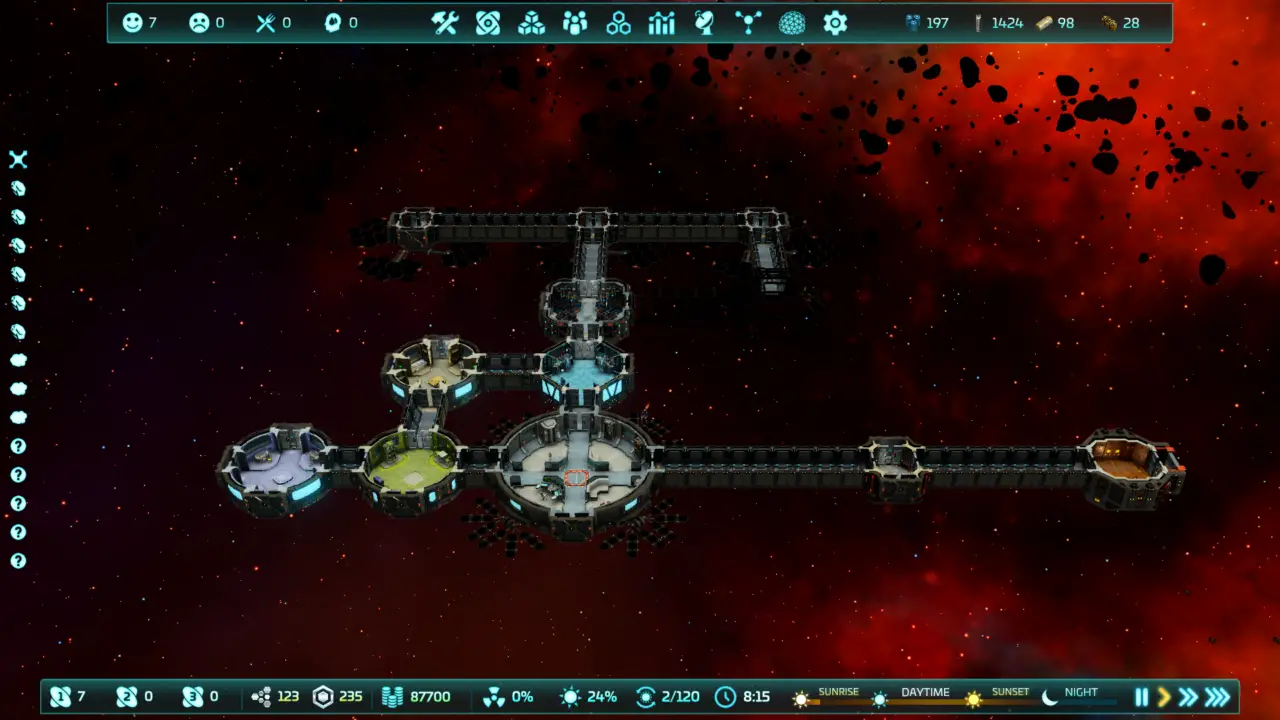
By the end of the first 24 uur, your station would look like this.
Next Steps (Dag 2 & Beyond)
Further Builds
You can start construction of additional Solar Panels (effectively one per battery that you install), and a second Life Support Module with two batteries and two ELDs for your next two module pairs. Cross-connect all batteries to all four solar panels; it does reduce the power supplied to each battery, but it provides redundancy for if/when one of the solar panels is damaged.
Further builds will depend on which tech option you took, either to the Gym and Medbay (on the Adaptation branch) or to the full-sized Life Support Module and the Bathroom (on the ALS branch).
Extra Scientists/Technicians
You can hire more of these to complete work more quickly, but they cost more. While the extra scientists are needed most in the first couple of days, after that, you will always have more research points than you can use. It is possible to research all techs within five weeks with only two scientists, and the biggest holdup is not having sufficient T3 science points.
You can fire scientists (of iemand) once they’re no longer useful, but firings cost you LP. You will eventually need many more technicians, but the more you hire before you have built the Bathroom module, the more likely you are to run into hygiene issues.
Is Happiness Relevant?
Ja. A happier crew works more efficiently, and it factors into your weekly report. (You earn LP for the happy crew, and you lose LP for the unhappy crew.) That is measured at the end of the week, so you only need to really pay attention to it (particularly with station decorations) from Day 5 op.
Further Research
Starting research into probes and computers requires a large first chunk; you need to start probing the system, particularly for debris and anomalies (which give you free science points), and you need to research the Spectrum Analyzer, and then the Mainframe, for the T2 and T3 science points, all of which you need for more advanced technologies. If you research the cheaper techs, bijv., Training Center and Medbay, by the time they’re complete and you’ve built the relevant modules, you’ll likely have something of a research surplus you can devote to the more expensive techs.
Thinking Ahead
The Training Center is useful to improve the performance of your personnel. The next phase of research should be drones so that you can scan the area’s resources and mine them. There’s no point in starting Manufacturing research until you’ve mined resources for a least one workday and your Manufacturers have something to work with.
Dat is alles wat we vandaag hiervoor delen Base One gids. Deze handleiding is oorspronkelijk gemaakt en geschreven door Groucho. Voor het geval we er niet in slagen deze handleiding bij te werken, U kunt de laatste update vinden door dit te volgen link.