
This guide will show you some of the best crafting recipes in TerraForge. 동시에, you will also find some of the best mining strategy to maximize your income in the game.
Crafting Recipes
I figured out the starting value of every resource by using the simplest recipe. When there are different recipes, such as for a silver dagger and a silver ring, I compared them based on how rare they are. You can check the categories like “흔한,” “희귀한,” 그리고 “전설적인” below for more details.
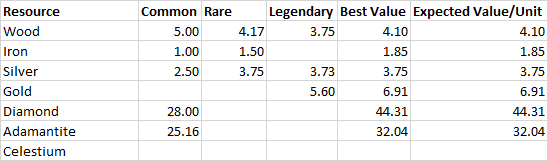
다음, I found out the value of all recipes using these starting values to figure out which recipes are the best.
I used the difference between the Sell Price and the Expected Value (calculated from the ingredient costs) as my guide.
For the recipes with the biggest difference, I worked out the “Expected Value/Unit.” This tells you the best price you can get for each unit.
Using this value, I went through my calculations again for all recipes. You can check the details below.
그만큼 “Margin[%]” shows whether a recipe is good or bad. If it’s at 0%, you’re making the optimal amount of money with that recipe. Anything below 0% means you’re not using the resources in the best way.
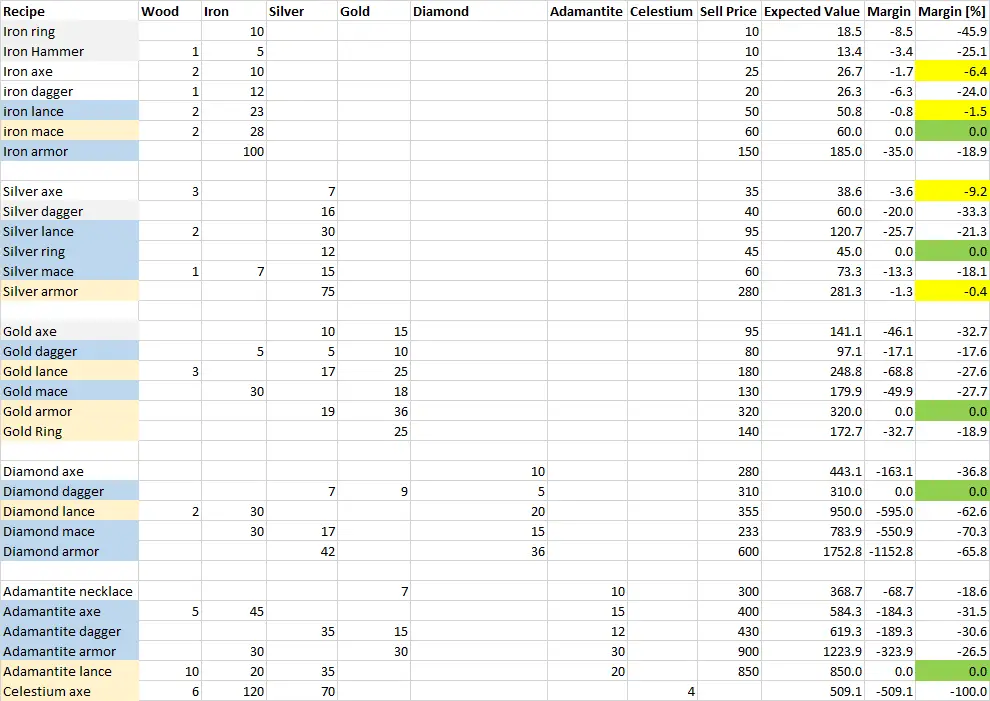
요약하면, there are a few recipes that are good, and a lot that you should steer clear of. I’ve highlighted the definitive optimal recipes for all base ingredients in green. 추가적으로, for iron and silver, there are some decent alternatives marked in yellow.
I hope this guide proves useful to you. Feel free to share any feedback or suggestions you may have.
Mining Strategy
지금, I want to share how I aim to efficiently mine resources. I don’t assert that this is the ultimate strategy, so feel free to add or comment if you have a better approach.
This guide’s general concept is suitable for the early game with some restrictions: only invest in sites you can easily reach the bottom of. The valuable resources are always found at the bottom. If you can’t realistically reach and mine them, you’re essentially wasting your gold.
Relic Selection
Let’s talk about my relic selection.
For this strategy, I opted for the following relics:
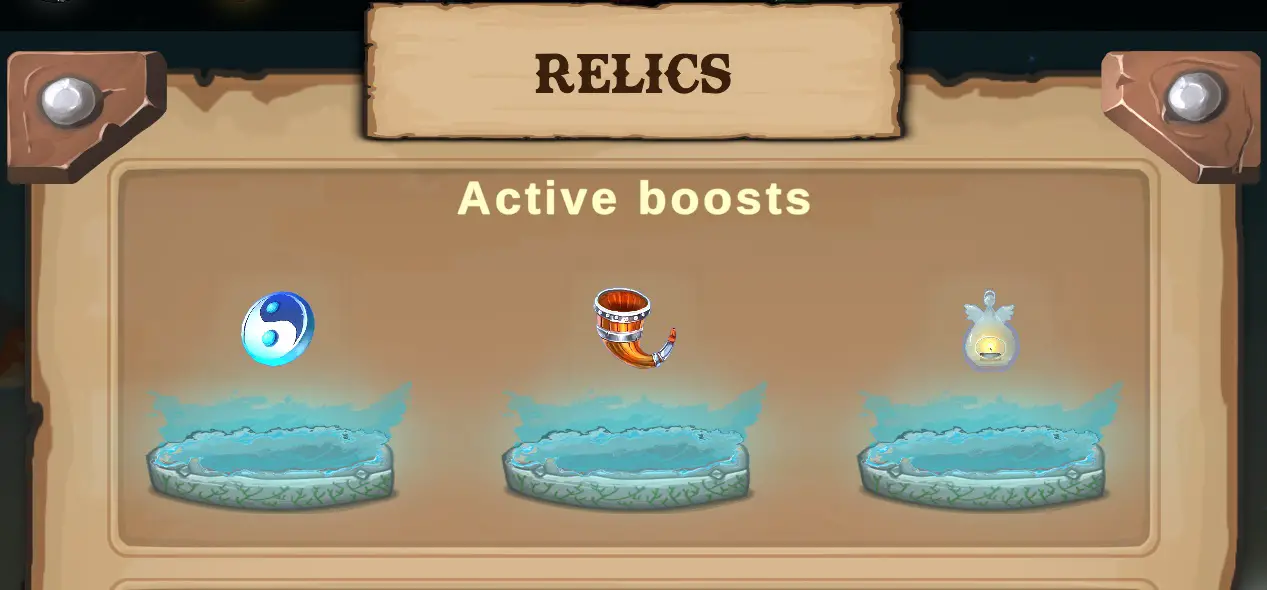
우선 사항 1: “Eternally Yin-Yang”
- The bonus energy return is highly beneficial because you have a limited time for mining resources, so being able to use as many utilities as possible is crucial.
우선 사항 2: “Horn of Action”
- When timed perfectly, this relic allows you to almost double the lifespan of your drill. This is crucial for digging as fast and as far as possible within a short time frame.
우선 사항 3: “Flame of Ghast” 또는 “Lens of Clarity”
- Since there’s no clear third Best in Slot (BiS) relic, I recommend either of these. They provide a small bonus in mining or overview, contributing to your efficiency.
Mining Site Selection
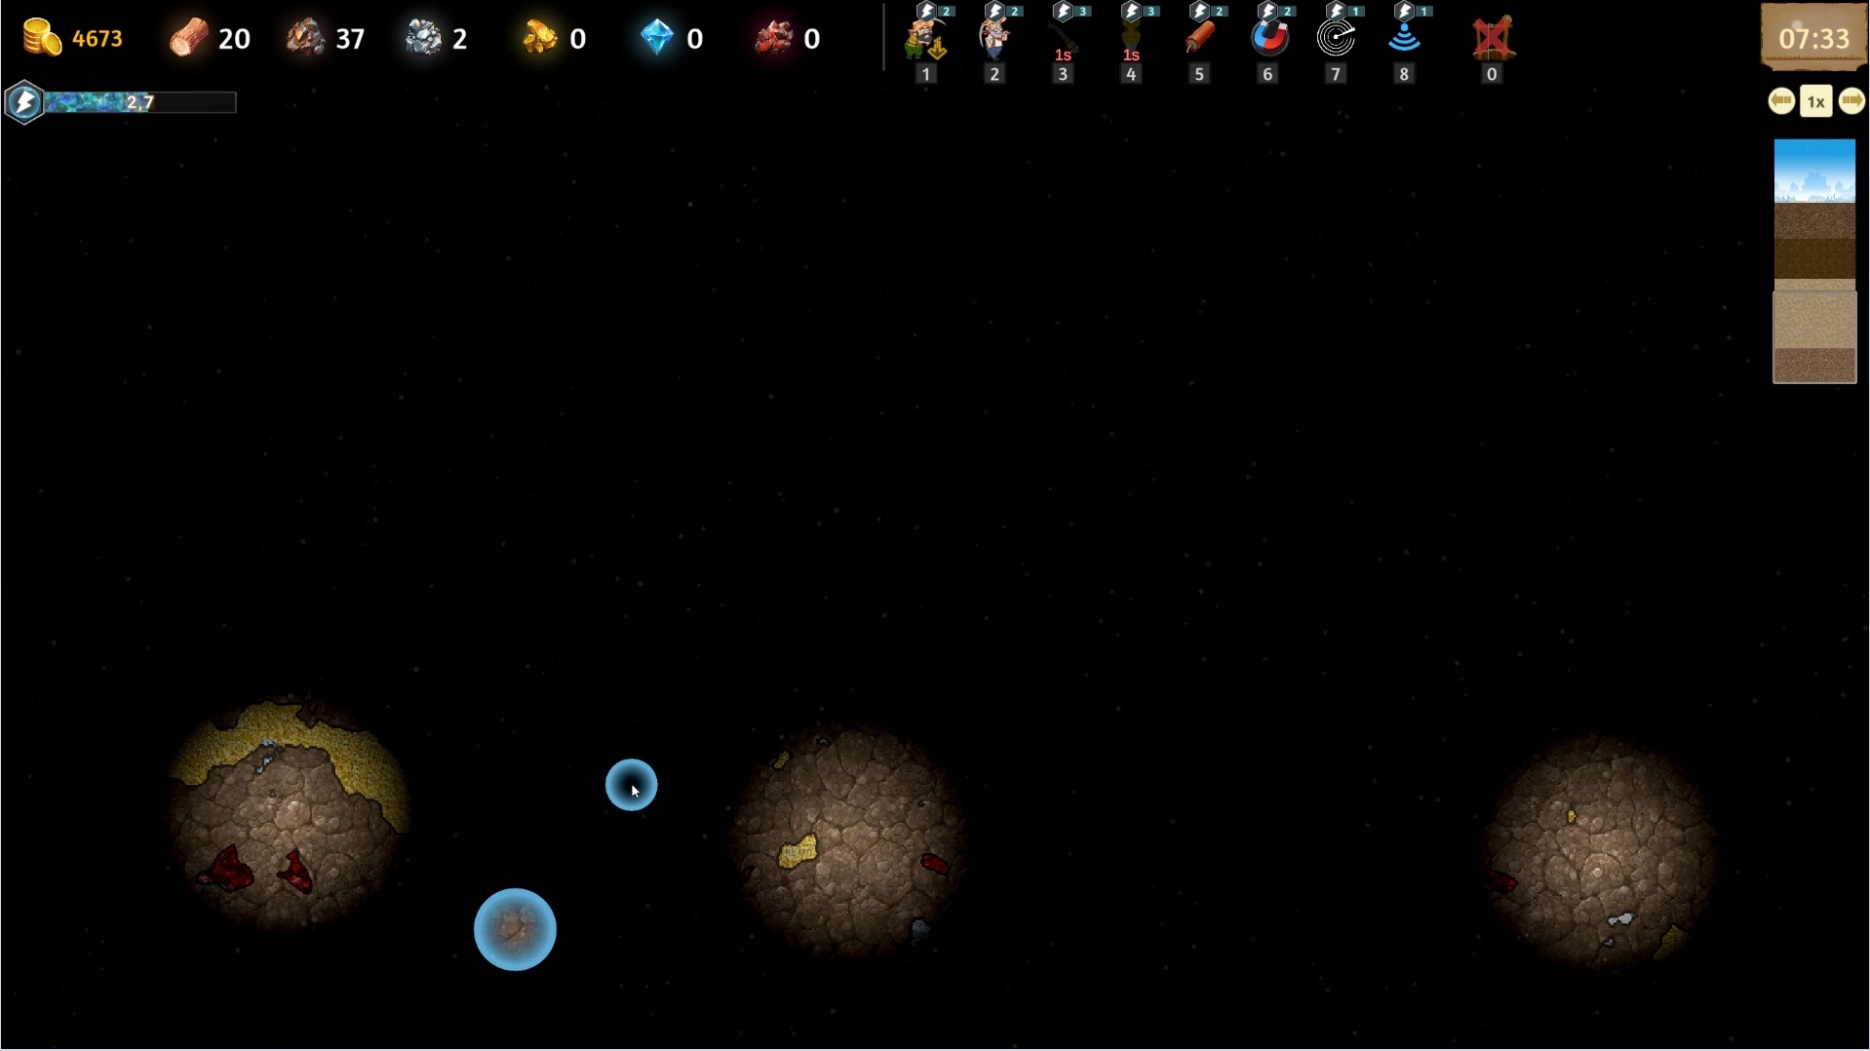
The mining sites come with varying resources, license days, and depth values. Since it’s free, I aim to roll for an optimal site.
An ideal site should meet the following criteria:
- It’s crucial to have at least diamonds or Adamantite resources on the site, as these are the most valuable resources by far.
- I prefer sites with 2 날, providing enough time to mine deep down and gather almost all important resources.
- Sites with diamonds and/or adamantite are always deep, so I don’t focus too much on the depth value.
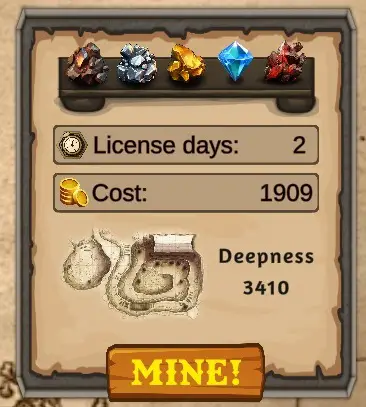
일반적으로, the overall price is always worth it if you manage to harvest most of the resources from deep below.
A quick note: Always keep around 100 Gold to ensure you can buy all the trees/wells.
Step-by-Step
When you pick a spot, the map shows up, and there’s a timer that’s not moving yet. The timer only starts counting down once you put your entrance in place. Before you do that, make sure to collect all the trees and wells. They’re really valuable and will make you more money.
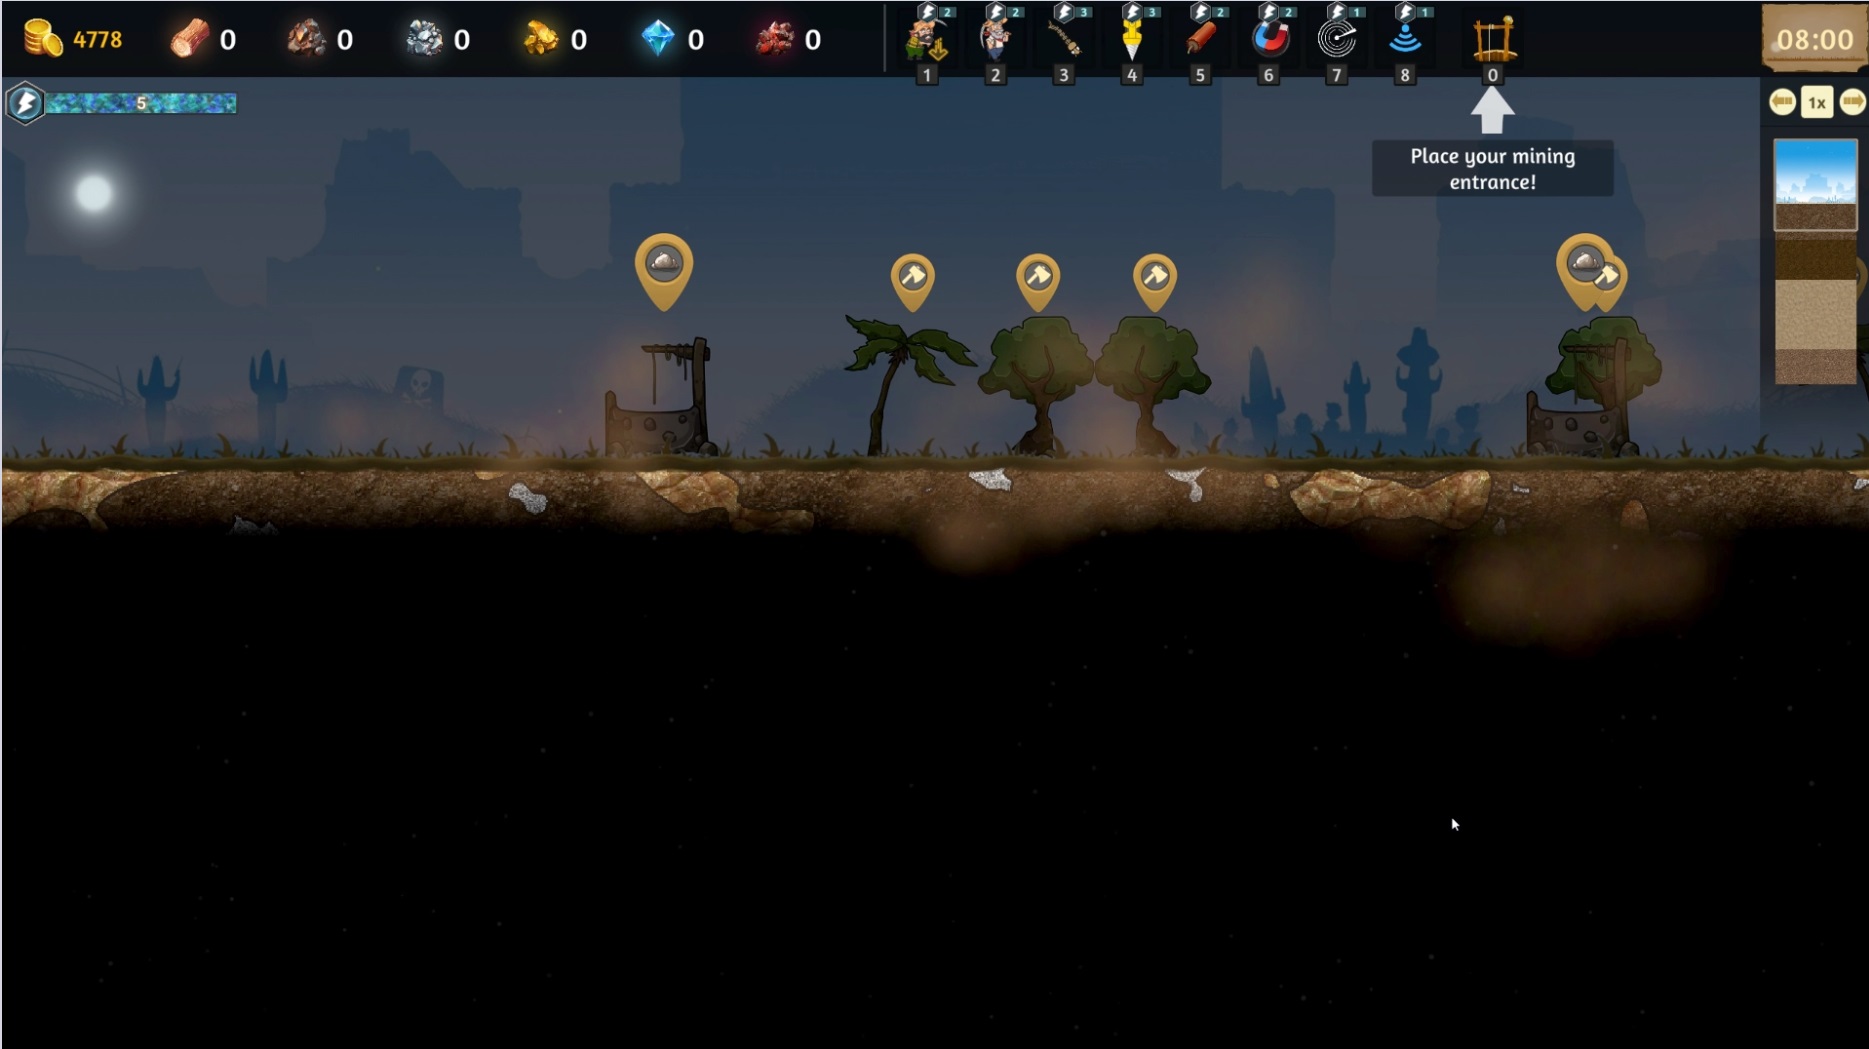
이후, I like to put my entrance somewhere near the middle, right on a resource spot to get the first resources easily. 다음, you begin digging with your drill. It’s the quickest and most efficient way to go down as fast as you can while getting the most resources.

While your drill is working, check the bottom of the map with your scanner to find valuable resources. 항상 가지고 있는지 확인하십시오. 3 energy to restart your drill, but don’t let it reach 5, or you’ll waste resources.
Use the ‘Horn of Action’ to reset your drill before it runs out. This doubles its range and helps you gather more resources.
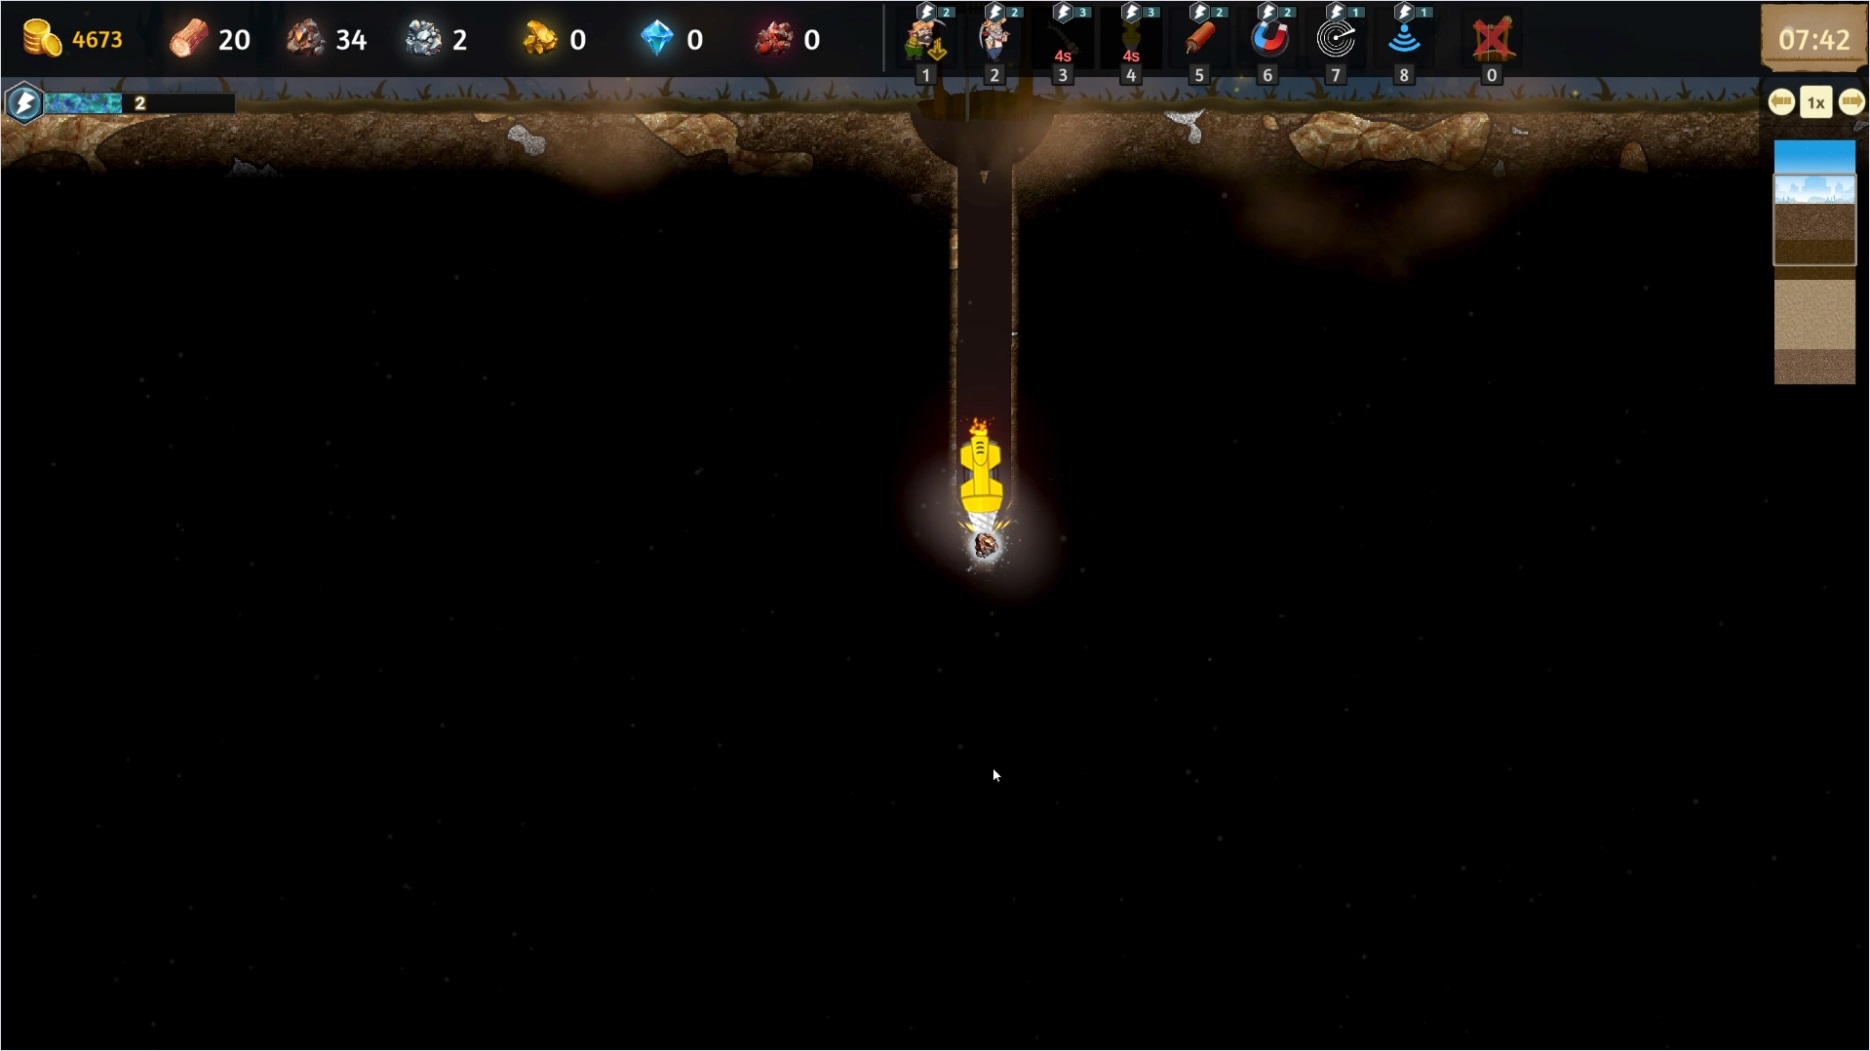
Continue scanning the ground and refresh your drill when needed. As you get closer to the bottom, you should have about 5-6 minutes left for mining. Move your drill towards the biggest nodes.
Whenever you have energy available, send a miner since they are the most effective units in terms of mined area per energy. Concentrate on gathering Adamantite and Diamonds, and begin with the largest resource nodes.
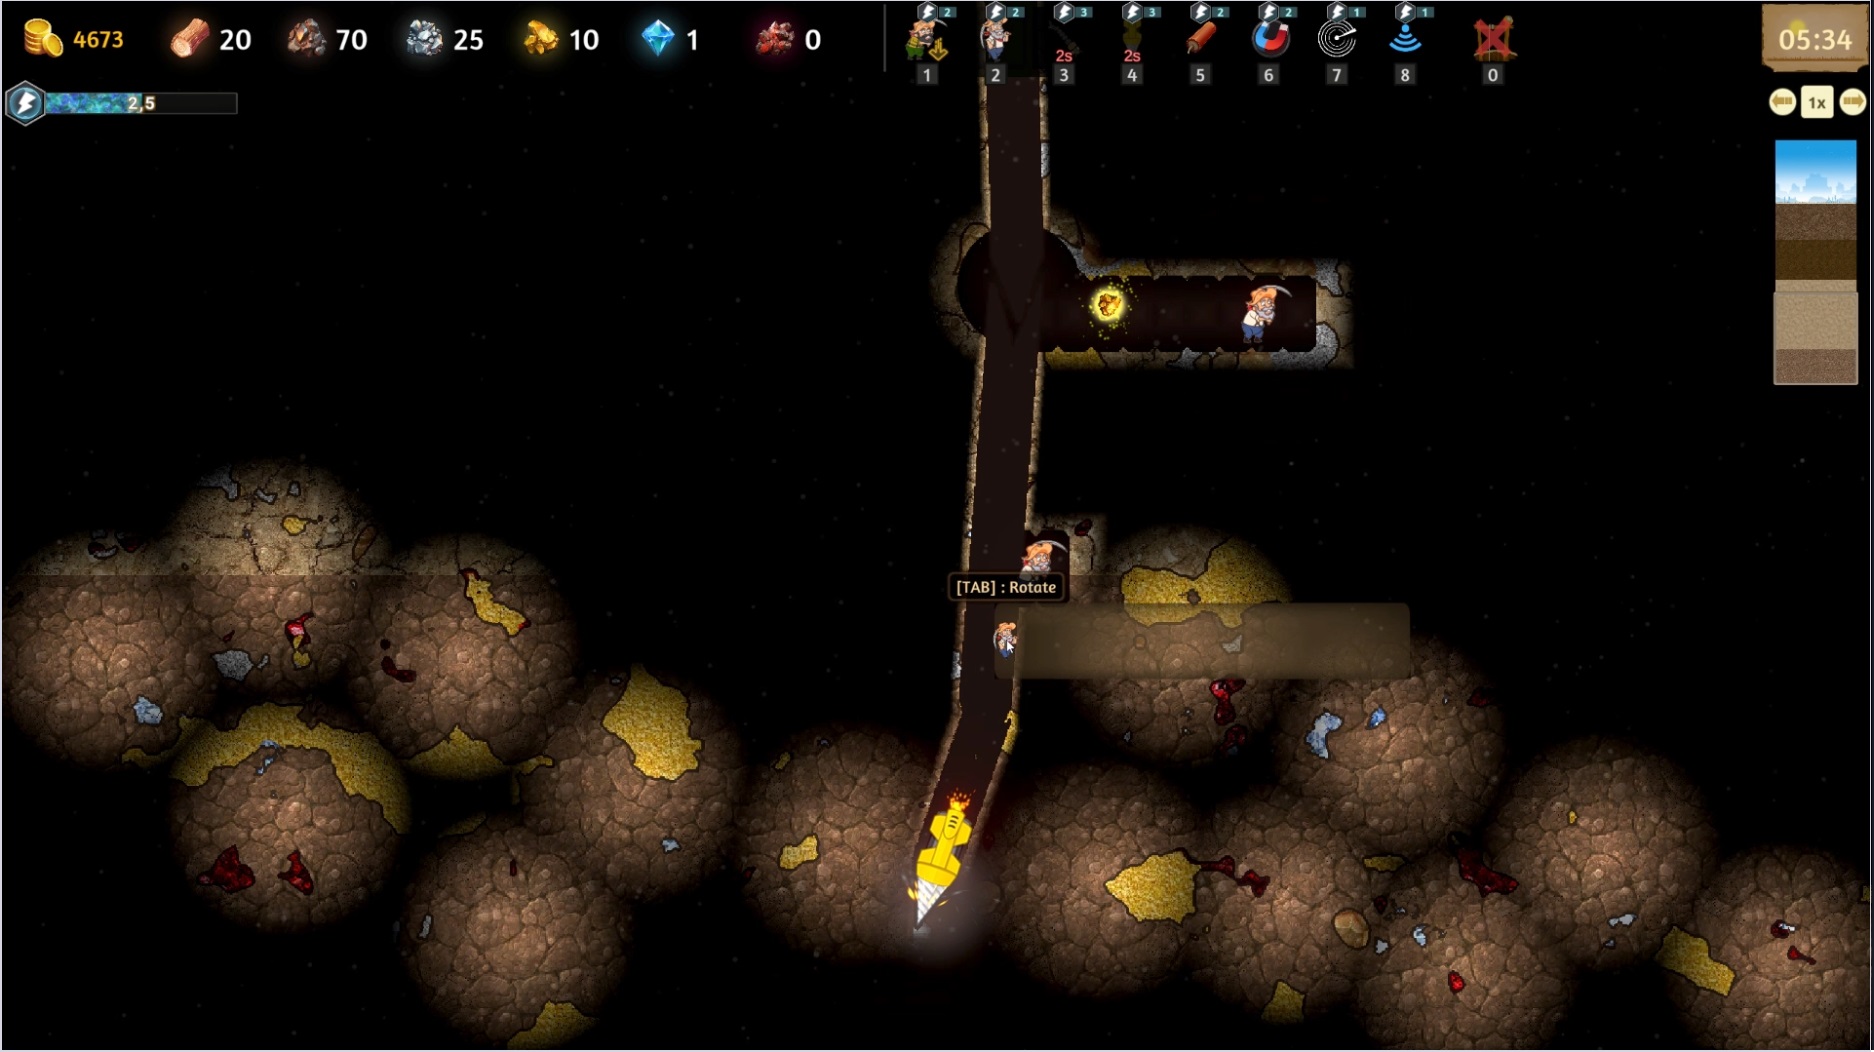
If you can’t find easily accessible nodes, use drills or sometimes worms to create a vertical shaft. Remember to redirect them as needed.
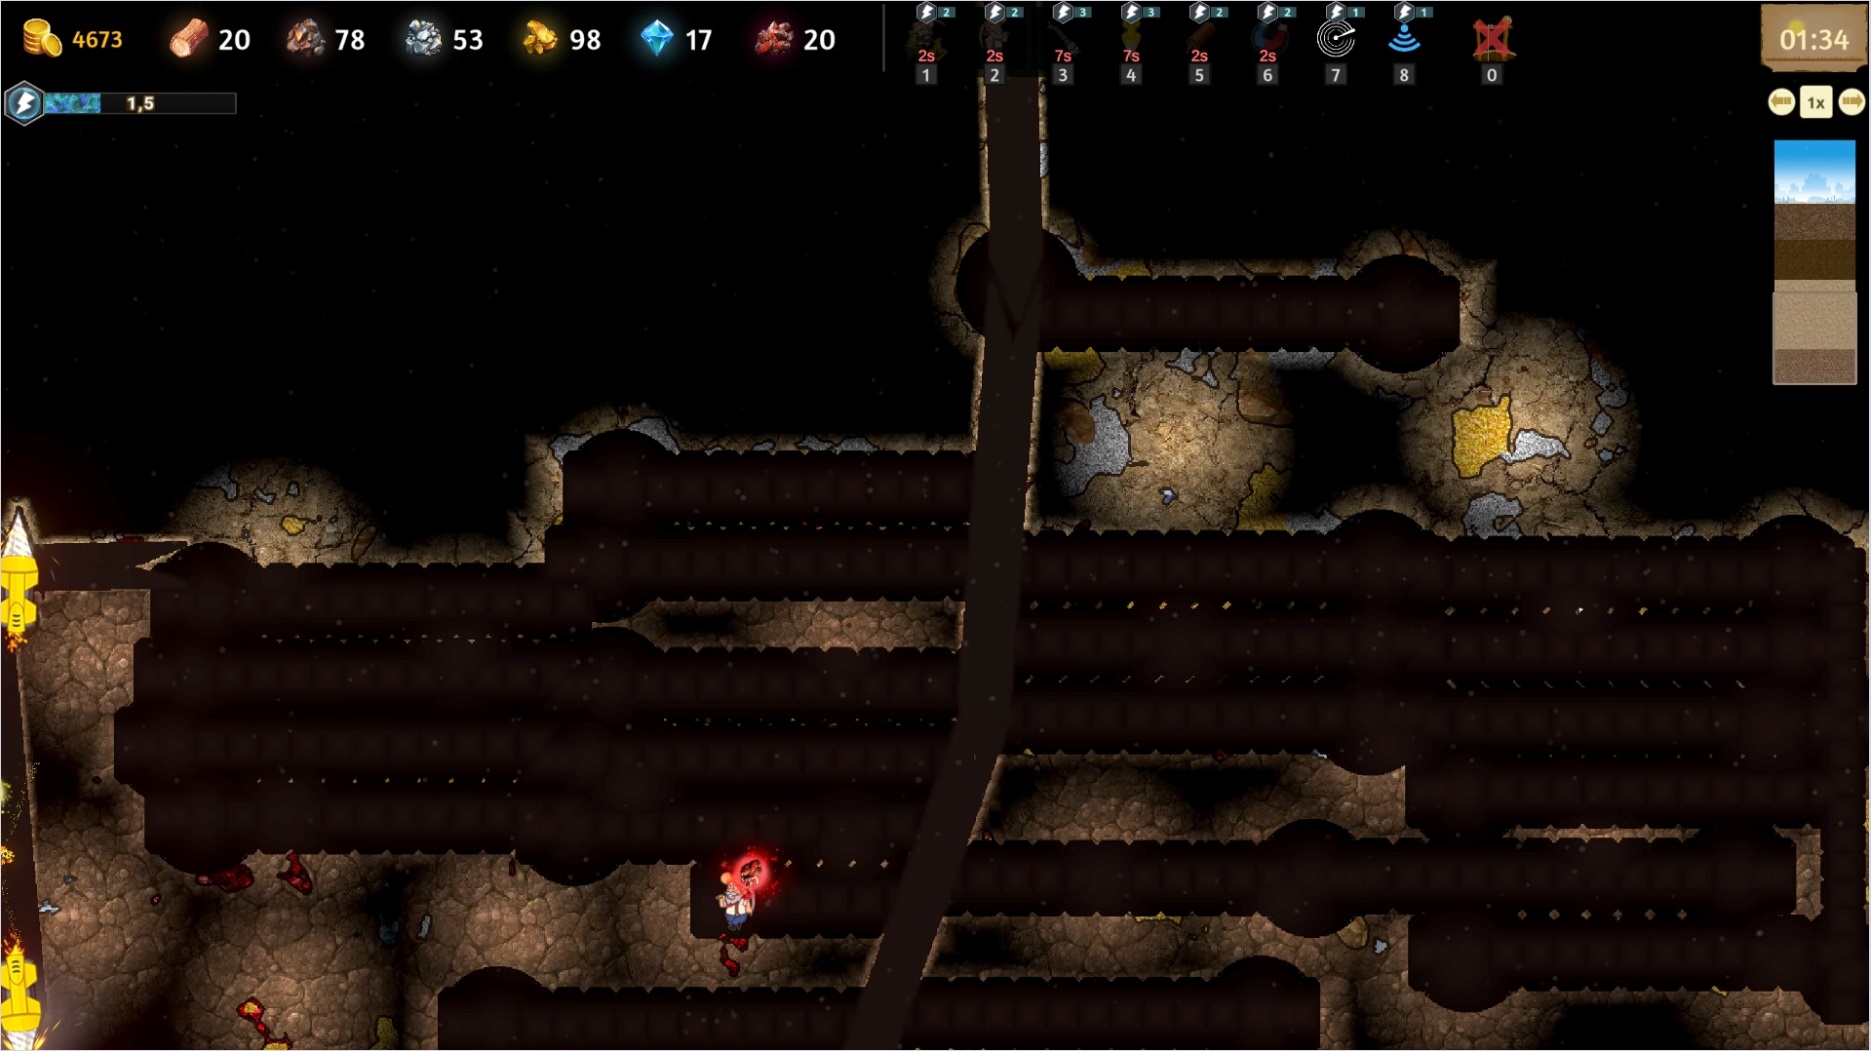
결국, you should have mined the entire bottom layer of the map and collected a good amount of Diamonds and/or Adamantite. 추가적으로, you should have gathered a decent amount of iron, 은, and gold, along with the wood from the trees.

이것이 오늘 우리가 공유하는 모든 것입니다. TerraForge 가이드. 이 가이드는 원래 작성자가 작성하고 작성했습니다. 2002turbo. 이 가이드를 업데이트하지 못한 경우, 다음을 수행하여 최신 업데이트를 찾을 수 있습니다. 링크.