- 제목: Tabletop Simulator
- 출시일:
- 개발자:
- 발행자:
Information about Tabletop Simulator is still incomplete. 이것을 사용하여 게임의 세부 정보를 입력할 수 있도록 도와주세요. 문의 양식.
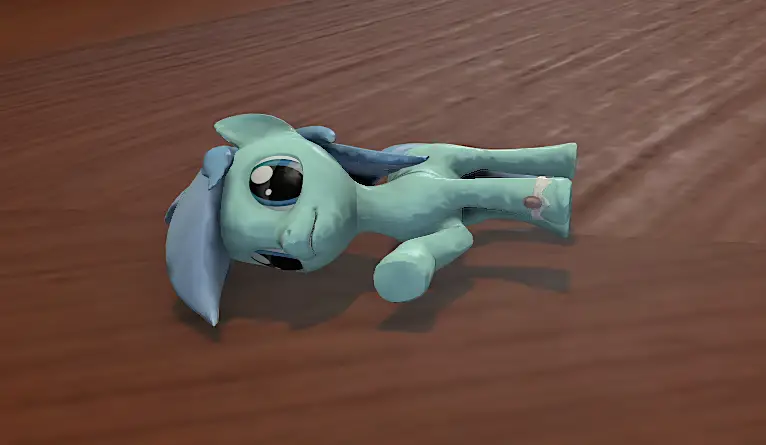
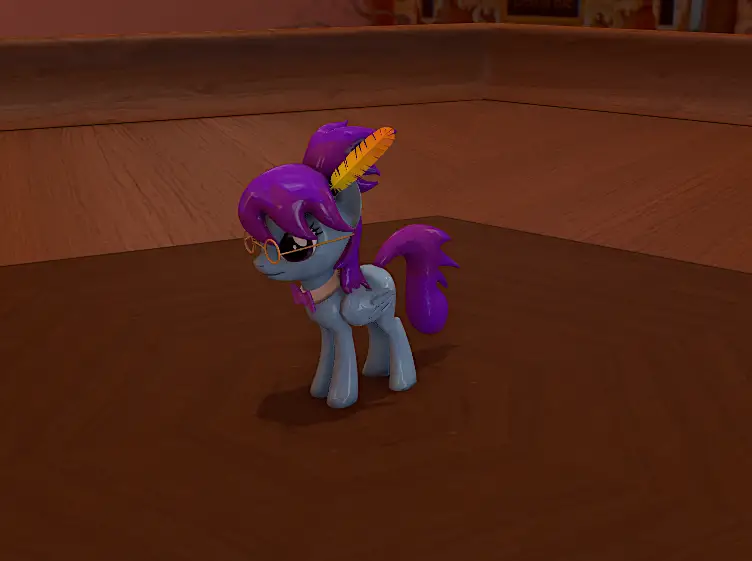
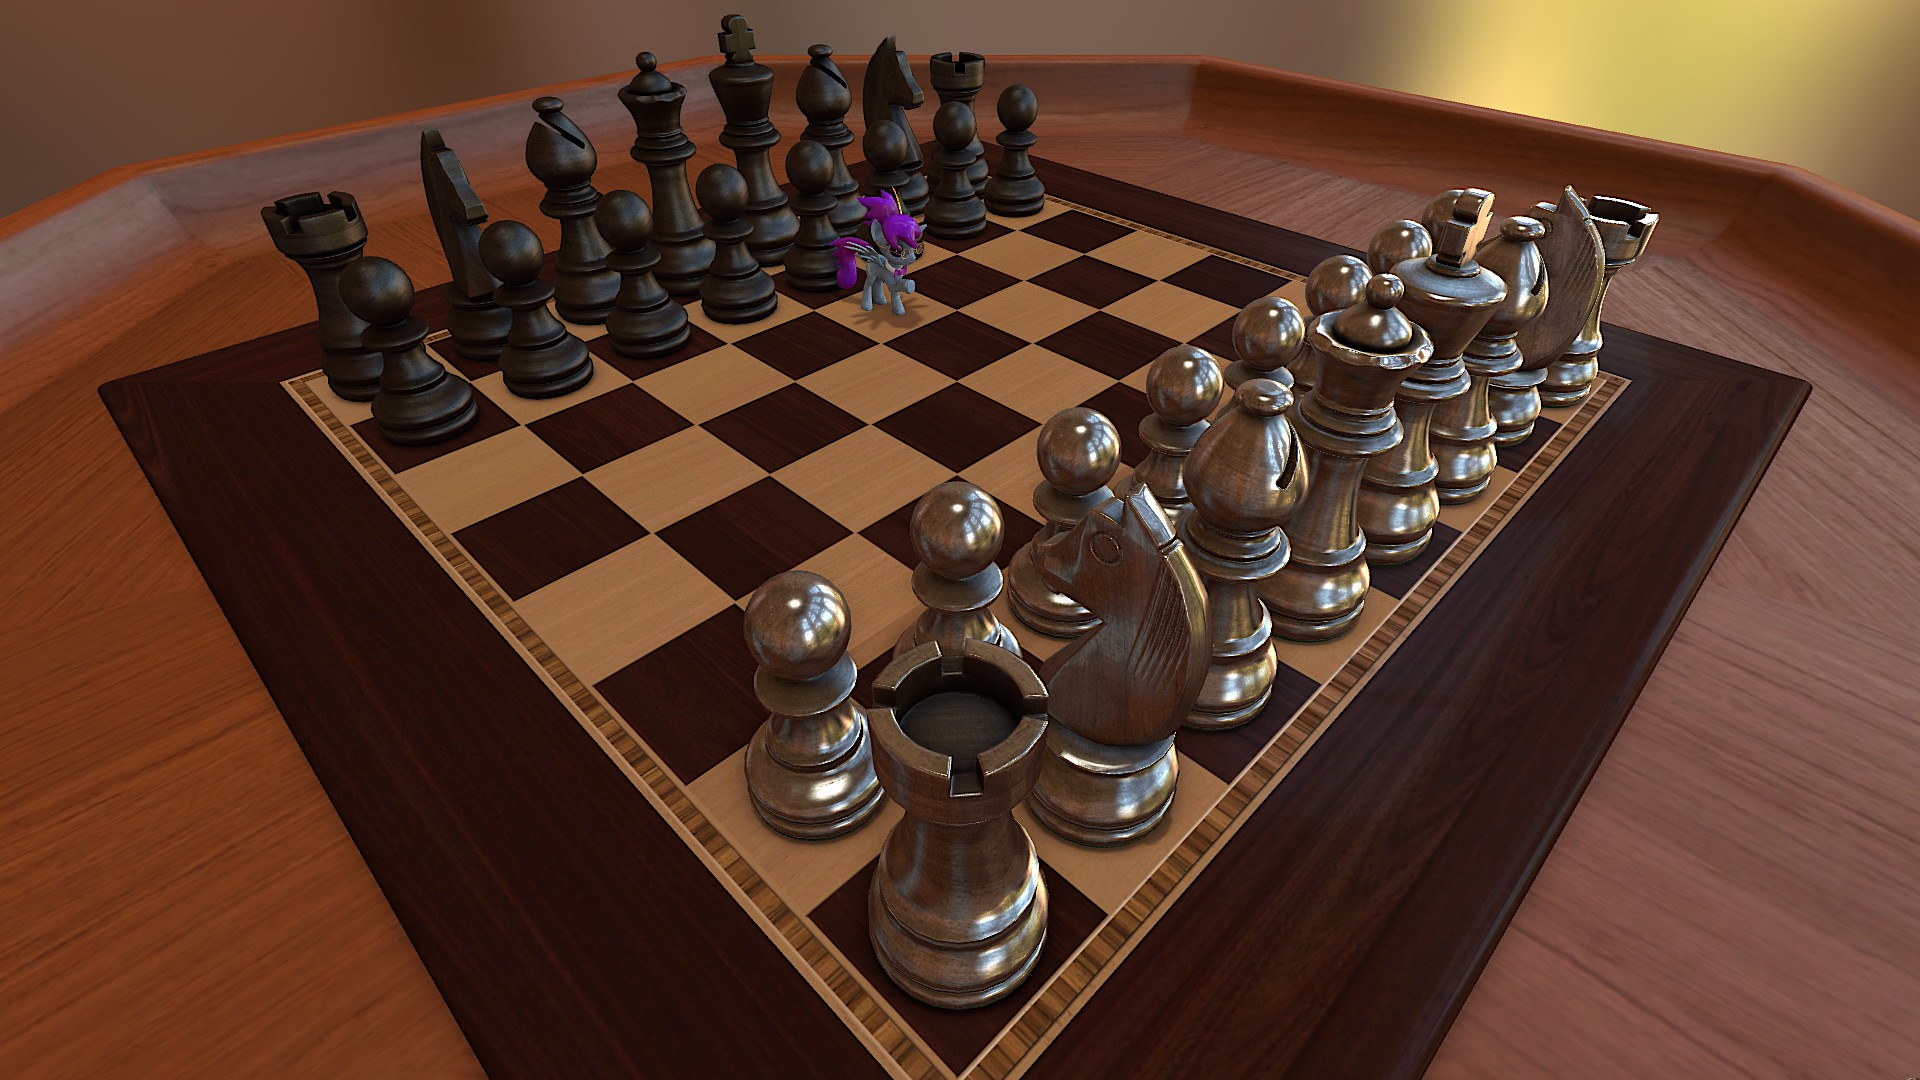
Ever been playing a My Little Pony game and thought, “This would be so much more fun if I could include a little plastic figure of my personal OC to play with, so I feel like I’m actually in the game!”
잘, this can be easier said than done. But I got you covered. Using nothing but various pieces of open source software (for the uninitiated that means ‘free’) I made custom pony figures for me and a few friends so we could play Tails of Equestria in Tabletop Simulator with the best tools possible. After encountering several problems, I managed to fix them one by one and over time, I streamlined the process to the point it can be done in 10 simple steps. And now I’ll share it with you.
Required Tools
- Tabletop Simulator (natch)
- PonyLumen’s 3d Pony Creator
- Blender
- GIMP (GNU Image Manipulation Program)
- dupeGuru (선택 과목, but will get unnecessarily tedious without)
- 7-zip (다시, optional but preferable)
단계 0: Create your pony
가장 먼저, you’ll need to design your pony.
Use PonyLumen’s 3D Pony Creator to create your pony.
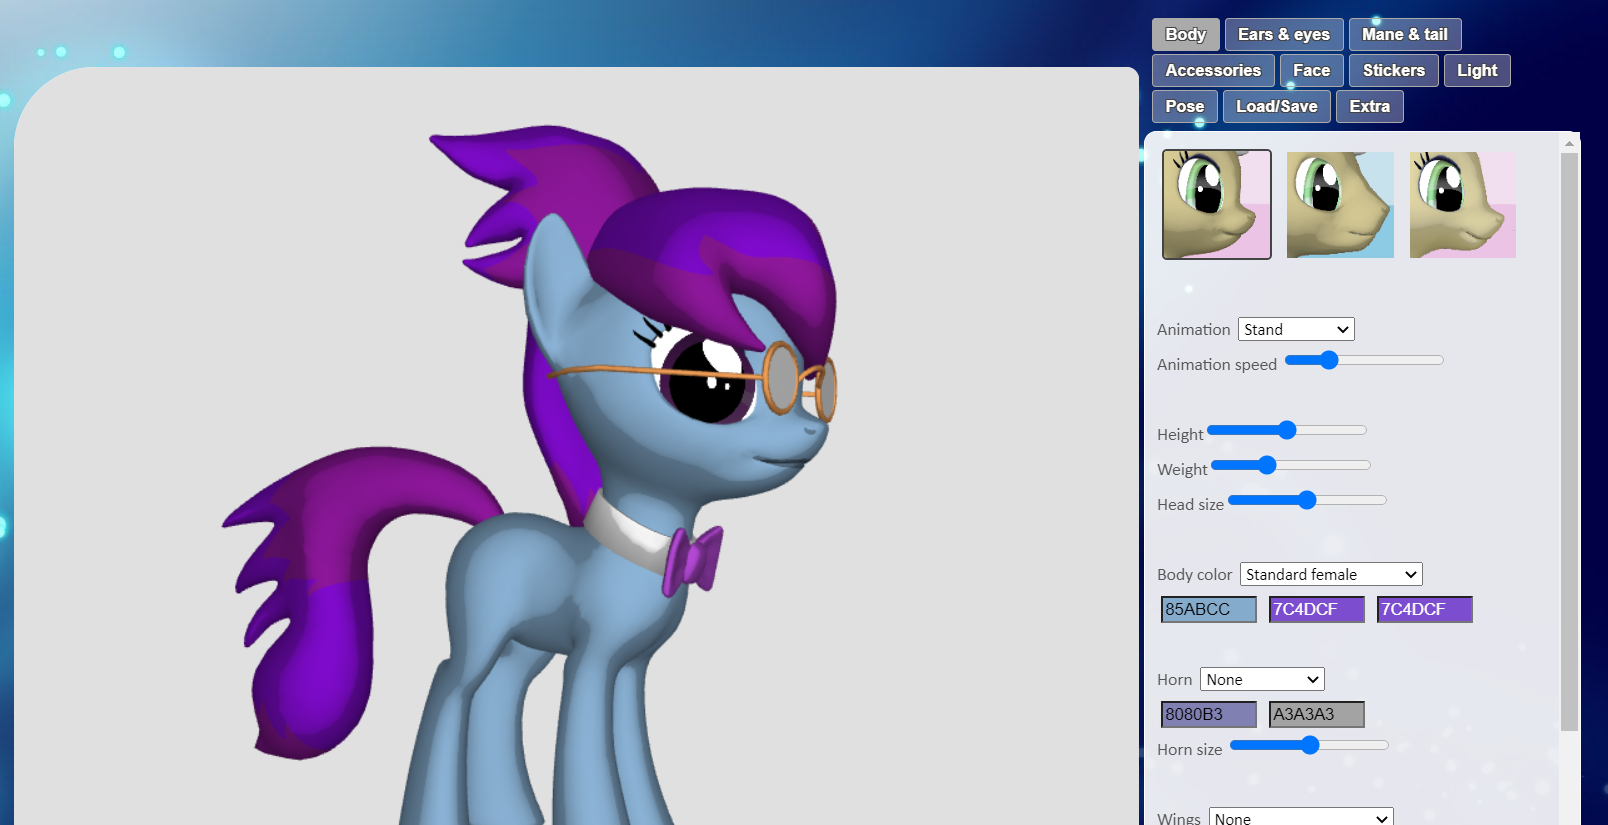
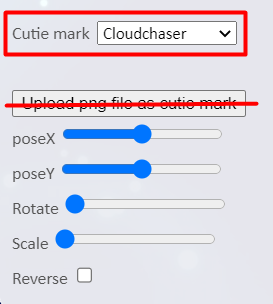
Customize it in as many ways as you like. 재미있게 보내세요. Though note that the custom cutie mark feature will not export, so it’s not worth adding. However we can add it later, so you can use a temporary cutie mark from the drop-down list for the time being.
완료되면, download the pony save file, and save it to a new folder, just in case you want to make additions later. 날 믿어, you’ll need it.
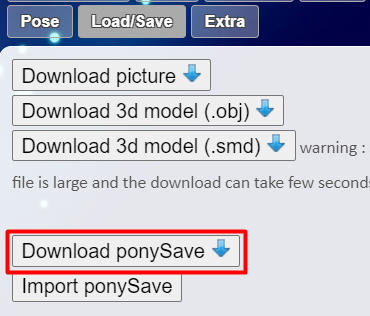
You’ll want to do this in a new folder, since there will be a lot of files we’re working with, and you don’t want them mixing in with a sea of other files.
지금, 일단 그게 완료되면, you’re ready to export. 하지만 먼저, you’ll want to consider which poses your pony will take.
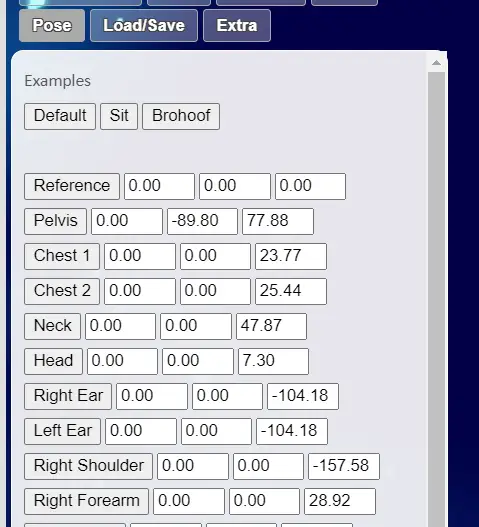
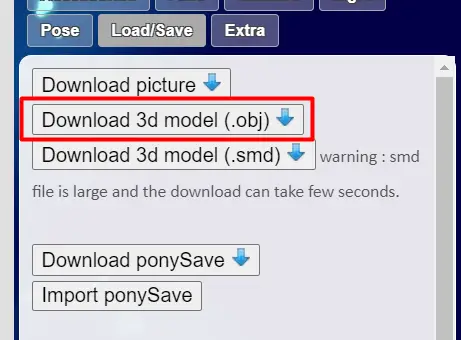
The pony creator comes with three built-in poses, which is a good place to start. Click on ‘Default’ (seriously click on ‘default’ don’t just assume it’s already on default, click on it) then go back to the save/load tab and click on ‘Download 3d model (.obj).’
Save it to the same folder you placed the pony save file in, and name it something unique, like ‘standing pony.zip.’
Do this for the other two poses, and save them using appropriate names, like ‘sitting pony’ and ‘brohoof pony.’
If your pony has wings, you’ll also want to save versions of each pose with the wings both open and closed.

이 후, if there are any other poses or facial expressions you want to include, by all means, have fun with them. 하지만 주의하세요, there’s no guarantee they’ll export properly. 어떤 이유로, the pony creator doesn’t export objs of closed eyes very well, 무엇보다도. But experiment and we’ll see what does export properly, you may get luckier than me. If you make custom poses, be sure to download the pony saves of that as well.
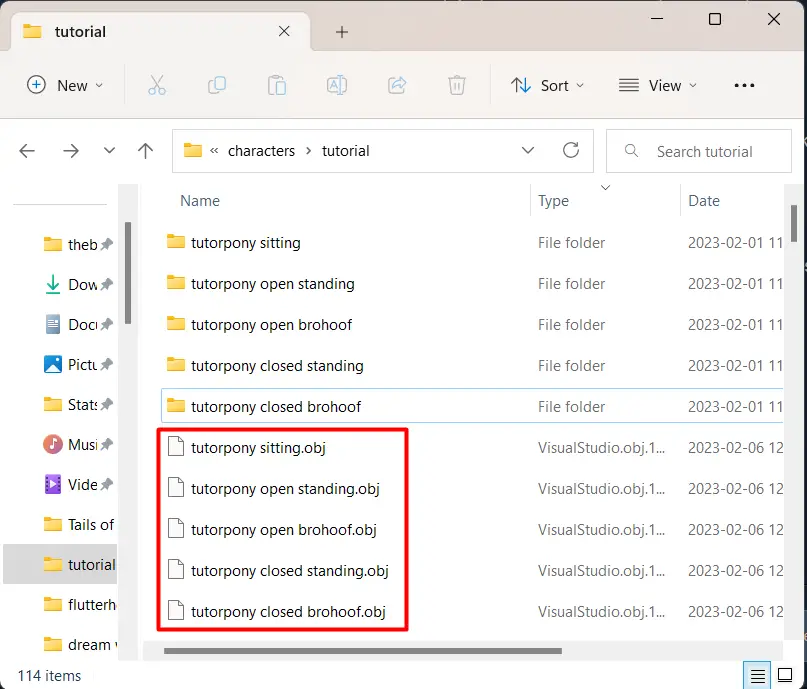
After this you’ll have between 3 그리고 6 (possibly more) zip files to work with, each containing around 2 dozen files. 하지만 걱정하지 마세요, we’ll be cleaning this up in short order.
단계 0.5: Extract and cleanup the exported files
Select all the zip files, and right-click on them, and use 7-zip to extract them all by clicking on “Extract to ‘*\'”.

If on Windows 11, you’ll have to click on ‘Show More Options’ 첫 번째.
If you don’t have 7-zip installed, you’ll need to right-click on each one individually to extract them.
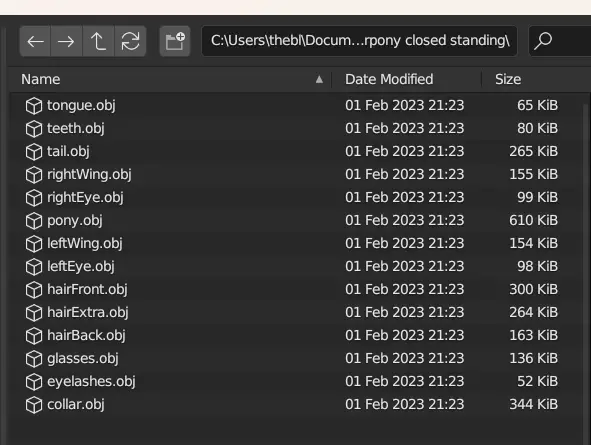
The result should be as many folders as there are zip files, now containing a bunch of png and obj files. Many of these files are duplicates of each other.
To thin out the heard, 달리다 dupeGuru on the folder by dragging and dropping it into the program.
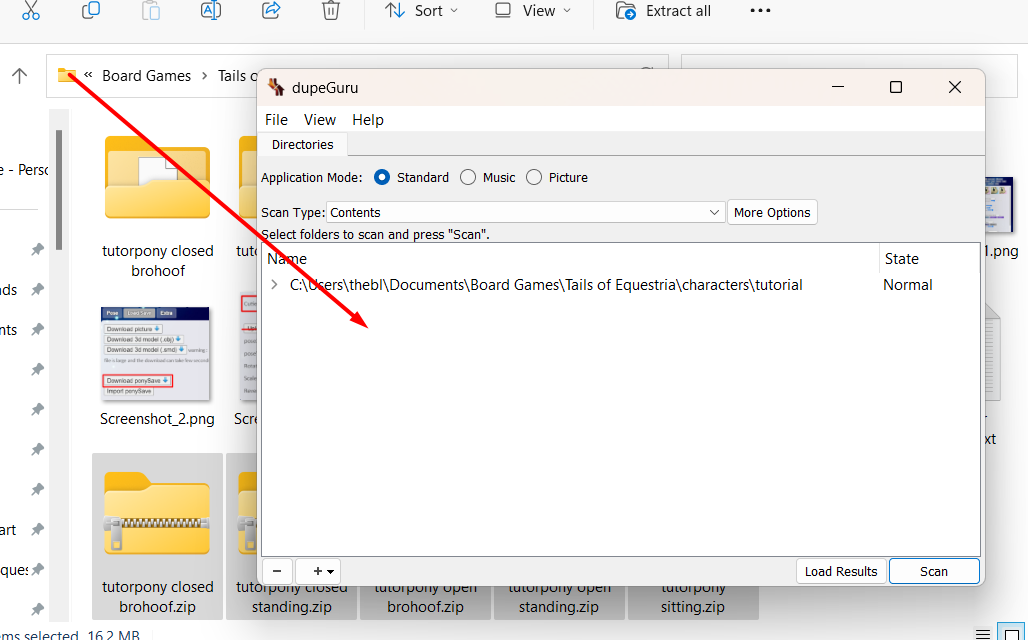
다음, click on ‘more options’, and ensure the program ignores nothing.
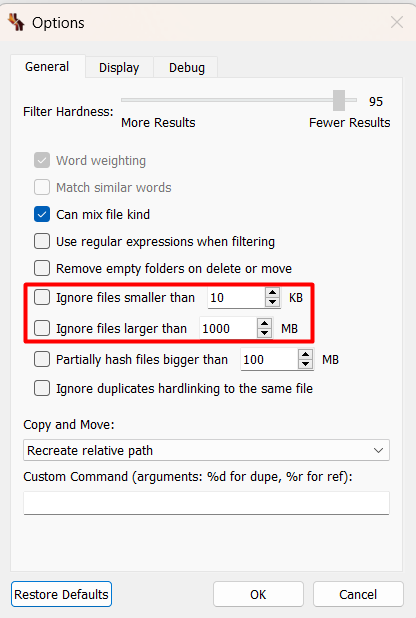
Click ‘OK’, and then click ‘scan’.
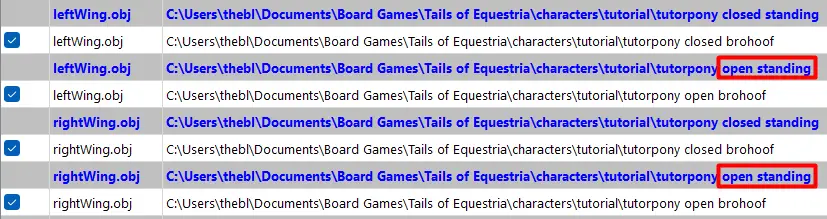
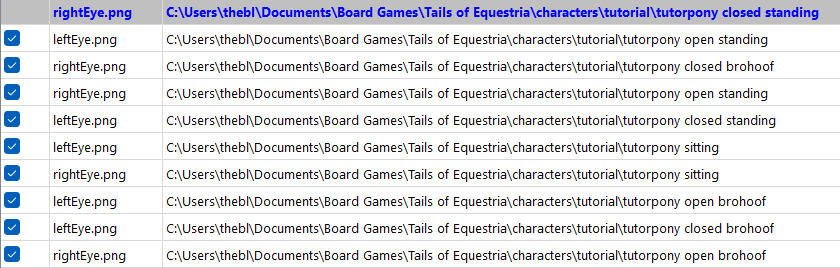
On the results screen, you’ll see a lot of files. Choose which pose will take priority. 내 경우에는, I chose ‘closed standing’.
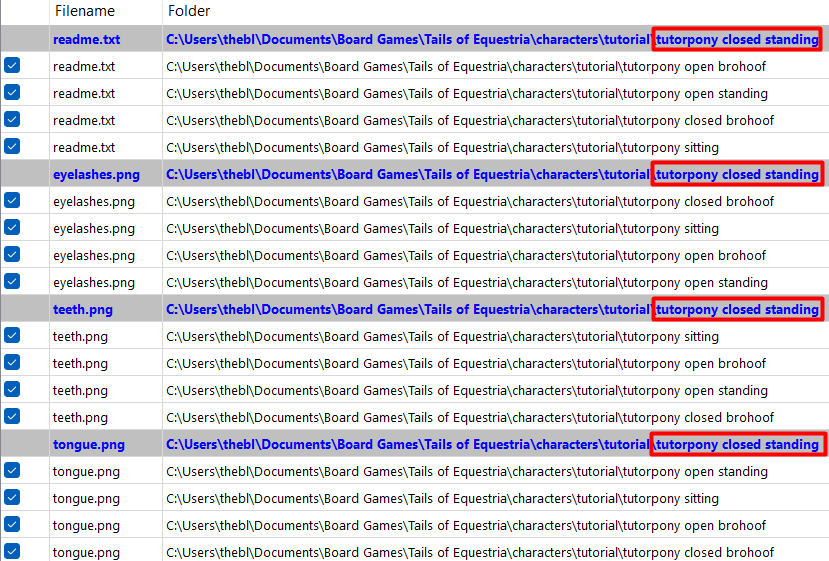
In any case where that’s not highlighted in blue, select the correct one and press Ctrl+Space.

In any case where you find that’s not an option, just select the closest one.
In most cases all the file names will be the same, 하지만 항상 그런 것은 아닙니다. 그런 경우에는, just choose one of them to take priority.
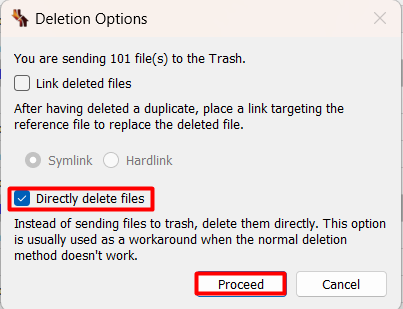
완료되면, press Ctrl+A then Ctrl+D. Then choose to directly delete files, and click on ‘Proceed’.
And now that you’ve trimmed the excess, it’s time to move onto the next step.
단계 1: Stitch Texture File
The pony downloaded was packaged as multiple files. This is a problem because TTS can only accept one texture file per object. So we need to make the multitude of texture files into one single file. The only other way is to make the pony figures out of multiple objects, which is just NOT an option.
열려 있는 GIMP, and create a new file.
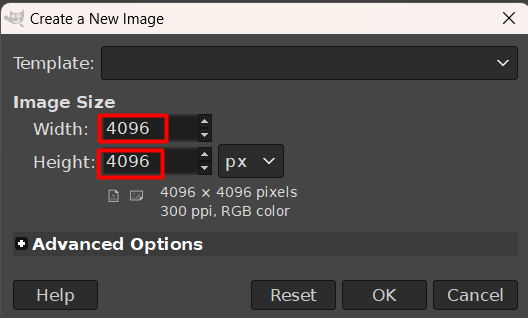
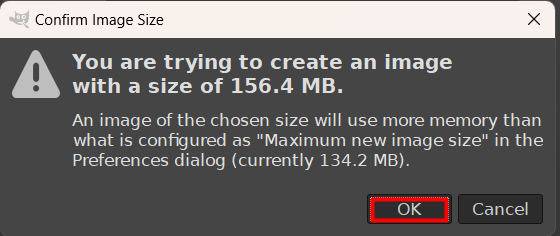
Make the file 4096 엑스 4096 픽셀, and click OK. You might get a message saying you’re exceeding the file size limit, just ignore it and click OK.
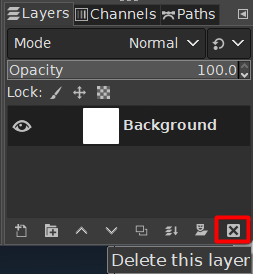
The file will come with a background layer already within. Delete it.
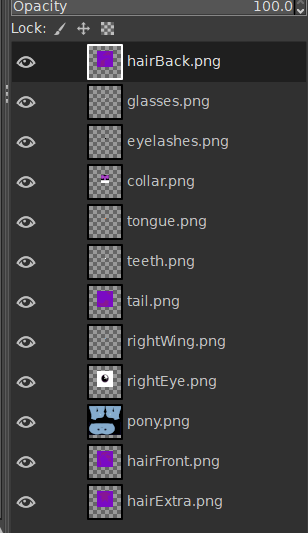
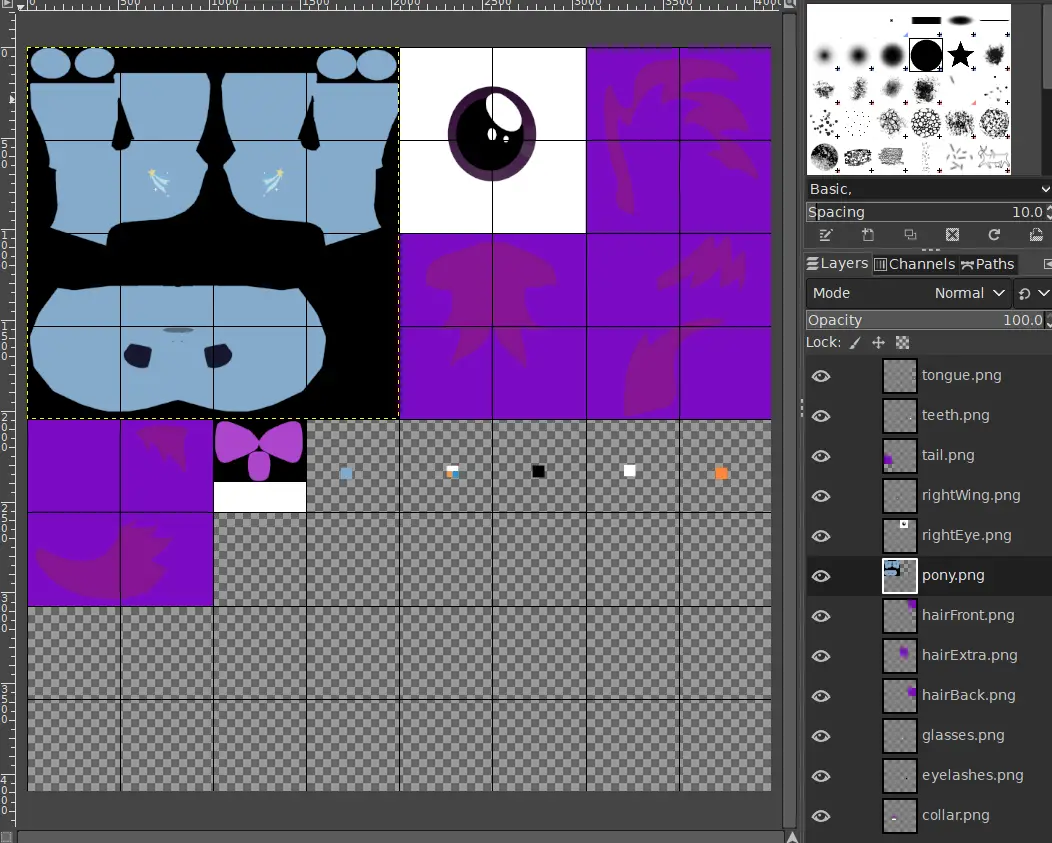
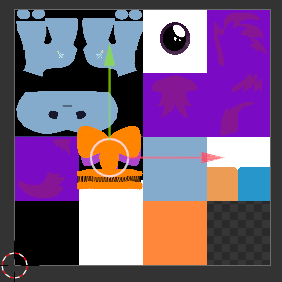
Go to the folder for the priority pose you chose in the previous step. All the png files should be there. Select all of them and drag them into the main screen in GIMP.
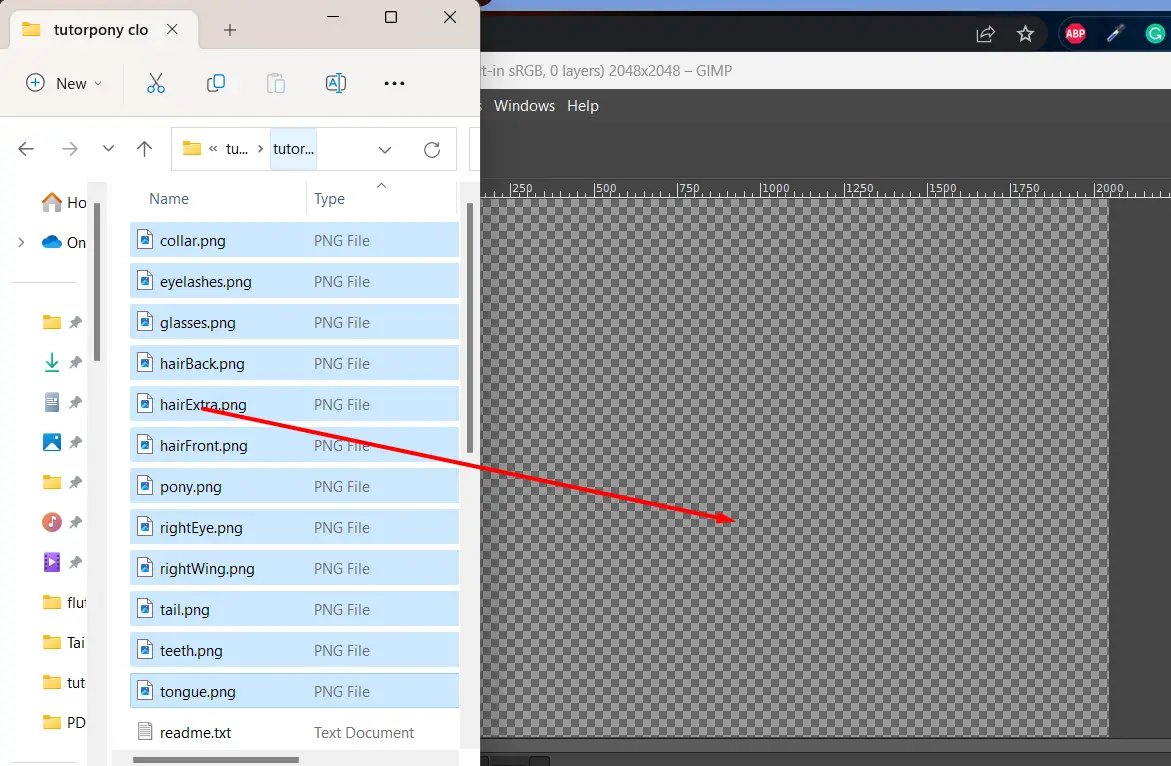
This will add all the files as layers.
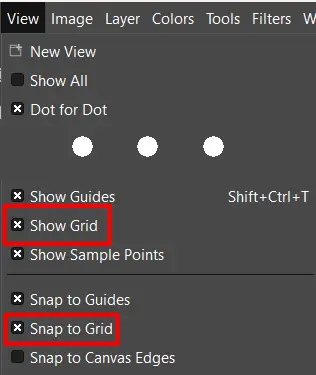
Now it’s time to set up the grid, to make the laying out of the elements much easier.
Click View -> Show Grid and View -> Snap to Grid.
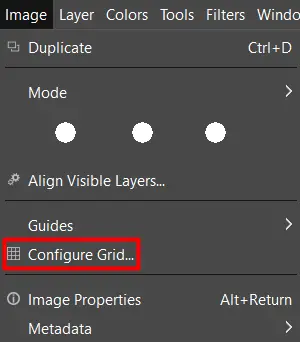
Then click on Image -> Configure Grid.
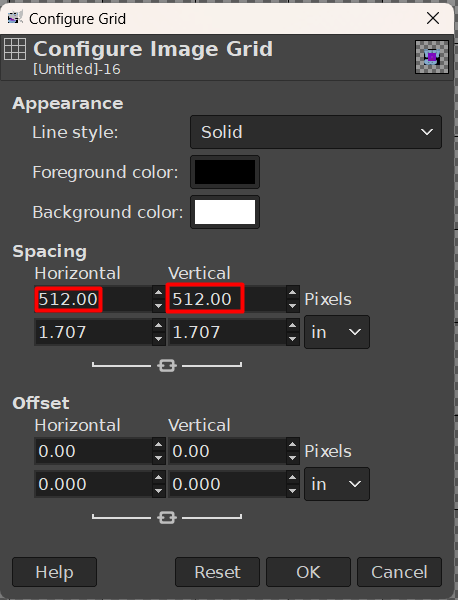
Set the vertical and horizontal spacing to 512 엑스 512.
다음, start rearranging the layers into the grid. Many will take up multiple spots. Others won’t fill the spaces at all, but just start placing them however you wish.
You may be tempted to trim the excess space, but don’t. Unless you find you want to trim it by exactly half on each side, so it remains square. Doing anything else would make things more complicated later. 대신에, you’re best off filling the excess space.
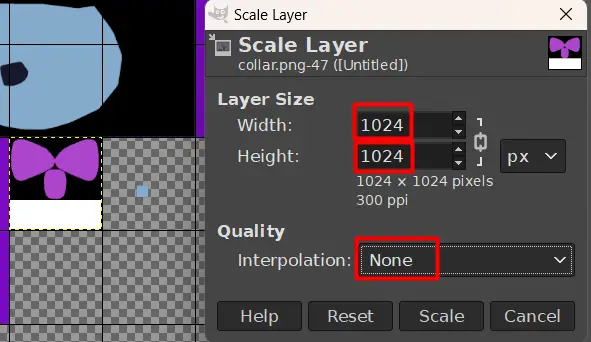
On the smaller items, right-click on them in the layer viewer, and click ‘scale layer’.
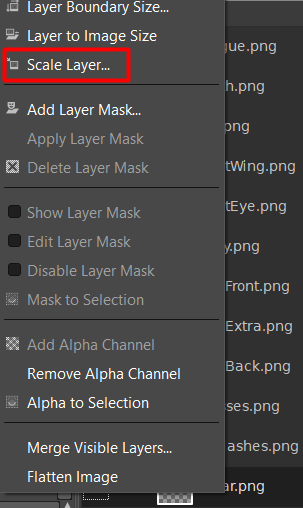
이 경우, we got the space to enlarge all the smaller items to 1024 엑스 1024. So that’s what we’re going to do. It doesn’t matter what size you chose, but just make sure you don’t shrink any of the layers, so it’s just a minimum size we’re choosing, and that the height and width are both equal and a power of 2.
You’ll also want to set the interpolation to ‘None.’
Do this to all the smaller items, and rearrange them in the grid.
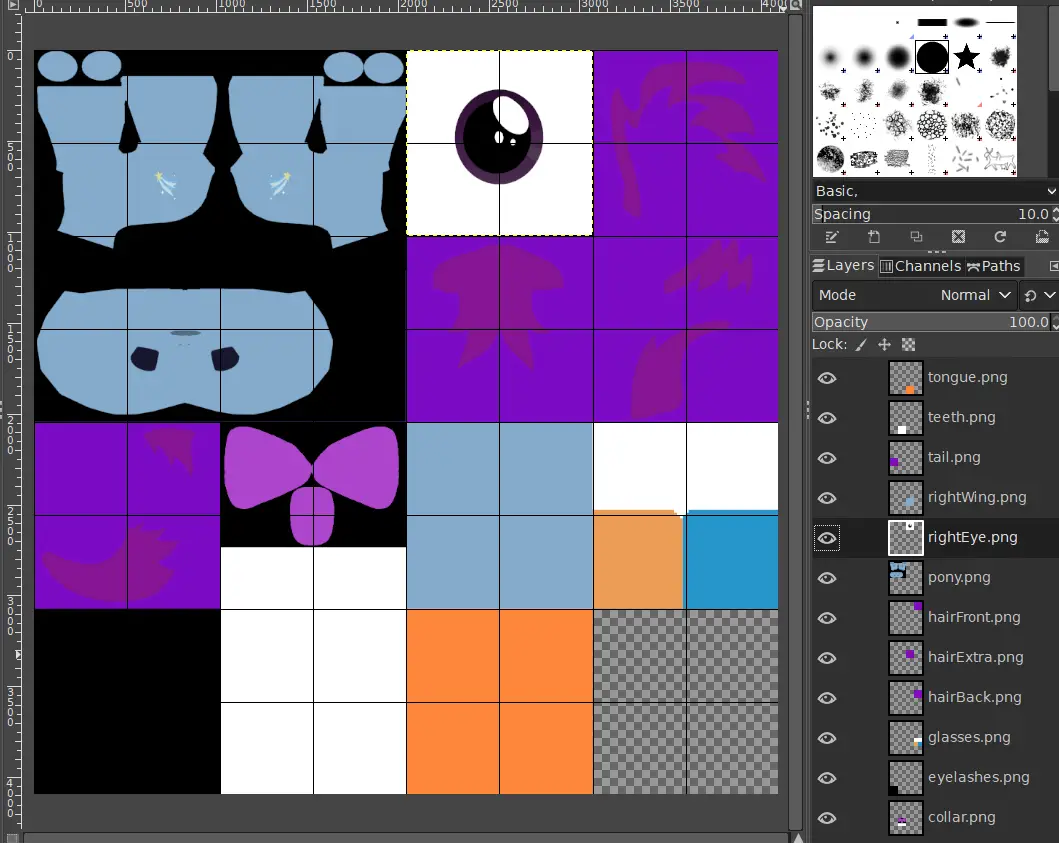
다시, if you find that what you have is only taking a quarter of the available space, you can shrink the canvas, by clicking on Image -> Canvas Size.
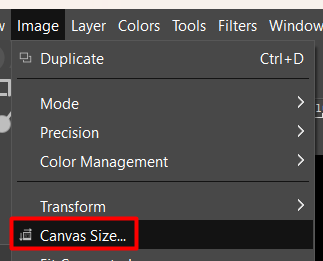
But make sure you only shrink it by exactly half on each side. Which is 2048 엑스 2048. Keeping everything as powers of 2 will make later portions a lot easier.
파일을 저장하십시오, and export it into a png with a clever name.

And that’s the texture completed. Be sure to save the xcf file. You might need it later.
단계 2: Merge the meshes
Next step is to create a single file that contains all the parts of your pony.
열려 있는 Blender. You’ll start with a new file containing nothing but a cube, a camera, and a light.
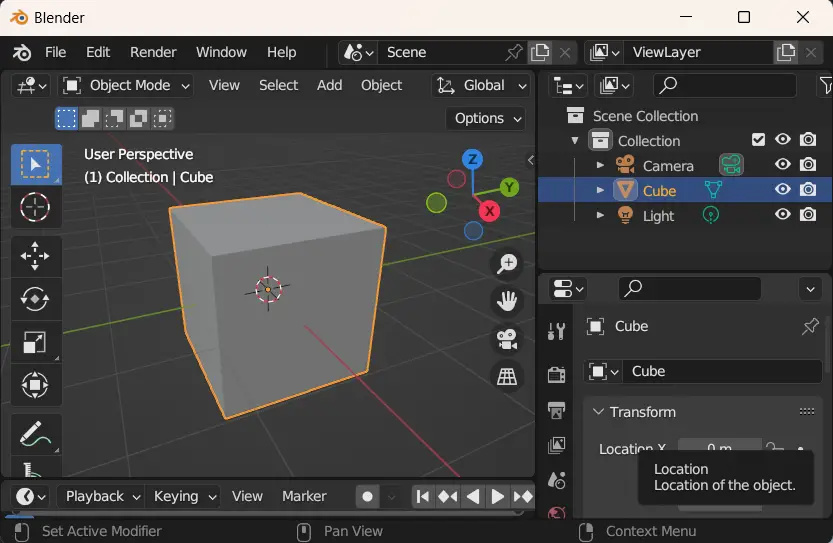
Select all three in the frame on the right, and press delete.
그 다음에, you’ll want to start importing the obj files. Go to File -> Import -> Wavefront (.obj)
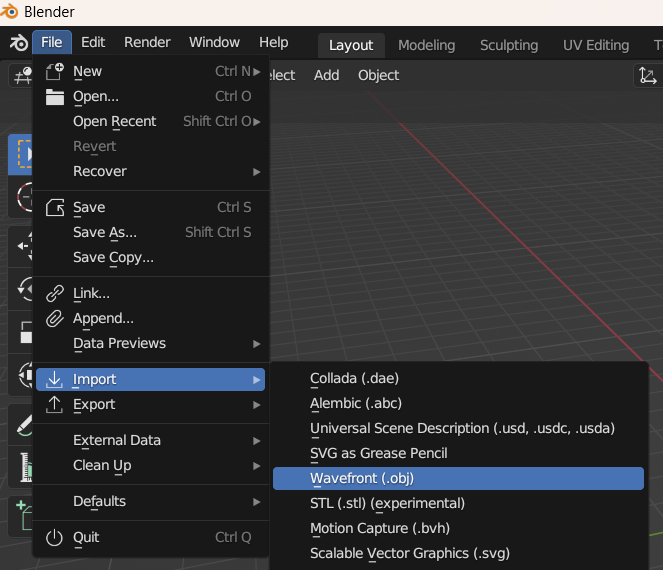
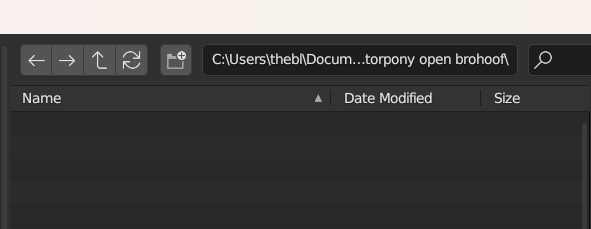
Browse to where you extracted the zip files earlier. You might be able to find the folder under ‘Recent’ in the bottom left. But if not, you’ll have to do it manually.
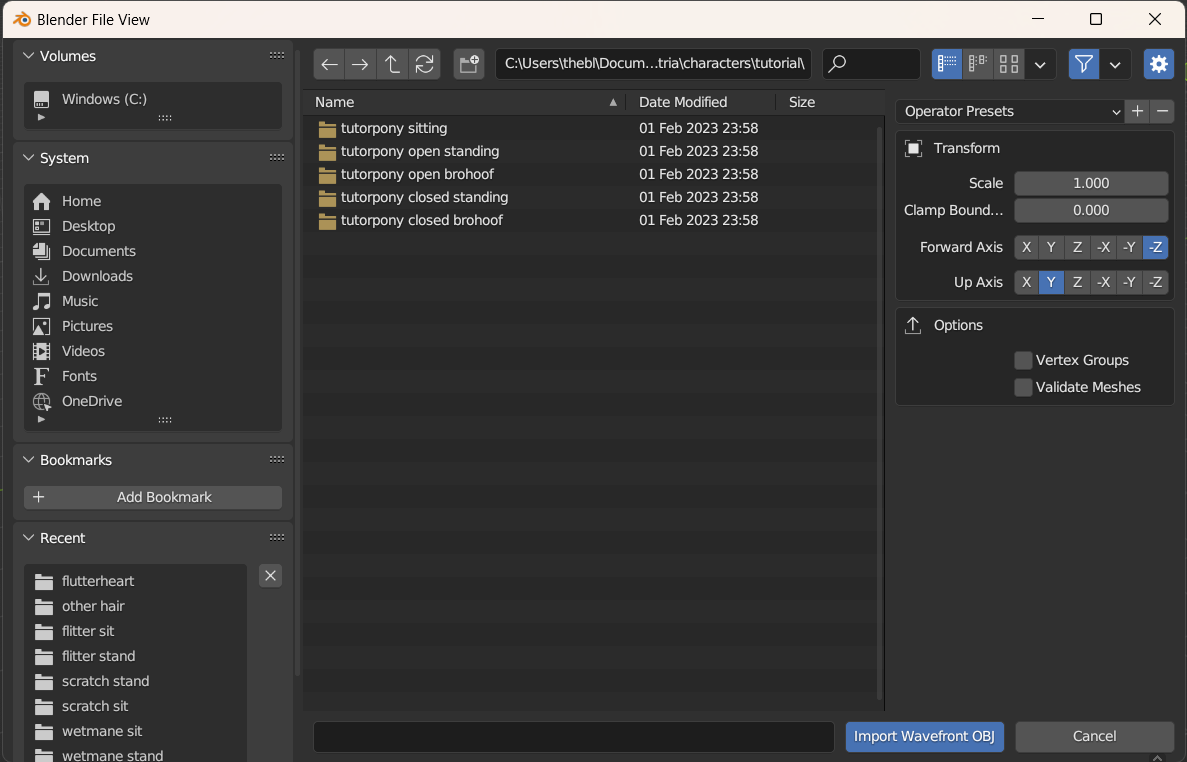
We’ll start with what we considered the priority pose. And this might get a bit tedious.
You’ll need to open each of these files, 한 번에 하나씩. Blender doesn’t have a way to open them in bulk, so this is the only way to do it.
Double click on the first one. Then go back to File -> Import -> Wavefront (.obj) and since the same folder should still be open, double click on the second one. Keep going until the entire folder is imported.
다음, it’s time to consider the other poses.
You should already know, from when you eliminated the duplicate files, which poses are similar enough so you can avoid importing the same thing twice. 우리의 경우, we already know closed standing and open standing are basically the same, except for the wings.
Go back to File -> Import -> Wavefront (.obj), and browse to the next pose that we know to be similar.

Import those files next.
Then we have the closed brohoof pose, which is also similar, the only difference being the position of the right front hoof.
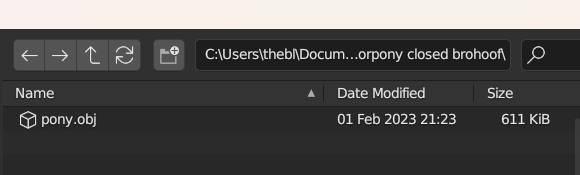
Import those files as well.
You may notice some folders will be empty.
That’s because that pose is already covered by the others. We don’t need to worry about it.
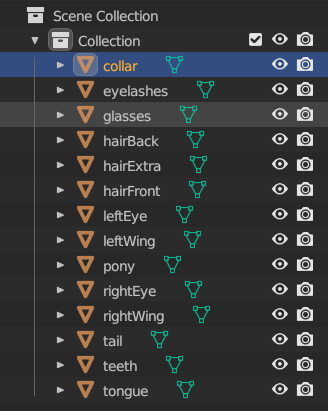
그것으로, we have all the files we need to import for that pose.
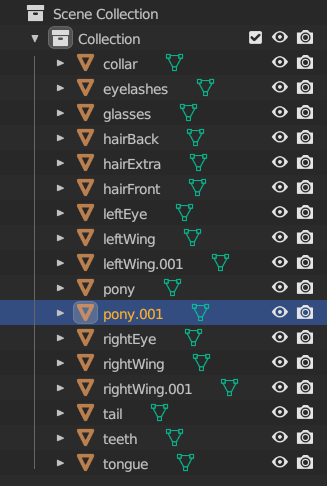
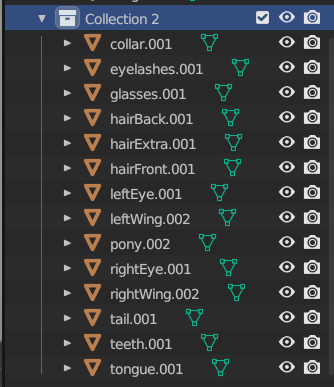
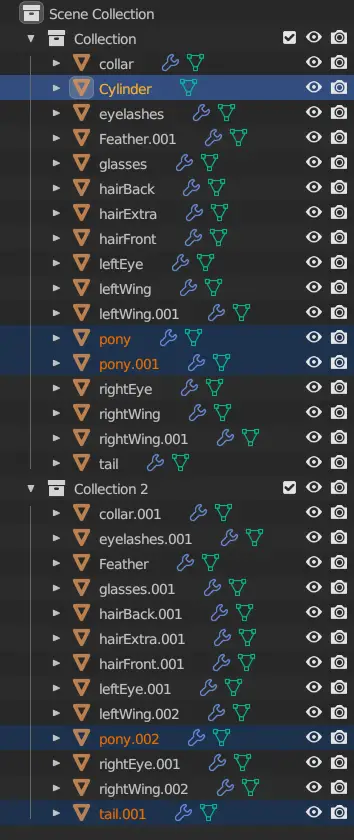
But there are other poses. The sitting pose will share no similarities with the standing and brohoof poses, because everything will be in a different spot.
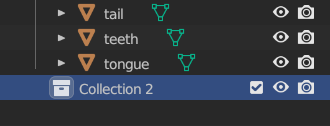
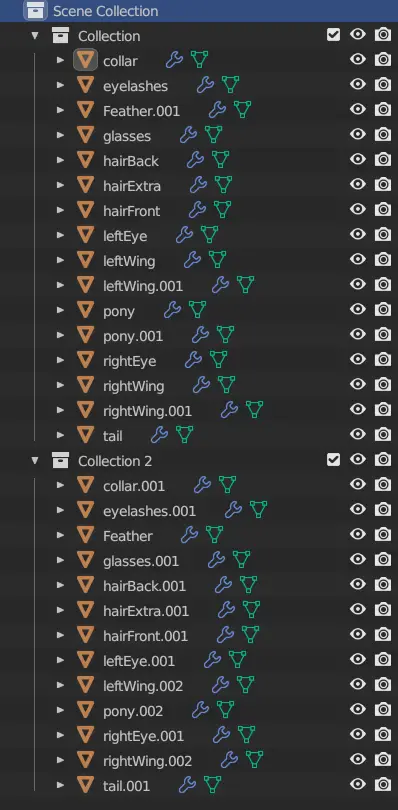
Right click on Scene Collection at the top, and create a new collection.
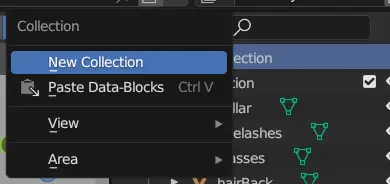
Select the new collection.
Now it’s time to get to importing. Repeat the earlier steps but for the sitting pose.
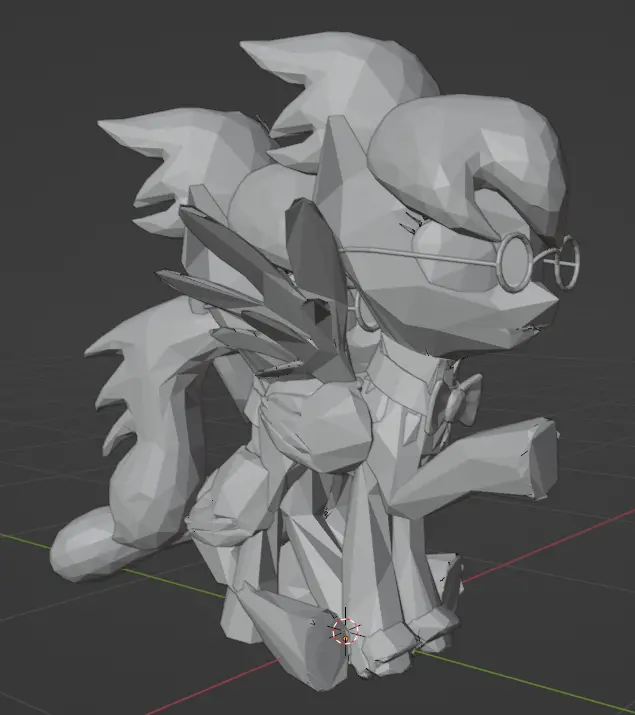
그리고 지금, with all the files imported, you have completed what might be the most tedious part.
구하다, before moving onto the next portion.
단계 3: Reconfigure the UV map
The UV map is what is used to match up a 2d texture on a 3d object. 지금 바로, each of the meshes (a mesh basically being each 3d object we imported) in the file are mapped to the entire texture. But we want each of them mapped to a specific part of the texture. So it’s time to fix that.
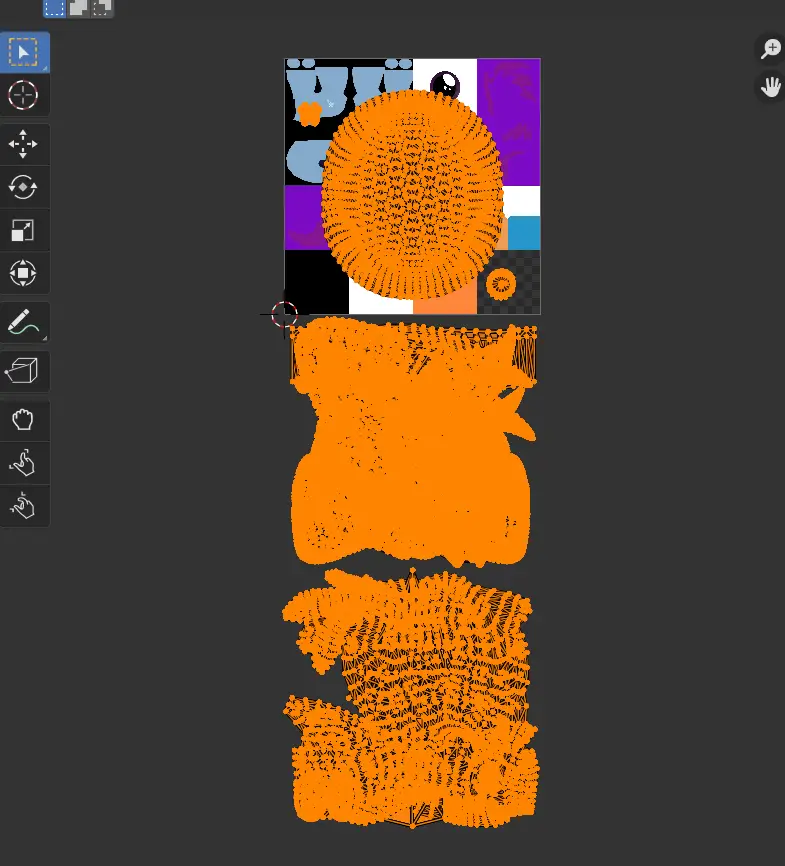
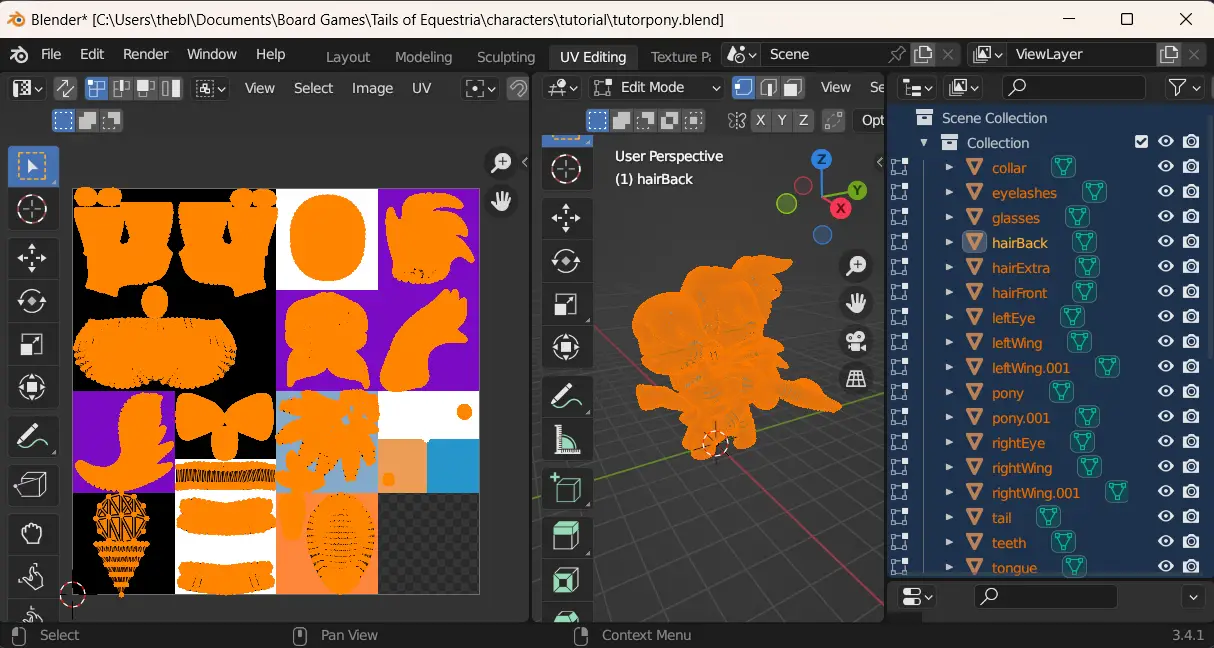
화면 상단, click on UV editing.

You’ll see now see the window split into 3 panes. On the left one, 상단에, click on ‘Open.’
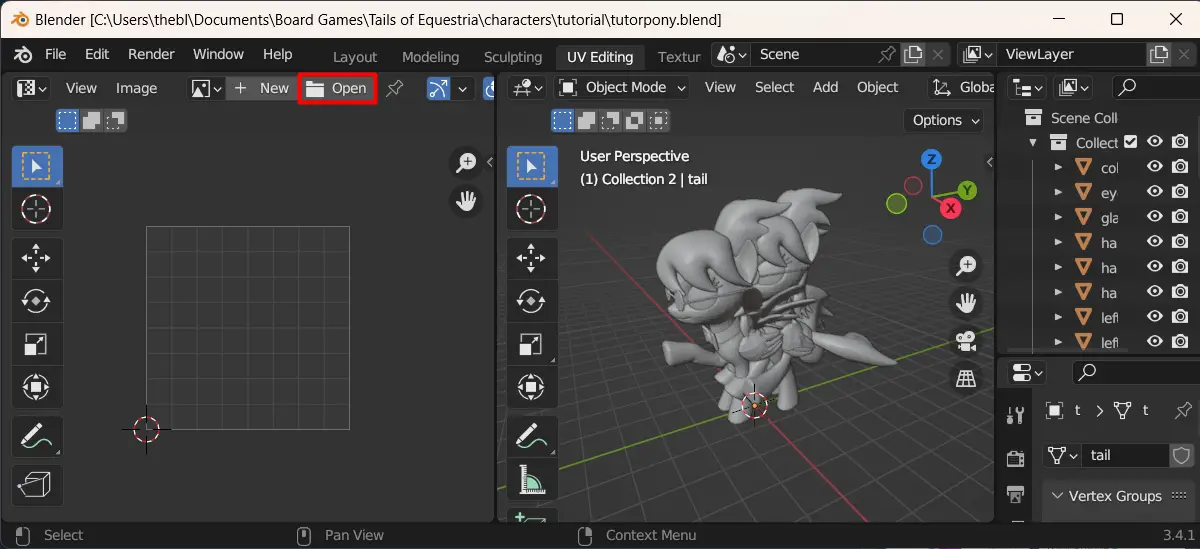
Select the texture file you created in Step 1.
Make sure the centre pane is in Object Mode.

다음, look at the texture file, and consider the size of each component. 우리의 경우, all of them except the pony body texture are the same size, each taking up a quarter of the height and width of the overall image. We now want to select all the meshes that have the same texture size.
Holding ‘Ctrl’ allows you to select multiple objects at the same time. Click on the first, 그 다음에, holding Ctrl, click on each of the others.
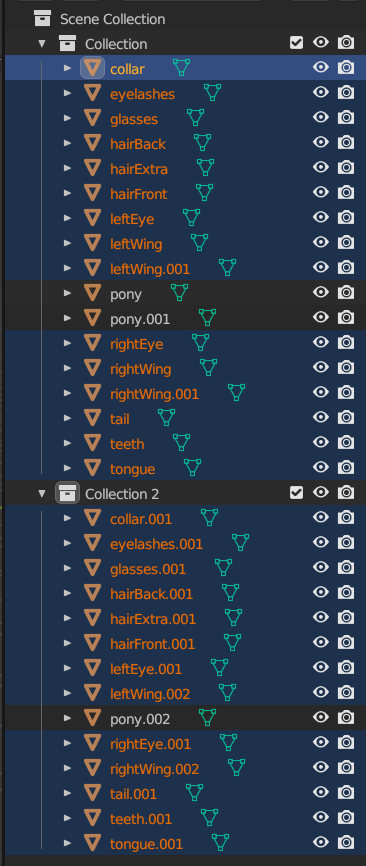
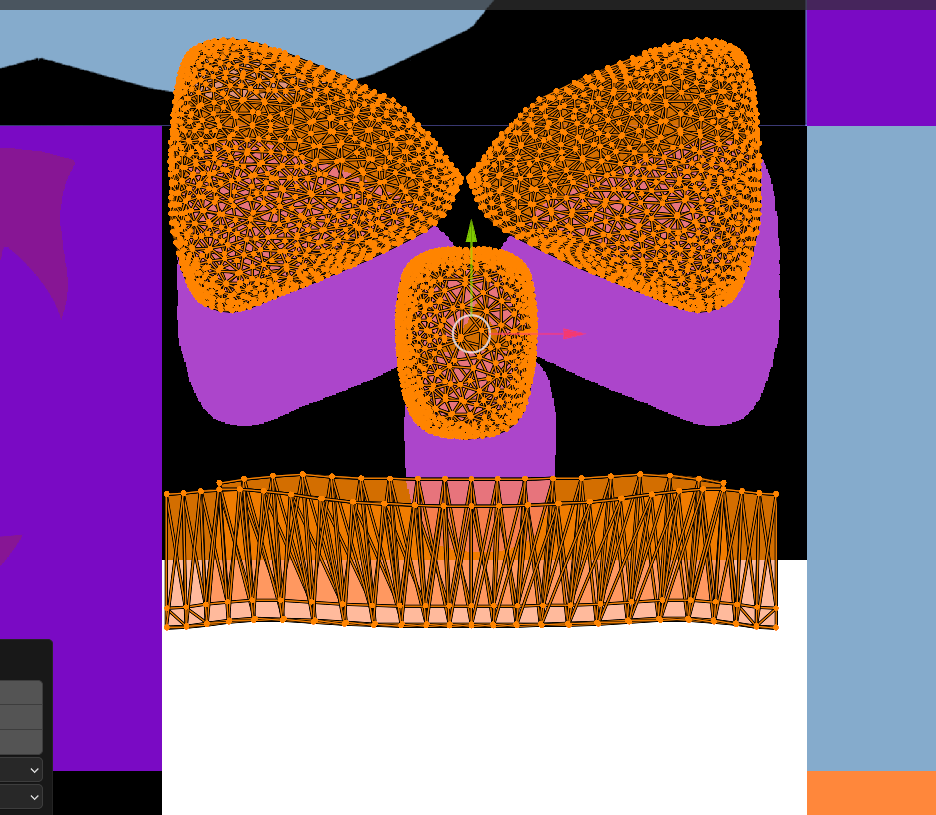
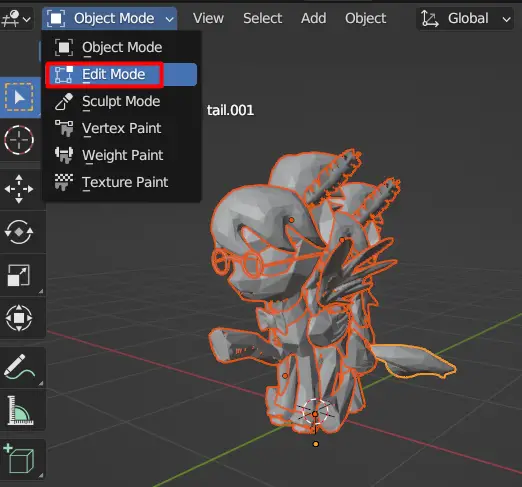
다음, where you previously switched to Object Mode, switch to Edit Mode.

You should see a special icon appear next to each mesh in the list.
This is to signify that this is the mesh we want to edit, and we want to edit all of these at the same time.
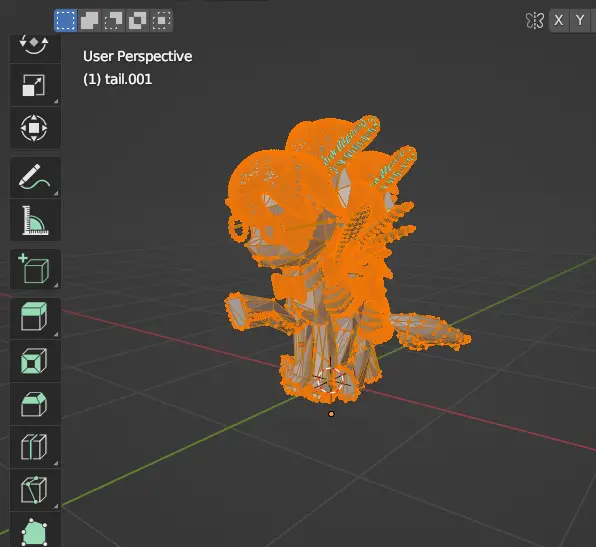
Click on some empty space in the middle pane and press ‘A’ to select all.
지금, click on the far right pane and press ‘A’ to select all.
These are the UV maps for those mesh objects. We need to resize them to fit in the new texture file.
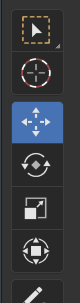
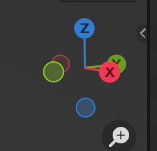
On the far left, click on the scale tool.

You’ll see this symbol appear somewhere on the screen.
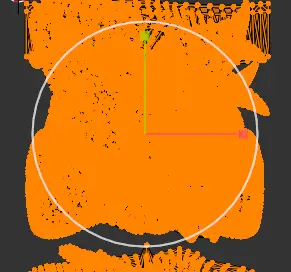
Use it to resize the map. Doesn’t matter by how much because it’s temporary, since we’re only doing it to activate the tool.
왼쪽 하단에, you’ll see a little box that says resize.

Click on it to expand the tool.
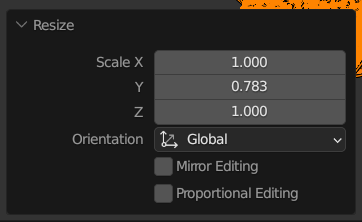
This is where we enter the numbers we need. 지금, we need the new height and width to be a quarter of the height and width of the overall image, and a quarter is 0.25. 그래서, 유형 0.25 in the X and Z boxes, 그리고 -0.25 in the Y box, to flip the map.
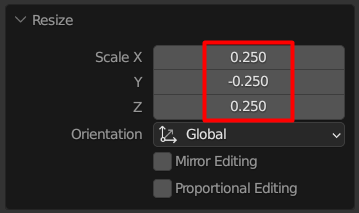
Because for some reason, the UV maps are flipped vertically for the textures provided on the 3d Pony Creator. This is to correct that.
대안으로, you could just flip the textures vertically, but personally, I prefer doing it this way, since it keeps the eye textures the right way up.
Now they’ll all be the right size, but no where in the right position.
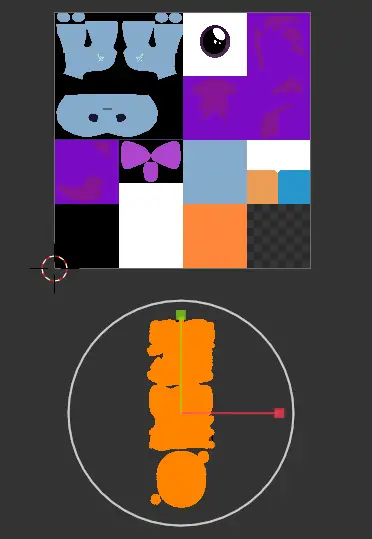
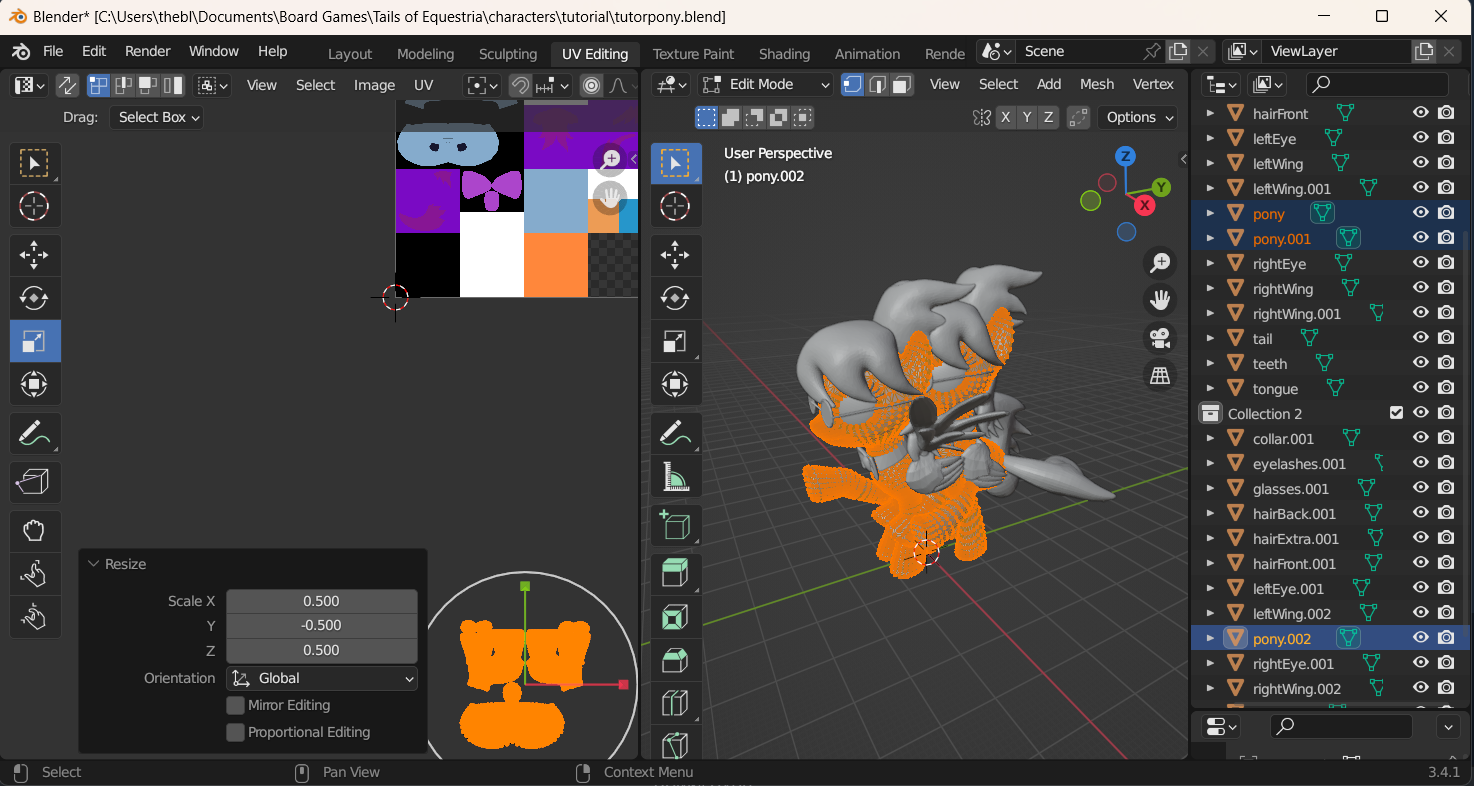
지금은, we’ll leave it, and concentrate on resizing the remaining components, which in our case is just the main pony body, taking up half the height, and half the width.
The process is exactly the same. Except we’re reducing it to 0.5 the height and width.
Depending how complex you made the texture, there might be more to do. You might find there are three or four different sizes of components in yours.
예를 들어: 이것에서, the smallest textures were only enlarged to 256 픽셀, which each takes up one-eighths of the height and width. Then you have the body texture taking up a quarter, and the rest taking up half.
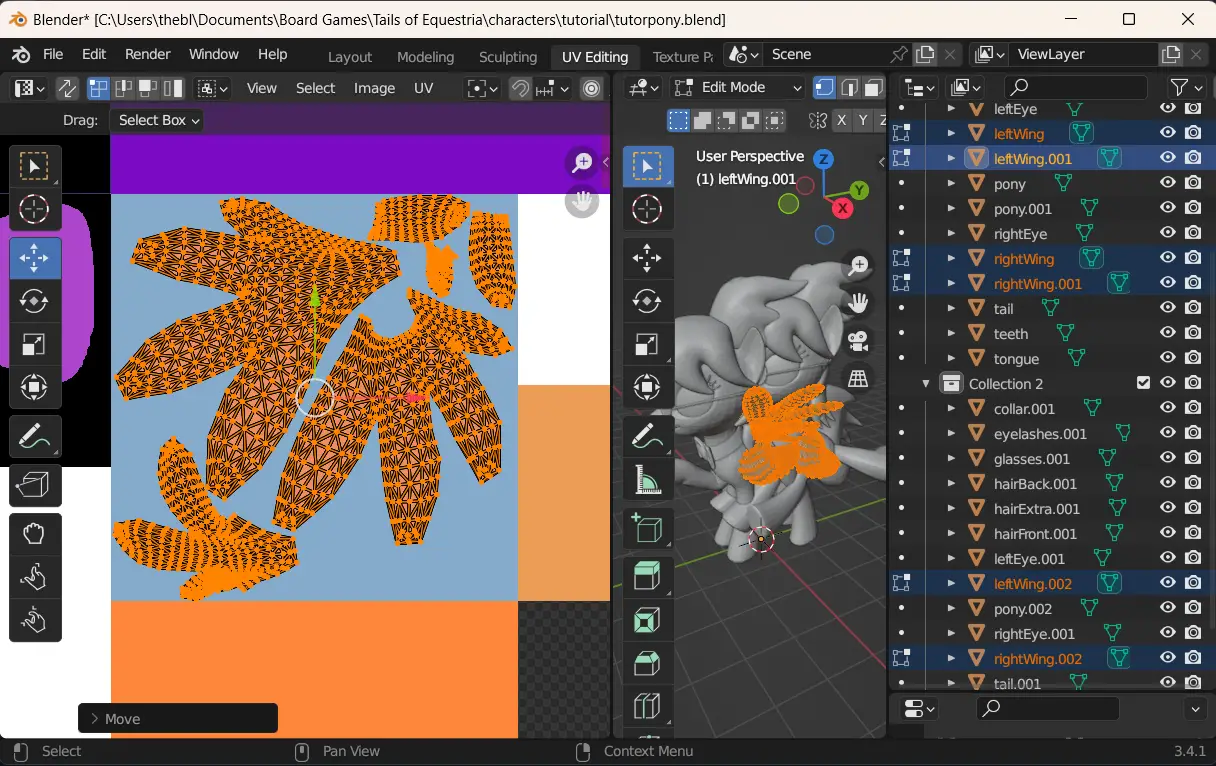
But that’s the resizing done. 다음, we need to move the maps.
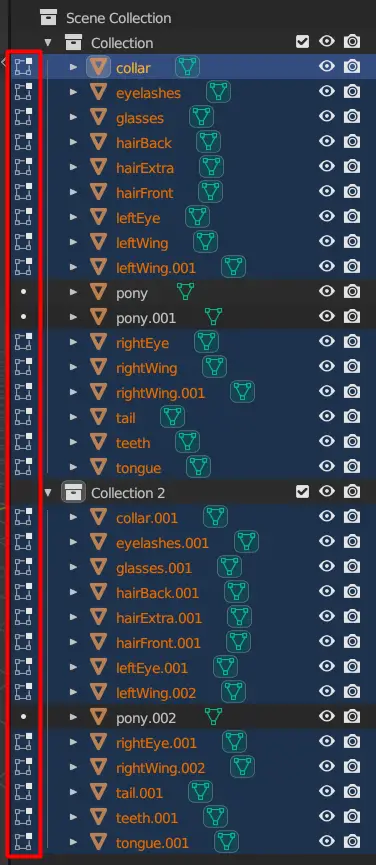
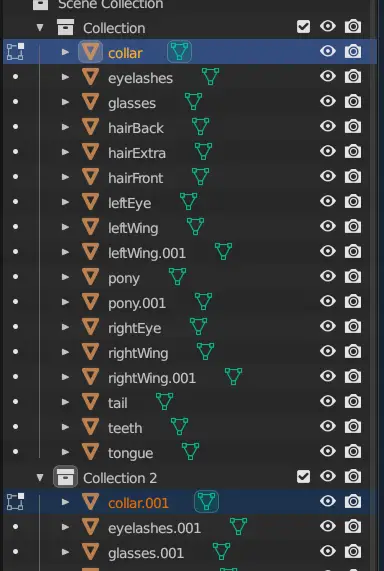
To simplify things, we’re not going to bother switching between object and edit mode. Stay in edit mode, and in the list on the right, click on the dot next to the first mesh in the list.
그 다음에, holding Ctrl, click on every other mesh with the same name.
Select all in the middle pane, and select all in the left pane.
Select the move tool on the far left.
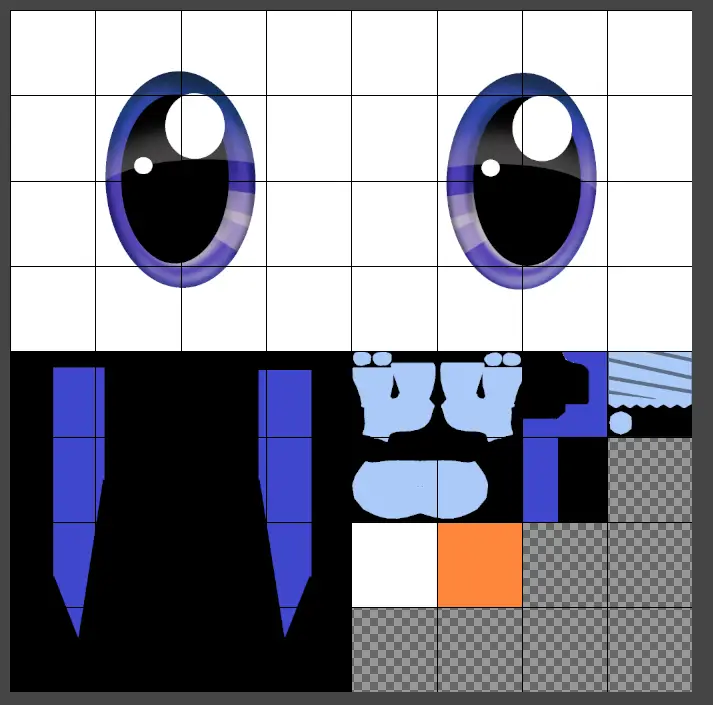
Press and hold the Ctrl key, and drag the mesh to the approximate location in the texture it will need to go.
It won’t line up perfectly, but it doesn’t need to yet. Use the mouse wheel to zoom in.
그 다음에, 다시, while holding Ctrl, try getting it as close to the lining up with the texture file as possible. You can also hold down the shift key for finer movements.
Keep zooming in if you have to. You may be tempted to forgo the Ctrl key and just move it without the snap. This may okay, for a few of them, but if you’re trying to line up certain things like the eye textures, it could cause misalignment, so I don’t recommend it unless you feel you really have to.
Repeat for all the texture components.
There’s a good chance you’ll forget which texture component matches up with each mesh. Remember you can still open up the xcf file we made in GIMP, which’ll still have all the layers named with the files they originated from.
물론, if you’ll remember, while we were eliminating duplicate files, some of the mesh files were mapped to identical texture files, which we filtered out. 그런 경우에는, it’s best to handle those at the exact same time. 우리의 경우, this’ll be the left and right eyes, and the left and right wings.
Once all the maps are in their correct positions, it’s time to move onto the next stage in proceedings, where things get a lot easier.
Be sure to save before continuing.
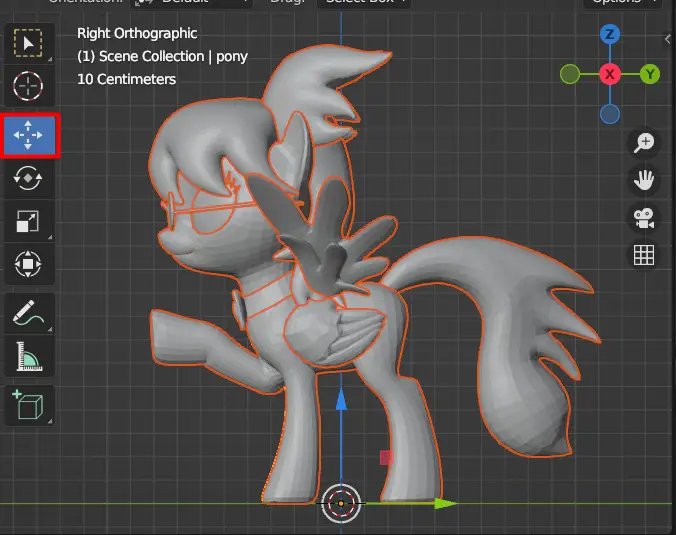
단계 4: Shrink down to size
Because of how Tabletop Simulator works, if we were to import what we have into the game, the figure would take up the space of the entire table. Even if we shrunk it down as far as we could, it would still be massive in size. We need to fix this so it’s something slightly more reasonable.
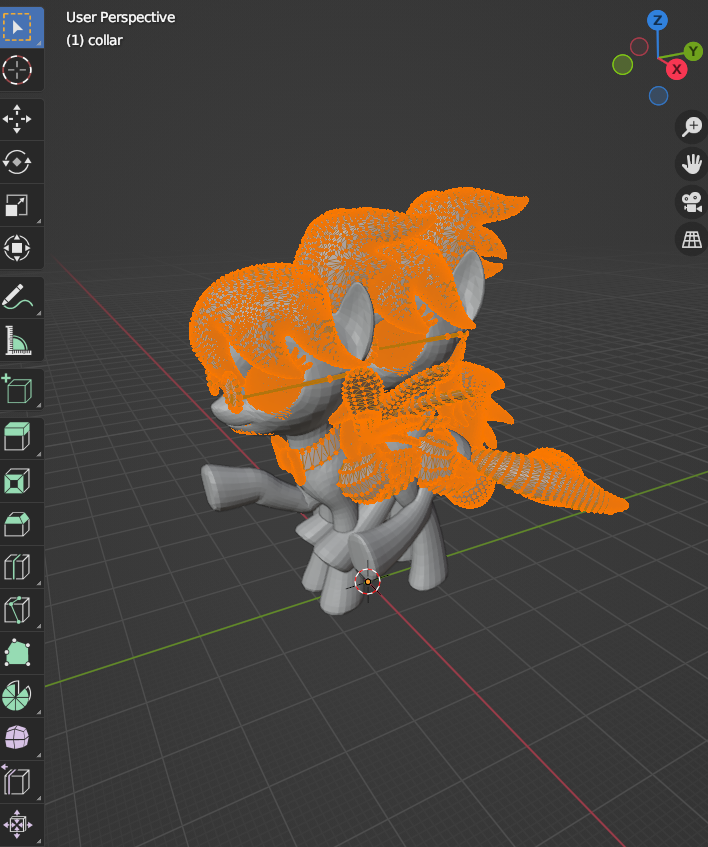
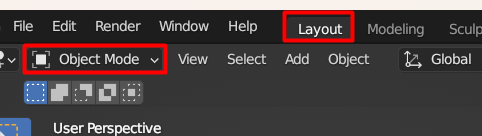
Go back to layout, and make sure we’re in Object Mode.
Click on empty space in the middle of the main work area, and press ‘A’ to select all.
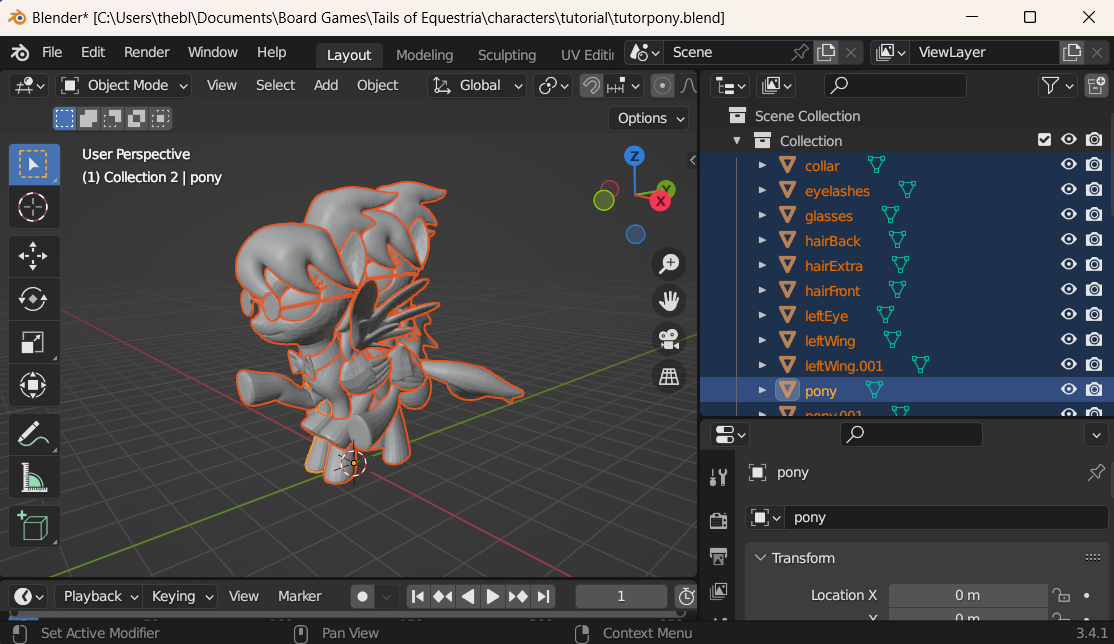
다음, click on the scale tool.
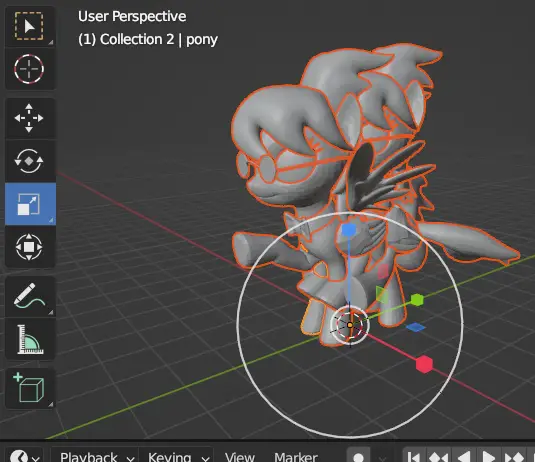
Just like last time we resized something, we’re going to type in our numbers. So resize it slightly so the box opens.
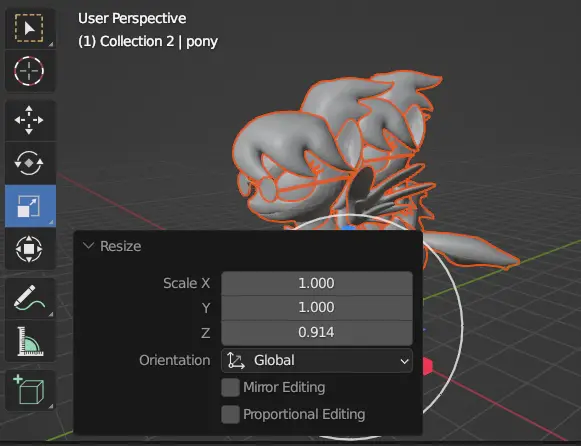
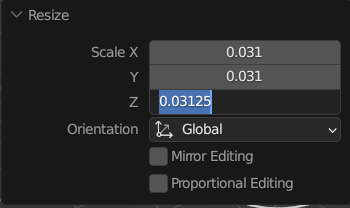
입력하세요 0.03125 (어느, 그런데, ~이다 1/32) in all three boxes. Or just copy-paste the number, that’s probably better.
You’ll notice the whole thing has disappeared.
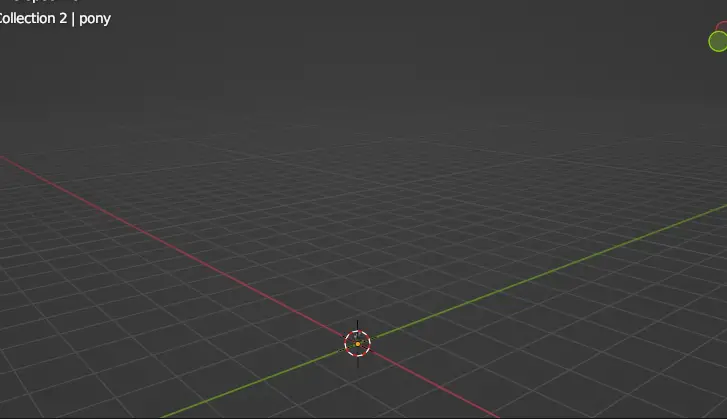
잘, obviously it didn’t. Use the mouse wheel to scroll into the centre of the grid.
그리고 지금, 넌 끝났어. The figure is now a reasonable size to import into TTS.
Save before continuing.
단계 5: Lower for alignment
In order to create a stable figure, it’s going to need a stable base. This is something we’ll mainly do in the collision layer, but we’ll need to lay the groundwork here. Thankfully this is extremely simple.
We’ll do this one pose at a time.
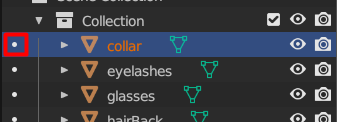
In the list on the right, each collection has a checkbox next to it.
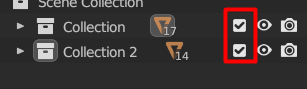
Make sure only the first one is selected.
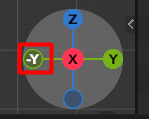
다음, you’ll see something that looks like a compass rose at the top-right of the main workspace.
Click on the red circle with the big X. This will make everything kinda 2D.
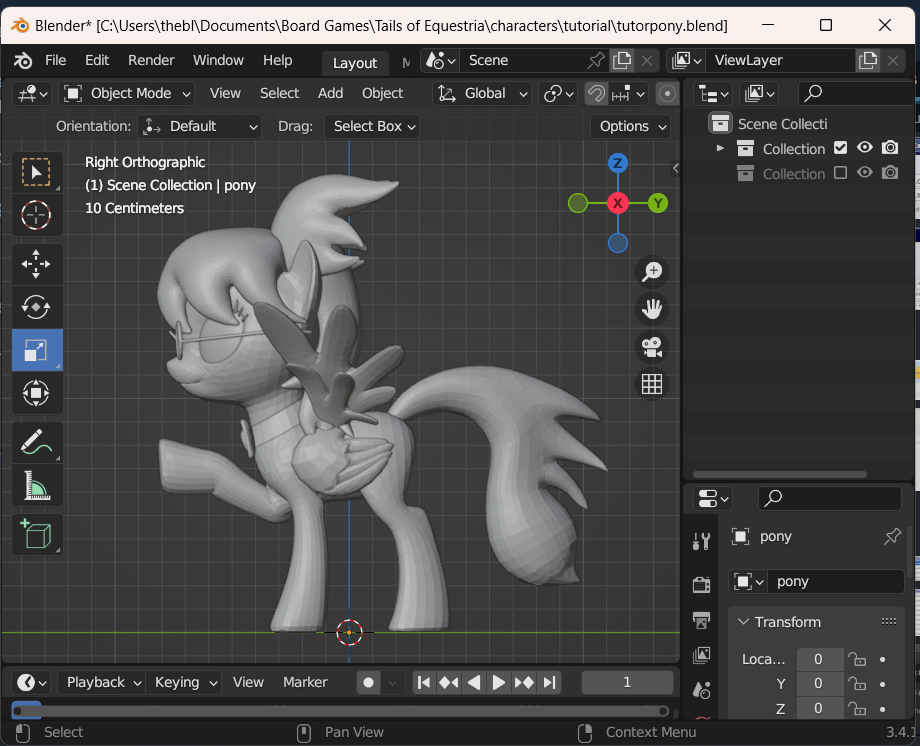
Click on empty space, and press ‘A’ to select all. Then choose the Move tool.
Zoom in to the hooves at the bottom. And while holding Ctrl + 옮기다, drag the figure down slightly, so the bottom of the hooves are slightly below the X-Y plane.
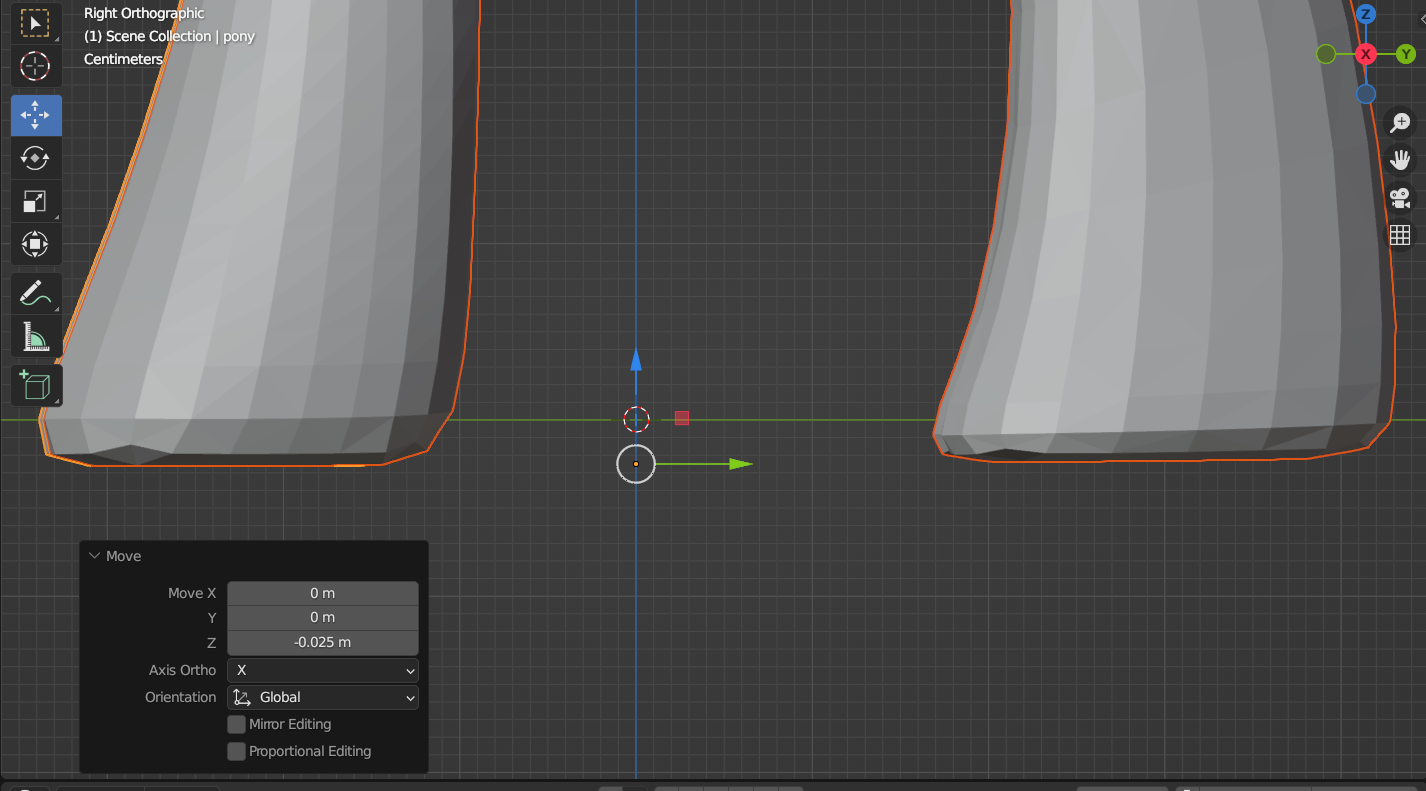
원래, this will create a stable base for the figure to stand on. 그것없이, it could get wobbly.
Switch to the other collection, and repeat. But while doing this pose, you might also want to look at it from a different angle.
You’ll basically want part of each hoof below the line. The default sitting pose is kinda wonky, so you might be inclined to rotate it a bit, I personally don’t bother, but it’s up to individual preference.

Once both poses have been lowered to a stable position, 넌 끝났어. 구하다, and move on to the next step.
단계 5.5: Final Tweaks and accessories.
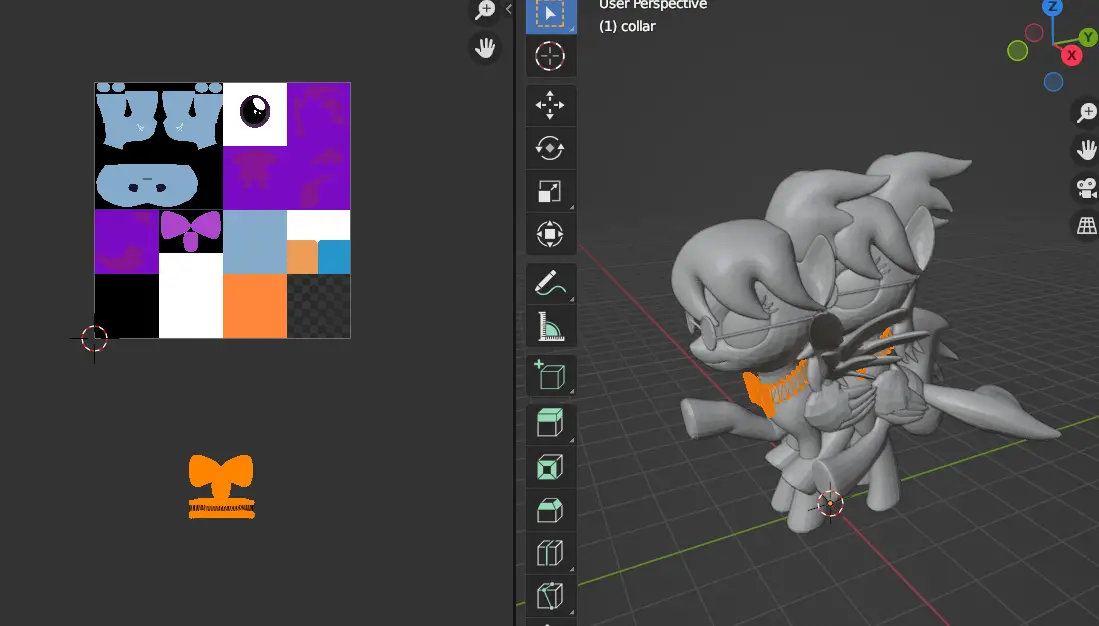
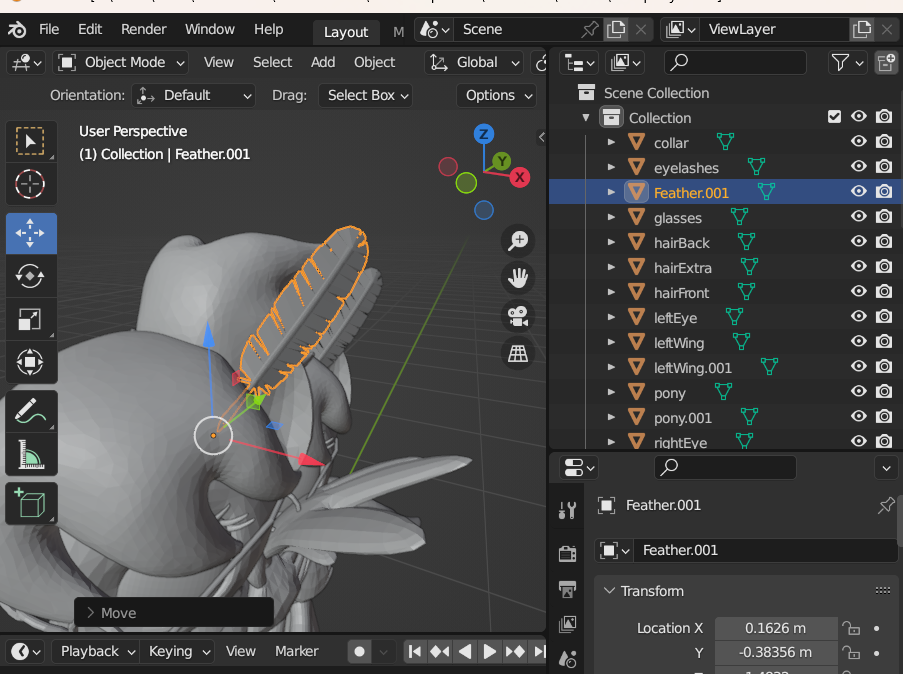
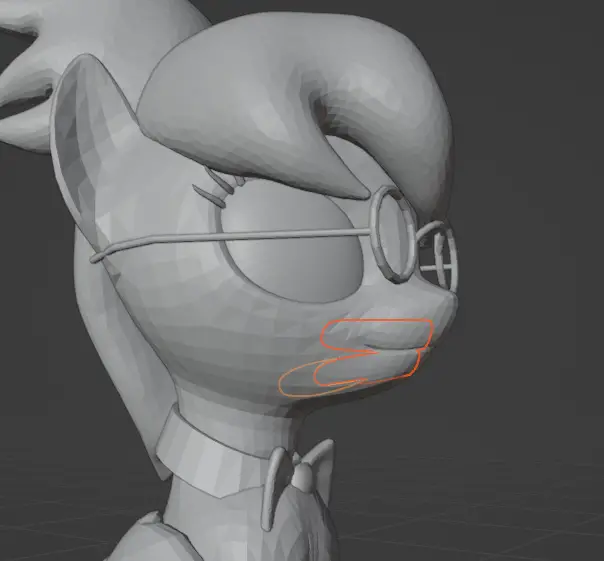
이 시점에서, you may want to make some final adjustments. 내 경우에는, I like to remove the lenses from the glasses, mainly because when exported, they’ll just look solid.
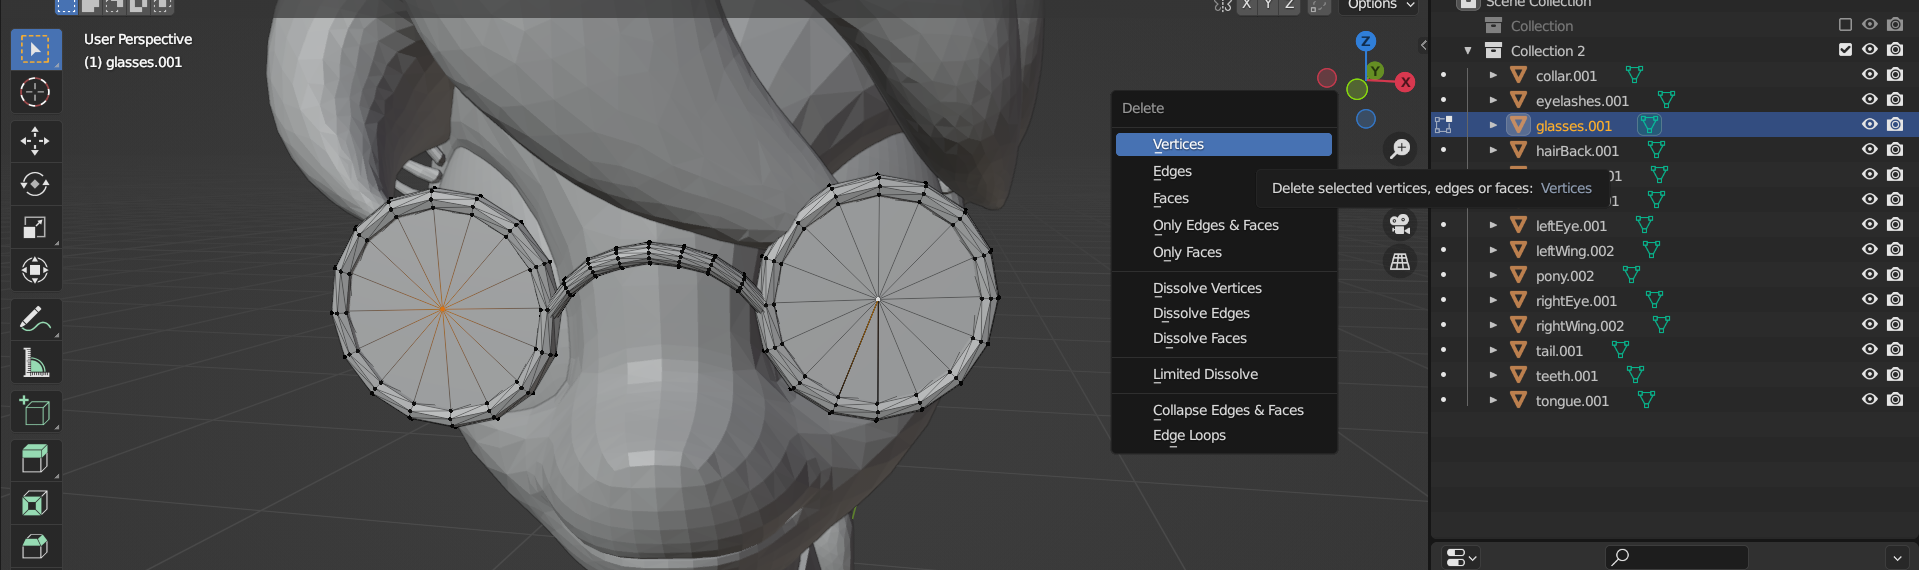
The left lens might be a bit troublesome, but it’s pretty simple to get rid of by just clicking on the point in the centre, pressing ‘Delete’ and clicking on ‘Vertices.’ It has to be done several times.

Other additions can be made as well, such as a feather in the hair.
If you wish to do this, find a model on SketchFab, and import it into Blender, than rotate it and moved it into position.
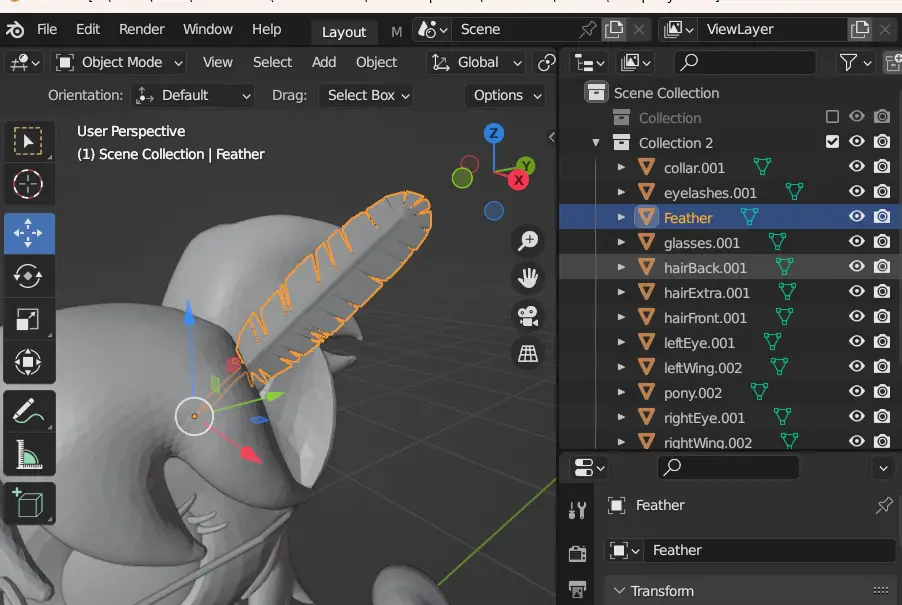
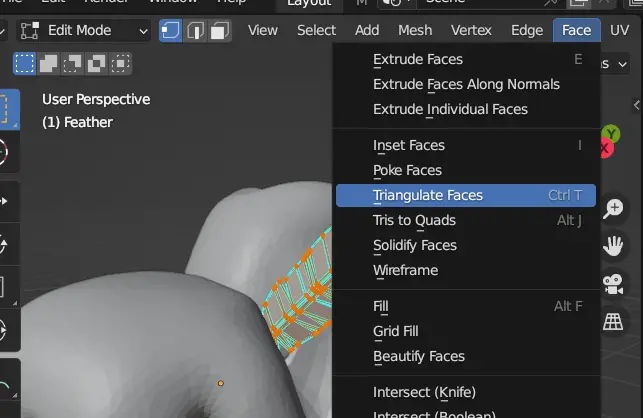
Sometimes these models can be a bit problematic, so it’s best to make sure it’s triangulated properly.
Switch to Edit Mode, and click on Face -> Triangulate Faces.
다음, it’s time to go back to the texture file and add the new object to the file. 이 경우, it’s just a simple gradient I made by first duplicating one of the other layers, moving it into position, and overwriting it with the new texture.
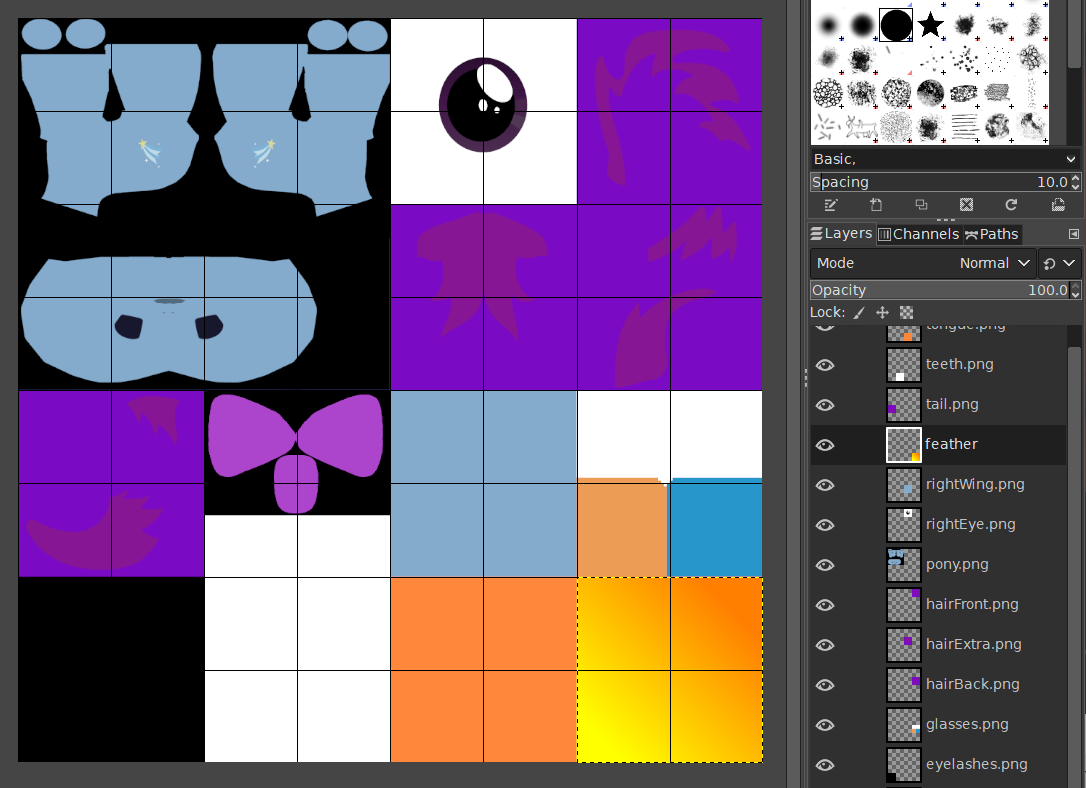
Export the texture, overwriting the old one with it.
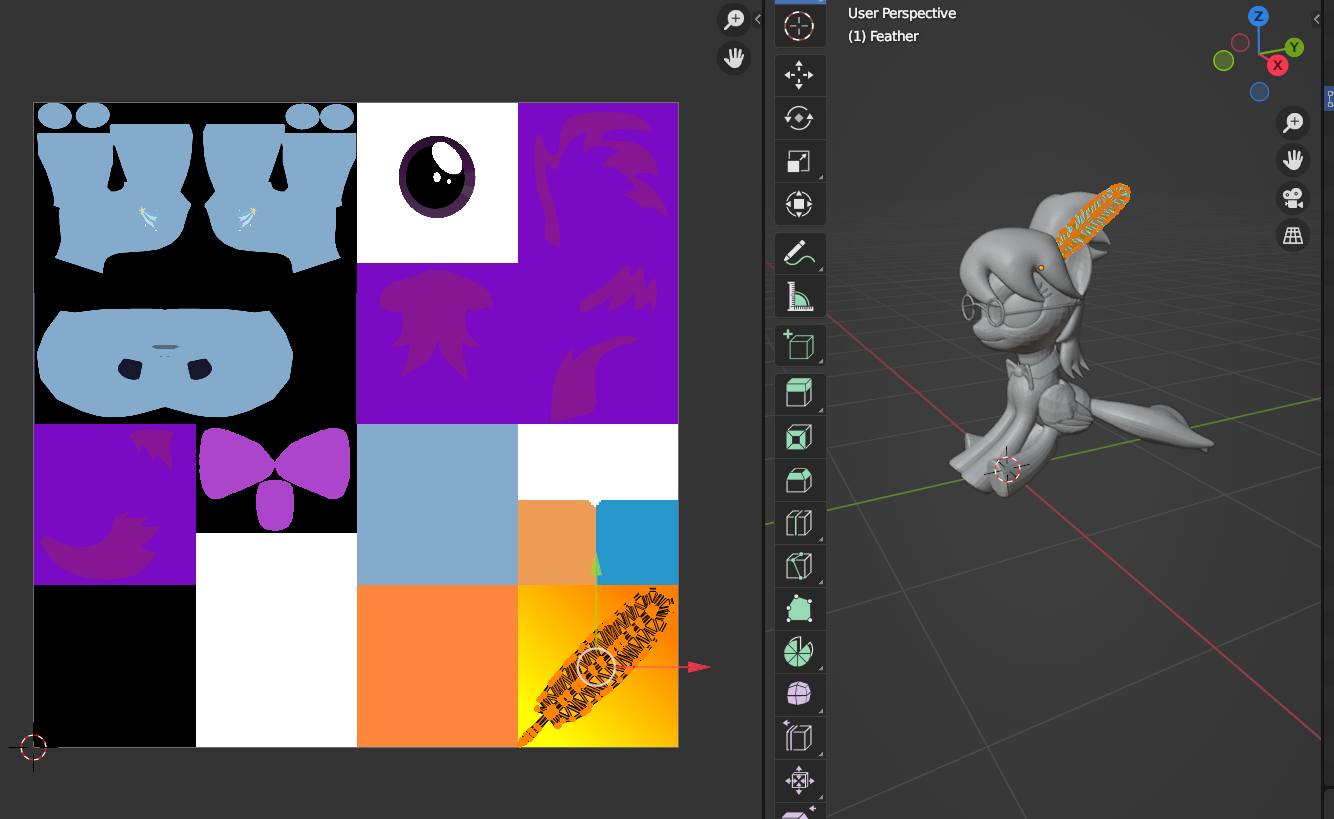
그 다음에, back into Blender, you’ll need to adjust the UV map.
Just do it the same way as before. Only this time, there’s no need to flip vertically.
Of course this is just for one pose. Now that you’ve done it with one, duplicate the mesh using Copy-Paste, so we can move it into position on the other pose.
And now that’s done. Save and move onto the next step.
단계 6: Export Primary Mesh
Now we’re done with the visible parts, it’s time to export.
Staying in Object Mode, click on the eyes in the list on the right to make sure only the parts you actually want in the pose are actually visible.
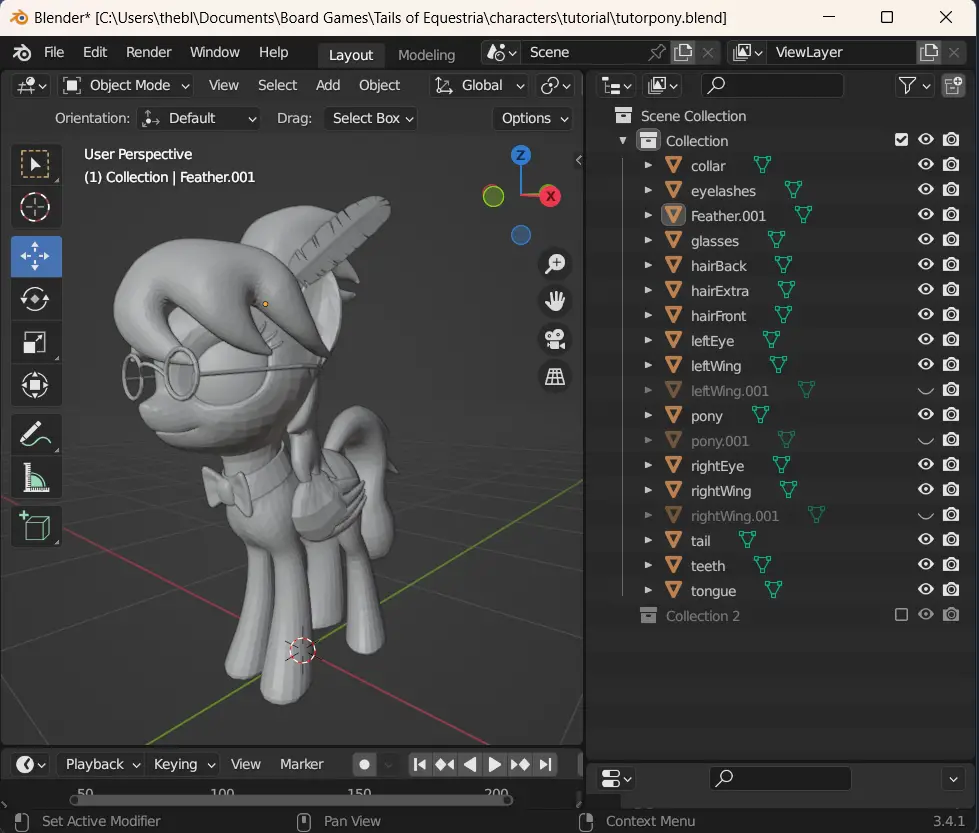
Click on empty space in the main workspace, then press ‘A’ to select all.
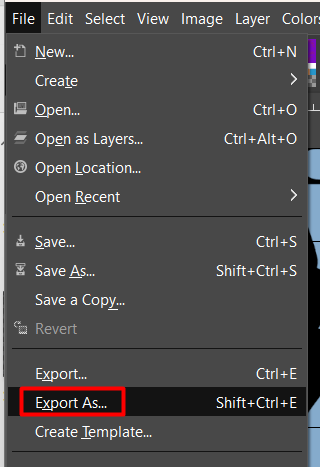
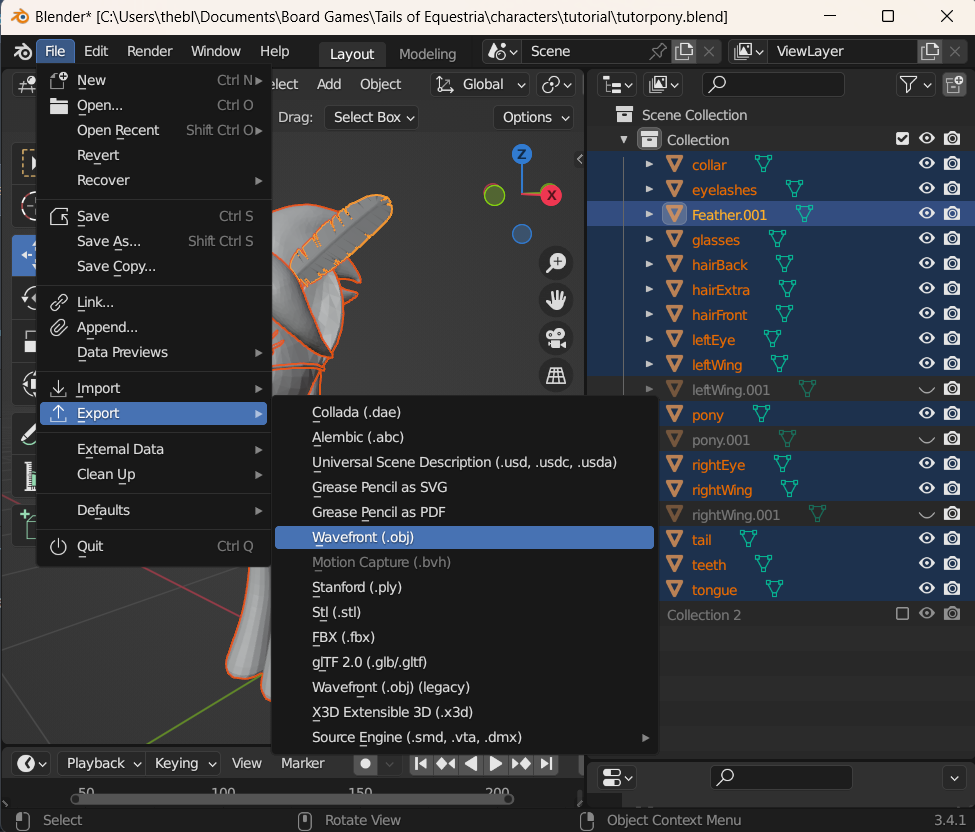
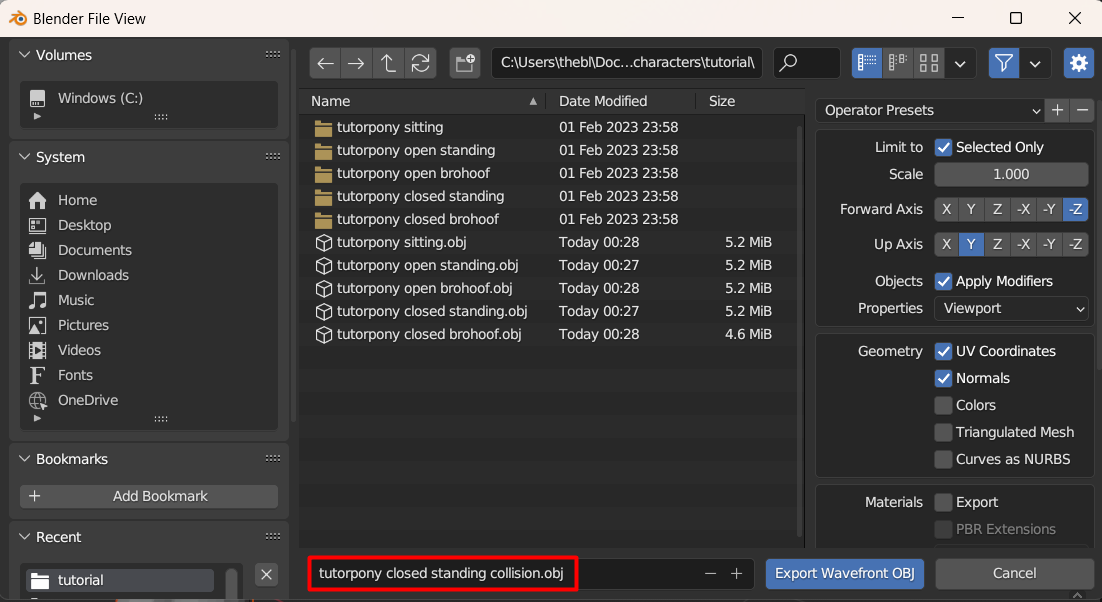
Click on File -> Export -> Wavefront (.obj)
Use a name that identifies the pony and the pose, and make sure Limit to Selected Only is checked, and Materials Export is unchecked.
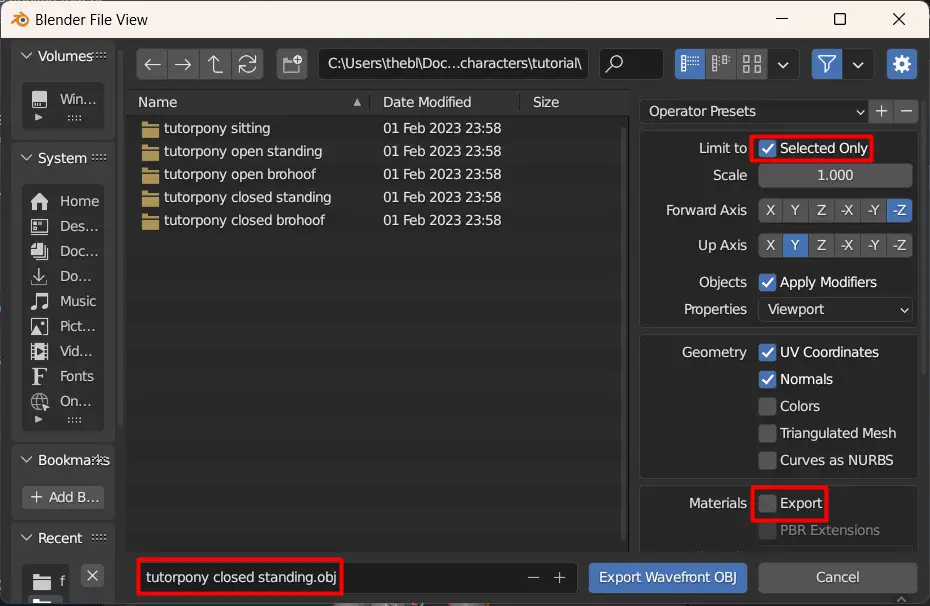
Export it, then repeat the process for the remaining poses.
결국, you’ll have an obj file for each pose.
Save the Blender file, then click on Save As to make a copy and give it a slightly different name.

For next, we’ll be working on the collision layer.
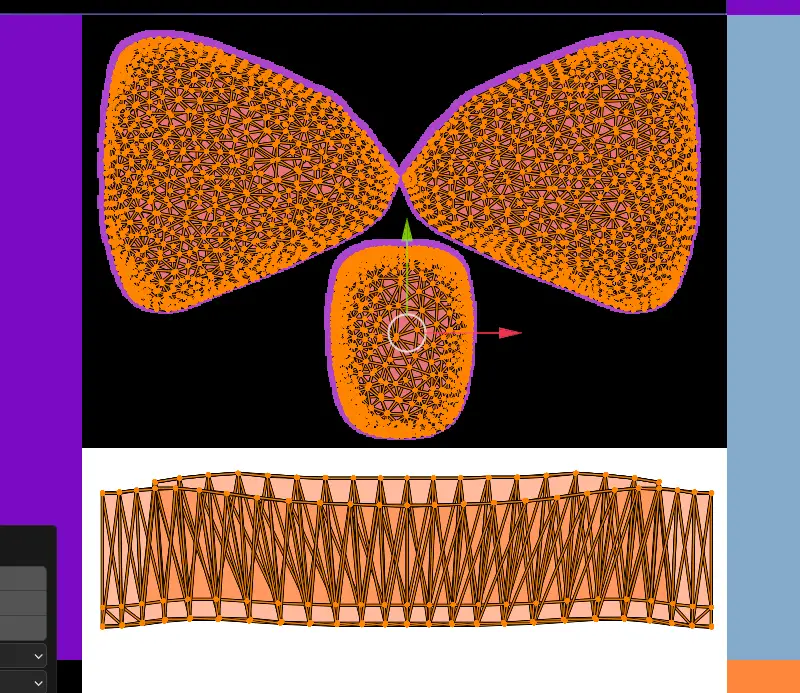
단계 7: Reduce Polygon Count
Now it’s time to create the collision layer.
이론적으로, we could just use the primary mesh we created in the last step, but if we do, you can expect the game to start chugging, particularly on low-spec machines.
하지만 고맙게도, there’s an easy fix, reduce the polygon count. Because currently the model has over 10000 polygons which the physics engine has to deal with. Reducing it would significantly improve the framerate.
Blender has a tool that makes this easy. The decimate tool.
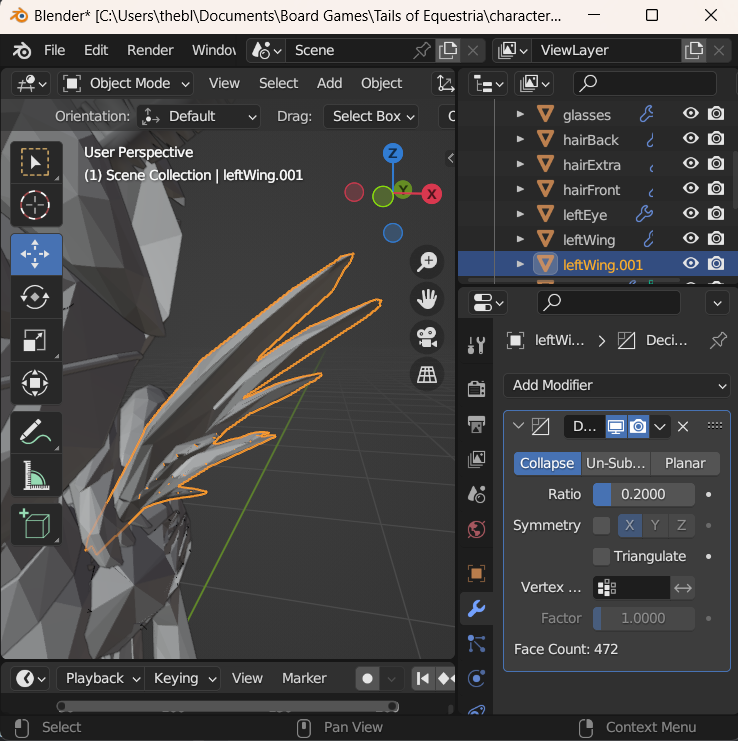
Select the first mesh in the list, then click on the wrench in the pane below, then click ‘Add Modifier.’
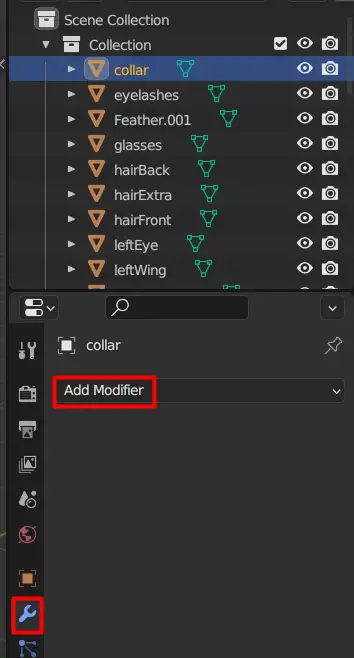
여기, you’ll see several tools. Select ‘Decimate.’

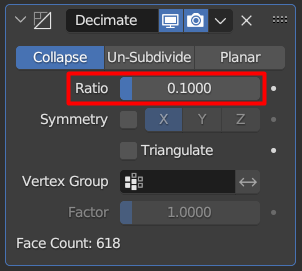
Set the ratio to 0.1.
And you’re done, for this mesh at least.
Blender doesn’t have a way of setting this tool up on multiple meshes in bulk, so this will have to be done one-at-a-time.
But of course, some meshes can be skipped entirely.
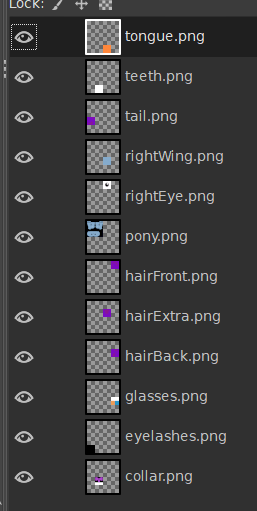
Both tongue and teeth are inside the pony’s mouth, and therefore do not need to be part of the collision layer.
So you can delete those.
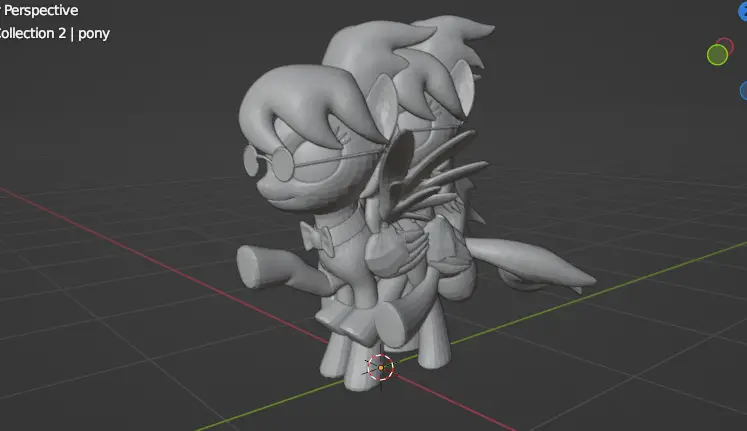
You may notice some of the meshes look quite decrepit afterward, such as the wings or the hair.
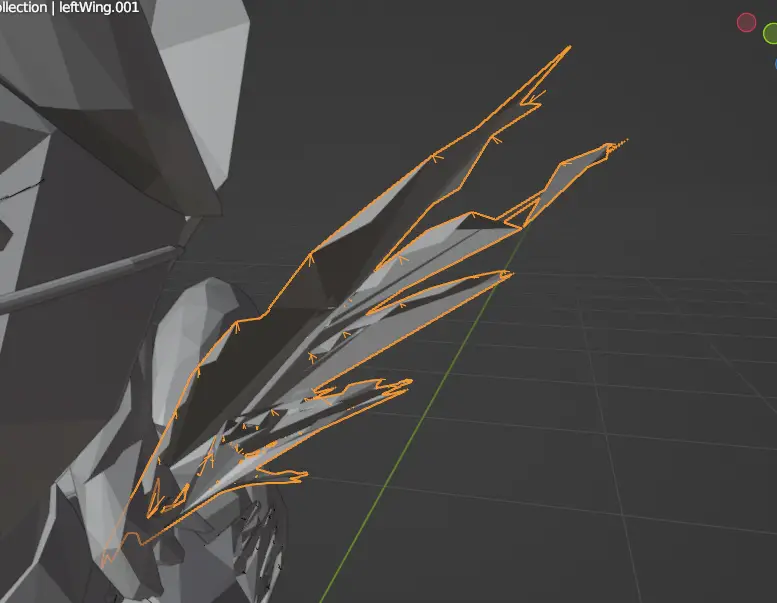
This is not a visible layer, so it’s really not a problem. But if it bothers you, you can choose a ratio of 0.2 또는 0.3 without issue. Just try to keep it as low as possible.
Once you’ve applied the decimate tool, you should see a blue wrench next to each mesh in the list.
And all the meshes will look pretty darn low-poly.
이 작업이 완료되면, save and move on to the next step.
단계 7.5: Add Supporting Meshes
This next step has a very specific purpose, making sure things don’t topple over.
구체적으로, the brohoof pose has the model standing on only three hooves. 그 때문에, it’s unbalanced. We can fix this by adding a bit of invisible support to the model.
You can do this however you want, but I prefer to use a simple cylinder mesh.
While in Object Mode, click on Add -> Mesh -> Cylinder.
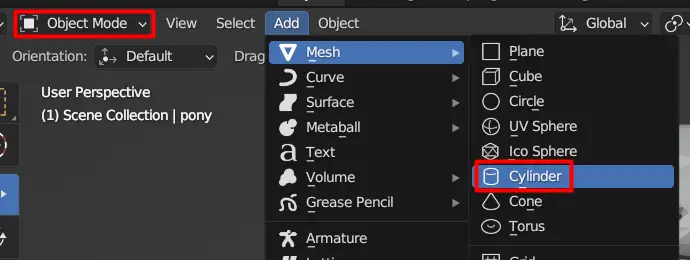
A cylinder will immediately spawn in.
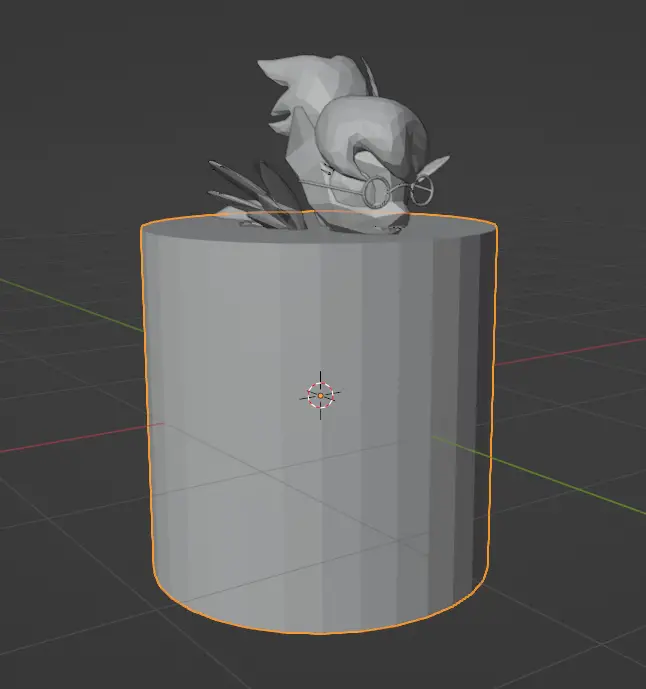
It’s a bit too big for us. In the bottom left, you’ll see the controls for editing the cylinder.
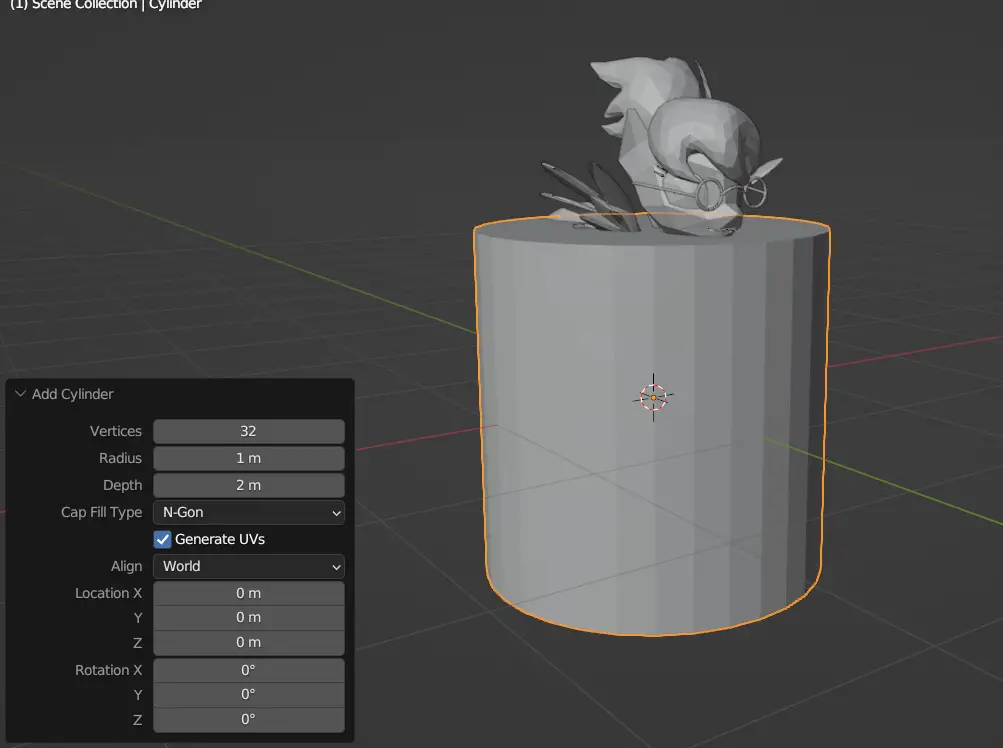
The specific position is up to you, but I like placing it where the pony’s leg would’ve been if it wasn’t pointing forward, while also reducing the vertex count to 16
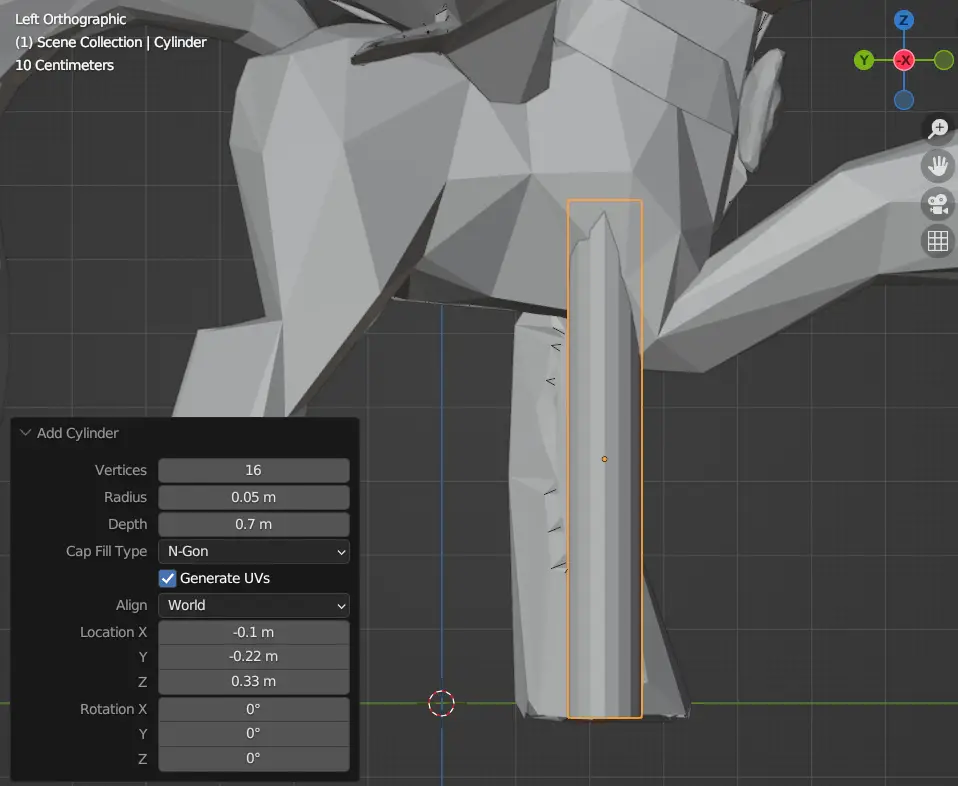
The important part is making sure the bottom part crosses the X-Y plane.
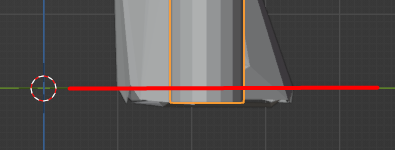
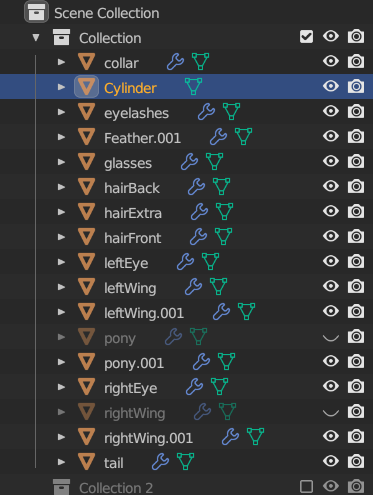
Be sure the cylinder is placed in the correct collection.
그리고 그것으로, we’re done. Time to save, and move onto the next step.
단계 8: Create a flat bottom
This step is really simple. We need to cut everything off below the X-Y plane. That’s why we were aligning everything with it in earlier steps.
But the only problem is that the decimate tool we used in Step 7 can interfere with this.
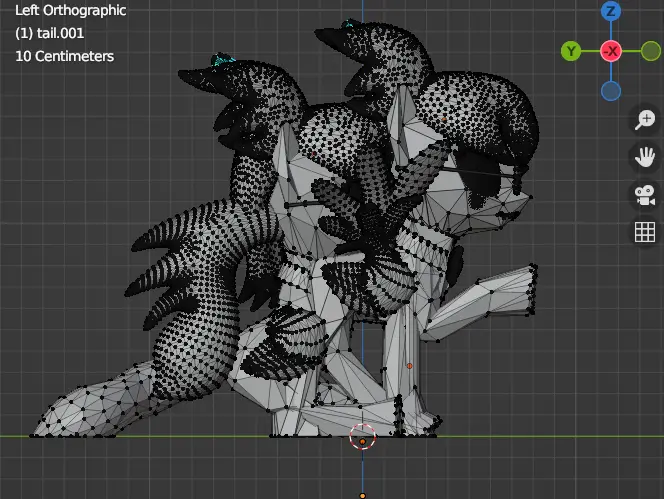
그래서, with all meshes set to visible, select every mesh that crosses over with the X-Y plane.
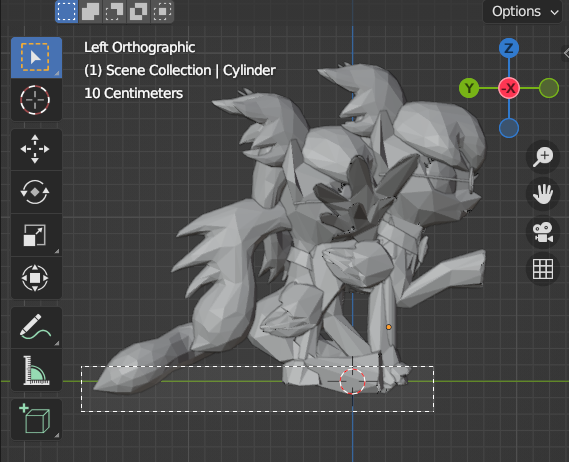
오른쪽, you’ll see which meshes cross over, which are the pony meshes, and the tail mesh from the sitting pose. There’s also the cylinder, but we don’t need to worry about that one.
각각을 클릭해 보세요., and you’ll see the controls for the decimate tool. You’ll need to apply the tool to stop it from interfering with what we’re about to do.
Click on the down arrow next to Decimate, and click Apply.

Do this to each of the meshes we just looked at.
완료되면, you should see no blue wrenches next to each of them.

Click on empty space in the main workspace, and press ‘A’ to select all. Then switch to Edit Mode.
Click on empty space again, and press ‘A’ to select all again.
On the toolbar on the left, look for the Knife tool. You may need to scroll down to find it. Click and hold on it, and choose ‘Bisect.’

Draw on the screen to activate the tool, and open up the control window.
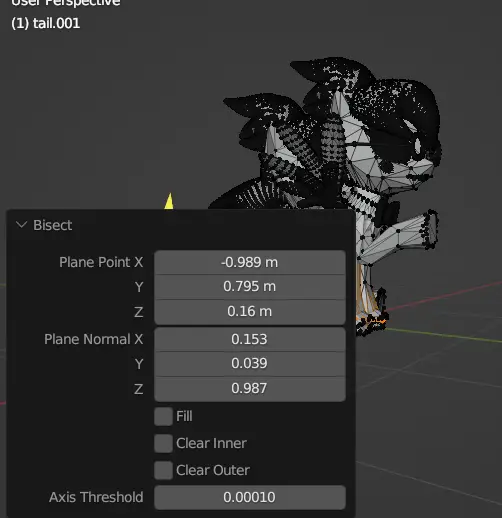
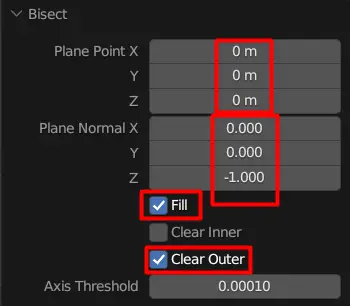
The settings you’ll want to use are simple. Plane Point should be (0,0,0) and Plane Normal should be (0,0,-1). You’ll also want to select Fill and Clear Outer, but NOT Clear Inner.
Click on empty space again.
The end result will be everything below the X-Y plane is now gone, giving the model a good, flat, stable base to rest on.
Time to save, and move onto the next step.
단계 9: Export Collision Layer
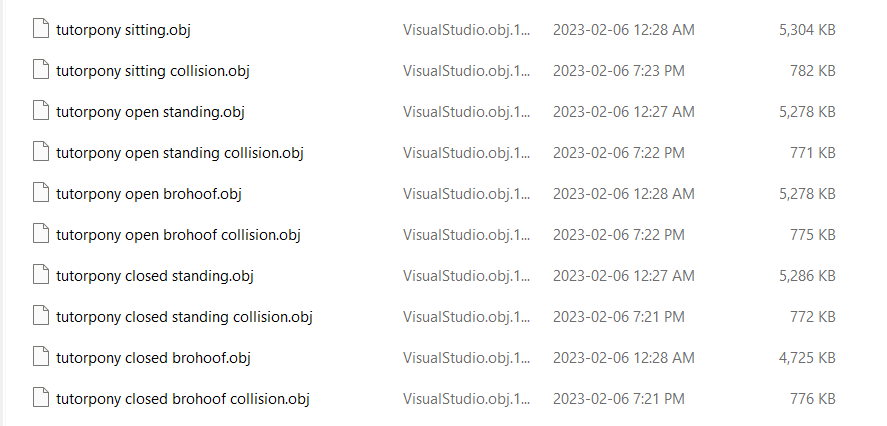
지금, 다시 한 번, it’s time to export. The steps for this are the exact same as when you exported the primary meshes. You’ll be exported the same number of files you did then as well. The only difference is making sure you also include the supporting meshes as well, and including the fact that it’s a collision layer in the filename.
그것으로, we have all the obj files we need. Two for each pose.
지금, it’s time to save, and now that we’re done with it, close Blender.
단계 10: Create Models in TTS
Now that all the files have been created, it’s time to bring them into Tabletop Simulator.
Open TTS, and create a new Single Player game.
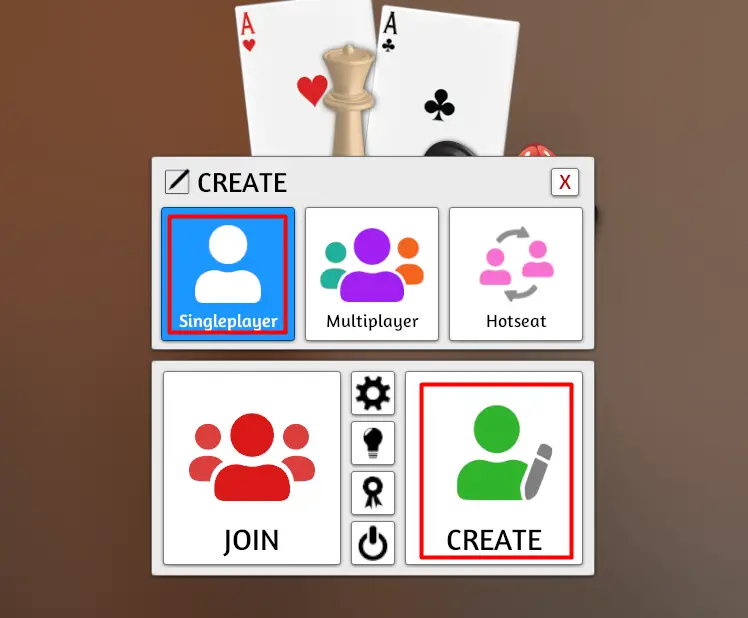
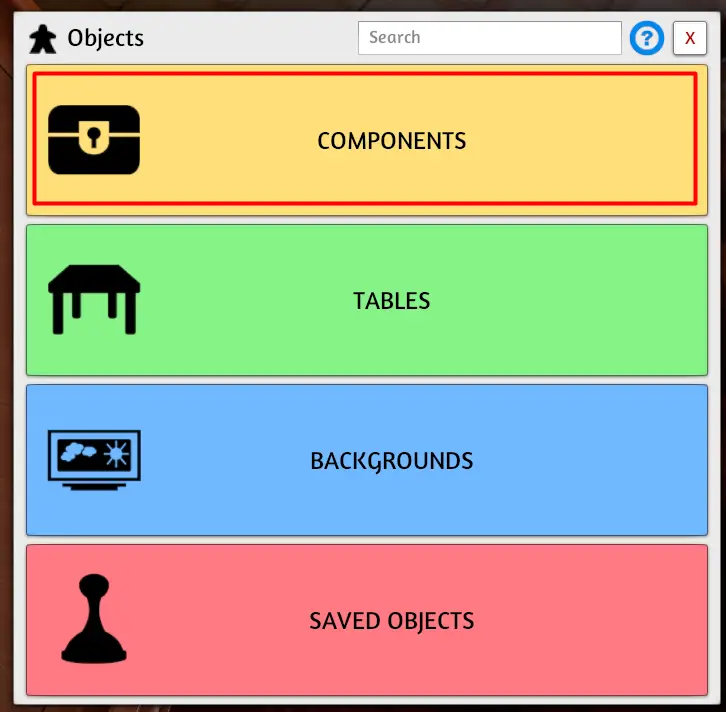
Close the Games screen that starts up, then click on Objects…

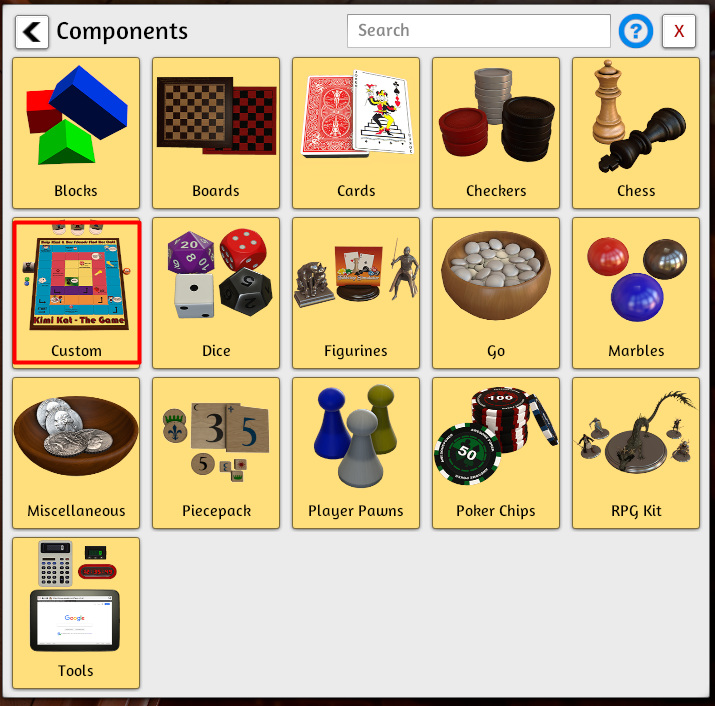
…구성요소…
…Custom…
…Model.
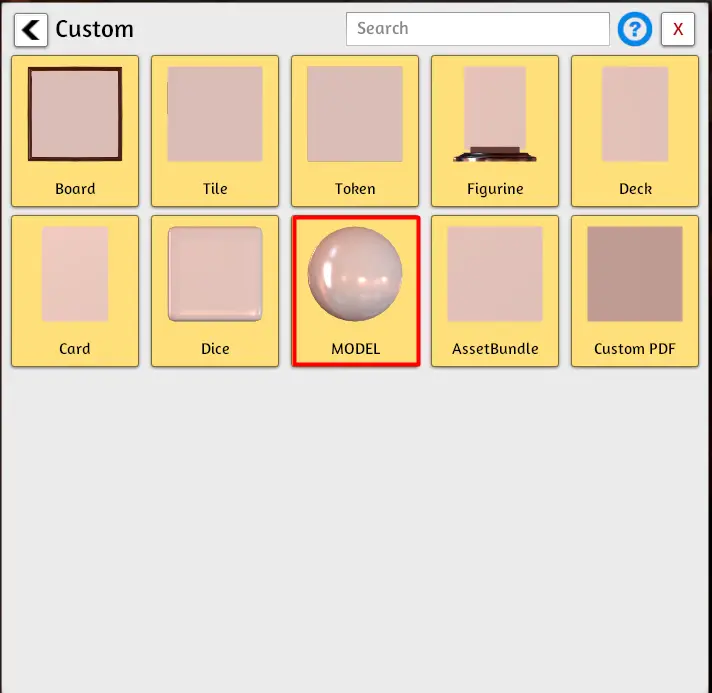
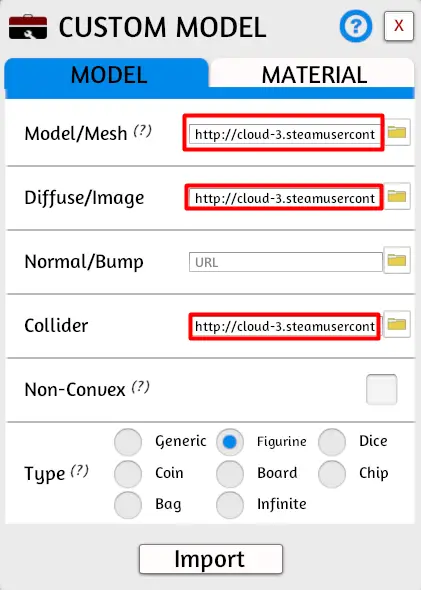
Click in the play area, then right click to begin setting things up.
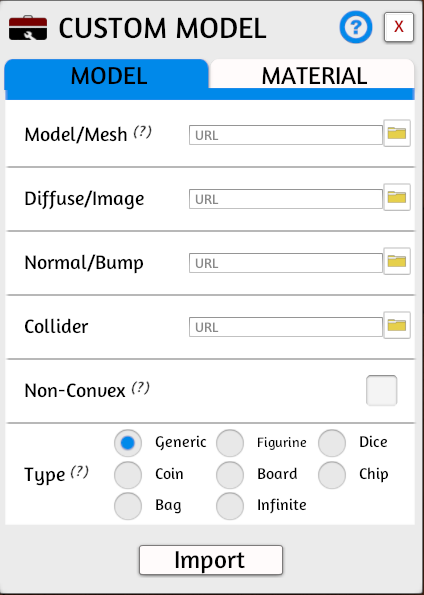
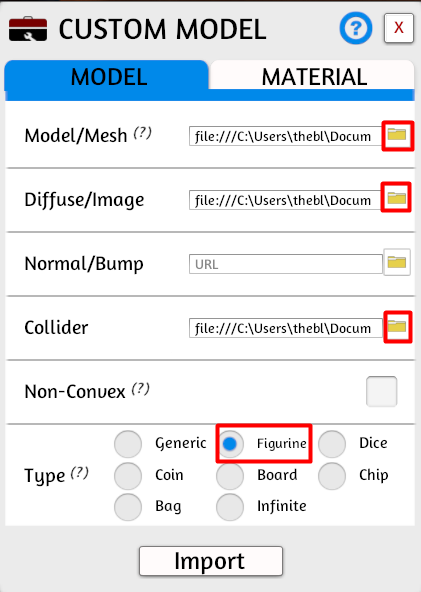
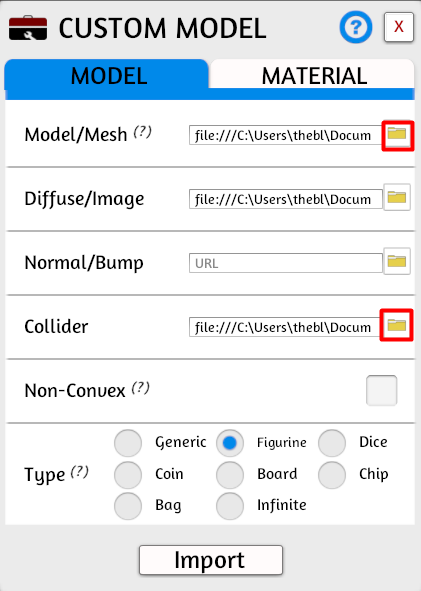
Use the folder icon next to each of the items and browse to the appropriate files. 지금은, just choose one of the poses to import.
Model/Mesh is the primary mesh we exported in Step 6.
Diffuse/Image is the texture file we created in Step 1.
Normal/Bump should be left blank.
Collider is the collision layer we created in Step 9.
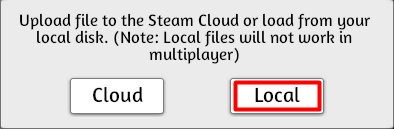
You will probably get a message suggesting you upload to the cloud. If you plan on uploading these files to some service that’s not the Steam Cloud, you should instead be uploading those files now, and using the URLs to those files instead.
But if you want to use the Steam Cloud, I suggest that for now, just click ‘Local.’
Set the type to Figurine.
Next click on Material, and set the Specular Intensity to 0.05. This is to stop the figure from being way to shiny. 마지막으로, click on Import.
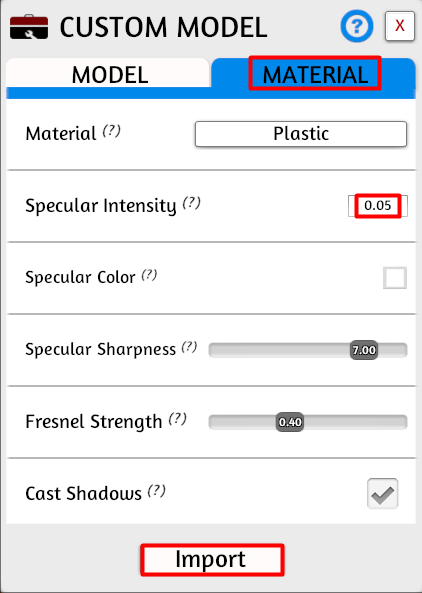
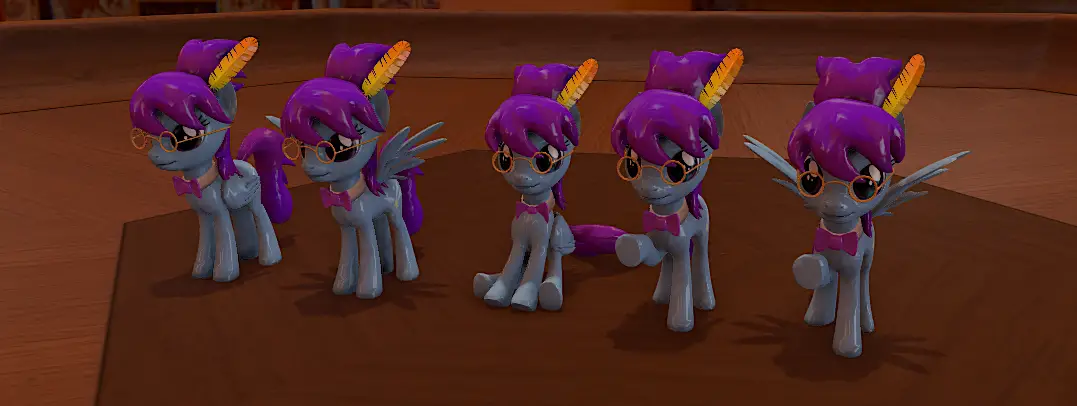
그것으로, the model is done.
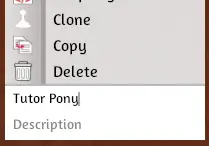
Before we move on, you might want to give it a name. Obviously you’d want to name it after whatever name you’re giving this character. Right-click on it, and enter the name at the bottom of the menu.
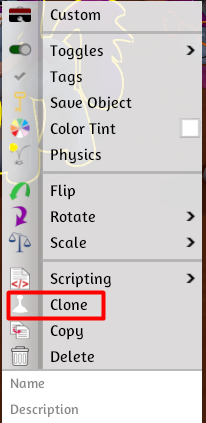
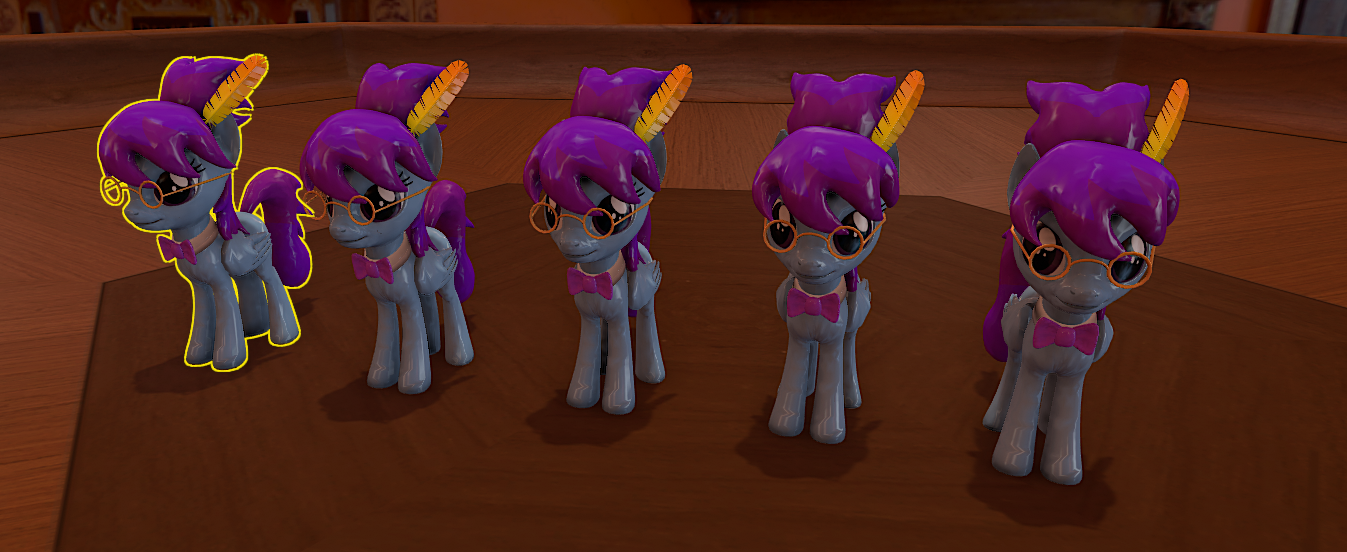
But now, we need to create the models for the other poses as well, and to save time, we’ll just duplicate the model we have. Right-click on the model, and choose ‘Clone.’
Then create an additional figure for each pose.
Keep the original on the left for now. Right click on the next one, and click ‘Custom.’
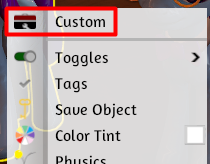
Returning to the Model tab, change the files for Model/Mesh and Collider to the next pose, then click Import.
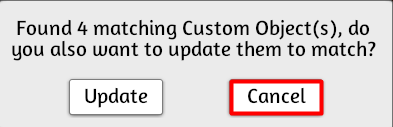
A box will pop up telling you you can update all the models at once. But we specifically don’t want to do that, so click Cancel.
Repeat for all the models.
다음, time for final inspection. Assuming they all turned out okay, it’s time to upload to the Steam Cloud.
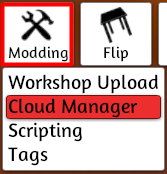
Click on Modding, Cloud Manager.
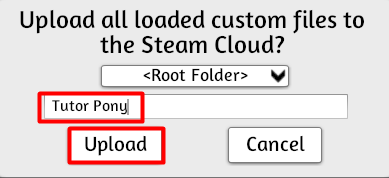
At the top of the window, you’ll see an upward pointed arrow. Click on it to upload all the files to the Steam cloud.

Create a new folder to upload everything into. Then click Upload.
You’ll see a spinning wheel around the upload button.

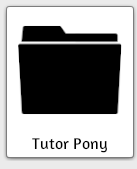
완료되면, you’ll see the new folder.
It’ll be filled with all the files we just created.
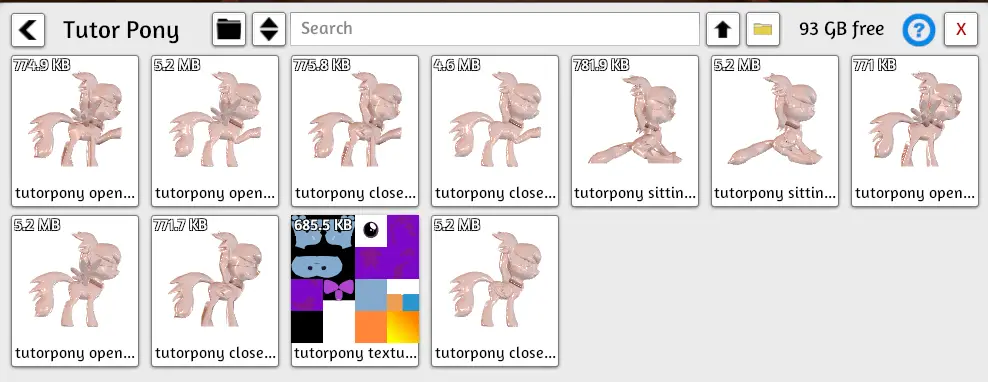
And all the models will be using the new file names.
But having three to five different models isn’t very useful, so now it’s time to merge them.
Select all the models at once, then right-click on the first one and choose ‘Create States.’
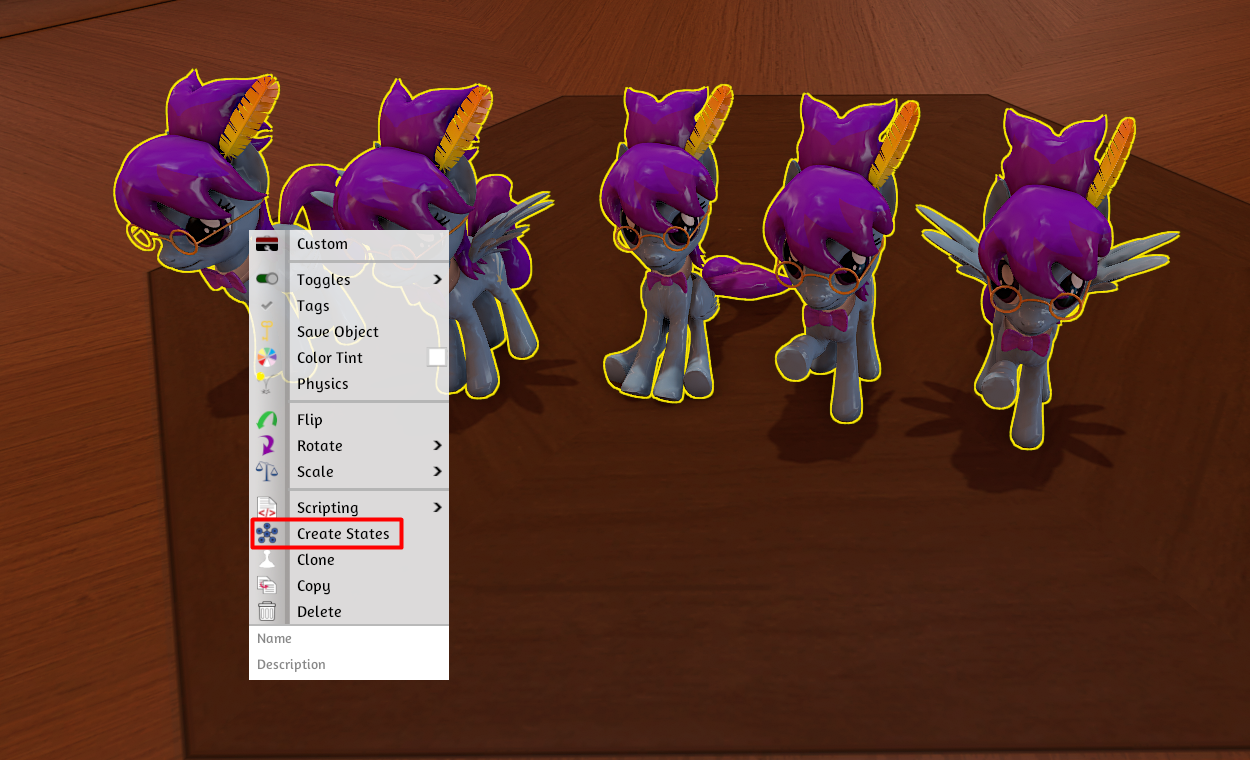
They will now all be merged into a single model.
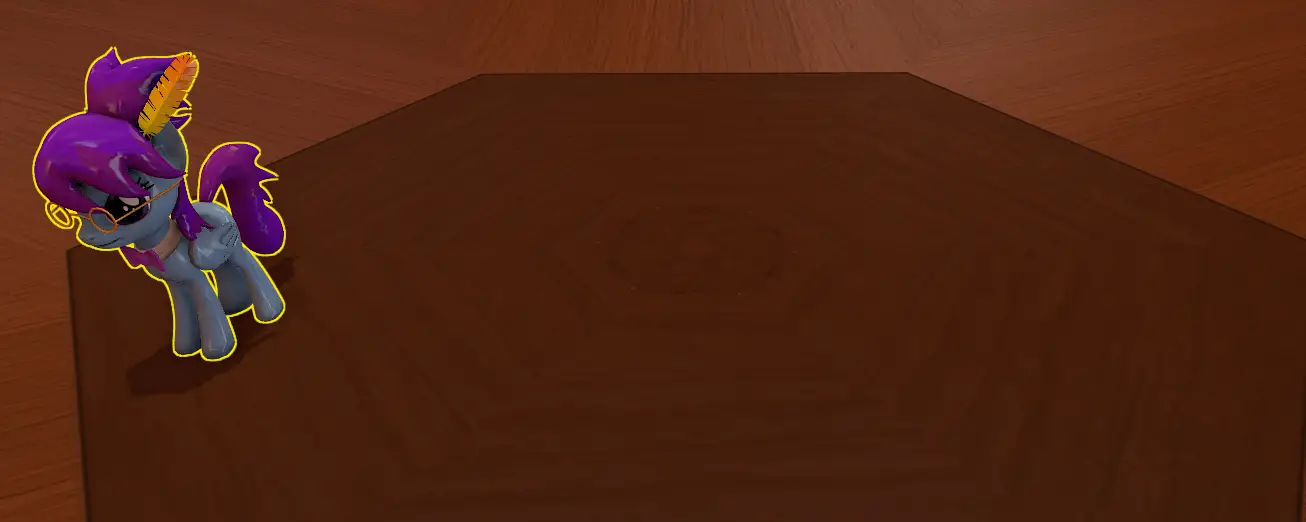
With one state for every pose.

They’ll be numbered in order of when the objects were originally created in-game.
참고하세요, that you have to do this all at once, and cannot add more later. Not without overwriting all but one of the poses. The only way to add more poses would be to duplicate this one model for each pose, set them each to a different pose, and select all of them, including whatever additional poses you’re including, and click on Create States again.
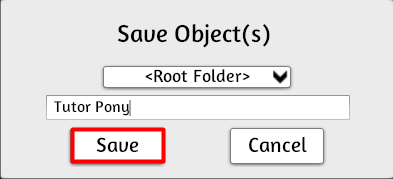
Right-click and click on Save Object.
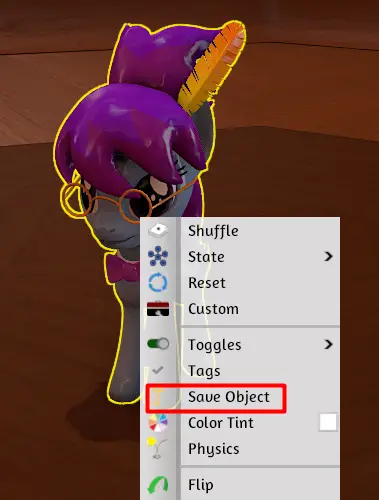
Then click on Save.
그리고 그것으로, 넌 끝났어. You can import the figure into any game you wish by clicking on Objects, and clicking on Saved Objects.
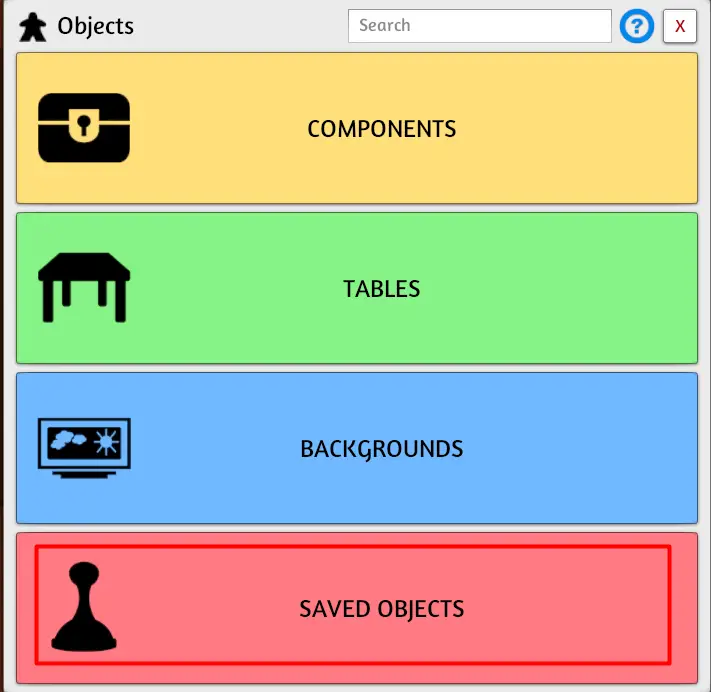
You might need to ask the host to promote you in order to do this, and if you’re already the host, 더 좋습니다.
이것이 오늘 우리가 공유하는 모든 것입니다. Tabletop Simulator 가이드. 이 가이드는 원래 작성자가 작성하고 작성했습니다. ScarletDuke. 이 가이드를 업데이트하지 못한 경우, 다음을 수행하여 최신 업데이트를 찾을 수 있습니다. 링크.