
The release of Starfield has raised concerns among PC gamers due to its disappointing performance, notably the absence of an FOV slider and HDR in a game released in 2023. 하지만, there is hope, as the modding community has a track record of coming to the rescue and improving Bethesda titles. 이 가이드에서는, we will explore various strategies to boost your FPS (Frames Per Second) in Starfield by 5-15%, regardless of the settings you play on.
.INI Configurations
In Starfield, you have the ability to access and modify the configuration files, similar to their previous titles. By making certain adjustments, you can significantly alter the game’s appearance, even to the extent of making it resemble a PS2 game (although this is not recommended).
시작하려면, I’ll guide you through the process of making changes to the config file without compromising the game’s graphical quality.
Locate the Configuration File
- Open your Steam library.
- Right-click on Starfield.
- 선택하다 “관리하다” and then choose “Browse local files.”
This will take you to the Starfield game folder where you can access the configuration files.

In this context, we have a set of configuration files for different presets (낮은, 중간, 높은, 극단론자).
We need to open the configuration file corresponding to the preset we are currently using, 예를 들어, if we’re using the Low preset, we should open the Low.ini file in the game folder.
이 파일 내부, we are looking for the [그림자] 범주, and we will modify it as follows:
[그림자]
fShadowCascadeSplitDistance0=6.0
fShadowCascadeSplitDistance1=12.0
fShadowCascadeSplitDistance2=50.0
fShadowCascadeSplitDistance3=400.0
uTerrainShadowMapSize=256
uShadowMapCount4096=0
uShadowMapCount2048=0
uShadowMapCount1024=16
uShadowMapCount512=44
uShadowMapCount256=128
uShadowMapCount128=128
uDirectionalLightShadowMapResolution=1024
uFocusShadowResolution=512
uShadowFilteringQuality=0
uShadowFilteringTransparencies=0
bContactShadowsEnabled=0
uTotalDynamicShadowMapRenderCount=12
uAdditionalDynamicOnlyLightsBudget=0
Now again, find in this file the [잔디] Category and change it like this:
[잔디]
fGrassStartFadeDistance=86.0
fGrassRandomCullFactor=2.6
fGrassStartRandomCullDistance=10.0
uGrassMeshInstanceCullingSSFootprint=12
메모: These are the default values for the low preset.
If you want to achieve the medium preset, use these instead:
[잔디]
fGrassStartFadeDistance=140.0
fGrassRandomCullFactor=2.2
uGrassMeshInstanceCullingSSFootprint=12

[그림자]
fShadowCascadeSplitDistance0=7.0
fShadowCascadeSplitDistance1=22.0
fShadowCascadeSplitDistance2=60.0
fShadowCascadeSplitDistance3=400.0
uTerrainShadowMapSize=512
uShadowMapCount4096=0
uShadowMapCount2048=4
uShadowMapCount1792=4
uShadowMapCount1024=16
uShadowMapCount512=36
uShadowMapCount256=128
uShadowMapCount128=128
uDirectionalLightShadowMapResolution=1792
uFocusShadowResolution=1024
uShadowFilteringQuality=0
uShadowFilteringTransparencies=0
bContactShadowsEnabled=1
uTotalDynamicShadowMapRenderCount=16
uAdditionalDynamicOnlyLightsBudget=1
For the high preset, we recommend using these settings:
[잔디]
fGrassStartFadeDistance=180.0
fGrassRandomCullFactor=1.75
uGrassMeshInstanceCullingSSFootprint=0

[그림자]
fShadowCascadeSplitDistance0=9.0
fShadowCascadeSplitDistance1=24.0
fShadowCascadeSplitDistance2=68.0
fShadowCascadeSplitDistance3=480.0
uTerrainShadowMapSize=1024
uShadowMapCount4096=0
uShadowMapCount2048=8
uShadowMapCount1920=8
uShadowMapCount1792=8
uShadowMapCount1024=16
uShadowMapCount512=32
uShadowMapCount256=128
uShadowMapCount128=128
uDirectionalLightShadowMapResolution=1920
uFocusShadowResolution=1792
uShadowFilteringQuality=1
uShadowFilteringTransparencies=0
bContactShadowsEnabled=1
uTotalDynamicShadowMapRenderCount=22
uAdditionalDynamicOnlyLightsBudget=3
bDirectionalShadowmapsUseLODFade=1
If you think your PC can handle more, use this ultra preset settings:
[잔디]
fGrassStartFadeDistance=200.0
fGrassRandomCullFactor=0.75
fGrassStartRandomCullDistance=50.0
uGrassMeshInstanceCullingSSFootprint=0

[그림자]
fShadowCascadeSplitDistance0=10.0
fShadowCascadeSplitDistance1=28.0
fShadowCascadeSplitDistance2=90.0
fShadowCascadeSplitDistance3=580.0
uTerrainShadowMapSize=1536
uShadowMapCount4096=4
uShadowMapCount3072=4
uShadowMapCount2816=4
uShadowMapCount2048=10
uShadowMapCount1536=10
uShadowMapCount1024=16
uShadowMapCount512=32
uShadowMapCount256=128
uShadowMapCount128=128
uDirectionalLightShadowMapResolution=3072
uFocusShadowResolution=2816
uShadowFilteringQuality=2
uShadowFilteringTransparencies=1
bContactShadowsEnabled=1
uTotalDynamicShadowMapRenderCount=28
uAdditionalDynamicOnlyLightsBudget=3
bDirectionalShadowmapsUseLODFade=1
Once we have made the adjustments to the [그림자] category in the configuration file (예를 들어, ‘Low.ini’), the next step is to go to the in-game menu during the initial launch. 여기, we should deviate from the target settings and choose something different from our desired preset. 예를 들어, if we initially modified the ‘Low.ini’ 파일, we can change the in-game preset from ‘Low’ to ‘Ultra,’ and then revert it back to ‘Low.’
The purpose of this action is to trigger a refresh of the game’s settings and apply the changes we made to the configuration file. These changes primarily involve reducing shadow resolution and altering the rendering distance of grass. The extent of the performance improvement will vary depending on the system’s bottleneck. If your GPU is the limiting factor, these modifications should lead to a noticeable increase in FPS. 하지만, if your CPU is the bottleneck, the difference may not be as significant.
DLSS Mod
For users with an RTX graphics card, I highly recommend considering the use of the DLSS mod developed by PureDark. Replacing FSR2 with DLSS can offer significant performance enhancements.
You can locate and download the mod from the following source: Starfield DLSS mod.
Remember to adjust the resolution scale after installing the mod to optimize your gaming experience.
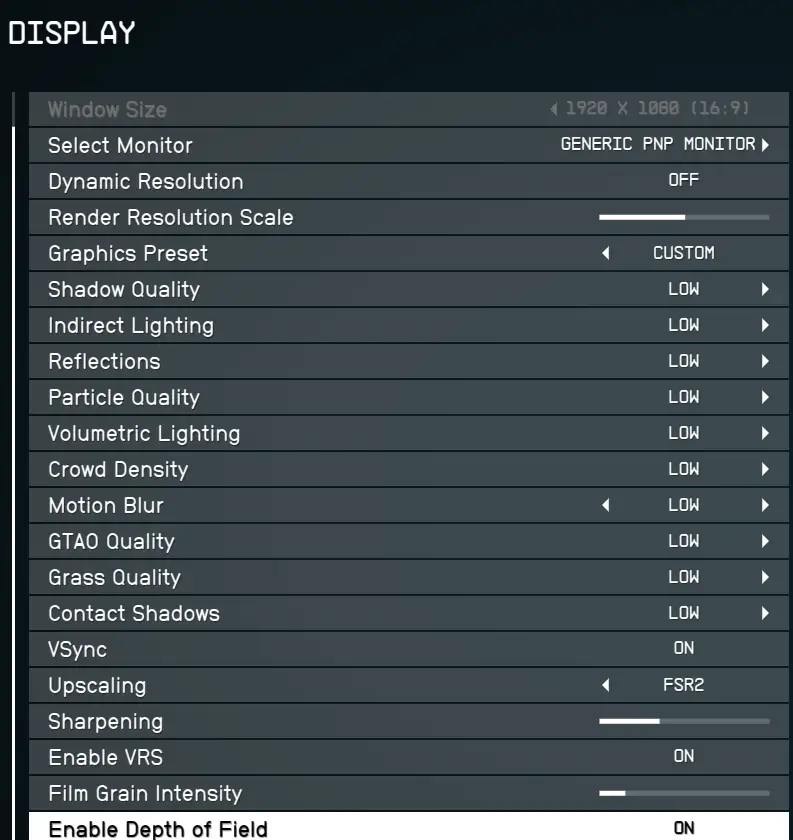
게임 내 설정
It’s worth noting that individual experiences with custom settings can vary. 몸소, I haven’t observed any significant performance enhancements when using custom settings. My preference is to play on the Low preset, with the only modification being setting motion blur to Low. This adjustment makes the game appear smoother, especially when the frame rate falls below 60FPS.
Overclocking
내 경험상, overclocking my GPU has had a notable impact on performance. I managed to gain an additional 5 FPS simply by overclocking. I recommend consulting a guide tailored to your specific GPU model and exploring the recommended settings using MSI Afterburner. If you’re unfamiliar with this process, I suggest watching the video provided below for a step-by-step tutorial:
It is indeed unfortunate when a game isn’t optimally optimized, and players need to resort to mods and configuration tweaks to improve their gaming experience. 바라건대, this guide has been helpful in making the game, 최소한, more enjoyable and playable for you. If you have any further questions or need additional assistance, please feel free to ask.