
If you wanna get a shiny gold medal in Alesia, that’s the final mission of Act 1 에서 Shieldwall 운동, here’s how you can do it.
Siege of Alesia Gold Medal Guide
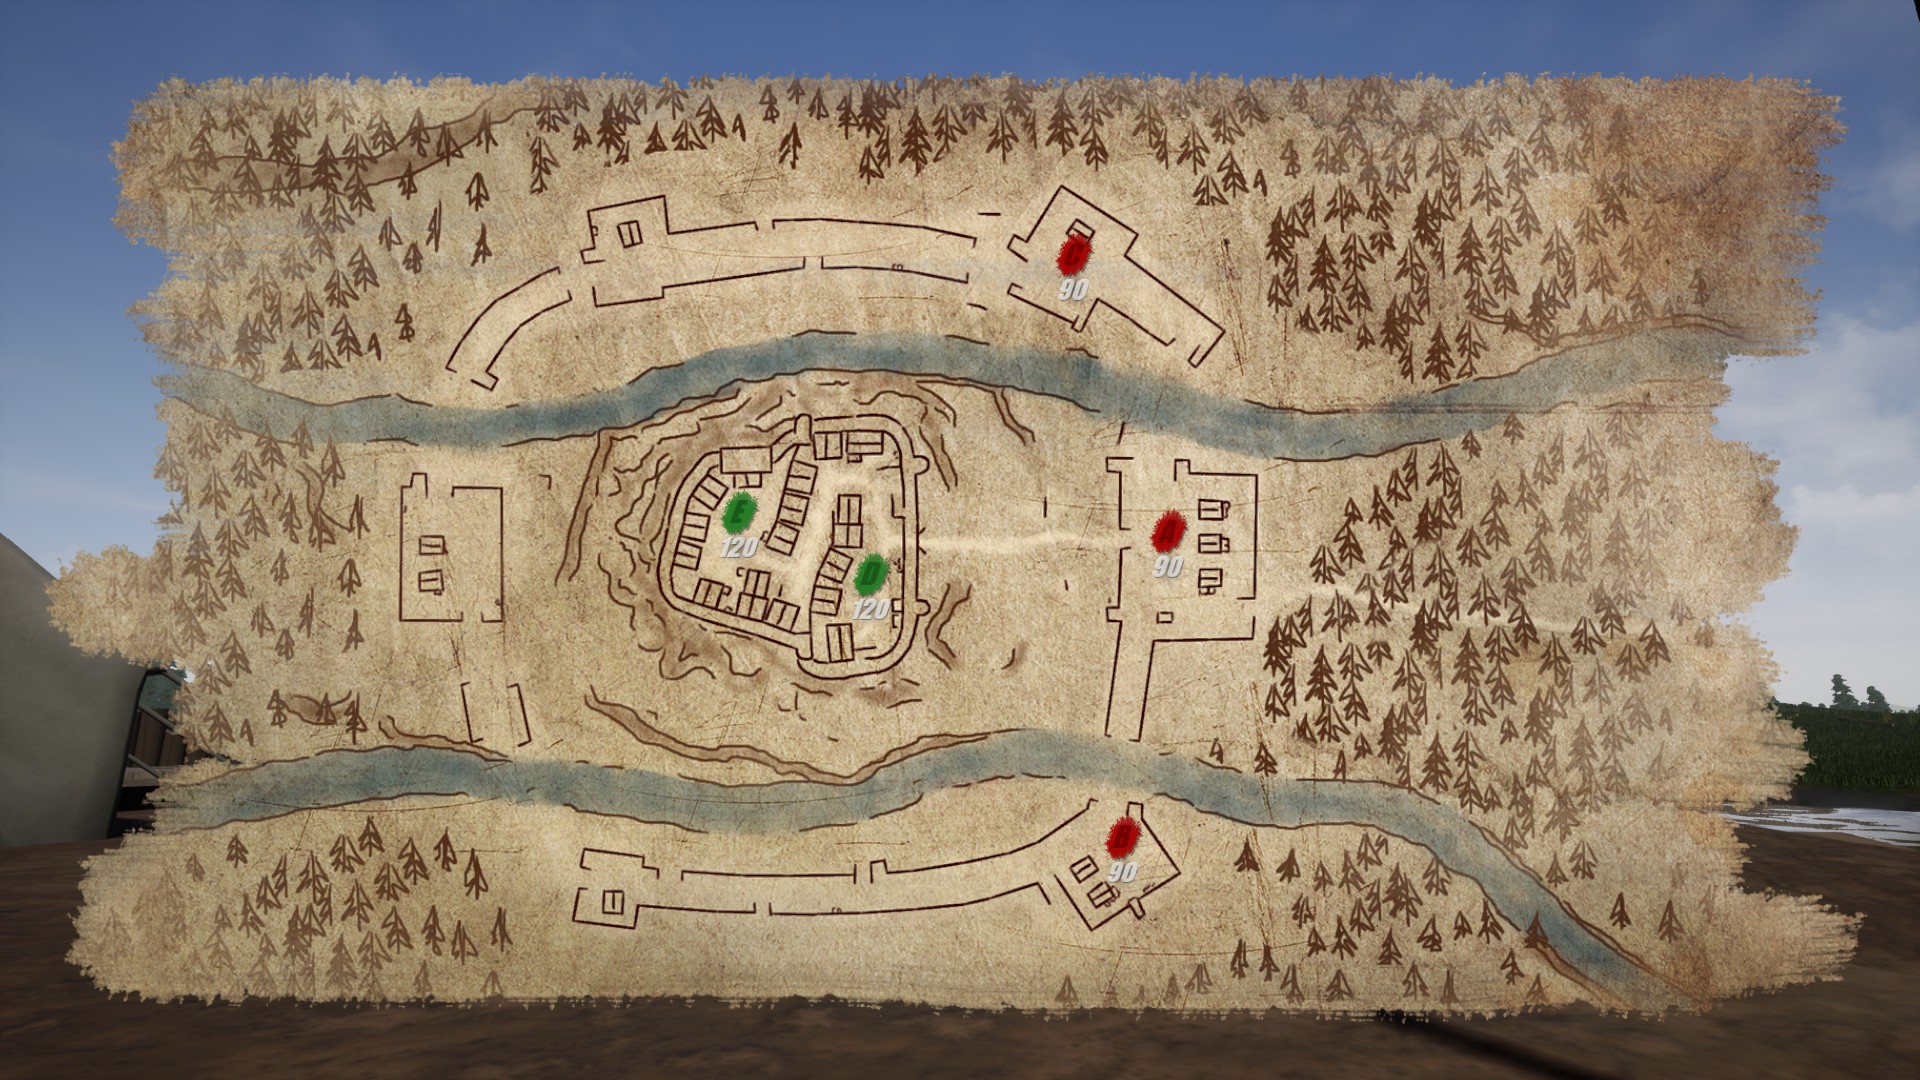
괜찮은, listen up! This map ain’t no walk in the park. The enemy’s dug in deep in a fortress on the hill, with two capture points snug inside, giving ’em a fat stack of cash.
지금, you start with your three camps circling the east side of town. No baddies or camps on the west side, but there might be some goodies like an amphora there (though I didn’t check, gotta keep my focus, ya know?).
Here’s the deal: enemy reinforcements will sneak out from the forest BEHIND your camps and try to snatch ’em up. 운동화, 뭐?
그래서, what’s the plan?
- Right outta the gate, grab yourself a camp guard and fill the rest of your squad with militia. Then hightail it toward your center camp, Camp A.
- When you get back to your central camp, you’re likely to encounter enemies there, prompting the need to defend it. The enemy frequently sends large groups toward your central camp from the city, making it the primary area where you’ll be on guard.
- Watch out for an alert announcing enemy reinforcements. These fresh troops will appear behind your lines, targeting any of your three camps. Stay vigilant upon receiving this alert to swiftly identify their location and respond accordingly.
- It’s wise to assign at least one guard to each camp. While they may not single-handedly repel the enemy, their hurling of pila (throwing spears) forces foes to defend with shields, slowing their advance and buying you time to rally your squad.
- Prioritize upgrading your squad with bonuses for increased squad size, standard units, 스피어 맨, and pila (throwing spear). 추가적으로, consider investing in the hero respawn bonus if you find yourself frequently falling in battle, as swift returns are crucial for replenishing troops and maintaining strength.
- As you hold your ground at the center camp, your focus will be on fending off enemy squads while maintaining control over all your camps. 처음에는, I prioritized upgrading my standard units for increased income. By matching and then surpassing the enemy’s monetary production, I expedited the acquisition of further upgrades. Once my income was steady, I shifted my investments towards enhancing attack power for greater combat effectiveness.
- When you’ve amassed legionaries and optimized your upgrades, it’s time to contemplate breaching the town defenses. By keenly observing the gate, you’ll notice occasional lapses in the enemy’s vigilance. The key is to time your assault precisely, ensuring their forces are positioned at the rear of the fort when you breach the defenses, swiftly neutralize the defenders, and secure the first camp just inside the left wall. Mastering this maneuver puts victory within reach.
- As enemy reinforcements grow stronger over time, swift action becomes imperative once you breach the fortifications. Rapidly recruit legionaries and push towards the rear of the fort to seize the second camp before the window of opportunity closes. Delaying too long risks losing control of your outer camps to enemy advances.
- Upon securing the fort, deploy a couple of defenders by the gate to safeguard it while your main force ventures outside to eliminate the remaining enemy resistance. The central camp’s strategic location ensures swift response times in both directions, facilitating efficient mop-up operations. Annihilate any lingering adversaries, reclaim any lost camps, and savor victory, earning a gold medal if accomplished within 45 분.
이것이 오늘 우리가 공유하는 모든 것입니다. Shieldwall 가이드. 이 가이드는 원래 작성자가 작성하고 작성했습니다. LOHR. 이 가이드를 업데이트하지 못한 경우, 다음을 수행하여 최신 업데이트를 찾을 수 있습니다. 링크.