This guide will show you where to find all Servoshell and the upgrade materials in Encased. At th same time, you will also discover the weapon display case contents that are scattered across the map.
Getting a Servoshell
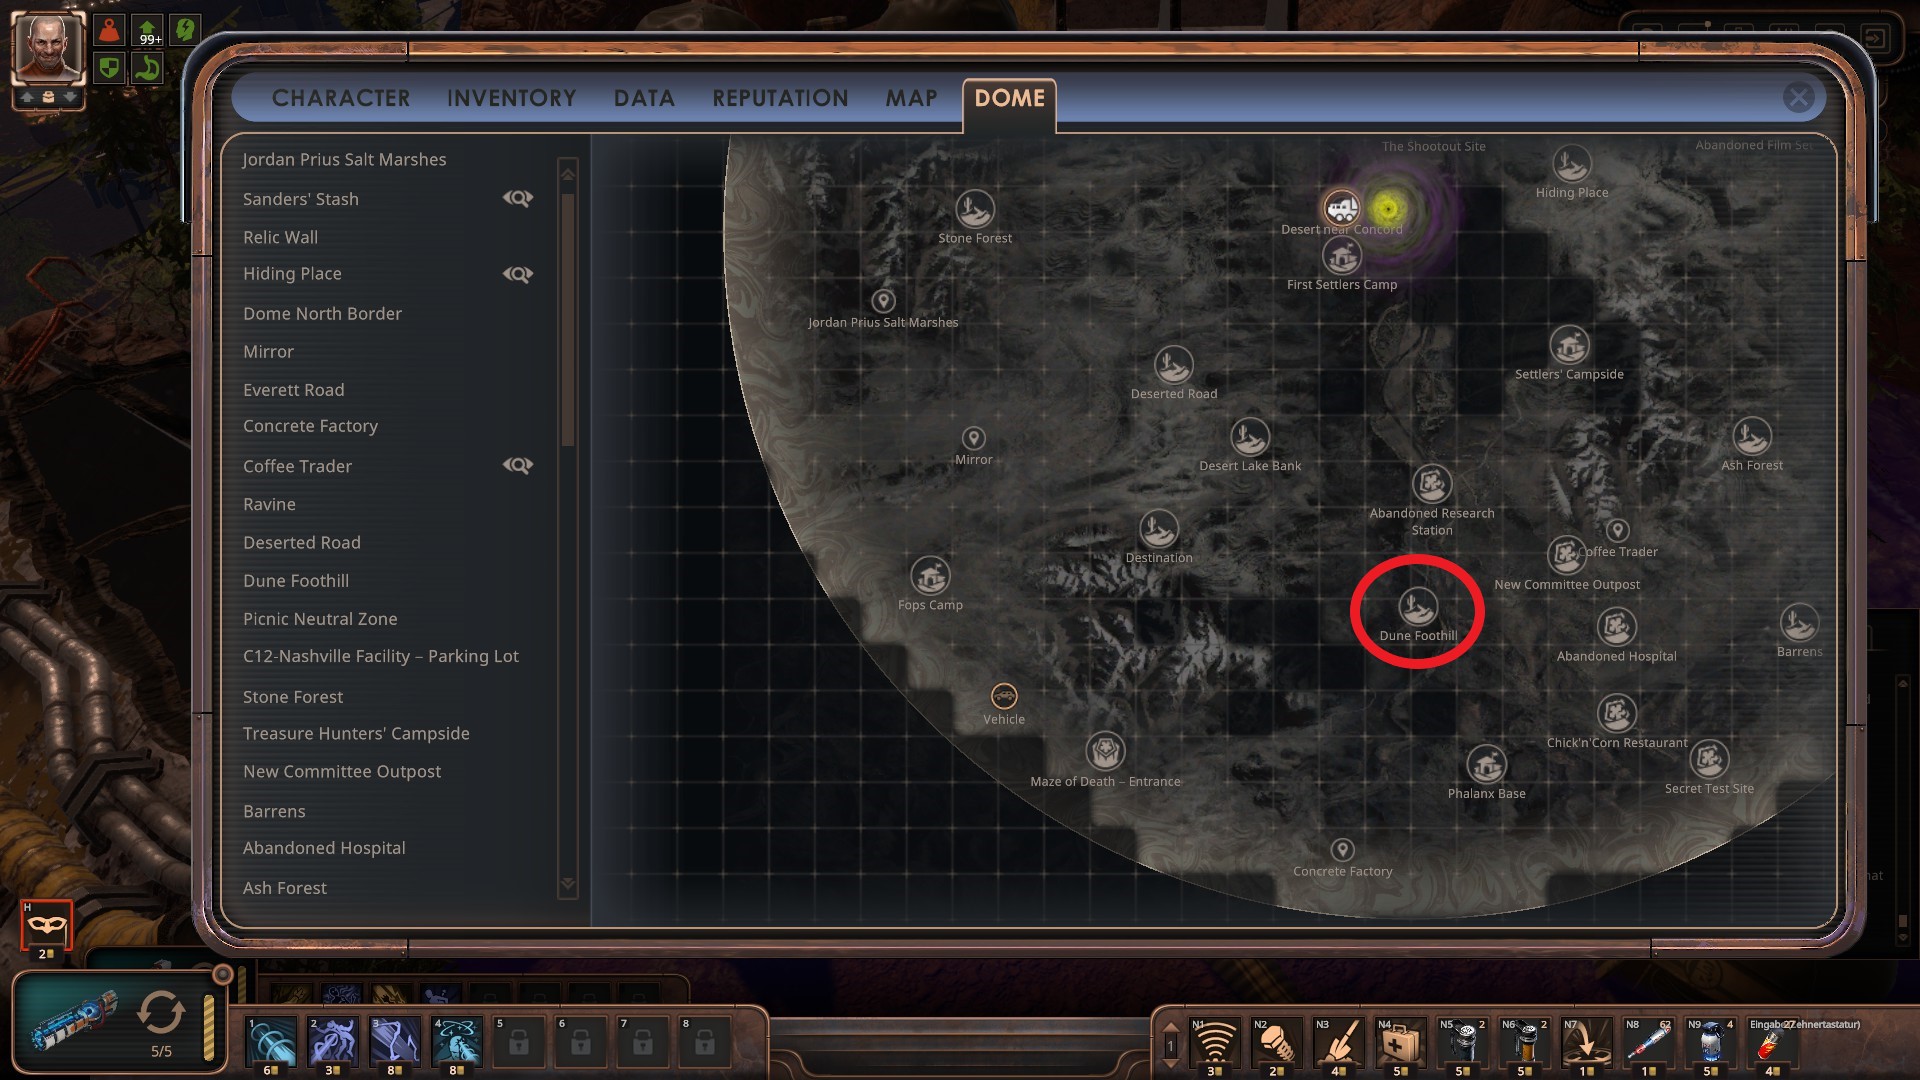
Instead of completing the Magellan quest called “Back to Nashville,” which only rewards you with a decommissioned servoshell, wait until you finish chapter 1. 이후, head to the dune foothill location south of the maelstorm. 거기, you’ll come across a soldier trapped in a rusted servoshell. By using grease or a high enough tech skill, you can not only free the soldier but also claim the MK1 servoshell for yourself.
To upgrade the servoshell, take it to a servoshell station. These stations can be found in various locations, ~와 같은:
- The picknick neutral zone, specifically in the shed next to the building where your personal box is located.
- Magellan station, specifically on level -3 at the military post.
- Ursula vehicle.
Servoshell Upgrade Manuals
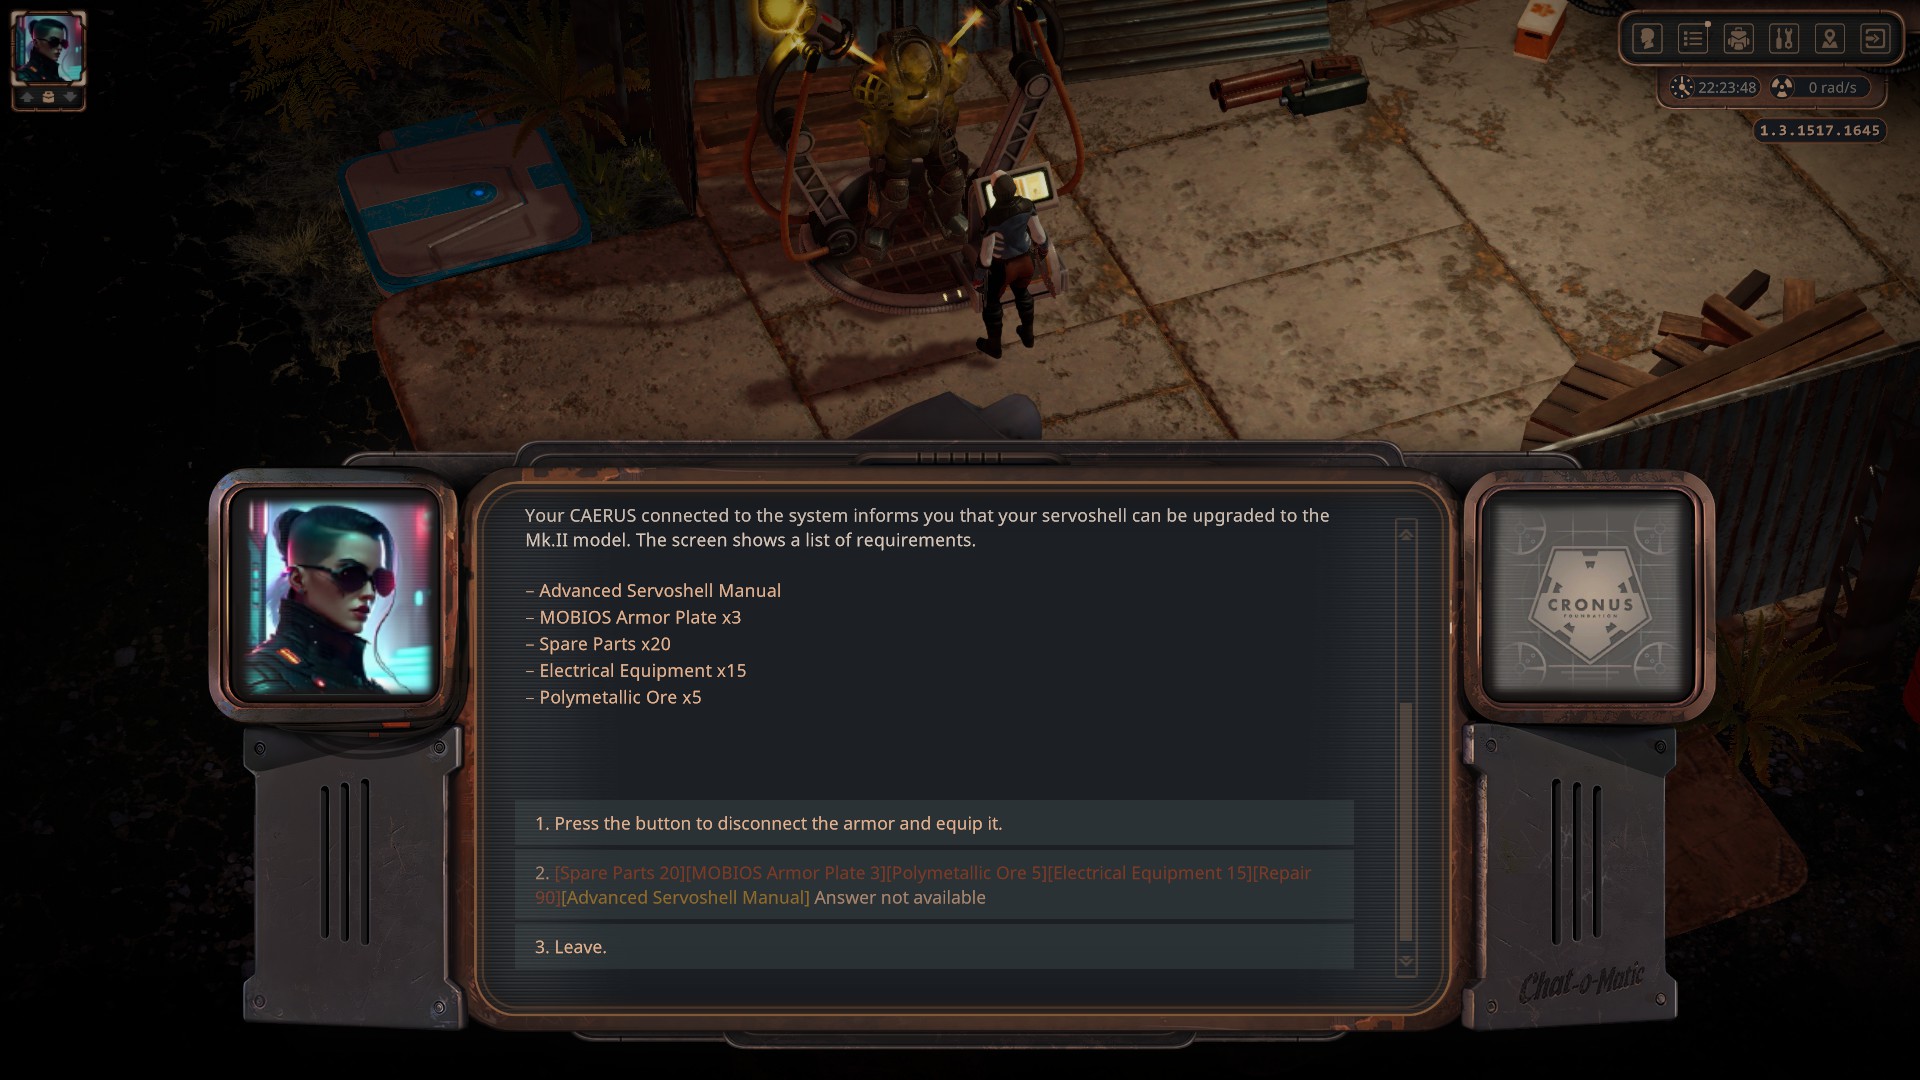
To enhance the servoshell to Mk.II and Mk.III, you’ll require upgrade manuals. Here’s where you can find each type:
The basic upgrade manual is located in Magellan, specifically in the Level – 3 Military Post. Move left from the elevator and locate a locked room in the outer part of the level. Inside a locker within that room, you’ll discover the basic upgrade manual. This manual is used to upgrade the decommissioned servoshell to MK.I.
The advanced upgrade manual can be found in Carmine Heights, within the building where the Isosuit is stored. Inside the Isosuit room, there’s a locked crate containing the advanced upgrade manual.
For the classified servoshell manual, head to the Phalanx Base underground warehouse. Look for a locked crate in the first row on the right side when approaching from the elevators. You can compare the location with the provided screenshot for reference.
Weapon Display Cases
Every faction has a weapon display case designed as a reward for achieving a high faction reputation. The simpler method to obtain these rewards is by having a sufficiently high criminal skill to lockpick them. The cases typically have a lock strength of 170/180. To pick these locks, you’ll need a criminal skill of around 150, and you can enhance your ability further by using comic books and/or regular/electrical lockpicks.
Most of these weapon display cases contain relics specifically useful if you play with servoshells. 하지만, there are exceptions, notably the Fops and the New Committee weapon display cases.
Neutral Picknick Zone
- 위치: Neutral Picknick Zone, the same building where your personal box is in.
- 콘텐츠: Symbol of Freedom (유물), +15 Inspiration while in servoshell
Maelstorm Church
- 위치: 도시, Temple. Santiagos office (immediately to your left when you enter via the main entrance).
- 콘텐츠: Servoshell Cloaking Device (유물), allows you to go into stealth while wearing a servoshell.
Phalanx
- 위치: Phalanx Base, Caravan Company Bureau (near the faction leaders house)
- 콘텐츠: Experimental Eye Pieces (유물), +15 Precision while in servoshell
Carmine Heighs
- 위치: Carmine Heighs, Isosuit Lab Building
- 콘텐츠: Thermal Absorber (유물), +40 Heat Resistance, -1 AP while in servoshell
Fops
- 위치: Fops Camp, behind the big TV-Screens at the Queens Throne
- 콘텐츠: Miss Norway (유물), Summons two doppelgangers as companions (doesnt work with loner perk)
New Comittee
- 위치: 도시, Council Building, Nakamuras Office
- 콘텐츠: Anjin, the Psy-Katana.
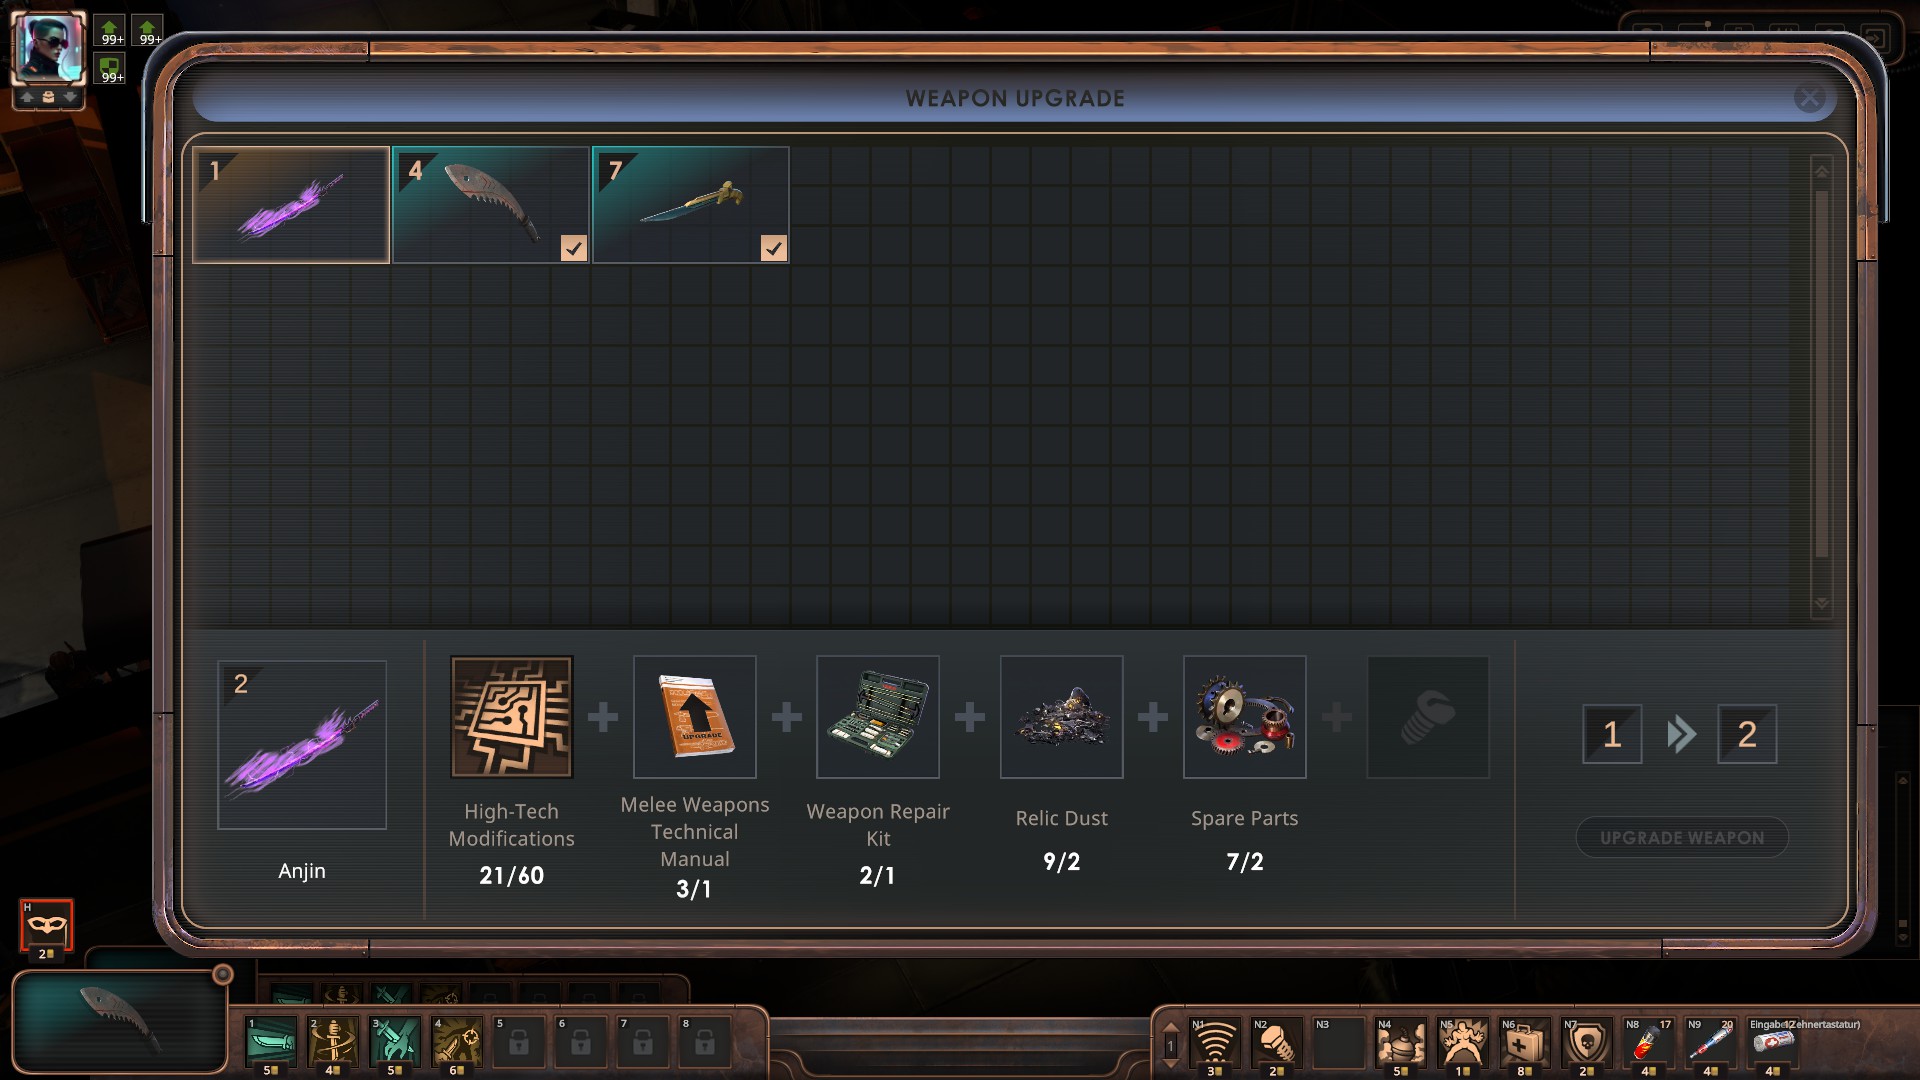
Take note that although having psychic damage as an extra option in melee builds and a notably high critical damage modifier, this weapon starts at level 1 and requires high-tech modifications (science skill) for upgrades.
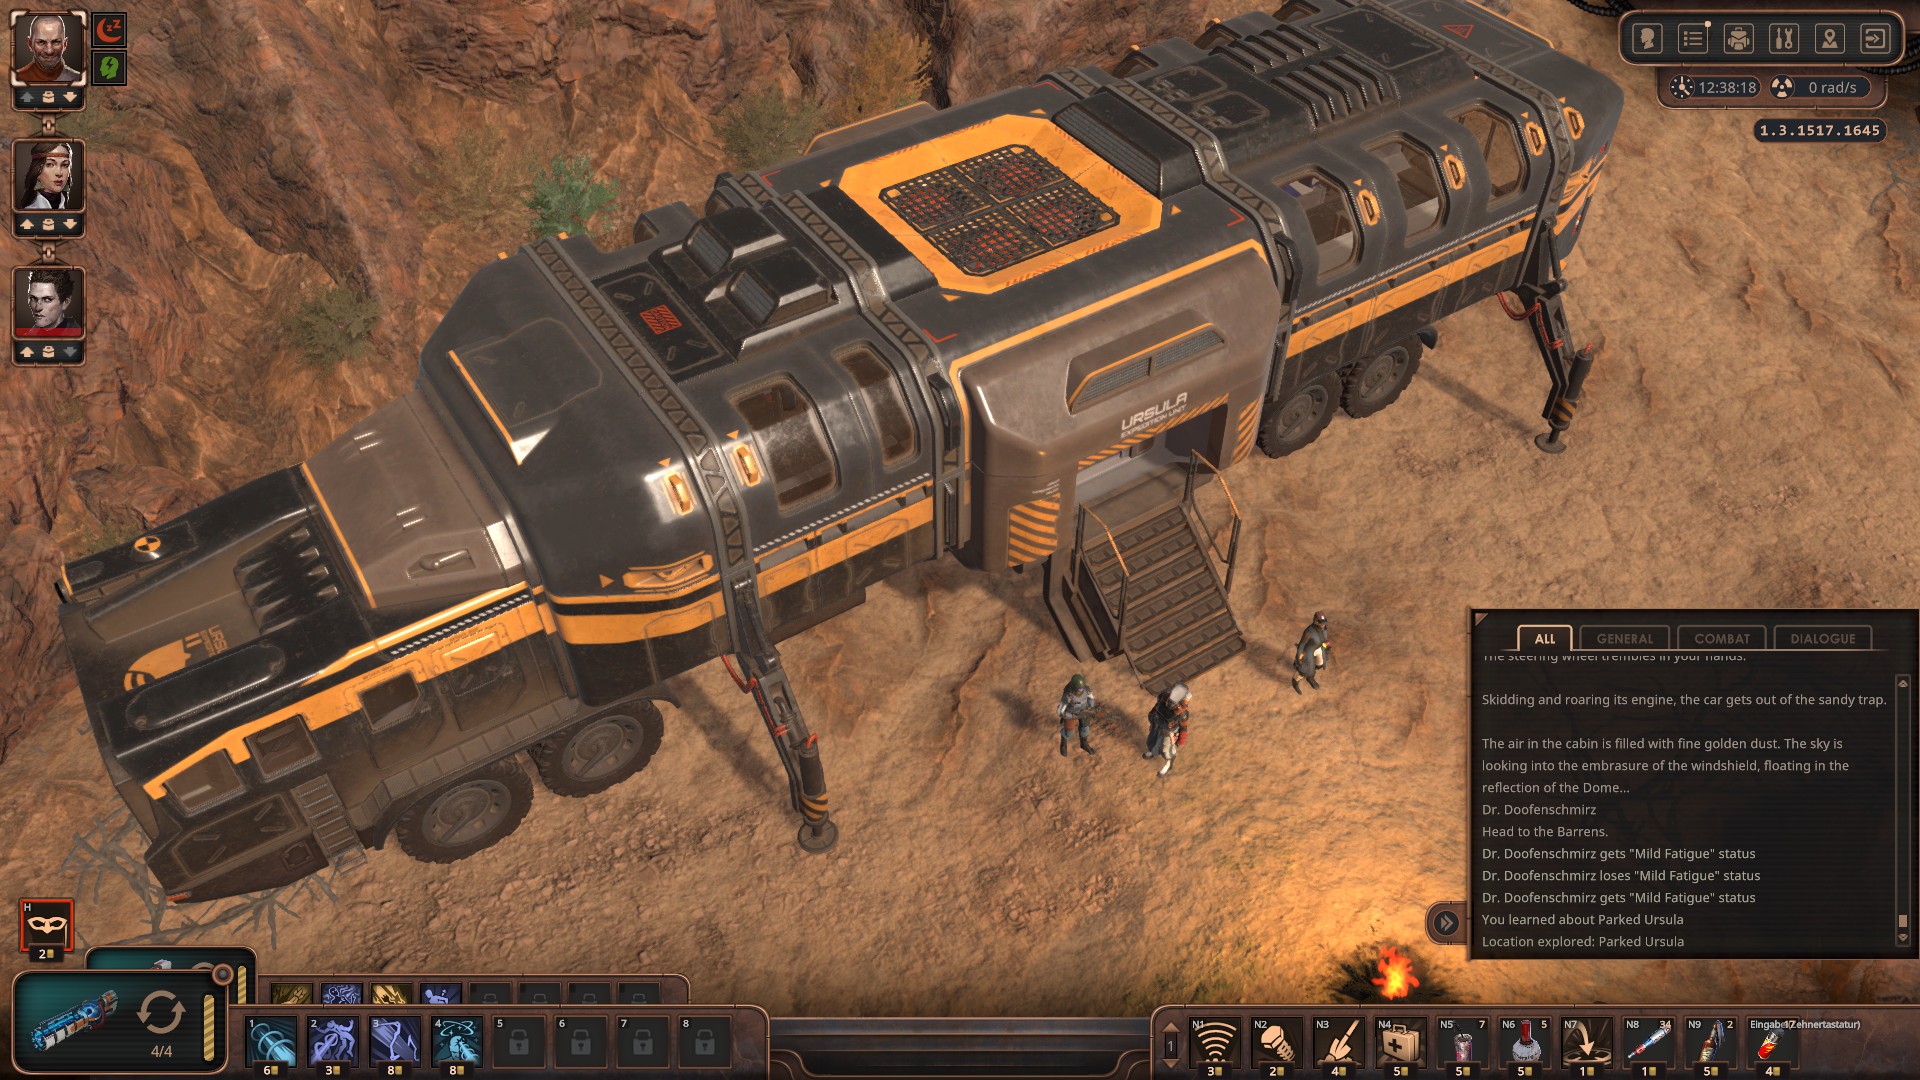
Ursula Street Train
The Ursula Street Train stands out as an excellent vehicle for comfortable travel within the dome. It is equipped with crafting stations, a toilet, a shower, a sink, your personal box, 침대, and a servoshell maintenance station. 하지만, be aware that this vehicle has its own random events, often breaking down and requiring tech skill to resolve the problem.
To get Ursula:
Discover the secret map spot for the abandoned street train.
팁: Bring a canister.
Conquer the foes in that area, including necroids and skeletons. Obtain a key card dropped by one of them. Access the helm of the street train. Employ the canister and initiate the train. Your task now is to separate the rear portion of the train by utilizing a console in the train’s middle. This console holds a riddle.
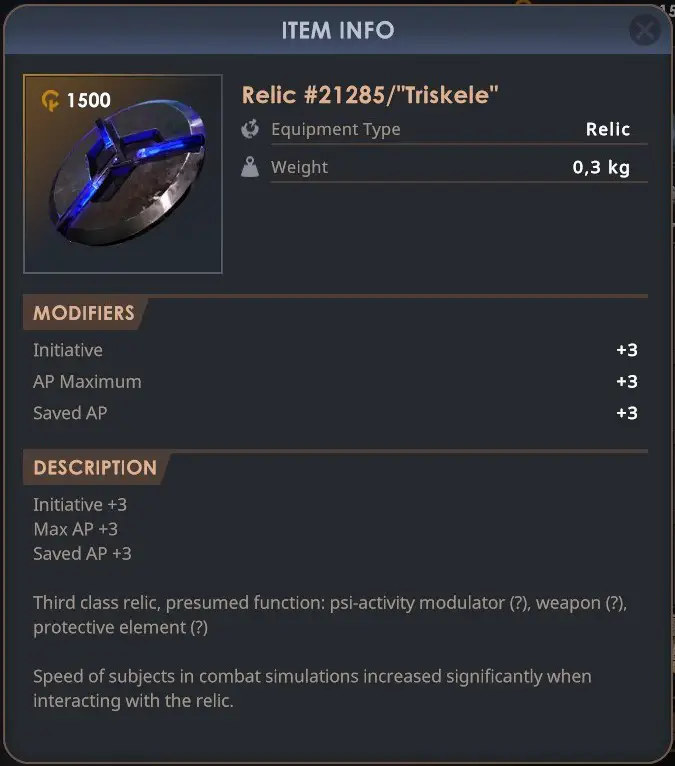
Triskele
The Triskele Relic is something you can get in the beginning part of the story in Nashville. It’s really useful, but you can only get it before you finish the starting part.
This relic has three pieces:
- The first part is in a locked safe on level 1 of the Nashville facility.
- The second part is also on level 1, but it’s in the air vents. Look for a vent with a speech bubble, then interact with it. Do this with two more vents. At the third vent, 선택하다 “sneak up upon it.” You might need to be good at being deft.
- The last part is on level 2 in a broken toilet in the medical station room.
When you have all three parts, go to your crafting window (press J by default) to put them together into the Triskele Relic.
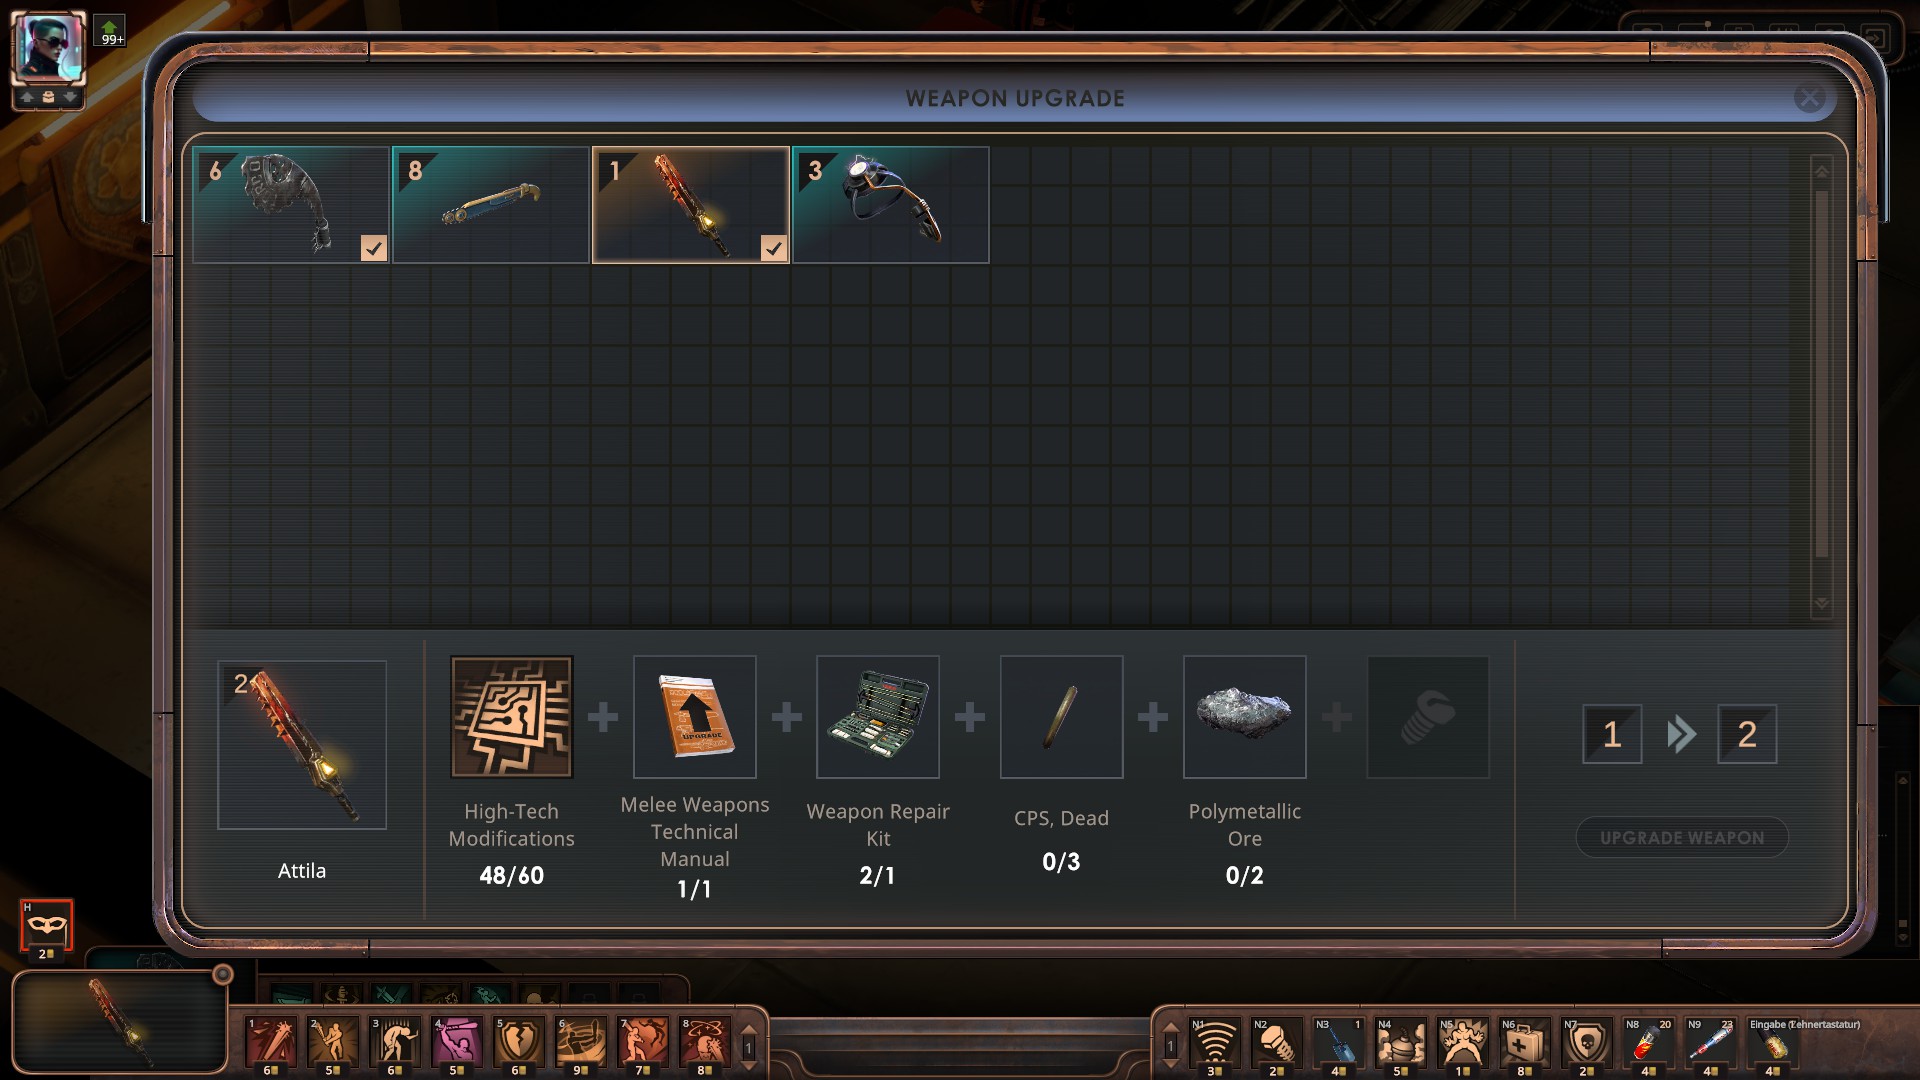
Attila
Attila is a special type of close-range weapon that causes heat damage.
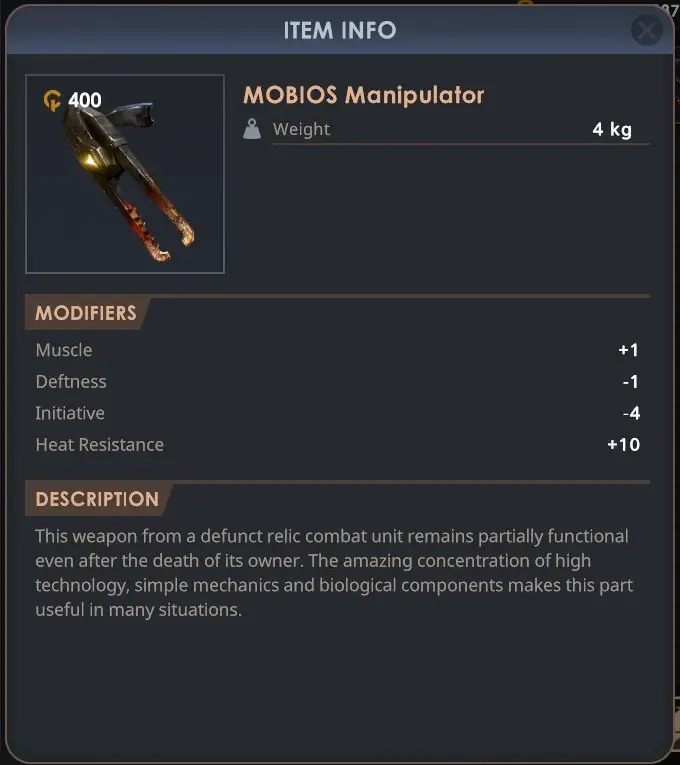
To create Attila, you must obtain the mobios manipulator, which is dropped by Old Al in the Neutral Picnick Zone, specifically in the Swamps at the anomalous grotto.
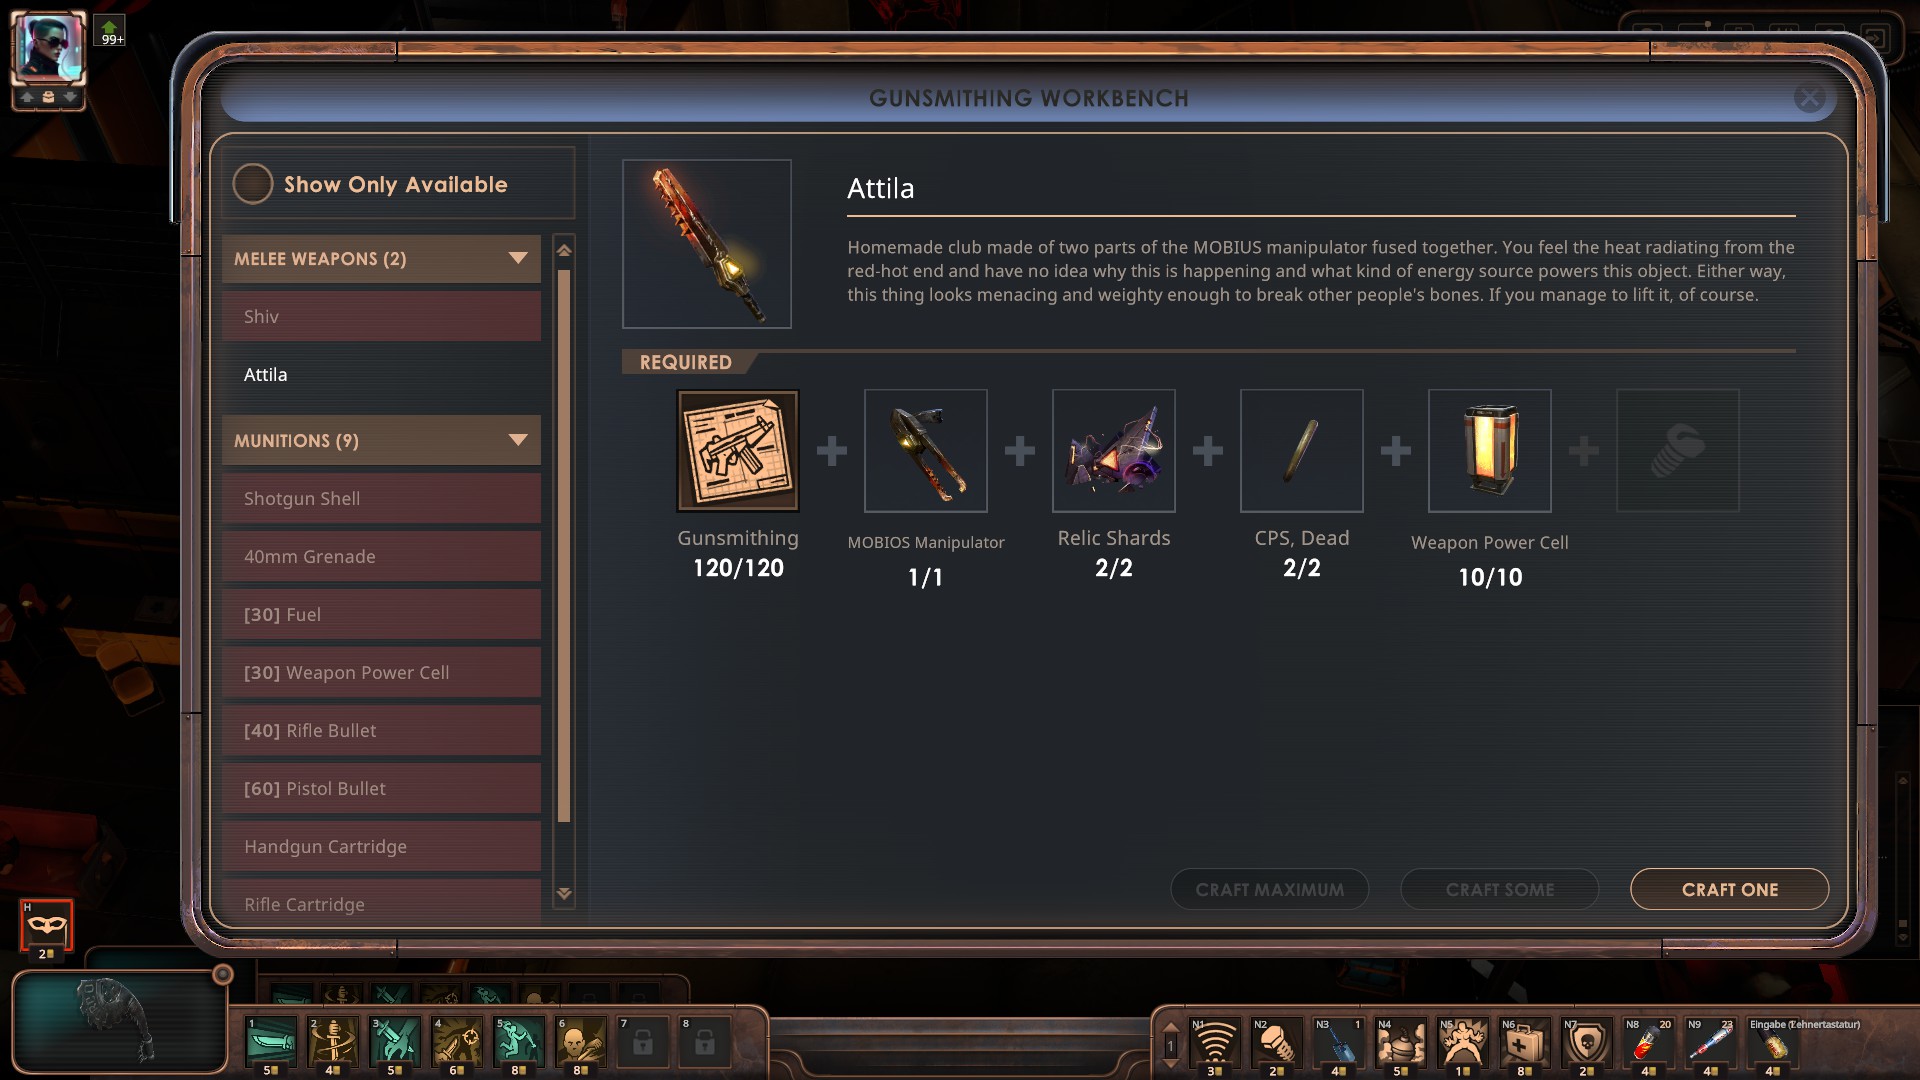
Once you have the mobios manipulator in your possession, you’ll be able to view the crafting recipe for Attila at the gunsmithing workbench.
Attila is particularly useful for characters who focus on using blunt melee weapons.
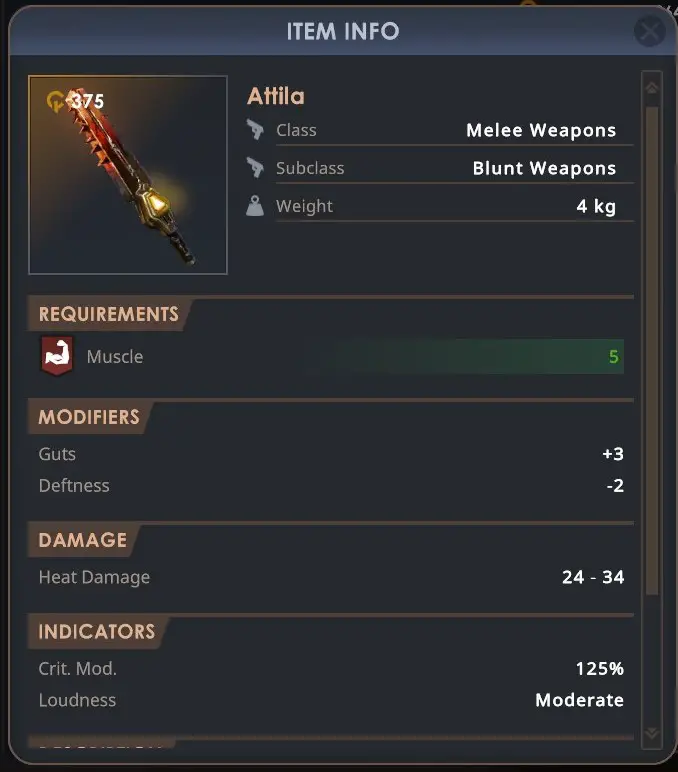
Keep in mind that similar to the psy-katana, Attila requires the high-tech modifications skill (obtained from the science skill) to enhance its capabilities.