
This is a guide for adding skins, 자동차, and locos to Derail Valley via the mods Skin Manager, Custom Car Loader (CCL), and Cargo Swap. This guide assumes you have already set up Nexus Mod Manager and know how to use it.
소개
So you’ve set up Unity Mod Manager, downloaded that shiny new Class 89 steam shunter, popped it in, and hold on; UMM says it’s not supported? 잘, this guide is here to help.
Skins and rolling stock fit into a category I like to call “Addon” mods because they add on to other mods. Think of them as a bit like a Resource or Shader Pack for Minecraft: they don’t fit the mold that UMM expects from a mod so it doesn’t know what to do with them, 그리고 그 결과, we have to install each addon manually.
Before We Begin
Find out exactly where the game is installed
Since we are going to be installing mods manually we need to know where to put them:
- Right-click the game Derail Valley on Steam and select Properties.
- Go to Local Files, then choose Browse…
This will open File Explorer to the Derail Valley install location. Keep the window open, or make a note of its file path, because you will need this later.
Ensure that UMM is running correctly
If you start installing mods and nothing seems to change, then it could be a problem with the mod but it could also be a problem with Unity Mod Manager. It’s best to check that UMM is running correctly even before you start adding other mods.
첫 번째, check that your UMM window looks like this:
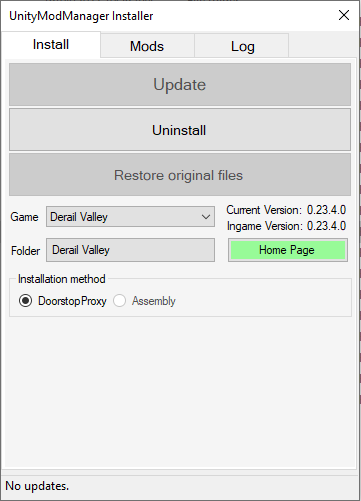
Note that the installation method is set to DoorstopProxy.
If yours is set to Assembly: 딸깍 하는 소리 Uninstall, change to DoorstopProxy, 그리고 클릭 Install.
두번째, check that UMM is correctly interacting with the game:
- Start the game Derail Valley.
- The Mod Manager window should pop up in-game automatically:
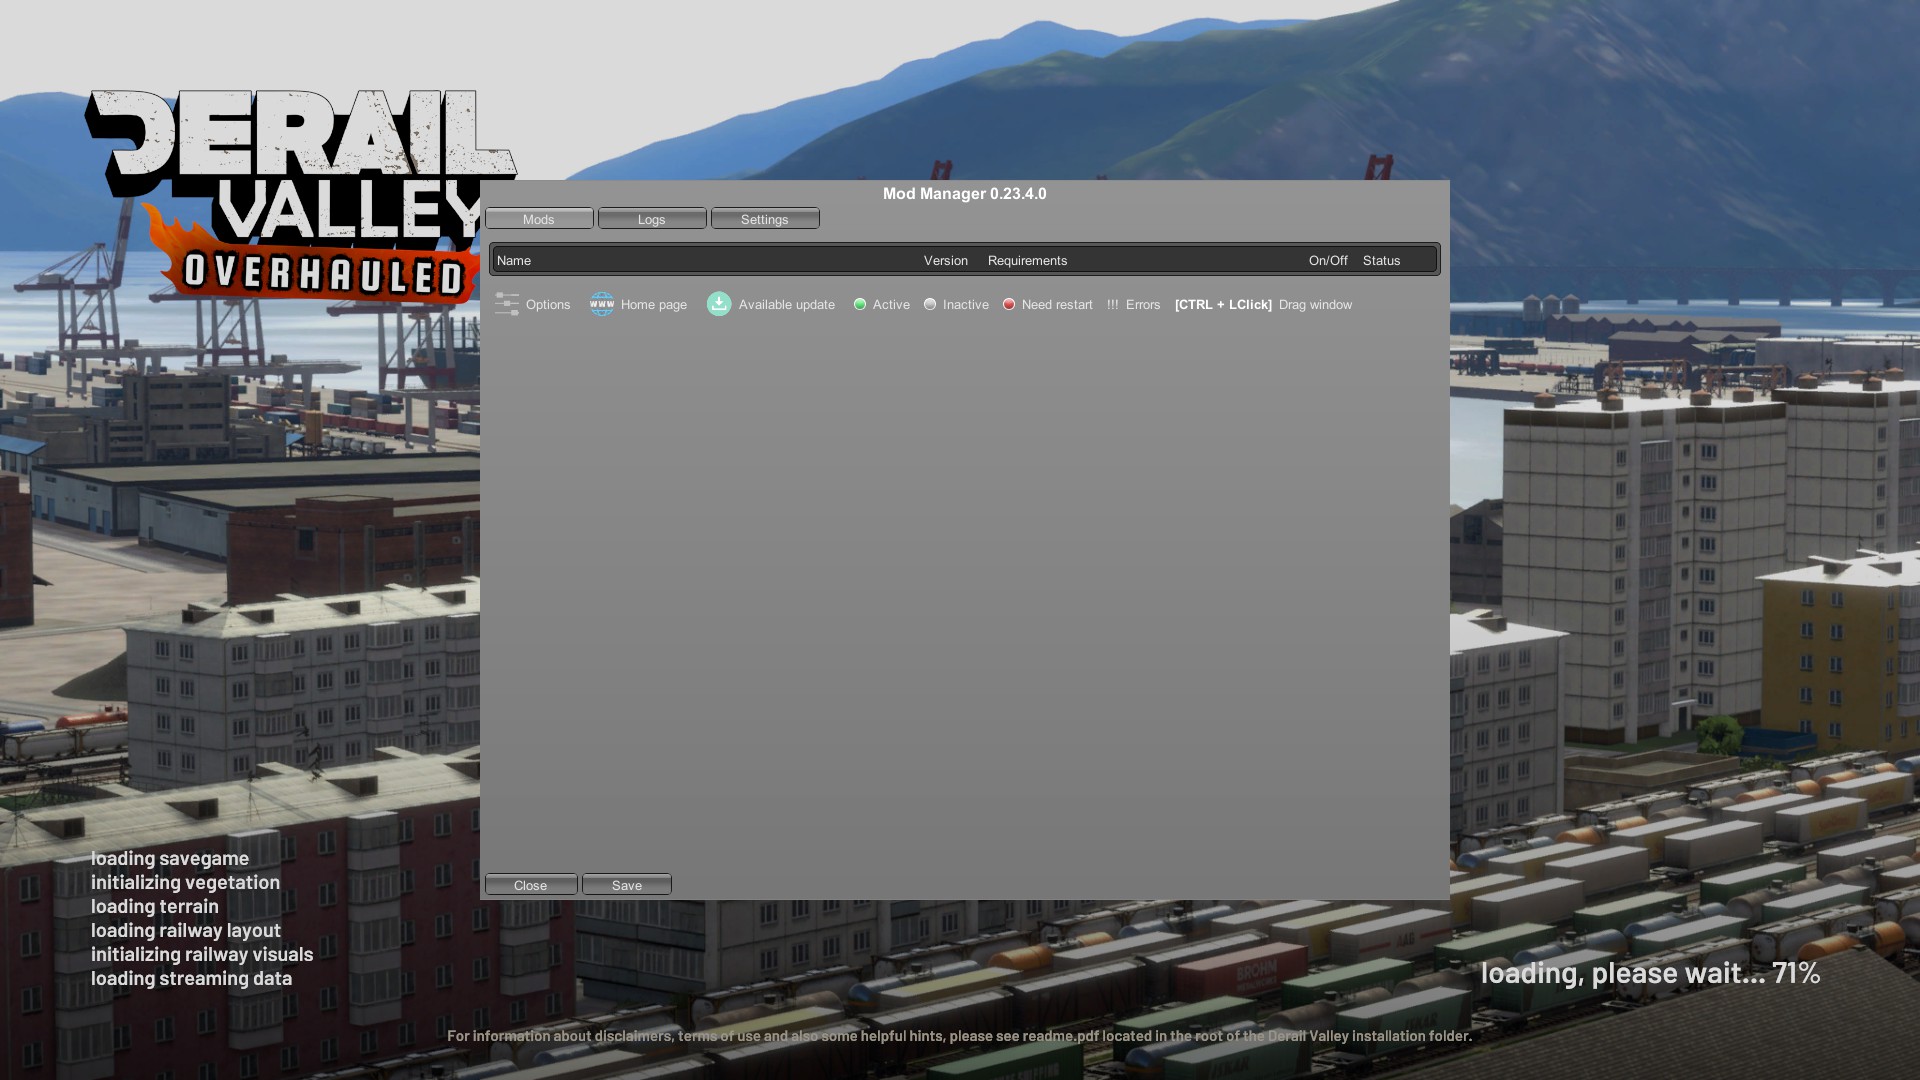
- If the game has finished loading and the Mod Manager window has not appeared, try to bring it up with ctrl-F10.
If the Mod Manager window pops up automatically, or with ctrl-F10, then Unity Mod Manager is installed correctly and you are free to begin installing other mods. If this window does not appear, you will need to return to your guide for installing UMM and ensure everything is set up correctly.
This window is a list of all installed mods. Use it to control various options for your mods, as well as to see simple debug information. Don’t want this window to pop up every time you load the game? You can disable that in the 설정 꼬리표, but be sure to remember that it’s ctrl-F10 to bring it up again.
How to Install Skins or Rolling Stock
So you know your Derail Valley install location, you know UMM is running correctly, and you’re at the Nexus Mods page for your brand new skin or piece of rolling stock. Now we can go about installing it:
단계 1: Read the instructions and install prerequisite mods
If the instructions on Nexus Mods for how to install your new addon are different from what’s in this guide, follow those instead.
Make sure you have the latest versions of all prerequisite mods. Skin Manager, Custom Car Loader, and Cargo Swap can all be installed traditionally with Unity Mod Manager.
단계 2: Download and extract your addon
If the mod you downloaded is a .rar file, you may need a third-party tool to extract it.
단계 3: Move your addon to its correct location
Installing Skins for Skin Manager or Cargo Swap:
- 다음으로 이동하세요. 모드 folder of your Derail Valley installation.
- 열기 SkinManagerMod 또는 CargoSwapMod 접는 사람, whichever is appropriate.
- Copy the 스킨 folder from the mod you downloaded and extracted into the folder you just opened. If the mod was compressed with its proper file structure then your file system will move everything appropriately.
- If you cannot complete 3, move the files you downloaded and extracted into their appropriate positions manually.
The proper file path should look like:
\Derail Valley\Mods\SkinManagerMod\Skins\<train-car-type>\<skin-mod-name>\<skin-files>
또는:
\Derail Valley\Mods\CargoSwapMod\Skins\<cargo-type>\<skin-mod-name>\<skin-files>
각기.
Installing Cars or Locos for Custom Car Loader:
- 다음으로 이동하세요. 모드 folder of your Derail Valley installation.
- 열기 DVCustomCarLoader 접는 사람.
- Copy the mod you just downloaded and extracted into the Cars folder.
The proper file path should look like:
\Derail Valley\Mods\DVCustomCarLoader\Cars\<car-mod-name>\<car-files>
CCL Locos not spawning automatically? 글을 쓰는 시점에, they’re not designed to! Enable comms radio spawning in the game menu settings then spawn them in yourself.
How to Uninstall Skins or Rolling Stock
- 다음으로 이동하세요. <train-car-type>, <cargo-type>, 또는 \Cars\ 접는 사람 (as shown above) that you installed the mod into.
- Delete the folder <skin-mod-name> 또는 <car-mod-name> 적절하게.
Need Help?
If you get stuck and don’t know what to do, drop by the Altfuture discord and ask your questions in the #mods-support-and-bugs 채널.
불화 is also the best place to get in touch with me if any aspect of this guide needs updating.
메모: This is unofficial mod support and the game developer is not responsible for mods. The community is happy to help out but do not send bug reports to the game developers if you have installed mods, as mods can cause errors even after they are removed.
이것이 오늘 우리가 공유하는 모든 것입니다. 계곡 탈선 가이드. 이 가이드는 원래 작성자가 작성하고 작성했습니다. Talkingpeanut. 이 가이드를 업데이트하지 못한 경우, 다음을 수행하여 최신 업데이트를 찾을 수 있습니다. 링크.