
- 제목: CosmicBreak Universal
- 출시일:
- 개발자:
- 발행자:
Information about CosmicBreak Universal is still incomplete. 이것을 사용하여 게임의 세부 정보를 입력할 수 있도록 도와주세요. 문의 양식.
Do you want to suffer as the underdog and experience great frustration in Cosmic Break Universal? Here’s a guide to do just that.
개요
I’m going to be honest with you. By choosing to play as a LND Gunner — by voluntarily electing to pilot a unit that runs on the ground and shoots at enemies — you’ve already decided to be suboptimal. LND Gunners are not meta. They are weaker than AIRs, ARTs, and melee LNDs, no questions asked. It’s just the ugly truth.
So what I’m saying is this isn’t a guide to operating a broken and autoplay unit (which shouldn’t require a guide to play in the first place — anyone can play a Baller or a Biker, thus they are excluded from this guide). This is a small resource for the underdogs of Cosmic Break Universal, a passion project for the incurable romantics who can endure getting owned by every offensive threat, but who do so in order to relish the opportunity to dive deep into enemy territory, secure a few frags, and then either escape by the skin of your teeth or get blown up for a huge BP cost and actively set your team back.
Cores to Consider
This is not a comprehensive list — there are other options out there not mentioned here. These are just some recommended cores that are tried and tested. You know the jacket you just reach for without really thinking when you’re leaving the house? That’s what I think of these cores.
I’m including some F2P options throughout this guide, but to be honest LND Gunner Options suck if you’re F2P. It’s actually expensive to build minmax’d subpar units, imagine that.
- Brisgandr Pawn — core comes with a reusable shield and a Swift Jet BS built-in. The DPH (damage per hit) for the built-in weapon is on the low side but clip size is large which can add to some amount of damage over time. You can buy him for 140 Chaos Coins.
- Misty Hollow — she gets to become temporarily immune to ranged damage at the cost of being slowed and taking additional melee damage (Sword Guard is actually disabled when she’s in mist). Relatively high base STR so keeping 1 STR for a fully functional WonderBit is a bit easier compared to other LND gunners. You can get her by completing the Missing Freshman mission once.
- Estes — technically free during a special event during Season 2. Insane mobility due to the sub.
- Lucca Decho — he can generate shield WonderBits that can either protect you or pursuit enemies (I’d recommended not targeting an enemy when using his sub so you get 4 shields instead of 2. He’s in the pool of Ro Cubes.
- Chrotacs — great built-in weapon, but no free arms just like Brisgandr Pawn. He’s also in the pool of Ro Cubes.
- Shadow Flow — his default Gamakage WonderBit is one of the best in the game. It can bind the enemy, it can slow the enemy, and it does melee damage. 더 나은, the froggy WonderBit is fixed performance value so you can dunk STR/TEC for free without affecting the WonderBit’s performance (if it was a stat dependent WB, then its performance would take a huge dip if you made your build’s STR or TEC below 1).
- 테레즈 — Probably my favourite unit to play. I’ll talk about her in length later on.
- Dark Revenant — similar to Shadow Flow except it summons 4 shadow clones which smack the opposition around for you.
Weapons to Consider
If your unit does not come with built-in weapons, 너
필요to give it a gun. That’s the whole point of LND gunners. They run and they gun.
다시, this list is not comprehensive at all. These are just the weapons I’ve tried and tested so far.
Your best option is probably
Estes Magnum, which is not only expensive in terms of cost (180 cost!) but also locked behind RT (하지만, you get one for free along with the RK bots). I personally like 1x Great Rapid, 2x Great Rapid Alpha weapon tunes on the Estes Magnum so I can reliably hit enemies when I’m close enough while not making the weapon too expensive, but some may opt to tune additional Range instead.
Your other options include:
- Raid Rifle — 그것 ~이다 a RT weapon 하지만 if you bought this season’s BP you get THREE Raid Rifles! It has very low Int at 140, which means you’ll burn through its ammo very quickly and the size of its bullets are teeny tiny (making confirming hits harder). You should tune 3x Great Rapid to increase that hit rate.
- Scouts Rifle — Raid Rifle’s cousin with very similar stats. In comparison, it hits harder with higher force, it fires less rapidly, and it has a smaller ammo pool. I haven’t tried this one yet but it’s quite accessible! It just costs 13 Desire Coins so you just have to slay the fly/bee mesugaki 3 times or use some coin discs. I imagine ideal tunes are 3x Great Rapid.
- 돌격소총 — the UC alternative to Raid Rifle and Scouts Rifle, but it just seems like a downgrade compared to the other two. It has less Force than Raid Rifle AND has less ammo. At least Scouts Rifle hits harder.
Auxiliary Parts to Consider
What kind of parts are these? 잘, these are the parts that help you survive longer as the subpar unit known as the LND gunner. There are two general categories.
These parts give you a frame of invincibility along with a burst of movement. They help with spacing, with juking, with escaping enemies frothing at the mouth to steal $300 from you, 등.
Everyone gets a free
Swift Jet BS Alphaif they talk to the students at Angel Academy. Great for hoppers because they can hop then use the BS action to cover a lot of ground rapidly.
을 위한 140 Chaos Coins, you can get a Zero Fighter NEXT for
Zero Fighter NEXT BS. I never bothered buying it since I have better alternatives to use, but at least it’s F2P.
And if you’re super broke, you can buy Syverlion with 50 Arena Coins.
Syverlion LGisn’t very good, but neither is the part selection for F2P players.
RT options include
Swift Jet BS ALPHA / BETA(same function, just different stats),
Jet Accel BS /
Shadow Wing BS (same function, different stats),
Zero Saber NEXT BS (leaves a decoy behind to mess with enemy tracking), 등.
These are pretty straightforward. They block damage and are reusable (using Viper Shields in 2022 is kinda cringe, NGL).
F2P options are
Force Barrier LGJ(generates a barrier so you can shoot while shielding; only problem is up-time is short and it sometimes bugs out) 그리고
Union Shield DOS (blocks frontal damage and gives Crimson Veil, so you can’t be stunned, but you can’t shoot while using).
RT options include
Cydron AM2(blocks frontal damage, gives CV, and parries LND melee attacks),
Torque Mighty Byne HD (blocks damage, gives CV, and is usable for bots that don’t have free arms aka Brisgandr Pawn),
Persecius AM4(generates a barrier so you can shoot while shielding; it’s better than K-shield since Pers AM4 is reusable, 더 저렴하다, and allows you to wield something such as a statstick for more stats), 등.
CARTS SECTION
- ALL the Capacity carts (언제나) and Enhance Internal Weaponry carts (when applicable) — I think this is pretty self-explanatory. You want to be able to have and use as much capacity in your build; otherwise it’s gimped and you’re wasting its potential. The only possible explanation to gimp your unit is for Clan Fight where commando cost is hardcapped at 3000 across 3 bots.
- Sword Guard and Blast Guard — it’s very funny to meme and say “just dont get hit bro” but you’re going to get hit as a LND Gunner. You have to be prepared to get hurt because LND gunners are weak in general. So do yourself a favour and take these guard carts so you can make yourself live longer.
The above carts are MANDATORY. 너
가지다to take these carts. But after those carts are picked up, you have to make a decision.
You need to decide whether or you’re going to hop (taking Short Boost, Quick Land, Quick Jump) or you’re going to go with Assault Step.
Hopping refers to double-tapping a directional in order to take an arched (arced?) leap through the air before landing on the ground. Short Boost is what lets you “hop” and leave the ground; Quick Land lets you move with less lag after you land on the ground; Quick Jump lets you jump higher when you hop.
The only problem is you have to keep at least 1 FLY or else your hops are gimped (back in CB1, some people would take Quick Jump and just nuke their FLY to 0 so the Quick Jump kind of counter-acts against the weaker hops you’d have with 0 FLY, but that is not sufficient in CBU). You also have to take THREE carts to optimize your hopping. Those are some considerable restrictions.
그 동안에, Assault Step lets you propel yourself forward, launching slightly into the air before landing on the ground to recover boost (and suffer from landing latency). If you go with Assault Step, you only have to take two carts (Assault Step and Quick Land, to reduce landing lag). You can also bottom out FLY! But it might take you some time to adjust to only be able to go forward as opposed to the omni-directional hop.
- Stun Regain — if your core has the cart, heavily consider taking it. You’ll live much longer with it, especially if your core has 25 TGH.
- Quick Boost — not really needed after they buffed S/M units to recover boost more quickly when using Assault Step. I don’t think L units should take it either since there’s better carts to consider.
- Fast Recovery — 내 생각에는, not needed. Play melee if you want FR for your build.
- Broad Radar / Stealth System — powerful yet costly carts. From my experience most LND gunner builds simply don’t have the capacity to support these, 안타깝게도.
STATS TALK
이 섹션에서는, I talk about the hard tuning choices you have to make as a LND gunner.
LND Gunners tend to have less time and opportunity than the other types to deal damage.
In order to keep up, you’ll need to make the most of your firing time, meaning you’ll want as much TEC as possible – 없이, ideally, nuking STR to 0.
…On bots without a unique WB, as Dual Slayers are so oppressive that they’re worth decreasing stats for.
With high damage output and stun rate, they’ll let you bully most grounded enemies.
If you choose to increase stats by ditching STR entirely –
bad choice tbh, please die – your only real choices for unlocked WBs are Pillbox and Vulcan Units.
If your WLK is too low to stay away from melees –
ever horny for weak, juicy LND Gunners– you quickly die a painful death.
Try to aim for 34 WLK for Hoppers, 또는 40 if you’re using Assault Step.
Mandatory for hoppers, recommended for Assault Step builds.
~에 0 FLY, falling into the water during combat is often fatal, and climbing starts to be a real chore.
The minor stat gain is not worth a high risk of inevitable death – unless, 물론, you’ve considered just not falling into the water.
Just ignore the stat – unless your BD of choice has Stun Regain, in which case you should sacrifice HP in order to reach 25 TGH.
25 TGH is the final HP restoration break point for Stun Regain and hitting that break point will help you live longer.
Example Builds
Now here are some example builds. Some of these are mine, some of these are not.
Her built-in weapon is piercing (aka her bullets go through allies, which also includes WonderBits and barrier items used by either team) and just feels incredible to use because her bullet is so hefty and big (people who play LND gunners are size queens when it comes to bullet girth; it’s just how things are). Her gun is so good that she doesn’t need that much extra Speed; what she does need is additional Range.
She also comes with a bomb-tossing sub that gives her additional movement (and a potential stun on enemy targets if they weren’t recently stunned)
그리고another weapon that creates a shield in front of her (오직 15 ammo for this gun so you’ll be using the other weapon much more regularly, but this shield+gun weapon can be reloaded and can help you win trades since you’ll be shielded and shooting while they might not be).
So now I’m going to walk you through 3 different Therese builds and discuss them at length. Shown below is my build.
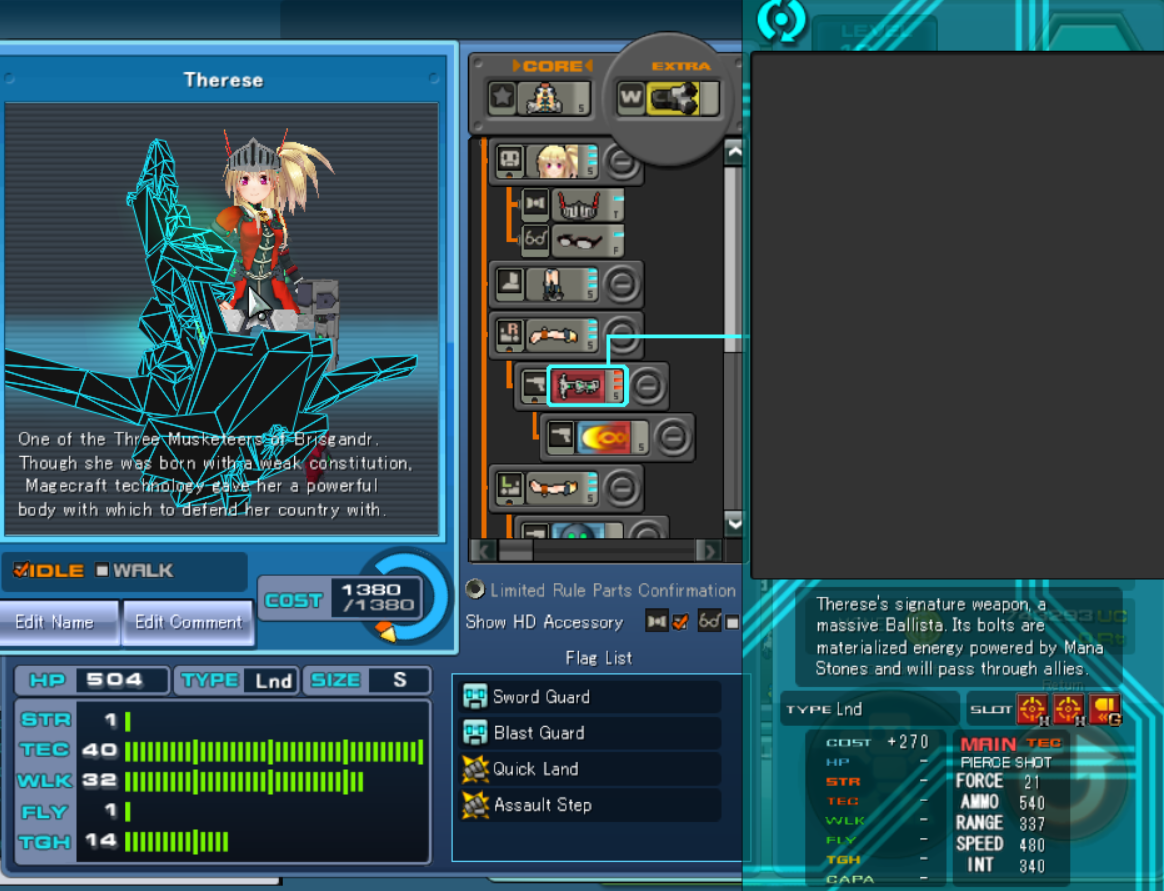
I kept 1 STR to be able to use Dual Slayer Bits effectively, maxed TEC, and used really heavy weapon tunes (나는 가지고있다 2 High Shooters & 1 Great Reach, 이는 +20% 속도 & +35% Range for 120 cost). The trade-off is I have less WLK, just shy of the recommended 34 WLK mentioned in a previous section, and less HP. I also decided to keep 1 FLY since she would barely be below 1 FLY with the usual efficient tunes so I was willing to use slightly less efficient tunes to keep that FLY.
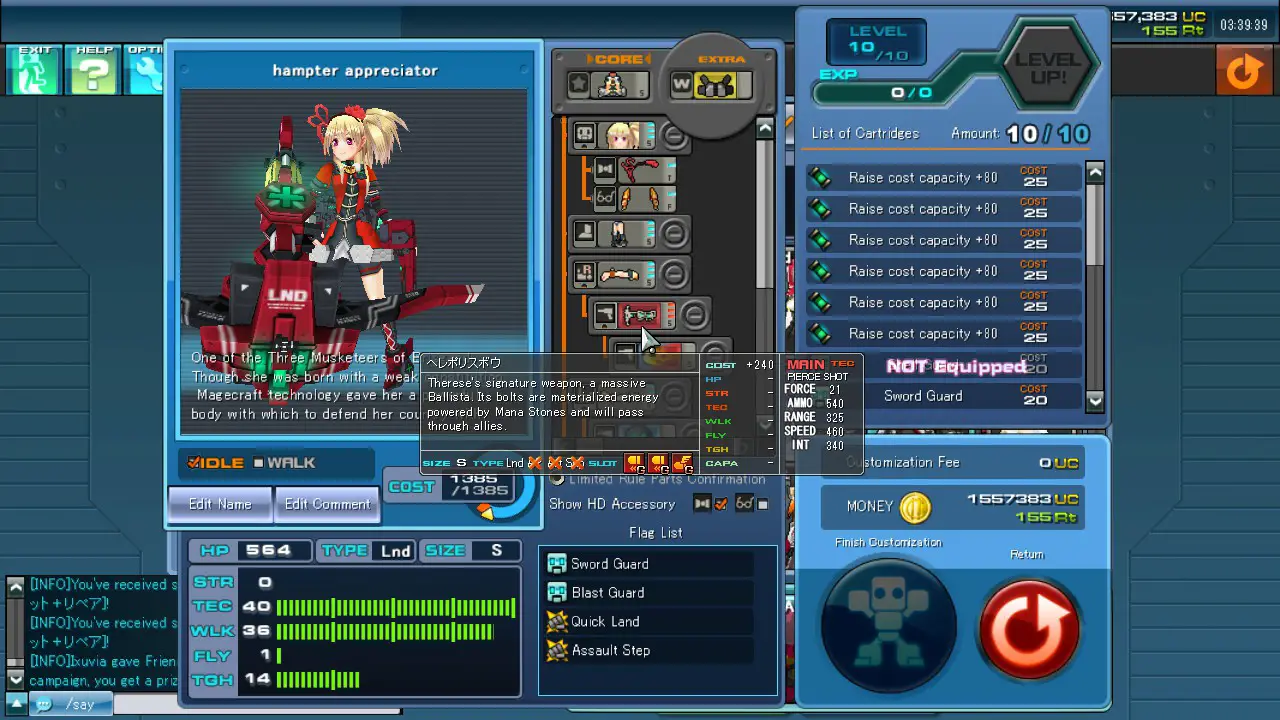
This build belongs to a clanmate. She opted to zero out STR (note the Pillbox WonderBit) and used cheaper weapon tunes (2 Great Reach & 1 Great Rapid is +15% Speed and + 30% Range for 90 cost) in order to have enough capacity to tune higher HP and higher WLK.
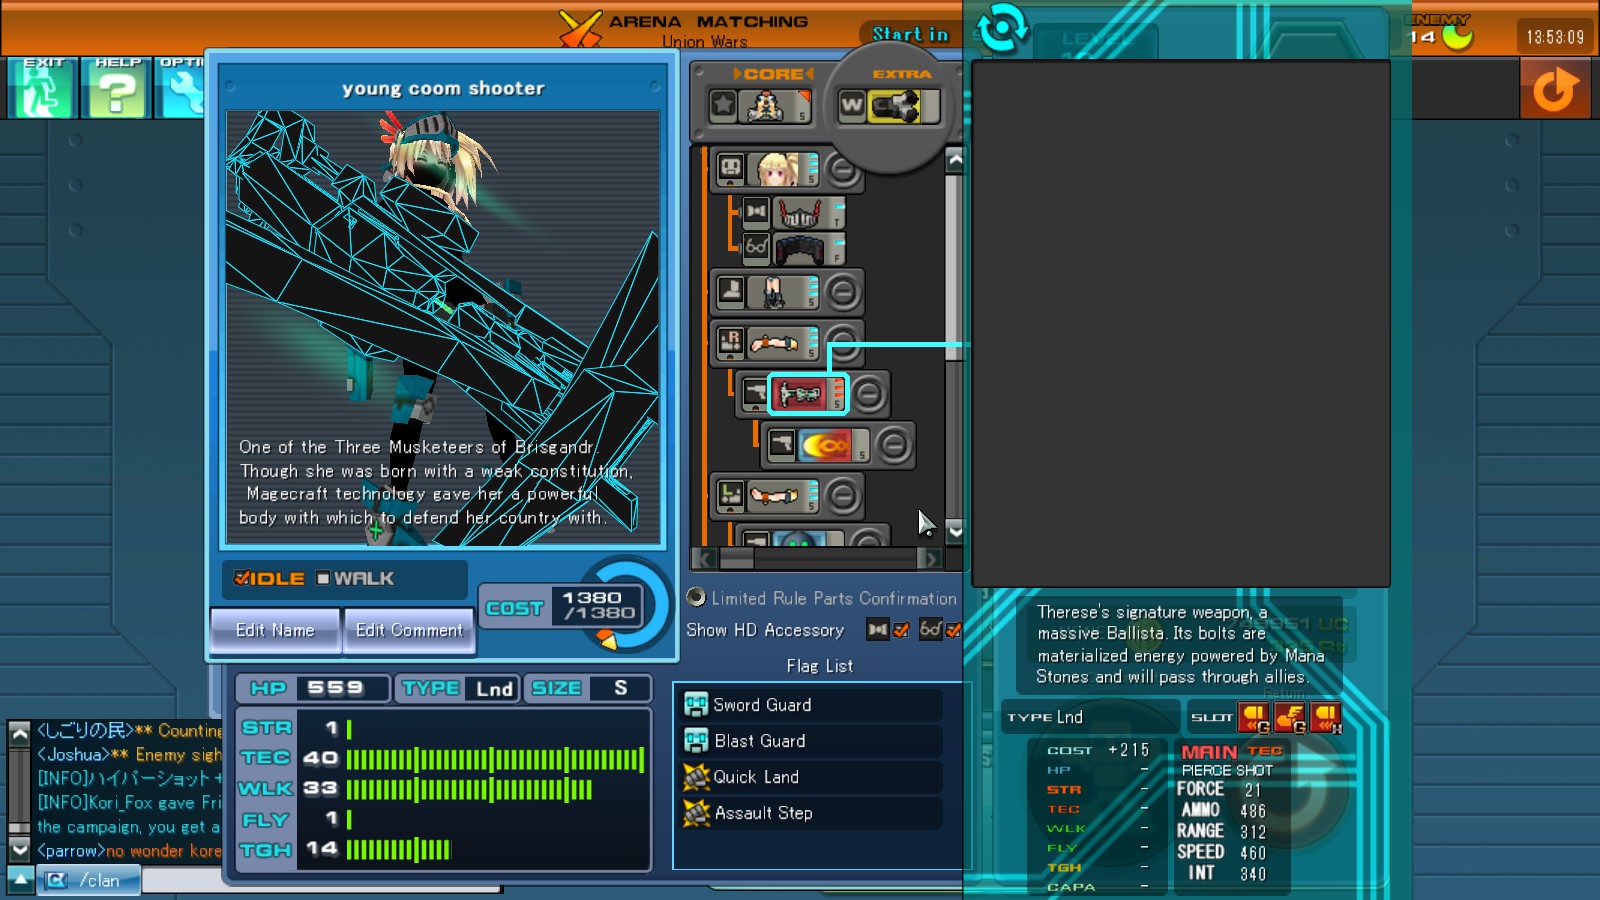
This build belongs to another clanmate. He chose to keep 1 STR for Dual Slayer Bits, but used the weakest weapon tunes shown thus far (1 Great Reach & 1 Great Rapid Alpha & 1 High Reach results in +15% 속도 & +25% 도달하다). 하지만, that allowed him to have a nice amount of HP as a result and his WLK is more or less fine.
보시다시피, different people will prioritize different aspects in regards to building a bot. There is a lot to consider when it comes to minmaxing builds. You might have also noticed we all chose to go Assault Step because it’s cheaper than being a hopper thus our builds can squeeze out more stats.
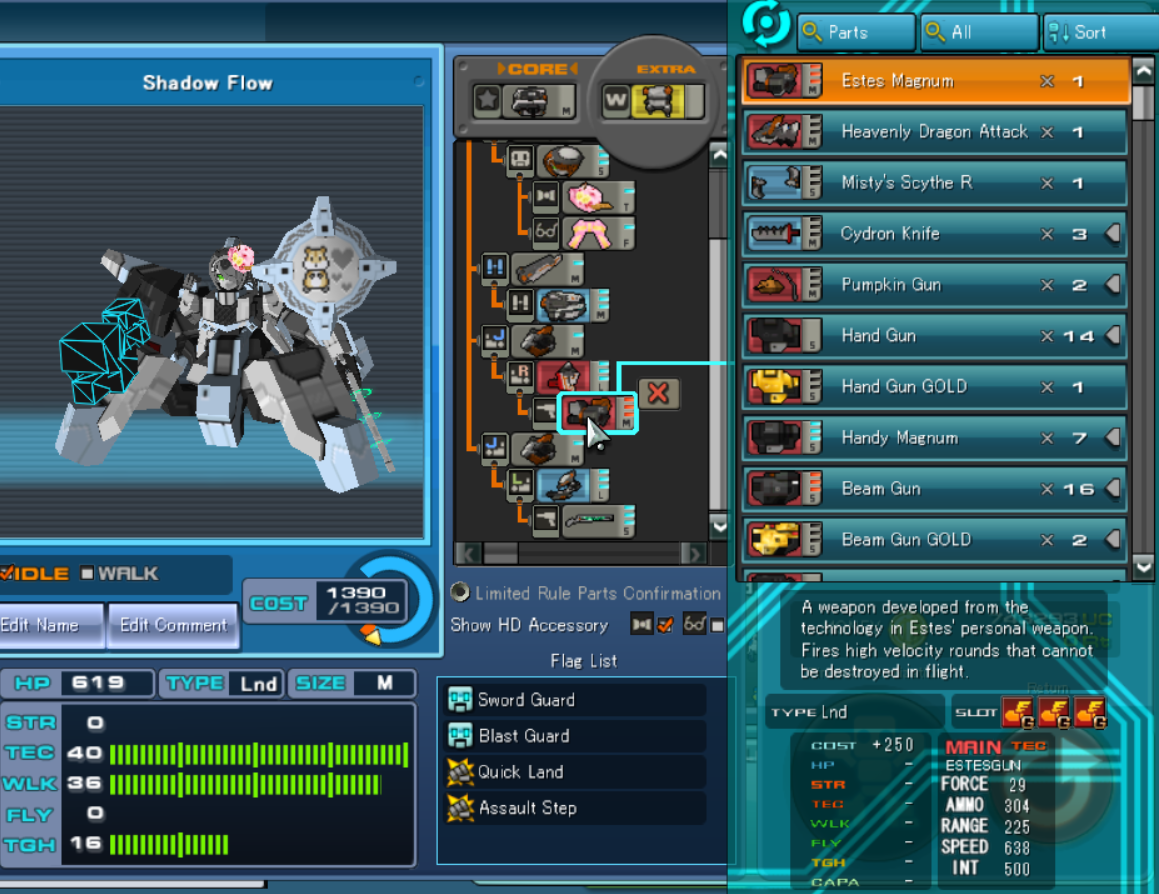
Here I dropped STR below 0 since his Gamakage WB doesn’t care about negative STR. My primary means of doing damage is the Estes Magnum, 물론. But I also threw in three auxiliary parts to make me live longer: Shadow Wing BS lets me escape when I’m in a pinch, Cydron AM2 lets me keep melee off me for a bit while also protecting me from ranged damage if I backpedal away from the enemies, and Persecius AM4 offers me some passive protection while I shoot enemies.
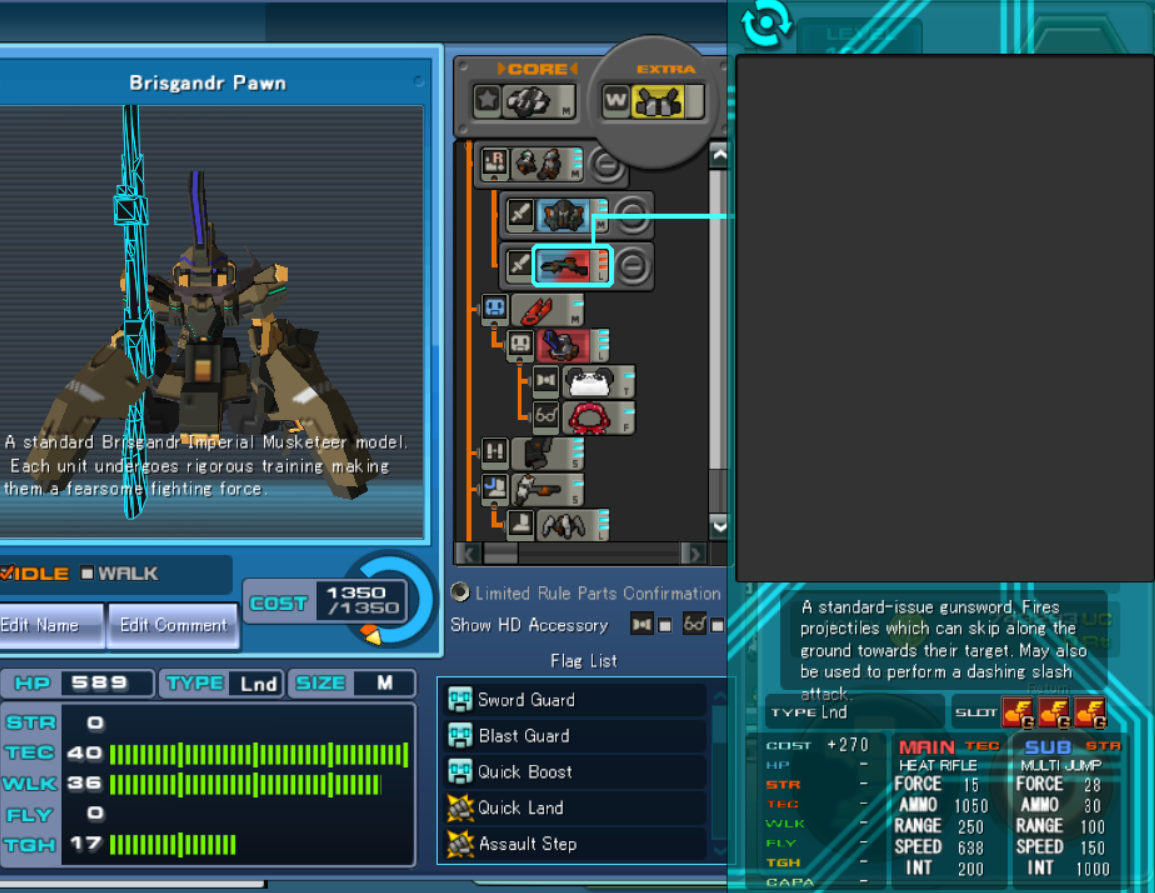
This F2P unit already comes with all the tools needed to succeed: a good weapon, a passive shield that allows you to shoot while protecting you, and an i-frames part. 하지만, I also added a Torque Mighty Byne HD so I backpedal and protect myself from damage if I’ve gone too deep.

Easy games if there’s no melee on the enemy team, a miserable time if there is.
General Gameplay Strategy & 팁
- At the start of the match, shoot some trees to charge up your WonderBit.
- Maybe wait a bit so the melees and airs on your team can go in to distract the enemy team. That way you’re not focused down and killed immediately.
- Shoot at ARTs and SUPs while dodging their bullets / their debuffs / their yes-men.
- Try to disengage from AIRs but don’t be afraid to shoot at them.
- Fall back when you’re low at HP so you can get healed upOR commit to the frags and die gloriously.
- T-That’s about it. The problem lies in trying to not get hit by all the enemies since LNDs just take it up the butt against AIRs (beam weaponry does increased damage against LNDs and ARTS flat out have higher burst damage if Hypershot is not involved). You have to rely on your mobility and your shields to outplay the opposition. Sometimes it works and you feel like a deity; sometimes it doesn’t and you feel like doing something else.
- Using a subweapon while hopping or using Assault Step increases the distance you travel (and also makes you go higher if you’re using Short Boost). Force Barrier LGJ and Variable Scarf (~와 함께 0 탄약) are good candidates for this.
- Consider charging into the enemy’s territory once you’re secured a few items. 내 생각에는, LND gunners make the best use of the barrier item out of everyone besides maybe ARTs. Fire PIllars and Wind Blows are also good at disruption, 확실히.
- Don’t hesitate to keep an actual good bot in your commando in case the players in the room start using obnoxiously powerful units. Showing some grit as the underdog is fine, but you still have to be realistic or else you’re in for a bad time.
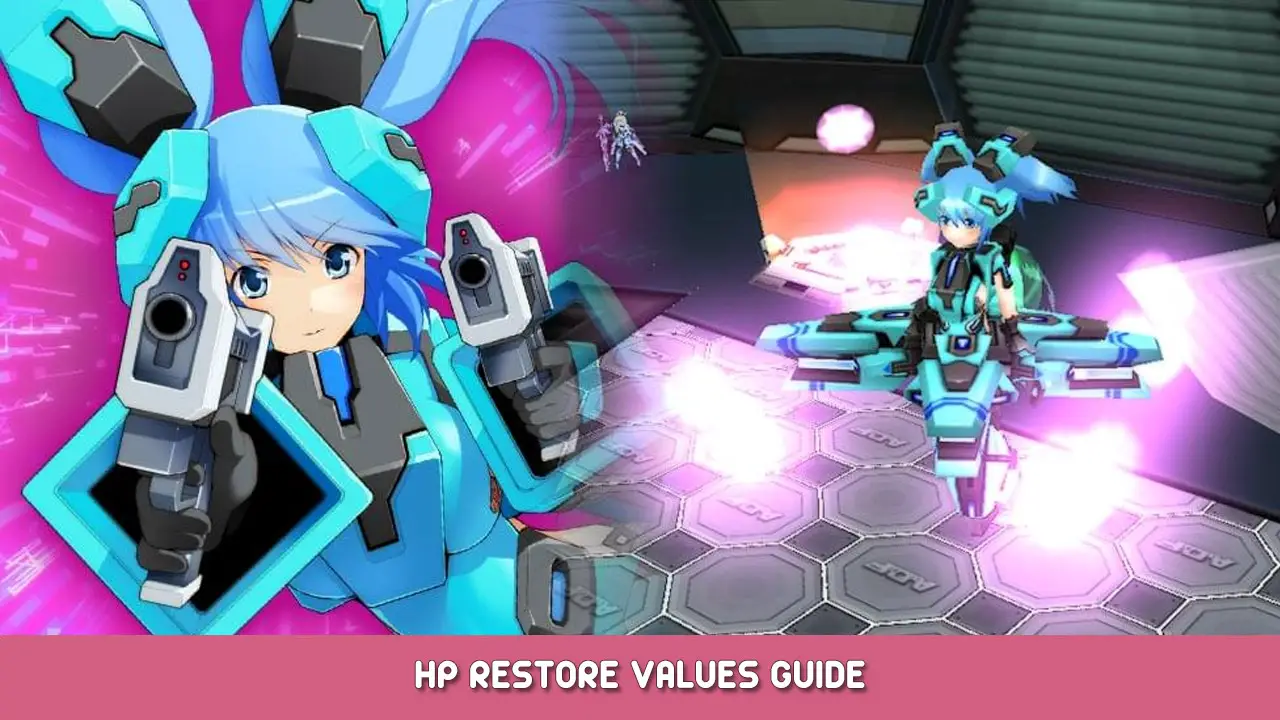
이것이 오늘 우리가 공유하는 모든 것입니다. CosmicBreak Universal 가이드. 이 가이드는 원래 작성자가 작성하고 작성했습니다. DOS Player. 이 가이드를 업데이트하지 못한 경우, 다음을 수행하여 최신 업데이트를 찾을 수 있습니다. 링크.