This tutorial will help you unlock the achievement named Not Yet Lost in Victoria 3. The goal is to form Poland-Lithuania and expand the commonwealth without facing defeat as Krakow, using a method known as save scaming (cope).
はじめる
Make sure to turn off Ironman mode (Difficulty Explanation):
私の意見では, the Not Yet Lost achievement is as challenging as dealing with American territory. Both of these Very Hard (VH) achievements are likely more difficult than establishing an empire under the pun and, 私は信じている, Piratini, not Pira-tiny.
The difficulty of American territory lies in winning the independence war in time to expand into Texas before facing annexation by the US. しかし, after securing Texas, you have the freedom to accumulate infamy for expansion, with a strategy focused on containing and weakening the US—a boomer’s line of play.
As for Not Yet Lost, winning independence is relatively manageable at the right time, but the newly independent Krakow faces an infamy challenge. Being surrounded by Austria, プロイセン, and Russia, Krakow struggles to utilize its infamy effectively until it fights through a coastal state. Once that occurs, Krakow becomes strong enough to challenge the states held by the three powers but can’t spare infamy elsewhere.
Without further delay, let’s discuss some key conditions.
How to Unlock Not Yet Lost Achievement
The birth of Poland hinges on leaving the Schleswig-Holstein question unresolved. しかし, this presents a critical condition for the entire run. To form Poland-Lithuania, you must gain full control of the 10 states necessary for the union:
For Russia: Brest, ヴォルィーニア, リトアニア, マゾビア, Greater Poland, Lesser Poland For Prussia: West Prussia, Posen For Austria: West Galicia, East Galicia
さらに, you can initially form Poland before combining with Lithuania by holding at least 5 のうち 9 州:
For Russia: マゾビア, Greater Poland, Lesser Poland For Prussia: West Prussia, East Prussia, シレジア, Posen For Austria: West Galicia, East Galicia
Although none of these three powers will easily relinquish their states, weakening Russia is challenging as it tends to decline due to its backward system. しかし, the formation of the North or South German Federation, particularly Austria annexing South German states, complicates the struggle against Prussia and Austria.
まだ, the formation of the German Federation is contingent upon resolving the Schleswig-Holstein question, with the region under German control. The RNG factor in achieving this involves:
- The Schleswig-Holstein question remaining unanswered. The best scenario is Sweden’s major unification into Scandinavia and a personal union with Schleswig-Holstein. If Prussia challenges Scandinavia for Schleswig-Holstein, Scandinavia is unlikely to yield easily as Denmark usually does.
- Repelling any civil war in Schleswig-Holstein. A revolutionary victory in the civil war leads to an independent German state, answering the question. しかし, Britain typically intervenes against troublemakers, and Krakow should assist if Denmark struggles to win.
- A draw or Austria’s victory in the German Leadership struggle. A draw preserves both sides of German states without annexation, while an Austrian victory is achievable, especially if Prussia is weakened.
Randomness plays a role in gaining independence and expanding:
During the early game, it’s mostly a waiting game. しかし, you can make the most of your time by stacking unfinished constructions. By queuing a new building on top of an ongoing construction with the alt key, you can save over 10k constructions once you have the necessary infrastructure and population, especially after acquiring the entirety of West Galicia. This becomes relevant around 70-90 years later. それにもかかわらず、, keeping the construction below 300 is sufficient, making the management of the construction queue less micro-intensive.
While waiting, there’s an interesting task to undertake: completely eradicating monarchism by first reverting to a monarchist system.
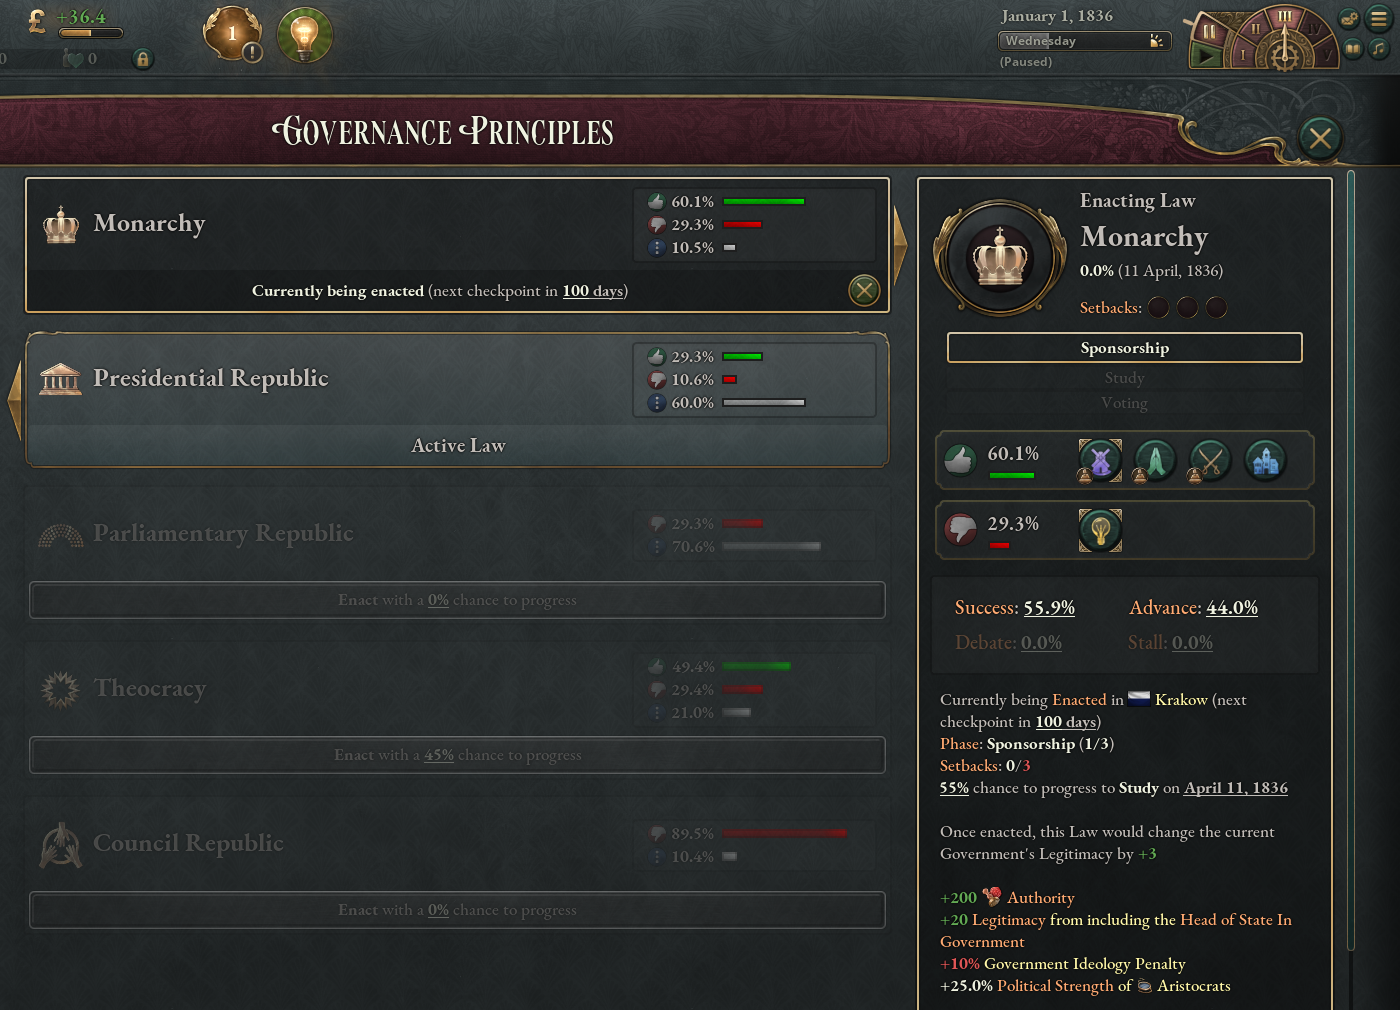
The rationale behind reverting to a monarchist system is that although Krakow starts with a republic, the in-game landowners still adhere to paternalistic ideology. By triggering the stamp-out monarchism journal event (JE) through the switch to monarchism, paternalistic ideology can be replaced with elitist, providing extra approval and causing less legitimacy loss when running a republic and laissez-faire. To handle revolutions, Austria is available to address any challenges.
今, you enter the waiting game, focusing on:
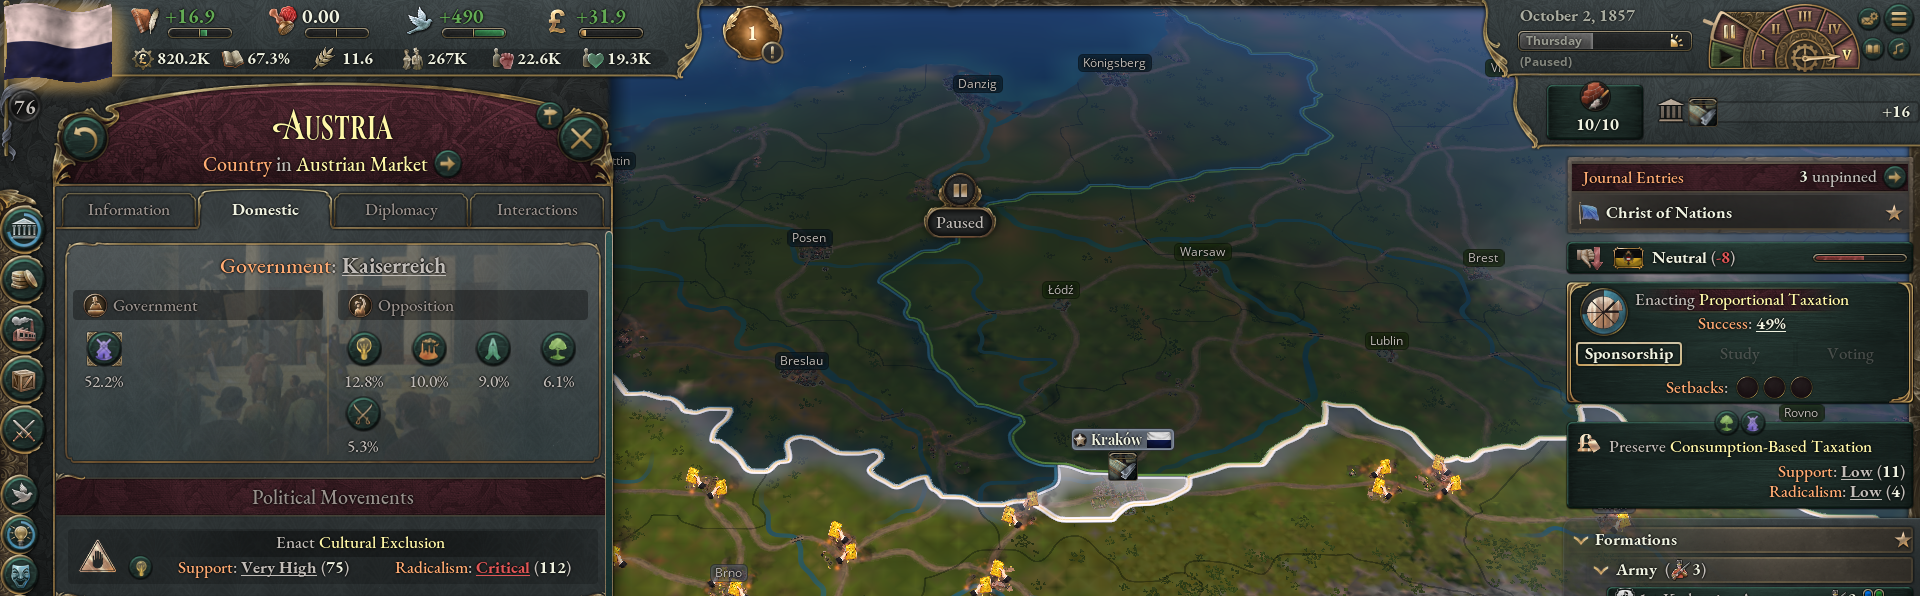
Austria’s landowners follow the Austrian hegemonists’ ideology, making any attempt to depart from national supremacy nearly impossible without resolving the matter of Hungary. When the revolution breaks out, Austria cannot directly send anything to you, as West Galicia will be on the side of civil war. As long as Prussia does not have a truce (restart the game if needed), you can declare independence right before (save-scumming if necessary) the revolution. If Austria doesn’t put up much resistance against Prussia, you can sneak in war reparations.
After gaining independence, ensure reconciliation and rejoin the Austrian market. Having Prussia (fighting on the same side for independence) and Austria (market member) will pave the way to attack Russia. Russia becomes the only realistic target because the Polish and Baltic states are unincorporated. This allows you to avoid aggro from Russia without it jumping to the other side every time, thanks to a return state CB. Strike when the time is right, such as when Russia’s main force is occupied helping France against liberal rebels, and when Prussia and Austria feel threatened by Russia. This is the opportune moment for the first expansion.

補足: You can earn obligations by assisting Prussia and Austria with their liberal rebels. To fulfill the declare interest requirement for doing so, implement reforms and manipulate renown playwrights to gain prestige, thereby elevating yourself to a minor power status. Build an army to prevent dropping back into an insignificant power.
After completing the first expansion, your GDP will support the rank, marking a significant milestone in your progress.
The German question, or in this case, プロイセン, becomes crucial in your strategy.
In the first war with Russia, securing at least three states is essential. Lesser Poland and Mazovia are definite targets, but your approach can vary:
- Greater Poland route: This is easier to achieve because you don’t need to push all the way to fully capture Mazovia. The empty Greater Poland front becomes available for grabbing. しかし, you won’t have naval access, limiting your ability to colonize. まだ, colonization may not be a significant concern if you can’t afford the navy to support the convoy line. Staying in the Austrian market is crucial for the Prussian campaign.
- Lithuania route: This provides naval access, allowing colonization. Since Lithuania is not an incorporated state of Russia, your first Prussian campaign is relatively safe from Russian interference. しかし, you have to push into Lithuania to acquire the state. While you’ll eventually walk into Greater Poland for free (uprising is unreliable), you will only have three iron mines if you leave the Austrian market. Greater Poland is also a required state for Poland’s formation, obligating you to undertake the Russian interlude between the two Prussian campaigns.
理想的には, start two wars against Prussia, each taking two states, for a total of four: West Prussia, East Prussia, シレジア, Posen. The concept is that obtaining two of these states allows you to form Poland with Lesser Poland, マゾビア, and Greater Poland (do the Russian interlude if you opt for the Lithuania route).
Forming Poland is crucial for the run because not only can you return the remaining two Prussian states without giving Prussia claims back, but you will also need the return states CB for West and East Galicia. This strategy is designed to minimize conflicts with Austria, as fighting them more than once is undesirable, and leaving the claims gives Austria a good reason to oppose you.
Dealing with Prussia’s claims in the first war is crucial, as it influences their stance in the upcoming conflict against Austria. Here are the possible options for handling the claims:
- Max Poland, No Concession: Opt for a third war against Prussia to revoke another claim, as you can only revoke one per war. This also allows you to complete the Christ of the Nation JE, although it’s not necessary for the achievement.
- Give Back East Prussia: West Prussia and Posen are essential for forming Poland-Lithuania. したがって, between Silesia and East Prussia, consider returning East Prussia to Prussia so you can call them against Austria. Remember to revoke Silesia’s claim in the second war.
- Return Both: Not recommended, as Silesia is valuable in terms of both population and resources. You only need to return East Prussia to fight against Austria, and there’s not much point in giving both back, especially against Russia, where you’ll have a tech advantage anyway.
If you’re confident in your progress, you can be bold and not give Prussia anything. しかし, if you have reservations, returning East Prussia ensures enough cannon fodder for the defensive phase against Austria. If you plan to return East Prussia, include it in the first war. The maximum approach, returning nothing, can be chosen if you want to see the Christ of the Nation JE completed, but keep in mind that this JE is not necessary for achieving the main goal.
The Russian interlude takes place between the first and second wars against Prussia, with the goal of conquering the two states of Brest and Volhynia, along with either Lithuania or Greater Poland, to obtain all 5 Russian states required to form Poland-Lithuania.
The battle itself shouldn’t be overly challenging. You can even build a fleet of 10 frigates to naval land in East Karelia (naval landing in Ingria is more promising but requires more navy investment, which is not recommended). Since East Karelia has low infrastructure, Russia struggles with material advantage and suffers from a tech disadvantage compared to the plains of Poland. Use strategic interests actively to route your army state by state towards Ingria, or observe Russia distract 60 units of line infantry against 10 units of trench infantry and struggle in East Karelia due to combat width limitations.
Once the Russian interlude concludes, focus on military buildup using the peasant population in Brest and Volhynia. Prepare to leave the Austrian market after the second Prussian war. You will have lead in Lesser Poland, potassium in West Prussia, and all necessary resources in Silesia to support the run.
Pre-calculate supply and demand, and adjust production methods if necessary. This preparation ensures a smooth transition as you progress through the military buildup against Austria.
Address the major shortages first, focusing on essential goods. Drive down turmoil below 25% to avoid penalties. France can assist by dumping excess clothes and furniture into your market, likely leading to a trade agreement.
その間, concentrate solely on investing in military tech. Rushing only tier 4 trench warfare is worthwhile; さもないと, stick with tier 3 tech initially.
For production tech:
- Dynamite: A must-have, unlocking explosive shells for munition plants. It’s also crucial for explosive factories and mines.
- Improved Fertilizer: Important for supplying the population with affordable food.
- Rotary Valve Engine: 良い, but wait for technology to spread.
For society tech:
- Delay Steel-Framed Building: 少なくとも, don’t rush it to save the airship JE.
- Corporatism: Consider researching it before the military buildup, as it can be beneficial.
Once you complete tier 3 military tech and trench warfare, proceed with steel-framed building and zeppelins. Time the research to save the airship JE right before the war. これに続いて, focus on defense in depth. This strategic approach ensures a balanced and efficient progression in technology for your campaign.
Engaging Austria alone would be imprudent, especially considering the potential involvement of Russia, given your actions in their incorporated states, leading to their claims.
Reconciliation with Austria is not recommended, as the overwhelming numerical difference makes any offensive idea impossible.
Italy becomes a natural ally, essential for opening a second front. Italy tends to stay in the war longer due to its claim on an Austrian-owned Italian state. しかし, their units might not be as effective, necessitating reinforcements to prevent the collapse of the Italian front.
Securing French assistance is relatively easy, as they can and will supply clothes and furniture to your market. しかし, you can only offer them favor, meaning that once France sustains too many casualties, they may withdraw. This leaves you to defend the gained states alone.
Great Britain is feasible but tricky. They usually won’t accept your favor, so you must either receive a favor from them by aiding GB on a colony issue or give a war goal toward Austria’s ally. GB typically has little direct involvement with Austria itself.
The USA tends to be uninterested in central European conflicts. Spain may not accept favor but can be influenced by receiving a favor over Cuba or the Philippines. Prussia can be persuaded by returning a state and offering nothing more. Strategically choosing and securing alliances is crucial for success in the complex geopolitical landscape.
Timing and Military Formation
まとめ: The plan suggests making the war against Austria the second-to-last campaign, aiming to acquire the required Russian states for expanding the Commonwealth JE in a single war. The return CB doesn’t bring much infamy, allowing for taking one state from Russia in this war while still being able to call allies.
Timing: To maximize success, work backward from the latest time to declare war on Russia, considering the 5-year truce. Declare war against Austria before 1926, allowing time to resolve the diplomatic crisis and win the war. A recommended time to declare war is around 1920, ensuring Russia backs down once and peaces out before 1923.
Military Strength: For the navy, maintain 50 に 70 torpedo boats/destroyers and ironclads, allocating fleets strategically. The army should consist of 250 standing army units at mass mobilization or 300 at a professional army, including conscripts. Allies like Italy and France are crucial. Diplomatic maneuvering or preemptive war may keep Prussia from aiding Austria.
軍隊構成: Divide the army into offensive and defensive formations. Offensive formations should use infantry/artillery or a slightly higher ratio, especially in Italy for potential naval invasions. Two special offensive formations are designated for East Karelia and Ingria, potentially equipped with machine guns.
Defensive formations consist of pure infantry for high defense. Defensive units don’t need extra supplies, as groceries are tied to sugar. Convoy management is vital for supporting extra fronts and importing essential goods. Defensive formations have liquor and first aid, with the latter used to offset the kill rate, and defense in depth tech providing additional defense.
ノート: AI’s ability to maintain a large army without going bankrupt is a mystery. Siege artillery is discouraged due to long tech and electrification times. Formation units should be equipped with liquor and first aid, with specific supplies tied to silk and sugar. Transport is deactivated to save money, and defensive formations prioritize matching Austrian army stats through tech and field works.
Save a Lot, 頻繁に保存する
Before you start the war with Austria, make sure to save your progress manually. In the war goal, aim to reclaim both west Galicia and east Galicia.
Expect Russia to ask Austria for a return state. Persuade Italy for a return state and France for a favor. Note that Prussia is not on Austria’s side, and GB is swayable.
Once Russia joins Austria’s side and your allies are on board, add another conquest state goal on a Ukrainian or Byelorussian homeland state, preferably Crimea. It’s a coastal state, easy for naval invasion, with low infrastructure for better offense and defense against Russia in future wars.
Avoid choosing Bessarabia due to a specific reason detailed later.
Prepare by moving a third of your formations to the Italian front in a defend front position. Maintain offensive and defensive formations on both fronts, with more defensive formations on the home front. Have one defensive formation in the attack front on your home front.
Move your navy into positions. Make a save when tension exceeds 80 and all bets are closed. Change the bait formation to defend front.
If you have the airship JE, research zeppelin until you can finish it in the last week. Activate it at the start of the war for a powerful offensive boost that lasts two years.
Make adjustments like recalling formations from Italy to wait for allies or mislead Austria to avoid reinforcing Italy. Keep an eye on war exhaustion. Save again before the war outbreak. Pause unnecessary state construction, maximize military wage, promise a reform to satisfy armed forces, and get ready for the confrontation.
Attrition Phase: Bleed them Dry
If you don’t have a big advantage in troops, especially if your allies are not doing well, it’s best not to directly face the full power of the Austrian-Russian forces. They have low war exhaustion due to their ongoing war goals, while your allies might get tired and leave the war.
Guide your allies to focus on defense rather than going on the attack. Let the Austrians and Russians take the lead. You can influence the battle by moving your formations to HQ and back.
At the beginning of the war, commit all formations in Poland to defend because your allies are still on their way. Delay naval landings until the Austrian and Russian navies are busy with the French and Italians.
Avoid touching anything in Italy for now. Micro-manage so that the Italian AI doesn’t initiate an attack, and prevent Austria from capturing any Italian provinces.
Be cautious if the front is below -20, as it’s at risk of collapsing. Formations lose morale without time to recover. If your allies are not advancing despite a +30 フロント, start a third front with only your formations. If the front gets close to 0 and your allies think they can attack, check their formations’ morale. If below 80, wait until it recovers. さもないと, distract by naval landing in East Karelia.
Consider reaching Ingria from East Karelia, but watch for Russian reinforcements. Keep Austrians and Russians on the offensive and your allies on the defensive by moving your formations between HQ and Italy. Don’t let the front collapse; avoid sending all formations to Italy.
Once reinforcements reach the Italian front, think about a naval landing in Crimea. It distracts the enemy and is a war goal, so hold Crimea. Be ready to go on the offensive when Austrian war exhaustion is below 50, and their formations are weakened.
Save the game before launching your offensive.
Opening the Fronts: The Grand Bessaria Divide
If you find a chance where the Austrian navy is not in the central Mediterranean and can’t return quickly, go for a landing in Croatia. Make sure to keep the Austrian army busy on the Italian front with an all-out attack, except for the formation doing the naval invasion. Austria shouldn’t be able to respond until the landing is completed.
Once you create the Croatia front, save the game immediately. Reinforce it well because you won’t lose it once Italy surrenders. If you have control of the Croatia front, go on the offensive there and stay defensive on the Italian front. The goal is to reach Austria, capture and hold the capital to break the war exhaustion deadlock.
As you make progress in Crimea and Italy (or the Croatia front), Russia’s war exhaustion should no longer be stuck at 0 (achieved by naval landing in Ingria if you have another war goal), and they will capitulate soon. Before Russia surrenders, exploit the situation a bit more by using the Bessarabia divide.
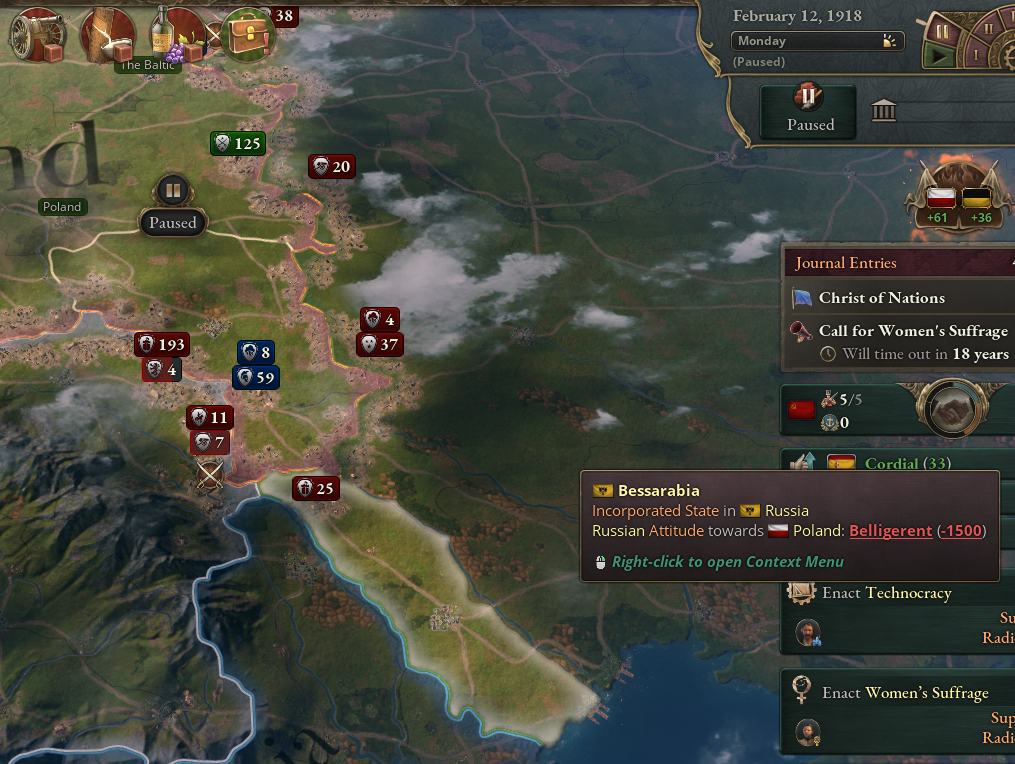
If you manage to land in Bessarabia, a state connecting the Austrian and Russian fronts in Poland, you create a situation where all formations on these fronts shift to the newly formed Austria front Poland and Russia front Poland. This sudden change catches the AI off guard, creating a power vacuum that can be exploited. しかし, it’s unlikely to capture both West Galicia and East Galicia due to the guarded Austrian front.
さらに, the proximity on the Poland side allows for a quick transition between the two fronts. Austrian formations, 一方で, have to navigate through the sea to reach the Russian front, creating a short window resembling the German spring offensive of 1918. The objective is to defeat Austria before their formations deploy onto the front.
During this period, you might not need to commit formations to the Russian front. It’s crucial to consider this as a strategic opportunity to focus on beating Austria before their full deployment. Once Russia capitulates, the Russian front disappears, and all Austrian formations on that front need to take the same lengthy route to return to Austria. 同時に, freed-up formations from the Russian front are immediately available for action on the Austrian front, providing a temporary advantage to break the Austrian army.
ファイナルアタック
Once Russia is out of the war, you’ll experience a rapid boost in army size, but this advantage is short-lived. Your allies’ war exhaustion is not fixed, and they’ll leave the war once it reaches a certain point. したがって, you’ll need to secure and maintain all the war goals by yourself or force Austria into a peace treaty before your allies withdraw.
Consider adding conscript artillery to your defensive formations, enabling them to be used offensively. 必要に応じて, remove some conscript infantry to free up space. Rotate low morale formations into the defend front to make actual progress in capturing states.
If Austria is significantly weakened, you can break the war exhaustion lock by reaching their capital state or capturing both West Galicia and East Galicia. Check the capitulation desire of your allies, and hold a defensive position in anticipation of their withdrawal. This prevents the war exhaustion lock, and as long as Austria hasn’t fully retaken the war goals, you can force them to surrender with -100 war exhaustion, which drops quickly given the casualties they’ve suffered.
Be mindful of Austria’s counterattacks if your allies drop out. Holding all war goals is crucial to preventing the war exhaustion lock. If capturing the war goals proves challenging, consider loading saves and trying again.
Note that the AI may not take loans despite a substantial military upkeep deficit of -580k with only a 53M GDP. This behavior adds to the complexity of the situation.
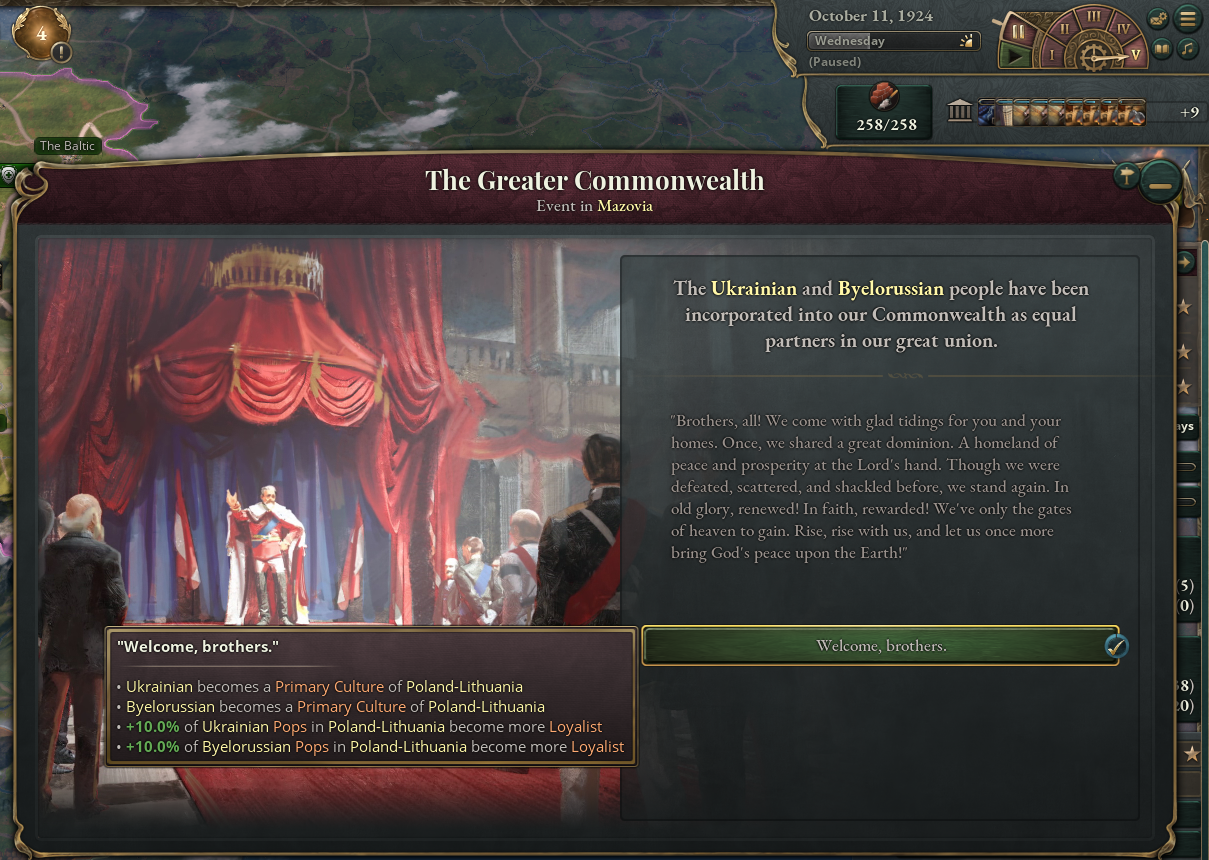
Forming the Commonwealth and Expanding the Common Wealth
Once you’ve successfully defeated Austria and secured West Galicia and East Galicia, it’s time to form the Poland-Lithuania Commonwealth. Wait until the truce with Russia expires, and then declare war to acquire the states necessary for the Commonwealth Journal Entry.
This phase tends to be less eventful than the Austrian war. You can accomplish the goal of returning all required states in a single war, stalling out other participants. Dealing with Russia becomes relatively straightforward after this.
Capture the necessary states and complete the Journal Entry for the effect. The year 1924 provides ample time to achieve this very hard accomplishment, making the process more manageable.
これが今日私たちがこの目的で共有するすべてです ビクトリア 3 ガイド. このガイドは元々、次の者によって作成および執筆されました。 color observation. このガイドを更新できなかった場合, これに従って最新のアップデートを見つけることができます リンク.