- タイトル: トレインシムワールド 3
- 発売日:
- 開発者:
- 出版社:
Information about Train Sim World 3 まだ不完全です. これを使用してゲームの詳細を記入するのにご協力ください。 お問い合わせフォーム.
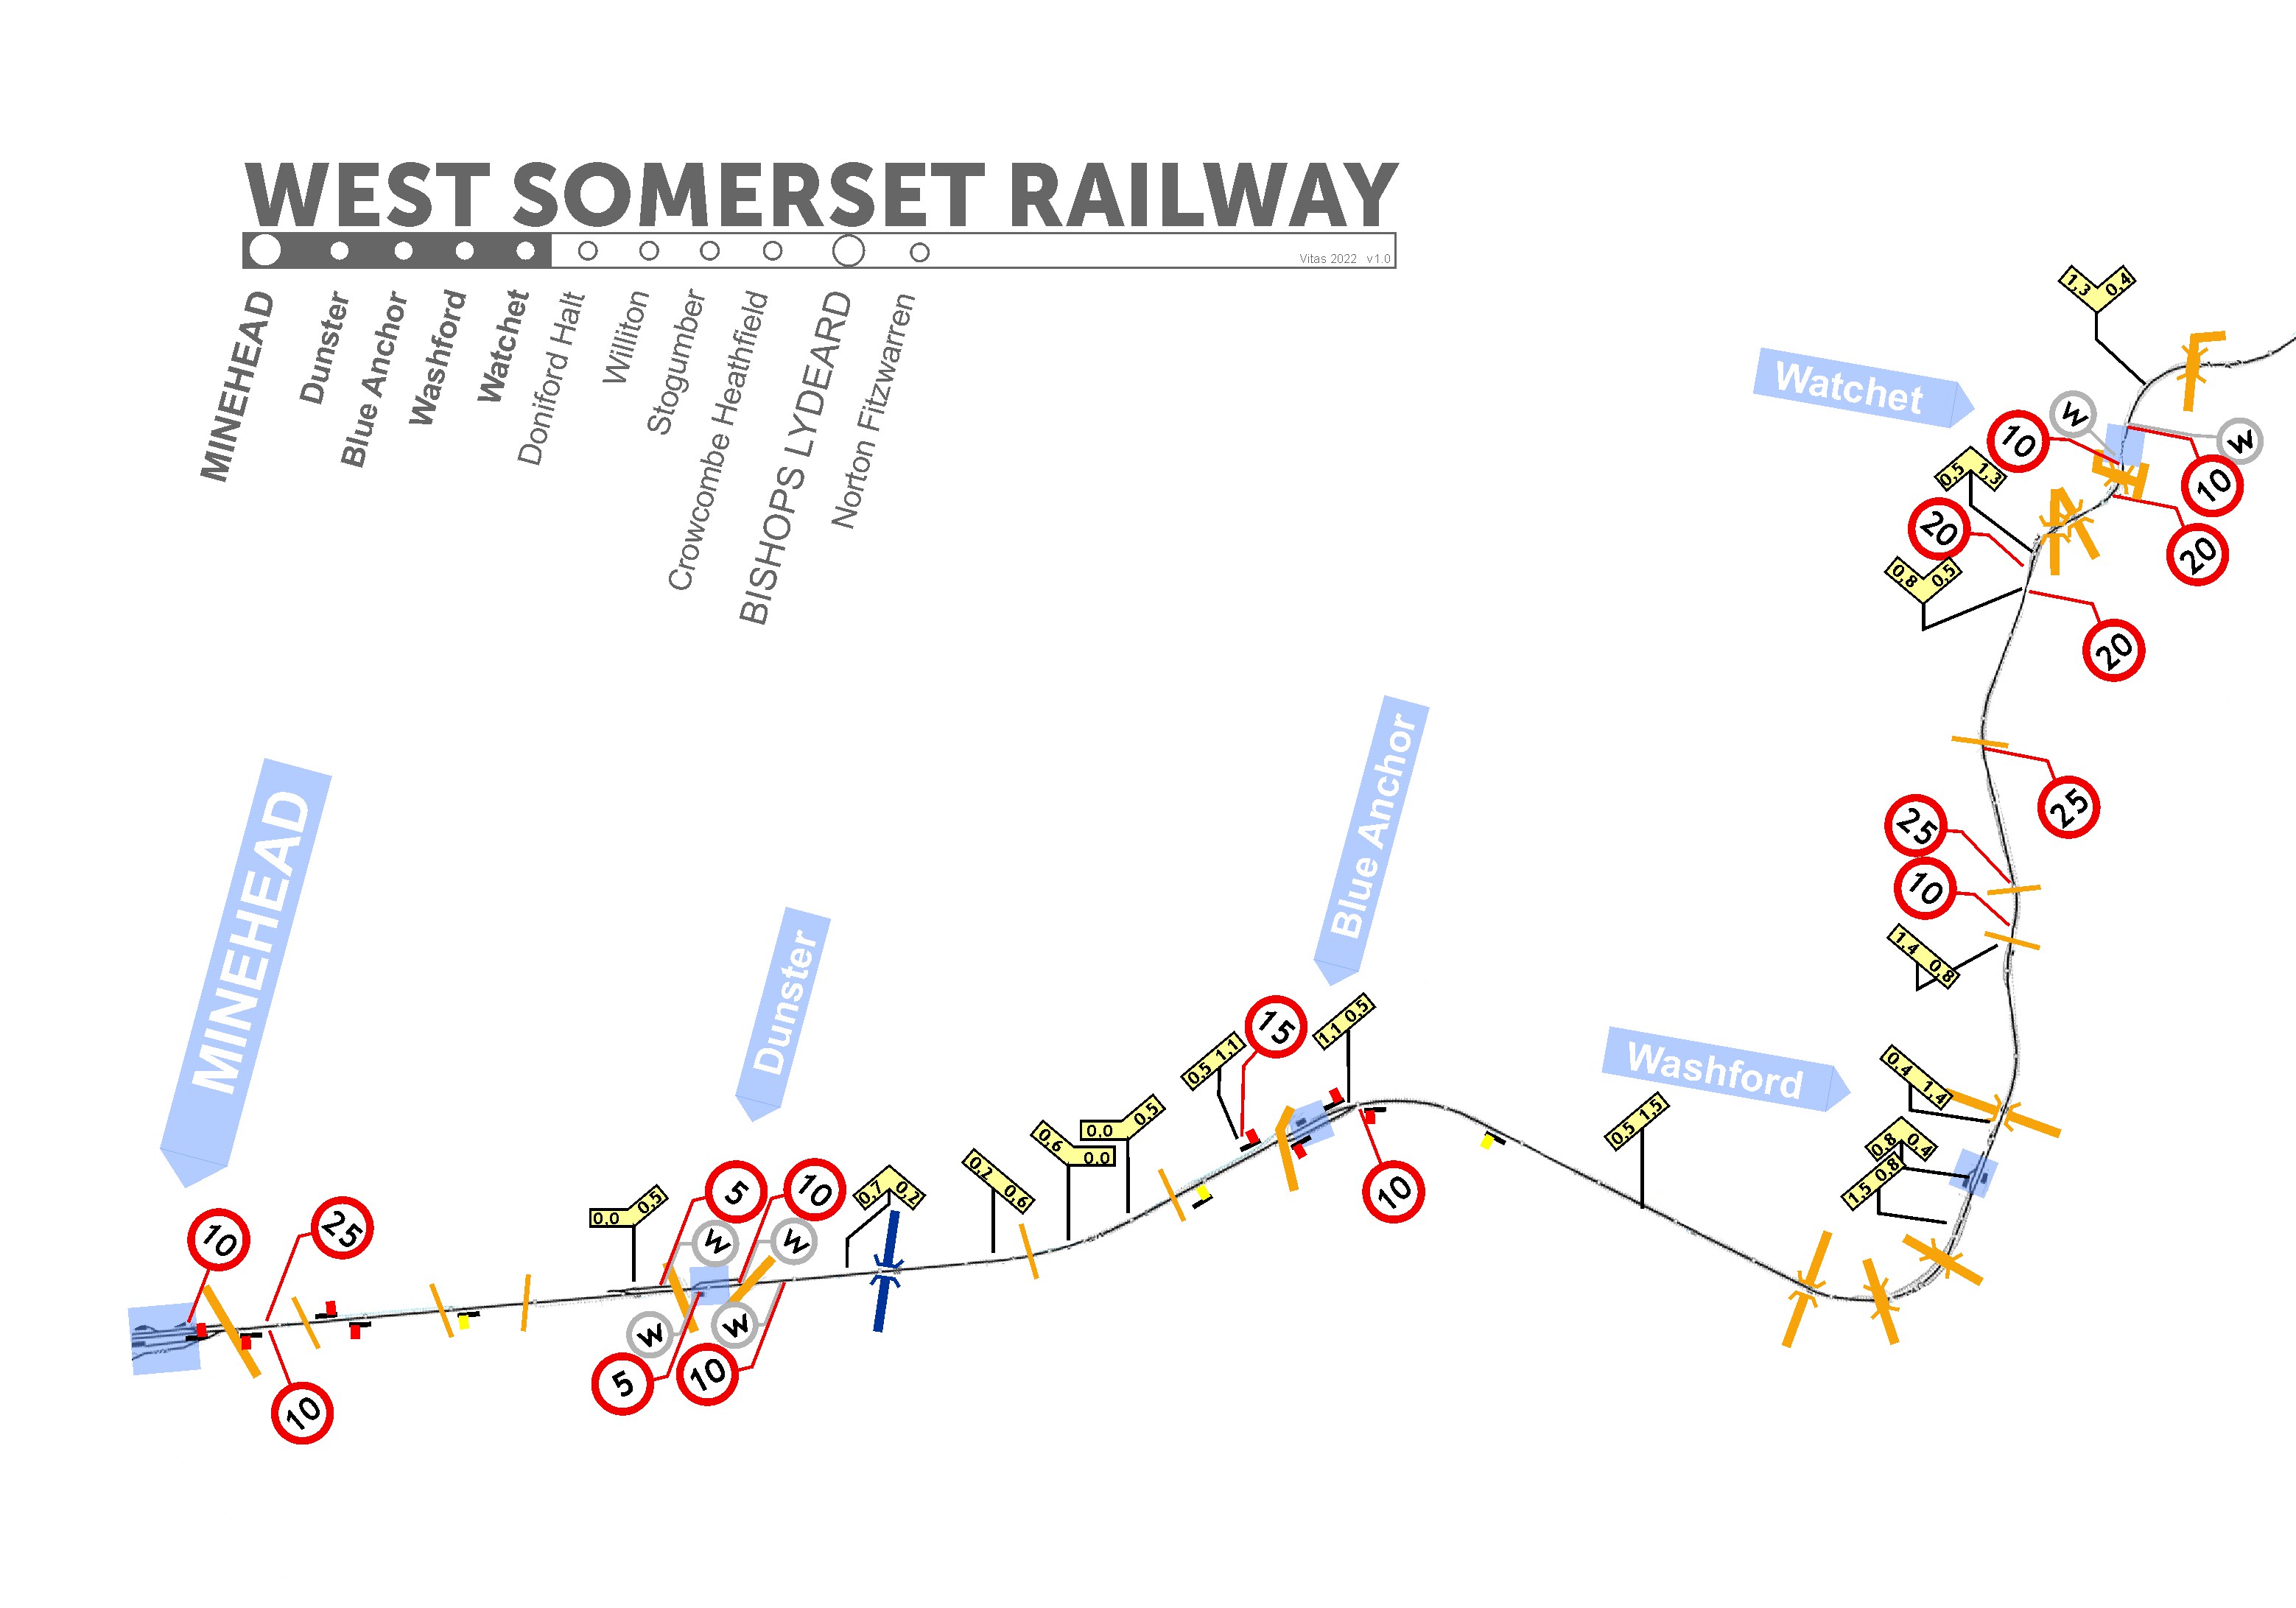
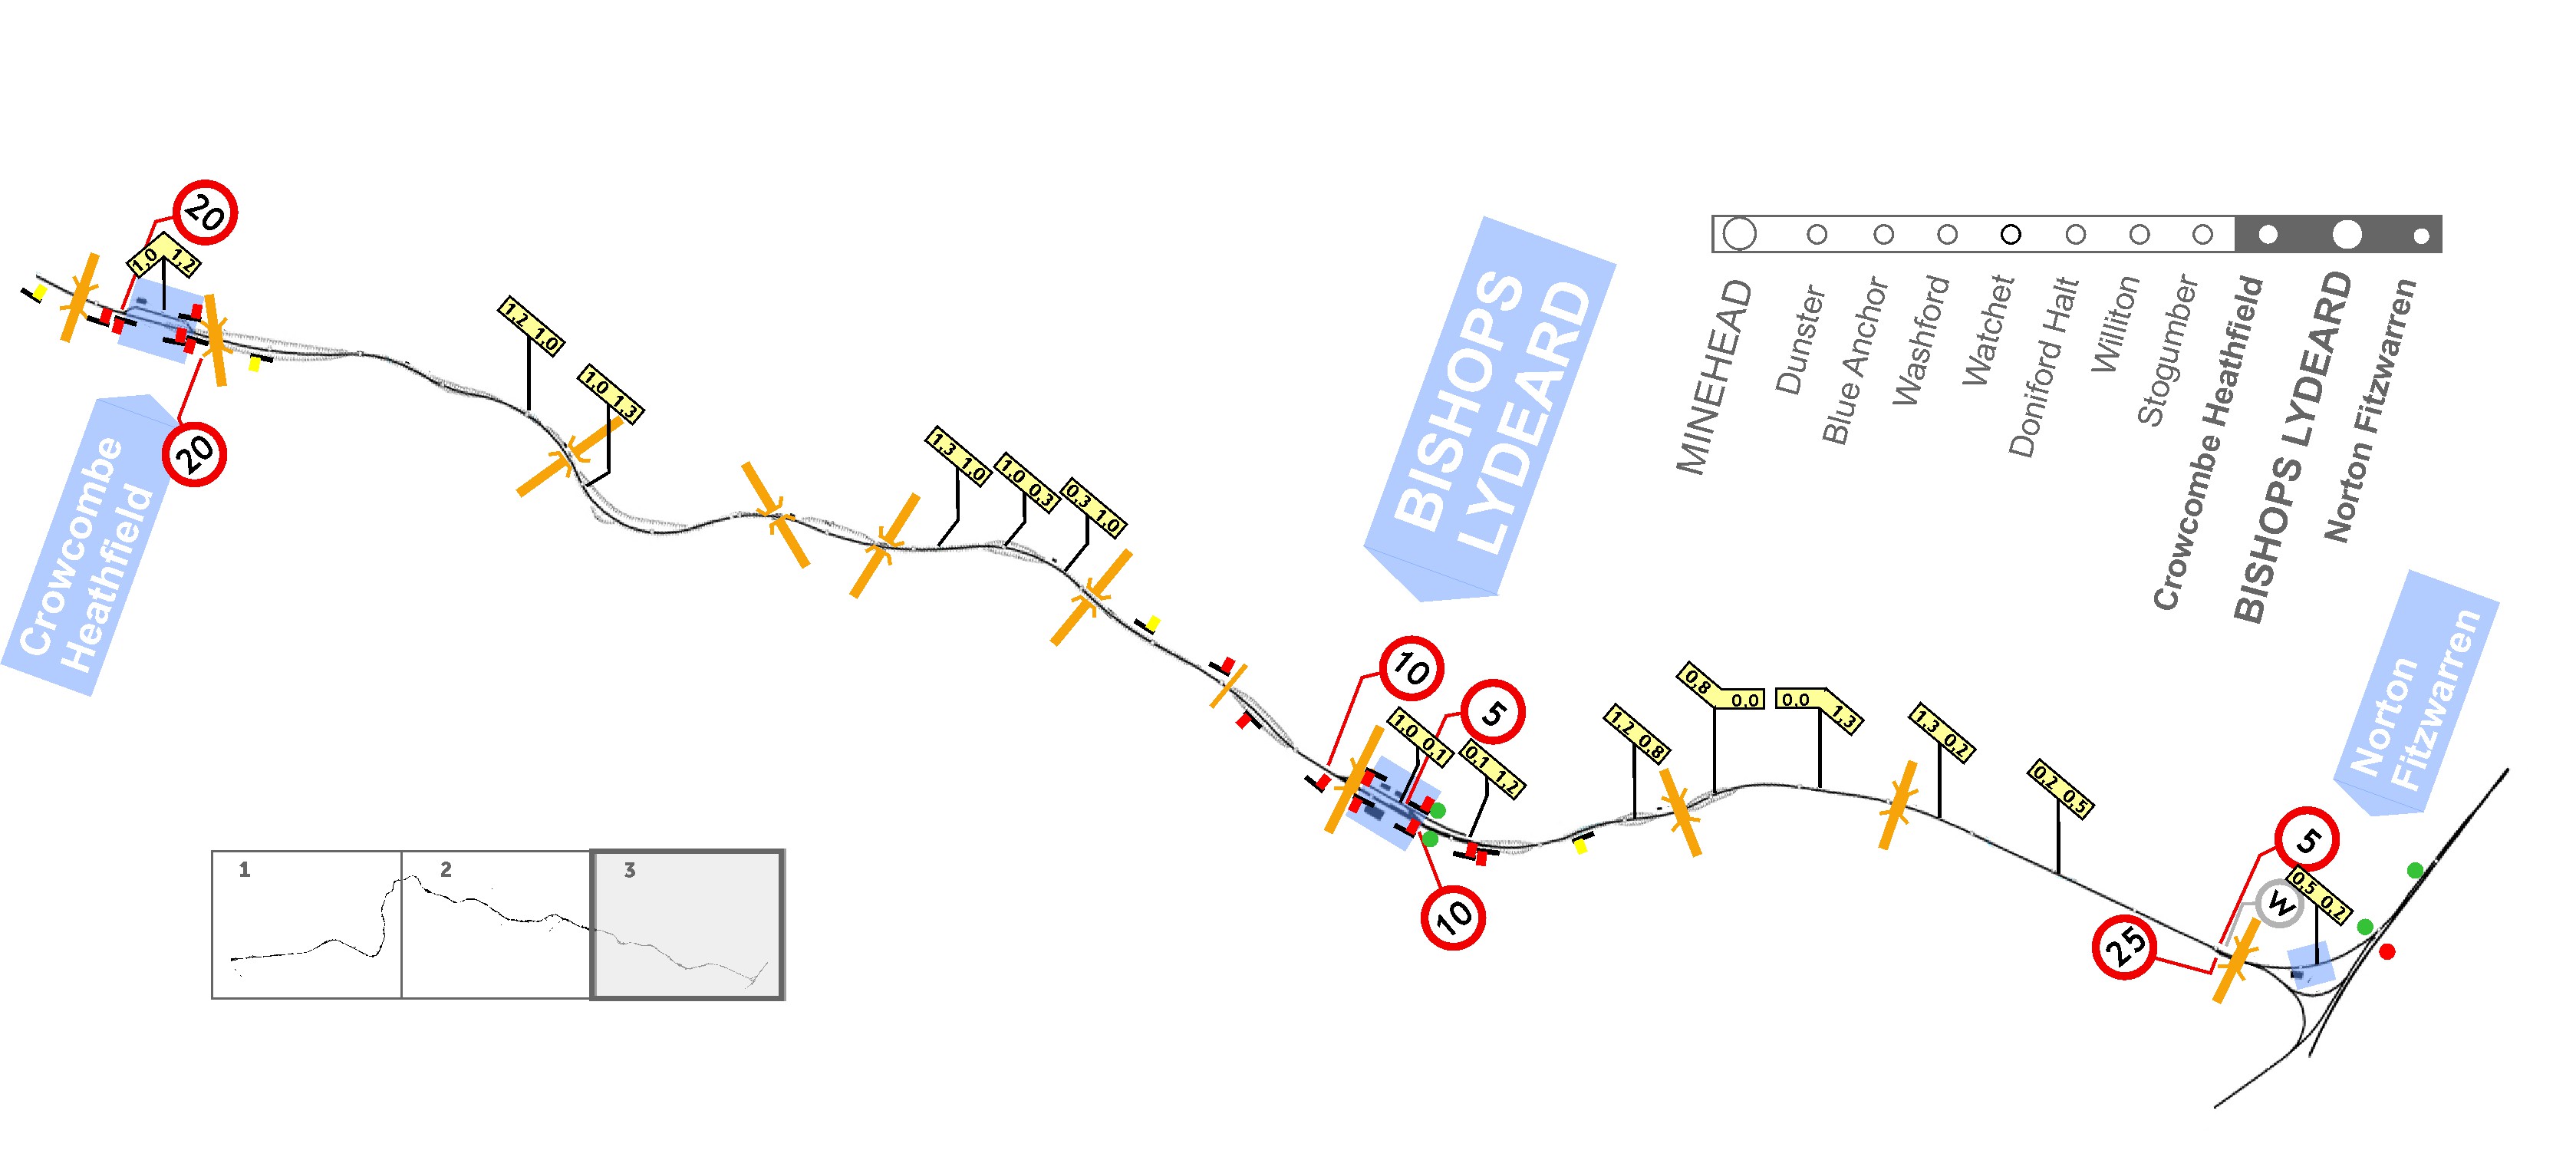
For those who like the WSR, I have prepared a precise map indicating all speed limits, uphill and downhill slopes and characteristic elements in the field. I hope that it will be useful, especially for realistic driving – without HUD, hints and assistant.
について
The route seems easy. The main challenge is controlling the speed due to the numerous uphill and downhill sections.
The diagram shows the route, with the marking of the most important elements allowing for correct passage and orientation in the field.
Speed limits are marked in red in the diagram. They are inclined, depending on the direction they refer to. I marked the main semaphores in red and the secondary semaphores in yellow. The map shows all road crossings, bridges, and viaducts. A gray mark with the letter “w” means the signal must be used. Note that each entrance to a train station is preceded by a speed limit. This limitation is canceled after passing the station, usually when the last car passes the entry/exit signal. The ascents and descents of the terrain are marked with yellow plates, slanted in the appropriate way. The numbers on the tile corresponding to the ascent and descent values that are in the game’s HUD.
The maps below can be downloaded as a higher-quality PDF file for self-printing.
Minehead – Watchet
The first part of the route from Minehead to Watchet. Minehead is a large station where some switches are changed automatically and some manually. There is also a turntable here.
Watchet – Crowcombe Heathfield
The second part of the route from Watchet to Crowcombe Heathfield. Diesel locomotives can be refueled at Williton station.

Crowcombe Heatfield – Bishop Lydeard (and Norton Fitzwarren)
The third part of the route from Crowcombe Heathfield to Bishop Lydeard and then on to the final stop at Norton Fitzwarren, where there is a possible turnaround.
これが今日私たちがこの目的で共有するすべてです トレインシムワールド 3 ガイド. このガイドは元々、次の者によって作成および執筆されました。 vitas. このガイドを更新できなかった場合, これに従って最新のアップデートを見つけることができます リンク.