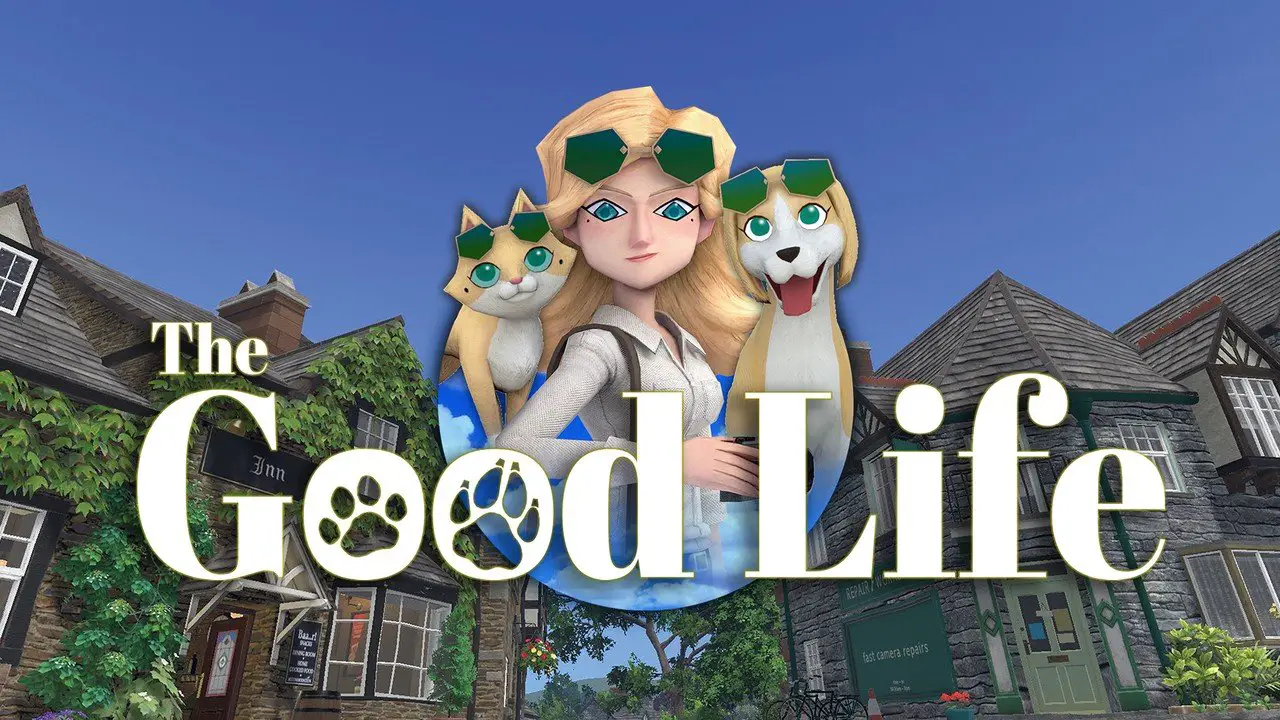

- タイトル: グッドライフ
- 発売日:
- 開発者:
- 出版社:
Information about The Good Life is still incomplete. これを使用してゲームの詳細を記入するのにご協力ください。 お問い合わせフォーム.
方法 “fully experience” the Good Life, and plan out Shrine Missions in advance! This is also a guide to all the Achievements. 31 of them are attached to Shrine Missions, so the guide doubles up as a guide for those.
Main Story Achievements
8 of the game’s 42 Achievements are part of the critical path of the game, so you’ll collect them automatically as you partake in the story.
I won’t give any further details on the individual achievements for the sake of spoilers. Try not to worry about when you get the achievements, just enjoy the ride along the way!
ゲーム序盤
- My First Big Scoop?! – Saw a villager turn into a cat or dog for the first time.
ルート
Halfway through the story, the game splits into “ルート”. The wording here is curious since you might think this means there are multiple endings with branching paths, but it’s actually just a nonlinear main quest. You do Routes A, B, and C in any order, they’re all canon to the plot, and then you continue with the last part of the story once you’ve done them all.
- Mount Thy Shteed! – Rode a sheep for the first time in Route A.
- Event Horizon – Completed Route A
- Woman VS Mountain – Gained access to the northern mountains in Route B.
- Blue Peacock – Completed Route B.
- Curtana, Blade of Legend – Gained access to the Kingswood in Route C.
- Blade of Mercy – Completed Route C.
エンディング
- 100% Debt-Free! – Completed the game.
Note that you’re given a “選択” at the ending. This doesn’t affect any achievements, and you don’t need to go back and see the other route for any bonus content. While the ending is mostly fluff, I will say that you get in-game rewards for being greedy, and no rewards for being selfless, so let that dictate your choice if you want the most bang for your buck.
Shrine Missions
31 of the game’s 42 achievements are attached to Shrine Missions.
Shrine Missions are obtained by selecting the “Oracle” option when interacting with a Shrine. You’ll be given a specific mission from that shrine, which will be displayed on your quest list.
You can have up to 5 shrine missions at one time – you’ll need to complete one before getting another one if you’re at the limit. さらに, after obtaining a mission from a shrine, you cannot get another one from the same shrine until a full in-game week has passed.
幸いなことに、あなたにとって, the Shrine Missions are 修理済み. Each Shrine gives a specific mission, and you’ll obtain them in order of difficulty – 簡単, then Medium, then Hard, then Expert, then Master.
の “マスター” Shrine Missions are what give you achievements. Some are easier than others. Much easier.
特に, you can actually have multiple difficulties of the same Shrine Mission at one time – if you have the Medium version, then come back a week later, you can claim the Hard version and add it to your list as well. I wouldn’t advise doing this until you’ve done most of the Shrine Missions, けれど, as it basically just means you’re losing a second slot until you grind out the requirement.
If you’re not here for 100% 業績, feel free to use this section as a way to plan out what Shrines you want to seek out for their missions since you can’t get rid of a bad Shrine Mission if you accidentally accepted it. You get a decent amount of money for doing these, and it’s arguably the best money maker you have until you unlock Time Trials after Route A (when the money stops being important).
I’m not listing the amount of money each Mission gives you, partly because I didn’t keep track of most of it, and also because they changed the amounts they’re worth in Patch 1.5 ともかく.
Shrine Missions 1-6
Shrine Missions are listed in the order that they’re given in the in-game Quest Completion List. Don’t ask me why they’re ordered like this, I’m as lost as you are
MarKING!
神社: Snowy Mountains Entrance – ミッション: Mark X spots.
要件:
- Easy Requirement: 10
- Medium Requirement: 30
- Hard Requirement: 100
- Expert Requirement: 250
- Master Requirement: 300
You unlock marking as you progress through the story.
As a dog, you’ll occasionally see spots that you can piss on to mark as your territory. For the next few in-game weeks, buried items may appear there. This mission wants you to just mark as many spots as possible – 特に, marking the same spots when they decay (either slightly or completely) count towards this achievement, unlike Horatio’s side quests which need you to mark a number of unique spots (まで 100).
I’d advise doing a daily trip along the Snowy Mountains once you’ve unlocked it as part of Route B, as there is a good number of marking spots up there. Just top those up once a day and you’ll hit 300 すぐに. There are also a good number of spots around town if you want to get there even quicker.
So Emokey
神社: North Lake Sutrains – ミッション: Earn a total of X Emokes.
要件:
- Easy Requirement: 1,000
- Medium Requirement: 3,000
- Hard Requirement: 10,000
- Expert Requirement: 30,000
- Master Requirement: 50,000
This is actually the easiest Shrine Mission, as the global achievement stats will reveal. 取得 50,000 Emokes is fairly easy, especially when you consider that photographing certain plot events and areas can get you 20,000+ それぞれ. You’ll almost surely get this achievement casually.
Bringin’ Home the Bacon
神社: Royal Tomb – ミッション: Earn a total of X money.
要件:
- Easy Requirement: £10,000
- Medium Requirement: £30,000
- Hard Requirement: £100,000
- Expert Requirement: £200,000
- Master Requirement: £500,000
From the easiest Shrine Mission to one of the worst. If you’re only starting out, you’re probably wondering how the hell you’re going to make 10k, ましてや 500k. The good news is that moneymaking gets easier as you progress in the game, and the bad news is you’re still going to be here a その間.
After Route A, you unlock the ability to race in time trials, which earns you £750 1日1回. This is repeatable and is your most reliable money maker, but keep in mind you’d still need to do this for just shy of 2 in-game years to rack up the money from that alone. それ以外は, you can try mining and selling minerals (large diamonds go for a few hundred, and most chunks sell for a decent amount), and scavenging for fossils at marked spots. There’s been a few analyses on ways to make money, and the truth is that you’re still only looking at just under £90k per in-game month for very intensive work.
It’s also worth mentioning that there’s nothing in-game that warrants you earning anything near this amount of money. You will struggle to find things to spend on after £30k or so, または £50k if you’ve been frivolous. So you’re grinding out an extra £450,000 for literally no reason other than a single achievement/few shrine missions.
I would sincerely advise not going for this achievement unless there’s a significant patch to it in-game. The bragging rights aren’t worth the dozens of hours you’ll throw away for no gain.
Wild at Heart
神社: Kingswood – ミッション: Enjoy X Game Overs.
要件:
- Easy Requirement: 5
- Medium Requirement: 15
- Hard Requirement: 35
- Expert Requirement: 60
- Master Requirement: 100
Asking the player to get 100 Game Overs is kinda weird, but hey, it’s a SWERY game. You’ll get a Game Over if your health falls to 0 from Starvation or Combat, or if you overdose on Alcohol. そうするとき, you’ll lose half the money you’re carrying with you (anything banked at the ATM is safe). You’re very unlikely to naturally get more than one or two Game Overs as you play, so you’ll be going out of your way to suicide on Sheep/Foxes/Deer/Badgers/Bears/whatever to grind this up. It’s tedious, but not overly hard.
Whenever you get a Game Over, you’ll automatically advance to 5 AM the next day, so I’d advise going for this in tandem with other content you can only do once a day (such as Brushing Sheep/Drinking Contests/Time Trials), getting a Game Over when you’re done and then getting right back into it from the top.
Extreme Hiker
神社: North Rainy Woods – ミッション: Walk X yards.
要件:
- Easy Requirement: 2,000
- Medium Requirement: 6,000
- Hard Requirement: 18,000
- Expert Requirement: 36,000
- Master Requirement: 60,000
If you play long enough, あなた すべき get this casually. さもないと, just run around the world map a few times until you get there.
Sheepman Virtuoso
神社: Arch 2 – ミッション: Travel X yards on Sheep.
要件:
- Easy Requirement: 5,000
- Medium Requirement: 15,000
- Hard Requirement: 30,000
- Expert Requirement: 60,000
- Master Requirement: 100,000
同上, but with the sheep. 100,000 yards sounds like a lot, but it’s fairly reasonable to get this with the sheep. 特に, distance traveled during the Time Trials contributes to this, so you’ll definitely get this if you’re grinding up money.
Shrine Missions 7-12
Shepherd with a Camera
神社: Arch 1 – ミッション: Collect X sheep.
要件:
- Easy Requirement: 10
- Medium Requirement: 30
- Hard Requirement: 60
- Expert Requirement: 90
- Master Requirement: 200
This is a very funky mission because you honestly don’t need to get any more sheep after your first one. Sheep stats are fairly meaningless to the point that there’s no point trying to go for one with good stats, just level up the one you have and enjoy it.
そうは言っても, don’t try and tame wild sheep if you’re going for this. It’s a huge waste of your time. Just buy them from Lonette – they cost £8 それぞれ, and you immediately sell them for £5, so you basically only spend £3 per sheep (which is much, MUCH preferable to the many minutes you’d spend taming a wild one). 残念ながら, you can only hold 8 sheep at a time in your pen, so you’ll have to go off and manually sell them one by one once you hit the limit, before buying them again from Lonette. It’s a lot of boring menuing, but much faster than the “intended” method.
It’s a waste of time and fairly terrible, so I wouldn’t recommend going for this unless you don’t value your free time.
The Obliterator
神社: Bloodwoodes’ – ミッション: Destroy X objects.
要件:
- Easy Requirement: 10
- Medium Requirement: 30
- Hard Requirement: 90
- Expert Requirement: 180
- Master Requirement: 300
You probably won’t come across this in a casual playthrough, but you’ll get it fairly early on if achievement hunting. While on the sheep, you can boost to smash through barrels or crates and collect the items inside. There’s a good number of these on the farm north of town.
しかし, the objects in the Time Trials also count towards this. You may have noticed there are a 多く of barrels and boxes in the third Time Trial specifically, so if you’re grinding up money, it won’t be long before you have this.
Breedin’ up a Storm
神社: Arch 3 – ミッション: Boost a Sheep’s Parameters to X.
要件:
- Easy Requirement: Fluffiness 2, 取り扱い 2, 力 2
- Medium Requirement: Fluffiness 4, 取り扱い 4, 力 2
- Hard Requirement: Fluffiness 6, 取り扱い 6, 力 6
- Expert Requirement: Fluffiness 9, 取り扱い 9, 力 10
- Master Requirement: Fluffiness 10, 取り扱い 10, 力 10
ノート: の “odd numbers out” in those requirements are the values given in-game. They also feel like a mistake to me, but who knows.
さらに, once you hit Level 5 in a stat, you have to take the sheep to Samuel by the Old Castle to “ロックを解除する” it before it will gain any more experience. Do this as soon as you hit the stat, さもないと, you’re wasting valuable time you could be getting free exp with.
それで, 上記のように, sheep stats are basically meaningless. This means that this achievement is also fairly meaningless. But not only that, it’s a huge PAIN.
Getting Power up is easy – you break boxes, and as seen in The Obliterator, Time Trial 3 counts for this. 簡単.
Getting Handling up is fairly rudimentary – you just travel around on the sheep and it levels up casually. For what it’s worth, I’m pretty sure you’ll get 100,000 yards before you get Level 10 取り扱い.
Fluffiness is the problem child here. Not only is the stat completely worthless (I think you at least get better steering/acceleration from Handling and Power, no matter how slightly), but it’s a nightmare to train. To level it up, you have to brush your sheep. This can only be done once a day, and it can only be done inside the Sheep Pen at Lonette’s Farm – so you have to take a detour there every day to raise the stat by a fraction of a level. It will take you a long, LONG time to get max fluffiness – 以上 100 日, 私は信じている.
I would wholeheartedly avoid this achievement unless they make it easier to raise Fluffiness, because you’ll hate yourself otherwise.
Shutter Junkie
神社: Rainy Woods – ミッション: Take X pictures.
要件
- Easy Requirement: 30
- Medium Requirement: 100
- Hard Requirement: 250
- Expert Requirement: 500
- Master Requirement: 1000
You’ll make a solid dent in the progress towards this over the course of the story, but you’re unlikely to hit 1000. The more pictures you take along the way, the less hassle this will be later on. 明らかに, if you need to grind this out, just spam take a ton of photos, and then delete them afterward (you don’t need to upload for this achievement). I’d only recommend doing that once you’ve exhausted all other photo-taking content in the game (such as email quests and hotwords), since mass deleting is a big pain.
Queen of my Domain
神社: Deargshaw Forest – ミッション: Modify your house X times.
要件:
- Easy Requirement: 1
- Hard Requirement: 2
- Master Requirement: 3
You’ll notice there aren’t any Medium or Expert missions here – that’s intentional, there are only 3 missions for the 3 total house renovations.
ここで言うことはあまりありません. Save up and buy all the different house modifications from McAvoy. Or don’t, because there’s a glitch where you can buy them without having enough money on you. What a swell guy, not turning down people because they’re poor!
The Greenest of Thumbs
神社: ??? (I think Lake Sutrains?) – ミッション: Apply X different layouts to your garden.
要件:
- Easy Requirement: 1
- Medium Requirement: 2
- Hard Requirement: 3
- Expert Requirement: 4
- Master Requirement: 5
同上, but for the different garden layouts this time. また, McAvoy will still do the job if you don’t have enough money, so this will take 5 seconds for you to just select each garden layout once. Done and done.
Shrine Missions 13-18
Reaping What You’ve Sown
神社: Norcoilltean Tarn – ミッション: Harvest X crops.
要件:
- Easy Requirement: 10
- Medium Requirement: 30
- Hard Requirement: 100
- Expert Requirement: 250
- Master Requirement: 500
This one is just a case of using your garden. Depending on your layout, you’ll have between 30 と 60 slots to plant seeds, so you won’t need to do too many full harvests to knock this one out.
Your best friend here is the first of Victoria’s Weird Seeds. At her shop, buy the very first weird seed she offers. This will grow into a sunflower, which will A) give you a fun quest afterward, およびb) be harvested into 5 weird seeds. おめでとう, infinite seeds. Just plant those over and over across your entire garden until you’ve hit your 500 – this is much, much faster than buying/foraging seeds otherwise.
For the record, the Post Office’s “Weird Seeds” は, 順番に:
- ひまわり
- じゃがいも
- キュウリ
- トマト
- リーキ
- 何もない (the seed literally just disappears when planted)
- バターナッツスカッシュ
Garimpeiro
神社: Blencarrick Quarry East – ミッション: Excavate X times.
要件:
- Easy Requirement: 10
- Medium Requirement: 30
- Hard Requirement: 100
- Expert Requirement: 250
- Master Requirement: 500
Pretty standard – buy a pickaxe from McAvoy, and then go mining. Blencarrick Quarry has the most spots, but I’d recommend visiting Weskirk Cave and John Peel’s Pot as your main go-to spots, as they have much more condensed mining spots. You can also go to the Old Mine, but lol
Mining is a very good moneymaker, and used for a lot of materials, so you’ll want to make a habit out of taking trips down to the mines to get materials (don’t forget the Prospector buff for double drops!). 取得 500 takes a while, but you’ll get it sooner or later.
DrinQUEEN!
神社: Quarry Road – ミッション: Win X drinking contests.
要件:
- Easy Requirement: 3
- Medium Requirement: 10
- Hard Requirement: 30
- Expert Requirement: 60
- Master Requirement: 100
良い, atheists, あなたは勝ちました. We found proof that there is no god.
The drinking contest crops up 3 times during quests – once as part of Route A, twice in side quests. その後, you can challenge Benedict Macauley once per day in 1977 to a drink-off. You can bet £10, £20, または £30, which reflects the difficulty. がある 5 rounds of 10 seconds each, not including the dialogue in between or cutscenes before/after, so that’s over a minute for each drink-off.
So that’s 97 unnecessary drinking contests for basically no money (given you can get £750 a day after Route A). They’re non-trivial enough that you’ll have to focus on even the easiest difficulty (otherwise you’ll lose and have wasted all your time), and just an all-around bad time.
I cannot stress enough how much you don’t want to go for this achievement. Just getting to 30 alone is miserable, let alone the other 70.
I know a few people struggle significantly with these contests, so the only tip is to repeatedly tap the direction you want it to go – NEVER hold it down. Gently push it away from falling off, and stay in the middle as much as possible (especially on the last round, where sometimes RNG will decide to try and kill you just for the lulz). This is still a nightmare achievement even after Patch 1.5.
Outdoor Warrior
神社: Blencarrick Quarry South – ミッション: Unlock X campgrounds.
- Easy Requirement: 3
- Medium Requirement: 6
- Hard Requirement: 9
- Expert Requirement: 12
- Master Requirement: 14
Fairly standard one to do – just unlock all the outdoor kitchens found scattered around the map. They’ll cost £75-£100 each when you do so, so bring money with you. Having more places to save is always a nice thing.
Diggity Dawg
神社: Blencarrick Quarry North – ミッション: Dig as a dog X times.
- Easy Requirement: 10
- Medium Requirement: 30
- Hard Requirement: 100
- Expert Requirement: 250
- Master Requirement: 300
This is basically an achievement in tandem with MarKING! – when you mark the spots, places to dig appear, and that’s what you want for this achievement. 前述したように, taking regular trips through the Snowy Mountains area is great, since a lot of spots there will give you up to 3 places to dig – and often with nice rewards. Do that a few times and you’re golden (and not just from the marking).
Ultimate Dog Lover
神社: South Lake Sutrains – ミッション: Reach X% DOG on the DC Gauge.
- Easy Requirement: 5%
- Medium Requirement: 25%
- Hard Requirement: 50%
- Expert Requirement: 75%
- Master Requirement: 100%
Team DOG is not only the easier team to join in the early game, but the better one – most of the NPCs in town are Team DOG, so when you’re hurting for money, the discounts add up. Doing side quests will also heavily push you in favor of Team DOG due to the prevalence of Team DOG NPCs. There’s a solid chance you’ll get 100% DOG casually, そうでない場合は, you can top yourself up by making offerings at the Shrines.
Shrine Missions 19-24
Ultimate Cat Lover
神社: Snowy Mountains – ミッション: Reach X% CAT on the DC Gauge.
Easy Requirement: 5%
Medium Requirement: 25%
Hard Requirement: 50%
Expert Requirement: 75%
Master Requirement: 100%
それで, after you’ve knocked out 100% DOG, you’ll want to swing that all the way back to 100% CAT. While you can game the system by playing with people as a cat/playing with people in cat form on the full moon, your best bet here is to just rock up to a Shrine and dump money into it.
Each offering costs £100, and increases your +2 to the team of your choice. Note that the Gauge actually goes from 50 DOG to 50 CAT, so that’s a total of 25 offerings if you’re in the middle, または 50 offerings if you’re 100% DOG. それは £5,000 total for a complete swing, but if you’ve been doing your Time Trials for £750 a day, that’s pocket change at this point. Easy game, easy life.
Resident Chatterbox
神社: Weskirk Cave – ミッション: Talk with X NPCs.
- Easy Requirement: 5
- Medium Requirement: 10
- Hard Requirement: 15
- Expert Requirement: 20
- Master Requirement: 28
あなたはそうするだろう おそらく get this casually, but it can be easy to miss an NPC or two if you’re not careful.
がある 26 NPCs listed in the Town Register, all of whom you’ll need to speak to for this achievement. The trap here is the three Macauley Kids – who only show up on certain days – and the White Twins, who share a dialogue box, but MUST be talked to separately for the achievement.
その後, your other 2 NPCs are Pauline Atwood from the Witch Doctor Pharmacy, and Kevin, who shows up in town by the end of the story. The nameless “Man/Woman” NPCs found in Eccles and across the world map don’t count for this, so don’t worry about them.
Orion Incarnate
神社: Southern Hills – ミッション: Defeat X animals.
- Easy Requirement: 10
- Medium Requirement: 30
- Hard Requirement: 100
- Expert Requirement: 250
- Master Requirement: 300
You’ll hopefully bite off a large chunk of this in early game grinding, fighting foxes/badgers, and the like for their drops. If you go for Fashionista, you’ll DEFINITELY get this.
The best places to go for this are the Snowy Mountains to fight Deer, or John Peel’s Pot (夜に) to fight Badgers. Don’t forget to bring Attack and Defence bonuses from your food. また, おい, combine this with the Game Over achievement and let an animal kill you at the end. Whatever floats your boat.
Camera OCD
神社: ??? (I think it’s Eccles Road?) – ミッション: Purchase X different cameras/lenses.
- Easy Requirement: 1
- Hard Requirement: 4
- Master Requirement: 8
Another shrine with no medium or expert missions. 一目瞭然, just save up and buy equipment from John.
I’m pretty sure that repairs are counted in this number, since you may have noticed he only sells 5 アイテム. So go and break the old camera/lenses a couple of times, fix em up, and you’re good to go on this one.
Glorious Gourmand
神社: Deep Woods – ミッション: Eat X different dishes.
- Easy Requirement: 10
- Medium Requirement: 25
- Hard Requirement: 45
- Expert Requirement: 70
- Master Requirement: 85
Pretty simple one here – just eat every item on the menus at 1977 and Mushroom & Evans at least once. 以上があります 85 dishes total (as some are found through side quests), so this shouldn’t be too bad to knock off.
Professional Eater
神社: Old Mine – ミッション: Drink X different drinks.
- Easy Requirement: 5
- Medium Requirement: 15
- Hard Requirement: 30
- Expert Requirement: 45
- Master Requirement: 50
上記の通り, try every drink at least once – this one is a tad more awkward, けれど, as the food will give you a recipe indicator to let you know when you’ve eaten it, and drinks don’t. Make a checklist or just remember to the best of your abilities what you have and haven’t touched. キノコ & Evans sells teas, 1977 sells alcohol. Keep in mind too much alcohol ingested will give you a game over, so take a break when you start to get really drunk (and maybe don’t even try more than 1 または 2 a day – の “alcoholic” debuff is the worst in the game, you do NOT want to get it unless you can afford the cure at the clinic).
Both shops also serve different drinks on the weekends, so watch out for that. しかし, all drinks are available on all days of the week over in Eccles, so if you’re missing one or two, hop over there instead of burning some days.
Shrine Missions 25-30
Lady of the Sheep
神社: 古城 – ミッション: Hit the target time for a Sheep Race.
- Easy Requirement: First Trial
- Medium Requirement: Second Trial
- Hard Requirement: Third Trial
For some reason this mission misses “Expert and Master” rather than “Medium and Expert”, but whatever.
After Route A, you’ll unlock the Time Trials, which is where you’re going for the money. Just hit the target time on all three missions at least once, then grind out trial 3 until your dying breath to get that money achievement.
Some people seem to struggle with the time trials, and there’s not much to say other than practice. The course doesn’t change for the individual trials, so you can just learn by trial and error where you can and can’t cut corners. I’d also recommend avoiding boosting if you’re having trouble with the course – it’s easy to lose control and end up in a bad spot with a bad boost, so only boost if you have a straight line of boxes or whatever until you’re comfortable enough with the course to know where you can and can’t boost.
The times given for the courses are fairly generous and allow for a decent number of mistakes, so don’t fret too much over them. For what it’s worth, I think trial 2 has the tightest time, and even that one only took me 2 または 3 tries to get.
The associated achievement here is to hit time on all 3 人種.
Free Roam
神社: John Peel’s Pot – ミッション: Unlock X gates.
- Easy Requirement: 2
- Medium Requirement: 10
- Hard Requirement: 18
- Expert Requirement: 25
- Master Requirement: 30
とてもシンプルです – just go to all the gates on the map and open them. 費用がかかります £10 それぞれ, so that’s £300 この成果のために. Most gates are pretty pointless since you can just jump over nearby walls as a cat, but some of them are pretty convenient to have open if you’re traveling by sheep. そしてねえ, it’s an achievement, so you might as well just open them for the fun of it.
ファッショニスタ
神社: Old St. Ardan’s – ミッション: Acquire X equipment.
- Easy Requirement: 3
- Medium Requirement: 12
- Hard Requirement: 28
- Expert Requirement: 38
- Master Requirement: 48
Bringin’ Home the Bacon is one of two egregious achievements. This is the other one.
If you’re tens of hours into the game, having knocked out the main quest, most side quests, and a good number of achievements on this list, you might have noticed something:
You have barely any equipment.
見る, the crafting system for equipment has layers upon layers of rare drops baked into them, to the point that you might need to grind several hours just to get everything for a single item. The equipment system is very anti-casual since you’re basically not going to come across enough resources to finish an item without going out of your way and grinding hard for it.
The main bottlenecks are aluminum cans (found by foraging in people’s rubbish), animal hide/plumage (rare drops from various animals, many of which are uncommon themselves), and items like Glowing Green Ore (レア, occasional finds from digging at marked spots. 必要です 78 of them btw)
The crafting system is so player unfriendly that I cannot in good faith recommend 誰でも goes away and grinds for it. By the time you’ll even have all the equipment, you’ll have 100%’d the game, so there’s no purpose to use any of it.
If you do want to run off and do this achievement, here’s the list of raw items you’ll need to complete:
Cotton Fabric 42
Denim Fabric 8
Cowhide 16
Wool Felt 46
Small Animal Hide 18
Pine Marten Fur 12
ラビットファー 30
High Quality Fur 31
Foxfur Felt 46
Deer Felt 37
Assorted Plumage 89
High Quality Feather 25
Pheasant Plume 8
Turkey Plume 24
Turbid Sap 33
Translucent Sap 5
Sticky Sap 4
Rough Bark 31
Sandy Caterpillar 6
Coarse Beetle 14
Butterfly Wing 3
Glass Bead 28
Strong Fiber 15
Black Fiber 10
Stretchy Fabric 13
フィルター 10
Super Ball 6
Spinning Gear 18
Baggie of White Powder 27
Dried Entrails 4
Humanoid Root 7
Glowing Green Ore 78
Aluminium Can 600
Iron Nugget 264
Bronze Nugget 50
Silver Nugget 80
金塊 164
Small Diamond 16
Large Diamond 5
Pious Pilgrim
神社: East Woods – ミッション: Awaken X shrines.
- Easy Requirement: 3
- Medium Requirement: 7
- Hard Requirement: 12
- Expert Requirement: 20
Master Requirement: 31
As with gates and campgrounds, just go to all the shrines across the map and spend the £1 to open them. If you want to know what shrine missions are available from them, I’ve got good news about the guide you’re reading right now. Opening all 31 shrines is heavily recommended, as they give you fast travel between them, which streamlines a lot of late-game running around.
Note that several shrines are locked behind Routes A, B, とC, so you won’t be able to finish this until you’re at the final part of the main quest (or past it).
The Hottest Buzz
神社: ストーンヘンジ – ミッション: Fulfil X Hotwords.
- Easy Requirement: 5
- Medium Requirement: 20
- Hard Requirement: 40
- Expert Requirement: 70
- Master Requirement: 100
それで, the game conveniently neglects to tell you that you have to fulfill unique hotwords. If you get #CrazyContraptions one week, fulfill it, then get it next week and do it again, you won’t get a second point towards the total. So keep an eye out for new words, and fulfil as many as you can as you go along. It’ll make the late-game grind more tolerable.
Note that some hotwords are missable. 例えば, #MadScientists wants a picture of Nicholas Anderson, who is only available for one part of the main quest. しかし, there are apparently around 150 Hotwords, so missing a few shouldn’t be too problematic.
If you want to grind this achievement, consider skipping 3 days at a time using the hotels. This will get you to the Hotword resets more quickly.
I’m working on a checklist of hotwords with explanations for them, which I’ll add here one day.
Walking Cookbook
神社: Eccles – ミッション: Learn X recipes.
- Easy Requirement: 10
- Medium Requirement: 25
- Hard Requirement: 45
- Expert Requirement: 70
- Master Requirement: 85
This is basically just the more obnoxious variant of the “eat all dishes” ミッション. この時, you have to eat each dish several 回, until you’ve remembered it. ここで言うことはあまりありません – it’s a grind, it’s tedious, but it’s not hard.
Shrine Mission 31
Giving and Taking, 無限へ
神社: Rainy Woods Southeast – ミッション: Complete side quests.
- Easy Requirement: 5
- Medium Requirement: 15
- Hard Requirement: 30
- Expert Requirement: 50
- Master Requirement: 60
This is a fairly easy one to get if you’ve been doing Side Quests as you go. 以上があります 60 ゲームの中で, including some repeatable ones, so you should easily get the achievement before you start struggling to find people to help.
Time Achievements and Completion Bonus
2 of the game’s 42 achievements are related to in-game time.
- Getting used to life in the sticks? – Spent one month in the game.
This one isn’t too bad. If you don’t get it while finishing the main quest, you’ll get it while cleaning up afterward.
- あなたが知っている, I kinda like Rainy Woods… – Spent twelve months in the game.
This one is pretty bad. You’re unlikely to see this proc unless you’re hardcore farming for the grinder achievements, and is definitely beyond the scope of a casual playthrough.
The best way to knock this out is to just go to a hotel and keep buying the 3 days stay over and over again. しかし, if you’re going for 100% 完了, I’d advise you to try and fit more into your day, since stuff like 100 Drink-offs and 100 Game Overs will eat up 100 days by themselves, which somewhat lessens the grind for spending a year in-game.
And with the other 41 Achievements unlocked, you’ll finally receive your last one:
- グッドライフ – Congratulations on fully enjoying The Good Life!
おめでとうございます, あなた “fully enjoyed” ゲーム. And by “fully enjoyed”, I mean probably enjoyed for 30-50 hours or so, and then slaved away hating yourself for twice as long. What I wouldn’t give for a rebalancing patch.
It’s unknown if there are any in-game 100% completion rewards at this point, and given the level of grind the game expects from you, it’ll be a while before anyone knows.