- タイトル: Sprocket
- 発売日:
- 開発者:
- 出版社:
Information about Sprocket is still incomplete. これを使用してゲームの詳細を記入するのにご協力ください。 お問い合わせフォーム.
このゲームでは, people often forget about the radio feature. This might happen because they either just forget about it or because many sprocket players prefer huge and heavy tanks. But for those of us who like using medium and light tanks, the radio can be super important. It can be what makes the difference between running away scared or totally crushing the enemy.
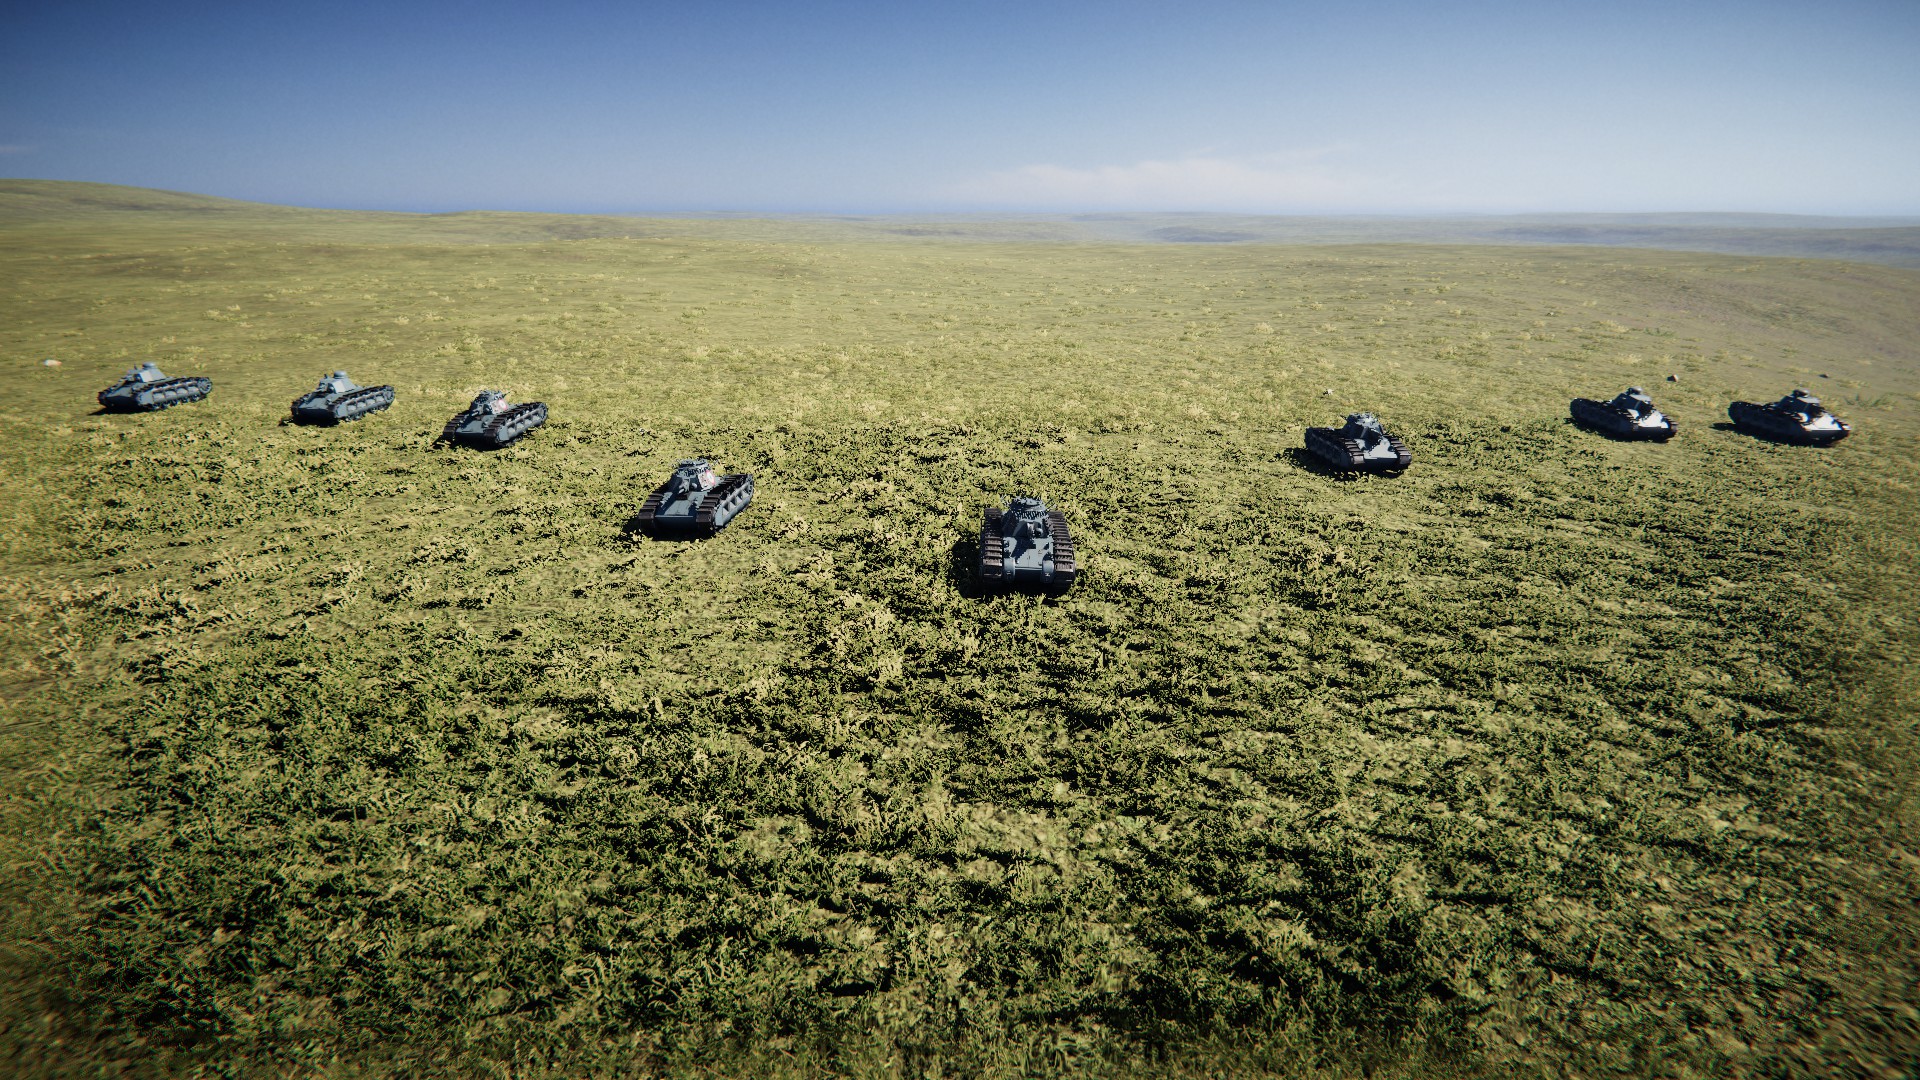
We’re going to focus on using the radio in fields mostly. この地図では, using the radio can either make you a winner or a loser. It’s also easier to spot how it helps here compared to other maps.
Things You Should Know
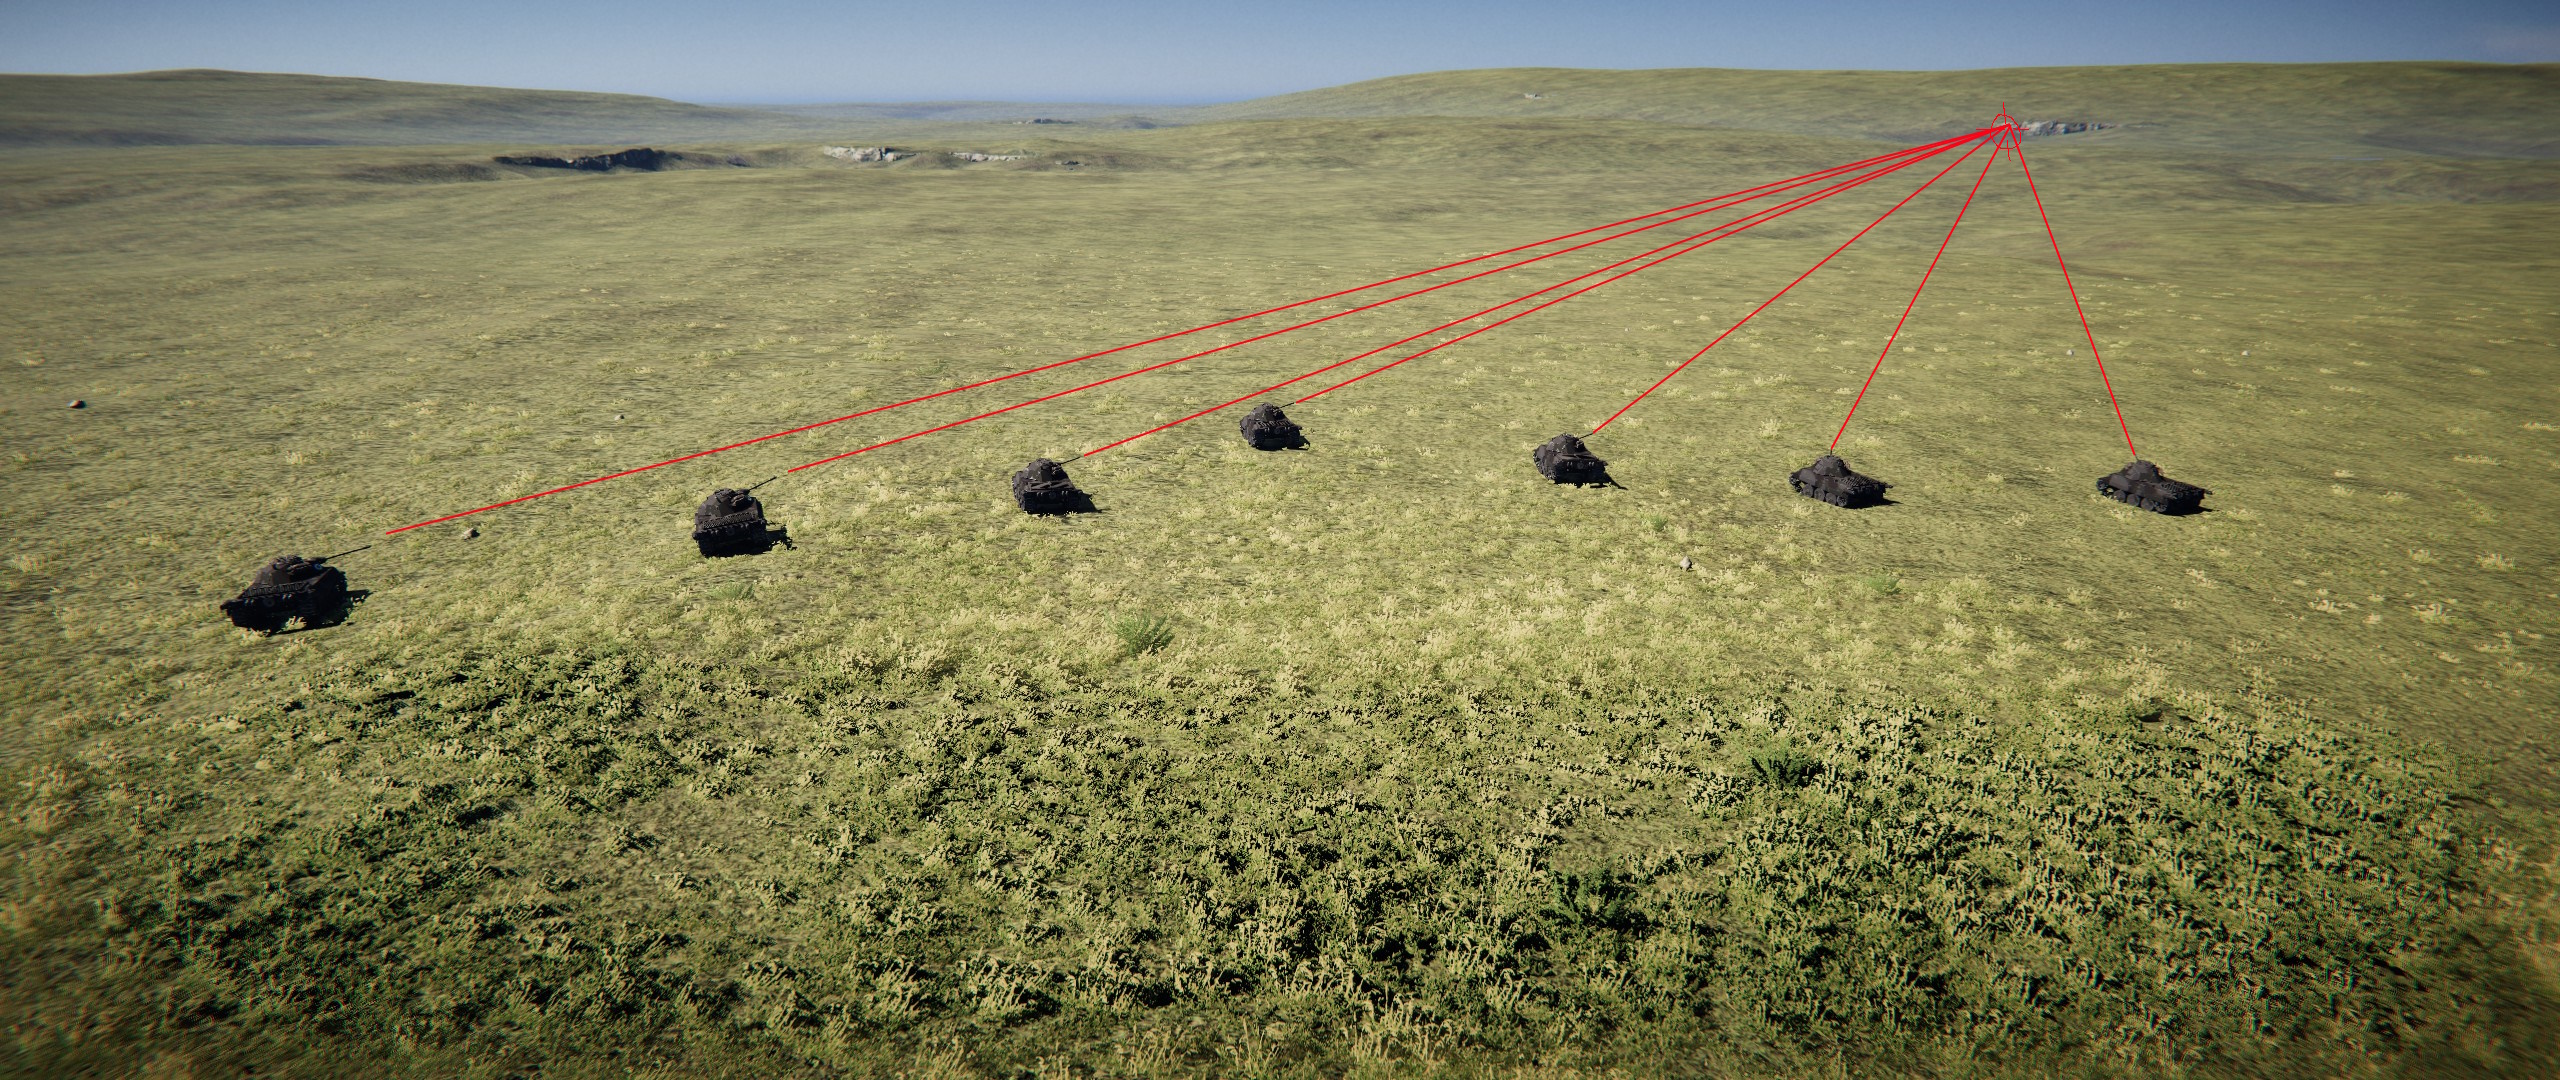
初め, when you’re not fighting and your tanks are in formation, they aim where you aim. This is really cool because it helps you get ready for sneak attacks or tricking the enemy into attacking you first. You can have your aim pointing where the enemy is coming from. What’s even better is that they keep following your aim even when you’re moving, and they keep doing this even if you tell them to stop.
Baiting/Ambushing
Baiting and ambushing might seem quite similar. Baiting happens before the enemies even show up, where you move to the trigger point, causing them to spawn and attack you, while your own tanks wait in hiding. Ambushing, 一方で, is when the enemies come at you, and you set up your tanks to attack them.
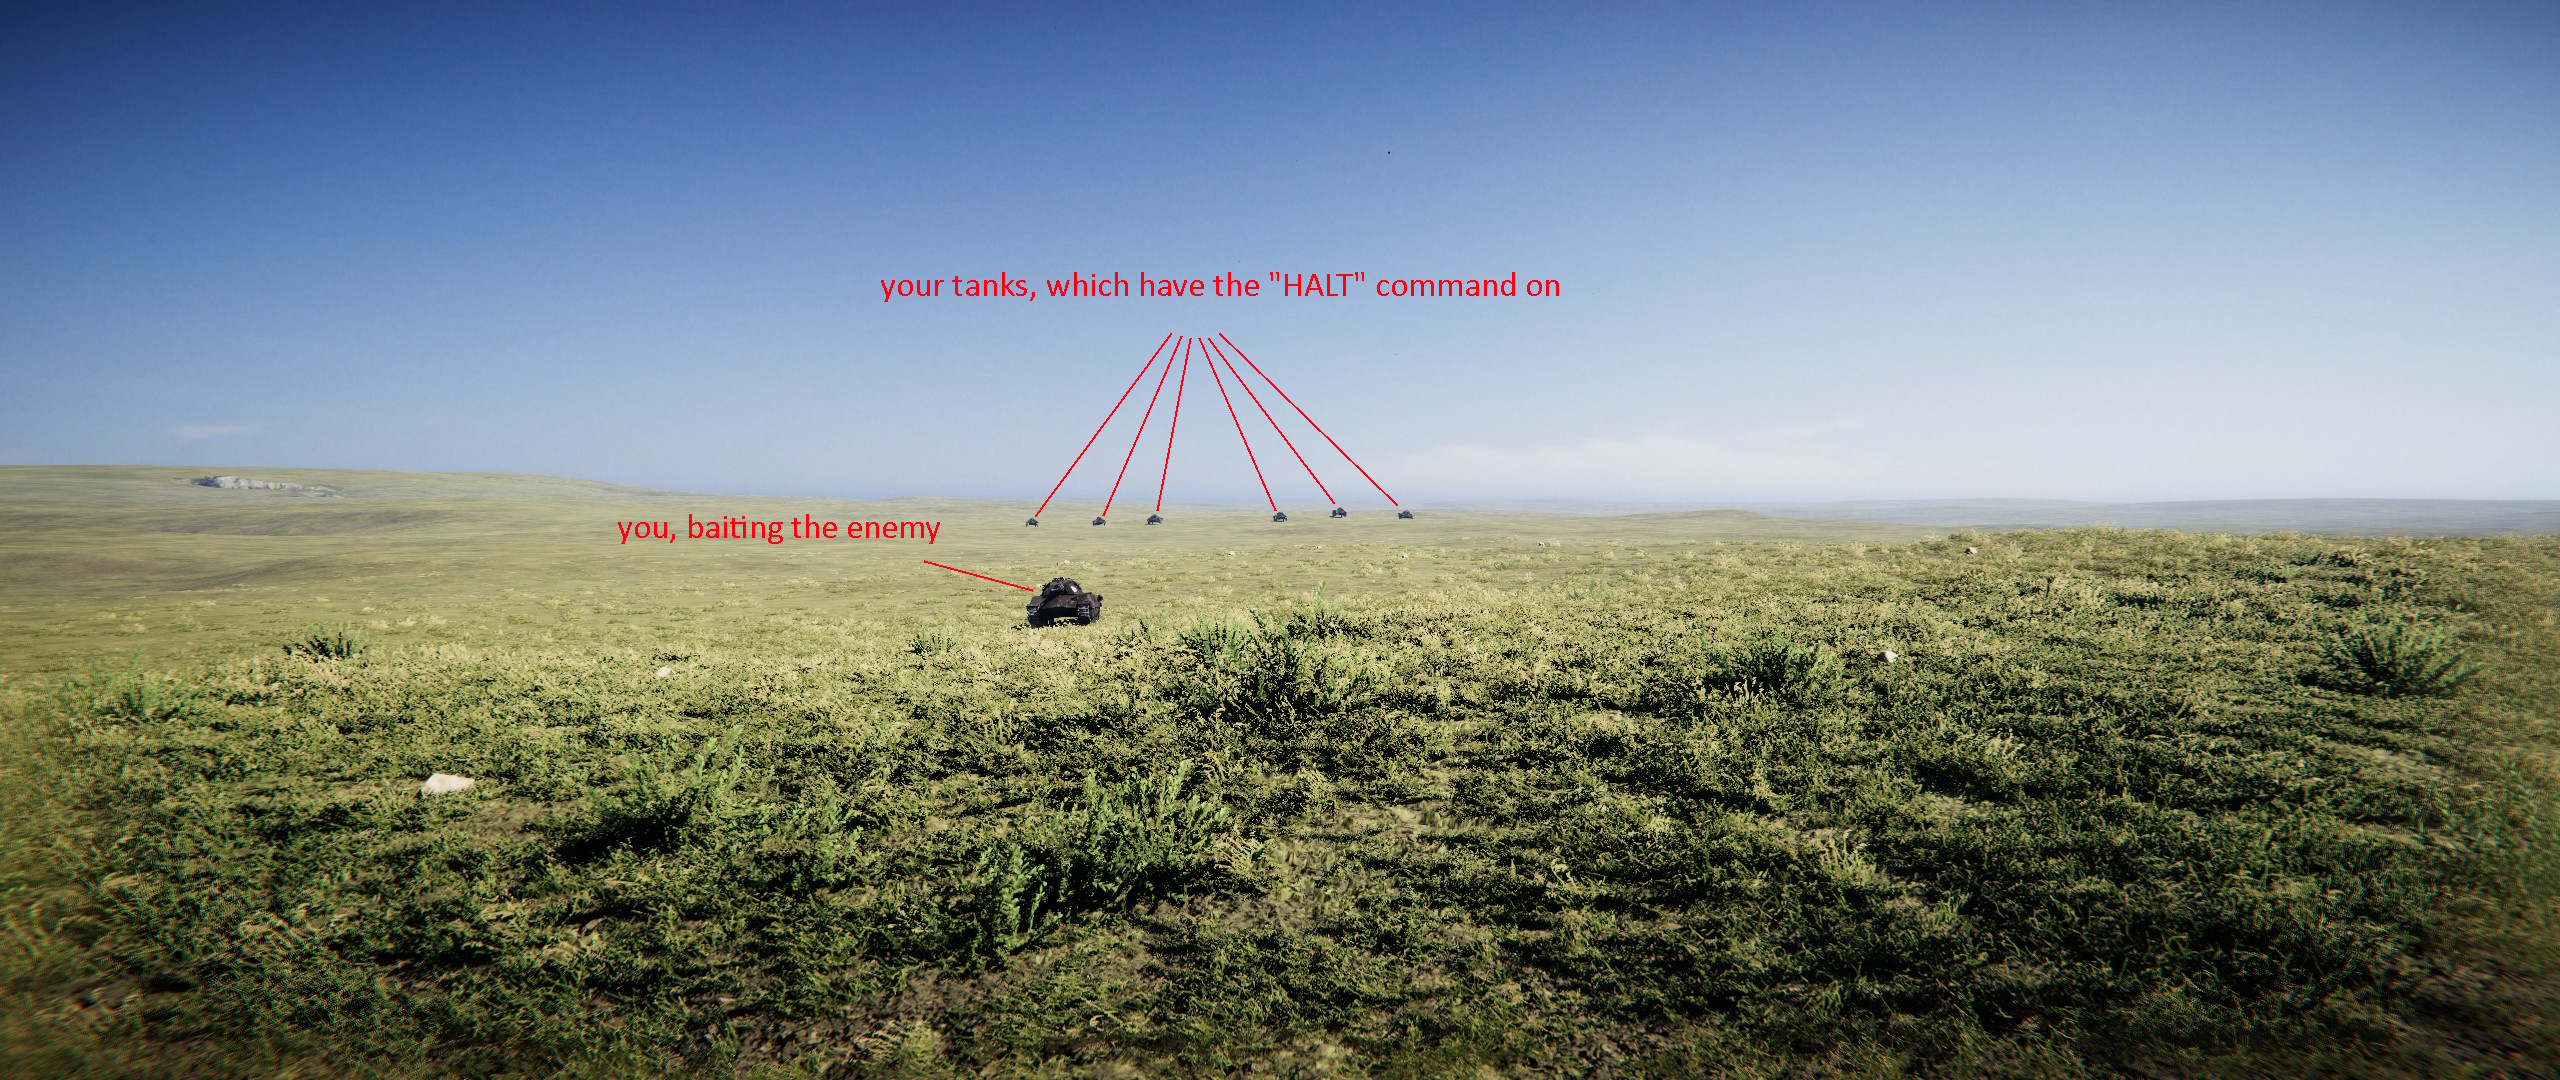
それで, how do you bait exactly? 良い, it’s as simple as moving straight forward and then backward. Once the enemies spawn, you reverse back to your original position.
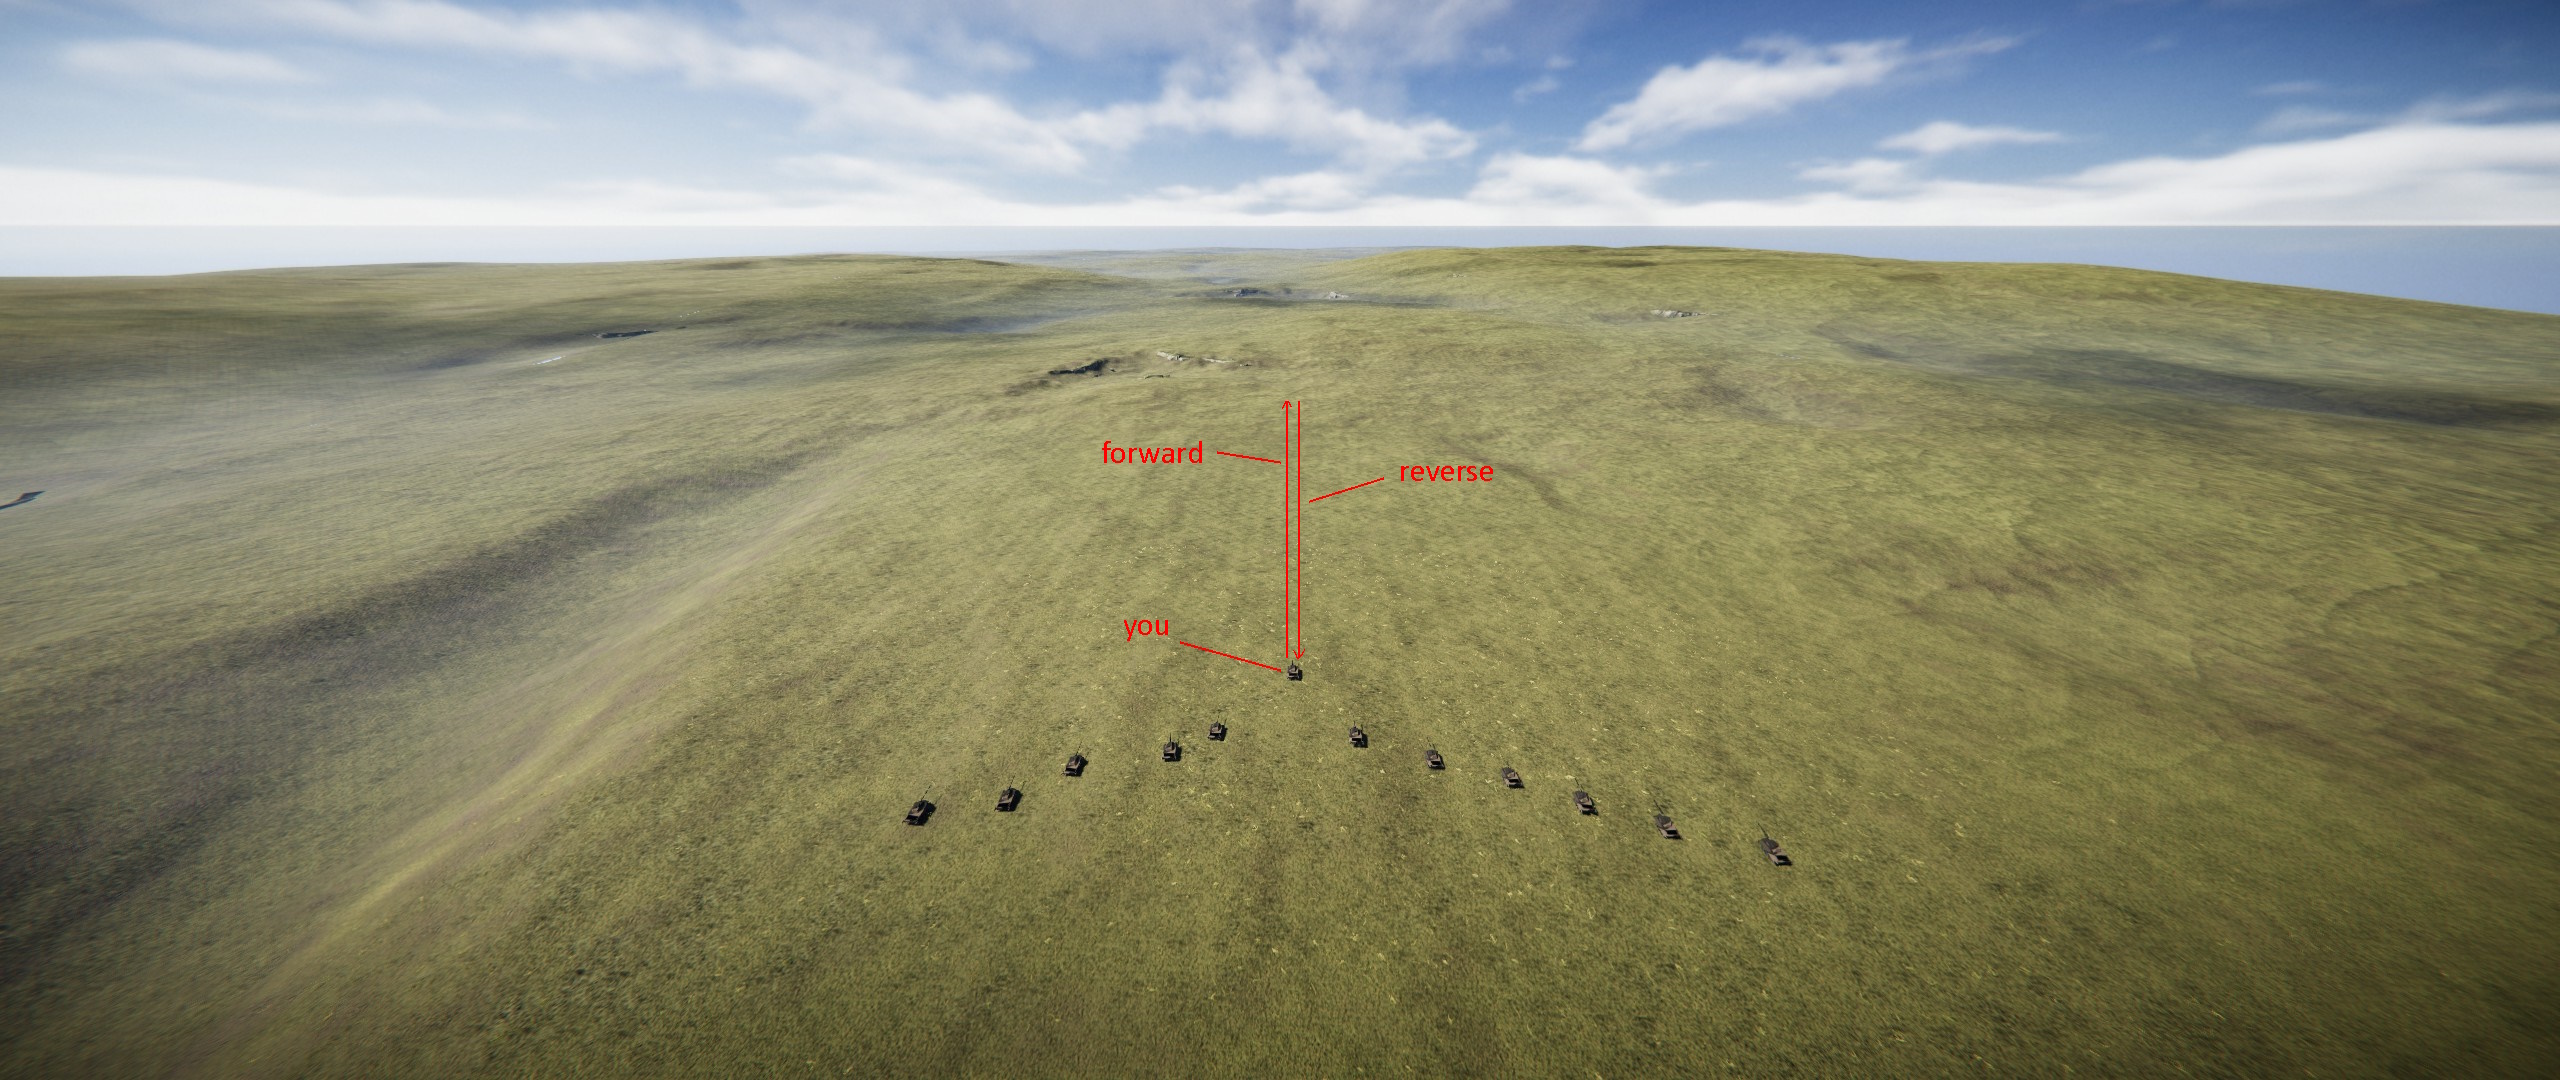
During this strategy, it’s more crucial to have a fast reverse than a fast forward speed. それで, make sure your transmissions and engines are in top shape! This could be the difference between a tank that works and a tank that’s on fire.
Covering
Covering can be important in both baiting and regular attacks. When you’re baiting, your tanks cover you until you get back to them. In a regular attack, they provide cover while you advance, drawing enemy fire away from you.
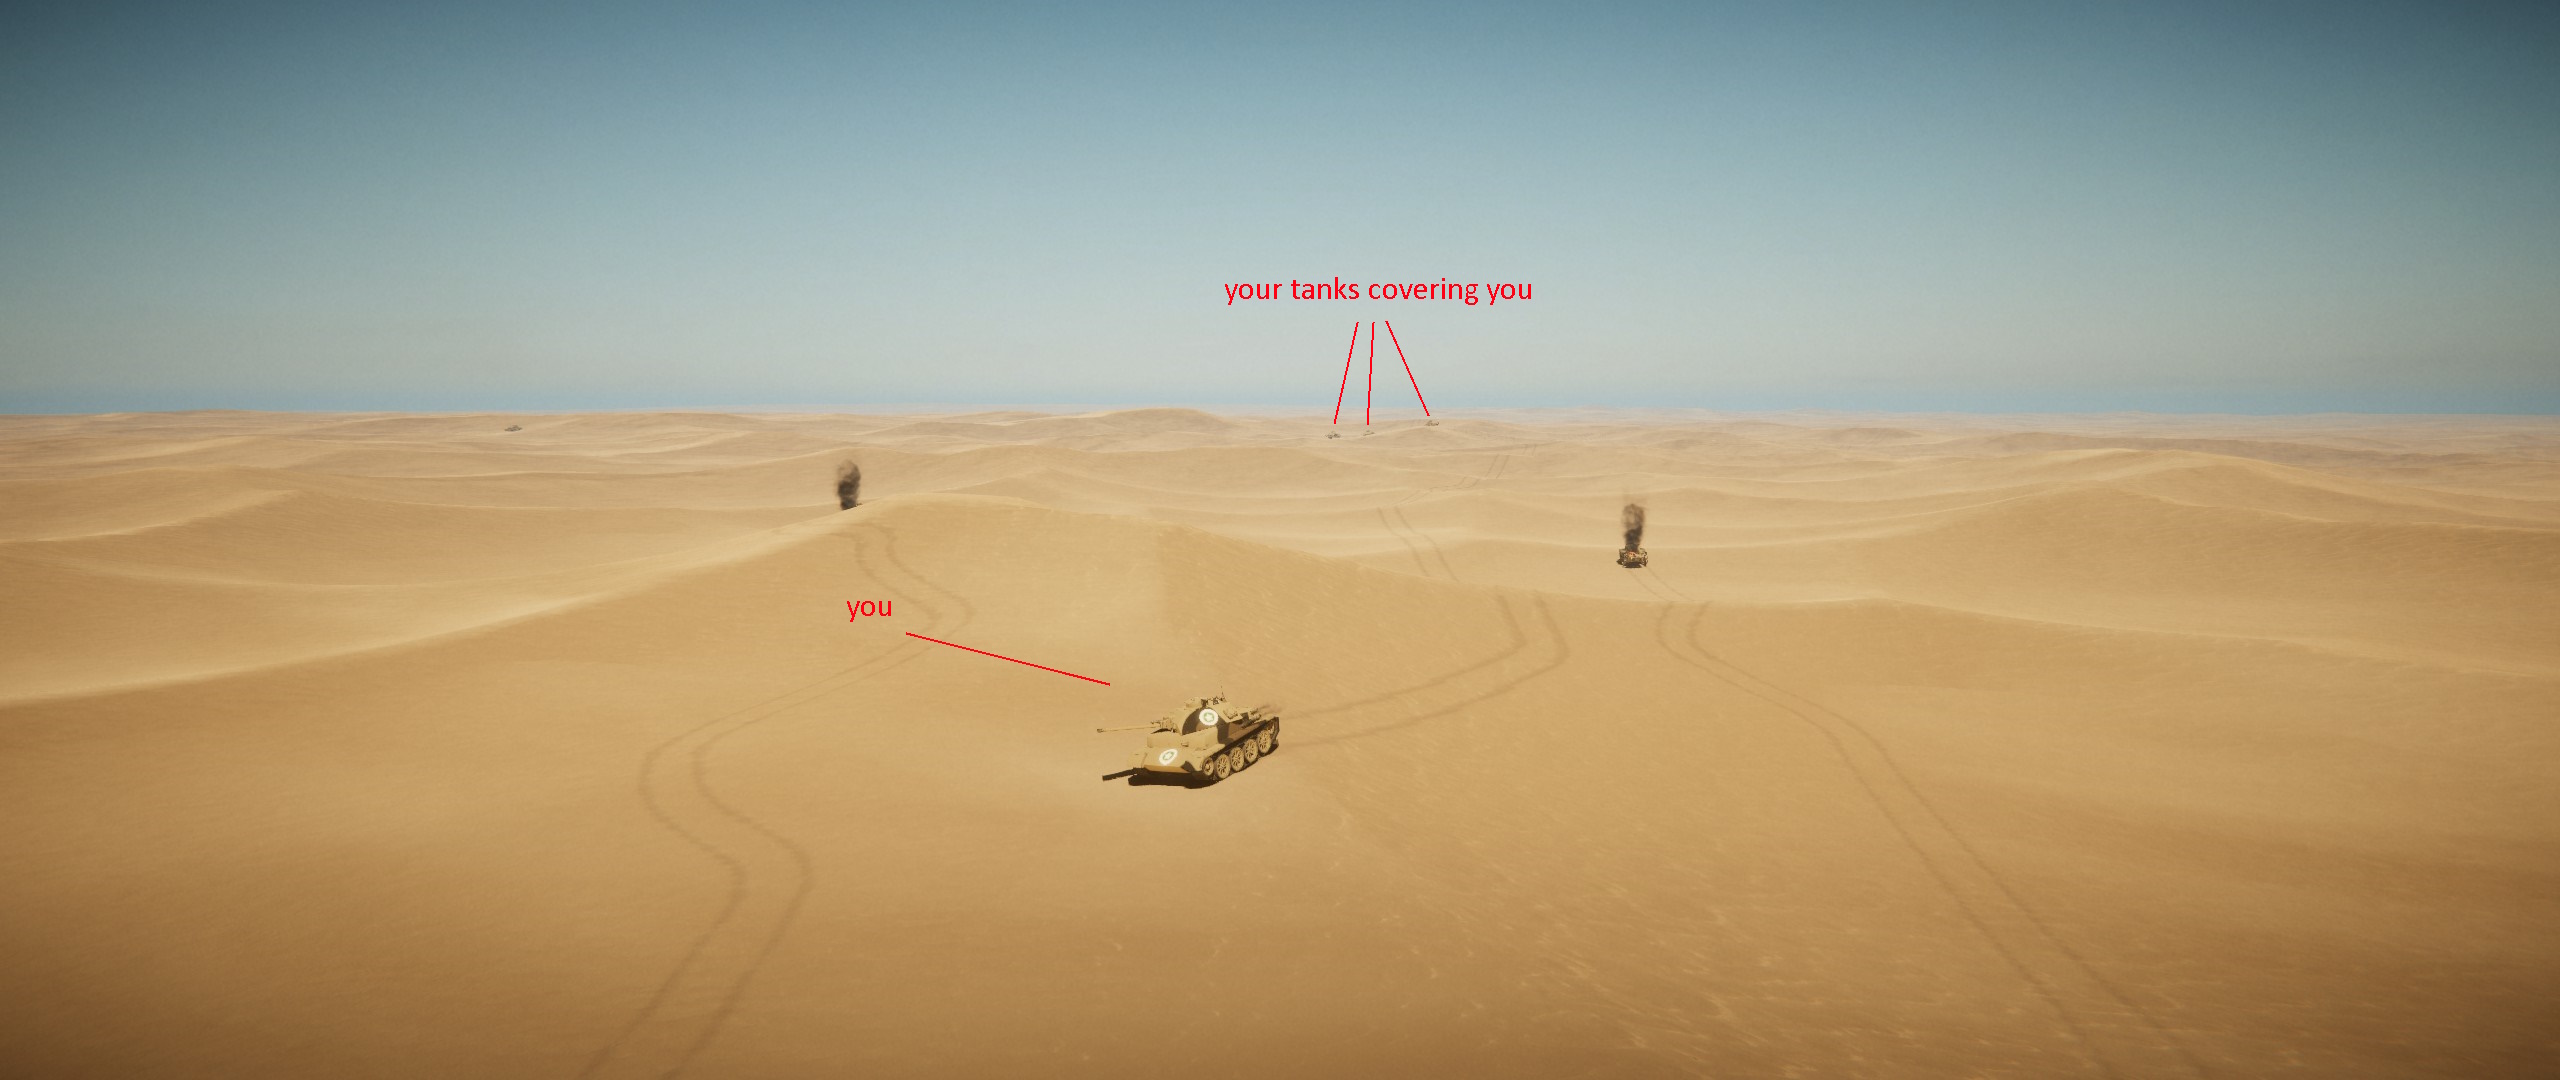
今, there are two ways to attack after they’ve drawn enemy fire. One is attacking after they’ve already attracted the enemy’s attention. The other is attacking before they’ve managed to do that, which is called a flanking attack.
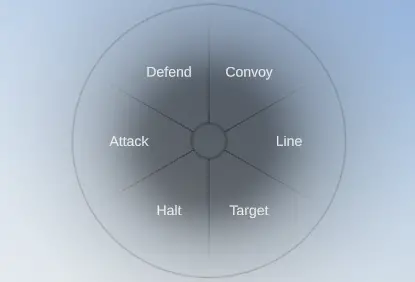
Types of Formations and Commands
It’s all about the important stuff that makes everything happen in the game.
そして, just a quick note, if you use a formation and then tell the tanks to halt, to get them working again, you’ll need to use another formation to reset them.
Convoy
Convoy is not super special. Your tanks just line up behind you. It’s handy if you think you might be attacked before they attack you.
ライン
The real magic happens with Line. It’s like the all-purpose tool in the game. It’s the bread of the formation and halt tactics.
In World War I, Line is quite useful because it keeps other tanks from doing silly things and lets them shoot at enemy tanks and guns.
正直に, everything on sprocket should have a model 1. Lines usually form a V shape, although tanks tend to mess it up and turn it into a goofy formation.
ターゲット
- Target seems to be a valid command, but its usage isn’t clear. I’ve attempted to use it before without success. If anyone has any insights, please share.
Halt
- Halt is a crucial command that makes the tanks hold their position no matter what. It’s essentially the butter of the formation and halt tactic.
攻撃
- The Attack command does work, but it appears to be somewhat unpredictable. It doesn’t seem to force the AI to attack, but rather sets their behavior to be more offensive.
その他
たまに, tanks can act oddly and keep inching forward continuously after getting into formation. The only way to stop this is by issuing a halt command.
It might be obvious, but you need an antenna to do anything with the radio. それがなければ, you’re limited to a 50m range.
Assigning the radio role to the driver is usually a better choice than having another crewmember handle it.