
Understanding the fundamentals of Ascension, employing effective strategies, and utilizing advanced builds are critical to successfully navigating the higher levels of the Curse. This guide aims to provide a comprehensive look at the mechanics of Ascension, practical usage techniques, and valuable recommendations for optimizing your gameplay.
How to Unlock Ascension
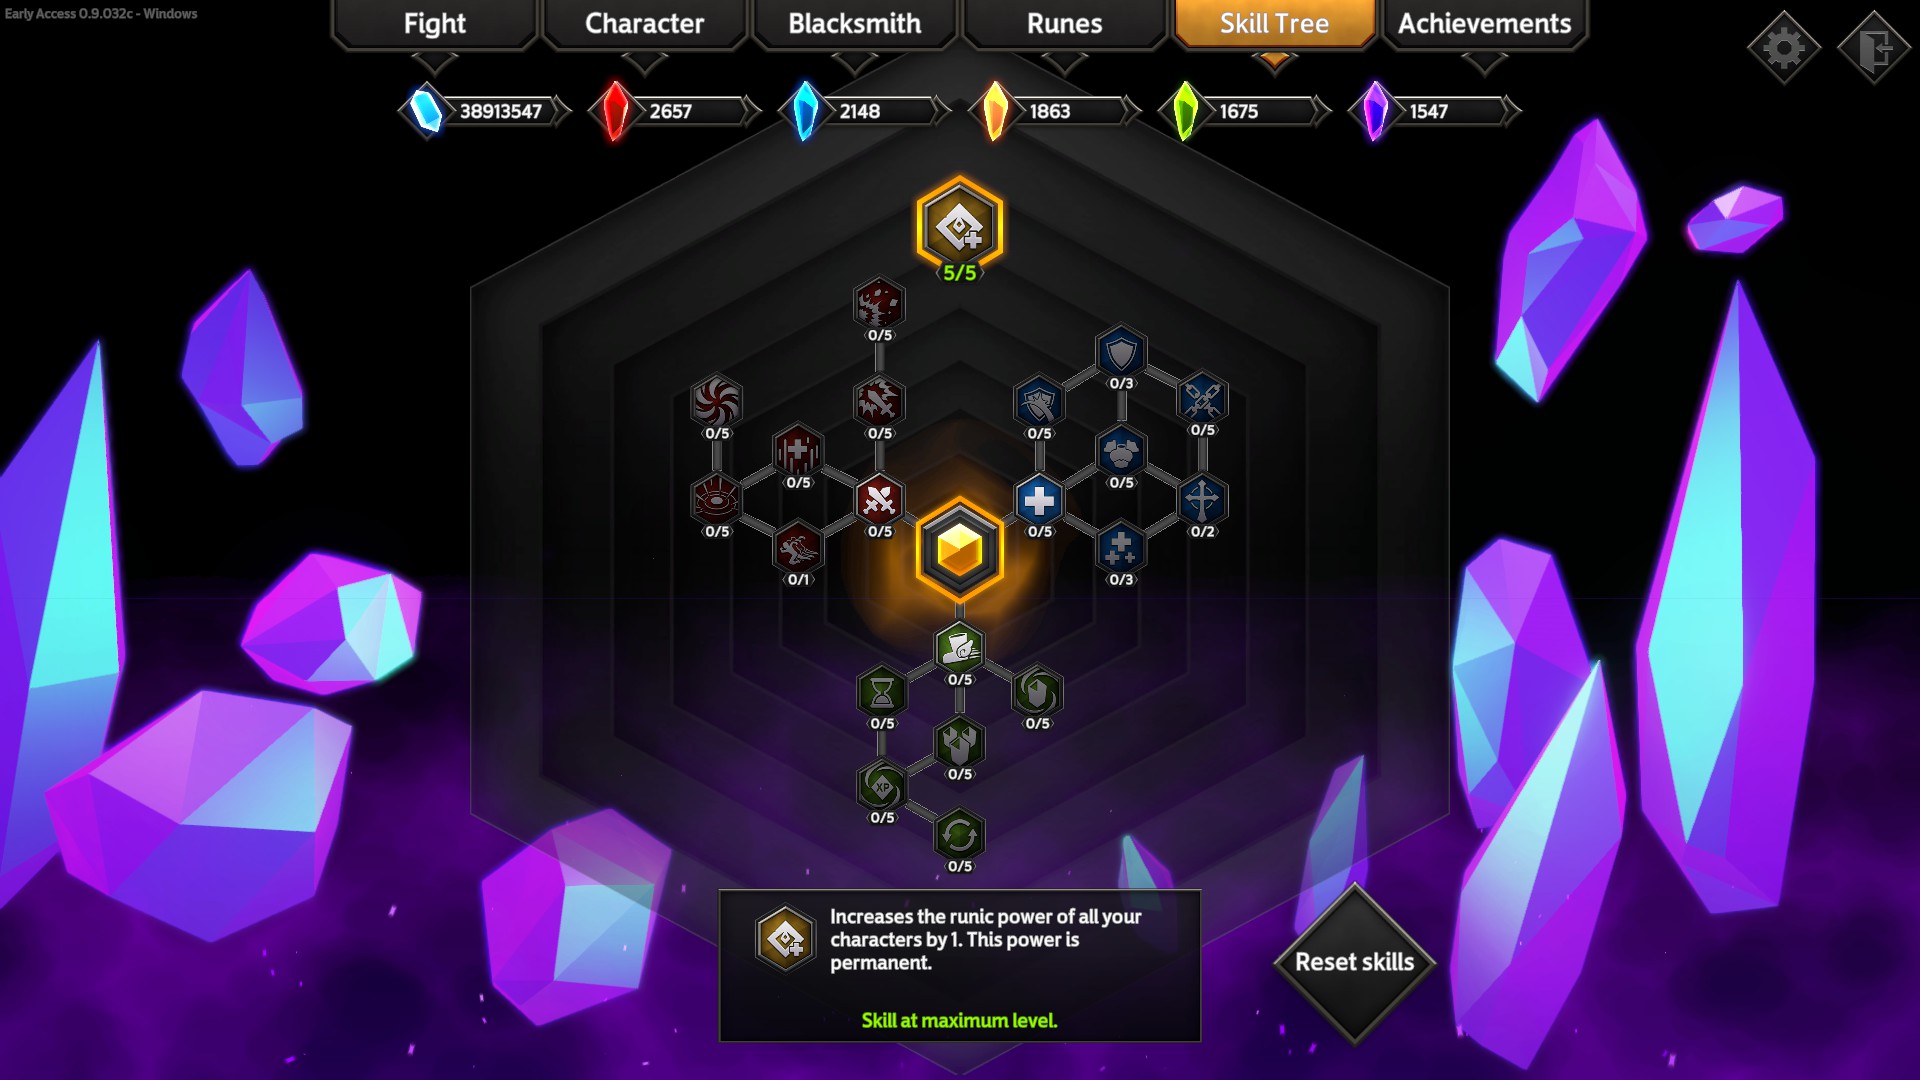
In order to access the Ascension skill tree for the first seven characters, it is necessary to purchase and fully upgrade all skills within the regular skill tree. It should be noted that the inclusion of runes at the top of the tree is uncertain for unlocking the entire regular skill tree, as resetting purchases does not reset acquired runes.
The following amounts of Soulstones are required:
- Minor Soulstones: 325,000
- Red Soulstones: 41
- Blue Soulstones: 16
- Yellow Soulstones: 17
- Green Soulstones: 14
- Purple Soulstones: 29
おめでとう! The Ascension skill tree for the first seven characters is now accessible. Please note that this guide is only intended to assist in the use of Ascensions and does not provide detailed information on the skill tree or materials required, as the update is relatively new at the time of writing.
Barbarian Ascension
At the top of the list is Barbarian Ascension, which takes the lead with its straightforward mechanics. A prominent blue square contains a gauge that gradually fills as you eliminate enemies. Once the gauge reaches its maximum capacity, Barbarian Ascension is triggered. Activating this state grants you access to his various benefits, which are conveniently displayed when you hover over the gauge. ノート, しかし, that the activated state is only temporary, as the gauge will gradually deplete over time.
Tips for Barbarian
Runes that are great with Barbarian:


- Critical Strike: The Barbarian has a remarkably high critical strike rate. The more damage inflicted, the quicker the opponent’s demise, thus facilitating the accumulation of charges for the Barbarian’s Ascension ability. Achieving a significant level of critical strike probability allows you to inflict astonishingly powerful damage, with a greater than 100% chance of landing multiple critical strikes on a single target (where the cumulative effect of the crits amplifies the damage output exponentially, such that a 200% critical strike chance results in four times the damage per strike instead of two times the damage)!
- 死刑執行人: This special skill is especially useful when running Overlord or Endless quests. In addition to the synergistic debuffs, you will also need to accumulate the debuffs you gain from leveling up, which will increase your damage output by about 40-45%.
- Multicast Madness: The more you use your abilities and cast them repeatedly, the more enemies you send out. This is a good choice if your build does not include the use of Scent of Blood. しかし, if Scent of Blood and Bloodlust are integral parts of your build, you may not need to purchase this rune.
- Ruthlessness: There is no downside to choosing this rune for the Barbarian! Since taking damage is inevitable, prioritizing increased damage output allows for quick destruction of enemies. A mutually beneficial arrangement.
Recommended Skills: Scent of Blood+Bloodlust+any skill that inflicts a significant number of Bleeding or Hemorrhage Stacks on opponents.
The Barbarian is really straightforward. Any recommended build should meet at least one of the three criteria for suggested skills. Did I mention that the Barbarian’s play style is pretty straightforward?
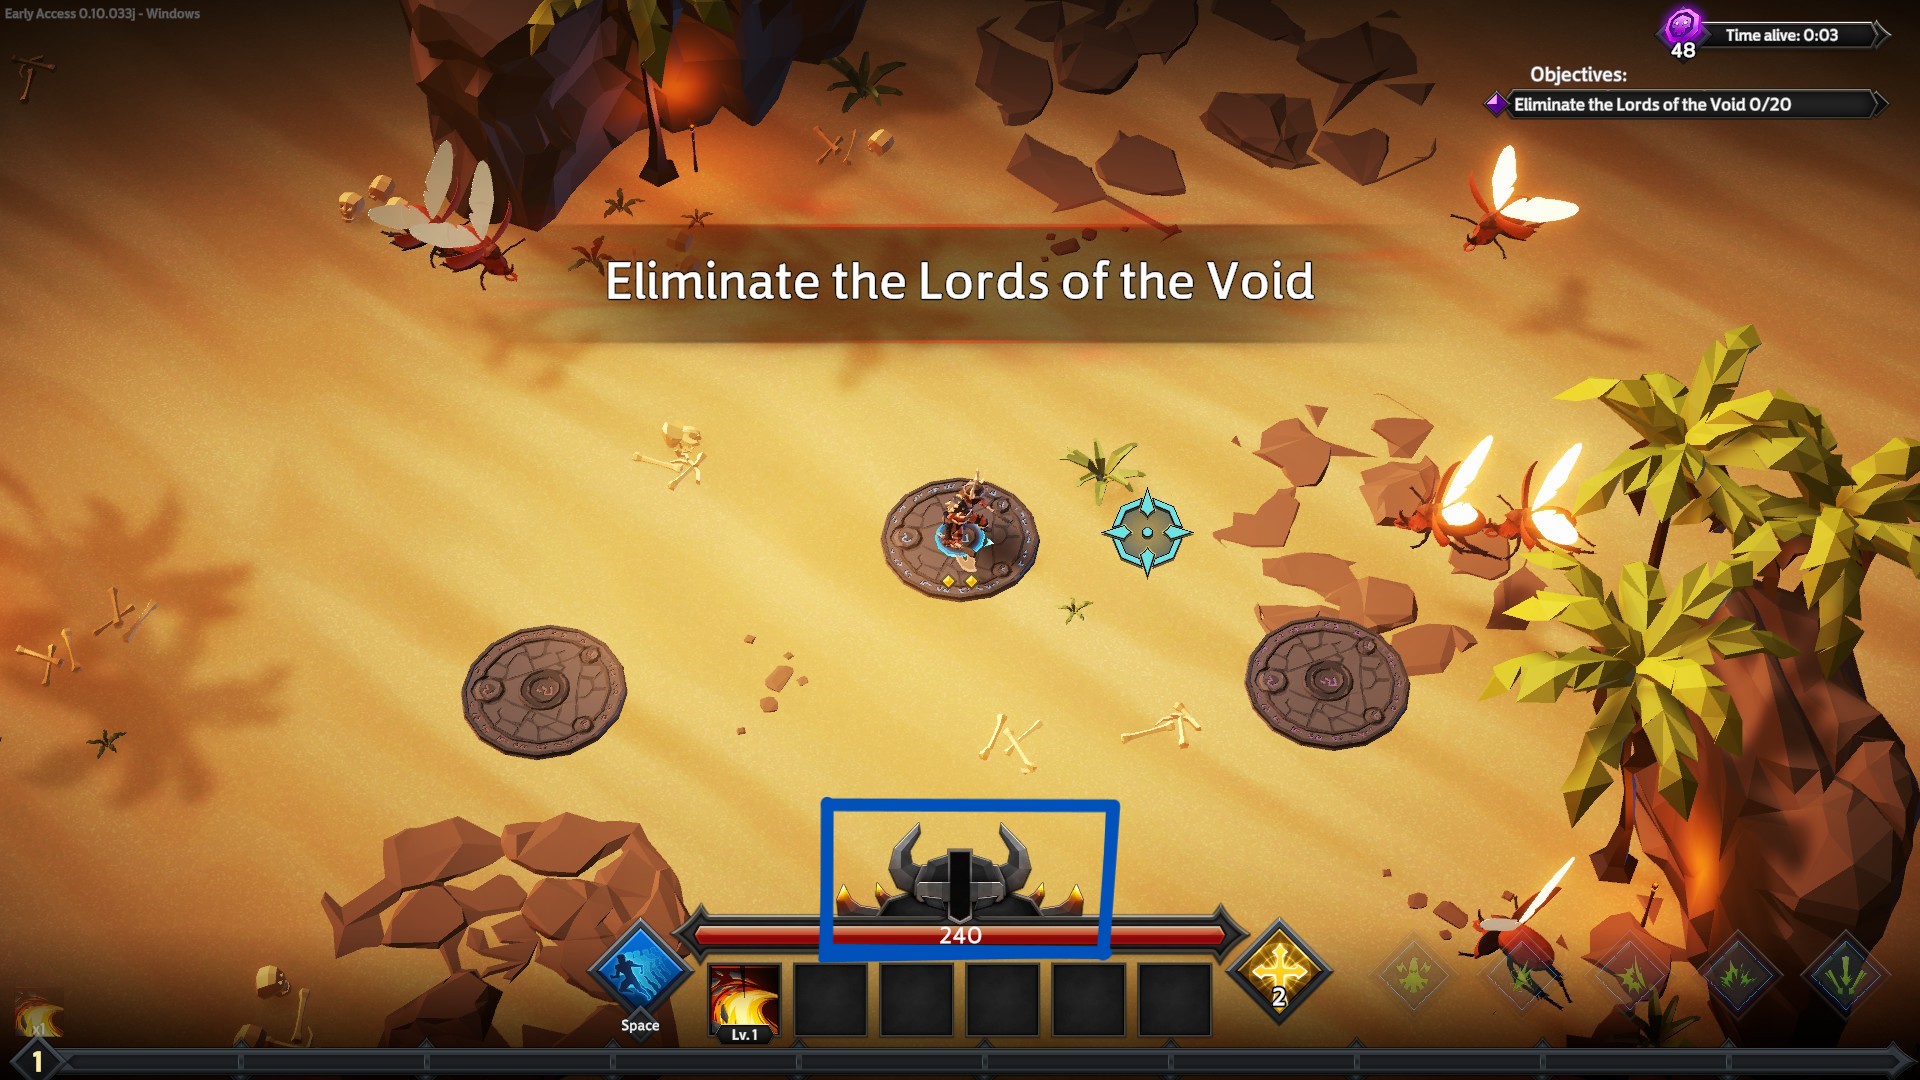
Pyromancer Ascension
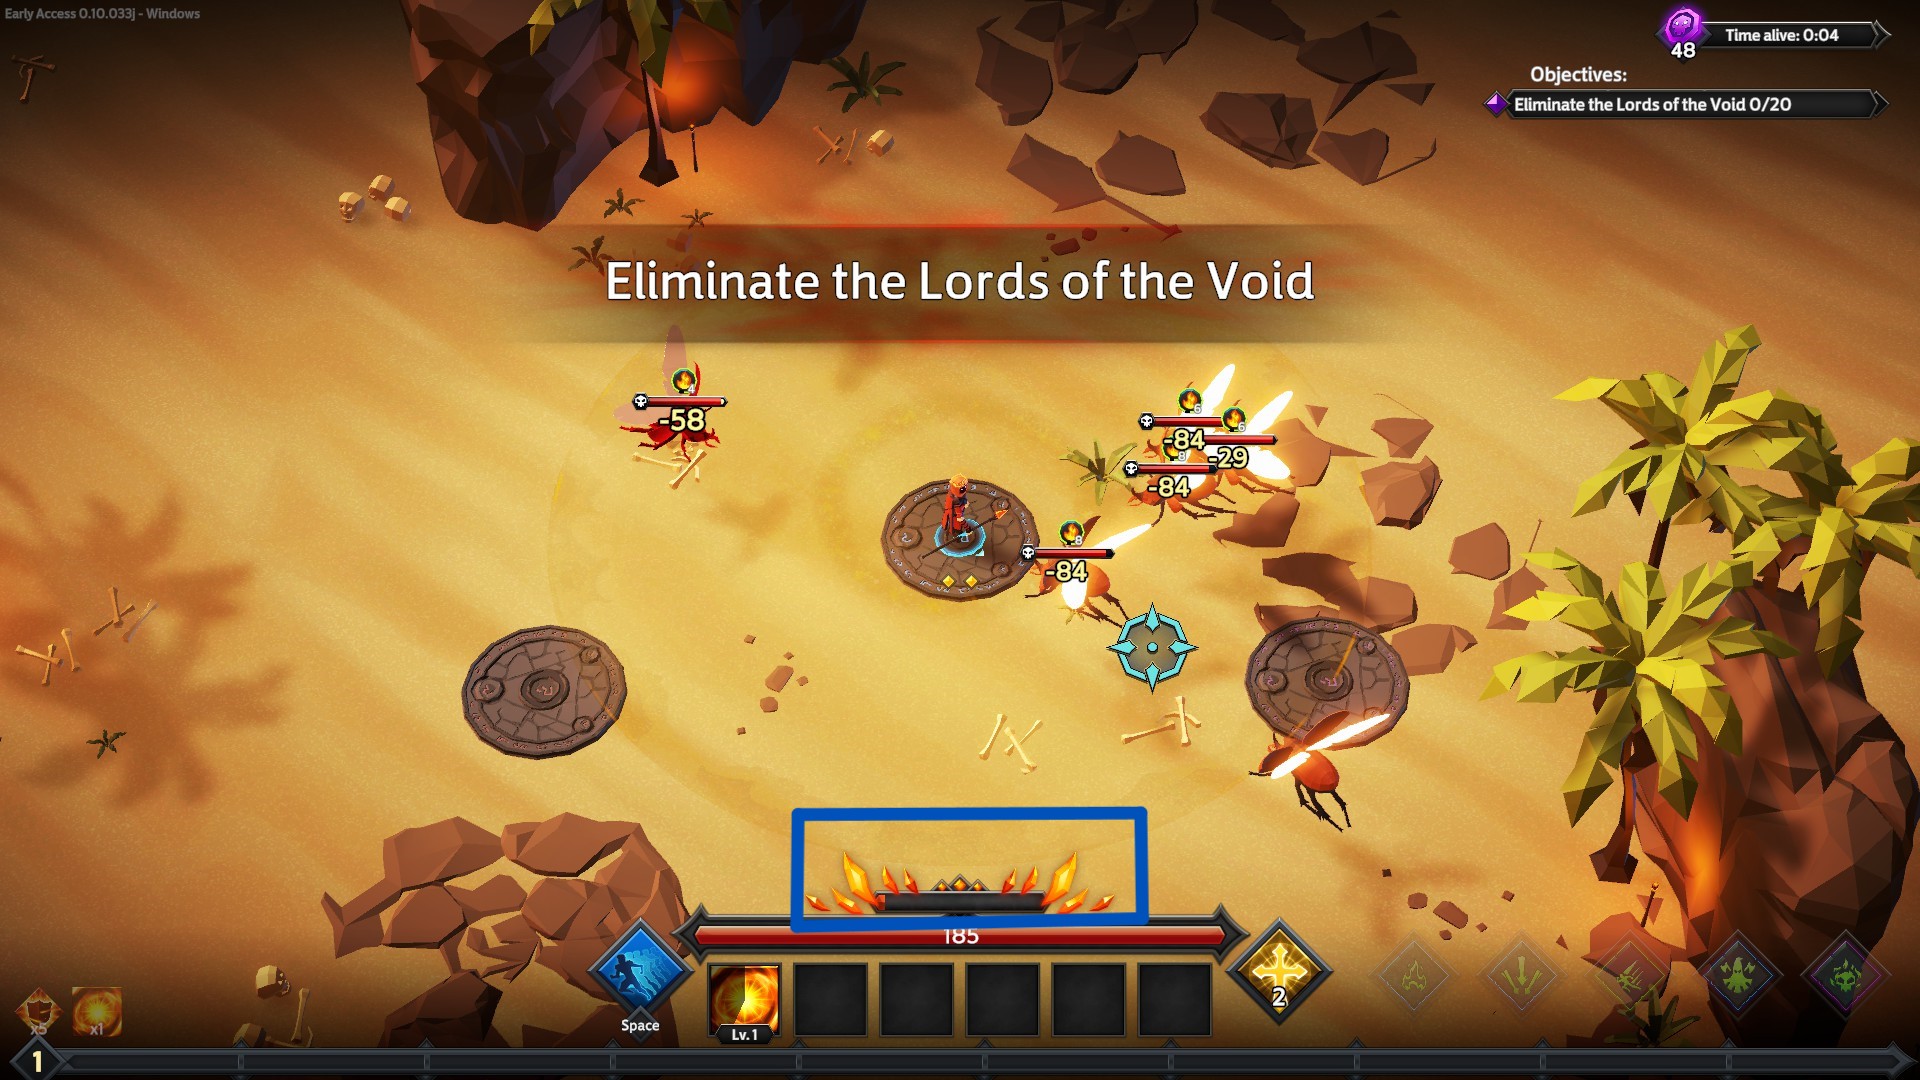
To activate the Pyromancer’s Ascension ability, one must patiently wait for the prominently highlighted bar to fill completely. 時間とともに, the Pyromancer’s bar will gradually fill; しかし, it will diminish with each strike. When the bar reaches its full capacity, a portal will materialize at the location where you were when the bar reached its maximum. Upon entering the portal, the Pyromancer’s Ascension ability is activated, granting various benefits (which are outlined as you hover over the bar). Throughout the Ascension phase, the Pyromancer’s bar will gradually deplete, and will also be reduced by an enemy’s attack.
Tips for Pyromancer
Runes that work best for Pyromancer:


- 死刑執行人: The Pyromancer requires additional damage to increase his output. While the damage output is generally consistent, it often falls short of the desired level.
- ダッシュマスタリー: To maximize the Pyromancer’s Ascension, it is crucial to prioritize evasion and avoid taking damage. Dash Mastery greatly increases the distance travelled while dodging, making this goal easier to achieve.
- Weapon Mastery: The Pyromancer’s primary abilities are typically lackluster (with the exception of the second weapon). While the secondary abilities of the second weapon do not always provide substantial support, they are often more beneficial than having no additional support.
- Multicast Madness: Multicast is essential to the Pyromancer. Given the abundance of abilities with damage over time effects, stacking these effects is beneficial and increases overall power.
- Singular Focus: 興味深いことに, the Pyromancer has several commendable skills that synergize well with Singular Focus. This choice is more of a preference for personal enjoyment than a strictly optimized selection.
- Fire Inclination/Fire Mastery: I have grouped these two skills together because of their common use in fire-focused builds. The effectiveness of these skills increases proportionally with the number of Fire-based abilities unlocked. 注目すべきは, しかし, that achieving a full fire build requires unlocking the Spellblade’s fourth weapon at Curse 48.
- ジェネラリスト: This skill comes in handy when running a build that deviates from a full Fire specialization. Additional damage is always beneficial to the Pyromancer.
Recommended Skills: Perhaps… Incinerate?
残念ながら, I cannot make extensive recommendations to help the Pyromancer significantly. While the Pyromancer’s Ascension synergizes well with the fast-firing Dragonic Flames, it provides little more than additional damage, and even that is not substantial. 残念ながら, any recommendations I could make for this Ascension would also apply to the Pyromancer in general. It seems that the Pyromancer’s fourth weapon inherently supports this ascent. 加えて, to use it effectively, it is necessary to acquire one of the Pyromancer’s runes from the Ascension skill tree. そのような, I am unsure if I should include a build specific to the rune itself, as it is more about the rune than the Ascension itself.
Houndmaster Ascension
Third is the Houndmaster
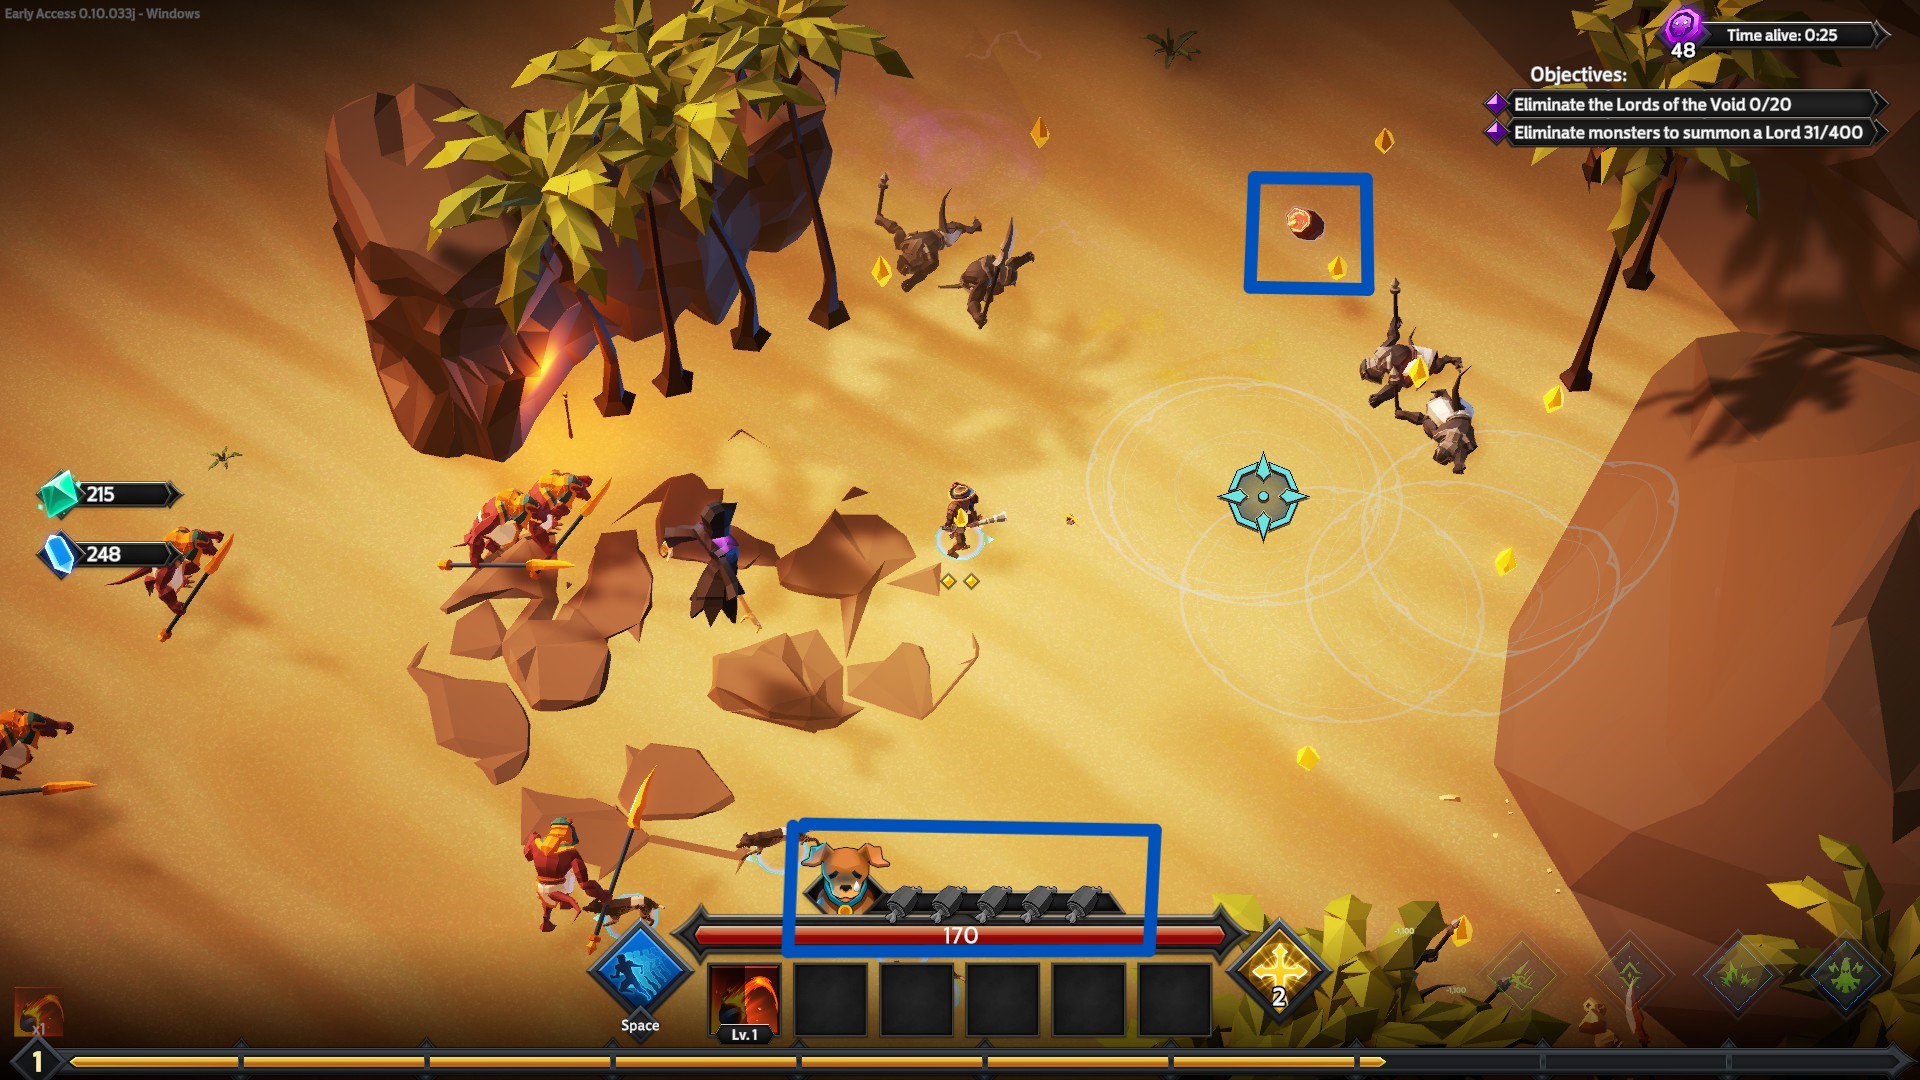
The Houndmaster’s Ascension is different from the others. 他とは異なり, the Houndmaster does not gain any additional benefits from Ascension. その代わり, his loyal companions (the hounds seen at his side during selection) receive additional benefits. When defeating an enemy, there is a random chance that the enemy will drop meat.
Once acquired, this meat can be used to replenish your hunger bar. 技術的には, each companion achieves Ascension once a “meat bar” is full, as each one provides a unique benefit. しかし, I think of Ascension as filling all the bars together. Once you accumulate enough MEAT, your pets will receive all the benefits that are explicitly listed when you hover over the hunger bar. Once the bar is full, your companions’ hunger will gradually decrease (although in my personal experience, it was relatively easy to keep them satiated once it reached maximum capacity).
Tips for Houndmaster
The Houndmaster’s progression revolves largely around the pets, そして私の知る限りでは (correct me if I’m wrong), the pets are unaffected by any runes or skills you choose to use with the Houndmaster. したがって, any suggestions I could make would be limited to a general Houndmaster guide. There’s not much else to go into here.
Below is a summary of each pet’s abilities:
- First Weapon: Inflicts Damage and Wound Status.
- Second Weapon: Inflicts damage and Fragility Status.
- Third Weapon: Inflicts damage, although I am unsure of the exact debuff and its nomenclature.
- Fourth Weapon: Inflicts damage and frailty status.
Spellblade Ascension
Fourth is The Spellblade!
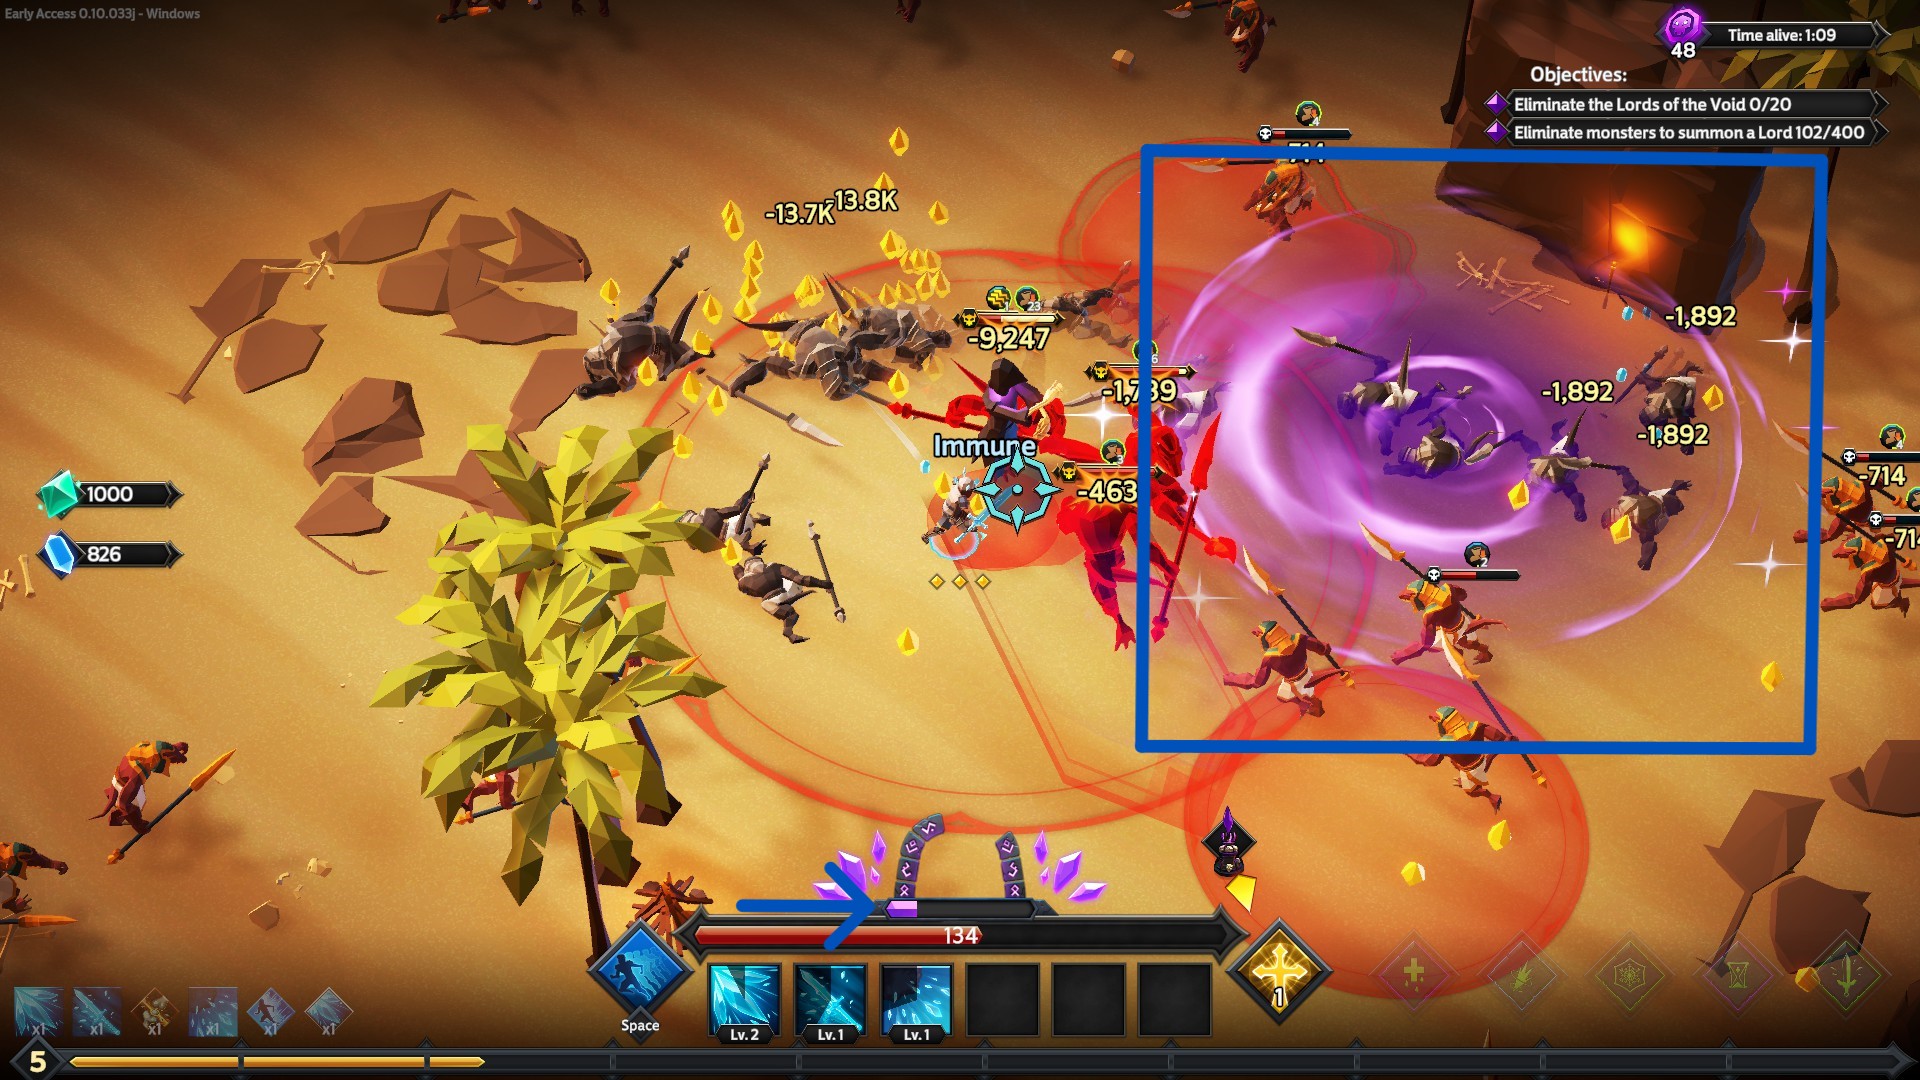
The activation process for Spellblade Ascension is somewhat complicated. In order to initiate Spellblade Ascension, you must stand within the highlighted purple pool. As the bar progresses and reaches 25% 容量, a portal will manifest nearby. Passing through this portal will successfully Ascend the Spellblade and grant the associated benefits, which are detailed when hovering over the aforementioned bar. The acquisition of each benefit is dependent on the level of the bar at the time of portal traversal. It is important to note that even if the bar exceeds the required threshold while already Ascended, the subsequent benefit(s) will not be granted, although such a circumstance is highly unlikely.
Tips for Spellblade
初め: Astral Beyblade
Now let’s delve into the more intriguing aspects! Suggested runes for the Spell Blade are next. There are three approaches you can take when it comes to using your Ascension.
The first is what I prefer to call the Astral Beyblade strategy. This method focuses on quickly eliminating enemies by using evasion and strategic positioning to trigger Spellblade Ascension.
Recommended Runes:


- Arcane/Slash Inclination: Your primary goal is to reach Arcane Blade status as quickly as possible, as you’ll be relying on vulnerable and exposed stacks to dispatch enemies. Acquiring Bladestorm early will also prove beneficial.
- ダッシュマスタリー: Remember when I mentioned that dodging and positioning are paramount? You need to become adept at staying in the purple area while dodging and fighting enemies.
- Multicast Madness: This ability allows you to cast spells multiple times, increasing the number of vulnerable and exposed stacks. 結果として, your Arcane Blade damage output is amplified.
- 無謀: This build comes with a trade-off. While the extra damage is appealing, you’ll always be on the verge of defeat. It is recommended for those who enjoy living on the edge or have mastered this particular play style.
- Weapon Expert: Only necessary if you need some extra help in the early stages. アッパーカット (first weapon) is useful if you lack crit and wound synergy, while Astral Overload (second weapon) is a good starting option. しかし, both become less effective as you progress.
Recommended Skills: Arcane Blade, Blood Frenzy, Arcane Power.
- Arcane Blade: The cornerstone of this play style. それがなければ, you’ll have little to rely on.
- Blood Frenzy: Increases casting speed and movement. Certain Spell Blade skills can be slow, so increased casting frequency is beneficial, while improved movement helps with evasive maneuvers.
- Arcane Power: Only necessary if you’re experiencing unfavorable RNG. If you’re lucky enough to get favorable multicast upgrades to your skills, you can skip this particular ability.
2番: Frost Knight of Steel
This particular configuration is in contrast to the Astral Beyblade approach, which prioritizes the use of armor, HP, 氷, and Titan’s Cleaver. 私の意見では, this option is the most user-friendly of the three alternatives. Its simplicity combined with its effectiveness is remarkable. The goal of this build is to have enough armor and HP to withstand all incoming damage while accumulating points on the Ascent meter. 特に, this build offers greater versatility than the first and third strategies, as it allows for a greater degree of control over the timing of Ascension acquisition. The recommended runes and skills are tailored to complement the use of the Spellblade’s third weapon.
Recommended Runes:

Thrust Mastery is an essential requirement to acquire Shield Wall. You can also opt for Shield Bash, but in my opinion, Titan’s Cleaver proves to be a superior choice for this particular build.
Weapon Expert, the second ability, converts all instances of slow into paralysis. Having slower enemies is always advantageous and can prove to be useful when you find yourself overwhelmed.
Ice Inclination serves as the primary method of attack, and acquiring Ice skills is crucial for achieving success.
Sure-Footed assists in mitigating damage.
Recommended skills for this build include Shield Wall, Titan’s Cleaver, and Ice Vortex.
Shield Wall allows you to endure enemy attacks without succumbing to death.
Titan’s Cleaver’s damage output scales with the amount of armor you possess. The more armor you have, the more damage it inflicts!
Ice Vortex deals damage based on the number of slow and paralysis stacks on enemies. By obtaining Ice Inclination, you gain access to the necessary Ice skills that enhance your damage output. Ice skills automatically apply slow or paralysis. Once you obtain the synergy for slow, you will also begin to apply fragility, resulting in even greater damage!
三番目: Inferno Swords
This particular build focuses on using the second ability of the fourth weapon to effectively eliminate all nearby enemies by inflicting Burn and Melt Conditions. A significant drawback to this build, しかし, is its vulnerability if the fiery swords fail to dispatch the enemies or if they converge on a single flank. If they manage to get past this line of defense, you won’t have the firepower to deal with them on your own. It should be noted that the selection of runes and skills for this build revolves around maximizing the potential of the Spellblade’s fourth weapon.
Recommended Runes:
- Weapon Expert: Acquiring the secondary skill of this weapon is imperative for any meaningful progress! It is highly advisable to obtain it right from the outset.
- Multicast Madness: Multicast Madness greatly enhances the capacity of your summoned swords to strike multiple times. With a stroke of luck, you may even amass a substantial number of swords early in your journey.
- Fire Mastery/Inclination: Proficiency in fire spells is indispensable for optimizing burn accumulation.
- 死刑執行人: Should your adversaries manage to breach your sword defenses, the Executioner skill becomes invaluable in augmenting your offensive capabilities.
Recommended skills: Fiery Blades, ファイアストーム, Bladestorm, 燃焼,
- Fiery Blades: This skill serves as the foundation of this particular build, rendering it indispensable.
- ファイアストーム: Unleashing a wide-reaching area of effect, this skill inflicts damage upon enemies and subjects them to the burn condition upon impact.
- Bladestorm: Similar to Firestorm, this skill relies on the burn debuff acquired through leveling up to replicate its effects. しかし, obtaining the necessary burn debuff becomes almost certain, enabling you to apply additional burn effects.
- 燃焼: When foes come within the range of this attack, it promptly subjects them to the burn condition. By combining all the debuffs attained through leveling up and employing multicast, you can swiftly accumulate a multitude of burn stacks.
Arcane Weaver Ascension
Fifth is the Arcane Weaver!
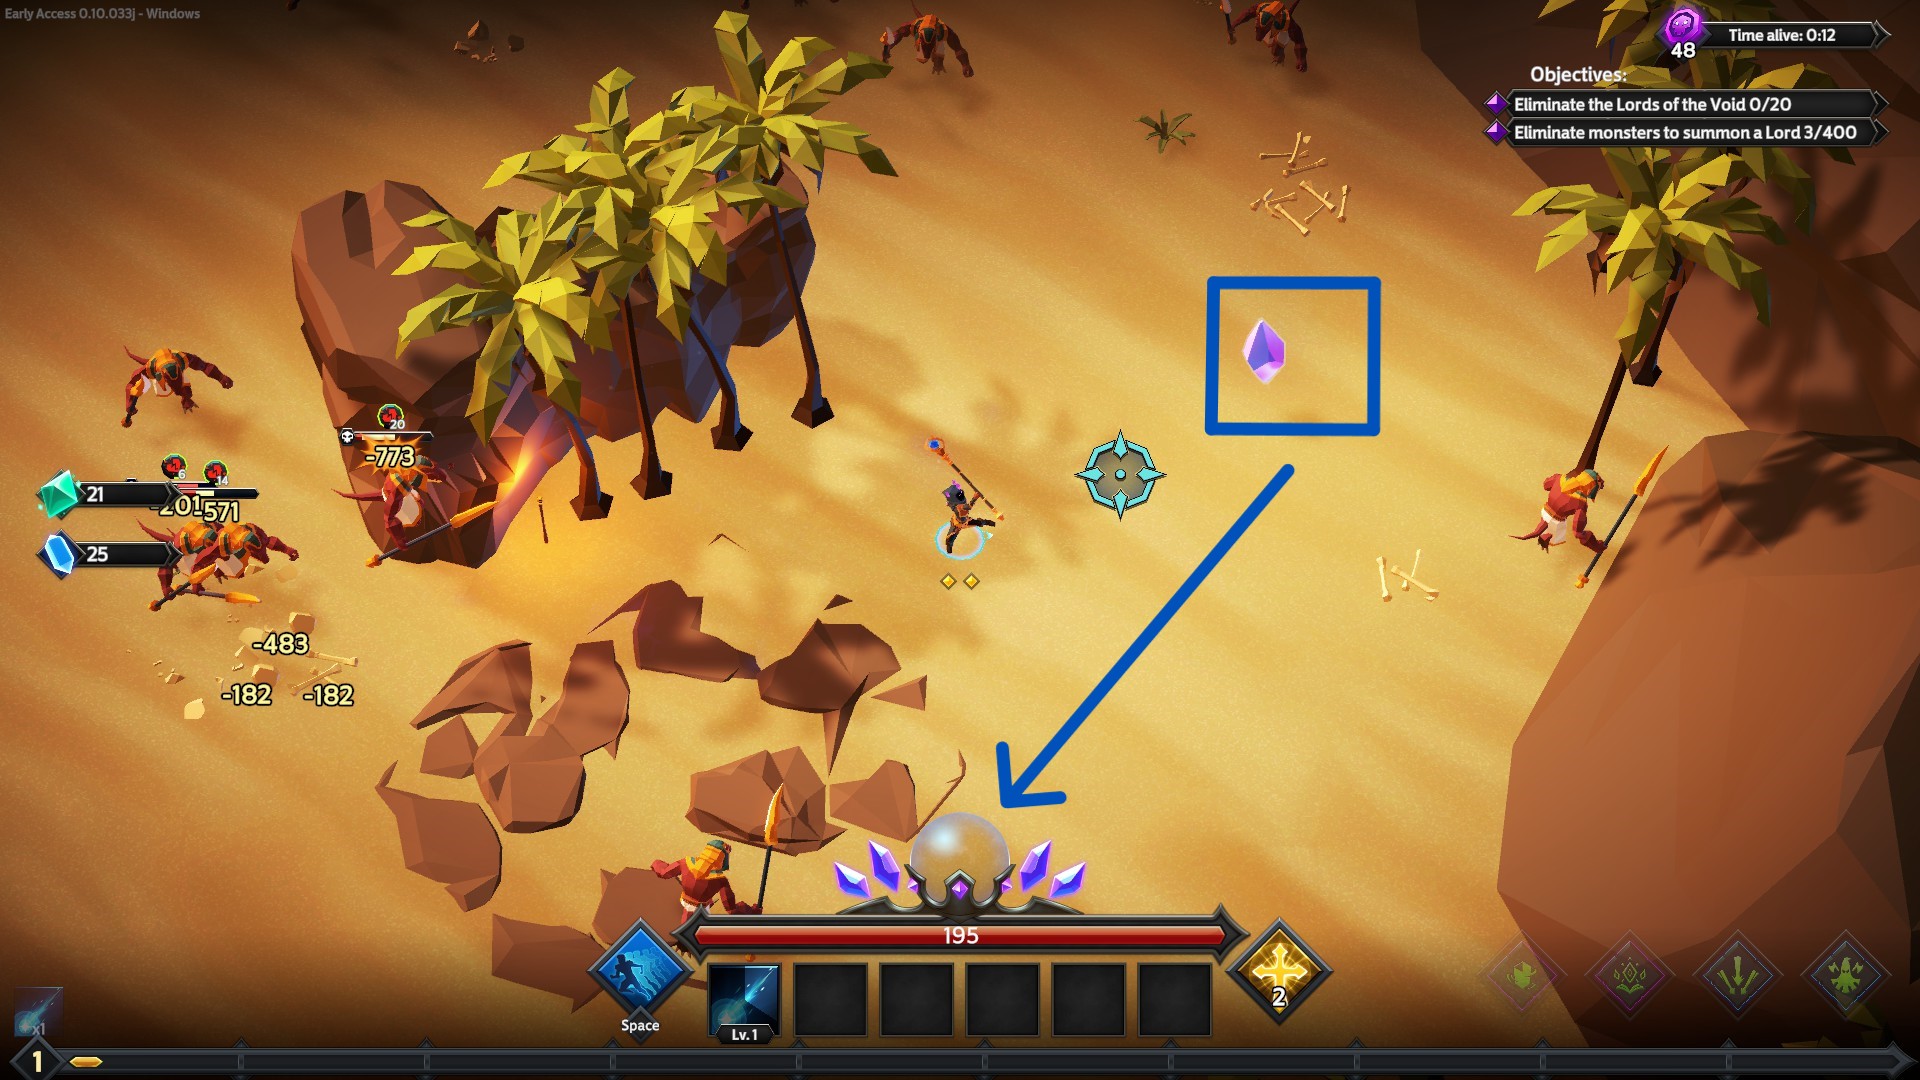
The Arcane Weaver exhibit simplicity in its mechanics. As time elapses, crystalline formations resembling the highlighted specimen descend from the heavens. These crystals are to be collected, and upon filling the designated circle, the Arcane Weaver will undergo Ascension. During the Ascended state, certain advantages outlined in the interface will become accessible upon hovering over the circle bar. It should be noted that while in the Ascended state, the Arcane Weaver’s Ascension bar will gradually deplete. There are no significant additional details to convey regarding this matter.
Tips for Arcane Weaver
The Arcane Weaver is also simple. Collect the magic stones and get the effects of Ascension!
Recommended Runes:
- Singular Focus: This constitutes the essence of the meta configuration comprising six beams.
- 死刑執行人: Given the additional multicast granted by Ascension, it would be prudent to accumulate debuffs to enhance the damage output while launching a multitude of attacks.
- Holy Inclination: Optimal for pursuing the Light Beam configuration.
- Arcane Inclination: Ideal for pursuing the Arcane Beam configuration.
- Multicast Madness: Presumably designed for use with this particular character. Unleash a series of multiclass abilities, allowing your utilized skills to go into a frenzy!
Recommended abilities: Light Beam, Arcane Beam, Lightning Beam.
本質的には, the Arcane Weaver exhibits an inclination towards excessive multicasting! Employ this character to witness your desired skills being triggered repeatedly, yielding a satisfying outcome. しかし, exercise caution when deploying the beam configurations, for once any of them are employed, nothing else will rival the sheer damage they unleash. Consider yourself duly warned.
Sentinel Ascension
The Sixth is The Sentinel!
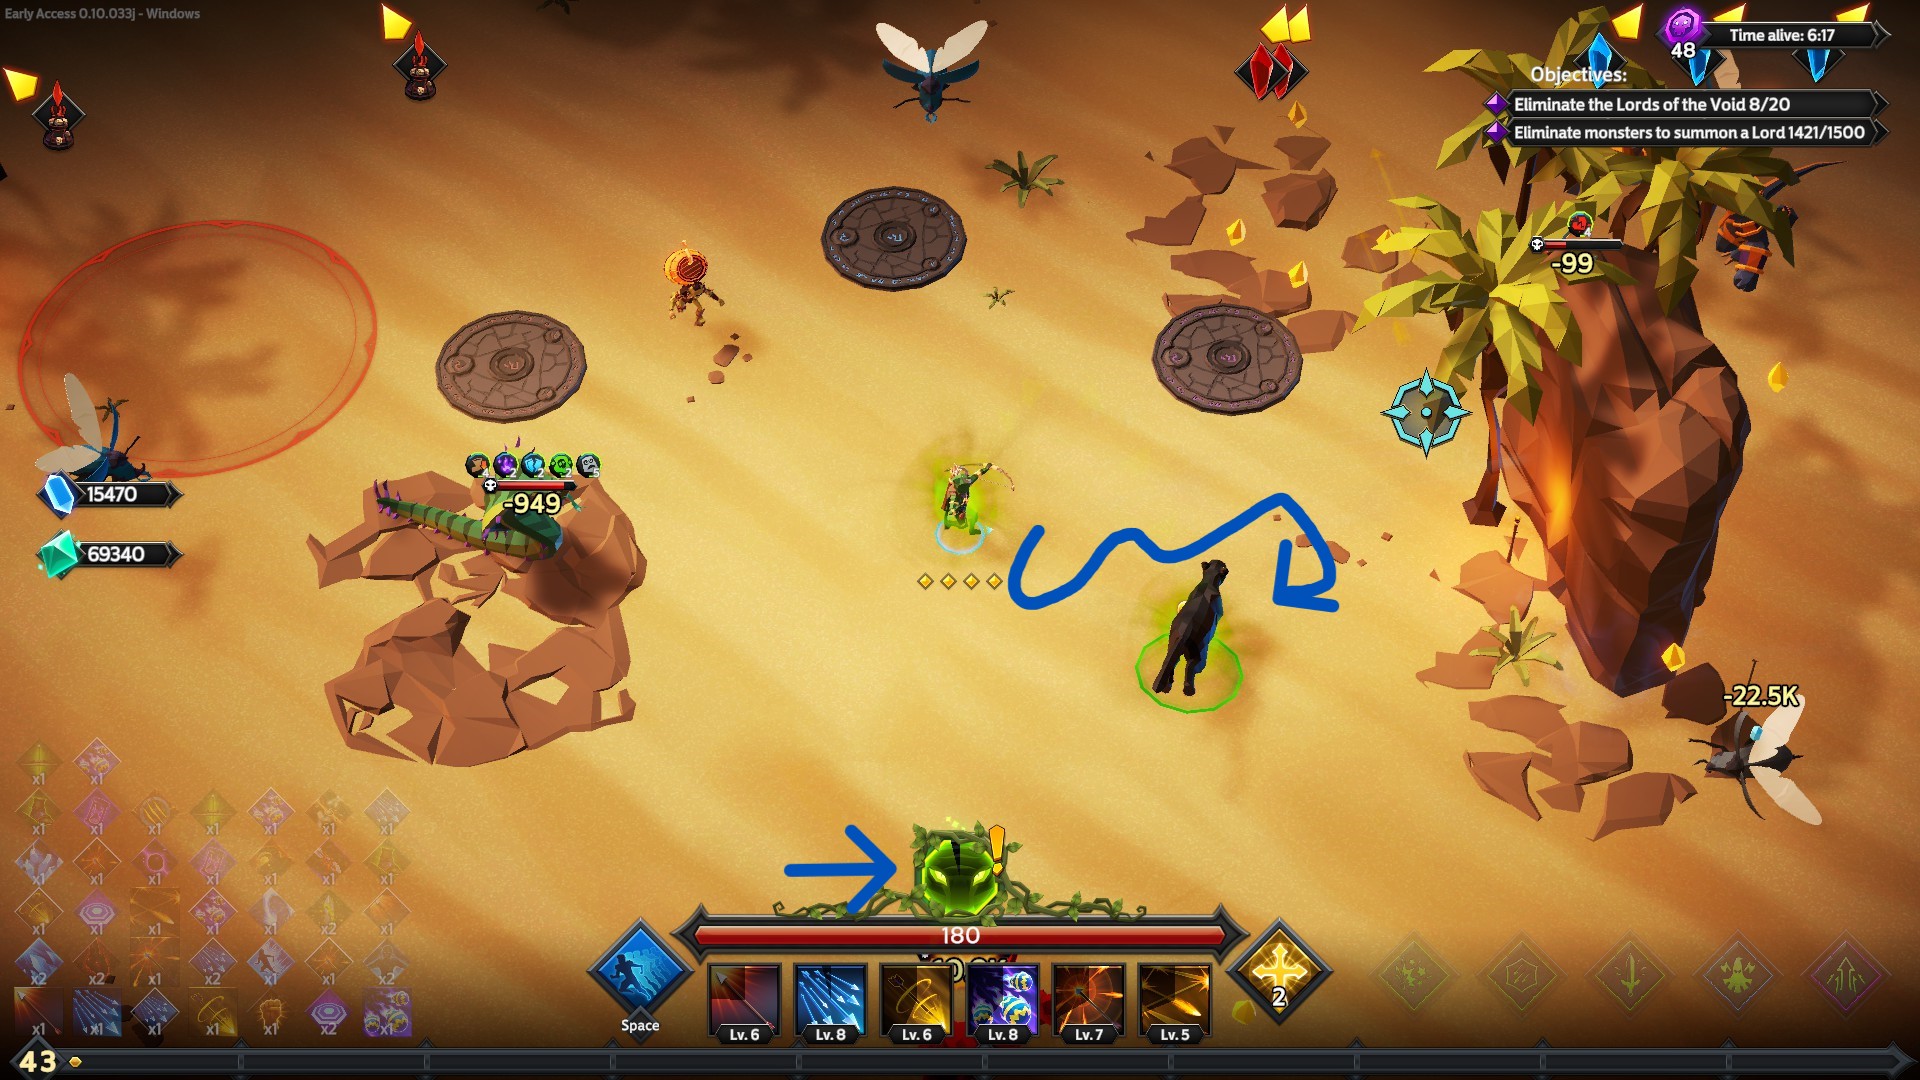
This particular task presents a challenge! In order to initiate the Ascension of The Sentinel, one must locate the animal indicated by the curved arrow. Pursue the identified animal until the Ascension bar transitions from a grey hue to a complete green, indicating the successful Ascension. Upon Ascension, The Sentinel acquires various advantages, which can be viewed by hovering over the ascension bar. As the Ascended state gradually diminishes (shifting from green to grey), the animal will be dismounted once the bar becomes empty. I am uncertain about the game’s mechanism for determining the spawn location and timing of the animal, thus further experimentation is required.
Tips for Sentinel
初め: Remember when Ice had long cooldowns?
Utilizing The Sentinel’s Ascension ability can be challenging, but once mastered, it enables impressive feats. It is advisable to equip the Dash Mastery rune in general, as during the Ascension process, one will need to engage in frequent evasive maneuvers. しかし, this particular build alleviates some of these challenges by employing Ice, slow effects, and paralysis to deter adversaries. Once Ascended, the primary weapon and ice-based skills of The Sentinel become remarkably potent.
Recommended Runes:

- Dash Mastery is a crucial skill if one intends to utilize the ascension feature following the emergence of the initial bosses, unless they possess precise knowledge regarding the timing and appearance of their tamed creature.
- Ice Mastery is a prerequisite for acquiring ice-related abilities that impede the movement of adversaries.
- Ice Inclination accelerates the acquisition of aforementioned ice skills. While not obligatory, it proves highly advantageous for expediting the development of your character.
- Multicast Madness proves advantageous for executing spread shots, and is also highly effective when used in conjunction with Ice Vortex.
Recommended Skills: Spread Shot, Ice Vortex, Severe Cold, Freezing Blow.
- Spread Shot: When combined with the gradual reduction in enemy speed achieved through leveling up, this skill enables rapid application of the slowing effect. Once ascended, the slowing effect becomes significantly accelerated.
- Ice Vortex: This skill serves as the ultimate finishing move in any ice-focused build. それがなければ, your damage output will be significantly reduced.
- Severe Cold: Unlocked upon obtaining the second weapon of The Elementalist. This skill proves immensely useful for bouncing between enemies and applying the slow effect to each target. When ascended, it becomes extraordinarily potent.
- Freezing Blow: Unlocked upon obtaining the second weapon of The Elementalist. This skill converts all accumulated slow stacks into paralysis, greatly impeding enemy movement. This allows you to focus primarily on acquiring your mount.
2番: You look quite fragile… Here’s a bomb!
This particular build centers around utilizing the Sentinel’s initial weapon basic skill, Fan of Bombs, to effectively apply a substantial amount of fragility. 加えて, it incorporates other types of bombs that can inflict fragility and weakness on multiple enemies simultaneously. It’s worth noting that this build is quite delicate, so it is highly recommended to utilize Dash Mastery to enhance your dodging abilities.
Recommended Runes:

- Dash Mastery is essential for maintaining high mobility and swift movement. It greatly aids in evading attacks and maximizing your speed.
- Multicast Madness offers the advantage of additional casts for all your fragility and weakness debuff requirements. It’s a valuable asset.
- Bomb Mastery is necessary to acquire the Weakness Grenade, Debilitating Bomb, and Fan of Bombs skills.
- Bomb Inclination is crucial for swiftly generating fragility, ensuring you can apply this effect promptly.
Recommended skills for this build include any abilities that can apply fragility or weakness debuffs.
Fan of Bombs serves as the distinctive skill associated with the third weapon of the Assassin. Unlocking this weapon is necessary to obtain this skill. The damage inflicted by Fan of Bombs scales according to the number of fragility and weakness stacks on the target. Since fragility and weakness increase your overall damage output, you already possess a built-in means of amplifying your damage.
Both builds face two evident challenges: the randomness of your tamed creature’s spawn location and the difficulty of filling up the bar while simultaneously fending off enemies. しかし, it’s important to note that these challenges primarily stem from the Ascension mechanic itself rather than the builds per se.
Paladin Ascension
Last one(for now at least) The Paladin!
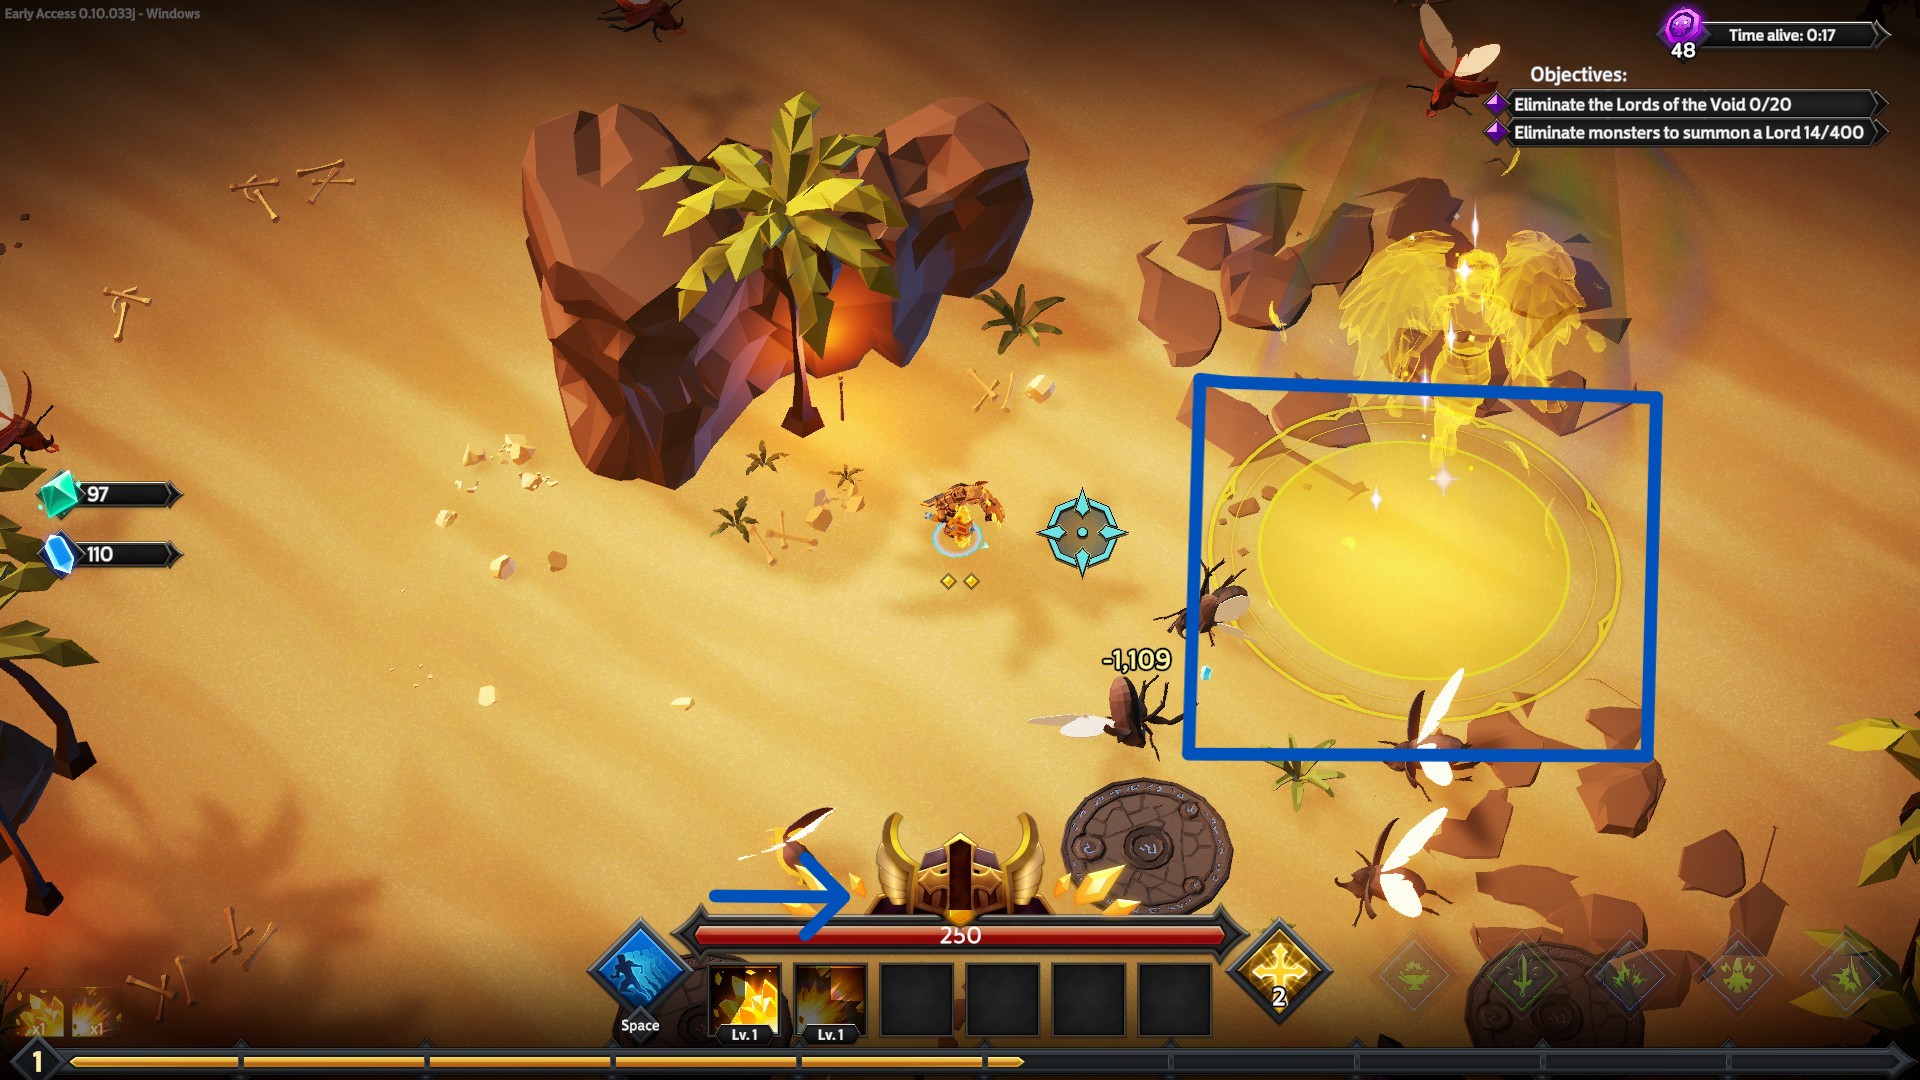
The utilization of the Paladin’s Ascension ability can prove to be challenging, yet it becomes truly remarkable once mastered. At regular intervals, an angel and a circle within a highlighted area will appear. If one remains within the circle until the angel disappears, the bottom bar will gradually fill up, eventually triggering the Paladin’s Ascension. While in the Ascended state, the Paladin acquires various benefits, which can be viewed by hovering over the ascension bar. しかし, it is important to note that the Paladin’s Ascension bar gradually diminishes during this phase.
Tips for Paladin
Upon closely examining the Paladin and thoroughly evaluating their abilities alongside other available options, it has become evident that the Paladin is excessively dominant. 逆説的に, attempting to focus on building a strategy centered around utilizing the Ascension ability tends to yield inferior results compared to simply employing the Paladin’s standard capabilities. 個人的には, I recall numerous instances during gameplay where my attempts to utilize the Paladin’s Ascension led to a quicker demise compared to employing conventional methods.
それにもかかわらず、, there exists a minor technique that involves precisely timing one’s movements just as the circle begins to shine and the angel starts to fade away. By executing this maneuver, it is possible to gradually fill the ascension bar. しかし, it is advisable not to excessively concentrate on this tactic. Constructing a build around the Ascension ability is not particularly recommended due to the following reasons: 1) It is challenging to remain within such a confined circle and accurately time movements, と 2) the Paladin does not genuinely require it.
Should anyone possess any suggestions for a build that focuses on the Ascension ability, please feel free to share them in the comments section (rest assured, appropriate credit will be given to contributors in the guide).
これが今日私たちがこの目的で共有するすべてです ソウルストーンの生存者 ガイド. このガイドは元々、次の者によって作成および執筆されました。 AquaineBay. このガイドを更新できなかった場合, これに従って最新のアップデートを見つけることができます リンク.