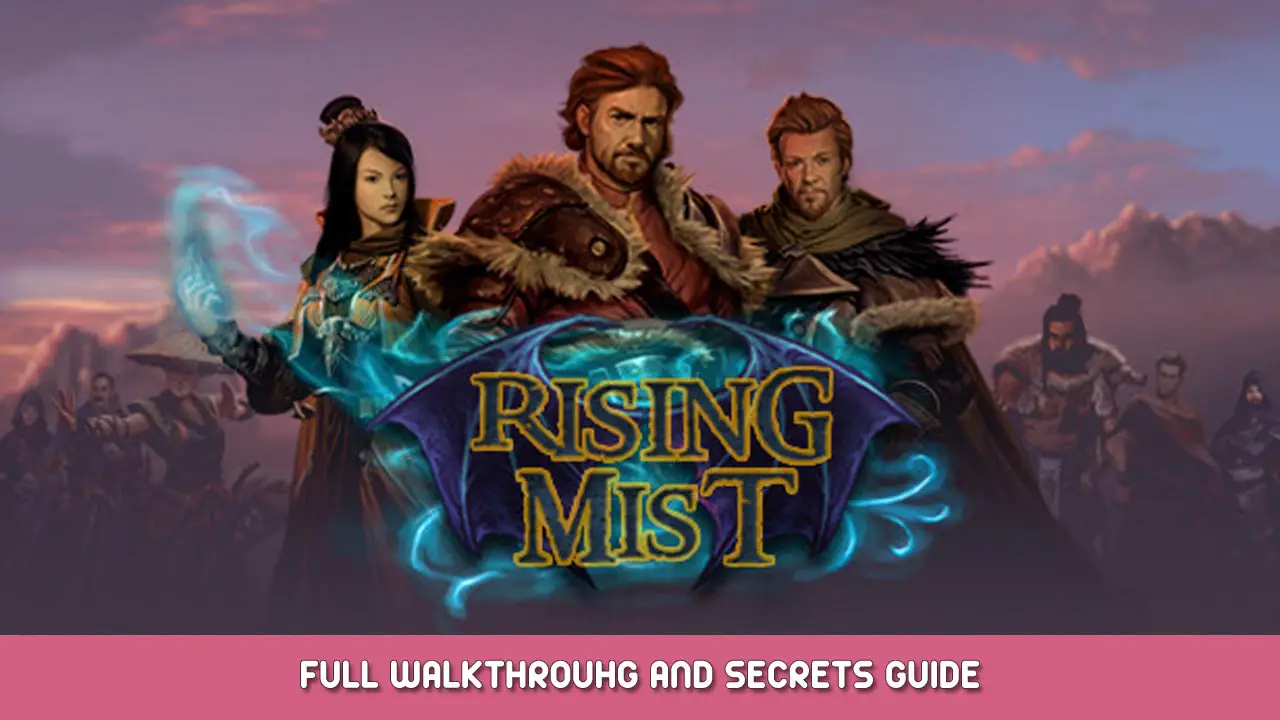
- タイトル: Rising Mist
- 発売日:
- 開発者:
- 出版社:
Information about Rising Mist is still incomplete. これを使用してゲームの詳細を記入するのにご協力ください。 お問い合わせフォーム.
This walkthrough will cover each individual mission (and hidden missions) in order to progress the story in the way, how it was meant to be played. You can play with your own pace and order of course.
ノート:
- Read the underlined text carefully.
- The game has missions that are visible to the player from the in-game task book. And there are hidden missions that are not visible as a task or a to-do mission to the player and the player needs to figure them out.
- My walkthrough is covering both and goes chronologically about how the game makes sense and how the story leads to an end.
- Do not confuse these mission numbers that I assigned to your in-game task book counts, rather read the content of my mission description to figure out where you are at in your game.
ミッション 1
Stillshire, this is where our journey begins. Once you have met Alira the in-game Guide you should go to the Tavern in the Village. Timon the tavern keeper will ask you to plant something on your filed and report back to him. You will also be given a new location on your map to get to your fields.
説明:
- ミッション 1: Grow any kind of crops on your field and go back to the tavern.
- 完全なミッション 1: Go to the fields, plant the seeds, harvest the crop and report back to Timon in the Village.
ノート: After completing Mission 1, Timon will tell you where to find a miller that lives outside Stillshire and will give you his location.
* ヒント: Seeds are located in the closet in your home. Later you can buy them in the Marketplace in Navalon and Tarrogar also from the traveling merchant and from his Bazaar that is located behind the Vurarus mountains, once you unlock the path.
ミッション 2
- ミッション 2: 持ってくる 15 pieces of wood to Kill.
- 完全なミッション 2: Return to Stillshire, select the small house located on the far right. You enter the logging camp. Click on the character. Garland will give you tools to chop trees and saw. Click on the Axe located on the right to Garland. Start chopping. Then collect the wood and click on the Saw located on the left to Garland. Cut the Logs to Wood here, this takes a few day depending on your skill tree.
入手したら 15 pieces of wood deliver them to the Kil the miller.
* ヒント: Logs and wood can be later purchased in the Marketplace in Navalon and Tarrogar.
ミッション 3
- ミッション 3: 持ってくる 8 pieces of fabric to Kill.
- 完全なミッション 3: Return to Stillshire, go to your home and collect the fabric from your closet. If you sold it or don’t have it, then the fabric can be found every so in the Logging camp, on the second crate.
入手したら 8 pieces of fabric deliver them to the Kil the miller.
* ヒント: Fabric can be later purchased in the Marketplace in Navalon.
ミッション 4
- ミッション 4: Check up on Kil after 10 days once repairs on his mill are completed.
- 完全なミッション 4: 待って 10 日. Then return to Kil. His mill should be fully restored.
ノート: Once the mil is restored, return to Stillshire and visit Timon in the Tavern.
After you talked to Garland in the tavern, Timon will ask you to bring him some fish. The path to the lake was given to you by Garland and is now on your map.
ミッション 5 – MAJOR EVENT
- ミッション 5: キャッチ 3 bluegill fish and deliver them to Timon.
- 完全なミッション 5: Go to the fishing spot. Note you first need to travel to the Mil and from then to the fishing spot. キャッチ 3 bluegill fish. Return to Stillshire and visit Timon in the tavern. Once you give the 3 bluegill fish to Timon, we will reward you with a travel permit for Navalon.
ヒント:
- To start catching fish succesfully and effective upgrade your fishing skill in the skill tree. Basic hook and Bait are very important for Mission 5.
- If you lack skill points, you can always chop wood, saw wood, collect plants and harvest your fields to collect them at this point. Even battles bring you skill points. When in battle every so often an icon with a? (A question mark appears), if you get it there is a chance you get somewhere from 5-35 skill points for it.
- You can sell any fish to get Gold or you can eat them to replenish your energy levels.Navalon, this is the next step in your journey and here is where you should be if you followed the steps above.ノート: Once you reach this city go to the tavern on the right and talk to Tostin (Timons brother).
Tostin will tell you about strange disappearances happening and strange sounds coming from the nearby woods and that you should return if you are interested in hearing more. Return at any point to testing to continue the journey.
ミッション 6
- ミッション 6: Find out what is going on in the woods and let Tostin know.
- 完全なミッション 6: Go to the woods, right of Navalon. You will be starteled by a stranger who will give you furter instruction. Then you need to return to Navalon and visit Tostin in the tavern to report back to him.
- OPTION: Here you can choose to do as the stranger told you to or to tell the truth about the resistance in the wood. This action will define your gameplay experience so choose wisely.
ノート: Once you made your decision, return to the stranger in the woods.
* ヒント: You can sell the Dragon head that the stranger gave you in the Marketplace.
ミッション 7
- ミッション 7: Deliver a package to Kil.
- 完全なミッション 7: Now visit Kil at his mil and deliver him the package you recived from Eldaiston.
ノート: Once you delivered the package to Kill, return to Eldaiston.
ミッション 8 と 9 – MAJOR EVENT
- ミッション 8: Deliver preserved food to Eldaistons camp X/50.
- 完全なミッション 8 – NEED TO COMPLETE MISSION 9 FIRST: Bring any food to Aenwyn. She will preserve it and you just need to pick it up and deliver it to Eldastion.
- ミッション 9: Find the old lady.
- 完全なミッション 9: Return to Navalon and enter the Inn. On the table is a note. Open it. Now go outside and click on the house with the green roof.
ノート: Now return to Kil the miller and recive the travel permit for Oakenrock.
ヒント:
- Preserved food is more valuable when you sell it than the food you Aenwyn puts in it and also restore your energy more than most of the food you can preserve.
- ヒント: You can preserve most items that you harvest from your fields, any fish you might catch and even some mushrooms.
- ヒント: At this point you can progress the story without completing Mission 8. But there will come a point that you will have to complete this Mission.
ミッション 10 – Oakenrock in the distance
ノート:
- Before you can get there you need to repair the bride between Stillshire and Oakenrock.
- 持っている 15 pices of wood in your inventory and go to the bridge.
Complete now Mission 8 if you have not yet done so and get a Rune.
ノート: Once you complete the delivery for Eldaistion go streight to Aenwyn where she will give you a special Rune.
ミッション 11 – Oakenrock reached
11.1 – Once you reached Oakenrock and you completed Mission 8 AND you have received the Rune from Aenwyn, there is a man standing next to the tower.
11.2 – Start with him and pay him for the information about Belos. Enter the Inn and come back out.
11.3 – The informer is gone, but a woman is standing next to a House on the right.
11.4 – Brew at least 1 potion.
要件:
- Atleast 1 recepie found,
- Upgrade to the potion brewing skill in the skill tree.11.5 – Collect the potion at Olidas once it is finished.
11.6 – A wild woman will appear, click on the Rune you received and immediately click on her.
11.7 – 待ってください 3 日. Then go to the Inn in Oakenrock. A letter will be waiting on the table. Read it. You will be given Mission 11.
11.8 – Go to Olidas and she will give you Mission 12.
ミッション 12
- ミッション 12: Bring the chest that is in the store in Navalon to Olida.
- 完全なミッション 12: Go to the marketplace in Navalon and speak to Bemam. 少なくとも 1 free inventory spot. He will give you a chest that he had stored for Olida. Delivery this chest to Olida.
ノート: Olida will also reward you with a location on your map that leads to the Rewood forest.
Hidden Mission 13
- ミッション 13 – Unofficial: Bring ingredients for the Stunny Mist potion.
- 完全なミッション 13: Find and grow the following ingredients for the Stunny Mist potion.
6x Fields Berries, 5x Wild Root, 12x Mistly Flowers and 1000 金. Now wait for 30 日.Field Berries – Buy the seeds from the traveling merchent in Stillshire or at the marketplace in Navalon.
Wild Root – Buy the seeds at the marketplace in Navalon.
Mistly Flower – Collect them in the Rewood forest east of Oakenrock.Once you have them all in your inventory, go see Olida to start the brewing process.
後 30 days the potion is ready and when you collect it Mission 11 will be completed.
ノート: Items in the marketplace in Navalon change so you will likely need to revisit the shop to find the necessary seeds.
Hidden Mission 14 – MAJOR EVENT
- ミッション 14 – Unofficial: Go to the Redwood forest and meet Belos.
- 完全なミッション 14: In the Redwood forest a wild man will be by the big Redwood tree. 初め, click on the Rune you have and then immediately click on him.
ノート:
– You will need to be at 100% with your energy to proceed to the next step.
– Once you start the next Mission, Belos will give you the travel permit for Eshudell, know as the Fallen City.
– On the map you will have the path to Eshudell.
Once you meet him, ミッション 10 will be completed.
Hidden Mission 15
- ミッション 15 – Unofficial: Defeat the Dragon on the path to Eshudell.
- 完全なミッション 15: Once you are ready, go to the dragon that is blocking the path between Oakenrock and Eshudell. You need to defeat him in order to progress the story.
ノート: Once you reach Eshudell, Belos will greet you.
Belos will introduce you to Ralf who will give you Mission 16.
ミッション 16
- ミッション 16: Find allies in the next 3 cities you visit.
- 完全なミッション 16: You need to find at least 3 new allies in the next 3 cities.
ノート: – This Mission you will be able to complete at a later stage.
– Once you defeat Estruth in a battle, you will be given Mission 17.
– Once you meet Dousy, she will give you Mission 18.
Ralf will let you know that you need to train here. To do this you go up the narrow stairs in Eshudell to reach the training area.
If at this point you have at least 1000 Experience points (collected from battles), then your progress will be fast (you will still need to fight Estruth-twice and Dousy atleast once). さもないと, you need to train here until you reach 1000 XP and defeat Ralf in a trainer battle.
ミッション 17
- ミッション 17: Find a way to tame a dragon.
- 完全なミッション 17: You need to deliver to Estruth the empty page and Magic Powder but you can do this if you brew the invisible Ink. At this moment cannot complete it. Just follow the guide, and you will complete this mission later.
ノート: You complete this mission when you are in the capital Tarrogar and gained access to the Library, collected the secret page, deliver it back to Estruth with the secret page and Magic Powder in your inventory. She will give you this hint the second time you face her.
ミッション 18
- ミッション 18: Deliver Dousy’s letter to a woman named Aanor in the capital Tarrogar.
- 完全なミッション 18: Aanor is not actually in Tarrogar, she fled the city. You can find her at the lake, south of Tarrogar.
ノート: You can only complete this mission after you completed mission 25 and read both messages in the Inn in Tarrogar.
Hidden Mission 19 – MAJOR EVENT
- ミッション 19 – Unofficial: Defeat Ralf in a traning battle.
- 完全なミッション 19: Gain atleast 1000 XP and challange Ralf to a traning battle. 彼を倒しなさい.
ノート:
– He will reward you with the travel permit for the Tartarus caves.
– Now you can return to Oakenrock where Atat the official should have returend. He can now sell you the travel permit for the capital Tarrogar. Buy it from him.
* ヒント: You can ask him to give you a better price for it.
You can also start Mission 20 from now if you go to the Tartarus caves and find Magic Powder (you will need to unlock the mining skill first). Once you have the Magic Powder in your inventory, go to Ebadin in Eshudell and he will further instruct you.
Hidden Mission 20 – Ebadin, magic and Obsidian sword
20.1 – Bring some magic powder from the Tartarus caves to Ebadin and give him that.
20.2 – Collect some limestone from the Tartarus caves.
20.3 – Find the recipe for the wizard’s potion. Located in Oakenrock, 真ん中, 底.
20.4 – Brew Wizards potion.
要件 (both can be found in the Tartarus caves):
– 5x Magic Powder.
– 7x Bulb Mushrooms.
– 80 金.
20.5 – Collect the potion after 15 日.
20.6 – Locate the recipe in Navalon. Right bottom in front of the barrel.
20.7 – Now go to Olida and create the Smokey Obsidian.
要件:
– 10x Limestones (Can be found in the Tartarus caves).
– 4x Wizards Potions.
– 420 金.
20.8 – Collect the potion after 21 days and go to Ebadin in Eshudell.
20.9 – Give Ebadin your sword.
20.10 – Come back after 30-45 日 (depends on your status) and collect the powerful Obsidian Sword.
Hidden Mission 21 – MAJOR EVENT
- ミッション 21 – Unofficial: Get the travel permit for the capital Tarrogar.
- 完全なミッション 21: Return to Oakenrock where Atat the official should have returned. He can now sell you the travel permit for the capital Tarrogar. Buy it from him.
* ヒント: You can ask him to give you a better price for it.
ミッション 22 – Tarrogar in the distance
Before you can get to Tarrogar you need to repair the stone bride between Oakenrock and Tarrogar.
持っている 20 pieces of stone in your inventory and go to the bridge.
ノート:
– You will need the Enables Mining skill from the skill tree.
– Reconstruction of the bridge takes 30 days once you provided the stones.
* ヒント: You can mine stones in Eshudell, the pickaxe is located next to Ralf.
ミッション 22 – Tarrogar reached
22.1 (図書館) – Depending if you want to go to the Library at first or not, click on the second rune you received and immediately click on the Guard. The library will help you with the Mission 17.
22.2 – If you want to focus on the story flow, as does this Guide then just click on the Guard. The guard will clear your entry to Tarrogar.
22.3 – Now start a conversation with the female in the red dress standing on the small balcony. You will recieve Mission 23.
ミッション 23
Tarrogar – Now that you have reached the capital, go to the Tavern and meet Phorowenia there. She will give you your next mission after her introduction.
- ミッション 23: Find and bring 9 Gnome Nightcaps mushrooms to Phorowenia.
- 完全なミッション 23: Now you should have a new location on your map that leads to the Mystic Lagoon, south of Tarrogar. Go there and collect the necessary amount of Gnome Nightcaps mushrooms and deliver them to Phorowenia. The mushroom regrow after 2 日.
ノート: After you deliver the mushrooms to Phorowenia, she tells you to wait 3 days for a letter in the Inn in Tarrogar.
* ヒント: At the Mystic Lagoon, there is Christa Sather. She will give you a hit about the Library, how to get in and the forbidden section in the Library.
Hidden Mission 24
- ミッション 24 – Unofficial: Read Phorowenias and Christas letters.
- 完全なミッション 24: Make a decision if you want to go to Phorowenia in the Tavern or to Christa Sather at the Mystic Lagoon.
ノート: If you picked Phorowenia, now go to the Mystic Lagoon.
ミッション 25 – MAJOR EVENT
At the Mystic Lagoon, there is no sign of Christa Sather, just a pool of blood and a scarf. An unknown female is standing in front of you. Start a conversation with her.
ノート:
– You need to give Aanor the letter which Dousy gave you.
– You recive Mission 26 from Aanor (飼いならす 2 ドラゴンズ).
* ヒント:
– Collect the scarf that is in the pool of blood.
– Return now to Tarrogar and go to the marketplace. Now there should be a small blue purse in the shop, left from Nilaus Sather. Buy this purse and receive the travel permit for Crystalbay.
Now go to the Library (Refer to Mission 22 – Tarrogar reached | 22.1. if you don’t know).
Hidden Mission 27
ノート: ミッション 26 と 29 are same, thats why number 26 is missing.
- ミッション 27 – Unofficial: Deliver invisible Ink to Warmund the librarian.
- 完全なミッション 27: You can brew invisible Ink with Olida the potion maker in Oakenrock.
* ヒント:
– The recipe for invisible Ink is located on the second book shelf, on the right side from Warmund in the middle.
– 3x Bulb mushroom can be found in Tartarus caves.
– 7x Lemons you can buy in Tarrogar. Lemons seeds you can buy also in Navalon.
– 17x Dragon Herb is located at your fields.
– 150 金.
– Takes about 15 days before Olida has it ready for you.
ノート: Once you have the invisible Ink, deliver it to Warmund. See Mission 28.
Hidden Mission 28
- ミッション 28 – Unofficial: Collect the secret page and deliver it to Estruth.
- 完全なミッション 28: With the invisible Ink in your inventory, go to Warmund. He will reward you by clearing the access to the forbidden section. Open the Pink book there and click the empty page (右側). Now go to the training area in Eshudell and meet Estruth there. Have with you the empty page and some Magic Powder.
ノート: Once you ware able to reveal the secret message on the page you are able to tame dragons. ミッション 17 is now completed.
ミッション 29
- ミッション 29: Capture the dragon in the Deadwood Forest.
- 完全なミッション 29: You can only complete this mission if you first go to dragon 1 (between Oakenrock and Eshudell) and throw the Stunny Mist potion at the dragon. Then go to the second dragon (between Tarrogar and Crystalbay) and throw also on this dragon the Stunny Mist potion.
ノート: By doing this you have paired there 2 dragons and they are now your allies. The roads are now also clear.
ミッション 26 と 29 are completed.
Before doing any mission in Crystalbay return to Tarrogar, we have some unfinished business there.
Hidden Mission 30
- ミッション 30 – Unofficial: Defeat the guards in Tarrogar.
- 完全なミッション 30: Every time you enter Tarrogar there is a small chance there will be 1 の 2 character on the screen (left bottom by the Marketplace or right infront of the Library). Click on them if you see them. They will drop a note, pick it up. Now you need to defeat the 3 Guards of Tarrogar.
ノート:
– If you dont see them. Reenter Tarrogar until you see one of them.
– あなたが持っている 3 minutes to defeate the first 2 そしてもう一つ 3 minutes to defeat the last one.
– You complete Mission 16.
* ヒント: If you suceed Tarrogar will have no more Guards, you will be able to enter without talking to the Guard, you will gain a new ally (Medwich and Meera) and you will be 1 step closer to completing the story.
Now go to Crystalbay.
ミッション 31
Crystalbay, everything is coming together and this is the next milestone in your journey.
Once here click on the women in the middle and be sure to have the bloody scarf you found earlier. Now you have the option to tell here the truth about her sister and you can give her the bloody scary, she will reward you later.
You can choose not to do so and just trade her amulets which catch a good price in Tarroger, a better one in Navalon and a great price at the Bazaar.
Talk to the fisherman by the name Fulder. それをやったら, enter the Tavern to his left.
Every so there will be a female captain present inside by the name Aphara. Accept her mission, which leads us to Mission 32.
ミッション 32
- ミッション 32: Help Aphara rebuild the fleet of ships.
- 完全なミッション 32: Chop and saw 65 pieces of wood in Stillshire. Mine Iron Ore in Eshudell, smelt the ore to Iron Ingots. Once you have at least 3 Iron Ingots, smelt them to a Chest of Weapons. Repeat until you have 5.
ノート: You need to deliver:
– 65x wood,
– 5x Chest of Weapons (You craft this with Ebadin in Eshudell. You need to have atleast 3 iron ingots in your inventory, you get them by smelting iron ore with him.)
Crafting process for Chest of Weapons:
Iron ore -> 1Iron Ingot -> Chest of Weapons.
1 Iron ore = 1 鉄のインゴット,
3 Iron Ingot = 1 Chest of Weapons.
Once you have the neccesery amounts in your inventory, bring them to Aphara.
* ヒント: You can drop of any amount you may have on you at any time.
Now wait 30 日. In the mean time, go outside the Tavern and talk to the fisher Fulder again (if he is there, if not talk to him as soon as you see him.)
He will give you the Mission 33.
Talk also to Meretrana, Christas sister. She will tell you that she is making a special amulet for you. Return to her in a few weeks to collect it. ミッション 34.
ミッション 33
- ミッション 33: Find and deliver to Fulder the long-lost magical Harpoon of Ziruma.
- 完全なミッション 33: A regular Harpoon can be found (時々) at the Windy Lake north of Eshudell, collect it. Make sure you also have 4 Magic Powder with you and go to Ebadin, give him the Harpoon and 4 Magic Powder. 待って 30 日. Collect the forged Harpoon and deliver it to Fulder in Crystalbay.
Hidden Mission 34 – MAJOR EVENT
Go to the ship that has landed in the port of Crystalbay. Aphare is there waiting for you. Start up a conversation with her.
- ミッション 34 – Unofficial: Get the travel permit for Winterguard.
- 完全なミッション 34: Return now to Oakenrock. Atat is back in town and you know what that means. Talk to him and get the permit from him. Once you have the permit return to Aphara and go to Winterguard.
ノート: Once you have the travel permit, the path to Winterguard will be visible on your map.[/b]
* ヒント:
– 左側, on a crate sits a small monkey. Collect him and deliver him to Bemam the merchant in Navalon. He will reward you.
– In the center of the ship is a round hole. If you have the special amulet that Meretrana made for you, you can use it here to speed up your voyage time to Winterguard.
ミッション 35
Winterguard, here the end of a great story begins.
Once you enter the City a female figure stand on the stairs. Start a conversation with her. After the conversation with Enlil a small monk will appear. 彼と話してください.
- ミッション 35: Find the third missing rune and bring it to Tulong.
- 完全なミッション 35: Go inside the Inn in Winterguard. Click on the picture on the wall. パズルを解く. And find the rune inside.
ノート: ミッション 16 will also be completed.
* ヒント: Once you solved the puzzle you see 2 hollow spots. Click on each or your runes now and take the Rune of primordial force that appreas before you and give it to Tulong.
Hidden Mission 36 – MAJOR EVENT
- ミッション 36 – Unofficial: Complete the special training and awake your hidden powers.
- 完全なミッション 36: Talk to Enlil once again and discover your past. Once the conversation is over go up the mountain stairs, top left of your screen. Once on the field start your training and collect as many elements as you can. Once you have completed the training talk to Tulong and Enlil in Winterguard.
ノート: You will recieve the travel permit for Nama-Thalor.
* ヒント: You can repeat the session once.
ミッション 37 – Nama-Thalor in the distance
Before you can get to Nama-Thalor you need to repair the bride between Tarrogar and Nama-Thalor.
持っている 25 pieces of wood in your inventory and go to the bridge.
ノート: Reconstruction of the bridge takes 30 days once you provided the wood.
ミッション 38 – Nama-Thalor reached
Nama-Thalor, The holiest and most spiritual ground in Occotera. Go to Nama-Thalor that is marked on your map now.
- ミッション 38: Reach Nama-Thalor and obtain your special ability.
- 完全なミッション 38: Go to Nama-Thalor, Aanor is waiting there for you. Start a conversation with her. その後, talk to Godar and he will perform the ritual.
ノート: You can now start the final battle for Occotera. You can do this by going to your allies screen and clicking the center button. This will start the final battle. The final battle will be exhausting, so stack up on health potions and other potions if you need to.
ミッション 39 – The final battle
The final battle begins.
All of your allies are gathered on top of a hill.
One by one you encourage them and they encourage you for what is to come and even some farewells are exchanged.
You will face 5 opponets and have 3 minutes for each of them.
Ragdrak is the last to cross your path.
ノート: The outcome of the game depends on whether you win the final battle or lose it.
* ヒント: Use your special ability, but be careful, using it too much will result in backfire.
Extra Hints
ヒント 1:
In almost every city there is an Inn and on the wall is a little puzzling. Complete all puzzles in Occotera and 2 passageways will open.
- From Winterguard throughout the great mountain rage which will allow you easy and fast access to Navalon and Stillshire.
- From Stillshire to the Bazaar or the traveling merchant, where all goods are exotic and much more valuable.
ヒント 2:
When you obtain the special ability, return to Stillshire and talk to Timon the tavern keeper. If you purchased all available files he will then give you one last permit. The travel permit is for a secret island in the ocean called, Nev Nen.
これが今日私たちがこの目的で共有するすべてです Rising Mist ガイド. このガイドは元々、次の者によって作成および執筆されました。 marino.osiris. このガイドを更新できなかった場合, これに従って最新のアップデートを見つけることができます リンク.