- タイトル: ピクセルボーイ: The Legend of Tain
- 発売日:
- 開発者:
- 出版社:
Information about Pixel Boy: The Legend of Tain is still incomplete. これを使用してゲームの詳細を記入するのにご協力ください。 お問い合わせフォーム.
This walkthrough will help you to finish the game.
一般情報
Time to finish: ~1.5h
Note that you can technically reach the boss room in less than 5 minutes if you skip all fights, although I’m not sure if you’ll be able to beat the final boss that way.
- Enemies don’t respawn. Kill all enemies that you find.
- Your HP will be restored after you level up.
- The game autosaves whenever you move screens.
- Reload your save if you get poisoned by Venom. You can’t cure that early game. Just press F5 right away and don’t wait for the battle to end.
- Use all stat increase items in battle as soon as you got it.
成果
The only achievement in the game can be obtained just by starting the game.

ピクセルボーイ
Start Your Journey
ウォークスルー
Go around the building from the east side until you are close to the big purple flower. Interact with the flower to obtain ポーション. Exit the area and head south until you reach Formal Garden.
Head to the south area, past the bridge. There is a twinkle near the east bridge. Interact with it to get Resistance Increase. Open the box nearby to get nothing too. Continue heading west to Flooded Plain, then northeast to reach Special Blossoms.
Interact with the twinkle near the body of water to get Attack Increase. There is another twinkle on the right side of the big flower tube that contains マナポーション. Return to Flooded Plain.
Head to the southwest corner of the map. があります Defense Increase lying near the waterfall’s left side. Head to the west exit.
Follow the north path until you see a twinkle near the sunflower fields (the yellow colored ground). を拾う HP Increase. Head to the northwest corner of the map to reach the next screen.

Enter the rightmost house.
があります ポーション next to the potty to the north. You also can rest in the bed to recover your HP and MP here. Feel free to come back to this place whenever you need it. Exit the building and enter the building to the left. Use the right door.
選び出す Magic Increase near the sink. Exit the building and use the left door.
選び出す Super Potion to the east. Return to Park Entry and head to the north exit.
Follow the path until you reach a tent, then cross the bridge. Follow the east path to find Resistance Increase lying on the floor. There are two exits in this area: north and west. Let’s explore the west exit first.
選び出す Agility Increase と マナポーション 南へ. There’s nothing more to do here, so return to Campsite and head to the north exit.
Watch out for the enemy. It’s strong. Enter the building.
選び出す Luck Increase 左の方です. You can buy potions by interacting with the twinkle to the right. Return to Firewatch and head to the north exit.
がある 2 exits here: inside the cave north from the area entrance and the northeast exit. Explore the northeast exit first.
選び出す MP Increase to the northeast corner. Open the box next to it to get 0G. Return to Resonant Cliffs and enter the cave, then proceed to the east screen.
Head to the north exit.
選び出す Attack Increase 地上で. Return to Asta Cave (交差点) and head to the south exit.
There are several exits here: northwest, southwest, and east. Let’s start with the northwest exit.
選び出す MP Increase 地上で. Return to Asta Cave (Underground Lake) and head to the southwest exit. アクセス方法がわからない場合, just follow the train tracks from the north exit, then head north at the end of the tracks.

選び出す Defense Increase 左の方です. You can save by interacting with the crystal. Your HP and MP will also be recovered after you save your game. The sword also sells some potions if you are interested. Once you are done, return to Asta Cave (Underground Lake).
Head all the way to the east to pick up HP Increase. You can explore the east exit to find 2 敵, but there is nothing to do apart from that. Feel free to battle them for extra exp if you wish. 完了したら, feel free to go to Asta Cave (交差点) and proceed to the east exit.
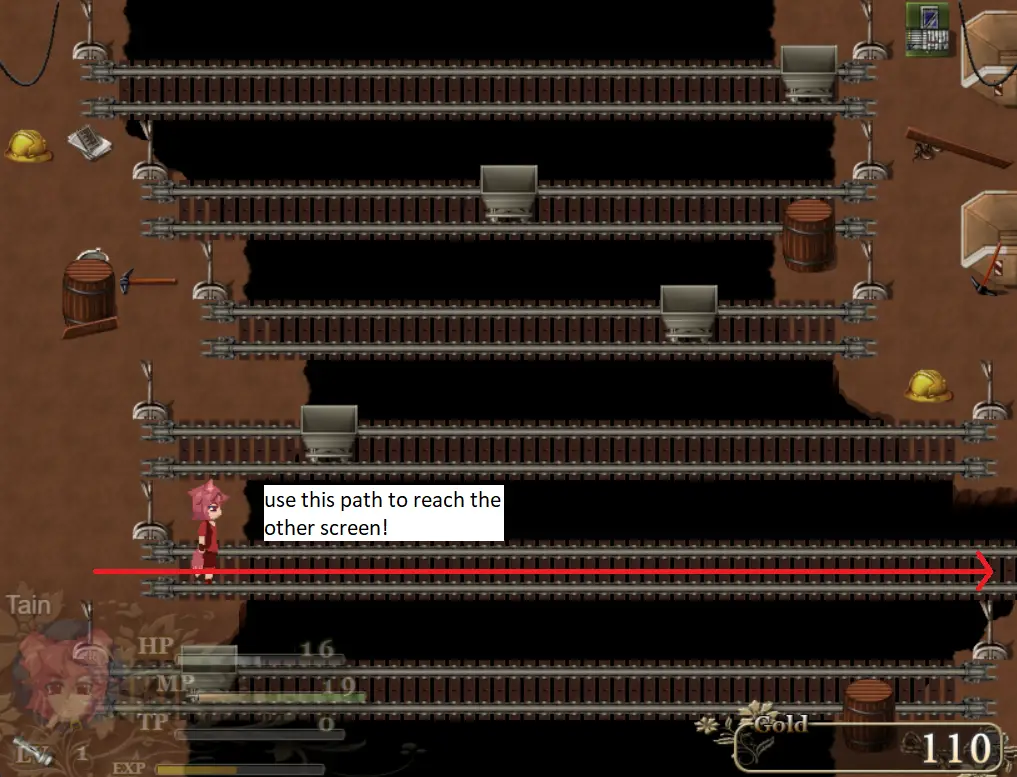
There is nothing much to do here, but if you somehow can’t find the area exit, you need to use the second track from the bottom.
Watch out for the bunny enemies (Ammereit) この領域で. They are strong. I advise you to just use Spell Enhancement + 2x Crispy Flare II, then rest at Asta Cave (Living Space) after you finish the fight. ともかく, once you’re done, 北へ向かう.
の 2 houses on the cave has nothing of interest, so just head to the north exit.
離れる 1 monster alive in this map. 選び出す HP Increase near the left building. また, there is nothing on the 2 houses here, so proceed to the north exit.
Pesper! Now we have another objective. の 5 Star Keys are scattered between the whole map. Before you find them, 選び出す MP Increase と Attack Increase to the west and east. You can use the stat increase with the enemy in the previous area if you keep it alive.
ともかく, time to find the Star Keys! ここが彼らの場所です. Just reexplore the whole map and check the area names for reference.
- Starland (草原), inside the left house.
- Asta Cave (Living Space), this is the place with the save crystal. From Asta Cave (交差点), 南へ向かう, then southwest exit.
- Asta Cave (Diamond Mine), in the southeast corner of the map. From Asta Cave (交差点), 南へ向かう, then east exit.
- Giant Bird’s Nest, located north from Resonant Cliffs.
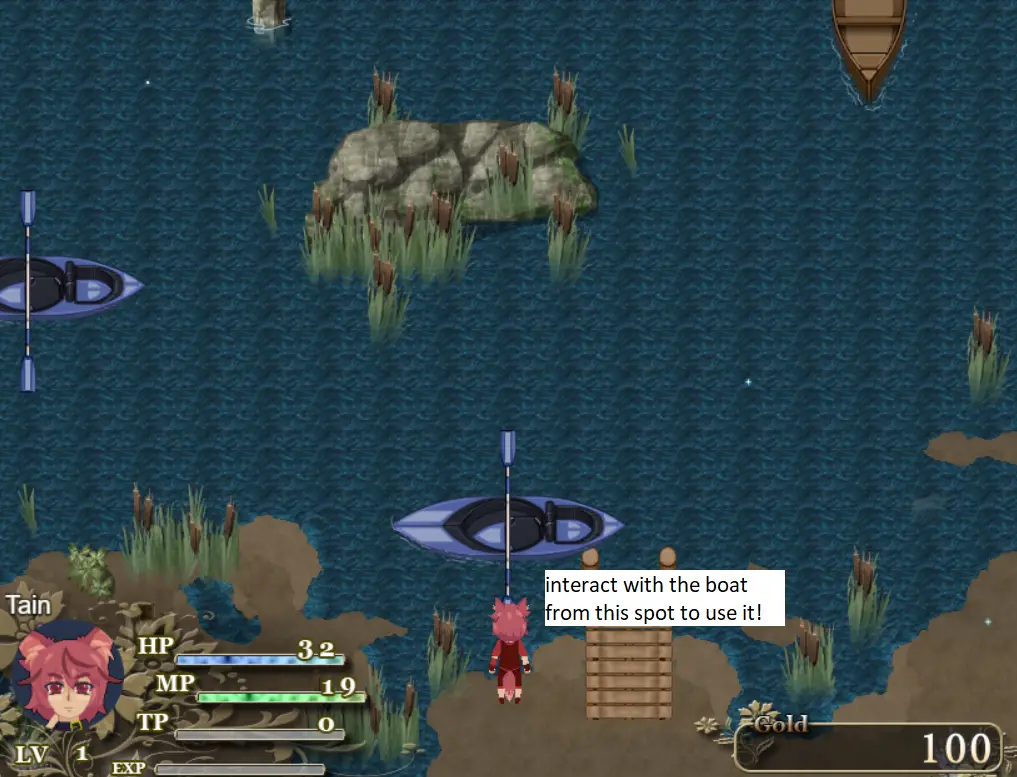
- 釣り場. From Campsite, head to the west exit. Press Z on the purple boat to use it, then land on the southwest corner.
- Lumberjack Workshop. From Firewatch, enter the building to reach Park Souvenir Shop, then enter the door to the northeast corner.
- レインボーフィールド, in the southwest corner of the area (down the cliffs).
- Special Blossoms. From Flooded Plain, head to the northeast exit.
入手したら 8 Star Keys, return to Starland (Startop) and use the Star Keys on the colored pillars on the star bridge.
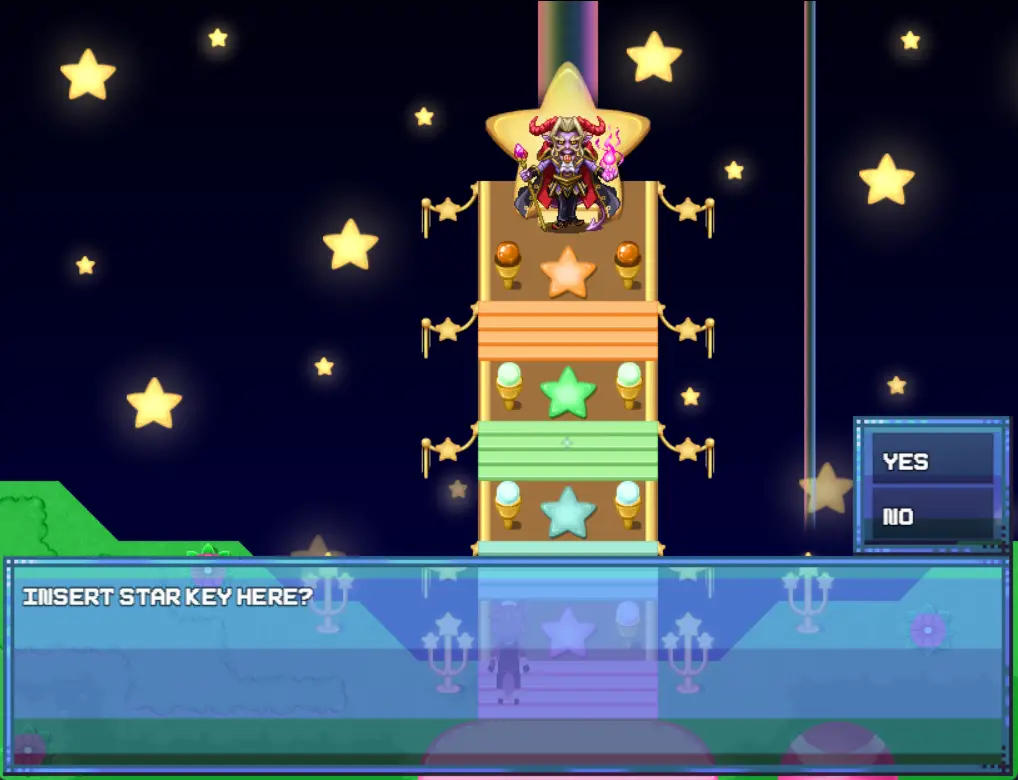
Interact with the twinkle between the green and blue star too to obtain 2 extra levels.
ボス: Akesha
Spam attack or Heavy Strike. Heal whenever your HP is less than 100.
これが今日私たちがこの目的で共有するすべてです ピクセルボーイ: The Legend of Tain ガイド. このガイドは元々、次の者によって作成および執筆されました。 aquatorrent. このガイドを更新できなかった場合, これに従って最新のアップデートを見つけることができます リンク.