
- タイトル: My life as an archeologist
- 発売日:
- 開発者:
- 出版社:
Information about My life as an archeologist is still incomplete. これを使用してゲームの詳細を記入するのにご協力ください。 お問い合わせフォーム.
This guide will be showing you the steps on how to get all My life as an archeologist achievements. このガイドにはゲームのネタバレが含まれる可能性があることに注意してください, continue reading at your own risk.
進歩の実績

Papa will be so proud!
Buy every research cards.
The difficulty slider needed to complete You’re not the boss of me is locked behind completing the game for the first time. The game suggests having all the research unlocked before trying to beat the hardest difficulty because you will definitely need the power spike to survive early on. Unlocking all the research cards for purchase is just a matter of repetition. 時間を節約します, try getting the Mimics from the Tarot cards sooner rather than later.

Lunch money
Gain more than 10,000 gold in a single run.
You’ll need gold to buy out all the research cards. このゲームでは, you have to hover over the coin to collect it. There is an artefact that increases the pull zone of your cursor to make collecting gold easier. Incrementally tick the difficulty slider higher to activate extra gold gains as the difficulty scales up.
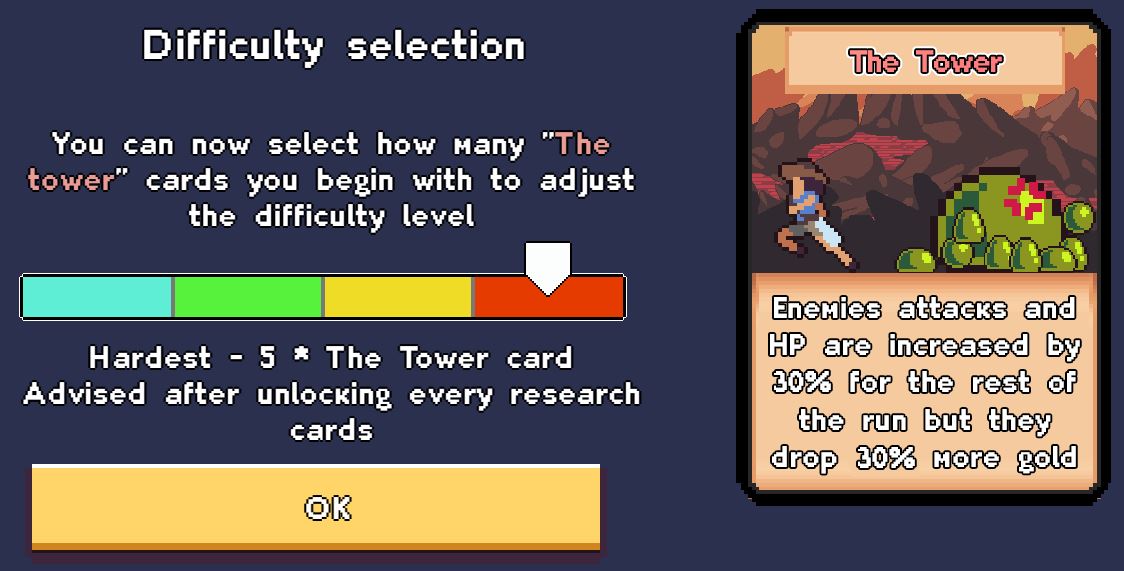
While the game isn’t tough, take your time during your first run on the hardest mode to guarantee success. With 5x Tower activated (150% more damage taken), you’ll need to be careful until you unlock the 2 defensive skills from the Theologist tree.

And don’t make me come back…
Beat the final boss for the first time.

You’re not the boss of me
Beat the final boss on the hardest difficulty.
The two builds below are builds that I personally used with success on the hardest difficulty. There are many ways to play and in this game and these are just my opinions. I hope you find it informative.
For the sake of minimizing redundancy, please visit this guide instead. It’s very informative and covers tarot cards, 統計, skill trees, and equipment. その代わり, I will be posting my take (the skill trees and some tips) で 2 builds I mentioned under One punch gal.
(all skills enclosed in a red box = level to max in the order prescribed)
Theology crit skill build:
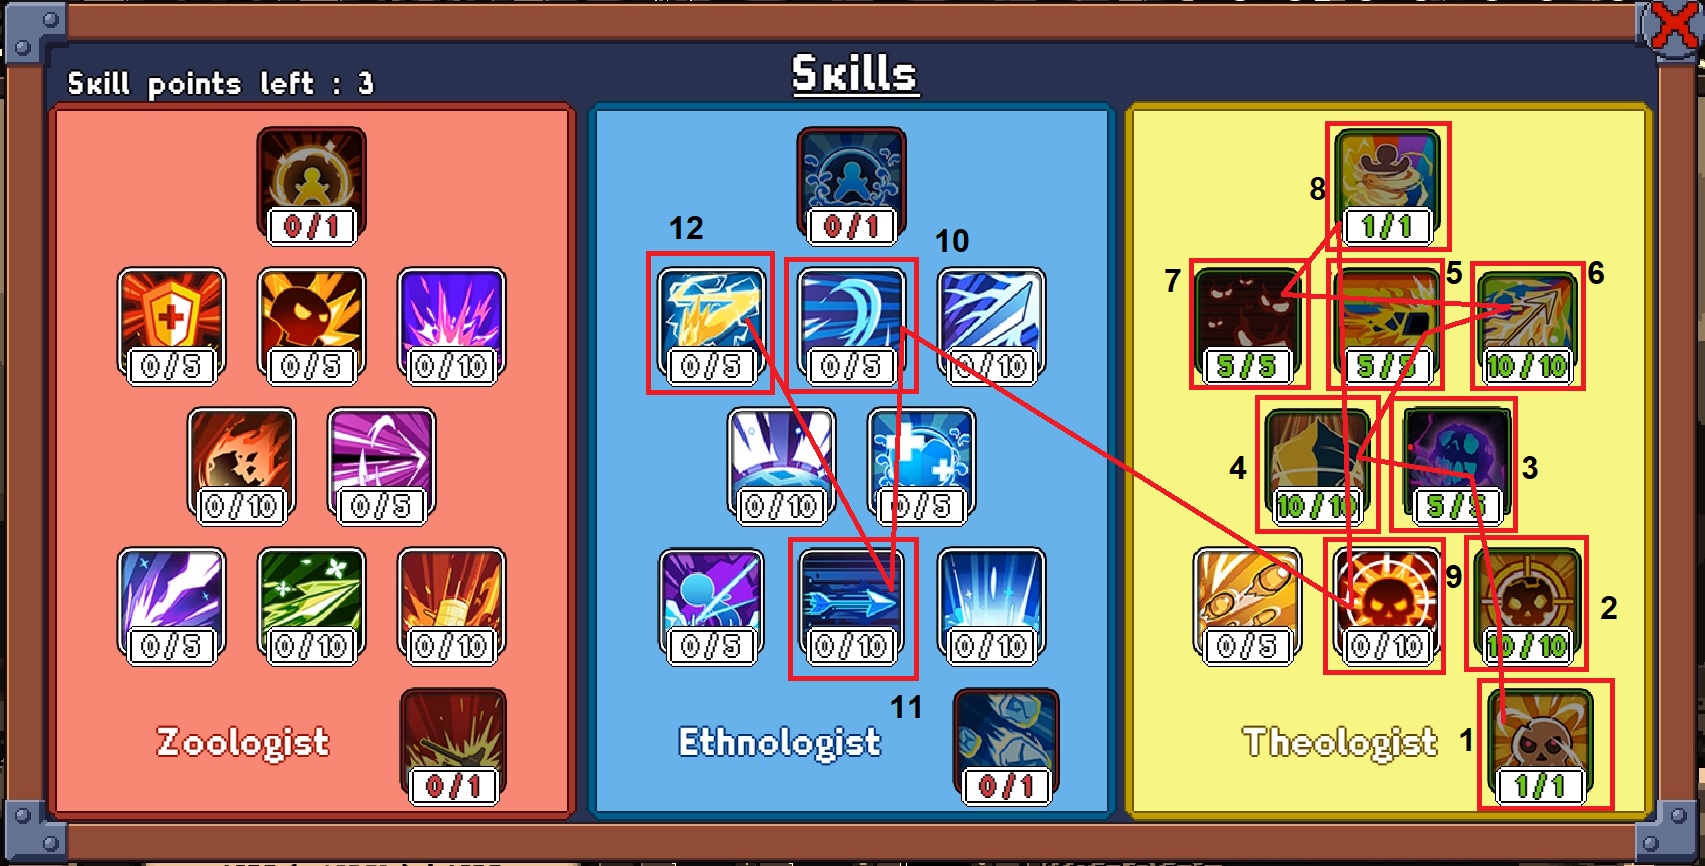
- #9-12 are not a priority. It’ll be next to impossible to get enough points to branch out to the left tree.
- The goal of this build is to crit as many times as possible to keep the shield defensive passive up. This includes actual clicks and auto-clicks. That’s why #9 is not as much of a priority as the tier 4 Theology skills that give auto-click generation.
- The burst window for these skills is when you activate Artefact+Jewel+Studies. The cooldown is lengthy so pay attention to the timing of when to use it if you are 1 (床) level away from the area’s boss. 要するに, anticipate the boss’ arrival so you come off cooldowns just before the boss fight. See Cool girls don’t look at explosions
Ethno/Theo hybrid skill build:
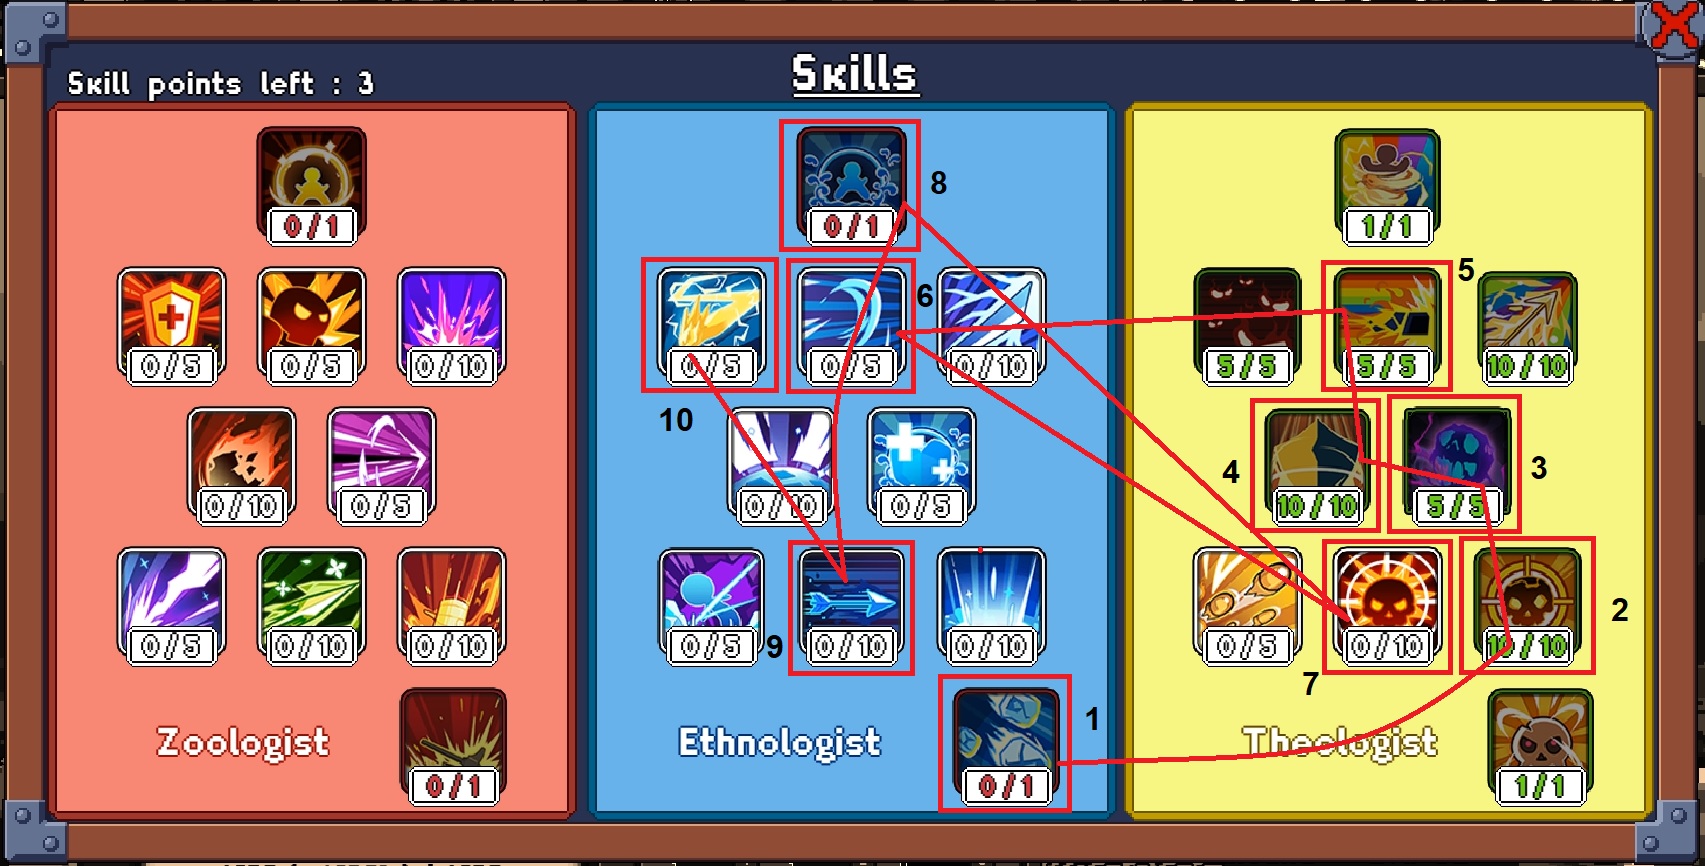
- This build does not rely on auto-clicks. Note that auto-clicks have a lower crit chance compared to actual clicks.
- その代わり, this build relies on burst damage from crit multipliers combined with spamming Powder.
- Powder is only weak at the start until you build up more base click damage by raising Strength and Efficiency.
- We get #2-4 from Theology for survival. #5&7 are for ramping up crit multipliers.
- #6 is to decrease cooldown so we can spam Powder (our nuke) そして 3 damage buffs.
- #8&9 boost efficiency. It’s better to get #9 late because the multiplier will be more noticeable.
- また, #10 is a luxury. If you have enough points then go for it. We’ll be spamming items by then.
- We don’t get any of the energy regen skills from Ethnology because items have way better regen.

A month’s rent
到着 100,000 gold found overall.
Last but not least of the progression-type achievements is collecting 100k gold. All you need to know is that this will take multiple runs. Beating the game at higher difficulties will net you more gold (まで 150% more due to 5x Tower Tarot cards activated).
Gear Achievements

Positively glowing
Have a legendary item equipped in every slot.
一目瞭然. There is a tarot card that upgrades gear to 1 tier up (like Purple to Gold) 必要に応じて. If you use the tarot card and the achievement didn’t trigger, simply swap a legendary piece out and repeat the process so the game processes the fact that you equipped it.

Fusey’s ultimate creation
を生成します。 “伝説の” item through fusion.
This achievement is just a small bit of RNG combined with inventory management. Each new item pushes the top leftmost item out of the limited item space you are given. Just keep fusing as necessary. It will help a lot if you have the following:
- Item drop rate gear
- Rarity increase gear
- Original jack-in-a-box artefact
The first two items are self-explanatory. The artefact is amazing, しかし必要ではありません. It will just make things go a lot more quickly by giving you a ton of items to fuse together.
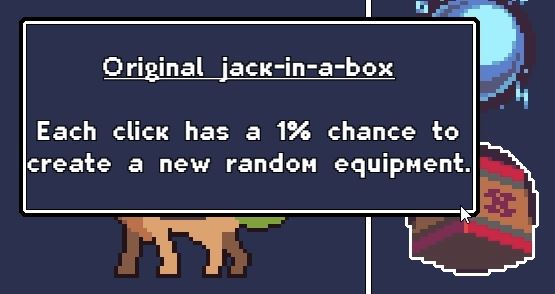
I got pretty lucky here, but you get the idea of how this artefact can benefit you.
戦い

Cool girls don’t look at explosions
Kill a boss less than 3 seconds after the fight begun.
You’ll get this without even trying. Use the Theologist crit build and activate Artefact+Studies+Jewel together to delete a boss in less than a second.

おお, a shiny!
選ぶ “The moon” tarot card on the hardest difficulty, then beat the buffed enemy.
This works on any enemy within that difficulty. You can even kill one of the weakest enemies of the first area if you get lucky enough to spawn “The moon” tarot card that early.

Class struggle
Lose your money to the “Hanged Woman” tarot cards, then beat up a boss to take it back!
Straightforward achievement. This Tarot card will rob you of your gold and you just have to kill the boss that comes next to nab this achievement and yoink your gold back.

No tears, only dreams now
Inflict at least 3 status effects to the enemy (Frozen/Poisoned/Confused/Slowed).
Artefacts have 3 の 4 status effects that you need. 最後のもの (毒) is from the Zoologist tree.

They made me come back!
Die and revive 3 times in a single run.
Where to get 3 revives:
- Purchase Skeleton research
- Cursed Ankh artefact
- Judgement Tarot card (can appear more than once)
Each time you have one revive, get yourself killed. That’s how I got the achievement.

Can’t touch this
Prevent 50 enemy hits in a single run.
Artefacts and tarot cards will get you this achievement. There is a tarot card that prevents the next 10 攻撃. As far as artefacts go, there’s one that prevents the first hit in each battle.

One punch gal
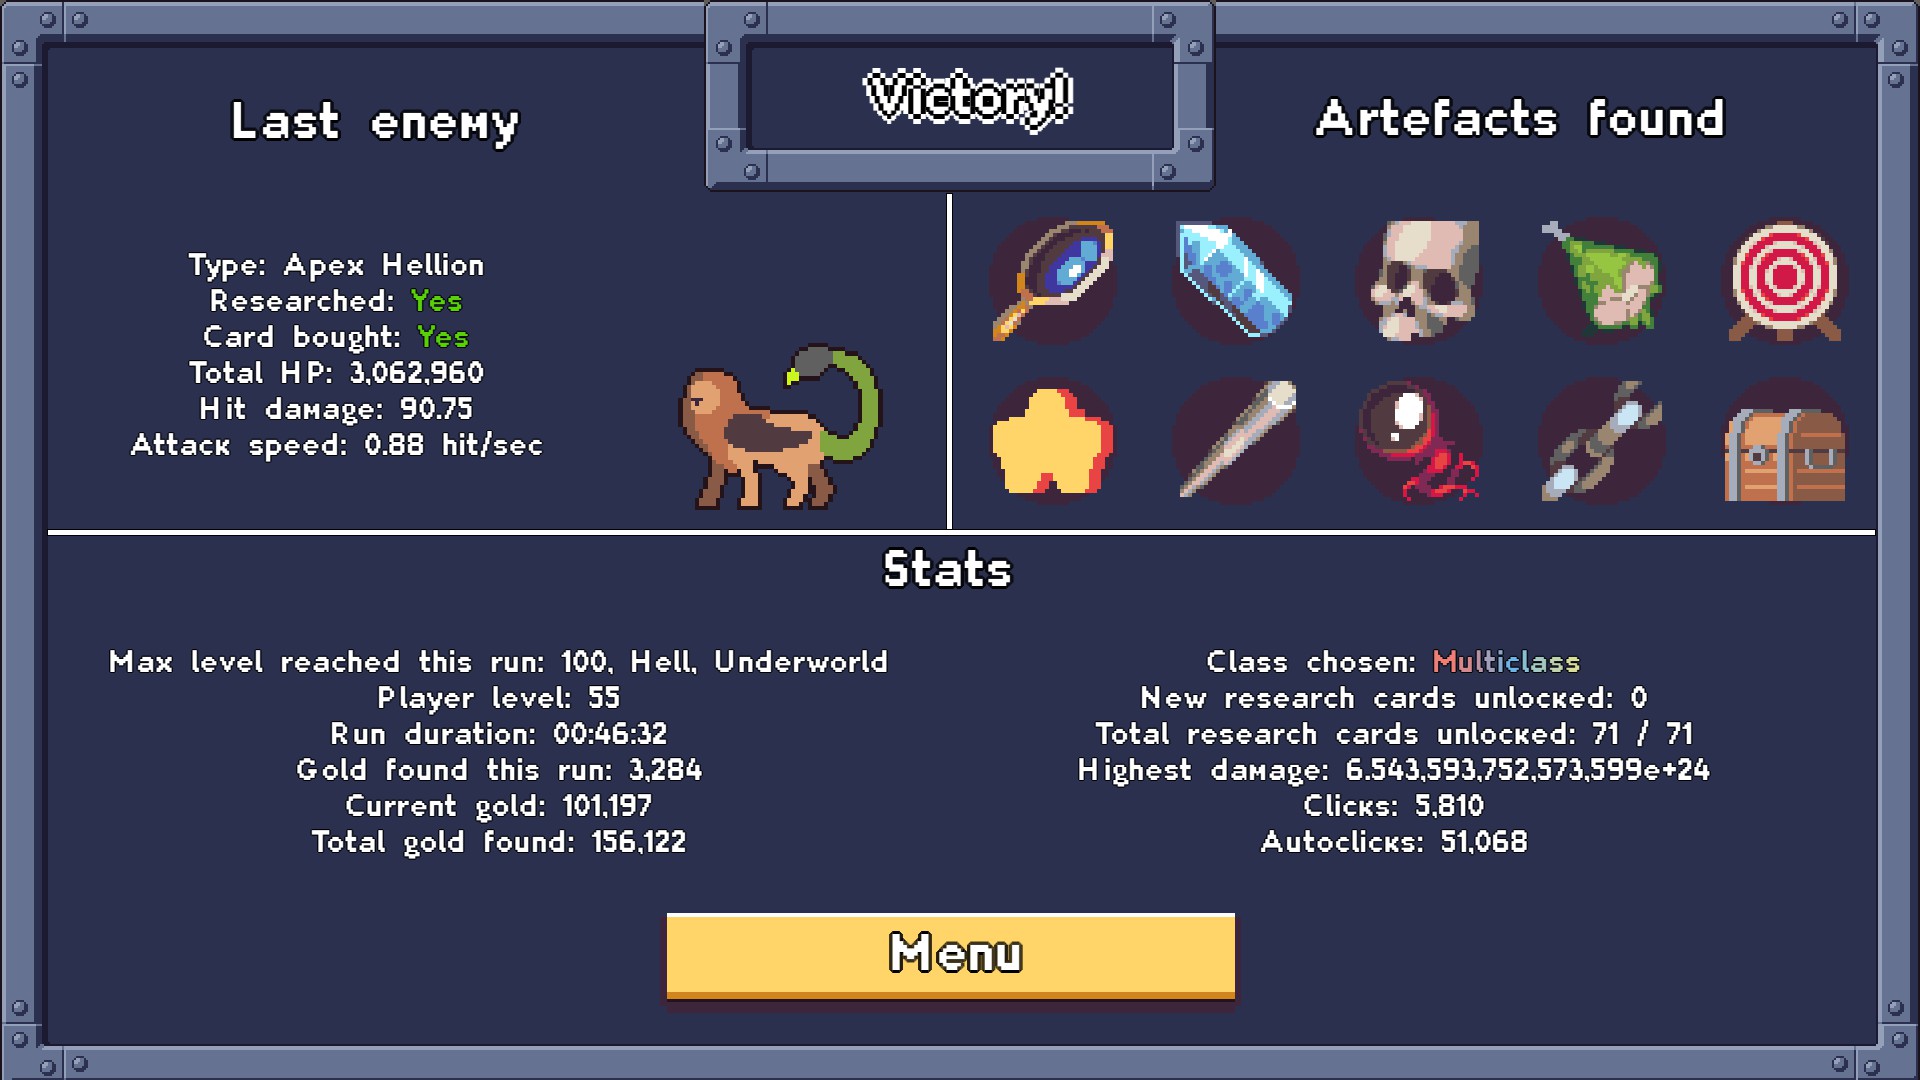
到着 1,000,000,000 一撃でダメージを与える.
You’ll be able to hit this hard around the 90th (エリア) レベル. Same rules apply when trying to beat the hardest difficulty. The goal is to balance 100% crit rate and build up your base click damage and multiplier.
- Start off with exp gain gear (head and shoes) and replace it with better exp gear.
- Hold the exp gear for as long as you can to get as many levels (ステータスポイント) できる限り.
- Artefacts will help, but they’re too random to rely on.
- Use the Theology crit build or Ethno/Theo hybrid build
- Theology build = big damage comes from Studies+Artefact+Jewel and hitting a fat crit.
- Ethno/Theo build = big damage comes from Studies+Artefact+Jewel AND using Powder. The skill Ethnology skill tree also has efficiency buffs. All of these will turn Powder into a 1-hit machine
(see You’re not the boss of me for both builds)
It’s a bit hard to see because of the overlapping numbers, but that’s a 3 million critical hit using the megacrit (5×) from the Theology tree.

その他の業績

Self-driving archeologist
Automate every activated items.
To automate an item, right click on it to see the various options available to you. You can only automate one item UNLESS you max out the Museum assistants skill under the Ethnologist tree. After getting this skill to max, just set an automation command on all skills for the achievement.

Doctor’s degree
Max out every single skill of a skill tree.
To clarify, it has to be the full tree from one of the 3 paths you can take. You should have enough skill points if you equip exp gain gear early on. さらに, there are Research cards and Tarot cards that give you even more skill points.

Click summoner
Generate more than 50,000 autoclicks in a single run.
If you want to avoid carpal tunnel, hold down LMB and the game will click for you. It’s not very fast but it’s something at least. After beating the game once, you’ll unlock an auto-click and 2x speed option. Ticking this option is almost as fast as setting an auto-clicker at 50ms/click.


Preparation is the key to success
Unlock every activated items.
You will naturally unlock the 6 usable items through research and gaining character levels in your run. I got this on my 2nd playthrough after selecting the Ethnology tree as my first skill (Powder).
Artefacts Achievements

Drink me!
癒す 1000 HP through artefacts in a single run.
The fairy mentioned in the achievement below is one of the artefacts that can get you this achievement. I’m not sure if you need to take damage for the healing to count BUT using the item “Jewel” (#6 in the item bar) can sometimes multiply your HP and it will look like you’re damaged. Just keep playing with healing artefacts and this will trigger during the run in no time.

Me and this army
Equip at least three out of four companions artefacts at the same time (“Bottled fairy”/”Build-a-bot 2000″/”Trapped ice”/”Rare turtle egg”).
Straightforward achievement. If you had bad RNG getting more than 2 to show up in one run, you’ll be happy to know that completing and unlocking research with gold can give you artefact rerolls (まで 3 rerolls per run). This should help you get the achievement.

I’m feeling lucky
Pick the “Gag gift” artefact while you already have five or more artefacts equipped.
I suggest doing this after you’ve beaten the game on the hardest difficulty. The randomized artefacts resulting from taking “Gag gift” can really mess you up if you were aiming to complete the run. I ended up with the “Demon Eye” artefact (0% クリティカルチャンス) while running the Theologist crit skill tree. 0% crit chance while running a crit build made my run more tedious than it needed to be.

Renowned archeologist
Equip every artefact at least once.
This will probably be your last or second last achievement if you’re like me and waited until beating the hardest difficulty to collect them all. After beating each boss, you’ll get a list of 3 artefacts. The game lets you know which artefacts have been collected (か否か) as indicated by the ✅/❌.

Even with rerolls, it took about 3~4 runs on top of hard mode to find all the artefacts.
- Clicking abandon run does not count. You need to beat the run or die.
- 使用する “Gag gift” will not negate the artefacts which you equipped on the same run.
これが今日私たちがこの目的で共有するすべてです My life as an archeologist ガイド. このガイドは元々、次の者によって作成および執筆されました。 彼らは食べる. このガイドを更新できなかった場合, これに従って最新のアップデートを見つけることができます リンク.