- タイトル: マスエフェクト レジェンダリー エディション
- 発売日:
- 開発者:
- 出版社:
Mass Effect Legendary Edition に関する情報はまだ不完全です. これを使用してゲームの詳細を記入するのにご協力ください。 お問い合わせフォーム.
このガイドでは、Mass Effect のセンチネルのキャラクターと分隊の最適化について詳しく説明します。 2, Mass Effect Legendary Edition に収録されているもの. このガイドには Sentinel のビルドが含まれています, おすすめの隊員も紹介. おすすめのクエスト順番も紹介, これにより、プレイヤーは難易度のスパイクを最小限に抑えながら、Insanity の難易度を進めることができるようになります。.
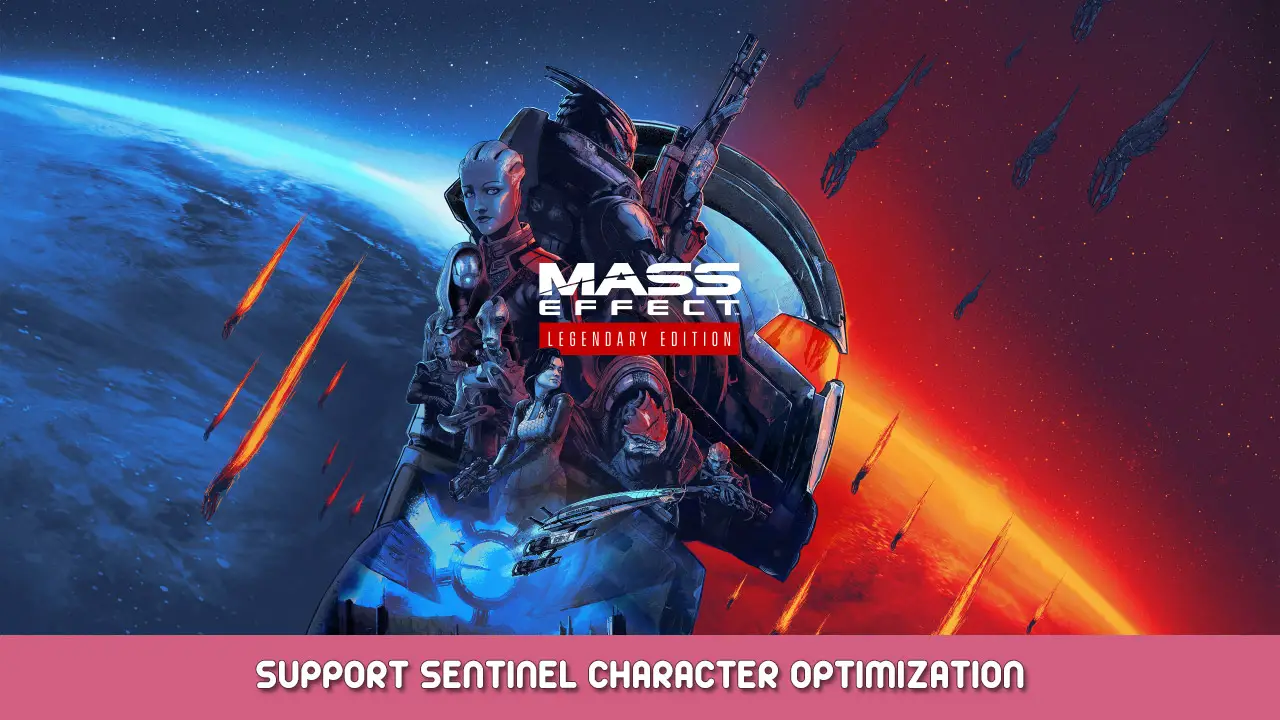
シェパードのビルドオーダー
レベル 30: 投げる 6 (半径, 爆発する, 双投), テックアーマー 4 (耐久性), オフェンスマスタリー 5 (力とダメージ, 分隊ボーナス), フィットネス 5 (耐久性, 分隊ボーナス)
レベル 32: テックアーマー 5 (パワーダメージ)
レベル 33: テックアーマー 6 (耐久性)
レベル 34: 要塞化 2
レベル 35: 要塞化 3
レベル 36: 要塞化 4 (耐久性)
レベル 37: 要塞化 5 (パワーシナジー)
レベル 38: 要塞化 6 (耐久性)
レベル 39: 過負荷 1
レベル 40: フィットネス 6 (耐久性)
レベル 41: 過負荷 3
レベル 42: 過負荷 4 (チェーンの過負荷)
レベル 43: ワープ 1
レベル 44: 過負荷 5 (神経ショック)
レベル 45: 過負荷 6 (チェーンの過負荷)
レベル 46: ワープ 2
レベル 47: オフェンスマスタリー 6 (力とダメージ)
レベル 48: ワープ 3
レベル 49: ワープ 4 (爆発する)
レベル 50: ワープ (さらす)
レベル 51: リフトグレネード 1
レベル 52: ワープ 6 (ピアス)
レベル 53: リフトグレネード 3
レベル 54: リフトグレネード 4 (半径)
レベル 55: クライオブラスト 1
レベル 56: リフトグレネード 5 (マックスグレネード)
レベル 57: リフトグランデ 6 (スラム)
レベル 58: クライオブラスト 2
レベル 59: クライオブラスト 3
レベル 60: クライオブラスト 4 (半径)
インテル
アーマーモッドキット: シールド +5%
リーパーデストロイヤーの残骸: パワーリチャージ速度 +5%
Advanced Biotic Implants: パワーリチャージ速度 +5%
Weapon Upgrade Kit: Weapon Damage +5%
Intel from Battle of Arcturus: シールド: +5%
Volus Intelligence Archives: 健康 +5%
Intact Reaper Weapon: Weapon Damage +5%
Gallae’s Electronic Signature: パワーダメージ +5%
Med Bay Surgery: 健康 +5%
Improved Geth Resistors: シールド +5%
Miniaturized Armor Capacitors: パワーリチャージ速度 +5%
Research Data From Pragia: パワーリチャージ速度 +5%
This build focuses on providing bonuses to the whole squad, executing power combos, および耐久性. The Sentinel is the only class Shepard has available that has a Squad Bonus that grants a 30% bonus to health and shields for the whole squad, so that’s a great addition to this build. Further, the class power “オフェンスマスタリー” has another bonus that grants a 10% bonus to squad weapon damage and a 15% bonus to the force and damage of squad powers. This build also focuses on executing power combos that are essential to doing high amounts of damage on higher difficulties. This build allows Shepard’s Squadmates to prime power combos and uses the Throw ability to execute the combos. Evolving Throw to have Double Throw is one of the few ways to execute 2 combos with one ability in single player. ついに, this build is highly durable and uses Tech Armor and Fortification to increase Damage Reduction by 90%, granting Shepard extreme survivability. Taking the Power Synergy bonuses to each Talent increase the Force and Duration of all of our powers. The downside to this is that both Tech Armor and Fortification both reduce Cooldown reduction, but since our primary power use will be Throw which has a very low cooldown to begin with, this is not a great issue.
Because this build wants to limit weight so as not to indue further pentalities to cooldown reduction, I recommend utilizing weapons with infinite ammo, elminiating the need for a sidearm. 序盤のゲームでは, we can pick up the Particle Rifle. This weapon does more damage after it’s been “charged up” with continuous fire, so using the Magazine upgarde will make it so you can fire the “charged up’ version for longer. In the 2nd Act of the game we can play the Citadel DLC to secure access ot the M-7 Lancer which has an even lower weight then the Particle Rifle. When customizing armor, focus on boosts to Shields first and then Health, to get the most value out of your Tech Armor and Fortification.
Recommended Squadmates
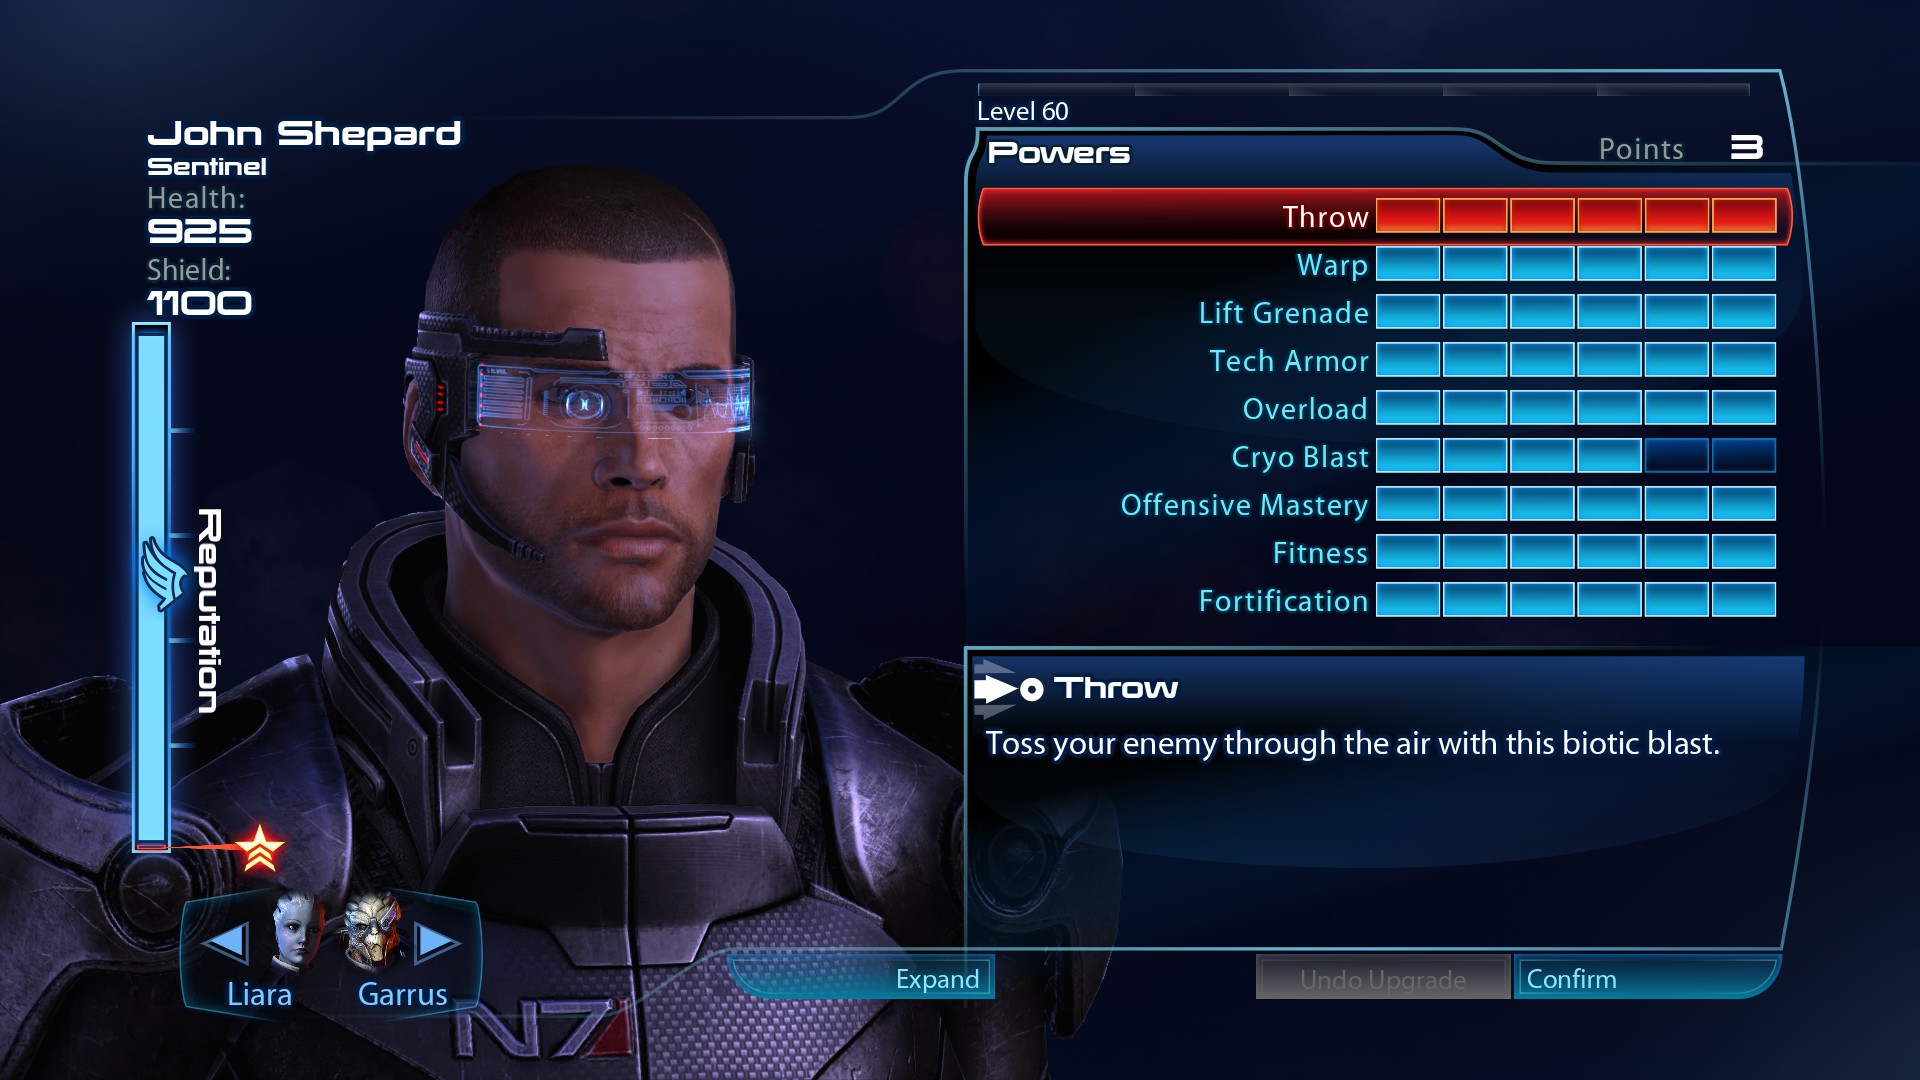
Liara
服装: パワーリチャージ速度 +25%
レベル 31: ワープ 6 (爆発する, さらす, ピアス), Pure Biotic 4 (Recharge Speed)
レベル 34: Pure Biotic 5 (Duration and Force)
レベル 38: 特異点 2, Pure Biotic 6 (分隊ボーナス)
レベル 39: 特異点 3
レベル 40: 特異点 4 (半径)
レベル 41: Stasis 1
レベル 43: 特異点 5 (Recharge Speed)
レベル 55: 特異点 6 (拡大する), Stasis 5 (間隔, Recharge Speed)
レベル 57: Stasis 6 (バブル)
Liara provides our primary method of crowd control and sets up powerful biotic power combos. She can use Singularity on unarmored enemies to disable them and set them up for biotic detonations and warp can set up detonations on protected enemies. Equip her with the N7 Hurricane and mod the weapon so that it increases power damage. Power combos do extra damage on Insanity (x3.375 damage compared to normal) so it’s essential o higher difficulties. Reduce Liara’s power recharge time with her alternative outfit and passive abilities so it’s comparable with Shepard’s Throw ability, allowing the two characters to work together to create frequent biotic explosions.
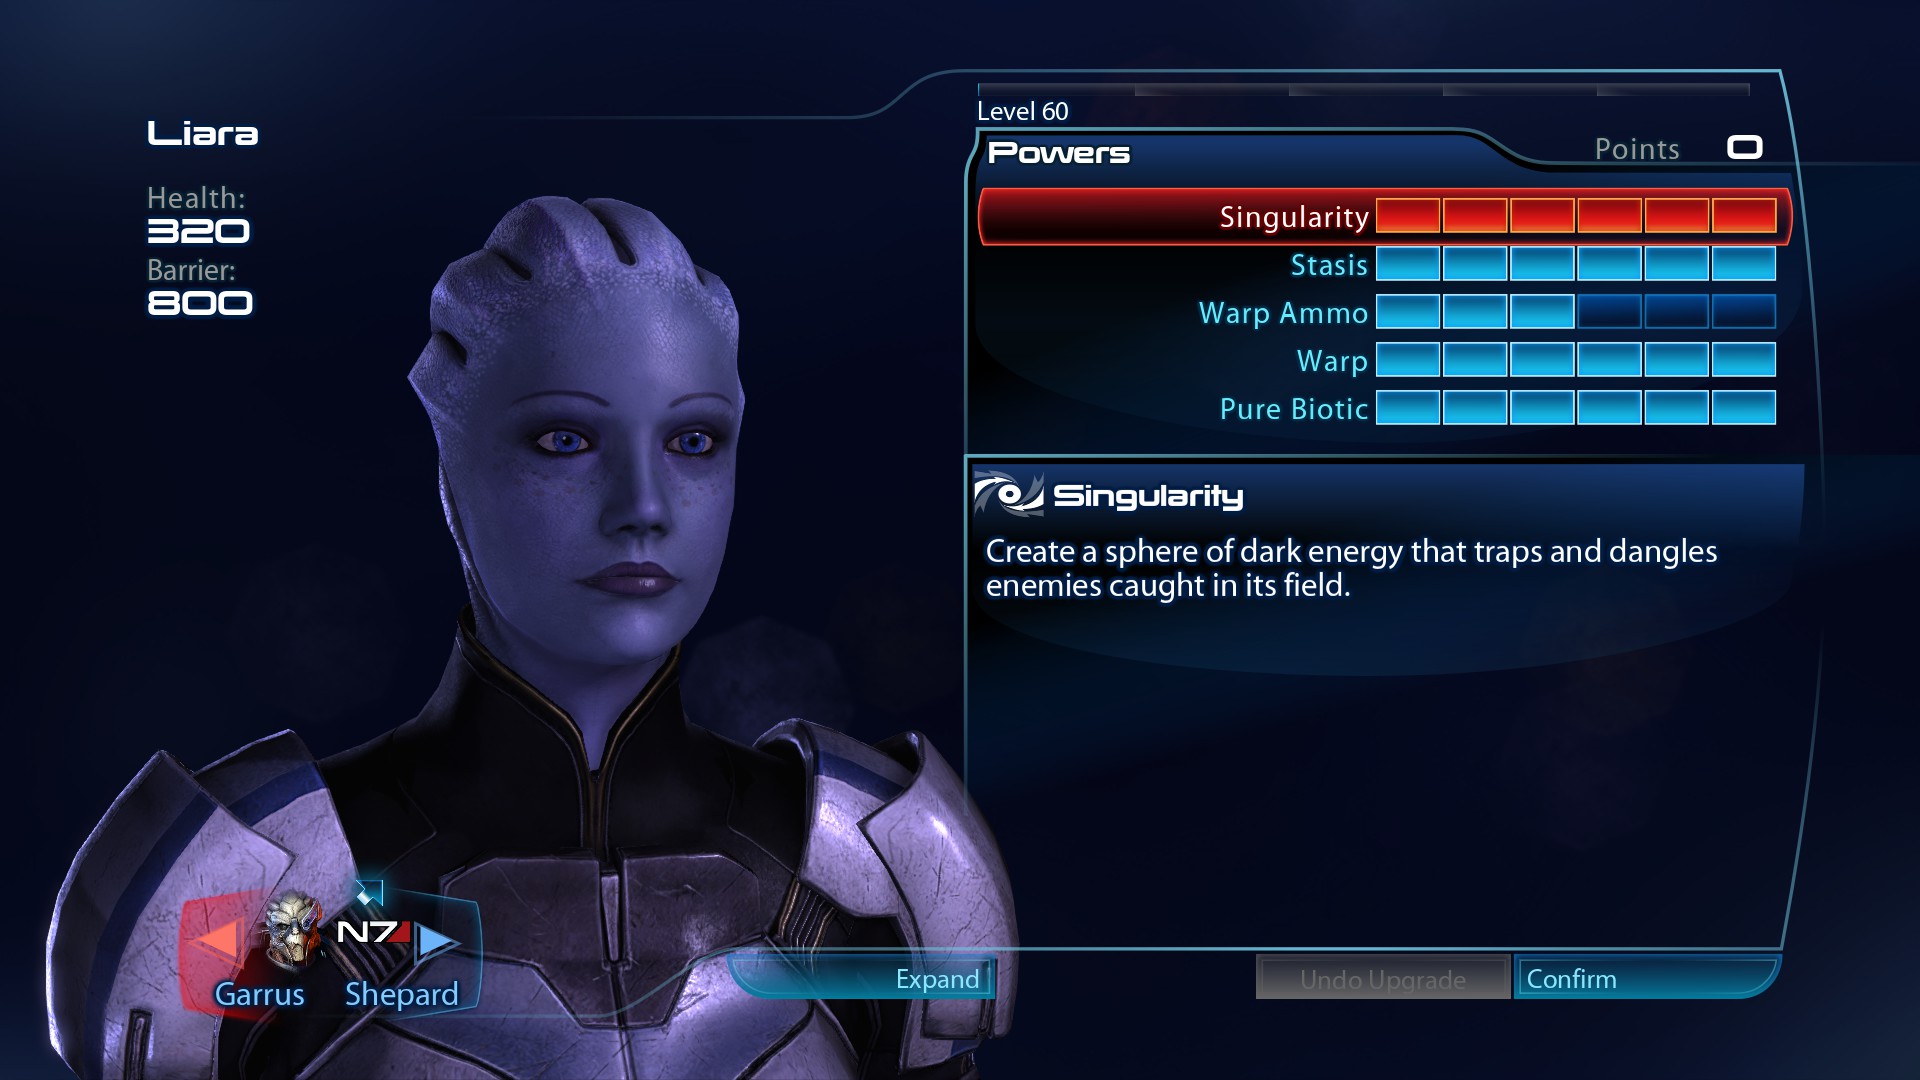
Garrus
服装: Weapon Damage +25%
レベル 36: 過負荷 2, Armor Piercing Ammo 6 (分隊ボーナス, ヘッドショット, ピアス), Turian Rebel 5 (Weapon Damage, アサルトライフル)
レベル 37: 過負荷 3
レベル 38: 過負荷 4 (チェーンの過負荷)
レベル 41: 過負荷 5 (神経ショック)
レベル 44: 過負荷 6 (チェーンの過負荷)
レベル 55: 近接地雷 6 (半径, Damage Taken, Recharge Speed)
レベル 58: Turian Rebel 6 (分隊ボーナス)
レベル 59: Concussive Shot 2
レベル 60: Concussive Shot 3
Garrus provides the primary source of weapon damage. The popular “Godhood” build that utilizes the N7 Typhoon, Armor Piercing Ammo, and using his passive Turian Rebel increases his weapon damage as high as possible for any squadmate. He can also set up Tech Bursts with Overload and he can use his Proximity Mine attack to apply a debuff on enemies which increases the damage they receive for 8 秒. The Squad bonus from Armor Piercing Ammo is particularly useful as squadmates tend to shoot directly at enemies in cover.
Tali:
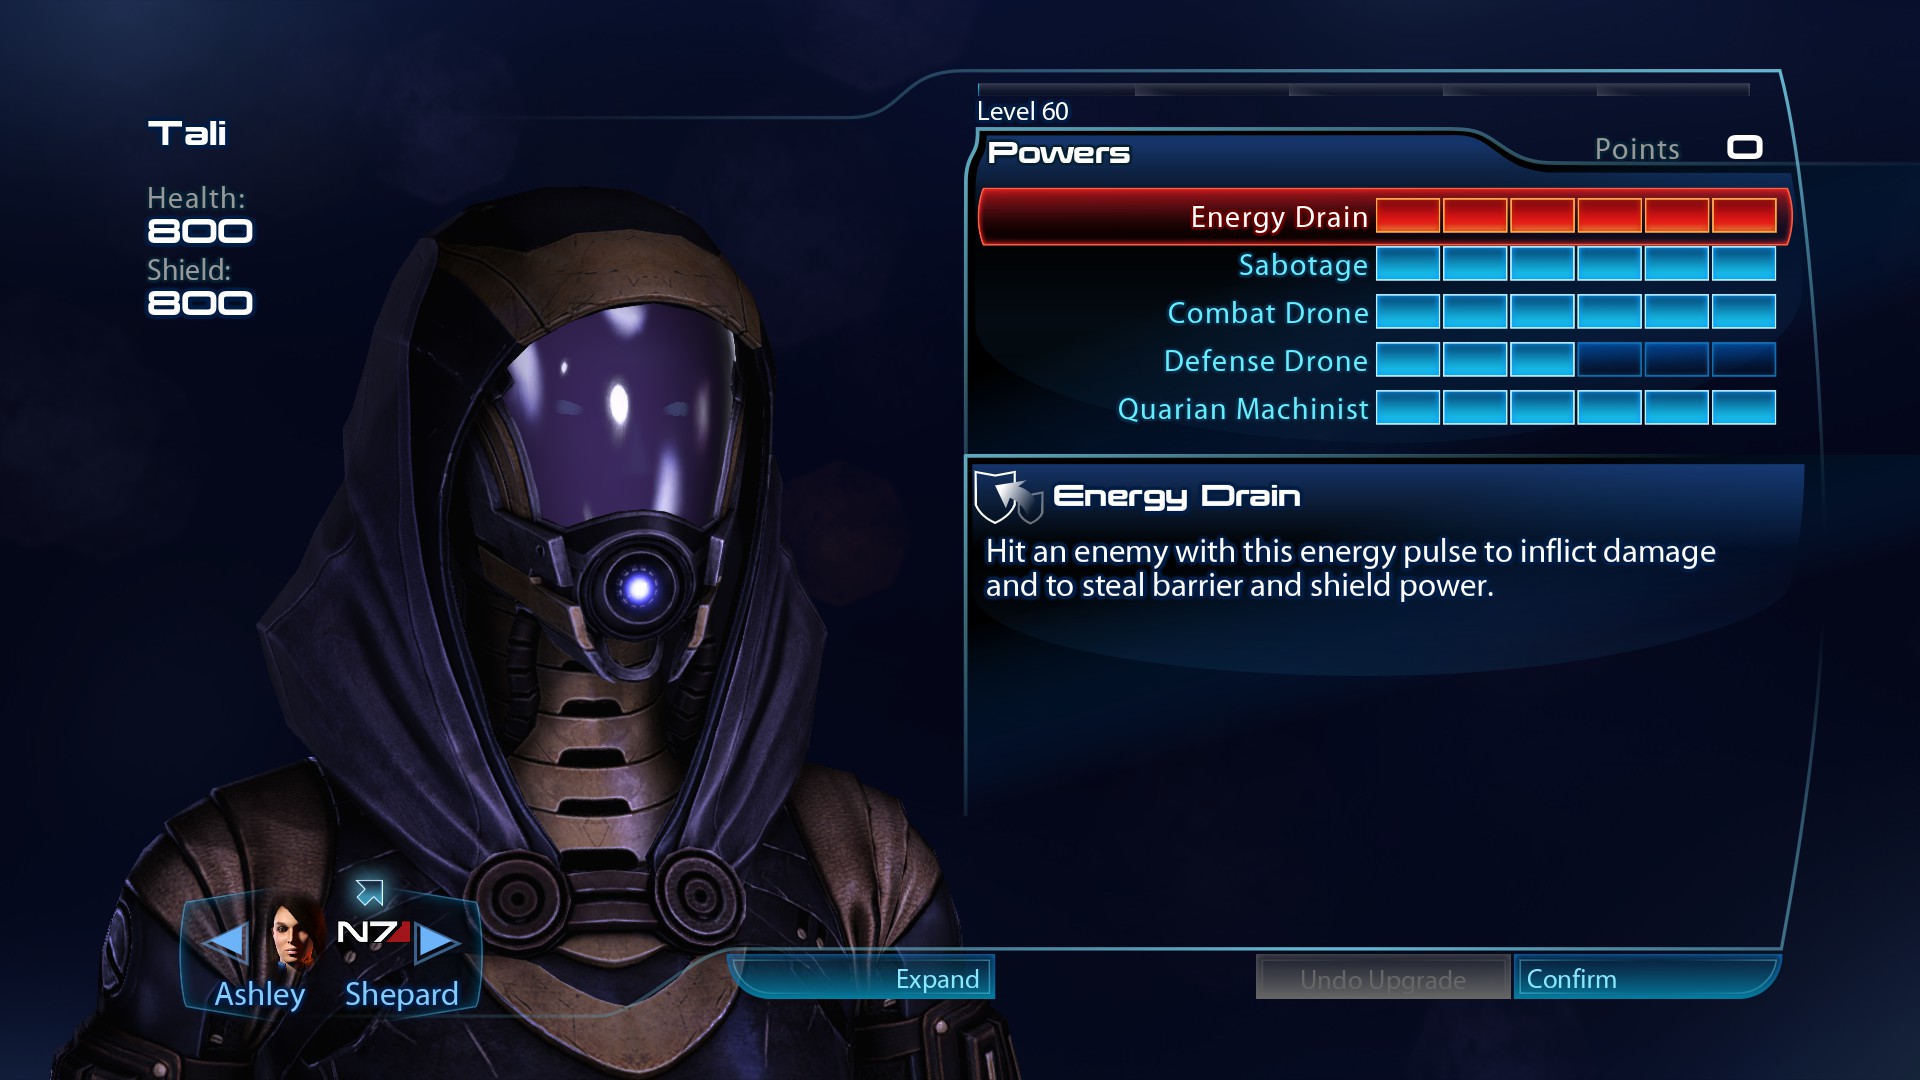
服装: パワーリチャージ速度 +25%
レベル 60: エネルギードレイン 6 (半径, Recharge Speed, ダメージ), 妨害行為 6 (間隔, Explosive Hack, Tech Vulnerability), Combat Drone 6 (爆発する, ショック, チェーンライトニング), Defense Drone 3, Quarian Machinist 6 (Recharge Speed, Tech Upgrade, 分隊ボーナス)
Tali replaces Laira whenever you have to face the Geth because of her unique powers. Sabotage is incredibly useful against Geth Primes, as it will temporarily cause them to attack their teammates. Evolving Sabotage with the level 6 アップグレード “Tech Vulnerability” increases the damage caused by Tech Bursts by 100%, allowing you to disable enemies while also increasing your DPS significantly. Energy Drain is also extremely useful as it can both prime and trigger Tech Bursts in conjunction with Shepard’s Overload power. Equip her with the Crusader Shotgun and swap to her alternate outfit to lower her power recharge time for more frequent Tech Bursts.
アシュリー:
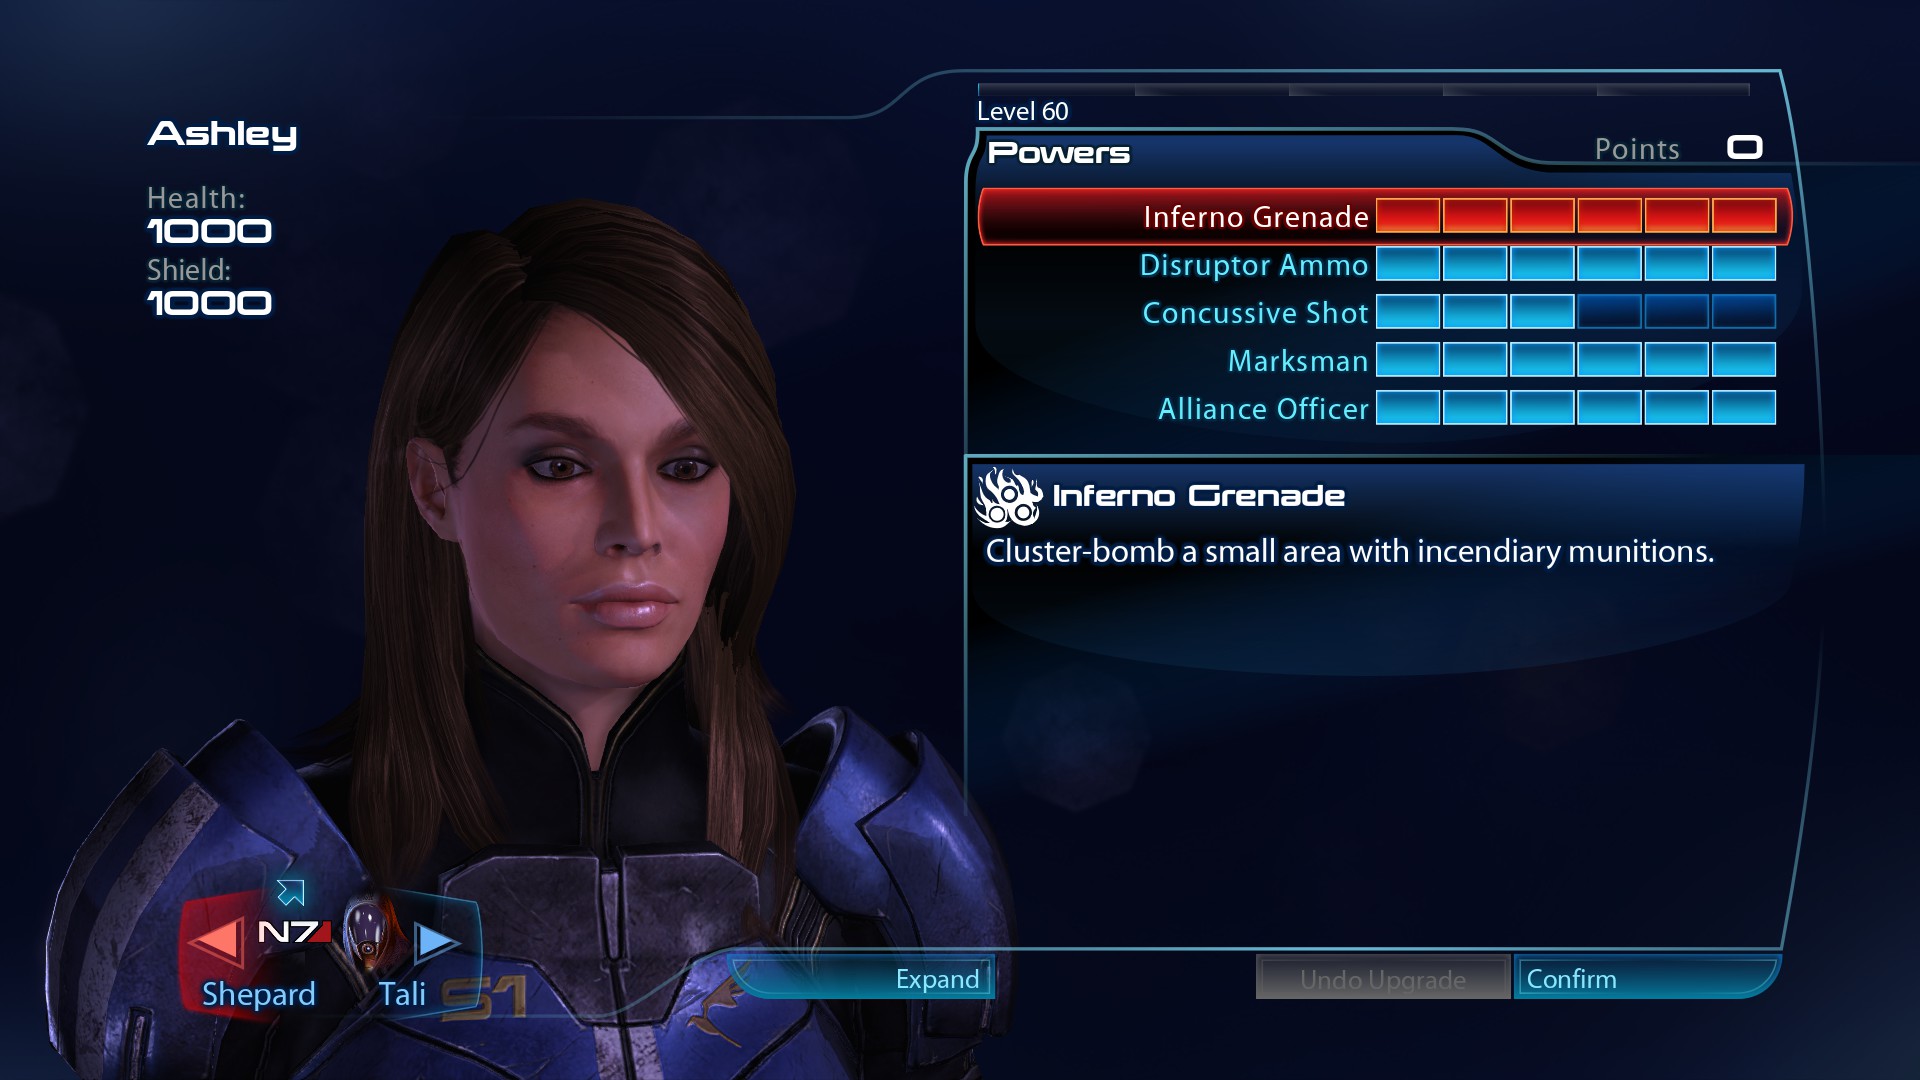
服装: Weapon Damage +25%
レベル 31: Disruptor Ammo 6 (分隊ボーナス, ヘッドショット, 気絶させる), 射手 4 (Firing Rate)
レベル 32: Alliance Officer 1
レベル 33: Alliance Officer 2
レベル 34: Alliance Officer 3
レベル 60: Inferno Grenade 6 (半径, Max Grenades, Radius and Shrapnel) Concussive Shot 3, 射手 6 (間隔, Accuracy and Firing Rate), Alliance Officer 6 (Weapon Damage, パワーダメージ, アサルトライフル)
Ashley replaces Garrus as our primary source of weapon damage because she has Disruptor Ammo. Applying Disruptor Ammo to the whole squad allows for gunfire to have a chance of stunning Geth and priming them for Tech Bursts. 彼女のユニークなマークスマンの才能を使用して射撃速度を高めると、銃撃によるこれらの二次効果がより頻繁にトリガーされるようになります。. 武器ダメージに対する衣装ボーナスとギャラスの N7 タイフーンの使用があっても, 彼女の生の DPS はギャラスには及ばない, しかし、追加のユーティリティにより、彼女はラノッホミッションでのタリのパートナーとして適しています.
おすすめのクエスト順番
プロローグ: 地球
火星
シタデル I
エクソダスクラスター
– インテル: リーパーデストロイヤーの残骸
– エデンプライム
– 抵抗運動
シグルド’クレードル
– N7: ケルベロス研究所
– エイリアン メディジェル フォーミュラ (一部 1)
アピエン クレスト
– 第 1 連隊の旗 (一部 1)
– 燃焼
シタデル
– エイリアン メディジェル フォーミュラ (一部 2)
– アリア: 血液パック
– アリア: ブルーサンズ (一部 1)
– アリア: 日食
– 第 1 連隊の旗 (一部 2)
– バーラ・フォン (一部 1)
– 男性外交官
– リヴァイアサンI
– プロトタイプコンポーネント (一部 1)
イスマル・フロンティア
– プロトタイプコンポーネント (一部 2)
ペトラ星雲
– グリッソムアカデミー
– バイオティックアンプインターフェース (一部 1)
凧’巣
– アリア’ ブルーサンズ (一部 2)
– 力の柱 (一部 1)
– インテル: 武器アップグレードキット
モズのアビサル
– 変幻自在のオベリスク (一部 1)
カレストンリフト
– ガルノーを探す
シタデル
– アリア: ブルーサンズ (一部 3)
– バイオティックアンプインターフェース (一部 2)
– リヴァイアサン II
– 力の柱 (一部 2)
– プロトタイプコンポーネント (一部 3)
– 変幻自在のオベリスク (一部 2)
ピュロス星雲
– アン・ブライソンを探せ
シタデル
– リヴァイアサンⅢ
シグルド’クレードル
– リヴァイアサン
シタデル
– アリアT’眠る
オメガ
– オメガの侵略
線量盆地
– の上’ケッシュ
ニンマクラスター
– クローガンチーム
– クローガンのダイイングメッセージ (一部 1)
アルクトゥルス ストリーム
– インテル: Intel from Battle of Arcturus
– ケルベロス誘拐
– 証拠 (一部 1)
クローガンDMZ
– トゥリアン小隊
– 爆弾
– Cerberus 自動タレットの概略図 (一部 1)
– ケルベロスアタック
– 電力網の改善 (一部 1)
– バーラ・フォン (一部 2)
シタデル
– バーラ・フォン (一部 3)
– 証拠 (一部 2)
– GX12 サーマルパイプ
– 電力網の改善 (一部 2)
– クローガンのダイイングメッセージ (一部 2)
クローガンDMZ
– トゥチャンカ
馬頭星雲
– ケルベロス戦闘機基地
– 加熱ユニット安定装置 (一部 1)
クラスターに行ってきました
– インテル: Volus Intelligence Archives
– プレニクスの本 (一部 1)
シタデル II
– バタリアン法典
– プレニクスの本 (一部 2)
– Cerberus 自動タレットの概略図 (一部 2)
– ケルベロスの報復
– 加熱ユニット安定装置 (一部 2)
– 感動的なストーリー
– メディゲルの妨害行為
– 負傷したバタリアン
ファーリム
– ペルセウスのベール
ヴァルハラの閾値
– プロテアン データ ドライブ (一部 1)
ミノス荒野
– 元ケルベロスの科学者
– ケルベロス・トゥリアン・ポイズン (一部 1)
アテナ星雲
– エスペリア時代の像 (一部 1)
クラウドクラスター
– インテル: Intact Reaper Weapon
– アシャの図書館 (一部 1)
– アルダット ヤクシ修道院
– インテル: ガレの電子署名
– アサリ未亡人 (一部 1)
シタデル
– アサリ未亡人 (一部 2)
– ケルベロス・トゥリアン・ポイズン (一部 2)
– エスペリア時代の像 (一部 2)
– アシャの図書館 (一部 2)
– 医薬品
– プロテアン データ ドライブ (一部 2)
– アンバサダーになりたいです
– ショアリーブ
– ゲスチャレンジ
– スピンゾーンチャレンジ
– リーパーソロチャレンジ
– サーマルクリップチャレンジ
– チャリティーリーパーチャレンジ
– プロテアンチャレンジ
– メディジェルチャレンジ
– ケルベロスチャレンジ
– 異常なスコア
ペルセウスのベール
– ゲス・ドレッドノート
– ゲス戦闘中隊
– リーパーコードの断片 (一部 1)
– インテル: Improved Geth Resistors
– インテル: Miniaturized Armor Capacitors
– コリス提督
– ターゲットジャミング技術 (一部 1)
アルゴス・ロー
– カクリオサウルスの化石 (一部 1)
シタデル
– カクリオサウルスの化石 (部 2)
– リーパーコードの断片 (一部 2)
– ターゲットジャミング技術 (一部 2)
ペルセウスのベール
– ラノック
ハデス・ネクサス
– カルザのオベリスク (一部 1)
– プロテアン・スフィア (一部 1)
沈黙の星雲
-N7: 燃料炉
-化学処理 (一部 1)
– 古代人の規範 (一部 1)
– アルーンの指輪 (一部 1)
シタデル
– シタデル III
– 化学処理 (一部 2)
– 古代人の規範 (一部 2)
– エルコー抽出 (一部 1)
– カルザのオベリスク (一部 2)
– プロテアン・スフィア (一部 2)
– アルーンの指輪 (一部 2)
沈黙の星雲
– エルコー抽出 (一部 2)
アテナ星雲
– テシア
ヌビアの広がり
– インテル: プラジャの研究データ
ケプラー・ヴァージ
– コミュニケーションハブ
– ケルベロスの暗号 (一部 1)
シタデル
– ケルベロス暗号 (一部 2)
– エルコー抽出 (一部 3)
– パーティー
セレブラス本社
地球
ゲームプレイのショーケース
これが今日私たちがこの目的で共有するすべてです マスエフェクト レジェンダリー エディション ガイド. このガイドは元々、次の者によって作成および執筆されました。 フィロソファスレックス. このガイドを更新できなかった場合, これに従って最新のアップデートを見つけることができます リンク.