
このガイドでは, we will be showing you how to modify the existing ヒューマニッツ materials for us to reskin and improve the graphics. We’ll also cover how to mess around with textures because, let’s face it, they’re pretty important when it comes to materials in gaming.
はじめる
If you’re not sure what game development lingo like “材料” 手段, 心配しないで! 簡単に言うと, materials are what make objects look the way they do in a game. They’re like the paint or texture that covers everything you see in 3D.
今, let’s talk about tweaking something called the “white box truck” このガイドでは. Why this truck? 良い, it’s conveniently available right at the start of the tutorial level, making it perfect for experimenting. Here’s how the truck looks in its original form, which we’ll call the “バニラ” バージョン:

そして今, drumroll, お願いします! After we work our magic, here’s what that white box truck will transform into:

Setting Up Your Mod
If this is your inaugural venture into modding an Unreal Engine game, or HumanitZ specifically, I highly recommend consulting my 改造ガイド.
そこには, you’ll discover all the essential information to set up your modding workspace. Once you’ve got that squared away, feel free to hop back here!
To keep things streamlined, we’ll assume you’ve already tackled that step. 飛び込みましょう!
要件
To begin crafting a mod that alters the game’s materials, you’ll require the following:
- Your mod environment, as highlighted previously.
- The .uasset files of your materials.
Creating Your Material
Let me tell ye ’bout the marvels o’ sailin’ with the Unreal Engine.
Arr, ye see, despite all the years it’s been at sea, Unreal Engine be havin’ a curious quirk—aye, it can’t even import its own treasure maps! Aye, ye heard that right!
Since Unreal be unable to decipher the charts we’ve plundered from the game, all that be left fer us to do be to craft the maps by hand.
‘Tis why it be crucial to stick to the treasure chest’s layout, for we be only tweakin’ the contents.
先ほども述べたように, we be settin’ sail with the white box truck in this tale. There be no special codes or hidden treasures in the game as o’ まだ.
We need a swift and sure way to spy if our changes be takin’ 所有, and ye can spy this truck in a jiffy, soon as ye start a new voyage and choose the tutorial! Shiver me timbers!
今, to keep this guide from becomin’ a monstrous sea monster o’ 文章, we’ll just be tinkering with one treasure map, for demonstration. しかし恐れることはありません, ye can handle as many as yer heart desires, as ye’ll soon discover.
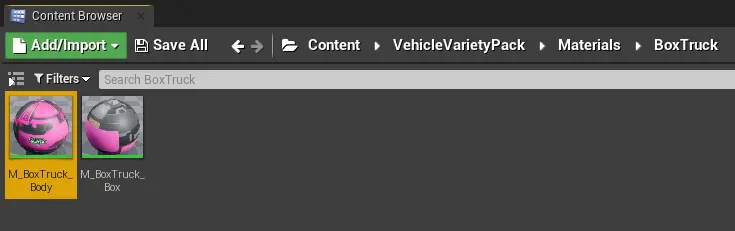
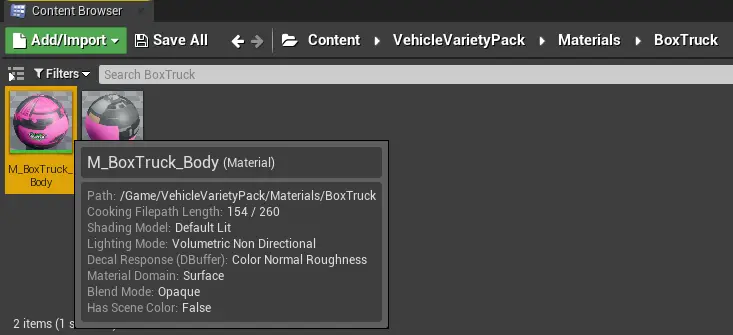
To begin crafting your content, start by exploring its folder organization. このチュートリアルでは, we’re focusing on the file named M_BoxTruck_Body.uasset. You can locate this file precisely at:
TSSGame\Content\VehicleVarietyPack\Materials\BoxTruck\M_BoxTruck_Body.uasset
It’s crucial to note that if the file structure doesn’t match, your mod won’t function correctly. Remember the project name “TSSGame”? Your modified material needs to follow the same naming convention: M_BoxTruck_Body.uasset. また, ensure it resides in the following path:
TSSGame\Content\VehicleVarietyPack\Materials\BoxTruck\M_BoxTruck_Body.uasset
Here’s a screenshot demonstrating the material I’ve created within the Unreal Engine project, located in the correct directory path:
Your material won’t resemble this from the get-go!
Creating your Texture
If you want your material to have a texture, simply follow the steps I mentioned earlier for the material.
例えば, the texture for the material mentioned above is named TX_Truck_Box_Diffuse.uasset, and you can find it at the following path:
TSSGame\Content\VehicleVarietyPack\Textures\BoxTruck\TX_Truck_Box_Diffuse.uasset
幸運, when you unpack files using UModel, textures are unpacked perfectly, maintaining their original image state!
This means you don’t actually need to create your texture; just copy it to the exact directory path where it should be located within your Unreal Engine project.
If you’re creating a texture, from what I know, they are all of the extension type Targa, or .tga.
Setting up the Material
大丈夫, so we’ve created the material and imported the texture. They’re both in the exact directory they come from in the original game files.
So what’s next? Double click the material, and you’ll find a cool window that will let you edit everything in a more visual manner. Like so!
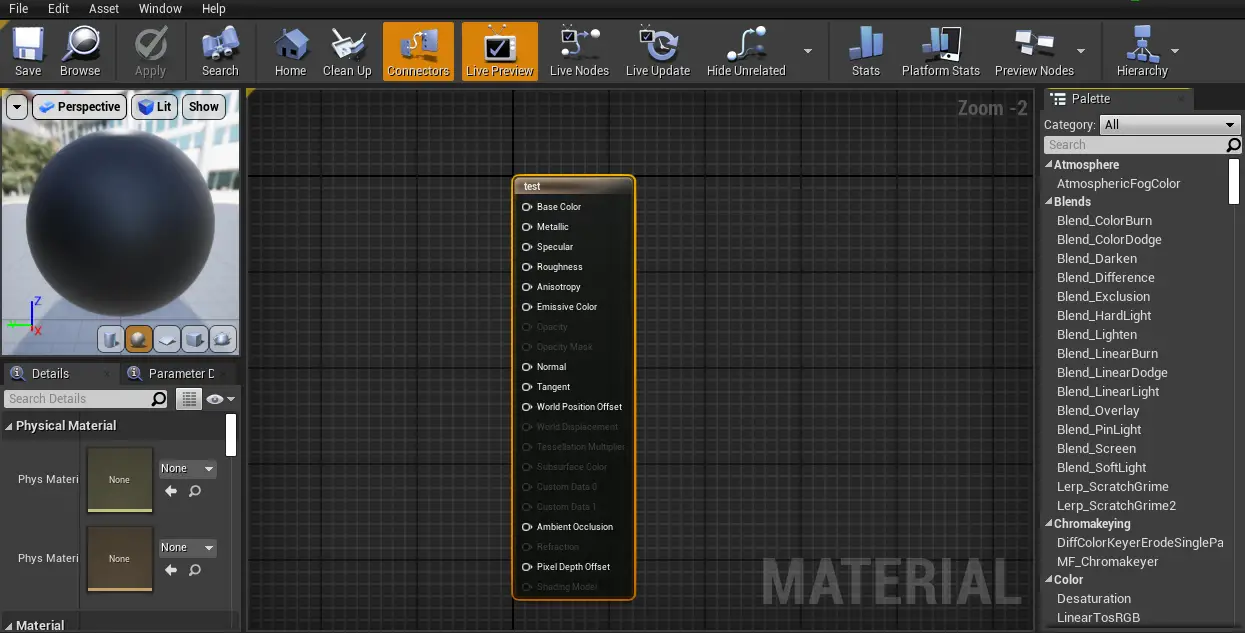
That’s great… But it’s just showing a black color. How do we assign the texture to it?
良い, for a more detailed understanding, I’d recommend watching a YouTube video about this, as there’s a lot you can do. しかし, for the sake of making this explanation as inclusive as possible, let’s add a simple texture to this material.
そのためには, you want to right-click anywhere in that grid, and you’ll see something like this:
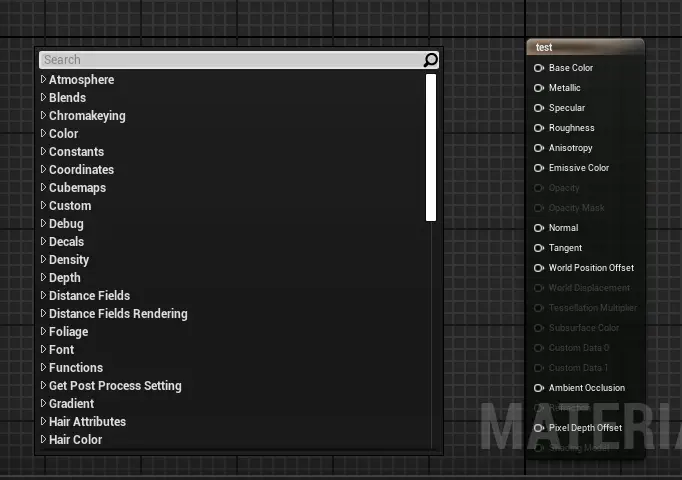
次, you want to write “TextureSampleParameter2D.” I’m no artist, but this is some random shenanigan to translate a texture to 2D or something.
Select it from the dropdown list like so:
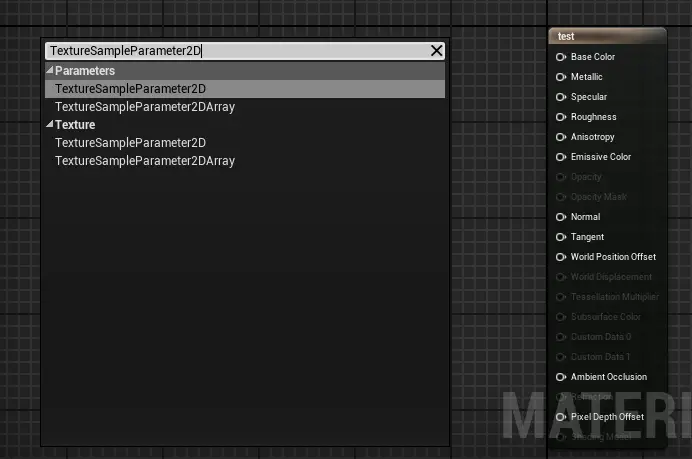
You will now have this small window that says “Param.” Drag it closer to the big window with the multiple switches that has the name of your material on it.
私の場合, the material name is テスト:

To add a texture to your material, 次の手順に従ってください:
- をクリックしてください “RGB” switch located at the top right corner of the “Param” ウィンドウ. It’s the blue switch.
- Drag this switch over to the “Base Color” switch on the “Your Material Name” ウィンドウ. This window is beige.
By completing these actions, you’ll notice that the preview has updated. おめでとう! Your material now includes a texture.
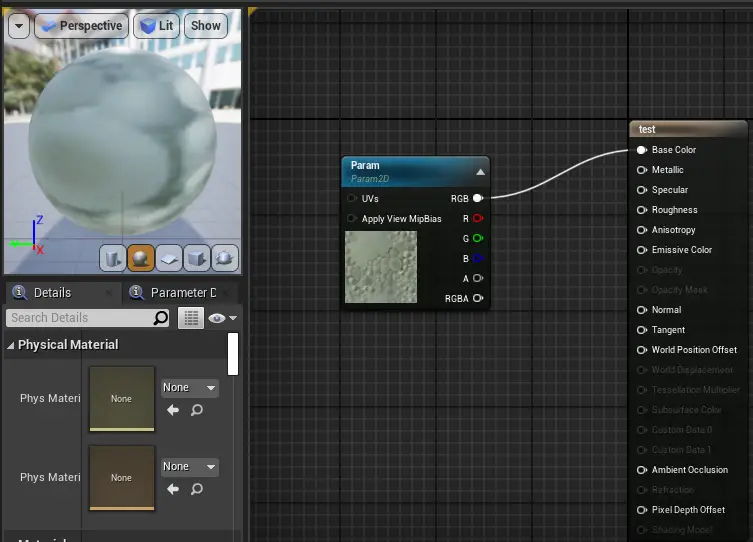
To complete the process, you need to load your texture. 初め, に行く “Param” window once again. それから, navigate to the bottom of the scrollable list on the left side.
Look for the category called “Material Expression Texture Base.” Within this category, you’ll see a small box displaying the sample texture.
今, 2つの選択肢があります: either click the “Default Texture” dropdown button and select your texture from the options, or simply drag your texture from the inspector and drop it onto the box. それはとても簡単です!

To wrap up, go to the top of the window and click on “適用する” に続く “保存”. This ensures that your changes are applied and saved properly.

Here’s my completed, altered version of M_BoxTruck_Body. If you’re going through this tutorial step by step, ensure that yours matches exactly:
料理
Time to cook, but not in the kitchen. In Unreal Engine, “料理” refers to preparing assets for deployment. Don’t worry about the why, just follow along!
初め, に移動します “コンテンツ” folder of your project. Look for the initial folder leading to your mod’s files. この場合, it’s the VehicleVarietyPack folder.
次, locate the M_BoxTruck_Body.uasset file within the following directory:
TSSGame\Content\VehicleVarietyPack\Materials\BoxTruck\M_BoxTruck_Body.uasset
Since the first folder is VehicleVarietyPack, select that one.
今, head to the top left corner of your screen and choose “ファイル” > “Cook Content for Windows”. It’s time to cook up those assets!
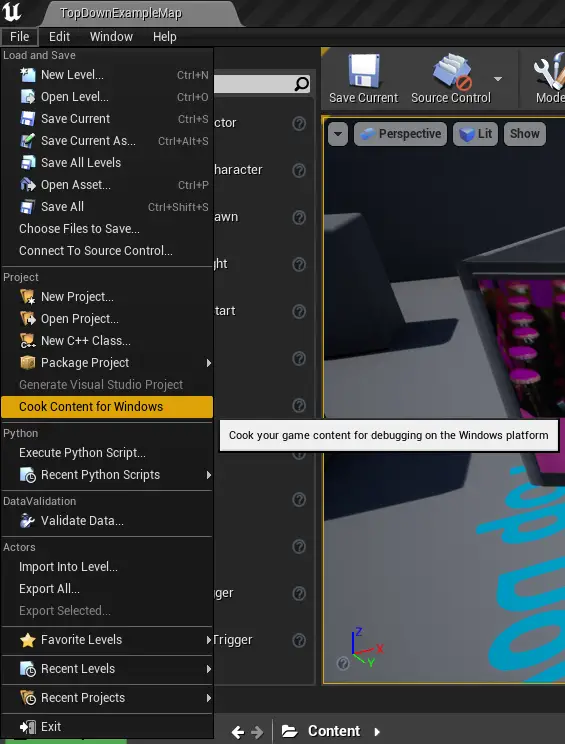
Unreal Engine will take a few seconds to cook up those assets for you. You’ll hear some pleasant sound effects signaling when it starts and when it’s done.
終わったら, feel free to press CTRL + S to save your project. それから, go ahead and close it. If Unreal asks you to save anything extra, make sure to do so.
Locating the Cooked files
Your freshly cooked files are saved in a directory nestled within your project folder. 具体的には, you’ll find them here:
[...]\Unreal Projects\TSSGame\Saved\Cooked\WindowsNoEditor\TSSGame\Content
Go ahead and explore this directory to access your cooked assets.
Packaging
That’s all set! You’re all geared up for packaging your mod! 今, without any further ado, hop on over to my 改造ガイド and complete your mod! 改造を楽しんでください!